- Manual installation steps for older versions of WSL
- Step 1 — Enable the Windows Subsystem for Linux
- Step 2 — Check requirements for running WSL 2
- Step 3 — Enable Virtual Machine feature
- Step 4 — Download the Linux kernel update package
- Step 5 — Set WSL 2 as your default version
- Step 6 — Install your Linux distribution of choice
- Troubleshooting installation
- Downloading distributions
- Install Windows Terminal (optional)
- Установка WSL
- Предварительные требования
- Установка
- Изменение установленного дистрибутива Linux по умолчанию
- Настройка сведений о пользователе Linux
- Советы и рекомендации
- Хотите испытать новейшие предварительные версии функций WSL?
- Install WSL
- Prerequisites
- Install
- Change the default Linux distribution installed
- Set up your Linux user info
- Set up and best practices
- Want to try the latest WSL preview features?
- Как работать с Linux используя Windows
- Ubuntu из Microsoft Store
- VirtualBox
Manual installation steps for older versions of WSL
For simplicity, we generally recommend using the wsl —install to install Windows Subsystem for Linux, but if you’re running an older build of Windows, that may not be supported. We have included the manual installation steps below. If you run into an issue during the install process, check the installation section of the troubleshooting guide.
Step 1 — Enable the Windows Subsystem for Linux
You must first enable the «Windows Subsystem for Linux» optional feature before installing any Linux distributions on Windows.
Open PowerShell as Administrator and run:
We recommend now moving on to step #2, updating to WSL 2, but if you wish to only install WSL 1, you can now restart your machine and move on to Step 6 — Install your Linux distribution of choice. To update to WSL 2, wait to restart your machine and move on to the next step.
Step 2 — Check requirements for running WSL 2
To update to WSL 2, you must be running Windows 10.
- For x64 systems: Version 1903 or higher, with Build 18362 or higher.
- For ARM64 systems: Version 2004 or higher, with Build 19041 or higher.
- Builds lower than 18362 do not support WSL 2. Use the Windows Update Assistant to update your version of Windows.
To check your version and build number, select Windows logo key + R, type winver, select OK. Update to the latest Windows version in the Settings menu.
If you are running Windows 10 version 1903 or 1909, open «Settings» from your Windows menu, navigate to «Update & Security» and select «Check for Updates». Your Build number must be 18362.1049+ or 18363.1049+, with the minor build # over .1049. Read more: WSL 2 Support is coming to Windows 10 Versions 1903 and 1909.
Step 3 — Enable Virtual Machine feature
Before installing WSL 2, you must enable the Virtual Machine Platform optional feature. Your machine will require virtualization capabilities to use this feature.
Open PowerShell as Administrator and run:
Restart your machine to complete the WSL install and update to WSL 2.
Step 4 — Download the Linux kernel update package
Download the latest package:
If you’re using an ARM64 machine, please download the ARM64 package instead. If you’re not sure what kind of machine you have, open Command Prompt or PowerShell and enter: systeminfo | find «System Type» . Caveat: On non-English Windows versions, you might have to modify the search text, translating the «System Type» string. You may also need to escape the quotations for the find command. For example, in German systeminfo | find ‘»Systemtyp»‘ .
Run the update package downloaded in the previous step. (Double-click to run — you will be prompted for elevated permissions, select вЂyes’ to approve this installation.)
Once the installation is complete, move on to the next step — setting WSL 2 as your default version when installing new Linux distributions. (Skip this step if you want your new Linux installs to be set to WSL 1).
Step 5 — Set WSL 2 as your default version
Open PowerShell and run this command to set WSL 2 as the default version when installing a new Linux distribution:
Step 6 — Install your Linux distribution of choice
Open the Microsoft Store and select your favorite Linux distribution.

The following links will open the Microsoft store page for each distribution:
From the distribution’s page, select «Get».
The first time you launch a newly installed Linux distribution, a console window will open and you’ll be asked to wait for a minute or two for files to de-compress and be stored on your PC. All future launches should take less than a second.

CONGRATULATIONS! You’ve successfully installed and set up a Linux distribution that is completely integrated with your Windows operating system!
Troubleshooting installation
If you run into an issue during the install process, check the installation section of the troubleshooting guide.
Downloading distributions
There are some scenarios in which you may not be able (or want) to, install WSL Linux distributions using the Microsoft Store. You may be running a Windows Server or Long-Term Servicing (LTSC) desktop OS SKU that doesn’t support Microsoft Store, or your corporate network policies and/or admins do not permit Microsoft Store usage in your environment. In these cases, while WSL itself is available, you may need to download Linux distributions directly.
If the Microsoft Store app is not available, you can download and manually install Linux distributions using these links:
This will cause the .appx packages to download to a folder of your choosing.
If you prefer, you can also download your preferred distribution(s) via the command line, you can use PowerShell with the Invoke-WebRequest cmdlet. For example, to download Ubuntu 20.04:
If the download is taking a long time, turn off the progress bar by setting $ProgressPreference = ‘SilentlyContinue’
You also have the option to use the curl command-line utility for downloading. To download Ubuntu 20.04 with curl:
In this example, curl.exe is executed (not just curl ) to ensure that, in PowerShell, the real curl executable is invoked, not the PowerShell curl alias for Invoke-WebRequest.
Once the distribution has been downloaded, navigate to the folder containing the download and run the following command in that directory, where app-name is the name of the Linux distribution .appx file.
If you are using Windows server, or run into problems running the command above you can find the alternate install instructions on the Windows Server documentation page to install the .appx file by changing it to a zip file.
Once your distribution is installed, follow the instructions to create a user account and password for your new Linux distribution.
Install Windows Terminal (optional)
Using Windows Terminal enables you to open multiple tabs or window panes to display and quickly switch between multiple Linux distributions or other command lines (PowerShell, Command Prompt, PowerShell, Azure CLI, etc). You can fully customize your terminal with unique color schemes, font styles, sizes, background images, and custom keyboard shortcuts. Learn more.
Источник
Установка WSL
Предварительные требования
Вам следует использовать Windows 10 версии 2004 и выше (сборка 19041 и выше) или Windows 11.
Чтобы проверить версию и номер сборки Windows, нажмите клавиши WINDOWS+R, введите winver и щелкните ОК. Вы можете выполнить обновление до последней версии Windows в меню параметров или с помощью помощника по Центру обновления Windows.
Если вы используете более раннюю сборку или не хотите использовать команду для установки и вам нужны пошаговые инструкции, см. статью Действия по установке WSL вручную для старых версий .
Установка
Теперь вы можете установить все необходимое для запуска подсистемы Windows для Linux (WSL), введя эту команду в PowerShell или командной строке Windows, а затем перезапустив компьютер.
Эта команда позволяет включить необходимые дополнительные компоненты, скачать последнюю версию ядра Linux, установить WSL 2 в качестве компонента по умолчанию и установить дистрибутив Linux (по умолчанию Ubuntu; инструкции по установке другого дистрибутива см. ниже) .
При первом запуске недавно установленного дистрибутива Linux откроется окно консоли. Вам будет предложено подождать, пока файлы будут распакованы и сохранены на компьютере. Все будущие запуски должны занимать меньше секунды.
Изменение установленного дистрибутива Linux по умолчанию
По умолчанию в качестве устанавливаемого дистрибутива Linux используется Ubuntu. Для этого используйте флаг -d .
- Чтобы изменить установленный дистрибутив, введите wsl —install -d . Замените именем дистрибутива, который хотите установить.
- Чтобы просмотреть список доступных дистрибутивов Linux, доступных для скачивания через Интернет-магазин, введите wsl —list —online или wsl -l -o .
- Чтобы установить дополнительные дистрибутивы Linux после исходной установки, можно также использовать команду wsl —install -d .
Если вы хотите установить дополнительные дистрибутивы из командной строки Linux или Bash (а не из PowerShell или командной строки), используйте .exe в команде wsl.exe —install -d . Чтобы получить список доступных дистрибутивов, используйте wsl.exe -l -o .
Если во время установки возникла проблема, см. раздел Установка руководства по устранению неполадок.
Настройка сведений о пользователе Linux
После установки WSL необходимо создать учетную запись пользователя и пароль для установленного дистрибутива Linux. Дополнительные сведения см. в статье Рекомендации по настройке среды разработки WSL.
Советы и рекомендации
Мы рекомендуем использовать наше пошаговое руководство Рекомендации по настройке среды разработки WSL. В нем описано, как настроить имя пользователя и пароль для установленных дистрибутивов Linux, использовать основные команды WSL, установить и настроить Терминал Windows, настроить управление версиями Git, отредактировать код и выполнить отладку с помощью удаленного сервера VS Code. Кроме того, в руководстве приведены рекомендации по хранению файлов, настройке базы данных, подключению внешнего диска, настройке ускорения GPU и пр.
Хотите испытать новейшие предварительные версии функций WSL?
Чтобы поработать с самыми последними функциями или обновлениями для WSL, присоединитесь к Программе предварительной оценки Windows. Когда вы присоединитесь к участникам Программы предварительной оценки Windows, вы сможете выбрать канал для получения предварительных сборок в меню параметров Windows и будете автоматически получать предварительные версии функций и обновления для WSL, связанные с этой сборкой. Можно выбрать одно из следующих значений.
- Канал разработчика: последние обновления, но низкая стабильность.
- Бета-канал: идеально подходит для ранних последователей; более надежные сборки, чем в канале разработки.
- Канал предварительного выпуска: предварительные версии исправлений и основных функций следующей версии Windows непосредственно перед предоставлением их общедоступной версии.
Источник
Install WSL
Prerequisites
You must be running Windows 10 version 2004 and higher (Build 19041 and higher) or Windows 11.
To check your Windows version and build number, select Windows logo key + R, type winver, select OK. You can update to the latest Windows version in the Settings menu or using the Windows Update Assistant.
If you’re running an older build, or just prefer not to use the install command and would like step-by-step directions, see WSL manual installation steps for older versions.
Install
You can now install everything you need to run Windows Subsystem for Linux (WSL) by entering this command in PowerShell or Windows Command Prompt and then restarting your machine.
This command will enable the required optional components, download the latest Linux kernel, set WSL 2 as your default, and install a Linux distribution for you (Ubuntu by default, see below to change this).
The first time you launch a newly installed Linux distribution, a console window will open and you’ll be asked to wait for files to de-compress and be stored on your machine. All future launches should take less than a second.
Change the default Linux distribution installed
By default, the installed Linux distribution will be Ubuntu. This can be changed using the -d flag.
- To change the distribution installed, enter: wsl —install -d . Replace with the name of the distribution you would like to install.
- To see a list of available Linux distributions available for download through the online store, enter: wsl —list —online or wsl -l -o .
- To install additional Linux distributions after the initial install, you may also use the command: wsl —install -d .
If you want to install additional distributions from inside a Linux/Bash command line (rather than from PowerShell or Command Prompt), you must use .exe in the command: wsl.exe —install -d or to list available distributions: wsl.exe -l -o .
If you run into an issue during the install process, check the installation section of the troubleshooting guide.
Set up your Linux user info
Once you have installed WSL, you will need to create a user account and password for your newly installed Linux distribution. See the Best practices for setting up a WSL development environment guide to learn more.
Set up and best practices
We recommend following our Best practices for setting up a WSL development environment guide for a step-by-step walk-through of how to set up a user name and password for your installed Linux distribution(s), using basic WSL commands, installing and customizing Windows Terminal, set up for Git version control, code editing and debugging using the VS Code remote server, good practices for file storage, setting up a database, mounting an external drive, setting up GPU acceleration, and more.
Want to try the latest WSL preview features?
Try the most recent features or updates to WSL by joining the Windows Insiders Program. Once you have joined Windows Insiders, you can choose the channel you would like to receive preview builds from inside the Windows settings menu to automatically receive any WSL updates or preview features associated with that build. You can choose from:
- Dev channel: Most recent updates, but low stability.
- Beta channel: Ideal for early adopters, more reliable builds than the Dev channel.
- Release Preview channel: Preview fixes and key features on the next version of Windows just before its available to the general public.
Источник
Как работать с Linux используя Windows
Если вы только начали свой путь разработчика и до сих используете операционную систему семейства Microsoft Windows, то уже наверняка столкнулись с ситуацией, когда ваш инструментарий отличается от того, что установлено у большинства людей из этой профессии. Чаще всего проблемы начинаются при работе в командной строке. Дело в том, что Windows не является POSIX-совместимой операционной системой, поэтому в ней отсутствует базовый набор прикладных программ, который необходим для разработки.
Этот вопрос можно решить установкой какого-либо из многочисленных дистрибутивов Linux в качестве основной, либо альтернативной операционной системы. Для новичков есть способ проще и быстрее — технологии виртуализации. Об этом и поговорим.
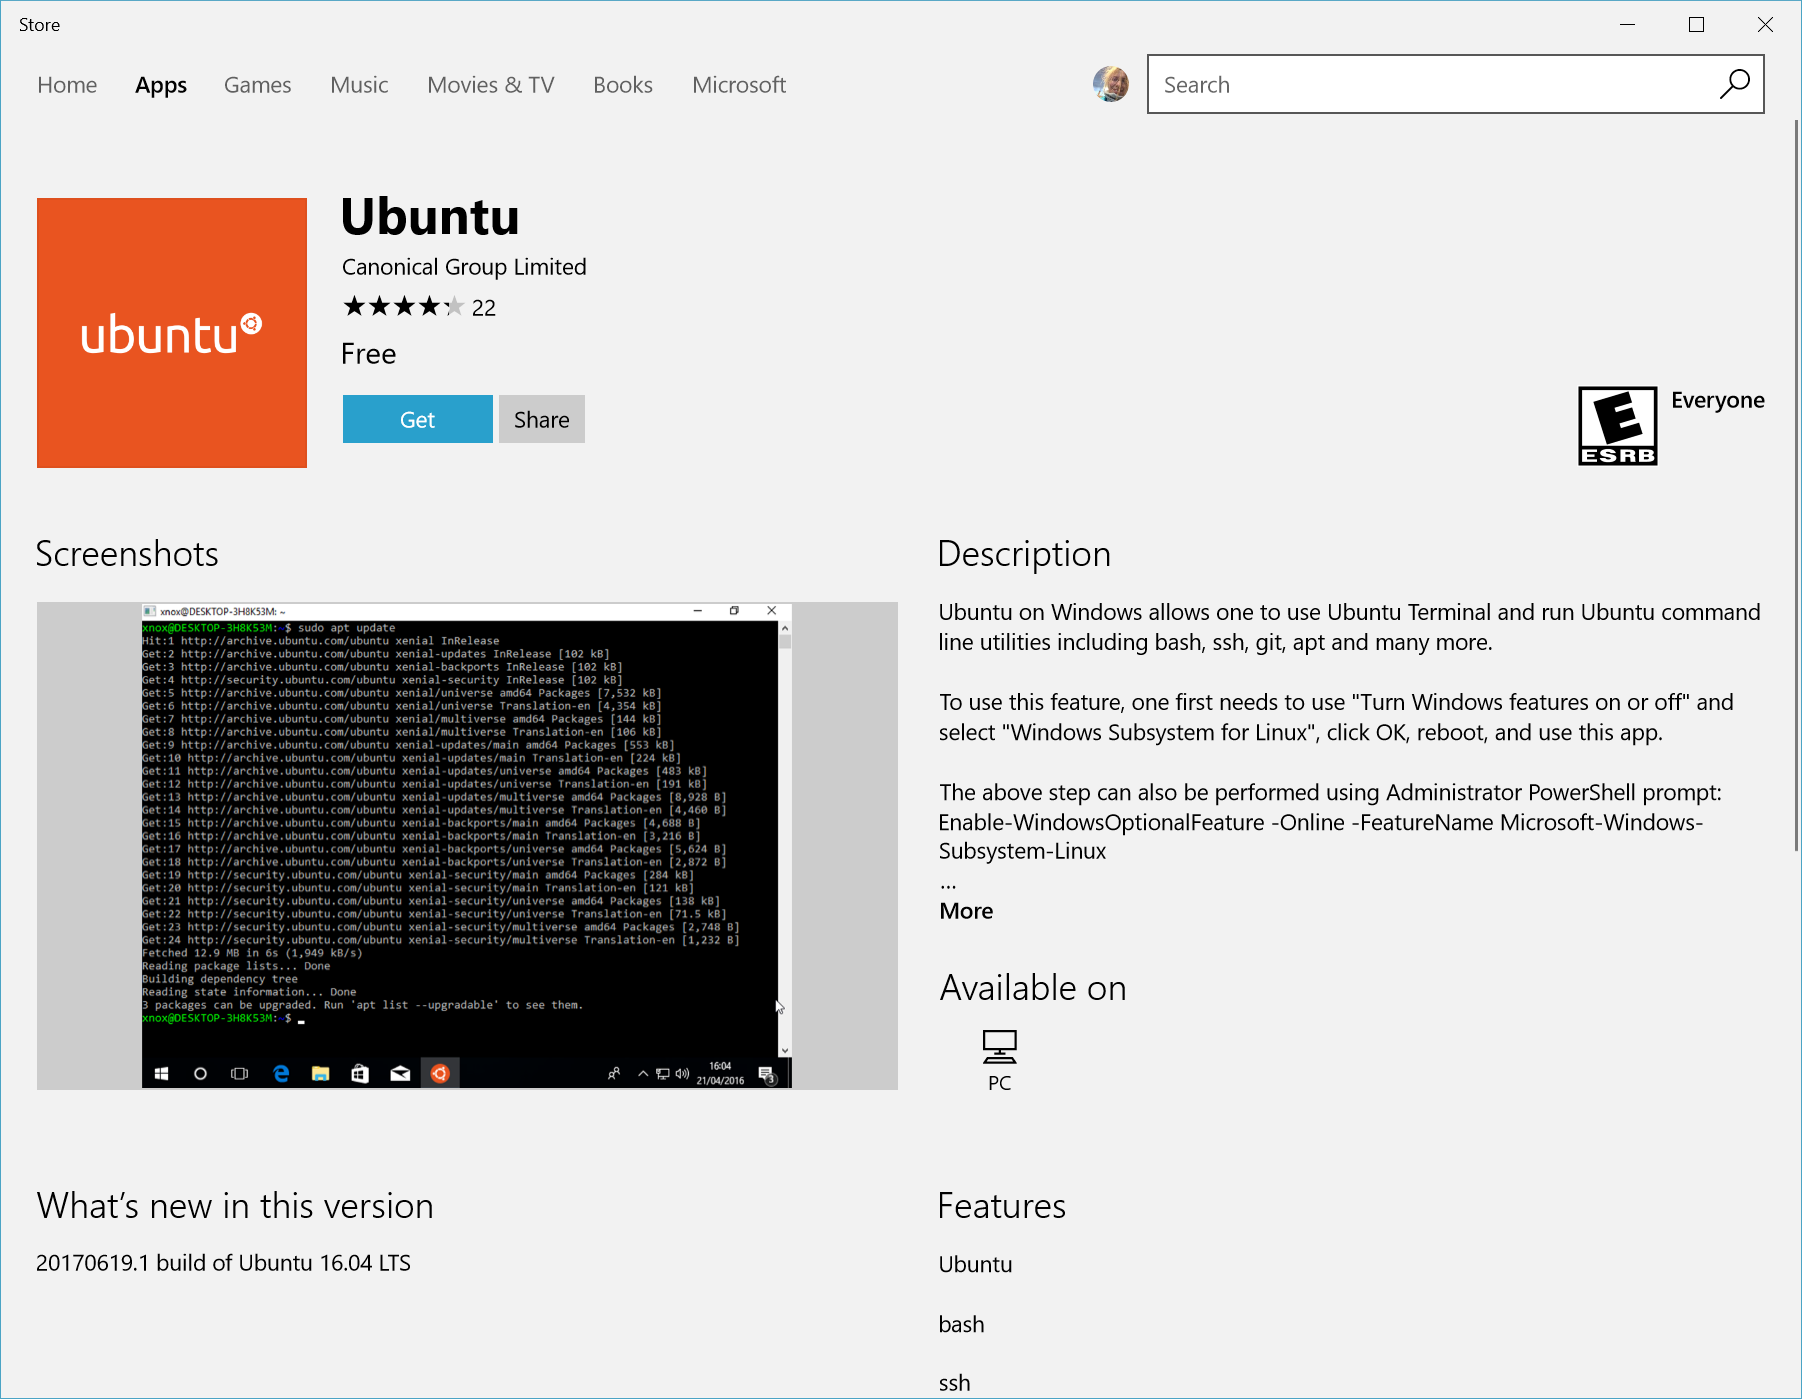
Ubuntu из Microsoft Store
Если вы работаете на Windows версии 10 с архитектурой x64, то можно можно воспользоваться встроенным решением и установить слой совместимости (Windows Subsystem for Linux) на основе Ubuntu Linux через магазин приложений Microsoft Store.

Перед тем как начать, необходимо убедиться, что системные требования соответствуют рекомендованным. Для этого запустите приложение Microsoft Store, введите в графе поиска Ubuntu и перейдите по найденной ссылке. Если ранее Windows не обновлялся, то вероятней всего вы получите соответствующее указание сделать это до начала установки Ubuntu. Если всё OK, то нажимайте на кнопку «Получить» и через несколько минут (в зависимости от скорости интернет соединения) вы получите сигнал об успешной установке приложения.
Первый запуск может вызвать ошибку Error: 0x8007007e и предложение прочитать инструкцию по её решению https://aka.ms/wslinstall. Если хотите сэкономить время, то просто запустите PowerShell (не путать с cmd ) от имени администратора и выполните следующую команду:
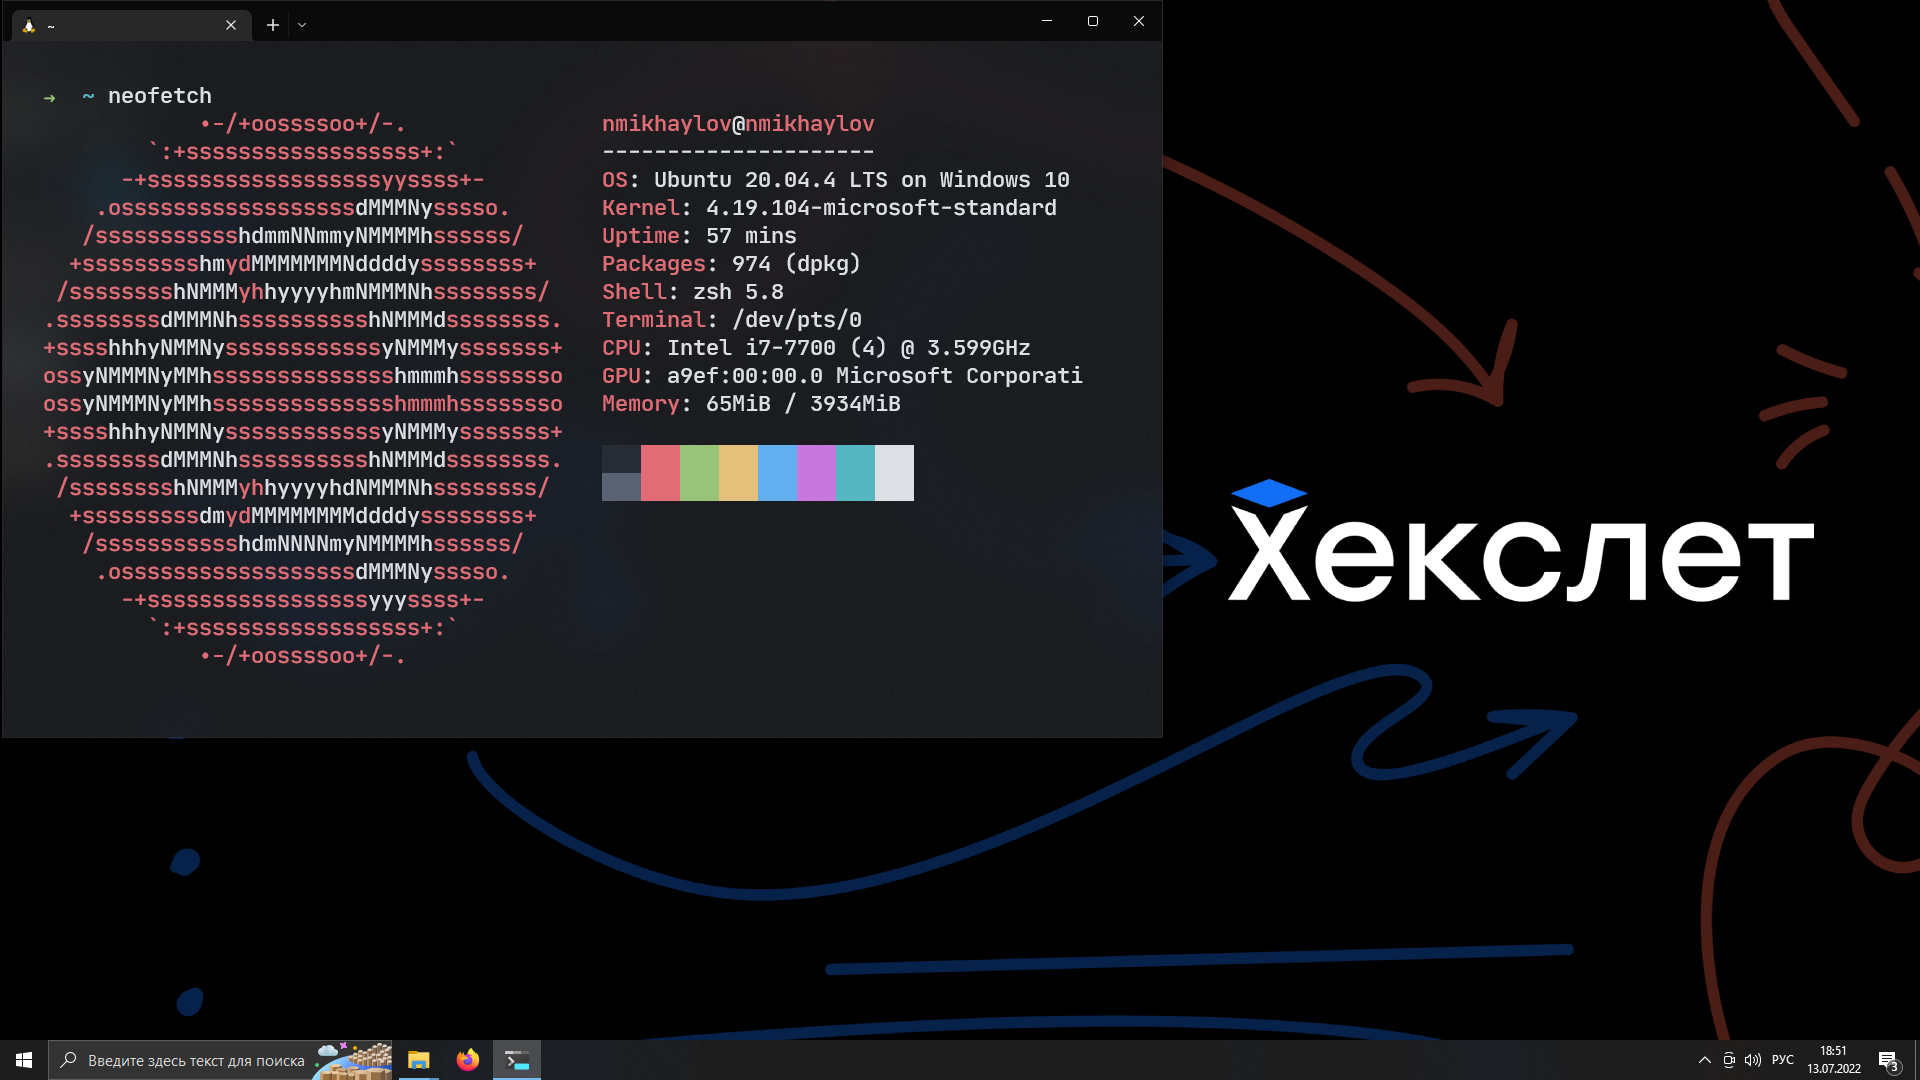
После этого компьютер попросит перегрузиться, а потом нужно снова запустить приложение Ubuntu. В случае удачной установки откроется интерпретатор командной строки с предложением ввести имя пользователя и пароль. Выглядеть это будет вот так:
Преимущество такого способа установки позволяют стереть грань между операционными системами и получить доступ ко всему инструментарию Linux ( bash , ssh , git , apt и так далее) из стандартной командной строки Windows не теряя привычное окружение и оставаясь на одном файловом уровне.
Ссылки на официальную документацию:
VirtualBox
Если вы работаете на Windows версии ниже 10 или хотите получить изолированную операционную систему Linux, да ещё и с графическим окружением, то можно воспользоваться сторонним бесплатным программным продуктом под названием VirtualBox.
Инсталлятор Oracle VM VirtualBox для Windows Hosts
Ссылка на скачивание: Download Oracle VM VirtualBox
Образ операционной системы Ubuntu Linux в формате ISO
Ссылка на скачивание: Download Ubuntu Desktop
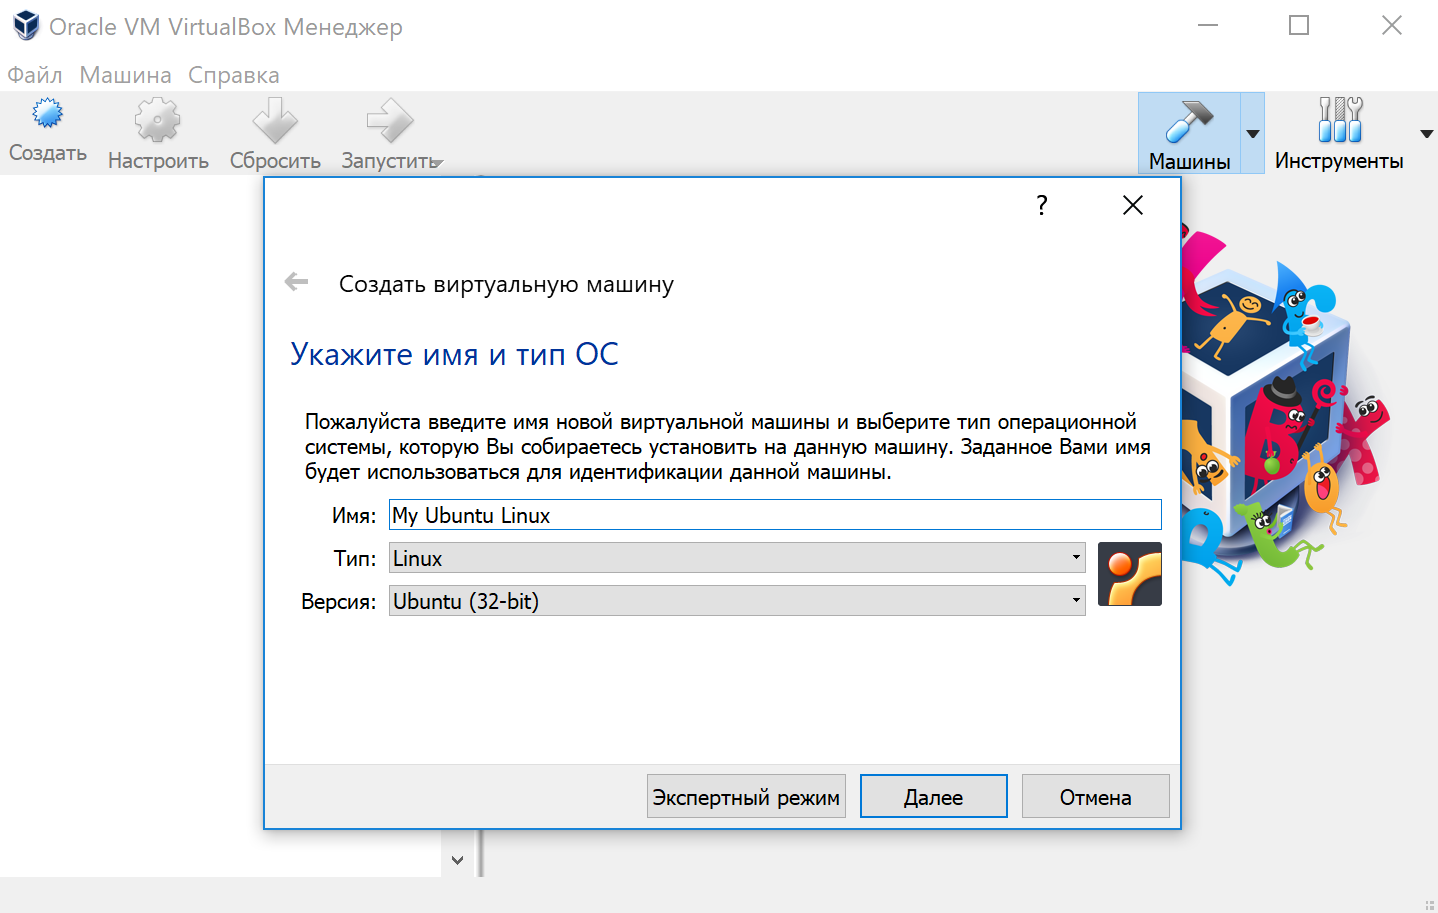
Для начала необходимо установить и запустить приложение VirtualBox.

Нажимаем кнопку «Создать», выбираем из списка тип операционной системы «Linux», если нет своих предпочтений по дистрибутиву, то выбираем версию «Ubuntu» 32 или 64 битной архитектуры, а название можно ввести любое.
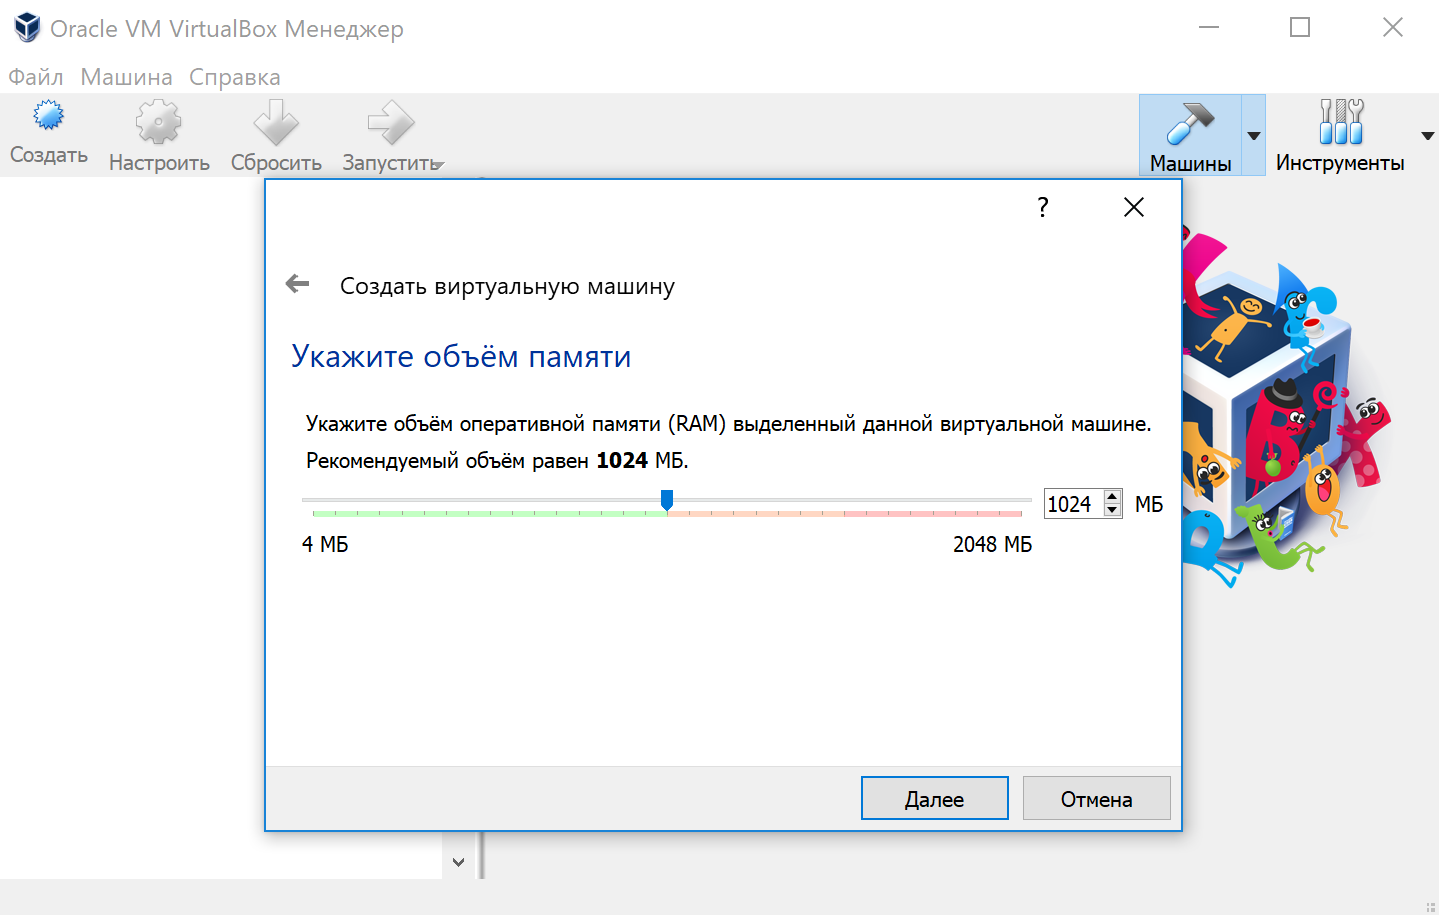
Указываем объём оперативной памяти выделенной под виртуальную систему. Рекомендованный объём составляет 1024 MB.
Указываем объём дискового пространства выделенного под виртуальную систему. Рекомендованный объём составляет 10 GB.

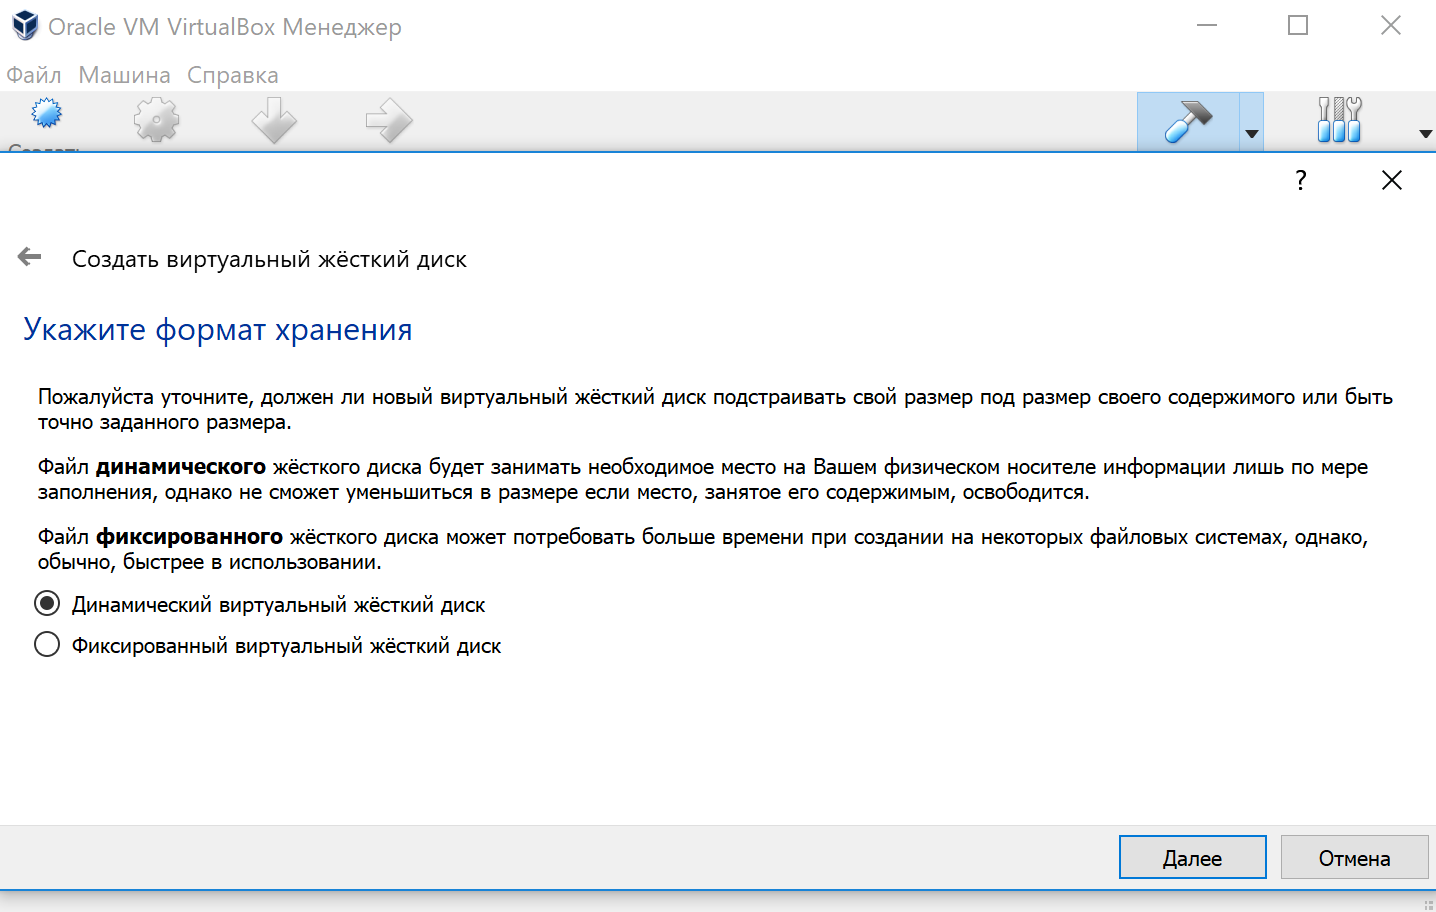
Тип виртуального жёсткого диска можно оставить как есть — VDI (VitrualBox Disk Image).

Формат хранения данных выберите исходя из личных предпочтений. Динамический виртуальный жёсткий диск растёт по мере заполнения, а фиксированный создаётся сразу того размера, который был указан на предыдущем шаге.
Имя и размер файла можно оставить без изменений и сразу нажать на кнопку «Создать».
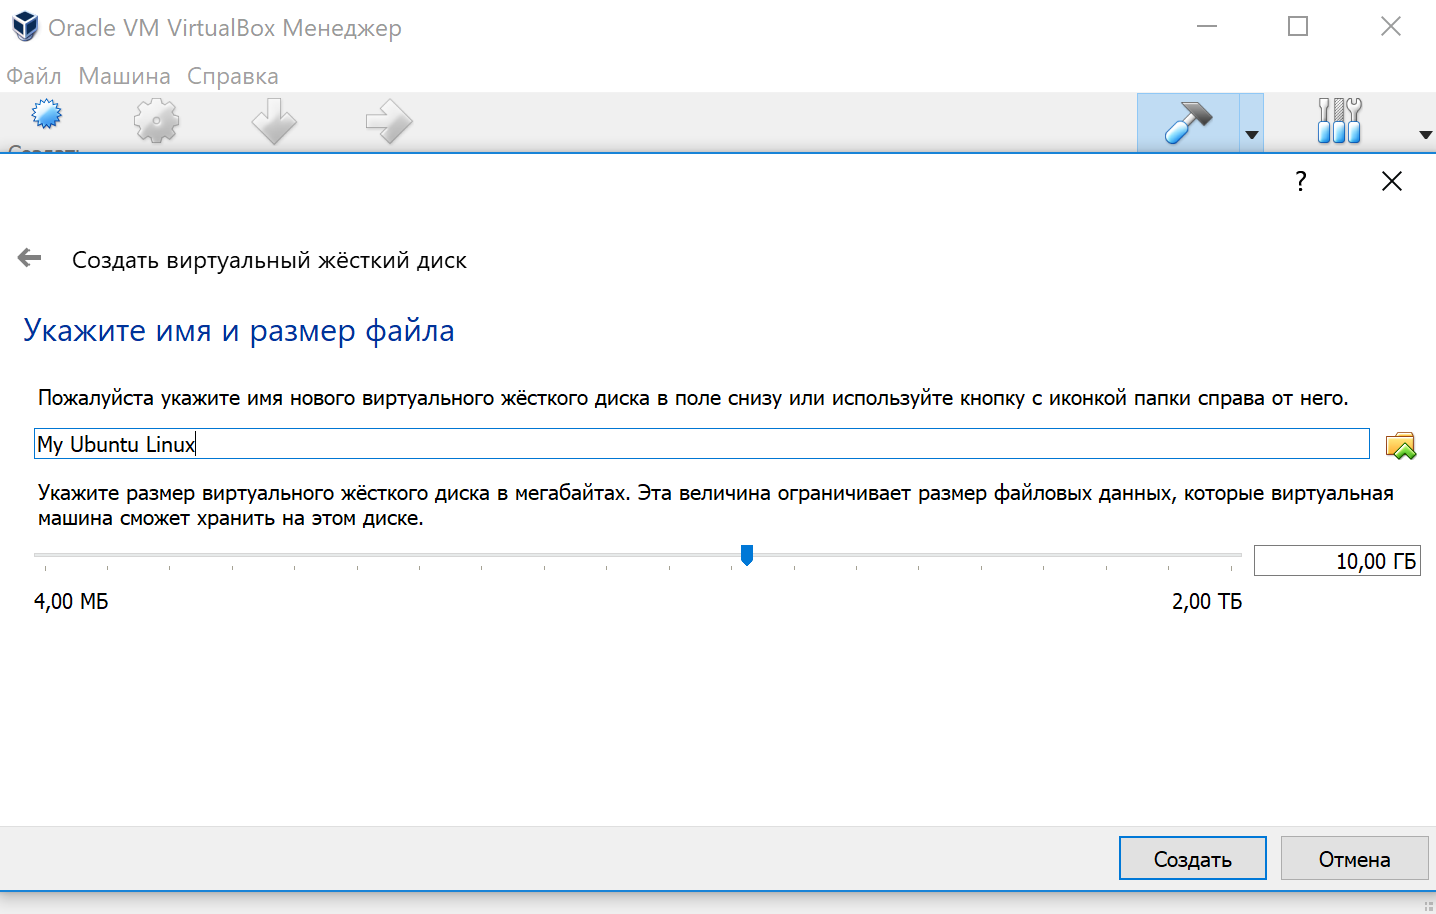
По завершению у вас будет создана виртуальная машина, но она пока без операционной системы. Для того чтобы её установить, нужно скачать Ubuntu Linux (32-bit или 64-bit, в зависимости от того, что было выбрано на шаге, где мы указывали тип ОС).
Нажатие на кнопку «Запустить» должно привести к появлению диалогового окна с предложением указать путь до скаченного ISO образа. Сделайте этого и нажмите кнопку «Продолжить»
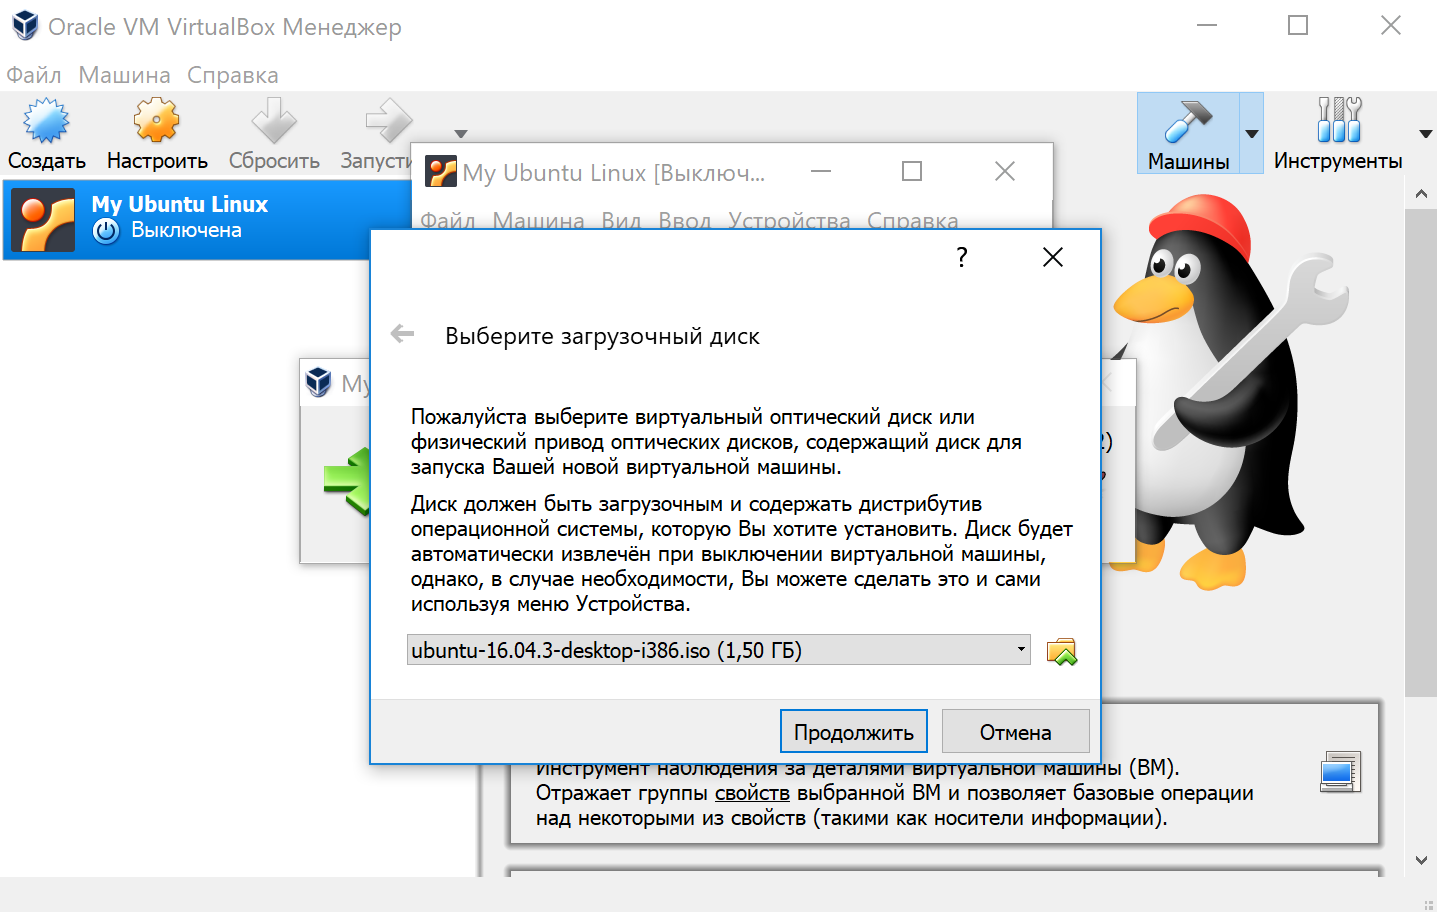
Виртуальная машина автоматически будет выполнять часть процессов, но в некоторых операциях всё же потребуется участие пользователя.
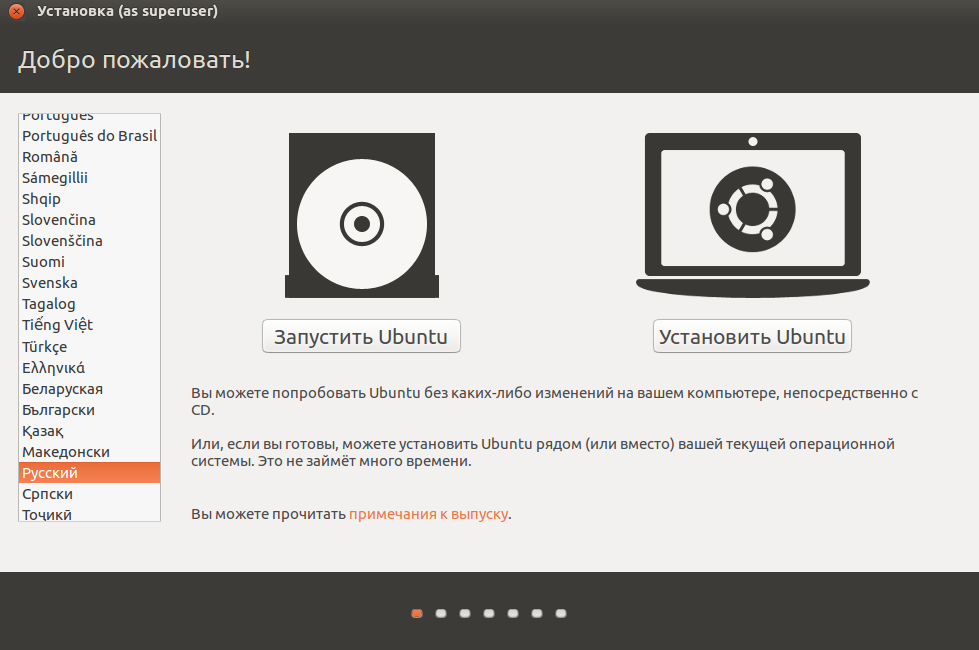
Выберите языковую поддержку в списке слева и нажмите «Установить Ubuntu».
Можно загрузить обновления сразу на этапе установки.

Без особых опасений выбираем пункт «Стереть диск и установить Ubuntu» и двигаемся дальше.

Если вы выбрали русский язык на первом этапе установки, то вам предложат русскую раскладку клавиатуры в качестве дополнительной.

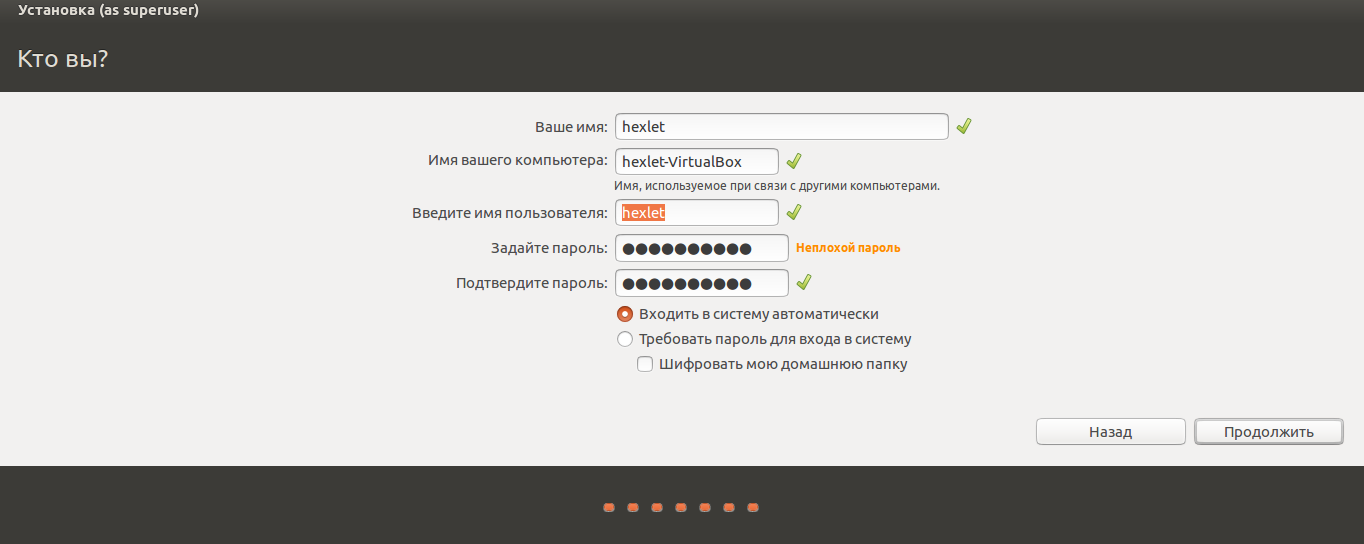
Заполните поля и выберите режим входа в систему.
Далее начнётся процедура разметки диска, переноса файлов, установка обновлений и другие процессы, которые не потребуют прямого участия пользователя.

По завершению виртуальный компьютер перезагрузится и вы попадёте в уже установленную среду Ubuntu Linux.
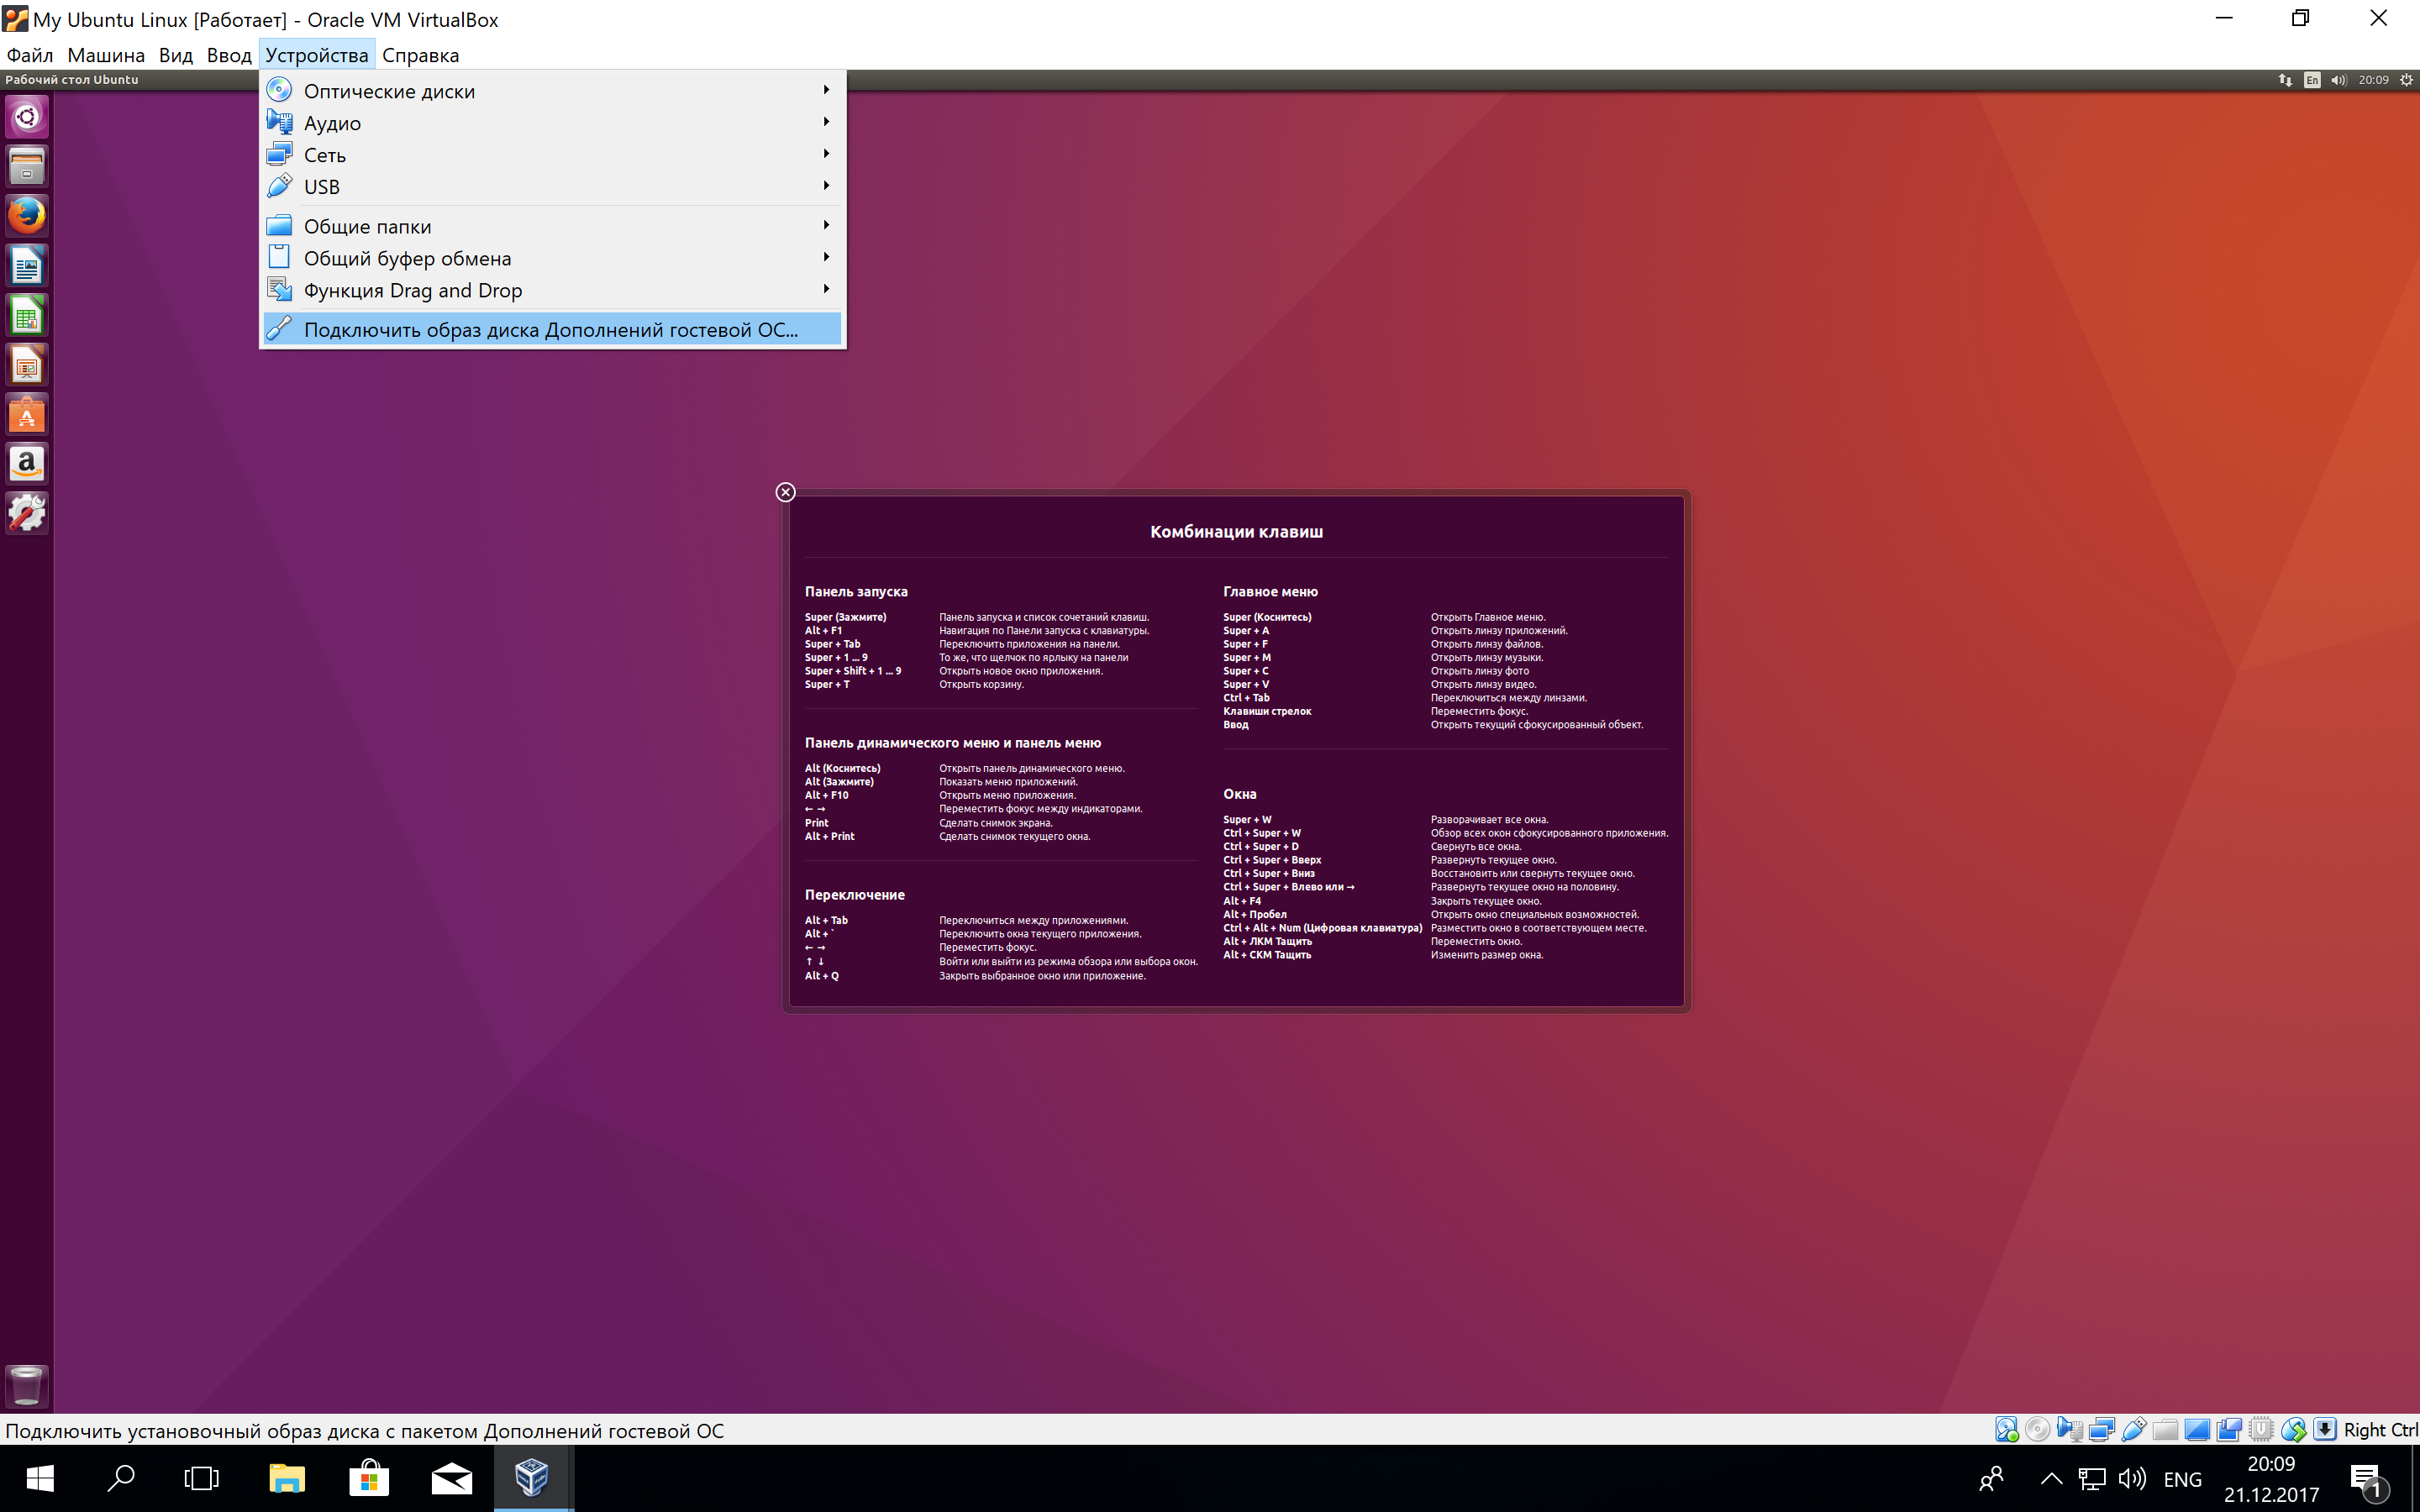
Но это ещё не всё. Весьма желательно установить так называемые «Дополнения гостевой ОС». Они содержат драйверы и прочие системные файлы, необходимые для наилучшей производительности и обеспечения дополнительных функциональных возможностей между виртуальной и гостевой операционными системами.
Выберите пункт меню «Устройства» программы VitrualBox, подпункт «Подключить образ диска Дополнений гостевой ОС…» и дождитесь предложение запустить приложение для автоматического запуска с виртуального привода.
Виртуальная ОС Ubuntu Linux установлена и готова к работе.
Ссылка на официальную документацию: Oracle VM VirtualBox User Manual
Источник


