- How to Install and Update Firefox in Linux
- Install Firefox using apt-get
- Install Firefox using yum
- Install Firefox using snap
- Install Firefox using pacman
- Possible problems while uninstalling/reinstalling or updating Firefox
- Установка Firefox в Ubuntu 20.04
- Установка Firefox в Ubuntu 20.04
- 1. Официальные репозитории
- 2. PPA репозиторий
- 3. Официальный сайт
- 4. Пакет snap
- Удаление Firefox
- Выводы
- Оцените статью:
- Об авторе
- 11 комментариев
- 4 Ways to Install Mozilla Firefox in Ubuntu
- Method 1: From the Snap Store-through the Ubuntu Software Manager
- Launch Firefox
- Remove
- Method 2: From the Official Ubuntu Repository-through the Command Line
- Launch Firefox
- Remove
- Method 3: From the Mozilla PPA repository-through the command line
- Launch Firefox
- Remove
- Method 4: From the official website through the command line
- Launch Firefox
- Remove
- Karim Buzdar
How to Install and Update Firefox in Linux

Firefox is the most popular web browser among Linux users. In this article, we are going to cover topics like Firefox installation, uninstall, and update. We will also discuss what kind of problems we can get during the mentioned processes.
Depending on type of Linux distribution we use the process of installation Firefox in Linux is different:
Install Firefox using apt-get
If you are using a Debian based system such as Ubuntu 16.04/18.04/20.04, you need to use apt to install packages.
To install the latest version using apt-get, type:
On Debian 10, type:
If you want to install a specific version of Firefox, you need to download it from Mozilla website (open this link, choose version, OS and language). Downloaded file will have tar.bz2 extension. Once file is downloaded, extract it using the following command:
where instead of * you must type the version you’ve downloaded
Now you can open Firefox by running ./firefox/firefox from the download path. You can create icon on your Desktop which will open this file for more convenience. Also don’t forget to turn off automatic updates for this version of Firefox, otherwise it will be updated to the latest one.
Manually installed Firefox will work as well as the default one (if you have one). Thus, you can have as many versions as you wish.
To update Firefox on your Debian based system, type the following commands in the terminal:
which will update all packages or
This one will try to install firefox and will do nothing if you are already using the latest version.
To uninstall Firefox which was installed using apt, make sure Firefox is closed and then type the following command in the terminal:
To remove firefox-esr, type:
To remove the firefox package and all its dependant packages,
In order to remove the specific version of Firefox which was installed manually, you can simply delete the folder in which Firefox files have been extracted.
Install Firefox using yum
If the Linux distribution you are using is RedHat based (Fedora 21 and below, or CentOS) then your default dependency resolver for the underlying package manager is YUM. Yum syntax is very simple and apt users shouldn’t face any problem using it.
To install Firefox using yum, you can type the following command in the terminal:
This command will install Firefox 52.7.2. If you want to install latest version of Firefox, you need to do it manually as described in apt section above. At the time of writing this article latest stable release of Firefox was 59.0.2.
Change your directory to home
Download tar.bz2 file of the latest version from Mozilla’s website.
Modify 59.0.2 if you want to download another version.
Extract the downloaded archive
Now you can open Firefox by typing in the terminal:
To be able to open Firefox from anywhere just by typing “firefox”, you need to create symlink:
Updating firefox can be done either from browser itself or by reinstalling manually a newer version. To do this just remove the folder where firefox has been extracted and install newer version in the same directory. In this case there is no need to create symlink again.
To remove Firefox which was installed via yum type:
Install Firefox using snap
Firefox is now available on snap store. Assuming your system already have snap installed, type:
Install Firefox using pacman
Pacman is the default package management system for Arch Linux. To install Firefox using pacman you must open terminal and run the following command:
This will install latest stable version of Firefox, which was 59.0.2 at the time of writing this article.
The process of installing specific version of Firefox is the same as in other distributions mentioned above.
To remove Firefox from Arch Linux type the following command in the terminal:
This will remove Firefox and its dependencies which are not required by any other installed package.
Possible problems while uninstalling/reinstalling or updating Firefox
While uninstalling Firefox, first make sure it’s not running. You can do that by typing the following command in the terminal:
If Firefox is running, just quit it. If it appears in the output of the command above, but actually it doesn’t running, type the following command to kill Firefox process:
After this command check again with ps ax command and if output contains firefox, type
If this doesn’t help too, try to execute this command with sudo privileges:
If this doesn’t help as well, reboot your machine and start from scratch.
While updating Firefox to a newer version you can get problems related to your profile. In that case you need to clear out your profile. You can do that with this command
Installing Firefox via terminal isn’t much harder than to install it from GUI package manager with several clicks. Vice versa, it is much faster.
Источник
Установка Firefox в Ubuntu 20.04
Firefox — это один из самых популярных браузеров. Исторически так сложилось, что он наиболее популярный среди всех браузеров для операционных систем Linux и поставляется по умолчанию вместе со многими системами в том числе и в Ubuntu. Программа имеет открытый исходный код и разрабатывается компанией Mozilla Corporation.
Разработка Firefox началась в 2004 году и за это время программа прошла очень длинный путь развития. Несколько дней назад состоялся релиз Firefox. К основным особенностям Firefox можно отнести его направленность в сторону приватности и возможность открытия страницы в режиме только для чтения. В этой статье мы рассмотрим как установить Firefox, а также как обновить его до самой новой версии.
Установка Firefox в Ubuntu 20.04
1. Официальные репозитории
Если вы удалили раньше Firefox, то можете сейчас установить программу из официальных репозиториев. Это можно сделать через менеджер приложений или терминал:
sudo apt install firefox
Firefox 50 вышел для всех поддерживаемых на данный момент систем Ubuntu. Поэтому в результате такой установки вы получите самую последнюю стабильную версию программы. Для обновления вы можете воспользоваться пакетным менеджером Ubuntu или просто выполнить штатное обновление системы:
sudo apt update
sudo apt upgrade
Установка Firefox Ubuntu 20.04 последней версии будет выполнена вместе с установкой других обновлений:
2. PPA репозиторий
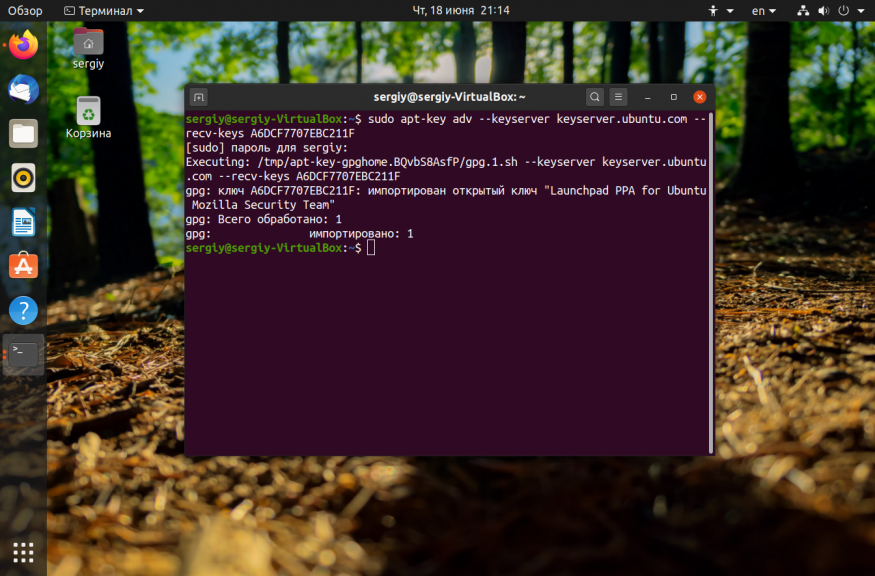
Если вы хотите самую свежую версию Firefox, которая ещё находится на стадии бета-тестирования, вам нужно использовать PPA репозиторий от Mozilla. Сначала надо добавить в систему ключ:
sudo apt-key adv —keyserver keyserver.ubuntu.com —recv-keys A6DCF7707EBC211F
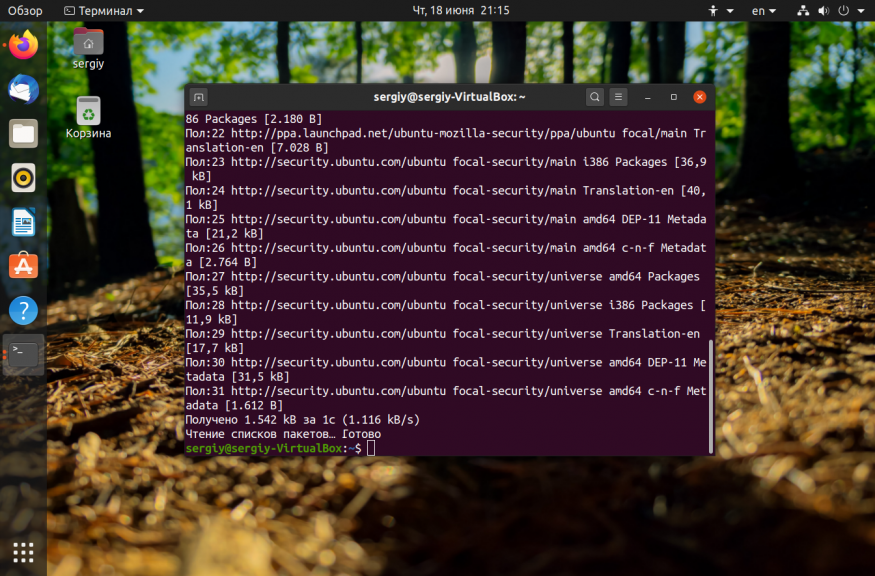
Затем добавьте репозиторий:
sudo apt-add-repository «deb http://ppa.launchpad.net/ubuntu-mozilla-security/ppa/ubuntu focal main»
После этого можно установить Firefox:
sudo apt install firefox
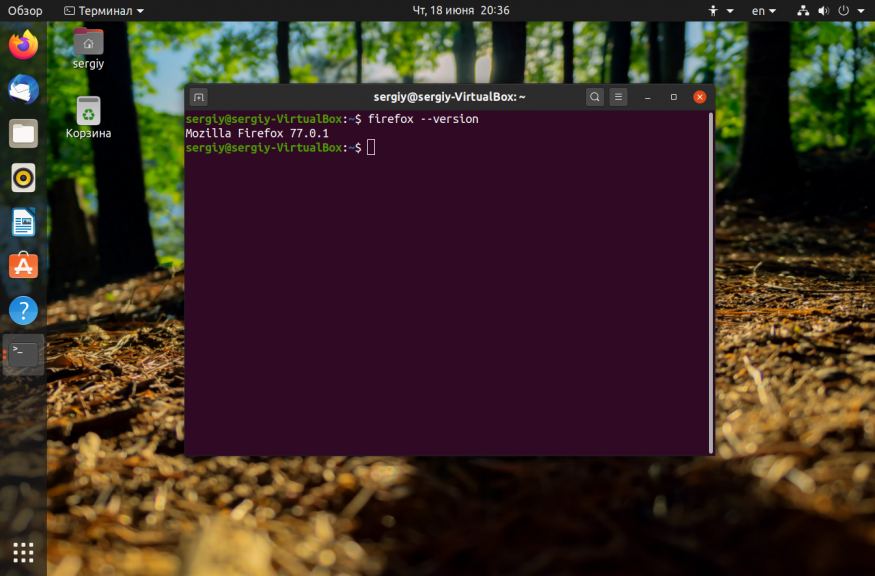
Затем проверьте версию:
3. Официальный сайт
Установка последней версии Firefox может быть выполнена не только из репозиториев. Вы можете скачать архив с бинарными файлами программы и распаковать его на своем компьютере. Сначала удалите существующую версию:
sudo apt remove firefox

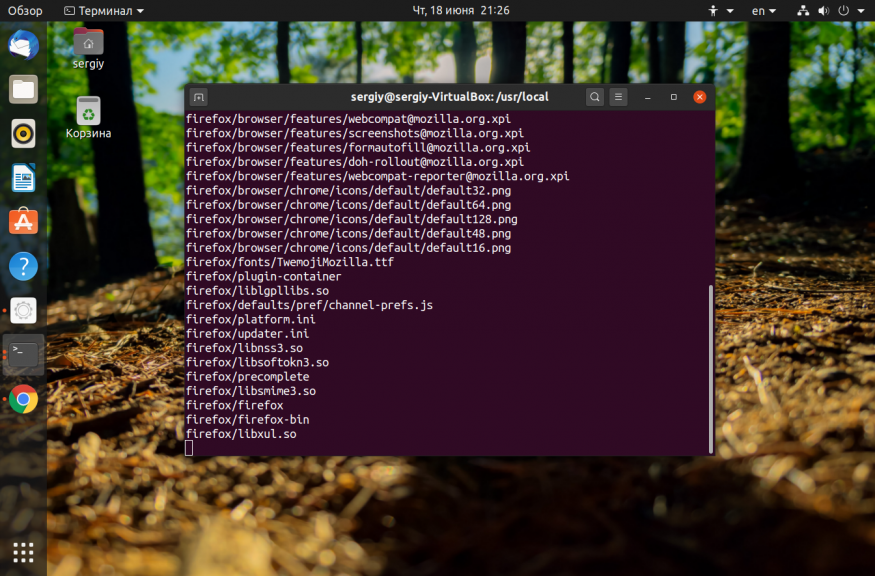
Перейдите в папку /usr/local/
Затем скачайте архив из официального сайта. Например, для последней версии Firefox 64 бит ссылка будет выглядеть вот так:

Затем распакуйте полученный архив:
sudo tar xvjf FirefoxSetup.tar.bz2
Программа уже скомпилирована и ничего собирать не нужно, осталось создать символическую ссылку на саму программу в каталог /bin:
sudo ln -s /usr/local/firefox/firefox /usr/bin/firefox
Для обновления полученного таким образом Firefox надо просто повторить процедуру. Затем можно запускать из главного меню или через терминал:
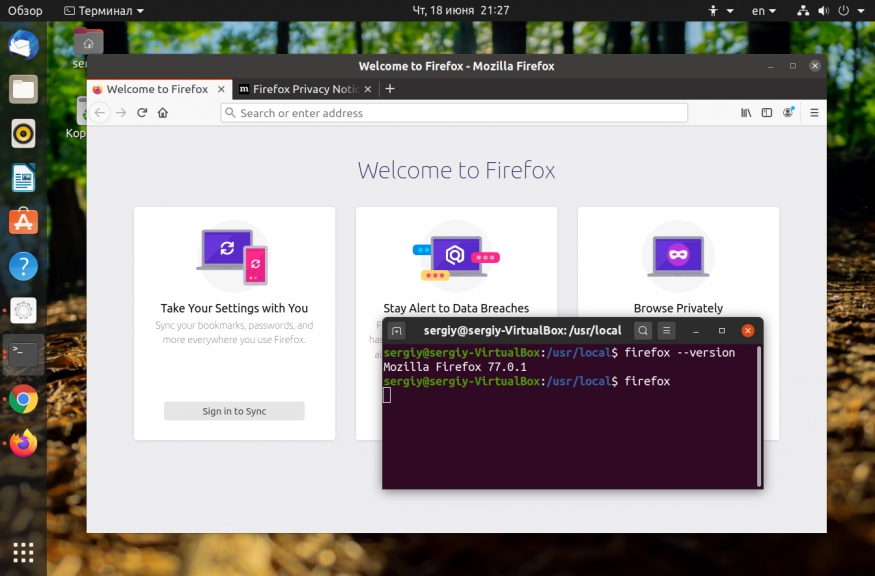
4. Пакет snap
Я не знаю зачем вам может это понадобится, но вы можете установить firefox из snap пакета. Для этого просто выполните:
sudo snap install firefox
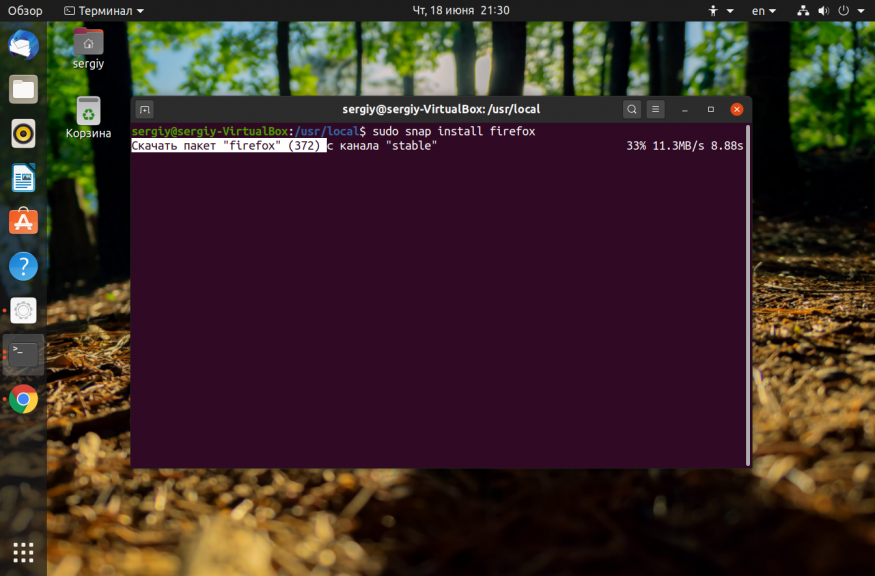
Никаких преимуществ у такого метода установки нет, но вы можете это сделать.
Удаление Firefox
Если вы хотите полностью удалить Firefox из системы используйте команду:
sudo apt remove firefox
Если же вы хотите удалить версию из репозитория, просто удалите сам репозиторий из файла /etc/apt/sources.list, обновите списки пакетов и переустановите firefox:
sudo apt update
Чтобы удалить Firefox установленный из официального сайта надо удалить символическую ссылку /usr/bin/firefox:
sudo rm -Rf /usr/bin/firefox
Затем удалить папку /usr/loca/firefox:
sudo rm -Rf /usr/loca/firefox
Для удаления snap пакета выполните:
sudo snap remove firefox
Выводы
В этой статье мы рассмотрели как установить Firefox Ubuntu 20.04, а также как обновить программу до самой новой версии. А вы используете Firefox? Или Chrome? Почему? Напишите в комментариях!
Оцените статью:
Об авторе
Основатель и администратор сайта losst.ru, увлекаюсь открытым программным обеспечением и операционной системой Linux. В качестве основной ОС сейчас использую Ubuntu. Кроме Linux, интересуюсь всем, что связано с информационными технологиями и современной наукой.
11 комментариев
Подскажите, почему жутко тормозит браузер. Любой — хоть хром, хоть фаерфокс. Давече видел видео в ютубе, так там хром летал как на винде. Тоже на убунту.
Давно используюсь Chromium. Потому что он стабилен без глюков, если кто используется на слабом оборудовании без проблем! Firefox пока все очень хорош, кроме не очень работает только на слабом компьютере.
Офигенно «нужный» пост.)))
А зачем выкашивать браузер встроенный в систему по умолчанию?
И вопрос не по теме: что за иконки на первом скрине?
Если учитывать что Лиса главный браузер линукса. то актуально, вот хочу без вайна IE поставить.
1. Чем FireFox заслужил такую честь — быть примером по удалению и установке приложений в Linux?
2. Почему бы не описать установку/удаление «остальных» приложений?
3. Зачем ЭТА статья?
Мы описываем и другие приложения, см категорию Программы. Firefox, поэтому что это интересует пользователей.
Пишите дальше и не обращайте внимания на всяких.Главное в политику не лезьте.Лично я на Опере в Убунту и на Винде.
ответьте мне на 3 вопроса. они касаются установки .tar.bz2 (ОЧЕНЬ прошуууу. я новичок и у меня уже глаза разбегаются по форумам сил нет):
1) а как мне удалить Firefox ? (Синаптик её не видит и Терминал тоже). просто удалить её с пути зайдя вручную в директорию (без Терминала) /usr/local/bin/ , /usr/local/src/firefox/ , и /home/пользователь/.mozilla/ ??
2) почему ярлык у меня выглядит не как ярлык а файл? имею ввиду, что нет привычного ярлыка которых я мог отыскать в папках инстале на диска С в Вин-7
3) а можно было все эти действия с .tar.bz2 архивом сделать в ручную без Терминала? то есть, распаковать, потом унести её в данную директорию, а ярлык дублировать на роб/стол?
спасибо!
Команда ‘check’ не найдена, возможно вы имели в виду:
Команда ‘vcheck’ из пакета ‘vcheck’ (universe)
Команда ‘mcheck’ из пакета ‘mtools’ (main)
Команда ‘icheck’ из пакета ‘icheck’ (universe)
Команда ‘acheck’ из пакета ‘acheck’ (universe)
Команда ‘chuck’ из пакета ‘chuck’ (universe)
Команда ‘fcheck’ из пакета ‘fcheck’ (universe)
check: команда не найдена
jura@jura-desktop:
$ mcheck
Can’t open /dev/fd0: Нет такого файла или каталога
Cannot initialize ‘A:’
jura@jura-desktop:
$ sudo mcheck
Can’t open /dev/fd0: Нет такого файла или каталога
Cannot initialize ‘A:’
jura@jura-desktop:
$ dist-upgrade
dist-upgrade: команда не найдена
jura@jura-desktop:
$ sudo dist-upgrade
sudo: dist-upgrade: command not found
jura@jura-desktop:
$ sudo vcheck
sudo: vcheck: command not found
jura@jura-desktop:
. «Have you mooed today?».
jura@jura-desktop:
$ sudo apt install firefox
[sudo] password for jura:
sudo: apt: command not found
jura@jura-desktop:
$ sudo apt install firefox
sudo: apt: command not found
jura@jura-desktop:
$ sudo apt update
sudo: apt: command not found
jura@jura-desktop:
Источник
4 Ways to Install Mozilla Firefox in Ubuntu
Mozilla Firefox is the official Internet browser for Ubuntu, therefore, most Ubuntu distros have it installed by default. If your system lacks this browser due to any reason or if you have accidentally deleted it, we will tell you how to install it on your Ubuntu. In this article, we will describe the following ways to install Mozilla Firefox on your system. You can then make a choice based on the source you want to install Firefox from and also if you want to use the UI or the command line.
- From the Snap Store-through the Ubuntu Software Manager
- From the Official Ubuntu Repository-through the command line
- From the Mozilla PPA repository-through the command line
- From Mozilla.org website-through the command line
We have run the commands and procedures mentioned in this article on a Ubuntu 18.04 LTS system.
Method 1: From the Snap Store-through the Ubuntu Software Manager
For a person who does not want to open the Command Line much, installing a software present in the Ubuntu repository through the UI is very simple. On your Ubuntu desktop Activities toolbar, click the Ubuntu Software icon.

Click the search icon and enter FireFox in the search bar. The search results will list the Firefox entry as follows:

This is the package maintained by the snap store. Click on the Firefox search entry to open the following view:

Click the Install button to begin the installation process. The following authentication dialog will display for you to provide your authentication details as only an authorized user can install software on Ubuntu.

Enter your password and click the Authenticate button. After that, the installation process will begin, displaying a progress bar as follows:

Mozilla Firefox will then be installed to your system and you will get the following message after a successful installation:

Through the above dialog, you can choose to directly launch Firefox and even Remove it immediately for whatever reason.
Launch Firefox
Ideally, Firefox should now be available in your system Dock/Activities panel. You can also access it from the Ubuntu application launcher bar as follows, or directly access it from the applications listing:

Remove
If you want to remove Firefox that was installed using the above method, you can remove it from your system as follows:
Open the Ubuntu Software Manager and search for Firefox as follows:

You will see the Installed status in the search entry as shown above. Click this entry and then click Remove from the following view:

The system will prompt you with an Authentication dialog. The software will be removed when you provide the password for sudo user and click Authenticate on the dialog.
Method 2: From the Official Ubuntu Repository-through the Command Line
Firefox being the official Ubuntu browser is also available on the Official Ubuntu repository. It can be easily installed through the command line as follows:
Open the Terminal either through the Ctrl+Alt+T shortcut or the Ubuntu Application Launcher search.
Enter the following command to update your system’s repository index with that of the internet repositories:

This way you can install the latest available version of software on your system.
Then enter the following command in order to install Mozilla Firefox from the official Ubuntu repository:
Please note that only an authorized user( sudo) can add, remove and configure software on Ubuntu. Enter the password for sudo after which the installation procedure will begin.

This might take some time, depending on your Internet speed, after which Firefox will be installed on your system.
Launch Firefox
Run the following command in your Terminal in order to launch Firefox:
Remove
You can remove Firefox completely, along with any configurations you might have made, through the following command:

Otherwise, you can use the following command in order to simply uninstall Firefox:
Method 3: From the Mozilla PPA repository-through the command line
The Mozilla PPA repository includes the latest version of Firefox. Follow these steps in order to install Firefox through this PPA repository:
First, please open the Terminal either through the system Dash or the Ctrl+Alt +T shortcut
Then, enter the following command in order to add the signing key for Mozilla PPA:

Now, enter the following command to add the Mozilla PPA repository to your Ubuntu:

Please note that only an authorized user can add, remove and configure software on Ubuntu. Enter the password for sudo, after which the PPA repository will be added to your system.
Tip: Instead of typing the command, you can copy it from here and paste in the Terminal by using the Ctrl+Shift+V, or by using the Paste option from the right-click menu.
The next step is to update your system’s repository index through the following command:
This helps you in installing the latest available version of software from the Internet.

Now that you are done with all the prerequisites required to install Firefox, use the following command as sudo in order to install Mozilla Firefox on your system:

Launch Firefox
Run the following command in your Terminal in order to launch Firefox:
Remove
You can remove Firefox completely, along with any configurations you might have made, through the following command:
Otherwise, you can use the following command in order to simply uninstall Firefox:
Method 4: From the official website through the command line
If you do not have, or do not want to use any other existing browser on your system, here is how to install Firefox from the official Mozilla.org website using the command line.
Open the Terminal either through the system Dash or the Ctrl+Alt+T shortcut. Enter the following command in order to download the Firefox Setup tar.bz2 file from Mozilla.org:

The file is by default saved in the current user’s home folder.
Extract the file to the /opt folder of your Ubuntu by using the following command as sudo:

Now, create a Firefox executable in /usr/lib/ that points to the location where you extracted the .tar.bz2 file (the /opt folder). Use the following command to do so:

Launch Firefox
Run the following command in your Terminal in order to launch Firefox:
Remove
In order to remove Firefox installed through this method, run the following command as sudo in your Terminal:
You can also delete the .tar.bz2 file that you initially downloaded from the Mozilla website.
So, this was not one but four ways to install Mozilla Firefox on your Ubuntu. Enjoy browsing!
Karim Buzdar
About the Author: Karim Buzdar holds a degree in telecommunication engineering and holds several sysadmin certifications. As an IT engineer and technical author, he writes for various web sites. You can reach Karim on LinkedIn
Источник


