- Redmine
- Latest releases
- Resources
- HowTo Install Redmine in a sub-URI on Windows with Apache
- Install Apache HTTP server 2.2.x
- Install MySQL 5.1.x
- Install MySQL Workbench 5.2.x
- Install PHP 5.3.x
- Install Ruby 1.8.7 with RubyGems
- Additional gems
- Install Rake
- Install Rails
- Install i18n
- Install Mongrel
- Install mysql gem
- Install mongrel-service + win32-service gems
- Install Redmine
- Setup windows services
- Configure Apache 2.2.x as proxy to Mongrel cluster
- Additional components
- Install RMagic
- Add redmine_attach_screenshot plugin
- Redmine
- Latest releases
- Resources
- How to install Redmine in Linux, Windows and OS X using BitNami Redmine Stack
- What is BitNami Redmine Stack?
- Installing BitNami Redmine Stack
Redmine
Latest releases
Resources
HowTo Install Redmine in a sub-URI on Windows with Apache
Following the steps below exactly as listed will produce a working Redmine installation hosted under http://localhost/redmine sub-URI on Windows XP/2003/2008 x86/x64 with Apache HTTP Server 2.2.x, MySQL 5.1.x, PHP 5.3.x and Ruby 1.8.7.
This walk-through was tested with Redmine 1.0.4.devel.4543 but should work with any version >= 0.8 .
The intended audience for this walk-through are Windows users.
Install Apache HTTP server 2.2.x
- Download «Win32 Binary without crypto (no mod_ssl) (MSI Installer)» or «Win32 Binary including OpenSSL (MSI Installer)», depending if you intend to use SSL on your webserver, from here
- Install to C:\webserver\Apache\
Install MySQL 5.1.x
- Download «Windows (x86, 32-bit), MSI Installer — Essentials — Recommended» from here
- (the 64-bit version could be installed on x64 Windows platforms, but the 32-bit version is and it works well on both x86 and x64 versions of Windows.)
- Install to C:\webserver\MySQL\
- During initial setup:
- (optional:) set data files installation directory to C:\webserver\MySQL_Data\
- During Server Instance Configuration Wizard:
- (optional:) Add firewall exception for the port used
- set to «Best Support for Multilingualism» UTF8
- select «Include Bin Directory in Windows PATH»
- During initial setup:
Install MySQL Workbench 5.2.x
- Download «Windows (x86, 32-bit), MSI Installer» from here
- Install to C:\webserver\MySQL_Workbench\
Install PHP 5.3.x
- Download «VC6 x86 Thread Safe — Installer» from here
- Install to C:\webserver\PHP\
- During setup:
- for webserver, choose «Apache 2.2.x Module»
- configuration directory is «C:\webserver\Apache\conf\»
- you can leave all default Extensions as they are, optionally adding «Internationalization» and «Multi-Byte String»
- During setup:
Install Ruby 1.8.7 with RubyGems
- At the time of writing this document the latest version of Ruby was 1.9.2, however for best compatibility use .
- Download «rubyinstaller-1.8.7-p302.exe» from here
- Install to C:\webserver\Ruby\
- During setup, select «Add Ruby executables to your PATH»
- Verify Ruby version
- Open command window, execute:
- expected output:
- Open command window, execute:
- Verify RubyGems version
- in command window, execute:
- expected output:
- At the time of writing this document the latest version of RubyGems was 1.3.7. Versions >= 1.5.0 won’t work with Redmine 1.1.x.
- expected output:
- in command window, execute:
- If you get errors about missing «SSLEAY32.dll», install PHP as shown above and this dll will become available
Additional gems
- mongrel-service and win32-service gems have to be downloaded manually. Download locations are added to sections below.
Install Rake
- At the time of writing this document the latest version of Rake was 0.8.7. Newer versions should work too.
- Install Rake gem
- in command window, execute:
- expected output:
- in command window, execute:
Install Rails
- At the time of writing this document, the latest version of Rails is 3.0.3, but Redmine 1.0.4 installation requires Rails 2.3.5.
- Install Rails gems
- in command window, execute:
- expected output:
- in command window, execute:
Install i18n
- At the time of writing this document, the latest version of i18n is 0.5, but Redmine 1.0.4 installation requires i18n 0.4.2.
- Install i18n gem
- in command window, execute:
- expected output:
- in command window, execute:
Install Mongrel
- At the time of writing this document the latest version of Mongrel was 1.1.5. Newer versions should work too.
- Project page
- Install Mongrel gems
- in command window, execute:
- expected output:
- in command window, execute:
Install mysql gem
- At the time of writing this document the latest version of mysql gem was 2.8.1. Newer versions should work too.
- It drastically improves page generation speed.
- Install mysql gem
- in command window, execute:
- expected output:
- The gem was made for MySQL 5.0 so there are some additional features in 5.1 which will not be defined, so you will see a number of lines about missing definitions, but it does not cause any problems
- in command window, execute:
Install mongrel-service + win32-service gems
- At the time of writing this document the latest version of win32-service was 0.7 which does NOT work with Ruby 1.8.7
- Use only win32-service version 0.5.2 for Redmine deployment.
- Download «mongrel_service-0.3.4-i386-mswin32.gem» from here
- Move mongrel_service-0.3.4-i386-mswin32.gem to C:\webserver\
- Download «win32-service-0.5.2-mswin32.gem» from here
- This file is also attached at the bottom of this wiki page
- Move win32-service-0.5.2-mswin32.gem to C:\webserver\
- Install the gem
- in command window, execute:
- expected output:
- in command window, execute:
- Delete the two .gem files from C:\webserver\
Install Redmine
- Procedure below assumes we will be installing Redmine 1.0.4, but it also works with any revisions >= r3235
- Download «redmine-1.0.4.zip» from here
- Extract the contents of the directory in the archive to C:\webserver\Redmine
- Log into MySQL as root using «MySQL Workbench». You can also use command prompt or another tool, such as «MySQL GUI Tools» or «phpMyAdmin».
- «Open connection to Start Querying»
- In SQL Query window enter the following script:
- «Execute SQL Script in Connected Server»
- You should of course change redmineUser and myPassword to something different.
- Copy C:\webserver\Redmine\config\database.yml.example to C:\webserver\Redmine\config\database.yml
- Edit C:\webserver\Redmine\config\database.yml file to configure your database settings for «production» environment. It should look like this:
- Set username and password to the values entered in the SQL script above.
- Save and close the file.
- Create (or update) Redmine database tables
- in command window, execute:
- If you encounter this error: Mysql::Error: query: not connected: CREATE TABLE `schema_migrations` (`version` varchar(255) NOT NULL) ENGINE=InnoDB :
- download libmySQL.dll from here
- move this .dll file to C:\webserver\Ruby\bin\
- in command window, again execute:
- If you encounter this error: Mysql::Error: query: not connected: CREATE TABLE `schema_migrations` (`version` varchar(255) NOT NULL) ENGINE=InnoDB :
- in command window, execute:
- If this is a fresh install, you can pre-populate the tables with default data
- in command window, execute:
- Assuming that we will be hosting Redmine under http://localhost/redmine
- Edit C:\webserver\Redmine\config\environment.rb file to configure Redmine to work as a sub-URI (Apache configuration is also required and is listed later on in this document).
- add the following line at the bottom of the file:
- save and close the file.
- This is a preferred way of setting up the application prefix. Mongrel_rails service «—prefix» directive does work with Rails 2.3.x
- Optionally, you can add a following initializer, but ONLY IF you want to use «—prefix» in «Mongrel_rails service» command of changing «environment.rb»:
- Create a file config/initializers/patch_for_mongrel.rb [name of file can be anything]:
- Optionally, you can add a following initializer, but ONLY IF you want to use «—prefix» in «Mongrel_rails service» command of changing «environment.rb»:
Setup windows services
- Memory usage is greatly affected by the number of mongrels running. Keep that in mind when deciding on how many processes you want to run. For example, memory usage on Windows Server 2003 x64 SP2:
- Apache = 5MB + 20MB + 40MB = 65MB
- MySQL = 35MB
- Mongrel cluster = number-of-mongrel_rails-services x (3MB + 90MB) = 279MB (@3 processes)
- Create windows services
- in command window (opened as admin!), execute:
- Start windows services, which in turn will start mongrel servers
- in command window, execute:
- Go to the Windows Services list and set all «Mongrel serving Redmine on 300#» services to start automatically
- in command window, execute:
- find each one of «Mongrel serving Redmine on 300#» services
- right click, select Properties
- set Startup type to «Automatic»
- press OK and repeat for the remaining Mongrel services.
- Alternatively you can execute this command on elevated command prompt for each mongrel service installed:
Configure Apache 2.2.x as proxy to Mongrel cluster
- Procedure below assumes we will be hosting Redmine under http://localhost/redmine and must match the relative_url_root set above
- Open C:\webserver\Apache\conf\httpd.conf
- At the bottom of this file add the following line:
- Create a file C:\webserver\Apache\conf\httpd-proxy-mongrel.conf
- Enter the following:
- Restart the Apache service.
- in command window, execute:
Your local installation of Redmine is now accessible at http://localhost/redmine
Additional components
Install RMagic
- Download «RMagick-2.12.0-ImageMagick-6.5.6-8-Q8.zip» or a later version from here
- Extract «rmagick-2.12.0-x86-mswin32.gem» to C:\webserver\
- Install «ImageMagick-6.5.6-8-Q8-windows-dll.exe» to C:\webserver\ImageMagick
- Install the RMagic gem
- in command window, execute:
- expected output:
- in command window, execute:
- Delete the .gem file from C:\webserver\
- Reboot your server. (I was unsuccessful trying to get it to work without rebooting)
Add redmine_attach_screenshot plugin
- download source from here
- Extract the archive to C:\webserver\Redmine\vendor\plugins\redmine_attach_screenshot
- Restart the Mongrel cluster
- in command window, execute:
win32-service-0.5.2-mswin32.gem — a working win32-service gem (41 КБ) Jack Kurzecki, 2010-02-01 10:38
Redmine
Latest releases
Resources
How to install Redmine in Linux, Windows and OS X using BitNami Redmine Stack
What is BitNami Redmine Stack?
BitNami Redmine Stack is an all-in-one installer that makes it easy to install Redmine on your computer. It is free, easy to use and self-contained. That means it bundles and automatically configures every piece of software (dependency) necessary to run Redmine for development or production purposes, including Apache, MySQL, Subversion and Ruby on Rails.
You can download the latest version of BitNami Redmine stack for Windows, Linux and OS X at http://bitnami.org/stack/redmine.
Installing BitNami Redmine Stack
Regardless of which operating system you are running (Windows / Linux / Mac), the install process is the same.
Download the latest version of Redmine Stack from the BitNami website.
Find the installer you just downloaded (the filename will be similar to bitnami-Redmine-VERSION-linux-installer.run). Double click on the icon to launch the installer.
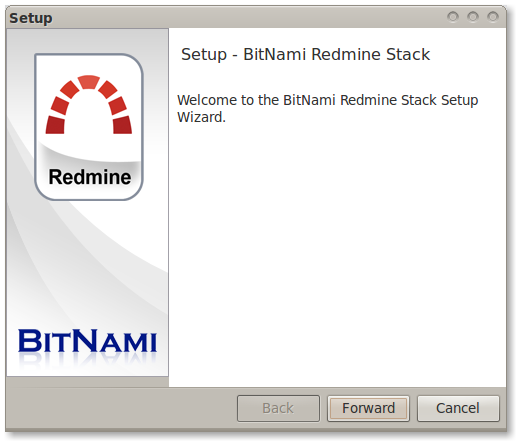
Click «Forward».

Now it will ask where do you want to install the program. Provide the location where you want to install the BitNami Redmine stack and click «Forward» when you are done.
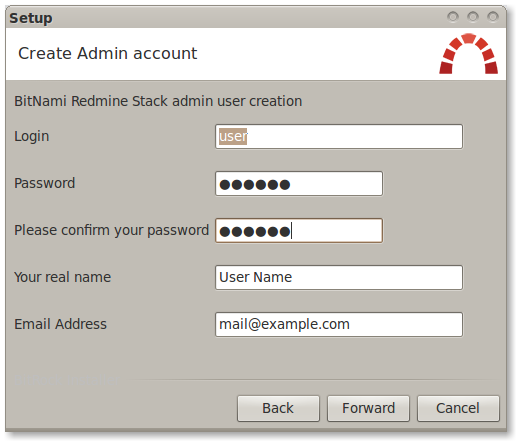
The user and password you provide here will be used to create the admin account in Redmine Click «Forward» when you are done.
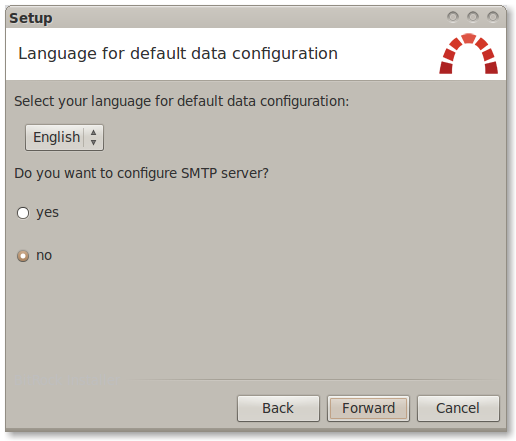
Type in the name you want to use for your Redmine site, and click «Forward».
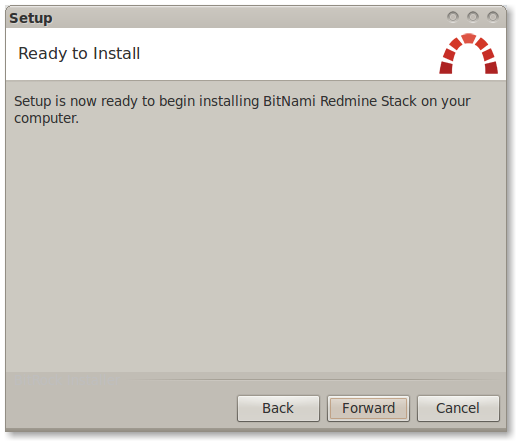
The installer is now ready to begin the installation process. Click «Forward».
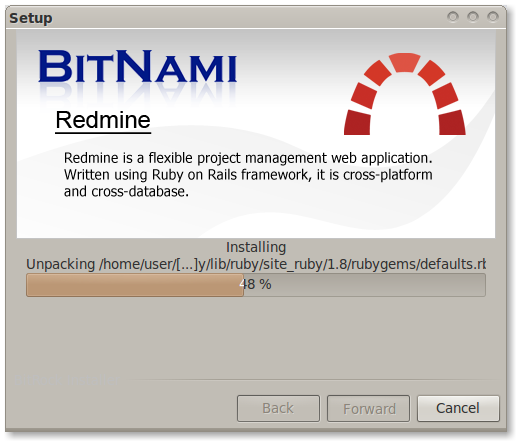
Wait a minute while the installer copies the files and configures your Redmine installation.
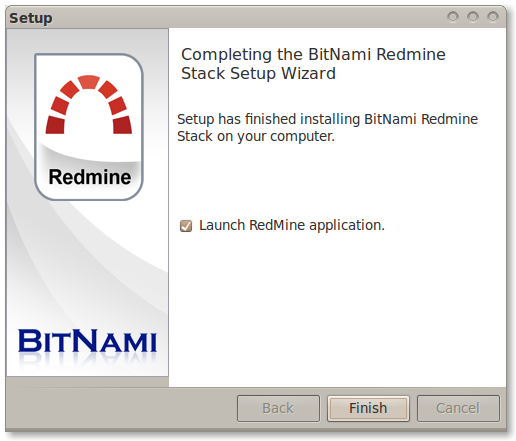
Redmine is now set up and ready to be used. Click «Finish» to launch the application.
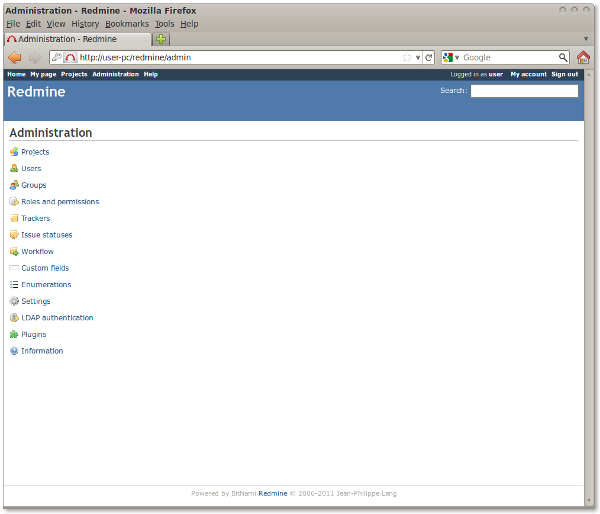
You can now log in using the username and password you provided during the installation.
redmine_installing.png (52,054 КБ) Josue Alvarez, 2011-08-04 18:09
redmine_launch.png (48,906 КБ) Josue Alvarez, 2011-08-04 18:09
Main_application.png (47,736 КБ) Josue Alvarez, 2011-08-04 18:09
Redmine_welcome_screen.png (42,882 КБ) Josue Alvarez, 2011-08-04 18:09
Choose_directory.png (24,991 КБ) Josue Alvarez, 2011-08-04 18:09
User_data.png (33,071 КБ) Josue Alvarez, 2011-08-04 18:09
redmine_settings.png (27,547 КБ) Josue Alvarez, 2011-08-04 18:09
tf00000010.xlsx (16,854 КБ) Mukesh Narayan, 2017-04-18 12:10


