- Ruby on Rails — Installation
- Rails Installation on Windows
- Step 1: Check Ruby Version
- Step 2: Install Ruby
- Step 3: Install Rails
- Step 4: Check Rails Version
- Rails Installation on Linux
- Step 1: Install Prerequisite Dependencies
- Step 2: Install rbenv
- Step 3: Install Ruby
- Step 4: Install Rails
- Step 5: Install JavaScript Runtime
- Step 6: Install Database
- Keeping Rails Up-to-Date
- Installation Verification
- Installing Ruby
- Choose Your Installation Method
- Package Management Systems
- apt (Debian or Ubuntu)
- yum (CentOS, Fedora, or RHEL)
- snap (Ubuntu or other Linux distributions)
- portage (Gentoo)
- pacman (Arch Linux)
- Homebrew (macOS)
- FreeBSD
- OpenBSD
- Ruby on OpenIndiana
- Other Distributions
- Installers
- ruby-build
- ruby-install
- RubyInstaller
- Ruby Stack
- Managers
- asdf-vm
- chruby
- rbenv
- RVM (“Ruby Version Manager”)
- Building from Source
- Installing Ruby on Rails in Windows 10 w/Bash & PostgreSQL
- Installing Rails: The Steps
- Installing the pre-requisites
- Installing Ruby
- Installing Bundler
- Installing Ruby on Rails Pre-requisites
- Installing Ruby on Rails
- Installing PostgreSQL
- Creating our Rails application
- Conclusion
Ruby on Rails — Installation
To develop a web application using Ruby on Rails Framework, you need to install the following software −
- Ruby
- The Rails Framework
- A Web Server
- A Database System
We assume that you already have installed a Web Server and a Database System on your computer. You can use the WEBrick Web Server, which comes with Ruby. Most websites however use Apache or lightTPD web servers in production.
Rails works with many database systems, including MySQL, PostgreSQL, SQLite, Oracle, DB2 and SQL Server. Please refer to a corresponding Database System Setup manual to set up your database.
Let’s look at the installation instructions for Rails on Windows and Linux.
Rails Installation on Windows
Follow the steps given below for installing Ruby on Rails.
Step 1: Check Ruby Version
First, check if you already have Ruby installed. Open the command prompt and type ruby -v. If Ruby responds, and if it shows a version number at or above 2.2.2, then type gem —version. If you don’t get an error, skip Install Ruby step. Otherwise, we’ll install a fresh Ruby.
Step 2: Install Ruby
If Ruby is not installed, then download an installation package from rubyinstaller.org. Follow the download link, and run the resulting installer. This is an exe file rubyinstaller-2.2.2.x.exe and will be installed in a single click. It’s a very small package, and you’ll get RubyGems as well along with this package. Please check the Release Notes for more detail.
Step 3: Install Rails
Install Rails − With Rubygems loaded, you can install all of Rails and its dependencies using the following command through the command line −
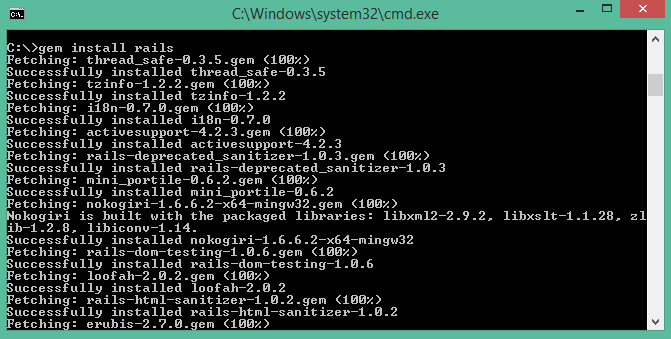
Note − The above command may take some time to install all dependencies. Make sure you are connected to the internet while installing gems dependencies.
Step 4: Check Rails Version
Use the following command to check the rails version.
Congratulations! You are now on Rails over Windows.
Rails Installation on Linux
We are installing Ruby On Rails on Linux using rbenv. It is a lightweight Ruby Version Management Tool. The rbenv provides an easy installation procedure to manage various versions of Ruby, and a solid environment for developing Ruby on Rails applications.
Follow the steps given below to install Ruby on Rails using rbenv tool.
Step 1: Install Prerequisite Dependencies
First of all, we have to install git — core and some ruby dependences that help to install Ruby on Rails. Use the following command for installing Rails dependencies using yum.
Step 2: Install rbenv
Now we will install rbenv and set the appropriate environment variables. Use the following set of commands to get rbenv for git repository.
Step 3: Install Ruby
Before installing Ruby, determine which version of Ruby you want to install. We will install Ruby 2.2.3. Use the following command for installing Ruby.
Use the following command for setting up the current Ruby version as default.
Use the following command to verify the Ruby version.
Ruby provides a keyword gem for installing the supported dependencies; we call them gems. If you don’t want to install the documentation for Ruby-gems, then use the following command.
Thereafter, it is better to install the Bundler gem, because it helps to manage your application dependencies. Use the following command to install bundler gem.
Step 4: Install Rails
Use the following command for installing Rails version 4.2.4.
Use the following command to make Rails executable available.
Use the following command for checking the rails version.
Ruby on Rails framework requires JavaScript Runtime Environment (Node.js) to manage the features of Rails. Next, we will see how we can use Node.js to manage Asset Pipeline which is a Rails feature.
Step 5: Install JavaScript Runtime
Let us install Node.js from the Yum repository. We will take Node.js from EPEL yum repository. Use the following command to add the EPEL package to the yum repository.
Use the following command for installing the Node.js package.
Congratulations! You are now on Rails over Linux.
Step 6: Install Database
By default, Rails uses sqlite3, but you may want to install MySQL, PostgreSQL, or other RDBMS. This is optional; if you have the database installed, then you may skip this step and it is not mandatory that you have a database installed to start the rails server. For this tutorial, we are using PostgreSQL database. Therefore use the following commands to install PostgreSQL.
Accept the prompt, by responding with a y. Use the following command to create a PostgreSQl database cluster.
Use the following command to start and enable PostgreSQL.
Keeping Rails Up-to-Date
Assuming you have installed Rails using RubyGems, keeping it up-to-date is relatively easy. We can use the same command in both Windows and Linux platform. Use the following command −
The following screenshot shows a Windows command prompt. The Linux terminal also provides the same output.
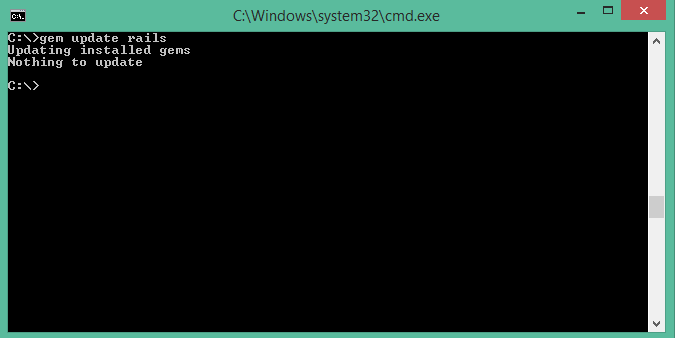
This will automatically update your Rails installation. The next time you restart your application, it will pick up this latest version of Rails. While using this command, make sure you are connected to the internet.
Installation Verification
You can verify if everything is set up according to your requirements or not. Use the following command to create a demo project.
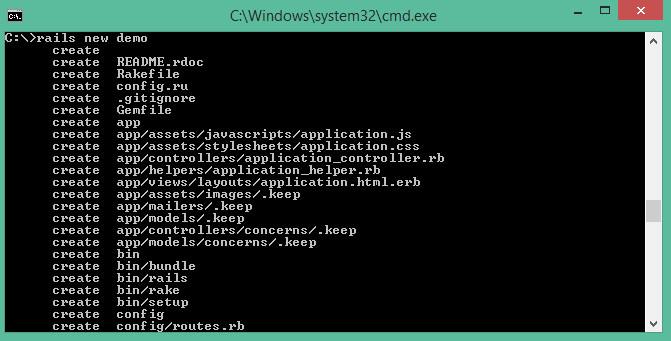
It will generate a demo rail project; we will discuss about it later. Currently we have to check if the environment is set up or not. Next, use the following command to run WEBrick web server on your machine.
It will generate auto-code to start the server

Now open your browser and type the following −
It should display a message, something like, «Welcome aboard» or «Congratulations».
Installing Ruby
With package managers or third-party tools, you have plenty of options to install and manage Ruby.
You may already have Ruby installed on your computer. You can check inside a terminal emulator by typing:
This should output some information on the installed Ruby version.
Choose Your Installation Method
There are several ways to install Ruby:
- On a UNIX-like operating system, using your system’s package manager is easiest. However, the packaged Ruby version may not be the newest one.
- Installers can be used to install a specific or multiple Ruby versions. There is also an installer for Windows.
- Managers help you to switch between multiple Ruby versions on your system.
- Finally, you can also build Ruby from source.
On Windows 10, you can also use the Windows Subsystem for Linux to install one of the supported Linux distributions and use any of the installation methods available on that system.
Here are available installation methods:
Package Management Systems
If you cannot compile your own Ruby, and you do not want to use a third-party tool, you can use your system’s package manager to install Ruby.
Some members of the Ruby community feel that you should avoid package managers to install Ruby and that you should use dedicated tools instead.
It is possible that major package managers will install older Ruby versions instead of the latest release. To use the latest Ruby release, check that the package name matches its version number. Or use a dedicated installer.
apt (Debian or Ubuntu)
Debian GNU/Linux and Ubuntu use the apt package manager. You can use it like this:
yum (CentOS, Fedora, or RHEL)
CentOS, Fedora, and RHEL use the yum package manager. You can use it like this:
The installed version is typically the latest version of Ruby available at the release time of the specific distribution version.
snap (Ubuntu or other Linux distributions)
Snap is a package manager developed by Canonical. It is available out-of-the-box on Ubuntu, but snap also works on many other Linux distributions. You can use it like this:
We have several channels per Ruby minor series. For instance, the following commands switch to Ruby 2.3:
portage (Gentoo)
Gentoo uses the portage package manager.
To install a specific version, set RUBY_TARGETS in your make.conf . See the Gentoo Ruby Project website for details.
pacman (Arch Linux)
Arch Linux uses a package manager named pacman. To get Ruby, just do this:
This should install the latest stable Ruby version.
Homebrew (macOS)
Ruby versions 2.0 and above are included by default in macOS releases since at least El Capitan (10.11).
Homebrew is a commonly used package manager on macOS. Installing Ruby using Homebrew is easy:
This should install the latest Ruby version.
FreeBSD
FreeBSD offers both pre-packaged and source-based methods to install Ruby. Prebuilt packages can be installed via the pkg tool:
A source-based method can be used to install Ruby using the Ports Collection. This is useful if you want to customize the build configuration options.
More information about Ruby and its surrounding ecosystem on FreeBSD can be found on the FreeBSD Ruby Project website.
OpenBSD
OpenBSD as well as its distribution adJ has packages for the three major versions of Ruby. The following command allows you to see the available versions and to install one:
You can install multiple major versions side by side, because their binaries have different names (e.g. ruby27 , ruby26 ).
The HEAD branch of the OpenBSD ports collection might have the most recent version of Ruby for this platform some days after it is released, see directory lang/ruby in the most recent ports collection.
Ruby on OpenIndiana
To install Ruby on OpenIndiana, please use the Image Packaging System (IPS) client. This will install the Ruby binaries and RubyGems directly from the OpenIndiana repositories. It’s easy:
However, the third-party tools might be a good way to obtain the latest version of Ruby.
Other Distributions
On other systems, you can search the package repository of your Linux distribution’s manager for Ruby. Alternatively, you can use a third-party installer.
Installers
If the version of Ruby provided by your system or package manager is out of date, a newer one can be installed using a third-party installer.
Some installers allow you to install multiple versions on the same system; associated managers can help to switch between the different Rubies.
If you are planning to use RVM as a version manager you don’t need a separate installer, it comes with its own.
ruby-build
ruby-build is a plugin for rbenv that allows you to compile and install different versions of Ruby. ruby-build can also be used as a standalone program without rbenv. It is available for macOS, Linux, and other UNIX-like operating systems.
ruby-install
ruby-install allows you to compile and install different versions of Ruby into arbitrary directories. chruby is a complimentary tool used to switch between Ruby versions. It is available for macOS, Linux, and other UNIX-like operating systems.
RubyInstaller
On Windows, RubyInstaller gives you everything you need to set up a full Ruby development environment.
Just download it, run it, and you are done!
Ruby Stack
If you are installing Ruby in order to use Ruby on Rails, you can use the following installer:
- Bitnami Ruby Stack provides a complete development environment for Rails. It supports macOS, Linux, Windows, virtual machines, and cloud images.
Managers
Many Rubyists use Ruby managers to manage multiple Rubies. They allow easy or even automatic switching between Ruby versions depending on the project and other advantages but are not officially supported. You can however find support within their respective communities.
asdf-vm
asdf-vm is an extendable version manager that can manage multiple language runtime versions on a per-project basis. You will need the asdf-ruby plugin (which in turn uses ruby-build) to install Ruby.
chruby
chruby allows you to switch between multiple Rubies. It can manage Rubies installed by ruby-install or even built from source.
rbenv
rbenv allows you to manage multiple installations of Ruby. While it can’t install Ruby by default, its ruby-build plugin can. Both tools are available for macOS, Linux, or other UNIX-like operating systems.
RVM (“Ruby Version Manager”)
RVM allows you to install and manage multiple installations of Ruby on your system. It can also manage different gemsets. It is available for macOS, Linux, or other UNIX-like operating systems.
Uru is a lightweight, multi-platform command line tool that helps you to use multiple Rubies on macOS, Linux, or Windows systems.
Building from Source
Of course, you can install Ruby from source. Download and unpack a tarball, then just do this:
By default, this will install Ruby into /usr/local . To change, pass the —prefix=DIR option to the ./configure script.
You can find more information about building from source in the Ruby README file.
Using the third-party tools or package managers might be a better idea, though, because the installed Ruby won’t be managed by any tools.
Installing Ruby on Rails in Windows 10 w/Bash & PostgreSQL

Mar 29, 2017 · 7 min read
Installing Rails: The Steps
This will focus on installing Ruby, Rails, and getting PostgreSQL to play nicely with Rails and Bash on Windows 10. We will be leveraging the Linux subsystem on Windows 10. This article will not go over installing the Linux Subsystem and getting Bash up and running, there’s already great articles on that very subject. Here is Microsoft’s guide on installing the Linux Subsystem.
Let’s continue on to installing Ruby, Rails, and getting PostgreSQL up and running so that we can use Windows 10 as a development environment for Rails web development.
Installing the pre-requisites
First we n eed to make sure that are current install of Bash on Windows is update to date.
Pro Tip: If you ever run into an issue or you just need to figure out what command or procedure you need to do for specific tasks in regards to Bash on Windows you can simply Google the question and reference Ubuntu. Bash on Windows is built on top of and in partnership with Ubuntu which makes troubleshooting (Linux specific issues & procedures) quite easy.
Lets update and install some pre-requisites.
The terminal will likely prompt you to make sure that it’s okay to install a specific package, just type Y and hit Enter .
That should cover all of the pre-requisites that we will need to be installed to continue on with the process. The pre-reqs are required to get Ruby installed and PostgreSQL (which we will be going over a little bit later).
Installing Ruby
In order for us to install Rails we first need to install Ruby. For the purpose of this article we will be installing Ruby 2.4.1 , your version may differ but at the time of writing this Ruby 2.4.1 is the latest stable build.
In order to install Ruby we will be using rbenv to handle the install and management of our Ruby gems.
Here is a script that will make life for us just a little bit easier. You should be able to just copy and paste this into your terminal but just like life, your mileage may vary.
Now that we have our path built and plugin directory installed for rbenv and Ruby we can now install the latest Ruby version.
Installing Ruby this way takes a bit running through the terminal; patience young grasshopper.
Disclaimer if you are like me and already had rbenv & Ruby previously installed and are getting a message that says…
… you will need to pull the latest version of rbenv and it’s definitions so that you can install the latest version of Ruby. To do that simple input this into your terminal.
Now you can go back to the previous step and install the latest Ruby version you have in your definitions.
Installing Bundler
Next we need to install Bundler Ruby’s package manager. This one is pretty simple.
Now we need to rehash our gems, this updates the pointers to the right location of the new packages.
Installing Ruby on Rails Pre-requisites
Rails is dependent on NodeJS for runtimes in the asset pipeline so we will need to first install NodeJS.
Lets add NodeJS official repository to our system.
Now that the official respository is mapped to our system we will need to install NodeJS.
Awesome, lets just take a minute to make a little sanity check before we continue on installing Rails. Lets just make sure that NodeJS is installed.
You should get something like v4.8.1 . If you get a version with the last command lets continue on installing Rails.
Installing Ruby on Rails
Now that we’ve got Ruby and all of our pre-requisites for Rails installed we can go ahead and install Rails.
Pretty straightforward really but we have to remember to rehash our environment so we have all the correct pointers.
Now lets check to see we have the correct version of Rails installed.
We should hopefully get v5.0.2 or a similar version. Again mileage may vary.
AWESOME! We’ve got Rails installed on our system!
Lets not get in front of ourselves though, we still can’t really use it. We need to setup our database infrastructure.
Installing PostgreSQL
At this point I’m going to state that the current, easiest and most supported database environment that works without workarounds with Rails is MySQL. That being said nearly every developer and bootcamp I can think of uses PostgreSQL and really that’s likely why you are here, so can we use PostgreSQL w/Rails on Windows 10 Bash Linux Subsystem?
Well, we can, we just have to do a little bit of working around. Instead of our typical route of installing PostgreSQL through the terminal we will have to install PostgreSQL as a Windows binary and getting our two systems to connect to each other.
I’ll be honest, it’s a bit of a pain in the ass but Microsoft is currently working on the issue and hopefully we won’t have this issue in the near future. They’ve done good work listening to the community and pushing through the work quickly so I’m hopeful.
Lets download and install the latest stable version of PostgreSQL Windows binary.
PostgreSQL 9.6.2 provided by BigSQL: Download
Now that we have the PostgreSQL downloaded, lets begin to install it.
Follow along with the “Setup Wizard” leaving the defaults checked. If you want to install the additional packages you can but it’s not necessary and we don’t need the extra bloat.
Once you get to the “Password” section set up your password that you want for your postgres user account. I choose to just have my password be password for ease of use in my local environment. You can choose whatever password that you want but you will need to remember it later on in our work.
DO NOT USE “PASSWORD” FOR YOUR PASSWORD IN YOUR PRODUCTION ENVIRONMENT.
Great we got that installed, we got our password set, lets do a quick sanity check to make sure that our Bash Linux Subsystem is connecting to our Windows installation of PostgreSQL.
Run this command from your Bash terminal.
If everything was installed properly you should get a response similar to this and the postgres shell prompt.
Great we got it working. Now type \q to exit the postgres shell.
Creating our Rails application
First we want to make sure that we are in the correct directory. I use a directory on my desktop to keep my files organized, again your mileage may vary. We will use my file locations for an example and you will have to substitute where it is necessarry.
Note that we are storing our application in our Windows filesystem and NOT our Linux Subsystem. This is why we are changing directory into /mnt/c/Users from here you will have to identify your Windows user account, you can do this by running ls and seeing what shows up. For me my user account name is User . After that you will have to cd your way to the directory that you want to work in.
Now that we are in the proper directory lets create our first application.
We should see rails creating the application.
Change directory into your application.
Lets setup our database.yml file real quick just to make sure everything is still going good with our PostgreSQL installation.
Now from our terminal lets create our database.
If everything is working good we should get a message saying our development and test database was created.
Lets run our Rails server and make sure everything is working.
Now in your browser go the your localhost:3000 and you should be presented with verification that Rails is indeed running and installed.

Conclusion
That’s it, you’re all set to go. We now have Rails running with PostgreSQL on a Windows 10! Give yourself a pat on the back!! Woohoo.
If you have any questions you can contact me and I will do my best to help you along, there are some pretty common gotchas but if you just spend a few minutes Googling them you should find your resolution. Remember Google is your friend. If you still are having issues reach out and I’ll see what I can do to give you a hand.


