- Installation
- Obtaining WinSCP
- Running the WinSCP Installation Program
- Upgrading WinSCP
- Downgrading WinSCP
- Removing / Uninstalling WinSCP
- Automating Installation and Uninstallation
- Download and Install WinSCP
- Downloading
- Installation
- Further Reading
- Использование встроенного SSH клиента в Windows 10
- Установка клиента OpenSSH в Windows 10
- Как использовать SSH клиенте в Windows 10?
- SCP: копирование файлов из/в Windows через SSH
- Free SCP Server for Windows, Download & Install in Under 2 min
- Download the SCP Server Software and Install
- FIREWALL Configuration
- Testing Connection with WinSCP
Installation
This article contains detailed description of downloading and installing WinSCP. You may want to see simplified guide to the process instead.
Most users will prefer installing WinSCP for an easy setup.
Though note that, if you prefer so, you can use WinSCP executable as a portable application with its settings stored in an INI file and no installation required. This configuration is best for using WinSCP from a removable media.
Obtaining WinSCP
You can obtain WinSCP from the WinSCP download page. You should save the installer to an easily accessible location such as your Microsoft Windows desktop or your My Documents folder.
WinSCP is also available from Microsoft Store.

Running the WinSCP Installation Program
- If you have WinSCP running, close it. The installer will not run if it finds any instance of WinSCP running.
- Open the installation program by double clicking on its icon.
- The WinSCP installer starts. Follow its instructions.
Upgrading WinSCP
To upgrade WinSCP, download the newer version, and then install it. The installation will preserve your configuration, and – if necessary – upgrade it.
The new WinSCP version will be installed in your language, unless this particular localization is abandoned for a long time. The installation package contains all the translations that are actively maintained at the time of its release. Otherwise you must install the new translation manually, if available. Any translation from your previous WinSCP version will not work with the new version.
When upgrading Portable executable, just replace the executable files with the new version. New version can always read configuration from the old version.
Downgrading WinSCP
In most cases, you may downgrade in the same way as upgrade (i.e. install the old version over the newer one). However safe way is to uninstall the newer version (while keeping your configuration) and only then install the old version.
Note that some of your configurations may be lost when downgrading. To make sure that you will be able to downgrade, you should backup your configuration before the upgrade.
Removing / Uninstalling WinSCP
To remove WinSCP, go to Control Panel > Programs > Uninstall a program. This works for the classic installation only. Microsoft Store installation cannot be removed this way.
On Windows 10, you can also use Settings > System > Apps & features. This works for either type of installations. In case you have both installations, to distinguish them, check the program name. The classic installation has a version number in its name (e.g. “WinSCP 5.17.10”), while the Store installation does not (on the other hand, it shows the author name – “Martin Prikryl”, and has Advanced options link and Move command).
During the removal, the uninstaller of the classic installation will ask, if you want to remove WinSCP configuration and other data stored on your computer. When uninstalling the Store installation, its configuration is removed unconditionally (but not the configuration of any previous classic installation).
Automating Installation and Uninstallation
WinSCP uses Inno Setup as installer. It lets you use optional command-line parameters to automate the installation.
You can use following parameters to automate the installation:
- /LANG=language – Runs the installer using the specified language. For the language , use the Code from translations page.
- /SILENT – Runs the installer without any prompts (with the exception of installation mode selection and error messages). Default selections are used for destination folder, components, etc. To select the installation mode, use /ALLUSERS or /CURRENTUSER .
- /VERYSILENT – As /SILENT , but without showing the progress window.
- /ALLUSERS – Instructs installer to install in administrative install mode.
- /CURRENTUSER – Instructs installer to install in non administrative install mode.
- /NORESTART – Instructs installer not to reboot even if it’s necessary.
- /LOG=»filename» – Causes Setup to create a log file.
- /LOADINF=»filename» – Instructs Setup to load the settings from the specified file after having checked the command line. This file can be prepared using the /SAVEINF parameter.
- /SAVEINF=»filename» – Instructs Setup to save installation settings to the specified file.
- /NOCLOSEAPPLICATIONS – Prevents Setup from closing applications using files that need to be updated by Setup.
WinSCP uninstaller ( unins000.exe in WinSCP installation directory) has the same parameters as above (except for /LOADINF and /SAVEINF ). See full list of Inno Setup uninstaller command line parameters. When running uninstaller silently, configuration and other data stored on your computer are not removed.
Download and Install WinSCP
This guide contains a simplified description of downloading and installing WinSCP. You may want to see detailed documentation of the process instead.
Downloading
You can obtain WinSCP from the WinSCP download page. Follow the Installation package link. You should save the installer to an easily accessible location such as your Windows desktop or your My Documents folder.
WinSCP is also available from Microsoft Store.
Installation
- Open the installation program by double clicking on its icon.
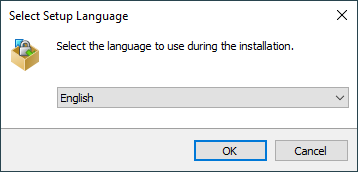
- If your Windows language is not supported by the installer, select an alternative language you want to use (both for installation and later when using WinSCP).
- On the License Agreement screen click Accept after reviewing the license.
- You will be prompted to select a setup type. For a basic setup, choose Typical installation.
- Then you will be prompted for Initial User Settings. This allows you to select user interface style. If you have used (and enjoyed) file managers like Total Commander, Altap Salamander or Norton Commander before, keep default Commander interface. Otherwise you will probably be more familiar with Explorer interface.


- After you select the interface, the Ready to Install screen opens. On this screen, you can review the installation options you’ve selected. Click Install to start the installation.
- A brief installation process will take place. You may have to restart Windows File Explorer or your computer. If you choose not to restart, some WinSCP functions may not be available until you do so.
Further Reading
If you need more details check documentation for installing WinSCP.
Once you have WinSCP installed you may want to check:
- Other guides to using WinSCP;
- Tasks you can do with WinSCP;
- Using WinSCP as portable application.
Использование встроенного SSH клиента в Windows 10
В Windows 10 и Windows Server 2019 появился встроенный SSH клиент, который вы можете использовать для подключения к *Nix серверам, ESXi хостам и другим устройствам по защищенному протоколу, вместо Putty, MTPuTTY или других сторонних SSH клиентов. Встроенный SSH клиент Windows основан на порте OpenSSH и предустановлен в ОС, начиная с Windows 10 1809.
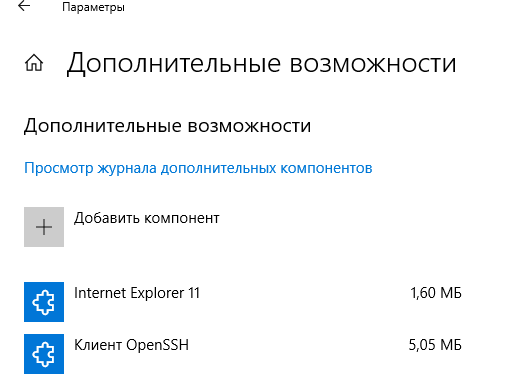
Установка клиента OpenSSH в Windows 10
Клиент OpenSSH входит в состав Features on Demand Windows 10 (как и RSAT). Клиент SSH установлен по умолчанию в Windows Server 2019 и Windows 10 1809 и более новых билдах.
Проверьте, что SSH клиент установлен:
Get-WindowsCapability -Online | ? Name -like ‘OpenSSH.Client*’

В нашем примере клиент OpenSSH установлен (статус: State: Installed).
Если SSH клиент отсутствует (State: Not Present), его можно установить:
- С помощью команды PowerShell: Add-WindowsCapability -Online -Name OpenSSH.Client*
- С помощью DISM: dism /Online /Add-Capability /CapabilityName:OpenSSH.Client
0.0.1.0
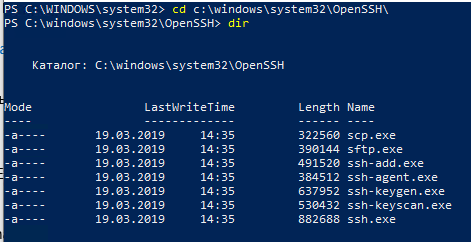
]Бинарные файлы OpenSSH находятся в каталоге c:\windows\system32\OpenSSH\.
- ssh.exe – это исполняемый файл клиента SSH;
- scp.exe – утилита для копирования файлов в SSH сессии;
- ssh-keygen.exe – утилита для генерации ключей аутентификации;
- ssh-agent.exe – используется для управления ключами;
- ssh-add.exe – добавление ключа в базу ssh-агента.
Как использовать SSH клиенте в Windows 10?
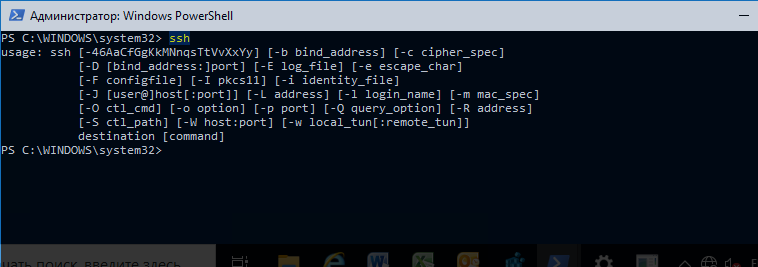
Чтобы запустить SSH клиент, запустите командную строку PowerShell или cmd.exe . Выведите доступные параметры и синтаксис утилиты ssh.exe, набрав команду:
ssh
usage: ssh [-46AaCfGgKkMNnqsTtVvXxYy] [-b bind_address] [-c cipher_spec]
[-D [bind_address:]port] [-E log_file] [-e escape_char]
[-F configfile] [-I pkcs11] [-i identity_file]
[-J [user@]host[:port]] [-L address] [-l login_name] [-m mac_spec]
[-O ctl_cmd] [-o option] [-p port] [-Q query_option] [-R address]
[-S ctl_path] [-W host:port] [-w local_tun[:remote_tun]]
destination [command]
Для подключения к удаленному серверу по SSH используется команда:
Если SSH сервер запущен на нестандартном порту, отличном от TCP/22, можно указать номер порта:
ssh username@host -p port
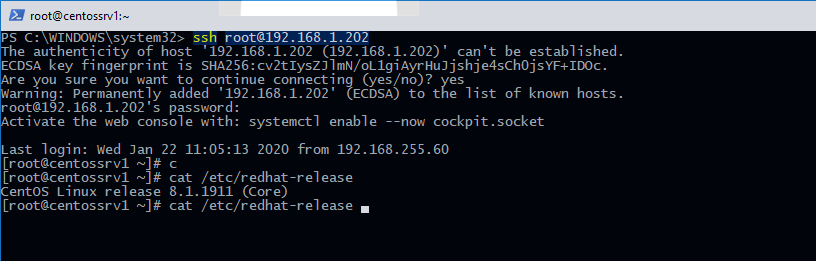
Например, чтобы подключиться к Linux хосту с IP адресом 192.168.1.202 под root, выполните:
При первом подключении появится запрос на добавление ключа хоста в доверенные, наберите yes -> Enter (при этом отпечаток ключа хоста добавляется в файл C:\Users\username\.ssh\known_hosts).
Затем появится запрос пароля указанной учетной записи, укажите пароль root, после чего должна открытся консоль удаленного Linux сервера (в моем примере на удаленном сервере установлен CentOS 8).
Если вы используете SSH аутентификацию по RSA ключам (см. пример с настройкой SSH аутентификации по ключам в Windows), вы можете указать путь к файлу с закрытым ключом в клиенте SSH так:
ssh root@192.168.1.92 -i «C:\Users\username\.ssh\id_rsa»
Также вы можете добавить ваш закрытый ключ в SSH-Agent. Сначала нужно включить службу ssh-agent и настроить ее автозапуск:
set-service ssh-agent StartupType ‘Automatic’
Start-Service ssh-agent
Добавим ваш закрытый ключ в базу ssh-agent:
Теперь вы можете подключиться к серверу по SSH без указания пути к RSA ключу, он будет использоваться автоматически. Пароль для подключения не запрашивается (если только вы не защитили ваш RSA ключ отдельным паролем):
Еще несколько полезных аргументов SSH:
- -C – сжимать трафик между клиентом и сервером (полезно на медленных и нестабильных подключениях);
- -v – вывод подробной информации обо всех действия клиента ssh;
- -R / -L – можно использовать для проброса портов через SSH туннель.
SCP: копирование файлов из/в Windows через SSH
С помощью утилиты scp.exe, которая входит в состав пакета клиента SSH, вы можете скопировать файл с вашего компьютера на SSH сервер:
scp.exe «E:\ISO\CentOS-8.1.1911-x86_64.iso» root@192.168.1.202:/home 
Можно рекурсивно скопировать все содержимое каталога:
scp -r E:\ISO\ root@192.168.1.202:/home
И наоборот, вы можете скопировать файл с удаленного сервера на ваш компьютер:
scp.exe root@192.168.1.202:/home/CentOS-8.1.1911-x86_64.iso e:\tmp
Итак, теперь вы можете прямо из Windows 10 подключаться к SSH серверам, копировать файлы с помощью scp без установки сторонних приложений и утилит.
Free SCP Server for Windows, Download & Install in Under 2 min

SCP Servers are used for all sorts of tasks, including updating firmware, transferring files to and from the internet and many other tasks that depend on SCP (Secure Copy Protocol).
SCP is the preferred method for transferring files for many web site hosts as well, as it utilizes SSH protocol to ensure proper security, authentication and confidentiality during file transfer to remote hosts.
SCP runs on TCP Port 22 and all clients connecting to the server should be configured to use that port as well.
Let’s quickly walk through the Process of Installing this Free SCP Server and getting it configured to accept incoming requests.
Download the SCP Server Software and Install
First off, head over to Here and Download the Free SCP Server package and lets get it installed on the machine that will act as the host.
Below you’ll find step-by-step instructions to do so.
- Download this Free SCP Server package (Courtesy of SolarWinds)
- Extract the EXE file from the Zip file that was downloaded in step #1
- Double-Click on the Installer executable and follow the screenshots below to Install.
Check the box that says “I accept the terms in the License Agreement” and then Press the “Install” button to start the install. That’s It! - The installation will Finish when you see the screen like this:
- Now open the Start Menu, Find “SolarWinds SFTP & SCP Server” folder, click on the folder and Click on “SolarWinds SFTP & SCP Server” program to start it.
- When the program opens up, Make sure you that the “Service Status” at the bottom left corner is set to “Start“. (Our install was “Stopped” by default, so click the “Start” button to start up the server). You should now see the “Service Status” say “Running”.
- FINISHED! At this point, the Server is configured to accept SCP (and SFTP) connections and transfer. You can change further settings within the File >Config menu if you wish.


 You should now see the “Service Status” say “Running”.
The server is ready to be used to transfer uploads and downloads to and from the server.
This is a very basic installation and no authentication has been setup or user accounts within the software itself, but we’ll be using the Computer user account to log into it.
You’ll also need to make sure that your Firewall is configured correctly, which we’ve detailed in the next section.
FIREWALL Configuration
If you have a Software firewall on the PC you installed the SCP Server on, whether the Windows Firewall or a different software firewall, you will need to allow Inbound Traffic on TCP Port 22. To do this on the Windows Firewall, follow the steps below:
- Go to Start > Control Panel > Windows Firewall > on the left-sidebar menu, click “Advanced Settings” link.
- When the Advanced Firewall Settings window comes up, (1.) Highlight the “Inbound Rules” link on the left-sidebar menu and then (2.) click the “New Rule…” link on the right-sidebar menu as seen below in the screenshot.
- The “New Inbound Rule Wizard” will now start. Follow the remaining steps below to Properly configure your Firewall to allow incoming Traffic on port 22.
- Choose “Port” at the first screen and click Next
- Then choose “TCP” and check the “Specific local ports:” box and enter 22, as seen below, then Click NEXT
- Check the “Allow the connection” check box and click NEXT
- Check the Boxes for Domain, Private and Public and click the NEXT
- Enter a name for the Firewall rule, ie: SCP Server Port Forward and click FINISH
- Choose “Port” at the first screen and click Next
- FINISHED! You have no configured your computer to accept traffic on TCP Port 22.


If you want to access this server from the Outside world, you’ll need to ensure that you setup a port forward on your Firewall to forward all SCP Traffic (TCP Port 22) to the computer with the SCP Server software.
Testing Connection with WinSCP
The final step of the process is to test the Server software and ensure that you can connected to it with WinSCP client, which is our favorite SCP, SFTP, FTP client.
Head over to WinSCP.net and download and install the latest version.
After the installation of WinSCP is complete, open the program and enter in the Information of your server below, as follows:
- File Protocol: SCP
- Host Name: IP Address of your SCP Server
- Port Number: 22 (the port number will already be set to 22)
- User name: Enter the username you use to log into the Server with.
- Password: Enter the password for the user from above.

You will See a Certificate Security prompt when first connecting to the server that will look like this: 
Click the “YES” button to store the RSA key in your local cache, so you don’t have to worry about accepting every time you log in.
At this point, you should see your Root folder on the SCP Server, where you can host files or upload/download files as needed.
Its as simple as that, you now have a server setup and ready to file transfer.
Make sure you follow the directions we’ve highlighted for port forwarding the correct ports onto the IP address of the Windows PC you’ve installed the server software on and you shouldn’t have any issues.


