- Как грамотно установить VirtualBox Extension Pack?
- Как установить Oracle VM VirtualBox Extension Pack
- Установка Oracle VM VirtualBox Extension Pack
- Шаг 1. Версия VirtualBox
- Шаг 2. Загрузка Extension Pack
- Шаг 3. Установка Extension Pack
- Оцените статью:
- Об авторе
- 6 комментариев
- VirtualBox
- Contents
- Installation steps for Arch Linux hosts
- Install the core packages
- Sign modules
- Load the VirtualBox kernel modules
- Accessing host USB devices in guest
- Guest additions disc
- Extension pack
- Front-ends
- Installation steps for Arch Linux guests
- Virtual disks management
- Formats supported by VirtualBox
- Disk image format conversion
- Mount virtual disks
- Compact virtual disks
- Increase virtual disks
- General procedure
- Increasing the size of VDI disks
- Replace a virtual disk manually from the .vbox file
- Transfer between Linux host and other OS
- Clone a virtual disk and assigning a new UUID to it
- Tips and tricks
- Import/export VirtualBox virtual machines from/to other hypervisors
- Remove additions
- Use the right virtual disk format
- Create the VM configuration for your hypervisor
- Virtual machine launch management
- Starting virtual machines with a service (autostart)
- Starting virtual machines with a keyboard shortcut
- Use specific device in the virtual machine
- Using USB webcam / microphone
- Detecting web-cams and other USB devices
- Access a guest server
- D3D acceleration in Windows guests
- VirtualBox on a USB key
- Run a native Arch Linux installation inside VirtualBox
- Make sure you have a persistent naming scheme
- Make sure your mkinitcpio image is correct
- Create a VM configuration to boot from the physical drive
- Install a native Arch Linux system from VirtualBox
- Install MacOS guest
- No keyboard/mouse input when attempting to install Mojave
- UEFI interactive shell after restart
- Move a native Windows installation to a virtual machine
- Tasks on Windows
- Using Disk2vhd to clone Windows partition
- Tasks on GNU/Linux
- Fix MBR and Microsoft bootloader
- Known limitations
- Run a Windows partition in VirtualBox
- VirtualBox configuration
- Set up a separate ESP in VirtualBox
- Add the virtual disks to the virtual machine
- Configure the virtual UEFI firmware to use the Windows bootloader
- Run an entire physical disk in Virtualbox
- Set guest starting resolution
- SSH from host to guest
- SSHFS as alternative to the shared folder
- Troubleshooting
- Keyboard and mouse are locked into virtual machine
- No 64-bit OS client options
- VirtualBox GUI does not match host GTK theme
- Cannot send Ctrl+Alt+Fn to guest
- USB subsystem not working
- USB modem not working on host
- USB device crashes guest
- Host freezes on virtual machine start
- Analog microphone not working
- Microphone not working after upgrade
- Problems with images converted to ISO
- Failed to create the host-only network interface
- Failed to insert module
- VBOX_E_INVALID_OBJECT_STATE (0x80BB0007)
- NS_ERROR_FAILURE and missing menu items
- OpenBSD unusable when virtualisation instructions unavailable
- Windows: «The specified path does not exist. Check the path and then try again.»
- Windows 8.x error code 0x000000C4
- Windows 8, 8.1 or 10 fails to install, boot or has error «ERR_DISK_FULL»
- WinXP: Bit-depth cannot be greater than 16
- Windows: Screen flicker if 3D acceleration enabled
- Cannot launch VirtualBox with Wayland: Segmentation fault
- Random freezing in guests with intel graphics
- Unable to view desktop in fullscreen mode
Как грамотно установить VirtualBox Extension Pack?
Как установить VirtualBox Extension Pack в гостевую Linux-машину?
В прежние года это делалось запросто. Но с годами стало запутаннее и непонятнее, т.к Oracle перестала следить даже за документацией.
Например, что мы видим в документации на сегодняшний день?
1.5. Installing VirtualBox and extension packs
VirtualBox extension packages have a .vbox-extpack file name extension. To install an extension, simply double-click on the package file and a Network Operations Manager window will appear, guiding you through the required steps.
Двойной клик и вы в дамках? Ага, щаззз!
Это относится только в их сраной обожаемой винде.
В Линуксе же этот пак откроется просто как архив, где есть кое-что для Линукса —
— VBoxLinuxAddition.run
— autorun.sh
— runasroot.sh
ну и виндовые файлы, куда ж без них.
Кстати, в архиве есть Readme.txt, но опять-таки — только для винды!
Пробовал установить с помощью этих ‘sh’ — ничего хорошего не получилось, хотя в VirtualBox Manager появился плагин VirtualBox Extension Pack.
Но что толку — мне же нужно установить его в гостевую Linux-машине.
Есть еще, правда, п. «8.41. VBoxManage extpack», в котором якобы можно этот пак установить из консоли —
Extension package management.
Synopsis
VBoxManage extpack install [—replace]
VBoxManage extpack uninstall [—force]
VBoxManage extpack cleanup
VBoxManage extpack install [—replace]
— пробую этот вариант — а фигушки, приложения ‘VBoxManage’ нет и в помине!
Потому что оракловцы забили на Linux.
Короче, я в диком а..е — простейшая задача превратилась в неодолимую проблему.
И что особенно бесит — в гостевой виндовс-машине с установкой пака проблем нет никаких (Р-ррр. )
Источник
Как установить Oracle VM VirtualBox Extension Pack
Виртуальная машина VirtualBox распространяется с открытым исходным кодом. Однако у неё есть набор проприетарных модулей, которые добавляют дополнительные возможности. Например, поддержку USB 2.0, подключение к машине по VNC или RDP, а также возможность загрузки PXE в виртуальной машине. После установки этого плагина вы получаете возможность пробрасывать вашу мышь и клавиатуру прямо в виртуальную машину.
В этой небольшой статье мы рассмотрим как установить Oracle VM VirtualBox Extension Pack на примере операционной системы Ubuntu.
Установка Oracle VM VirtualBox Extension Pack
Шаг 1. Версия VirtualBox
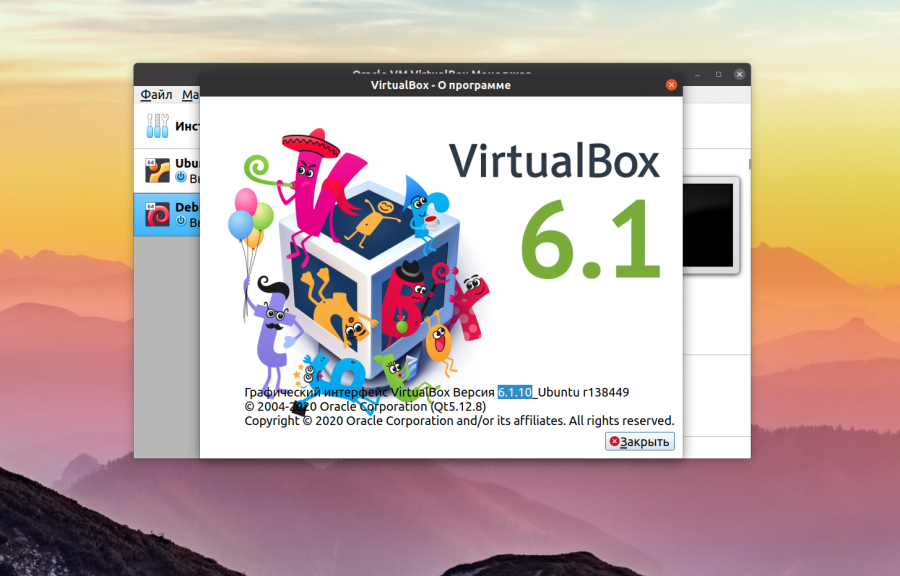
Плагин VirtualBox Exetension Pack выпускается для каждой версии VirtualBox, поэтому сначала надо узнать какая версия у вас установлена. Для этого запустите программу, кликните по меню Справка, а в нём выберите О программе:

В открывшемся окне вы можете видеть версию VirtualBox, в данном случае это 6.1:
Шаг 2. Загрузка Extension Pack
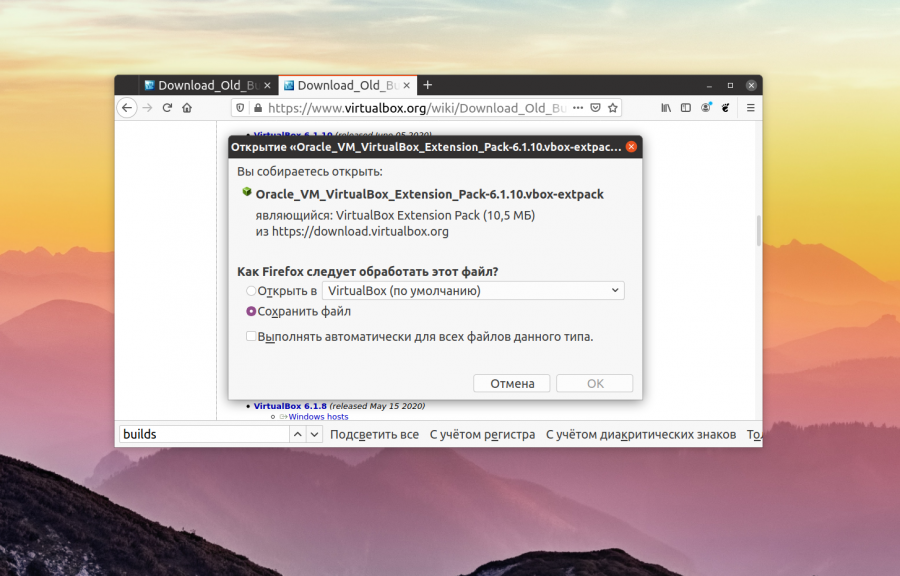
Скачать VirtualBox Extension Pack можно с официального сайта VirtualBox. Если у вас самая последняя версия VirtualBox, которая есть на этой странице, можно скачивать Extension Pack прямо отсюда. Но в данном случае, нам надо не 6.1.16, а 6.1.10. Поэтому надо найти ссылку на страницу Older builds:

Здесь вы берите нужную мажорную версию виртуальной машины, а уже на самой странице старых сборок VirtualBox найдите свою минорную версию:

Здесь есть ссылка на Extension Pack. Просто кликните по ней, затем выберите Сохранить файл в чтобы скачать плагин в папку Загрузки.
Шаг 3. Установка Extension Pack
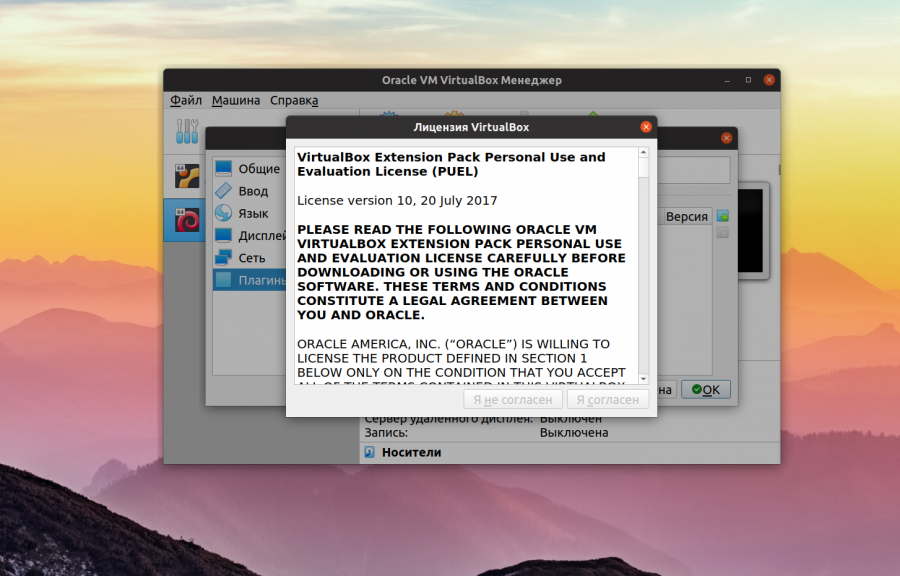
Теперь осталось только установить Extension Pack. Для этого в главном окне VirtualBox откройте меню Файл, а затем Настройки. В открывшемся окне выберите Плагины:
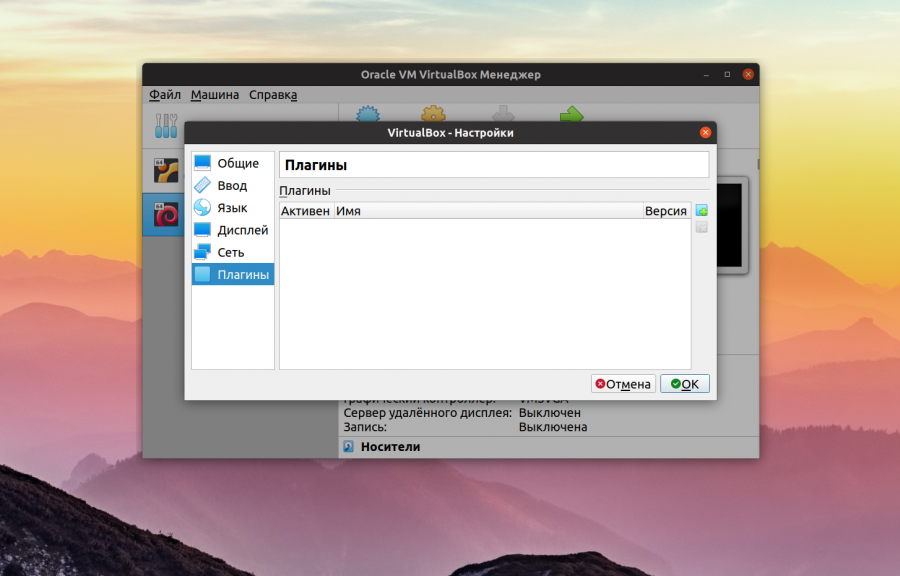
В этом окне кликните по кнопке с зелёным плюсом и выберите файл плагина. Затем подтвердите установку с помощью кнопки Установить:
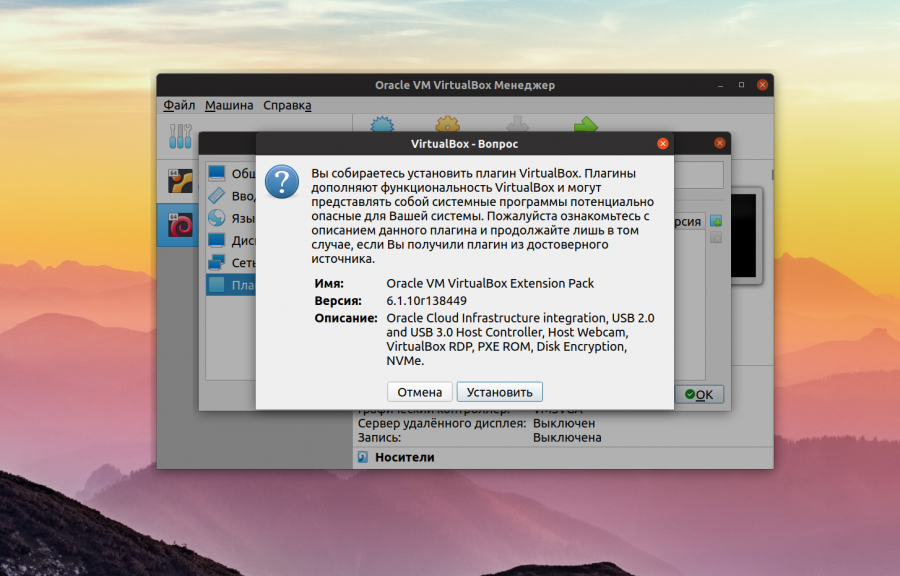
Спустя несколько мгновений программа сообщит, что VirtualBox Extension Pack успешно установлен:

Теперь вы можете использовать USB 2.0, пробрасывать свою мышь или клавиатуру в виртуальную машину, а также подключаться к виртуальной машине по RDP.
Нет похожих записей
Оцените статью:
Об авторе
Основатель и администратор сайта losst.ru, увлекаюсь открытым программным обеспечением и операционной системой Linux. В качестве основной ОС сейчас использую Ubuntu. Кроме Linux, интересуюсь всем, что связано с информационными технологиями и современной наукой.
6 комментариев
Нет, я понимаю, что надо популизировать линукс , что статьи разные нужны и статьи разные важны . Но Losst , вы опускаетесь до уровня Ответы.Mail.ru . Вам нечем наполнить контент ? Сделайте опросник, тем накидают кучу. С уважением , старый ваш читатель.
Отлично! Теперь ждем новость, как то-же самое проделать на QEMU, общий буфер обмена, масштабирование, открытие виртуальной машины в полный экран, подключение локальных дисков, папок, подключение съемных носителей, usb, и. т. д .
Всё хорошо, но никак не могу создать общую папку. Приходится чесать правой рукой левое ухо: передавать данные из системы в виртуальную машину с помощью флешки (((
samba тебе в помощь. Расшарь папку и лазь по сетке
Лет пять назад написал себе скрип:
VBOX_VER=`VBoxManage —version|awk -Fr ‘
EXTPACK_FILENAME=Oracle_VM_VirtualBox_Extension_Pack-$VBOX_VER.vbox-extpack
gfile=http://download.virtualbox.org/virtualbox/$VBOX_VER/$EXTPACK_FILENAME
al=—accept-license=33d7284dc4a0ece381196fda3cfe2ed0e1e8e7ed7f27b9a9ebc4ee22e24bd23c
echo $EXTPACK_FILENAME
if [ -e $EXTPACK_FILENAME ]; then
echo «Файл $EXTPACK_FILENAME обнаружен.»
echo «Устанавливаем файл $EXTPACK_FILENAME. »
VBoxManage extpack install —replace $EXTPACK_FILENAME $al
exit 0
else
echo «Файл $EXTPACK_FILENAME не обнаружен.»
echo «Загружаем файл $EXTPACK_FILENAME. »
wget $gfile
echo «Устанавливаем файл $EXTPACK_FILENAME. »
VBoxManage extpack install —replace $EXTPACK_FILENAME $al
fi
#========================================================
Источник
VirtualBox
VirtualBox is a hypervisor used to run operating systems in a special environment, called a virtual machine, on top of the existing operating system. VirtualBox is in constant development and new features are implemented continuously. It comes with a Qt GUI interface, as well as headless and SDL command-line tools for managing and running virtual machines.
In order to integrate functions of the host system to the guests, including shared folders and clipboard, video acceleration and a seamless window integration mode, guest additions are provided for some guest operating systems.
Contents
Installation steps for Arch Linux hosts
In order to launch VirtualBox virtual machines on your Arch Linux box, follow these installation steps.
Install the core packages
Install the virtualbox package. You will also need to choose a package to provide host modules:
To compile the VirtualBox modules provided by virtualbox-host-dkms , it will also be necessary to install the appropriate headers package(s) for your installed kernel(s) (e.g. linux-lts-headers for linux-lts ). [1] When either VirtualBox or the kernel is updated, the kernel modules will be automatically recompiled thanks to the DKMS Pacman hook.
Sign modules
When using a custom kernel with CONFIG_MODULE_SIG_FORCE option enabled, you must sign your modules with a key generated during kernel compilation.
Navigate to your kernel tree folder and execute the following command:
Load the VirtualBox kernel modules
virtualbox-host-modules-arch and virtualbox-host-dkms use systemd-modules-load.service to load VirtualBox modules automatically at boot time. For the modules to be loaded after installation, either reboot or load the modules once manually; the list of modules can be found in /usr/lib/modules-load.d/virtualbox-host-modules-arch.conf or /usr/lib/modules-load.d/virtualbox-host-dkms.conf .
Among the kernel modules VirtualBox uses, there is a mandatory module named vboxdrv , which must be loaded before any virtual machines can run.
To load the module manually, run:
The following modules are only required in advanced configurations:
- vboxnetadp and vboxnetflt are both needed when you intend to use the bridged or host-only networking feature. More precisely, vboxnetadp is needed to create the host interface in the VirtualBox global preferences, and vboxnetflt is needed to launch a virtual machine using that network interface.
Accessing host USB devices in guest
To use the USB ports of your host machine in your virtual machines, add users that will be authorized to use this feature to the vboxusers user group.
Guest additions disc
It is also recommended to install the virtualbox-guest-iso package on the host running VirtualBox. This package will act as a disc image that can be used to install the guest additions onto guest systems other than Arch Linux. The .iso file will be located at /usr/lib/virtualbox/additions/VBoxGuestAdditions.iso , and may have to be mounted manually inside the virtual machine. Once mounted, you can run the guest additions installer inside the guest.
Extension pack
The Oracle Extension Pack provides additional features and is released under a non-free license only available for personal use. To install it, the virtualbox-ext-oracle AUR package is available, and a prebuilt version can be found in the seblu repository.
If you prefer to use the traditional and manual way: download the extension manually and install it via the GUI (File > Preferences > Extensions) or via VBoxManage extpack install , make sure you have a toolkit like Polkit to grant privileged access to VirtualBox. The installation of this extension requires root access.
Front-ends
VirtualBox comes with three front-ends:
- If you want to use VirtualBox with the regular GUI, use VirtualBox .
- If you want to launch and manage your virtual machines from the command-line, use the VBoxSDL command, which only provides a plain window for the virtual machine without any overlays.
- If you want to use VirtualBox without running any GUI (e.g. on a server), use the VBoxHeadless command. With the VRDP extension you can still remotely access the displays of your virtual machines.
A security feature in Wayland (i.e. when using GDM) disallows VirtualBox to grab all keyboard input. This is annoying when you want to pass window manager shortcuts to your guest OS. It can be bypassed by whitelisting VirtualBox:
The first command will show if any other apps are already whitelisted. If so, add ‘VirtualBox Machine’ to that list, rather than having it as the only one.
Finally, you can also use phpVirtualBox to administrate your virtual machines via a web interface.
Refer to the VirtualBox manual to learn how to create virtual machines.
Installation steps for Arch Linux guests
Virtual disks management
Formats supported by VirtualBox
VirtualBox supports the following virtual disk formats:
- VDI: The Virtual Disk Image is the VirtualBox own open container used by default when you create a virtual machine with VirtualBox.
- VMDK: The Virtual Machine Disk has been initially developed by VMware for their products. The specification was initially closed source, but it became now an open format which is fully supported by VirtualBox. This format offers the ability to be split into several 2GB files. This feature is especially useful if you want to store the virtual machine on machines which do not support very large files. Other formats, excluding the HDD format from Parallels, do not provide such an equivalent feature.
- VHD: The Virtual Hard Disk is the format used by Microsoft in Windows Virtual PC and Hyper-V. If you intend to use any of these Microsoft products, you will have to choose this format.
- VHDX (read only): This is the eXtended version of the Virtual Hard Disk format developed by Microsoft, which has been released on 2012-09-04 with Hyper-V 3.0 coming with Windows Server 2012. This new version of the disk format does offer enhanced performance (better block alignment), larger blocks size, and journal support which brings power failure resiliency. VirtualBox should support this format in read only.
- HDD (version 2): The HDD format is developed by Parallels Inc and used in their hypervisor solutions like Parallels Desktop for Mac. Newer versions of this format (i.e. 3 and 4) are not supported due to the lack of documentation for this proprietary format.
Disk image format conversion
VBoxManage clonehd can be used to convert between VDI, VMDK, VHD and RAW.
For example to convert VDI to VMDK:
VirtualBox does not support QEMU’s QCOW2 disk image format. To use a QCOW2 disk image with VirtualBox you therefore need to convert it, which you can do with qemu ‘s qemu-img command. qemu-img can convert QCOW to / from VDI, VMDK, VHDX, RAW and various other formats (which you can see by running qemu-img —help ).
For example to convert QCOW2 to VDI:
There are two revisions of QCOW2: 0.10 and 1.1. You can specify the revision to use with -o compat=revision .
Mount virtual disks
Mounting VDI images only works with fixed size images (a.k.a. static images); dynamic (dynamically size allocating) images are not easily mountable.
The offset of the partition (within the VDI) is needed, then add the value of offData to 32256 (e.g. 69632 + 32256 = 101888):
The storage can now be mounted with:
For VDI disks with more partitions you can also use losetup :
After this you should find the partitions under /dev/loop* (e.g. /dev/loop0p1 ). Then you can mount them as usual (e.g. mount mount /dev/loop0p1 /mnt/ ).
You can also use mount.vdi script that, which you can use as (install script itself to /usr/bin/ ):
Alternately you can use qemu ‘s kernel module that can do this attrib:
And then to unmount:
If the partition nodes are not propagated try using partprobe /dev/nbd0 ; otherwise, a VDI partition can be mapped directly to a node by: qemu-nbd -P 1 -c /dev/nbd0 storage.vdi .
Another way is to use vdfuse AUR :
which mounts the disk in mountpoint1 with the PartitionN naming format. Each partition can then be loop-mounted in mountpoint2 :
Like VDI, VHD images can be mounted with QEMU’s nbd module:
Compact virtual disks
Compacting virtual disks only works with .vdi files and basically consists of the following steps.
Boot your virtual machine and remove all bloat manually or by using cleaning tools like bleachbit which is available for Windows systems too.
Wiping free space with zeroes can be achieved with several tools:
- If you were previously using Bleachbit, check the checkbox System > Free disk space in the GUI, or use bleachbit -c system.free_disk_space in CLI;
- On UNIX-based systems, by using dd or preferably dcflddAUR (see here to learn the differences):
When fillfile reaches the limit of the partition, you will get a message like 1280 blocks (5120Mb) written.dcfldd:: No space left on device . This means that all of the user-space and non-reserved blocks of the partition will be filled with zeros. Using this command as root is important to make sure all free blocks have been overwritten. Indeed, by default, when using partitions with ext filesystem, a specified percentage of filesystem blocks is reserved for the super-user (see the -m argument in the mkfs.ext4 man pages or use tune2fs -l to see how much space is reserved for root applications). When the aforementioned process has completed, you can remove the file fillfile you created.
- On Windows, there are two tools available:
- sdelete from the Sysinternals Suite, type sdelete -s -z c: , where you need to reexecute the command for each drive you have in your virtual machine;
- or, if you love scripts, there is a PowerShell solution, but which still needs to be repeated for all drives.
Once the free disk space have been wiped, shut down your virtual machine.
The next time you boot your virtual machine, it is recommended to do a filesystem check.
- On UNIX-based systems, you can use fsck manually;
- On GNU/Linux systems, and thus on Arch Linux, you can force a disk check at boot thanks to a kernel boot parameter;
- On Windows systems, you can use:
- either chkdsk c: /F where c: needs to be replaced by each disk you need to scan and fix errors;
- or FsckDskAll from here which is basically the same software as chkdsk , but without the need to repeat the command for all drives;
Now, remove the zeros from the .vdi file with VBoxManage modifyhd:
Increase virtual disks
General procedure
If you are running out of space due to the small hard drive size you selected when you created your virtual machine, the solution adviced by the VirtualBox manual is to use VBoxManage modifyhd. However this command only works for VDI and VHD disks and only for the dynamically allocated variants. If you want to resize a fixed size virtual disk disk too, read on this trick which works either for a Windows or UNIX-like virtual machine.
First, create a new virtual disk next to the one you want to increase:
where size is in MiB, in this example 10000MiB
= 10GiB, and new.vdi is name of new hard drive to be created.
Next, the old virtual disk needs to be cloned to the new one which this may take some time:
Detach the old hard drive and attach new one, replace all mandatory italic arguments by your own:
To get the storage controller name and the port number, you can use the command VBoxManage showvminfo VM_name . Among the output you will get such a result (what you are looking for is in italic):
Download GParted live image and mount it as a virtual CD/DVD disk file, boot your virtual machine, increase/move your partitions, umount GParted live and reboot.
Finally, unregister the virtual disk from VirtualBox and remove the file:
Increasing the size of VDI disks
If your disk is a VDI one, run:
Then jump back to the Gparted step, to increase the size of the partition on the virtual disk.
Replace a virtual disk manually from the .vbox file
If you think that editing a simple XML file is more convenient than playing with the GUI or with VBoxManage and you want to replace (or add) a virtual disk to your virtual machine, in the .vbox configuration file corresponding to your virtual machine, simply replace the GUID, the file location and the format to your needs:
Transfer between Linux host and other OS
The information about path to harddisks and the snapshots is stored between . tags in the file with the .vbox extension. You can edit them manually or use this script where you will need change only the path or use defaults, assumed that .vbox is in the same directory with a virtual harddisk and the snapshots folder. It will print out new configuration to stdout.
Clone a virtual disk and assigning a new UUID to it
UUIDs are widely used by VirtualBox. Each virtual machines and each virtual disk of a virtual machine must have a different UUID. When you launch a virtual machine in VirtualBox, VirtualBox will keep track of all UUIDs of your virtual machine instance. See the VBoxManage list to list the items registered with VirtualBox.
If you cloned a virtual disk manually by copying the virtual disk file, you will need to assign a new UUID to the cloned virtual drive if you want to use the disk in the same virtual machine or even in another (if that one has already been opened, and thus registered, with VirtualBox).
You can use this command to assign a new UUID to a virtual disk:
Tips and tricks
Import/export VirtualBox virtual machines from/to other hypervisors
If you plan to use your virtual machine on another hypervisor or want to import in VirtualBox a virtual machine created with another hypervisor, you might be interested in reading the following steps.
Remove additions
Guest additions are available in most hypervisor solutions: VirtualBox comes with the Guest Additions, VMware with the VMware Tools, Parallels with the Parallels Tools, etc. These additional components are designed to be installed inside a virtual machine after the guest operating system has been installed. They consist of device drivers and system applications that optimize the guest operating system for better performance and usability by providing these features.
If you have installed the additions to your virtual machine, please uninstall them first. Your guest, especially if it is using an OS from the Windows family, might behave weirdly, crash or even might not boot at all if you are still using the specific drivers in another hypervisor.
Use the right virtual disk format
This step will depend on the ability to convert the virtual disk image directly or not.
Automatic tools
Some companies provide tools which offer the ability to create virtual machines from a Windows or GNU/Linux operating system located either in a virtual machine or even in a native installation. With such a product, you do not need to apply this and the following steps and can stop reading here.
- Parallels Transporter which is non free, is a product from Parallels Inc. This solution basically consists in an piece of software called agent that will be installed in the guest you want to import/convert. Then, Parallels Transporter, which only works on OS X, will create a virtual machine from that agent which is contacted either by USB or Ethernet network.
- VMware vCenter Converter which is free upon registration on the VMware webiste, works nearly the same way as Parallels Transporter, but the piece of software that will gather the data to create the virtual machine only works on a Windows platform.
Manual conversion
- Importing or exporting a virtual machine from/to a VMware solution is not a problem at all if you use the VMDK or OVF disk format, otherwise converting VMDK to VDI and VDI to VMDK is possible and the aforementioned VMware vCenter Converter tool is available.
- Importing or exporting from/to QEMU is not a problem neither: some QEMU formats are supported directly by VirtualBox and conversion between QCOW2 to VDI and VDI to QCOW2 is still available if needed.
- Importing or exporting from/to Parallels hypervisor is the hardest way: Parallels does only support its own HDD format (even the standard and portable OVF format is not supported!).
- To export your virtual machine to Parallels, you will need to use the Parallels Transporter tool described above.
- To import your virtual machine to VirtualBox, you will need to use the VMware vCenter Converter described above to convert the VM to the VMware format first. Then, apply the solution to migrate from VMware.
Create the VM configuration for your hypervisor
Each hypervisor have their own virtual machine configuration file: .vbox for VirtualBox, .vmx for VMware, a config.pvs file located in the virtual machine bundle ( .pvm file), etc. You will have thus to recreate a new virtual machine in your new destination hypervisor and specify its hardware configuration as close as possible as your initial virtual machine.
Pay a close attention to the firmware interface (BIOS or UEFI) used to install the guest operating system. While an option is available to choose between these 2 interfaces on VirtualBox and on Parallels solutions, on VMware, you will have to add manually the following line to your .vmx file.
Finally, ask your hypervisor to use the existing virtual disk you have converted and launch the virtual machine.
Virtual machine launch management
Starting virtual machines with a service (autostart)
Find hereafter the implementation details of a systemd service that will be used to consider a virtual machine as a service.
Enable the vboxvmservice@your_virtual_machine_name systemd unit in order to launch the virtual machine at next boot. To launch it directly, simply start the systemd unit.
VirtualBox 4.2 introduces a new way for UNIX-like systems to have virtual machines started automatically, other than using a systemd service.
Starting virtual machines with a keyboard shortcut
It can be useful to start virtual machines directly with a keyboard shortcut instead of using the VirtualBox interface (GUI or CLI). For that, you can simply define key bindings in .xbindkeysrc . Please refer to Xbindkeys for more details.
Example, using the Fn key of a laptop with an unused battery key ( F3 on the computer used in this example):
Use specific device in the virtual machine
Using USB webcam / microphone
- Make sure the virtual machine is not running and your webcam / microphone is not being used.
- Bring up the main VirtualBox window and go to settings for Arch machine. Go to USB section.
- Make sure «Enable USB Controller» is selected. Also make sure that «Enable USB 2.0 (EHCI) Controller» is selected too.
- Click the «Add filter from device» button (the cable with the ‘+’ icon).
- Select your USB webcam/microphone device from the list.
- Now click OK and start your VM.
Detecting web-cams and other USB devices
If the device that you are looking for does not show up on any of the menus in the section above and you have tried all three USB controller options, boot up your VM three seperate times. Once using the USB 1.1 controller, another using the USB 2.0 controller, etc. Leave the VM running for at least 5 minutes after startup. Sometimes Windows will autodetect the device for you. Be sure you filter any devices that are not a keyboard or a mouse so they do not start up at boot. This ensures that Windows will detect the device at start-up.
Access a guest server
To access Apache server on a Virtual Machine from the host machine only, simply execute the following lines on the host:
where 8888 is the port the host should listen on and 80 is the port the VM will send Apache’s signal on.
To use a port lower than 1024 on the host machine, changes need to be made to the firewall on that host machine. This can also be set up to work with SSH or any other services by changing «Apache» to the corresponding service and ports.
To communicate between the VirtualBox guest and host using ssh, the server port must be forwarded under Settings > Network. When connecting from the client/host, connect to the IP address of the client/host machine, as opposed to the connection of the other machine. This is because the connection will be made over a virtual adapter.
D3D acceleration in Windows guests
Recent versions of Virtualbox have support for accelerating OpenGL inside guests. This can be enabled with a simple checkbox in the machine’s settings, right below where video ram is set, and installing the Virtualbox guest additions. However, most Windows games use Direct3D (part of DirectX), not OpenGL, and are thus not helped by this method. However, it is possible to gain accelerated Direct3D in your Windows guests by borrowing the d3d libraries from Wine, which translate d3d calls into OpenGL, which is then accelerated. These libraries are now part of Virtualbox guest additions software.
After enabling OpenGL acceleration as described above, reboot the guest into safe mode (press F8 before the Windows screen appears but after the Virtualbox screen disappears), and install Virtualbox guest additions, during install enable checkbox «Direct3D support». Reboot back to normal mode and you should have accelerated Direct3D.
VirtualBox on a USB key
When using VirtualBox on a USB key, for example to start an installed machine with an ISO image, you will manually have to create VDMKs from the existing drives. However, once the new VMDKs are saved and you move on to another machine, you may experience problems launching an appropriate machine again. To get rid of this issue, you can use the following script to launch VirtualBox. This script will clean up and unregister old VMDK files and it will create new, proper VMDKs for you:
Note that your user has to be added to the «disk» group to create VMDKs out of existing drives.
Run a native Arch Linux installation inside VirtualBox
If you have a dual boot system between Arch Linux and another operating system, it can become tedious to switch back and forth if you need to work in both. You may also experience performance or compatibility issues when using a virtual machine, which can impact your ability to do certain tasks.
This guide will let you reuse, in a virtual machine, your native Arch Linux installation when you are running your second operating system. This way, you keep the ability to run each operating system natively, but have the option to run your Arch Linux installation inside a virtual machine.
Make sure you have a persistent naming scheme
Depending on your hard drive setup, device files representing your hard drives may appear differently when you will run your Arch Linux installation natively or in virtual machine. This problem occurs when using FakeRAID for example. The fake RAID device will be mapped in /dev/mapper/ when you run your GNU/Linux distribution natively, while the devices are still accessible separately. However, in your virtual machine, it can appear without any mapping in /dev/sdaX for example, because the drivers controlling the fake RAID in your host operating system (e.g. Windows) are abstracting the fake RAID device.
To circumvent this problem, we will need to use an addressing scheme that is persistent to both systems. This can be achieved using UUIDs. Make sure your boot loader and fstab file is using UUIDs, otherwise fix this issue. Read fstab and Persistent block device naming.
Make sure your mkinitcpio image is correct
Make sure your mkinitcpio configuration uses the HOOK block :
If it is not present, add it and regenerate the initramfs.
Create a VM configuration to boot from the physical drive
Create a raw disk .vmdk image
Now, we need to create a new virtual machine which will use a RAW disk as virtual drive, for that we will use a
1Kio VMDK file which will be mapped to a physical disk. Unfortunately, VirtualBox does not have this option in the GUI, so we will have to use the console and use an internal command of VBoxManage .
Boot the host which will use the Arch Linux virtual machine. The command will need to be adapted according to the host you have.
On a GNU/Linux host
There are 3 ways to achieve this: login as root, changing the access right of the device with chmod , adding your user to the disk group. The latter way is the more elegant, let us proceed that way:
Apply the new group settings with:
Now, you can use the command:
Adapt the above command to your need, especially the path and filename of the VMDK location and the raw disk location to map which contain your Arch Linux installation.
On a Windows host
Open a command prompt must be run as administrator.
On Windows, as the disk filename convention is different from UNIX, use this command to determine what drives you have in your Windows system and their location:
In this example, as the Windows convention is \\.\PhysicalDriveX where X is a number from 0, \\.\PHYSICALDRIVE1 could be analogous to /dev/sdb from the Linux disk terminology.
To use the VBoxManage command on Windows, you can either, change the current directory to your VirtualBox installation folder first with cd C:\Program Files\Oracle\VirtualBox\
or use the absolute path name:
On another OS host
There are other limitations regarding the aforementioned command when used in other operating systems like OS X, please thus read carefully the manual page, if you are concerned.
Create the VM configuration file
After, we need to create a new machine (replace the VM_name to your convenience) and register it with VirtualBox.
Then, the newly raw disk needs to be attached to the machine. This will depend if your computer or actually the root of your native Arch Linux installation is on an IDE or a SATA controller.
If you need an IDE controller:
While you continue using the CLI, it is recommended to use the VirtualBox GUI, to personalise the virtual machine configuration. Indeed, you must specify its hardware configuration as close as possible as your native machine: turning on the 3D acceleration, increasing video memory, setting the network interface, etc.
Finally, you may want to seamlessly integrate your Arch Linux with your host operating system and allow copy pasting between both OSes. Please refer to VirtualBox/Install Arch Linux as a guest#Install the Guest Additions for that, since this Arch Linux virtual machine is basically an Arch Linux guest.
Install a native Arch Linux system from VirtualBox
In some cases it may be useful to install a native Arch Linux system while running another operating system: one way to accomplish this is to perform the installation through VirtualBox on a raw disk. If the existing operating system is Linux based, you may want to consider following Install from existing Linux instead.
This scenario is very similar to #Run a native Arch Linux installation inside VirtualBox, but will follow those steps in a different order: start by #Create a raw disk .vmdk image, then #Create the VM configuration file.
Now, you should have a working VM configuration whose virtual VMDK disk is tied to a real disk. The installation process is exactly the same as the steps described in VirtualBox/Install Arch Linux as a guest, but #Make sure you have a persistent naming scheme and #Make sure your mkinitcpio image is correct.
After completing the installation, boot your computer natively with an GNU/Linux installation media (whether it be Arch Linux or not), chroot into your installed Arch Linux installation and install and configure a bootloader.
Install MacOS guest
Before starting the VM, run the following commands on the host machine [2]:
No keyboard/mouse input when attempting to install Mojave
If you are attempting to install Mojave, after doing the aforementioned steps, the installer will load up but you might not be able to send keyboard or mouse input. The reason seems to be that Mojave no longer supports the USB 1.1 controllers and in order to fix the issue you need to emulating USB 3.0. To do that first install the VirtualBox Extension pack.
Then go to Machine > Settings > USB and select USB 3.0. Input should work from this point onwards.
UEFI interactive shell after restart
If the installer is unable to properly format the bootable drive during installation and you end up in an UEFI shell, enter the following:
- Type exit at the UEFI prompt
- Select Boot Maintenance Manager
- Select Boot From File
You will now be brought to couple of obscure PCI paths. The first one is the one that you just attempted to boot from and it did not work. The second (or third) one should be the one with the MacOS recovery partition that you need to load to continue the installation. Click the second Entry. If it is empty, press Esc to go back and select the third entry. Once you get one with folders click though the folders. It should be something like macOS Install Data > Locked Files > Boot Files > boot.efi. Once you click enter on the boot.efi you should boot into the MacOS installer and resume installation. Note that some of the subdirectories might be missing. Remember that you need to get to a boot.efi .[3]
Move a native Windows installation to a virtual machine
If you want to migrate an existing native Windows installation to a virtual machine which will be used with VirtualBox on GNU/Linux, this use case is for you. This section only covers native Windows installation using the MSDOS/Intel partition scheme. Your Windows installation must reside on the first MBR partition for this operation to success. Operation for other partitions are available but have been untested (see #Known limitations for details).
A couple of tasks are required to be done inside your native Windows installation first, then on your GNU/Linux host.
Tasks on Windows
The first three following points comes from this outdated VirtualBox wiki page, but are updated here.
- Remove IDE/ATA controllers checks (Windows XP only): Windows memorize the IDE/ATA drive controllers it has been installed on and will not boot if it detects these have changed. The solution proposed by Microsoft is to reuse the same controller or use one of the same serial, which is impossible to achieve since we are using a Virtual Machine. MergeIDE, a German tool, developped upon another other solution proposed by Microsoft can be used. That solution basically consists in taking all IDE/ATA controller drivers supported by Windows XP from the initial driver archive (the location is hard coded, or specify it as the first argument to the .bat script), installing them and registering them with the regedit database.
- Use the right type of Hardware Abstraction Layer (old 32 bits Windows versions): Microsoft ships 3 default versions: Hal.dll (Standard PC), Halacpi.dll (ACPI HAL) and Halaacpi.dll (ACPI HAL with IO APIC). Your Windows install could come installed with the first or the second version. In that way, please disable the Enable IO/APIC VirtualBox extended feature.
- Disable any AGP device driver (only outdated Windows versions): If you have the files agp440.sys or intelppm.sys inside the C:\Windows\SYSTEM32\drivers\ directory, remove it. As VirtualBox uses a PCI virtual graphic card, this can cause problems when this AGP driver is used.
- Create a Windows recovery disk: In the following steps, if things turn bad, you will need to repair your Windows installation. Make sure you have an install media at hand, or create one with Create a recovery disk from Vista SP1, Create a system repair disc on Windows 7 or Create a recovery drive on Windows 8.x).
Using Disk2vhd to clone Windows partition
Boot into Windows, clean up the installation (with CCleaner for example), use disk2vhd tool to create a VHD image. Include a reserved system partition (if present) and the actual Windows partition (usually disk C:). The size of Disk2vhd-created image will be the sum of the actual files on the partition (used space), not the size of a whole partition. If all goes well, the image should just boot in a VM and you will not have to go through the hassle with MBR and Windows bootloader, as in the case of cloning an entire partition.
Tasks on GNU/Linux
- Reduce the native Windows partition size to the size Windows actually needs with ntfsresize available from ntfs-3g . The size you will specify will be the same size of the VDI that will be created in the next step. If this size is too low, you may break your Windows install and the latter might not boot at all.
Use the —no-action option first to run a test: If only the previous test succeeded, execute this command again, but this time without the aforementioned test flag.
- Install VirtualBox on your GNU/Linux host (see #Installation steps for Arch Linux hosts if your host is Arch Linux).
- Create the Windows disk image from the beginning of the drive to the end of the first partition where is located your Windows installation. Copying from the beginning of the disk is necessary because the MBR space at the beginning of the drive needs to be on the virtual drive along with the Windows partition. In this example two following partitions sda2 and sda3 will be later removed from the partition table and the MBR bootloader will be updated.
Using cat /sys/block/sda/sda1/size will output the number of total sectors of the first partition of the disk sda . Adapt where necessary. We need to display the size in byte, $(( $sectnum * 512 )) will convert the sector numbers to bytes.
- Since you created your disk image as root, set the right ownership to the virtual disk image:
- Create your virtual machine configuration file and use the virtual disk created previously as the main virtual hard disk.
- Try to boot your Windows VM, it may just work. First though remove and repair disks from the boot process as it may interfere (and likely will) booting into safe-mode.
- Attempt to boot your Windows virtual machine in safe mode (press the F8 key before the Windows logo shows up). if running into boot issues, read #Fix MBR and Microsoft bootloader. In safe-mode, drivers will be installed likely by the Windows plug-and-play detection mechanism view. Additionally, install the VirtualBox Guest Additions via the menu Devices >Insert Guest Additions CD image. . If a new disk dialog does not appear, navigate to the CD drive and start the installer manually.
- You should finally have a working Windows virtual machine. Do not forget to read the #Known limitations.
- Performance tip: according to VirtualBox manual, SATA controller has a better performance than IDE. If you cannot boot Windows off virtual SATA controller right away, it is probably due to the lack of SATA drivers. Attach virtual disk to IDE controller, create an empty SATA controller and boot the VM — Windows should automatically install SATA drivers for the controller. You can then shutdown VM, detach virtual disk from IDE controller and attach it to SATA controller instead.
Fix MBR and Microsoft bootloader
If your Windows virtual machine refuses to boot, you may need to apply the following modifications to your virtual machine.
- Boot a GNU/Live live distribution inside your virtual machine before Windows starts up.
- Remove other partitions entries from the virtual disk MBR. Indeed, since we copied the MBR and only the Windows partition, the entries of the other partitions are still present in the MBR, but the partitions are not available anymore. Use fdisk to achieve this for example.
- Write the updated partition table to the disk (this will recreate the MBR) using the m command inside fdisk .
- Use testdisk (see here for details) to add a generic MBR:
- With the new MBR and updated partition table, your Windows virtual machine should be able to boot. If you are still encountering issues, boot your Windows recovery disk from on of the previous step, and inside your Windows RE environment, execute the commands described here.
Known limitations
- Your virtual machine can sometimes hang and overrun your RAM, this can be caused by conflicting drivers still installed inside your Windows virtual machine. Good luck to find them!
- Additional software expecting a given driver beneath may either not be disabled/uninstalled or needs to be uninstalled first as the drivers that are no longer available.
- Your Windows installation must reside on the first partition for the above process to work. If this requirement is not met, the process might be achieved too, but this had not been tested. This will require either copying the MBR and editing in hexadecimal see VirtualBox: booting cloned disk or will require to fix the partition table manually or by repairing Windows with the recovery disk you created in a previous step. Let us consider our Windows installation on the second partition; we will copy the MBR, then the second partition where to the disk image. VBoxManage convertfromraw needs the total number of bytes that will be written: calculated thanks to the size of the MBR (the start of the first partition) plus the size of the second (Windows) partition. < dd if=/dev/sda bs=512 count=$(cat /sys/block/sda/sda1/start) ; dd if=/dev/sda2 bs=512 count=$(cat /sys/block/sda/sda2/size) ; >| VBoxManage convertfromraw stdin windows.vdi $(( ($(cat /sys/block/sda/sda1/start) + $(cat /sys/block/sda/sda2/size)) * 512 )) .
Run a Windows partition in VirtualBox
In some cases, it is useful to be able to dual boot with Windows and access the partition in a virtual machine. This process is significantly different from #Move a native Windows installation to a virtual machine in several ways:
- The Windows partition is not copied to a virtual disk image. Instead, a raw VMDK file is created;
- Changes in the VM will be mirrored in the partition, and vice versa;
- OEM licenses should still be satisfied, since the Windows partition still boots directly on the hardware.
Before proceeding be sure to have access to a Windows installation media (such as the Windows 10 ISO).
VirtualBox configuration
A VirtualBox virtual machine must be manually created. As of now do not add any storage device any disk to the virtual machine, it will be done later.
Configure the virtual machine with the following settings (settings panel can be opened by clicking the «Settings» button in the main toolbar):
- View: System
- Tab: Motherboard
- mark Enable I/O APIC
- mark Enable EFI
- mark Hardware Clock in UTC Time if you have
- Tab: Processor
- mark Enable PAE/NX
- mark Enable VT-x/AMD-V
- Tab: Acceleration
- Chose the paravirtualization interface Hyper-V from the drop down menu
- mark Enable Nested Paging
- Tab: Motherboard
Optionally you can enable also the following settings:
- View: Display
- Tab: Screen
- mark Enable 3D Acceleration. Note that it could cause glitches.
- Tab: Screen
Create virtual disk image files
To access the Windows partitions, create a raw VMDK file pointing to the relevant Windows partitions and set the ownership:
After creating the image, change the ownership so that the desired user/group has access.
Attach virtual disk images to the VM
VirtualBox must have raw disk access in order to run a Windows partition. Normally, this would require VirtualBox to be run with full root privileges, but more elegant options are available.
Higher security option: using a dedicated group for the Windows partitions
Here udev is configured to restrict the access to partitions Windows partitions to the vboxusers group, and then the user running VirtualBox is added to the group.
Assigning the disks to the vboxusers is done by creating the following file:
The UUIDs in these rules correspond to particular GPT partition types.
Then to add the user running VirtualBox to the vboxusers group the following command can be used:
Lower security option: using ‘disk’ group
To be able to add the vmdk file in Virtualbox Virtual Media Manager without running VirtualBox as root, the user running VirtualBox need to be in vboxusers and disk groups.
Set up a separate ESP in VirtualBox
In order to boot the virtual machine in UEFI mode, a dedicated virtual disk for the EFI system partition must be created:
Add the virtual disks to the virtual machine
Configure the virtual machine storage devices (Settings panel — Storage) as following:
- add esp.vmdk as a SATA device (SATA Port 0).
- add windows.vmdk as a SATA device (SATA Port 1).
- mount the Windows installation disk into an optical drive.
Configure the virtual UEFI firmware to use the Windows bootloader
Now start the virtual machine and it should automatically boot from the Windows installation disk. After choosing the installation locales click on the «Repair your computer» link, then choose «Troubleshoot» and then » Command Prompt» in order to launch a command prompt from the install media.
Enter the following commands to create a new GPT table in the esp.vmdk disk and install the Windows boot loader onto it using configuration from the existing Windows partition:
List all disks identified by the system:
The esp.vmkd disk should be labeled as disk 0 (due to the fact that was attached to the SATA port 0),
512MB in size and unpartitioned. The disk 1 instead is the raw disk pointing to the disk where the phisical parititions «Windows basic data» and «Windows reserver» resides. Note that the size is the disk size, not the partition one.
Select the desired disk:
Format as UEFI and assign a label and drive letter:
Check that the partiton has been correctly created:
Our newly created UEFI boot partition will be labelled as «SYSTEM» with letter as «S».
Note the Windows basic data partition letter, will be used in next steps.
Install the Windows boot loader onto EFI virtual disk (substitue:
Now simply detach the Windows Installation disk from the virtual machine and reboot. The virtual machine should now boot from the newly installed boot partition and load the original Windows installation. It may display ‘detecting disks’ for a short while prior to booting up.
Run an entire physical disk in Virtualbox
This works the same way as #Run a Windows partition in VirtualBox but the vmdk will contain the entire disk rather than one partion, and so you will not need to create a separate ESP or MBR partition as the one in the physical disk will be used.
Create the raw disk:
Then follow the same method as in #Run a Windows partition in VirtualBox for the configuration and virtual disk attachement.
Set guest starting resolution
You can change the BIOS/UEFI booting resolution using VBoxManage tool. For example:
Recommended resolutions are 1280×720, 1920×1080, 2048×1080, 2560×1440, 3840×2160, 1280×800, 1280×1024, 1440×900, 1600×900.
SSH from host to guest
The network tab of the virtual machine settings contains, in «Advanced», a tool to create port forwarding. It is possible to use it to forward the Guest ssh port 22 to a Host port, e.g. 3022 :
will establish a connection from Host to Guest.
SSHFS as alternative to the shared folder
Using this port forwarding and sshfs, it is straightforward to mount the Guest filesystem onto the Host one:
and then transfer files between both.
Troubleshooting
Keyboard and mouse are locked into virtual machine
This means your virtual machine has captured the input of your keyboard and your mouse. Simply press the right Ctrl key and your input should control your host again.
To control transparently your virtual machine with your mouse going back and forth your host, without having to press any key, and thus have a seamless integration, install the guest additions inside the guest. Read from VirtualBox/Install Arch Linux as a guest#Install the Guest Additions if your guest is Arch Linux, otherwise read the official VirtualBox help.
No 64-bit OS client options
When launching a VM client, and no 64-bit options are available, make sure your CPU virtualization capabilities (usually named VT-x ) are enabled in the BIOS.
If you are using a Windows host, you may need to disable Hyper-V, as it prevents VirtualBox from using VT-x. [4]
VirtualBox GUI does not match host GTK theme
See Uniform look for Qt and GTK applications for information about theming Qt-based applications like VirtualBox.
Cannot send Ctrl+Alt+Fn to guest
Your guest operating system is a GNU/Linux distribution and you want to open a new TTY shell by hitting Ctrl+Alt+F2 or exit your current X session with Ctrl+Alt+Backspace . If you type these keyboard shortcuts without any adaptation, the guest will not receive any input and the host (if it is a GNU/Linux distribution too) will intercept these shortcut keys. To send Ctrl+Alt+F2 to the guest for example, simply hit your Host Key (usually the right Ctrl key) and press F2 simultaneously.
USB subsystem not working
Your user must be in the vboxusers group and you need to install the extension pack if you want USB 2 support. Then you will be able to enable USB 2 in the VM settings and add one or several filters for the devices you want to access from the guest OS.
If VBoxManage list usbhost does not show any USB devices even if run as root, make sure that there is no old udev rules (from VirtualBox 4.x) in /etc/udev/rules.d/ . VirtualBox 5.0 installs udev rules to /usr/lib/udev/rules.d/ . You can use command like pacman -Qo /usr/lib/udev/rules.d/60-vboxdrv.rules to determine if the udev rule file is outdated.
Sometimes, on old Linux hosts, the USB subsystem is not auto-detected resulting in an error Could not load the Host USB Proxy service: VERR_NOT_FOUND or in a not visible USB drive on the host, even when the user is in the vboxusers group. This problem is due to the fact that VirtualBox switched from usbfs to sysfs in version 3.0.8. If the host does not understand this change, you can revert to the old behaviour by defining the following environment variable in any file that is sourced by your shell (e.g. your
/.bashrc if you are using bash):
Then make sure, the environment has been made aware of this change (reconnect, source the file manually, launch a new shell instance or reboot).
Also make sure that your user is a member of the storage group.
USB modem not working on host
If you have a USB modem which is being used by the guest OS, killing the guest OS can cause the modem to become unusable by the host system. Killing and restarting VBoxSVC should fix this problem.
USB device crashes guest
If attaching a USB device to the guest causes a crash or any other erroneous behavior, try switching the USB controller from USB 2 (EHCI) to USB 3 (xHCI) or vice versa.
Host freezes on virtual machine start
Generally, such issues are observed after upgrading VirtualBox or Linux kernel. Downgrading them to the previous versions of theirs might solve the problem.
Analog microphone not working
If the audio input from an analog microphone is working correctly on the host, but no sound seems to get through to the guest, despite the microphone device apparently being detected normally, installing a sound server such as PulseAudio on the host might fix the problem.
If after installing PulseAudio the microphone still refuses to work, setting Host Audio Driver (under VirtualBox > Machine > Settings > Audio) to ALSA Audio Driver might help.
Microphone not working after upgrade
There have been issues reported around sound input in 5.1.x versions. Ticket #16191
Downgrading may solve the problem. You can use virtualbox-bin-5.0 AUR to ease downgrading.
Problems with images converted to ISO
Some image formats cannot be reliably converted to ISO. For instance, ccd2iso ignores .ccd and .sub files, which can result in disk images with broken files.
In this case, you will either have to use CDemu for Linux inside VirtualBox or any other utility used to mount disk images.
Failed to create the host-only network interface
Make sure all required kernel modules are loaded. See #Load the VirtualBox kernel modules.
If all required kernel modules are loaded and you are still unable to create the host-only adapter, navigate to File > Host Network Manager and click the Create button to add the network interface.
Failed to insert module
When you get the following error when trying to load modules:
Sign your modules or disable CONFIG_MODULE_SIG_FORCE in your kernel config.
VBOX_E_INVALID_OBJECT_STATE (0x80BB0007)
This can occur if a VM is exited ungracefully. Run the following command:
NS_ERROR_FAILURE and missing menu items
This happens sometimes when selecting QCOW/QCOW2/QED disk format when creating a new virtual disk.
If you encounter this message the first time you start the virtual machine:
Exit VirtualBox, delete all files of the new machine and from VirtualBox config file remove the last line in MachineRegistry menu (or the offending machine you are creating):
OpenBSD unusable when virtualisation instructions unavailable
While OpenBSD is reported to work fine on other hypervisors without virtualisation instructions (VT-x AMD-V) enabled, an OpenBSD virtual machine running on VirtualBox without these instructions will be unusable, manifesting with a bunch of segmentation faults. Starting VirtualBox with the -norawr0 argument may solve the problem. You can do it like this:
Windows: «The specified path does not exist. Check the path and then try again.»
This error message may appear when running an .exe file which requires administrator privileges from a shared folder in windows guests. [5]
As a workaround, copy the file to the virtual drive or use UNC paths ( \\vboxsvr ). See [6] for more information.
Windows 8.x error code 0x000000C4
If you get this error code while booting, even if you choose OS Type Win 8, try to enable the CMPXCHG16B CPU instruction:
Windows 8, 8.1 or 10 fails to install, boot or has error «ERR_DISK_FULL»
Update the VM’s settings by going to Settings > Storage > Controller:SATA and check Use Host I/O Cache.
WinXP: Bit-depth cannot be greater than 16
If you are running at 16-bit color depth, then the icons may appear fuzzy/choppy. However, upon attempting to change the color depth to a higher level, the system may restrict you to a lower resolution or simply not enable you to change the depth at all. To fix this, run regedit in Windows and add the following key to the Windows XP VM’s registry:
Then update the color depth in the «desktop properties» window. If nothing happens, force the screen to redraw through some method (i.e. Host+f to redraw/enter full screen).
Windows: Screen flicker if 3D acceleration enabled
VirtualBox > 4.3.14 has a regression in which Windows guests with 3D acceleration flicker. Since r120678 a patch has been implemented to recognize an environment variable setting, launch VirtualBox like this:
Make sure no VirtualBox services are still running. See VirtualBox bug 13653.
Cannot launch VirtualBox with Wayland: Segmentation fault
This problem is caused by Qt detecting Wayland (e.g., if XDG_SESSION_TYPE=wayland ), while VirtualBox does not work on Wayland yet. See FS#58761 and the upstream bug.
The Qt platform detection can be disable and X11 forced over Wayland by setting the environment variable QT_QPA_PLATFORM=xcb . To not affect the other Qt applications (which usually work well with Wayland), QT_QPA_PLATFORM=xcb should only be set when launching VirtualBox.
If starting through the desktop entry, follow the instructions in Desktop entries#Modify environment variables and change the lines starting with Exec=VirtualBox . to Exec=env QT_QPA_PLATFORM=xcb VirtualBox . . If starting from the shell, alias (Bash#Aliases) virtualbox to env QT_QPA_PLATFORM=xcb virtualbox .
Random freezing in guests with intel graphics
With Intel cpu and graphics, allocating more processors for the guest can lower render performance, thus cause random freezing. Allocating less or one processor can help.
Unable to view desktop in fullscreen mode
Disable the Mini Toolbar by selecting Machine > Settings, select the User Interface tab and uncheck the Mini Toolbar checkbox
Источник


