- Fix: No Device Drivers Were Found
- Solution 1: Switch to a USB 2.0 Port
- Solution 2: Set the Partition to Active
- Solution 3: Create a New Disc
- Solution 4: Enable the xHCI hand-off Option in BIOS
- Solution 5: Change Everything to Legacy and Set the Boot Device to Your DVD or USB
- no device drivers were found when trying to install windows 7 on a new build
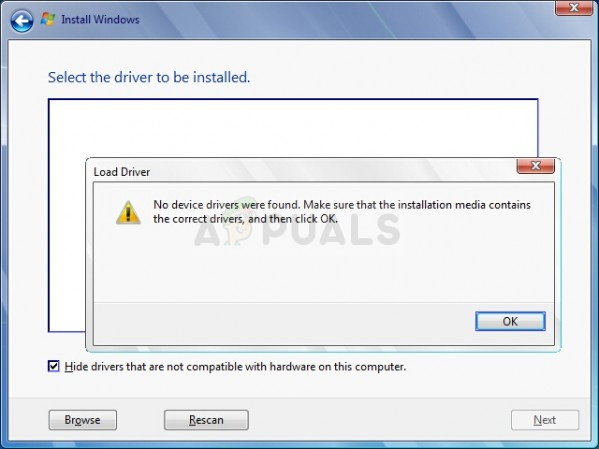
Fix: No Device Drivers Were Found
This error is quite specific as it occurs when users are either trying to reinstall their current operating system or when they are installing a new one using a DVD or USB installation storage device. The message indicates that the drivers on the installation media are either missing or corrupt but we will show that this is not always the case.
There are quite a few different solutions to this problem so make sure you try out all of them and we are certain that one of them will be successful. Good luck!
Solution 1: Switch to a USB 2.0 Port
If you have plugged the USB installation media from where you want to install the new operating system into a 3.0 USB on your computer, try disconnecting it and connecting to a 2.0 port. This is a weird fix but it has helped numerous users and this is definitely the easiest thing for you to check and take care off. Proceed with other solutions if this one doesn’t work out.
Solution 2: Set the Partition to Active
Setting the partition where you want to install Windows to as Active has also helped in countless cases where users were on the verge of giving up. This needs to be performed via Recovery tools which appear as an option before choosing to install Windows.
- Insert the installation media storage device you own and start your computer. The following steps are different from one operating system to another so follow them accordingly:
- WINDOWS XP, VISTA, 7: Windows Setup should open prompting you to enter the preferred language along with time and date. Enter them correctly and choose the Repair your computer option at the bottom of the screen. Keep the initial radio button as your choice when prompted with Use recovery tools or Restore your computer and click on the Next option. Choose Command Prompt when prompted with the Choose a recovery tool selection.
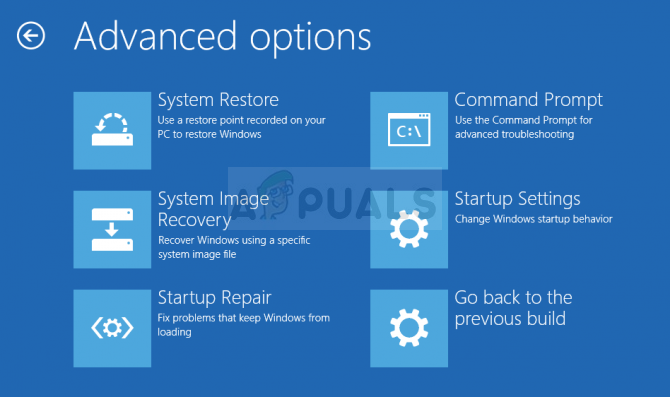
- WINDOWS 8, 8.1, 10: You will see a Choose your keyboard layout window so choose the one you want to use. The Choose an option screen will appear so click on Troubleshoot >> Advanced Options >> Command Prompt.
- Once Command Prompt opens successfully, type in the following commands and make sure you click the Enter key after you type in each one:
- Note that the X stands for the name of the disk in command “select disk X” and the X in command “select partition X” where you intend to install Windows to. After this, only one command remains:
- Now you can quit and restart your computer in order to apply the changes and to initiate the installing process with your new operating system.
Solution 3: Create a New Disc
If the reason for this error is simply the fact that the drivers weren’t burned successfully or if the disc or the USB device endured some damage in the meantime, there is no other choice than to try and burn another copy of the operating system. The important thing is that you keep your serial key as it can be used only once. Here are the complete instructions on creating a Windows 10 installation DVD or USB:
- Download the Media Creation Tool from Microsoft’s official website. Open the downloaded file called MediaCreationTool.exe in order to open the installation file and initiate the process. Tap Accept to agree on terms set by Microsoft.
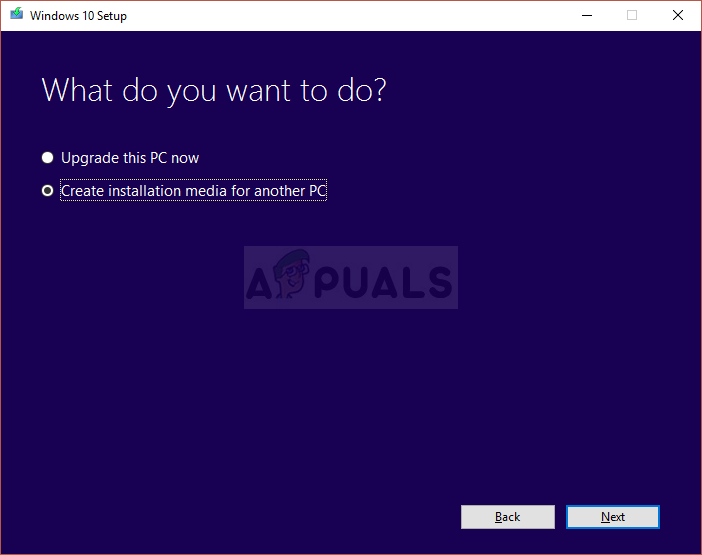
- Select the Create installation media (USB flash drive, DVD, or ISO file) for another PC from the initial window.
- The language, architecture, and edition of the bootable drive will be chosen based on your computer’s settings, but you should uncheck the Use the recommended options for this PC in order to select the correct settings for the PC which is encountering the error (if you are creating this on a different PC).
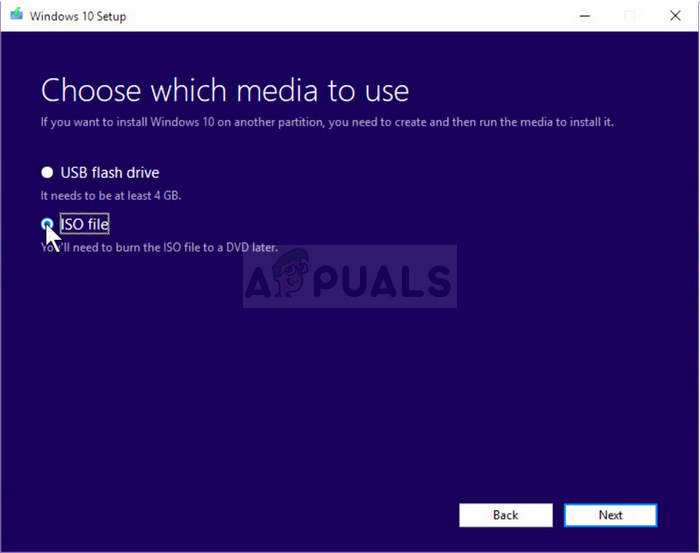
- Click Next and click on the USB drive or DVD option when prompted to choose between USB or DVD, depending on which device you want to use to store this image on.
- Click Next and choose the drive from the list which will show the storage devices connected to your computer.
- Click Next and the Media Creation Tool will proceed to download the files necessary to install create the installation device.
- Try installing your Windows 10 operating system using this drive and check to see if the same error appears.
Solution 4: Enable the xHCI hand-off Option in BIOS
This option is quite debatable and there are quite a few representations of what exactly does it to. However, the most accepted answer is that, when Disabled, it lets BIOS manage USB devices and ports and, when Enabled, it lets the operating system manage this. There are plenty of people who claim that enabling this option fixed their problem immediately. This is also recommended for new operating systems such as Windows 10 or Windows 8.
- Turn off your computer by going to the Start Menu >> Power Button >> Shut down.
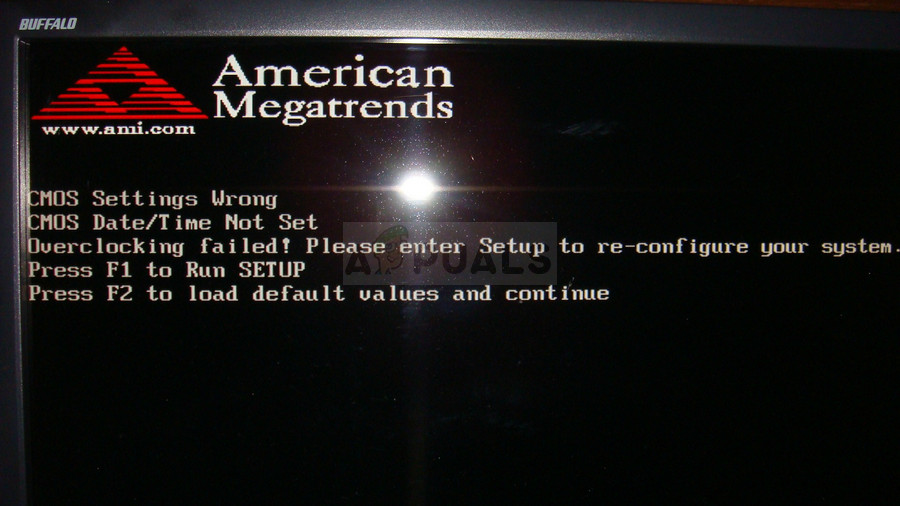
- Turn your PC on again and try to enter BIOS settings by pressing the BIOS key as the system is about to start. The BIOS key is typically displayed on the boot screen, saying “Press ___ to enter Setup.” There are other keys as well. Common BIOS keys are F1, F2, Del, Esc and F10. Note that you will have to be quick about this as the message disappears pretty fast.
- The setting which you need to turn off is usually located under the Advanced tab which may be called different depending on the manufacturer. The setting is called BIOS xHCI Hand-Off or BIOS EHCI Hand-OFF and it’s usually right there under USB Configuration in the Advanced tab.
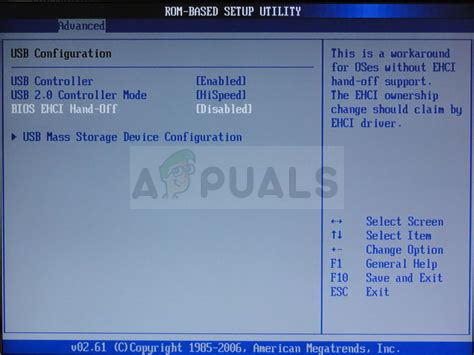
- Once you locate the correct settings, set it to Enabled. Navigate to the Exit section and choose to Exit Saving Changes. This will proceed with the computer’s boot. Make sure you try to run the installation again.
- Don’t forget to change the settings back to their original state after you have finished with the process and installed Windows 10 successfully on your computer.
Solution 5: Change Everything to Legacy and Set the Boot Device to Your DVD or USB
Setting certain settings to support Legacy has proven to be successful in many cases and sometimes your computer tries to boot from your HDD first ignoring the inserted Windows installation media which results in poor readings of the device. That is why you will need to assess the set of steps below in order to solve the problem.
- Navigate to BIOS by following the steps 1 and 2 from the solution above.
- Use the right arrow key to select the Security menu, use the down arrow key to select Secure Boot Configuration, and press the Enter key.
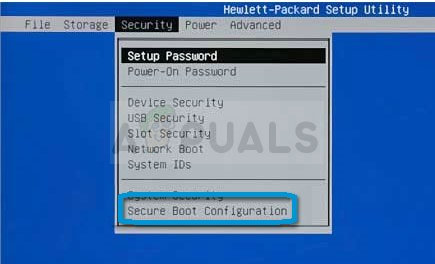
- Before you can use this option, a warning appears. Press F10 to continue to the Secure Boot Configuration menu.
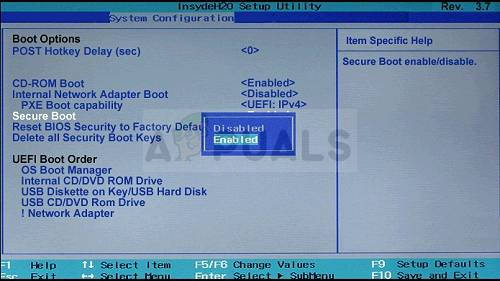
- Use the down arrow key to select Secure Boot and use the right arrow key to modify the setting to Disable.
- Use the down arrow key to select Legacy Support, and then use the right arrow key to modify the setting to Enable. Press F10 in order to accept the changes.
- Use the left arrow key to select the File menu, use the down arrow key to select Save Changes and Exit, then press Enter to select Yes.
- The Computer Setup Utility closes and the computer restarts. When the computer has restarted, use the power button to turn the computer off.
If you are not certain how to boot from installation media, you need to know just which option to select when the boot menu opens. It will ask you from which device you want to boot your computer. Follow the instructions below to boot from your storage device easily.
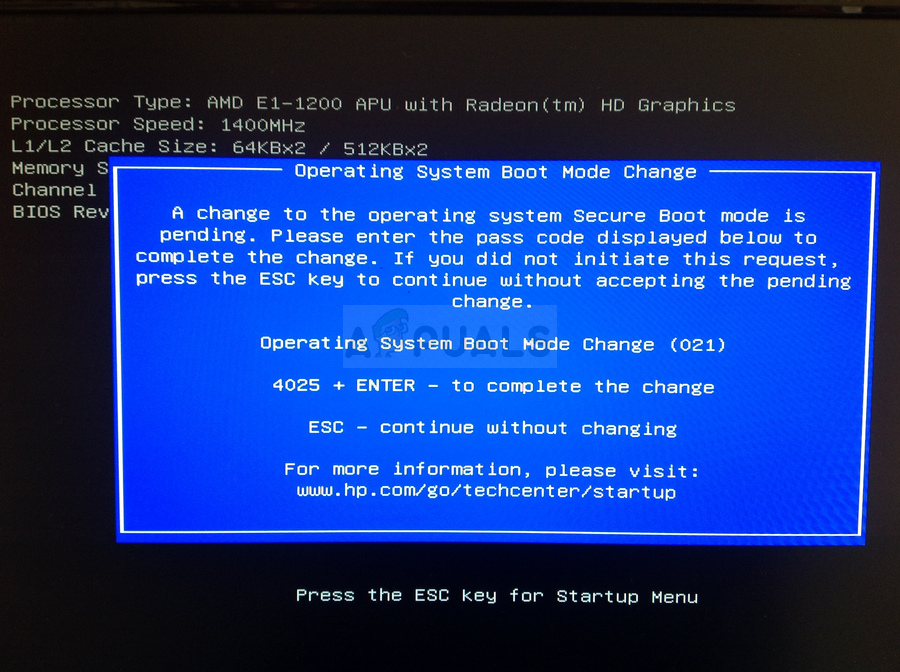
- Turn the computer on. As soon as the computer starts, a message appears indicating that the boot mode has changed.
- Type the four-digit code shown in the message, and then press Enter to confirm the change.
- Press the power button to turn off the computer, wait a few seconds, then turn on the computer and immediately press the Escape key repeatedly, about once every second, until the Startup menu opens. Press F9 to open the Boot Menu.
- Use the down arrow key to select your hard disk from the boot menu and make sure you choose it by clicking the Enter key. Restart your computer and check to see if the problem is solved.
no device drivers were found when trying to install windows 7 on a new build
This is a new build: Asus M4A87TD/USB3 motherboard, Phenom ll X4 965 processor, with 1 64GB Soild State hard drive which is where Windows 7 Pro will be installed, 2 500GB SATA hard drives which I will be utilizing Raid, 8GB total of DDRS-1600 Dual Channel memory, and an ATI Radeon HD5830 1024 GDDR5 video card.
I am now trying to install windows and I keep getting an error message saying that no device drivers were found when trying to install windows 7 pro, so I tried putting in the disc that came with the motherboard because thats what I have found while researching this issue and it will not read the disc. I have also learned that I should use a jump drive however, I do not have one large enough to copy the device drivers documents from the disc.
Any input would be appreciated because I have been down a machine now for a week just figuring out what I wanted and then building it and now this issue — Please Help
Suggest you start by installing a non-RAID configuration first. Also since this is a new build you need to do some hardware testing to verify that you do not have any hardware issue. Connect a SATA drive to one of the standard SATA connectors as opposed to the RAID connector.
Set of test utilities for DIY computer builders:
Note: If you are OverClocking or use any automatic overclocking BIOS features, Intel EIST or Turbo Mode (Disable it),
then drop back to the stock speed as a starting point.
Disconnect any other internal hard drives and external USB devices.
First try running Memtest86+: This runs from a boot disk or CD and should eliminate or
confirm if your one or more of your memory sticks are bad or the SPD values in the BIOS are correct.
Let it run for as long as you can: 2,4,6,8 or more hours (at least 3 full passes), if no errors by then your ram is OK.
http://www.memtest.org/
Memtest86+ Guide/How To’s (use the .ISO to create a bootable CD)
http://www.overclockers.com/forums/showthread.php?t=409152
After Windows is installed:
Device Drivers: Did you install the motherboard manufacture’s latest device drivers?
Check their support site for the latest drivers as the CD that came with the motherboard may have
older less stable drivers.
Check the Graphics card manufacture’s download site: Download and install the most recent Windows 7 drivers
for your card.
ATI: http://support.amd.com/us/gpudownload/Pages/index.aspx
NVIDIA: http://www.nvidia.com/Download/index5.aspx?lang=en-us
Also check out Nvidia’s «Box of Smoke» test or other Demos: http://www.nvidia.com/object/cool_stuff.html#/demos
or ATI equivilent.
Prime 95:
http://www.mersenne.org/freesoft/
It’s a stand alone .exe file contained in a .zip archive.
Just choose to run the «stress test» option for 3 hours or more.
If your PC can pass this test both your memory and CPU
are fine (close the case cover to maintain proper ventilation)
Core Temp:
Monitor the temperature of each core of your processor.
Note: For non overclockers using the stock Intel/AMD heatsink and cooling fan you can expect a temperature range of
35 to 40C at idle and from 60C to 65C max when running Prime95.
http://www.alcpu.com/CoreTemp/
CPU-ID (CPUZ): http://www.cpuid.com/cpuz.php
Shows the clock speed of the CPU under various load conditions
(when using Intel’s EIST speed step technology).
Note #1:
CPU-ID has two tabs (Memory and SPD) which show the actual memory speed and ‘SPD’ tab shows the rated speeds
for each memory slot that is populated.
Note #2:
Compair the two values, the actual speed should not exceed the rated speed of your memory.
CPUID HWMonitor: A hardware monitoring program that reads PC systems main health sensors.
voltages, temperatures, fans speed.
http://www.cpuid.com/hwmonitor.php
PassMarks burn in test: http://www.passmark.com/
The Burnin test and their benchmark test both give a good workout of all the major parts of Windows.
HD Tune:
Provides drive info and has an option (error scan tab ) to test your drive.
http://www.hdtune.com/
SpeedFan:
Monitors internal temperatures and has an online drive health analysis feature (SMART tab) for hard drives.
It will display your drives model number and compares your drive with other drives of the same make and model.
http://www.almico.com/speedfan.php
GPU-Z:
A lightweight utility designed to give you all information about your video card and GPU.
http://www.techpowerup.com/gpuz/
PC WIZARD:
A powerful utility designed especially for detection of hardware, also some more analysis.
It’s able to identify a large scale of system components and supports the latest technologies
and standards.
http://www.cpuid.com/pcwizard.php
Partition Wizard Home Edition:
http://www.partitionwizard.com/free-partition-manager.html
Note: There is also a bootable CD or bootable Flash drive versions:
http://www.partitionwizard.com/partition-wizard-bootable-cd.html
http://www.partitionwizard.com/bootable-flash-drive.html
Some of the features and Functions include: Create partition, Delete partition, Format partition,
Resizing a partition, Move partitions, Restore Partition after accidental deletion,
Convert partition, Explore partition, Hide partition,
Change drive letter, Set active partition, partition explorer (View contents).
Note: To complete any task use the ‘Pending Operations’ box located in the lower left.
UBCD4Win:
http://www.ubcd4win.com/index.htm
UBCD4Win is a bootable recovery CD that contains software used for repairing,
restoring, or diagnosing almost any computer problem.
Never be afraid to ask. This forum has some of the best people in the world available to help.


