- How to Install XCode on macOS Catalina on Windows
- Install XCode on macOS Catalina on Windows
- Step One – Install macOS Catalina on VMware or VirtualBox
- Step Two – Install XCode on Windows
- Xcode for Windows: Develop iOS Apps on PC
- Xcode for Windows: What & Why
- Rent a Mac in the Cloud
- Learn how to code iOS apps
- Xcode for Windows (12 Ways to Build iOS Apps on PC)
- Rent a Mac
- Virtualize MacOS
- Build a “Hackintosh”
- Third Party Solutions
How to Install XCode on macOS Catalina on Windows

Whether you’re a Windows or Mac user, developing an iOS or macOS app with XCode shouldn’t limit you to your operating system. While XCode isn’t available on Windows neither on Microsoft Store nor elsewhere. Particularly, if you’re a Windows user who would like to develop apps for iOS, macOS or other Apple apps particularly on XCode, it would be somewhat impossible for you since XCode is and can exclusively run on a Mac. Since the XCode isn’t possible to install straightly on Windows, but that doesn’t mean that it’s entirely impossible to adapt XCode on Windows at all. There are multiple ways to do those all on your Windows operating system at this point. However. it’s completely possible to run XCode at your computer particularly on Windows but it might take some time and effort to reach that point. Here is How to Install XCode on macOS Catalina on Windows.
As macOS Catalina was out even in the testing version, the XCode was set to release the next version of it which is XCode 11. This new version of XCode provides much new features such as SwiftUI, dropping your iPad apps to Mac and lets you share code. With macOS Catalina out, the XCode is now entirely available on App Store which is particularly for Mac. With that said, the way we’ll install the XCode will be on Mac, not actual Mac but macOS working Mac. For this, first, we’ll need to install macOS Catalina on Windows which the latest version of XCode works with then we’ll continue to the path to XCode which is pretty easy. That in mind, we’ll take a look and then take the steps to accomplish with it.
Table of Contents
Install XCode on macOS Catalina on Windows
As far as building an app is necessary, having access and utilizing the tool is necessary too. But as of XCode, that might look impossible or really difficult which they might end up spending thousands of bucks to snatch a Mac which isn’t the accurate idea to do. For this purpose, we’ve made it to install XCode on macOS Catalina on Windows or simply install XCode on Windows. But speaking of it, it might look awkward or somewhat impossible for some but here’s to install XCode on Windows.
Step One – Install macOS Catalina on VMware or VirtualBox
While XCode isn’t possible to adapt directly on Windows, but it’s fairly easy to do with macOS Catalina installed on Windows. When the macOS Catalina is there, we can definitely install XCode then. In this terms, we’ll take a look at how to install macOS Catalina on Windows first.
There are two places to install macOS Catalina on, particularly on Windows. First, VMware Workstation or Player and Oracle VirtualBox. Both are working and super powerful apps to run and work Catalina perfectly. Whether you install macOS Catalina on VMware or VirtualBox, it’ll work fine to install XCode and work on it and even most features are similar to each other.
Installing macOS Catalina on VMware Workstation or Player process are pretty much the same, there’s no extra options or steps to take. But of course, installing macOS Catalina on VMware can be done in two different ways, which is installing macOS Catalina with macOS Catalina VMware & VirtualBox file and installing macOS Catalina with Catalina ISO file that both works fine.
Installing macOS Catalina on VirtualBox is pretty easy as well, compared to installing macOS Catalina on VMware. This app does all of the thing and in some cases better than VMware and is quite fun. This installation is also done in two different ways. First, installing macOS Catalina on VirtualBox with Catalina VMware & VirtualBox file and installing macOS Catalina on VirtualBox with Catalina ISO file.
All of these are super-working method and will work super-fine not only for working with XCode but for most things. There’s no much difference between a running macOS on actual Mac and running macOS on VMware or VirtualBox. We’ve covered with it entirely and all of the files that are required are completely available to collect at here.
Step Two – Install XCode on Windows
Once the macOS Catalina is installed, open it up and switch it on from VMware or VirtualBox. Next, open the App Store and search for XCode.
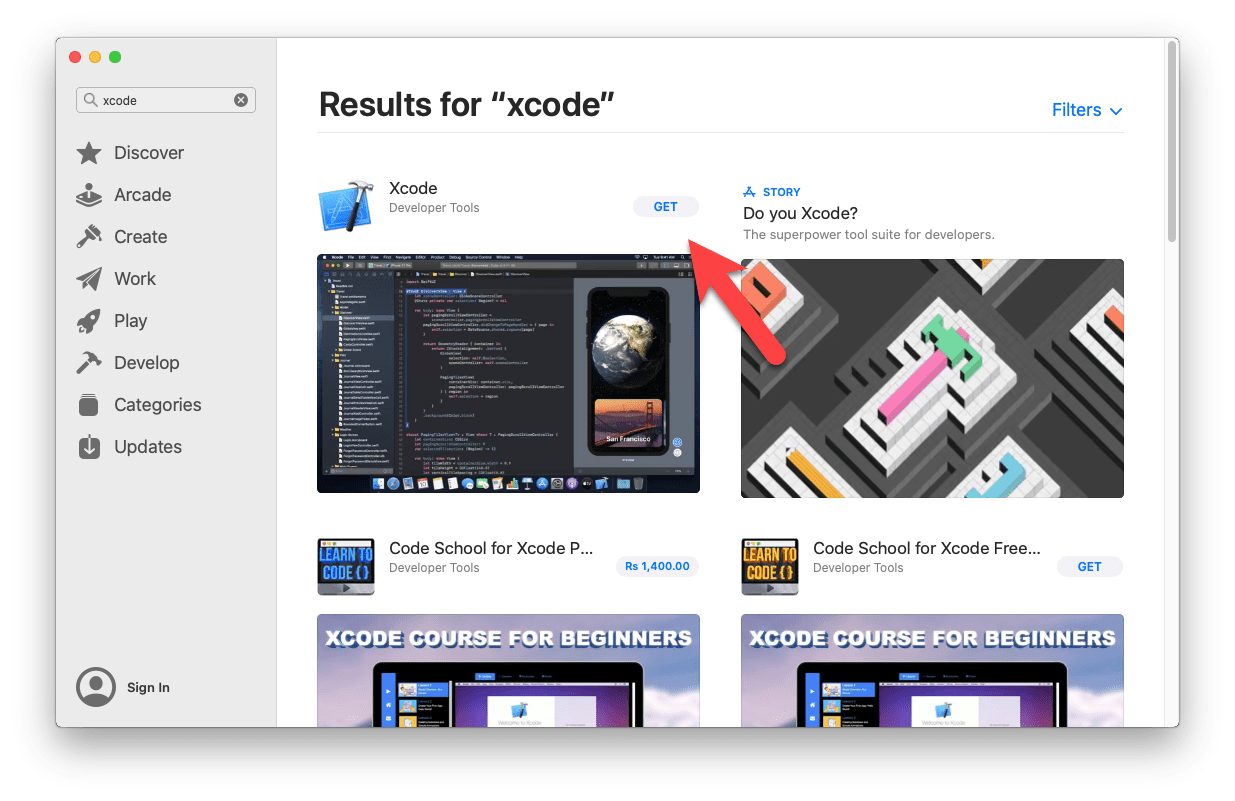
XCode on App Store
On the results, click the XCode then click Get on this window. It will ask for your Apple ID, sign in and it will start. It might take a little long since it’s around 7.2GB.
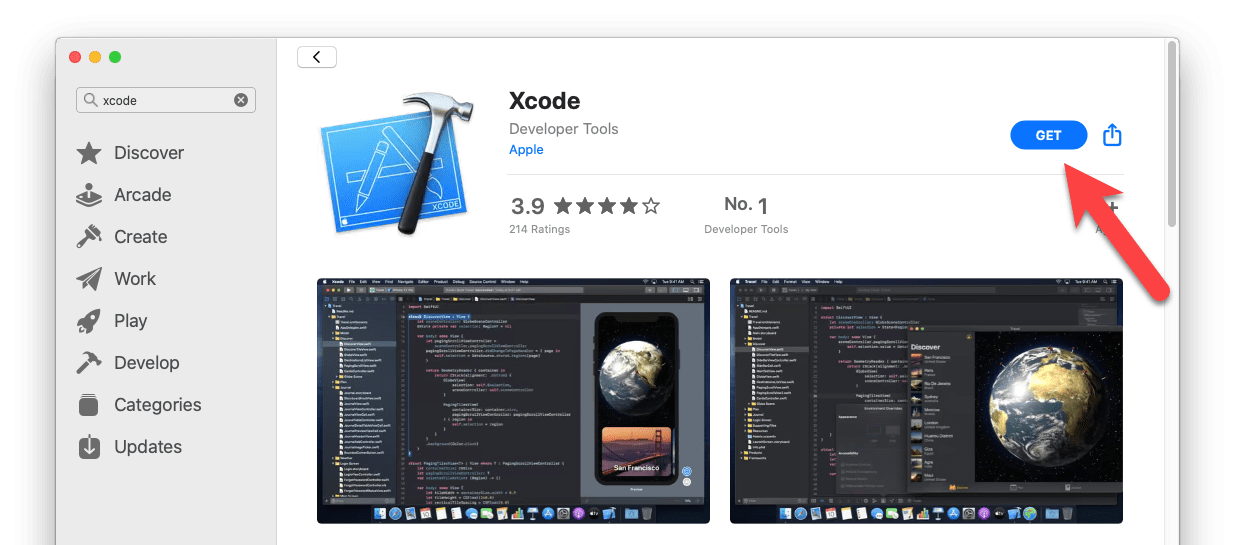
Once it’s done, open the XCode from the App Store.
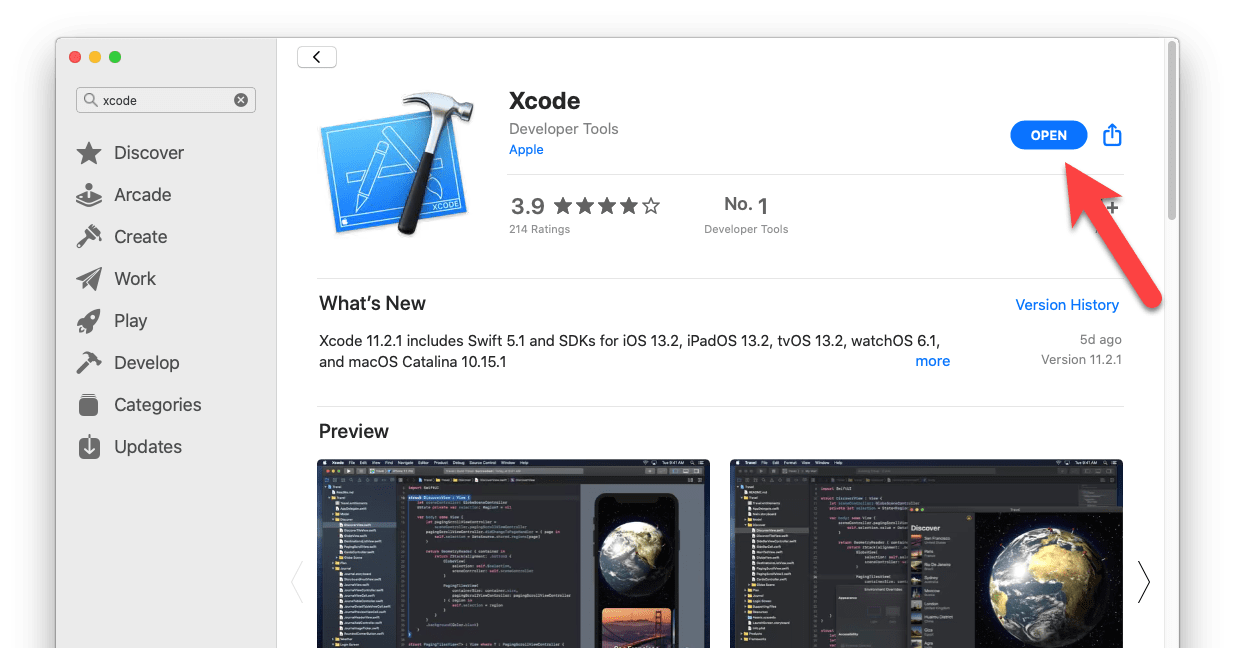
That open, agree with license agreement by clicking on Agree.
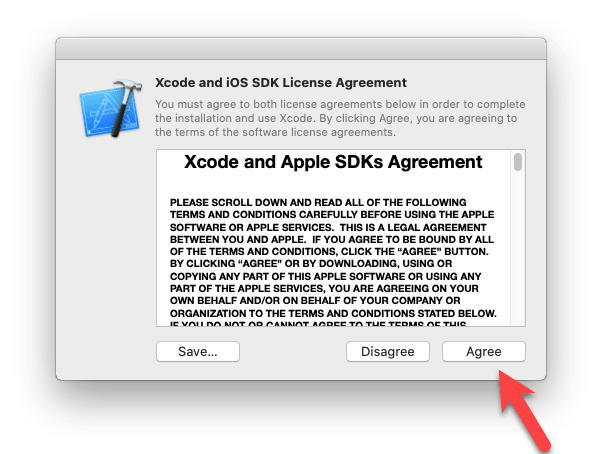
Clicking it will ask for your Windows credentials, entering it will begin installing XCode, just wait.
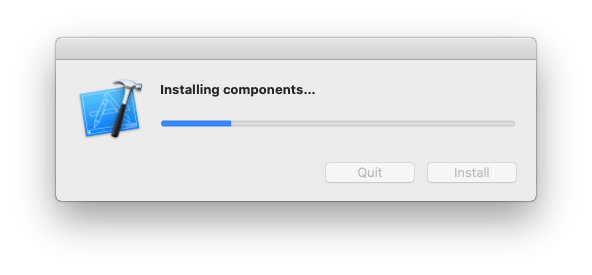
Installing XCode on Windows
The XCode has now finished installation and is ready to use. There’s nothing more to do.
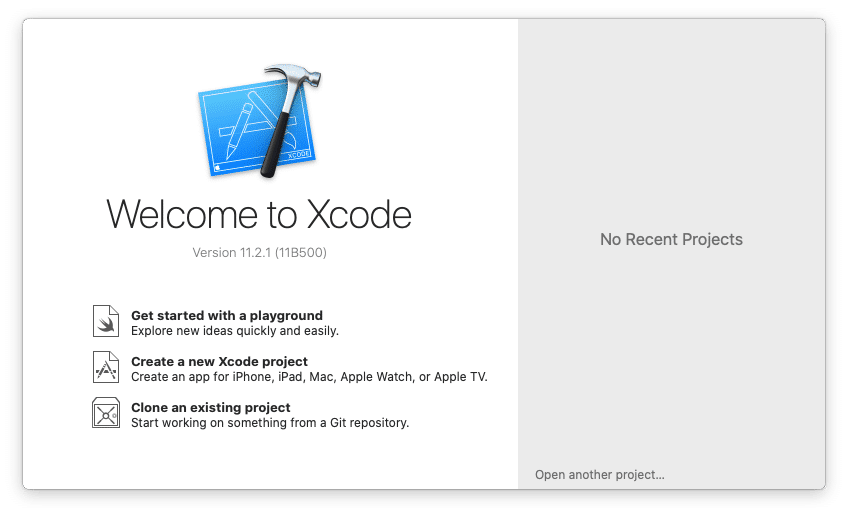
XCode on Windows
With that done, you’re completely free to use and start your project. Build some nice apps and let us know how was that. For making sure you don’t lose working with the project, I recommend taking a snapshot which is similar to backup in Windows, so it will restore all the things inlcluding project files, and all the things. It’s free to use and we’ve shown it to you.
That’s all to there it is. Well, at this point, you should have installed XCode on Windows. If there’s something that remains, or would like to add or provide some cool suggestions or ideas with us, we’re happy to hear.
Xcode for Windows: Develop iOS Apps on PC
Written by Reinder de Vries on February 28 2020 in App Development

How can you run Xcode on Windows and develop iOS apps with a Windows PC? The short answer is: you can’t! You’ve got a few alternatives to get around that, however. In this tutorial, we’ll discuss how you can install Xcode on Windows to build iOS apps.
Here’s what we’ll get into:
- Rent a Mac in the cloud (starting at $20/mo)
- Run and compile Swift directly on Windows/Linux
- Learning to code with a Swift Sandbox
- Build your own “Hackintosh” by installing macOS on a PC
- Run Xcode on Windows by installing macOS on a virtual machine
- Develop iOS apps on Windows with cross-platform tools
- Get your hands on a second-hand Mac (starting at $300)
Xcode for Windows: What & Why
Xcode contains everything you need to build iOS apps, and it only runs on macOS!
That’s when the problems start. You want to make an iOS app with your Windows PC, but you can’t buy a PC or laptop with macOS pre-installed on it. Unlike Windows, Apple doesn’t license its operating system to other computer manufacturers. You can only use macOS on a Mac.
In fact, when you obtain a license to use macOS, which happens when you purchase a Mac computer, you have to agree to only run the operating system on Apple hardware. This effectively limits you to only develop apps on a Mac.
“It’s more fun to be a pirate than to join the navy.”
— Steve Jobs (1983)
But… it’s more fun to be a pirate, than to join the navy, right? Let’s discuss a few alternatives that’ll let you run Xcode on Windows and develop iOS apps on a Windows PC!
Rent a Mac in the Cloud
An even easier way to get your hands on macOS, albeit more expensive, is to rent a Mac “in the Cloud”. You can work with Xcode on Windows with this approach, because you’re essentially connected to a Mac that’s elsewhere.
Here’s how that works:
- Someone connects a bunch of Mac’s to the internet
- You sign in on one of those Macs via a Remote Desktop Connection (RDP)
- Done! You can use this Mac from Windows/Linux and build iOS apps
Services like MacinCloud and MacStadium offer affordable rent-a-Mac products, usually paid on a monthly basis. Prices typically start at $20/month and you can choose from several hardware options, including Mac Mini and Mac Pro.
| Starting at | Type | |
|---|---|---|
| MacinCloud | $20/month | Dedicated, Virtual, Server |
| MacStadium | $79/month | Dedicated, Enterprise |
| virtualmacosx.com | $9.75/month | Shared (timesharing) |
| Mac Cloud | $49/month | Virtual |
| Flow | Premium | Dedicated, Enterprise |
| HostMyApple | $25/month | Virtual, Dedicated |
You connect to those cloud-based Macs via a Remote Desktop Connection (RDP). Windows includes a stock Remote Desktop Client you can use, and so do most Linux operating systems. Once you’re logged on, you can launch Xcode, and start building your iOS app. That way you’re effectively running Xcode on your Windows PC!
Cloud-based Macs usually come in 3 flavours:
- A dedicated Mac, which means you get access to a physical Mac located in a data center, as if you bought a Mac in the Apple Store and put it on your desk.
- A virtual Mac, which means you get access to a virtual Mac in a data center, much like the VirtualBox solution mentioned earlier. Your Mac won’t run on Apple hardware, but it will run macOS.
- A Mac Build Server, which is a specialized kind of Mac that can be used to compile iOS apps. You’ll create those apps on your Mac, and then instruct the Build Server to compile the app for you.
A dedicated Mac is the most convenient, and the most powerful option. A virtual Mac is OK too, but it typically does not perform as well as a physical Mac computer.
Running Xcode via a Mac in the cloud has a drawback: you can’t easily connect your iPhone to Xcode via USB! With Xcode on your local Mac you can run and debug your app on your own iPhone, via the USB/Lightning cable. This obviously won’t work when your Mac is in the cloud…
Don’t worry! There are plenty of solutions for that:
- A simple approach is to run your app on iPhone Simulator, right from within Xcode. You can launch iPhone Simulator in Xcode, and debug your app with it. This is perfect for the development phase of your project.
- An alternative solution are tools like Flexihub, NoMachine and USB Network Gate. They only work with dedicated Mac hardware, and you need to have a dedicated IP address.
- Install your iOS app on your iPhone via TestFlight, and debug it with a tool like Bugsnag. You can monitor and debug live crashes in your app.
An interesting use case for renting a Mac in the cloud comes from the latest developments in Apple’s hardware. Many designers, developers and desktop-publishers have voiced their concerns over Apple hardware lagging behind, offering low-spec computers for a fairly high price.
If you don’t want to take your $3.000 MacBook Pro with you in a coffee shop, or on your next trip to Thailand, why not purchase a low-end Windows or Linux laptop, and connect to your Mac in the cloud? You can either host it at home yourself, co-locate it in a data center, or rent a dedicated cloud-based Mac.
Do you want to learn how to code iOS apps, but don’t want to invest money in a Mac? Rent a Mac in the cloud for the duration of the iOS development course you’re taking! It’s a great way to bootstrap learning iOS development, and you can always buy your own Mac later.

Learn how to code iOS apps
Get started with Xcode and Swift
Ready to get started with iOS development? Learn how to code iOS apps with Xcode and Swift with our immersive iOS development course. Works both on Mac and PC!
Xcode for Windows (12 Ways to Build iOS Apps on PC)
I wish I had known this when I first started because I delayed myself for 3 years before biting the bullet and buying a Mac.
Had I known about running Xcode on Windows or about the solutions below, I might’ve started building iPhone apps much earlier!
Rent a Mac
Before committing to buying a new Mac, you can actually “rent” one for development. You’ll remotely access the Mac and Xcode through your PC.
It’ll be like having the Mac desktop in a window on your Windows Desktop.
The really nice thing about this option is that the cost is really low and it’s the fastest option to get up and running.
If you decide that app development isn’t for you, you just cancel your plan.
1. MacStadium
These guys were featured in the recent Apple keynote when they introduced the updated Mac Mini! They have the newest Macs available.
(Use coupon code “CODEWITHCHRIS” for 50% off your first month. If you do, please let me know in the comments below. I’ll get a small kick back at no extra expense to you so thank you for supporting my site!)
If you go down this route for iOS app development, make sure you get my Xcode cheatsheet with references and keyboard shortcuts for Windows users.
There are a couple other companies that provide this service:
2. MacInCloud
This is the most well known service out of the three. You won’t have to install Xcode because it comes preinstalled. You can also do pay-as-you-go so it’s a pretty low commitment. Some people complain that it’s slow but you can try it out for yourself since it’s only about a buck an hour!
3. XcodeClub
XcodeClub is run by Daniel who is a passionate developer himself. From the reviews I see, the service is fast and friendly. The pricing is less flexible than MacInCloud and you’ll have to commit to at least a month.
Virtualize MacOS
If you’re a little more technically savvy, you can use virtualization software and run a “virtual Mac” on your PC.
The services above are essentially doing the same thing on their servers and then they charge you a fee to access the virtual machine.
By setting it up yourself on your own PC, you essentially cut the middle man out of the equation.
Unfortunately it does take a little bit of technical know-how to get this up and running.
The two most popular pieces of software to do virtualization are VirtualBox and VMWare Workstation.
You can download them below and then use Google to find a guide on how to install the latest MacOS (Mojave) with either VirtualBox or VMWare Workstation.
After that, spin up your new virtual Mac and download Xcode. This is as close as you’ll get to running actual Xcode on Windows!
4. VirtualBox
VirtualBox is open source software which means that it’s free. That probably explains why it’s a lot more popular than VMWare Workstation when it comes to running MacOS on your Windows machine!
5. VMWare Workstation
Unfortunately you’ll have to pay for this piece of software and at the time of this writing, a license costs about half the price of a brand new Mac Mini which is perfectly suitable for iOS app development. I would recommend you try VirtualBox first or try to buy a used Mac Mini.
Build a “Hackintosh”
You can also build a “Hackintosh” which is a PC that has been customized to run MacOS.
This requires the most effort out of all the options presented so far but it can work for someone who wants a separate physical computer running MacOS.
6. Hackintosh.com
A great resource for all things Hackintosh. The first How-To section contains links to a number of great tutorials for building your own Hackintosh and installing High Sierra.
7. Hackintosh Subreddit
I love looking for Reddit communities on anything that I’m interested in because there are always interesting conversations happening. Reddit provides a way to have a dialogue with like minded individuals, to get help and to help others!
8. Hackintosh Articles on 9to5mac.com
I included this link because it contains up to date news and articles for Hackintosh builds.
Third Party Solutions
Lastly, there are many third party solutions that you can use to do iOS development on Windows.
You won’t be using Xcode in these solutions but you’ll be able to generate an app that can run on iOS devices.
Check out these great Xcode alternatives:
9. React Native
Use JavaScript to build native mobile apps.
10. Xamarin
Use C# to build a mobile app that you can deploy natively to Android, iOS and Windows.
11. Appcelerator
Build native mobile apps using JavaScript.
12. PhoneGap
Build hybrid cross-platform mobile apps using HTML, CSS and JavaScript.


