- Install IntelliJ IDEA
- System requirements
- Install using the Toolbox App
- Install the Toolbox App
- Install the Toolbox App
- Install the Toolbox App
- Standalone installation
- Silent installation on Windows
- Silent configuration file
- Install as a snap package on Linux
- How to Install IntelliJ IDEA 2020 on Linux Mint 17.1 Rebecca 32-64bit Easy Guide
- Install IntelliJ on Linux Mint 17.1 Rebecca 32/64-bit
- Как установить JDK и среду разработки IntelliJ IDEA
- Установка Java Development Kit в Windows
- 1. Скачиваем установочный архив
- 2. Устанавливаем
- 3. Настраиваем переменные окружения Windows
- 4. Проверяем установку
- Установка Java Development Kit в Linux (Ubuntu)
- 1. Проверяем ранее установленные версии
- 2. Устанавливаем
- 3. Проверяем установку
- Установка Java Development Kit в Linux (macOS)
- 1. Устанавливаем
- 2. Проверяем установку
- Установка среды разработки IntelliJ IDEA Community (Windows)
- 1. Какую версию (редакцию) выбрать
- 2. Сама установка
- 3. Запуск IntelliJ IDEA и настройка параметров
- Установка среды разработки IntelliJ IDEA Community (macOS)
- Установка среды разработки IntelliJ IDEA Community (Ubuntu)
Install IntelliJ IDEA
IntelliJ IDEA is a cross-platform IDE that provides consistent experience on the Windows, macOS, and Linux operating systems.
IntelliJ IDEA is available in the following editions:
Community Edition is free and open-source, licensed under Apache 2.0. It provides all the basic features for JVM and Android development.
IntelliJ IDEA Ultimate is commercial, distributed with a 30-day trial period. It provides additional tools and features for web and enterprise development.
For more information, see the comparison matrix.
System requirements
| Requirement | Minimum | Recommended |
|---|---|---|
| RAM | 2 GB of free RAM | 8 GB of total system RAM |
| CPU | Any modern CPU | Multi-core CPU. IntelliJ IDEA supports multithreading for different operations and processes making it faster the more CPU cores it can use. |
| Disk space | 2.5 GB and another 1 GB for caches | SSD drive with at least 5 GB of free space |
| Monitor resolution | 1024×768 | 1920×1080 |
| Operating system | Latest 64-bit version of Windows, macOS, or Linux (for example, Debian, Ubuntu, or RHEL) |
You do not need to install Java to run IntelliJ IDEA because JetBrains Runtime is bundled with the IDE (based on JRE 11). However, to develop Java applications, a standalone JDK is required.
Install using the Toolbox App
The JetBrains Toolbox App is the recommended tool to install JetBrains products. Use it to install and manage different products or several versions of the same product, including Early Access Program (EAP) and Nightly releases, update and roll back when necessary, and easily remove any tool. The Toolbox App maintains a list of all your projects to quickly open any project in the right IDE and version.
Install the Toolbox App
Download the installer .exe from the Toolbox App web page.
Run the installer and follow the wizard steps.
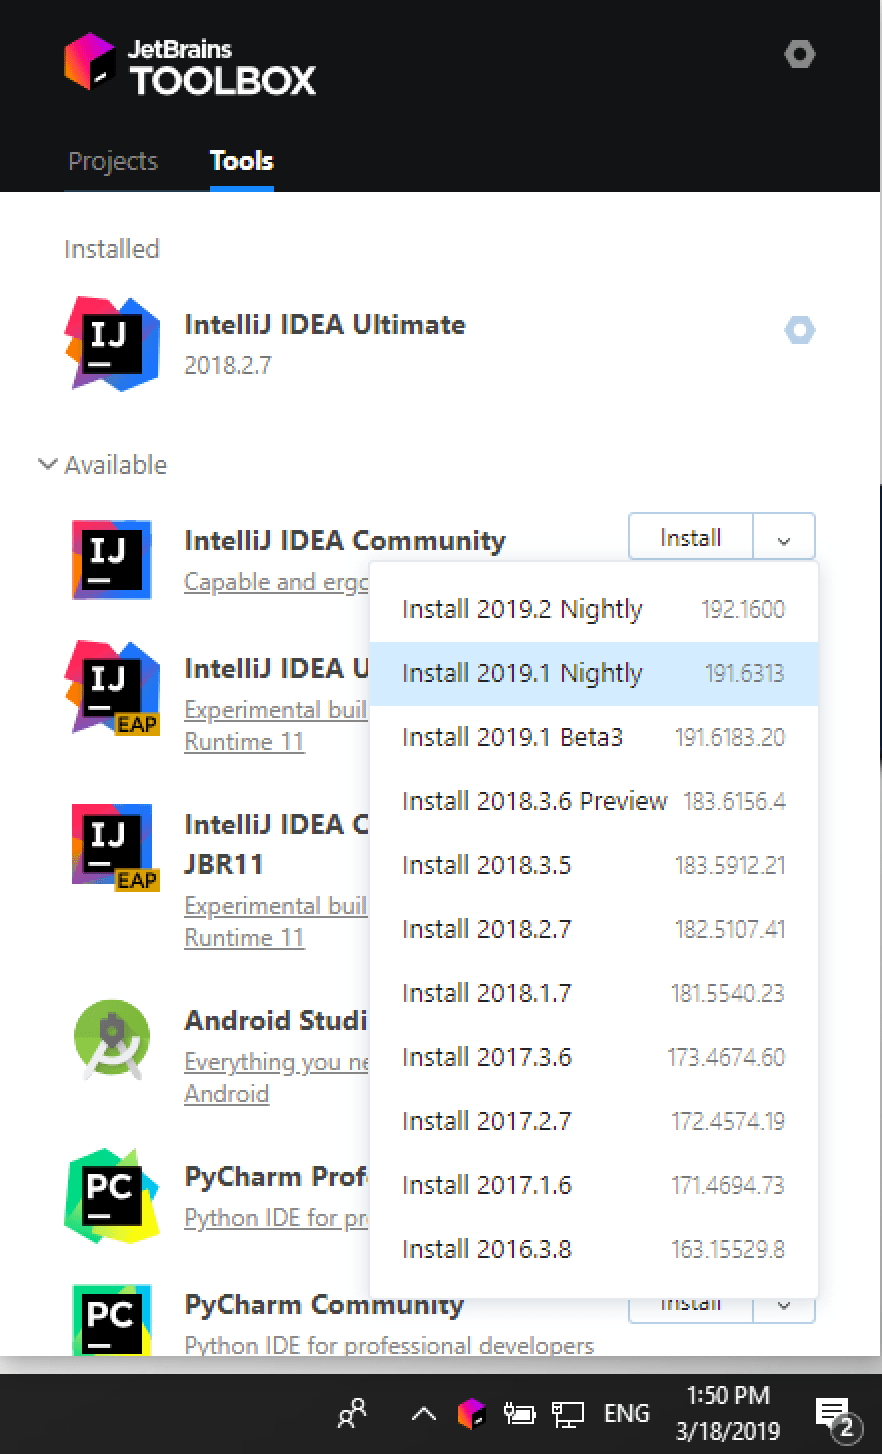
After you run the Toolbox App, click its icon in the notification area and select which product and version you want to install.
Log in to your JetBrains Account from the Toolbox App and it will automatically activate the available licenses for any IDE that you install.
Install the Toolbox App
Download the disk image .dmg from the Toolbox App web page.
There are separate disk images for Intel and Apple Silicon processors.
Mount the image and drag the JetBrains Toolbox app to the Applications folder.
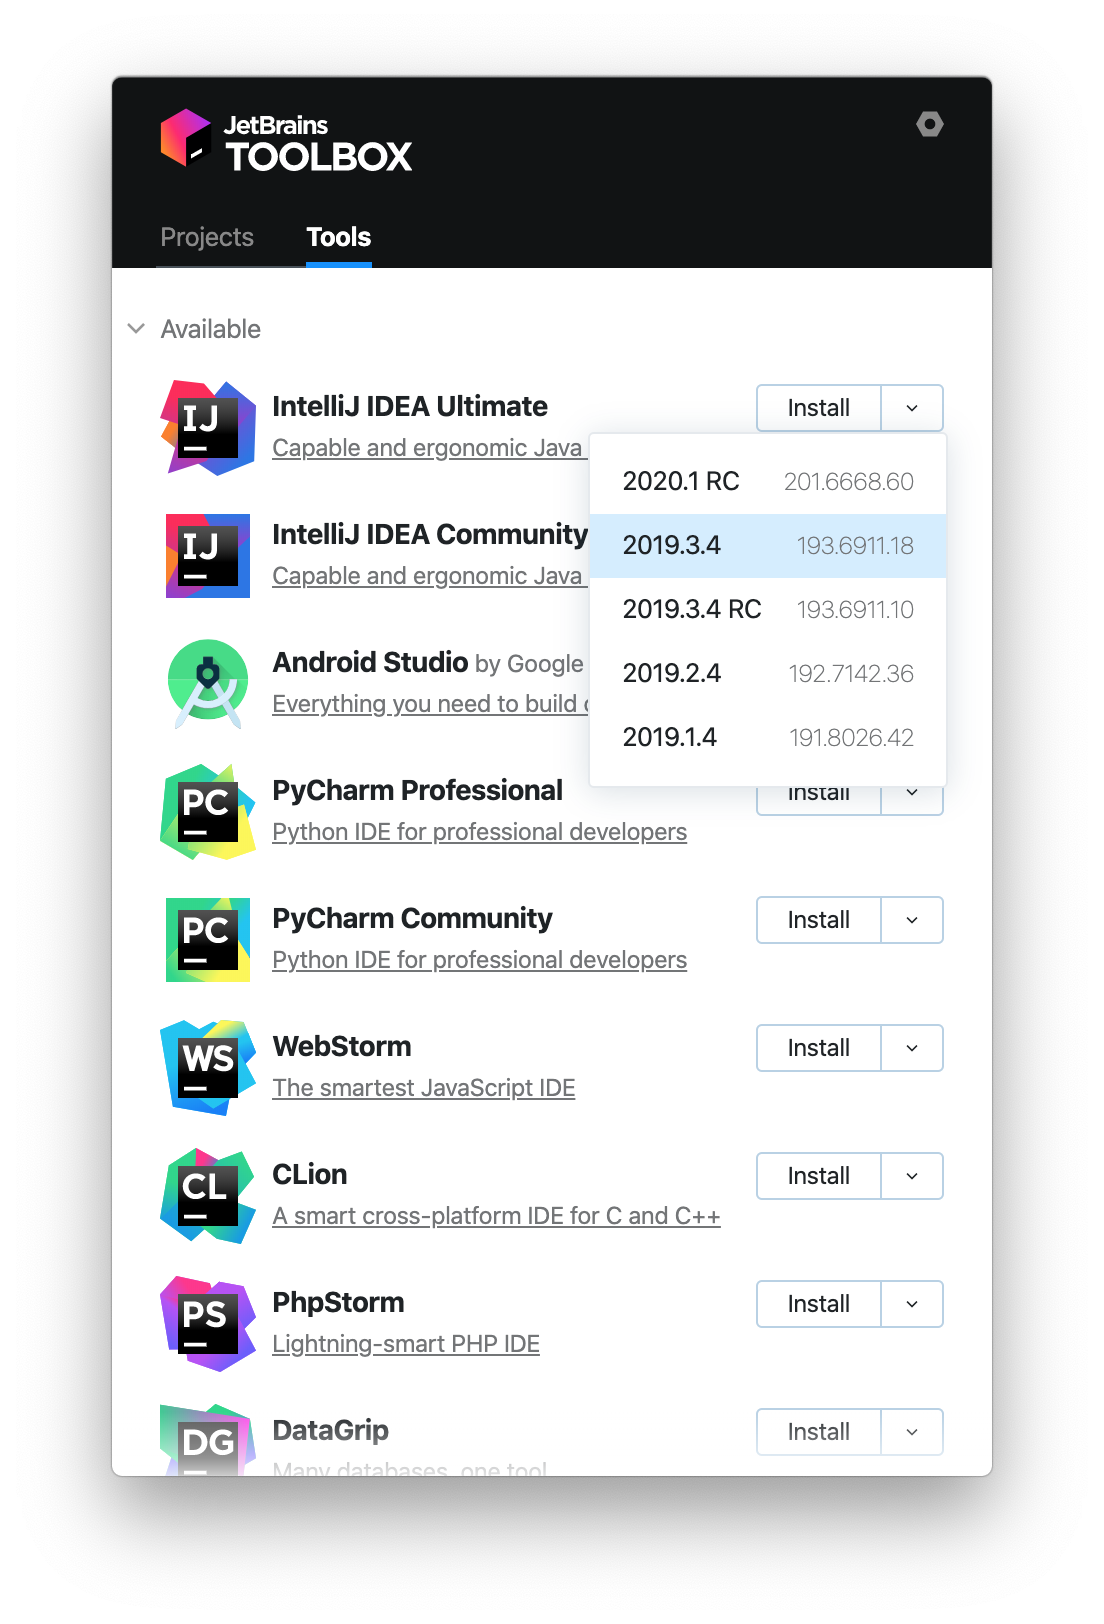
After you run the Toolbox App, click its icon in the main menu and select which product and version you want to install.
Log in to your JetBrains Account from the Toolbox App and it will automatically activate the available licenses for any IDE that you install.
Install the Toolbox App
Download the tarball .tar.gz from the Toolbox App web page.
Extract the tarball to a directory that supports file execution.
For example, if the downloaded version is 1.17.7391, you can extract it to the recommended /opt directory using the following command:
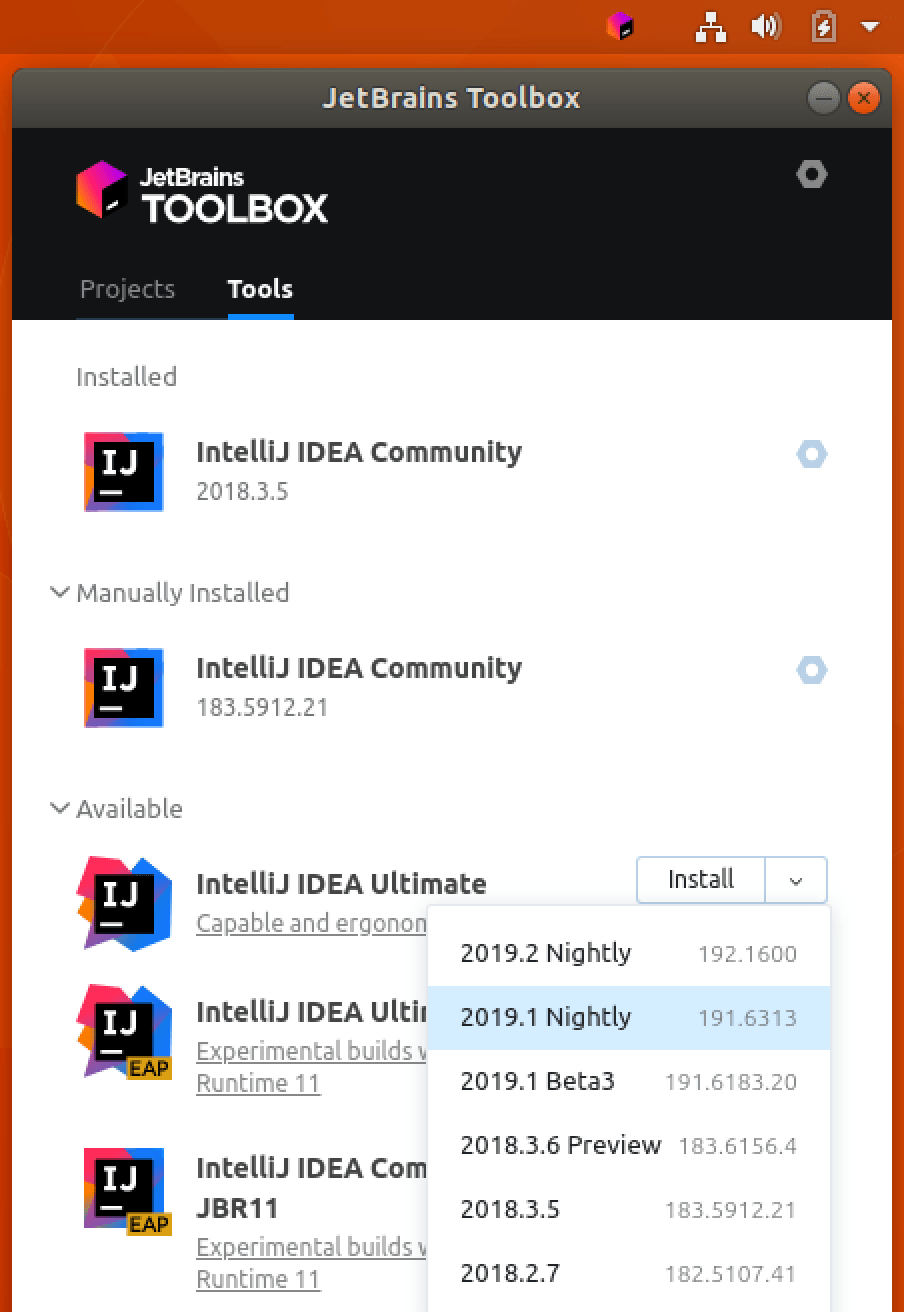
Execute the jetbrains-toolbox binary from the extracted directory to run the Toolbox App and select which product and version you want to install. After you run the Toolbox App for the first time, it will automatically add the Toolbox App icon to the main menu.
Log in to your JetBrains Account from the Toolbox App and it will automatically activate the available licenses for any IDE that you install.
You can use this shell script that automatically downloads the tarball with the latest version of the Toolbox App, extracts it to the recommended /opt directory, and creates a symbolic link in the /usr/local/bin directory.
Standalone installation
Install IntelliJ IDEA manually to manage the location of every instance and all the configuration files. For example, if you have a policy that requires specific install locations.
Run the installer and follow the wizard steps.
On the Installation Options step, you can configure the following:
Create a desktop shortcut for launching IntelliJ IDEA.
Add the directory with IntelliJ IDEA command-line launchers to the PATH environment variable to be able to run them from any working directory in the Command Prompt.
Add the Open Folder as Project action to the system context menu (when you right-click a folder).
Associate specific file extensions with IntelliJ IDEA to open them with a double-click.

To run IntelliJ IDEA, find it in the Windows Start menu or use the desktop shortcut. You can also run the launcher batch script or executable in the installation directory under bin .
Extract the archive to the desired folder.
To run IntelliJ IDEA, use the launcher batch script or executable in the extracted directory under bin .
There are separate disk images for Intel and Apple Silicon processors.
Mount the image and drag the IntelliJ IDEA app to the Applications folder.
Run the IntelliJ IDEA app from the Applications directory, Launchpad, or Spotlight.
Extract the tarball to a directory that supports file execution.
For example, to extract it to the recommended /opt directory, run the following command:
Do not extract the tarball over an existing installation to avoid conflicts. Always extract it to a clean directory.
Execute the idea.sh script from the extracted directory to run IntelliJ IDEA.
To create a desktop entry, do one of the following:
On the Welcome screen, click Configure | Create Desktop Entry
From the main menu, click Tools | Create Desktop Entry
When you run IntelliJ IDEA for the first time, some steps are required to complete the installation, customize your instance, and start working with the IDE.
For information about the location of the default IDE directories with user-specific files, see Directories used by the IDE.
Silent installation on Windows
Silent installation is performed without any user interface. It can be used by network administrators to install IntelliJ IDEA on a number of machines and avoid interrupting other users.
To perform silent install, run the installer with the following switches:
/S : Enable silent install
/CONFIG : Specify the path to the silent configuration file
/D : Specify the path to the installation directory
This parameter must be the last in the command line and it should not contain any quotes even if the path contains blank spaces.
To check for issues during the installation process, add the /LOG switch with the log file path and name between the /S and /D parameters. The installer will generate the specified log file. For example:
Silent configuration file
You can download the default silent configuration file for IntelliJ IDEA at https://download.jetbrains.com/idea/silent.config
The silent configuration file defines the options for installing IntelliJ IDEA. With the default options, silent installation is performed only for the current user: mode=user . If you want to install IntelliJ IDEA for all users, change the value of the installation mode option to mode=admin and run the installer as an administrator.
The default silent configuration file is unique for each JetBrains product. You can modify it to enable or disable various installation options as necessary.
It is possible to perform silent installation without the configuration file. In this case, omit the /CONFIG switch and run the installer as an administrator. Without the silent configuration file, the installer will ignore all additional options: it will not create desktop shortcuts, add associations, or update the PATH variable. However, it will still create a shortcut in the Start menu under JetBrains .
Install as a snap package on Linux
You can install IntelliJ IDEA as a self-contained snap package. Since snaps update automatically, your IntelliJ IDEA installation will always be up to date.
To use snaps, install and run the snapd service as described in the installation guide.
On Ubuntu 16.04 LTS and later, this service is pre-installed.
IntelliJ IDEA is distributed via two channels:
The stable channel includes only stable versions. To install the latest stable release of IntelliJ IDEA, run the following command:
The —classic option is required because the IntelliJ IDEA snap requires full access to the system, like a traditionally packaged application.
The edge channel includes EAP builds. To install the latest EAP build of IntelliJ IDEA, run the following command:
When the snap is installed, you can launch it by running the intellij-idea-community , intellij-idea-ultimate , or intellij-idea-educational command.
To list all installed snaps, you can run sudo snap list . For information about other snap commands, see the Snapcraft documentation.
Источник
How to Install IntelliJ IDEA 2020 on Linux Mint 17.1 Rebecca 32-64bit Easy Guide
Install IntelliJ on Linux Mint 17.1 Rebecca 32/64-bit
The Tutorial Shows Step-by-step How to Install IntelliJ IDEA 2021 Java IDE FREE Community Edition Linux Mint 17.1 Rebecca Mate/Cinnamon/KDE/Xfce Desktop.
To Make Use of the IntelliJ IDEA 2021 Java IDE you Need the Oracle Sun Java SE JDK 6+ Installed on Linux Mint.
And this Visual Guide includes the Basic Screenshots of All GUI Steps involved.
Finally, the post’s Content is Expressly Reduced to Give Focus to the Essentials Instructions and Commands.

Download IntelliJ IDEA 2021 for Linux:
Double-Click and Extract IntelliJ Archive into /tmp
Open a Command Line Console Window
(Press “Enter” to Execute Commands) .

Relocate IntelliJ Idea Folder
If Got “User is Not in Sudoers file” then see: How to Enable sudo
Set the root superUser as Holder on IntelliJ IDEA
Then Switch the Content into the /opt Directory
Make a Symlink into the working Paths
Start IntelliJ IDEA
Next you can Start IntelliJ from Terminal with
How to Install Required Oracle JDK 6/7/8 on Linux Mint:

Quick Start on IntelliJ IDEA 2021 with Java Hello World
Источник
Как установить JDK и среду разработки IntelliJ IDEA
Начинаем разрабатывать на Java: где взять, как установить и настроить всё, что нужно.


Чтобы начать программировать на Java, нужно установить комплект разработчика приложений (SDK) . Он позволит запускать, отлаживать и исполнять наши первые программы. Также нам понадобится среда разработки ( IDE ), где мы и будем писать код.
Пройдём через это вместе. Установим JDK в Windows, Ubuntu и macOS, и IntelliJ IDEA тоже в Windows, Ubuntu и macOS. Поехали!
Установка Java Development Kit в Windows
Java Development Kit (JDK) — это комплект ПО для разработчиков приложений на Java. Стандартная установка включает в себя интерпретатор, облегчённый интерпретатор JRE, компилятор, библиотеку Java-классов, отладчик, средства архивации и сжатия jar и другое.
Чтобы установить JDK в Windows, нужно:
- загрузить актуальную версию пакета,
- установить его,
- настроить переменные окружения.

Пишет на Java. Верит в Agile. Пьёт много кофе и не любит грязный код.
1. Скачиваем установочный архив
Нам нужна бесплатная версия — AdoptOpenJDK (она есть под Windows, macOS, Ubuntu и другие платформы).
Идём сюда и выбираем версию JDK (актуальны версии 8+), виртуальную Java-машину (JVM) и свою платформу.
Я выбрал OpenJDK 11 ( LTS ), HotSpot и Windows x64 jdk соответственно:
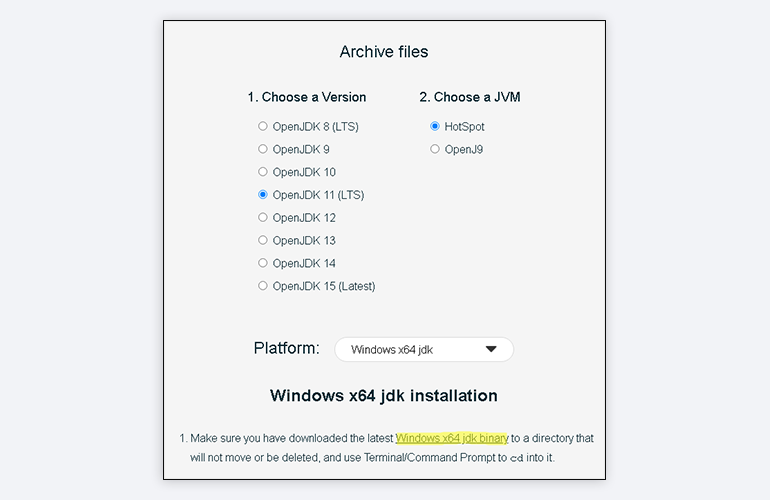
Скачиваем файл по появившейся ссылке (я выделил её жёлтым на скрине выше).
2. Устанавливаем
Извлекаем скачанный архив в папку C:\Program Files\Java\
При этом будет создана подпапка jdk-*номер версии*, а внутри неё появится папка bin.
В результате полный путь до папки bin у меня выглядит так:
3. Настраиваем переменные окружения Windows
Нам нужно создать системную переменную JAVA_HOME, которая будет хранить путь до нашей версии JDK. Это понадобится программам для работы с проектами Java.
Заходим в Панель управления → Система → Дополнительные параметры системы → Дополнительно
А можно и прямо в Панели управления вбить в поиск слово « переменных» (без кавычек). ОС предложит варианты, из которых выбирайте « Изменение системных переменных среды».
У вас откроется окно:
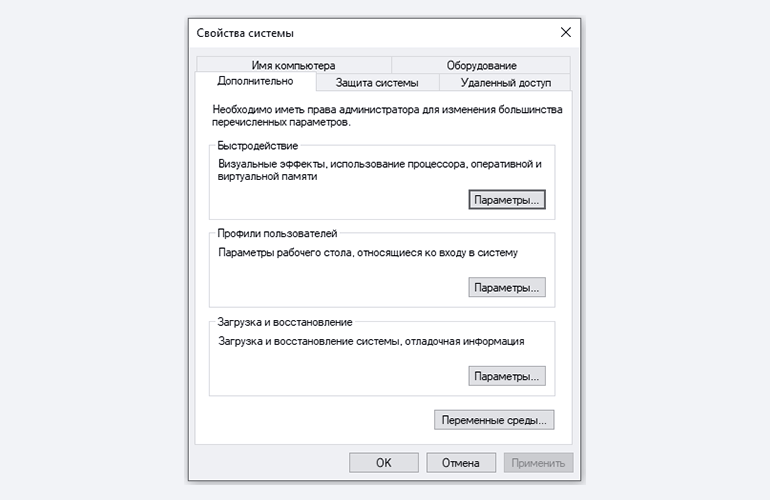
Здесь жмём на кнопку « Переменные сред ы».
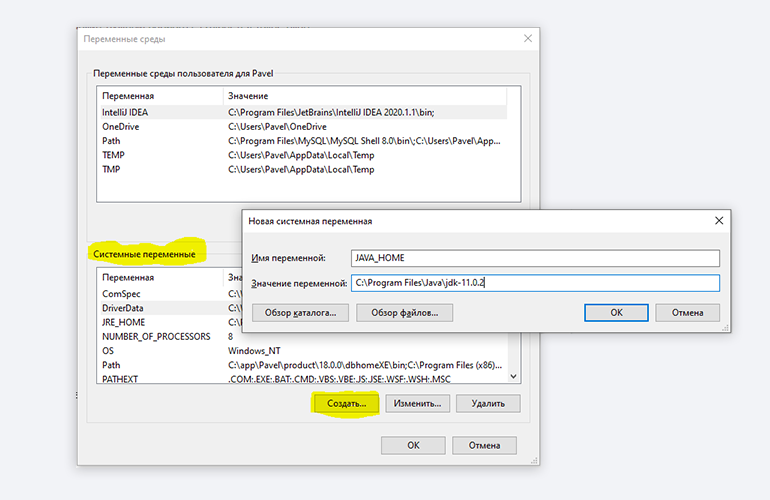
В новом окне для раздела « Системные переменные» кликаем « Создать». В « Имя переменной» вводим JAVA_HOME (именно так, латиницей в верхнем регистре), а в поле « Значение переменной» подставляем наш путь C:\Program Files\Java\jdk-*номер версии* :
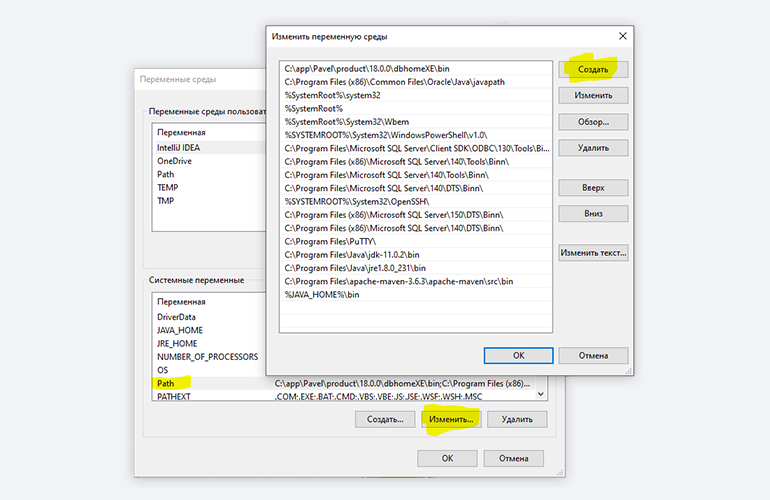
Далее в разделе « Переменные сред ы…» редактируем системную переменную Path. Нужно добавить в неё путь к папке с исполняемыми файлами Java, а именно: %JAVA_HOME%\bin (соблюдайте регистр символов):

4. Проверяем установку
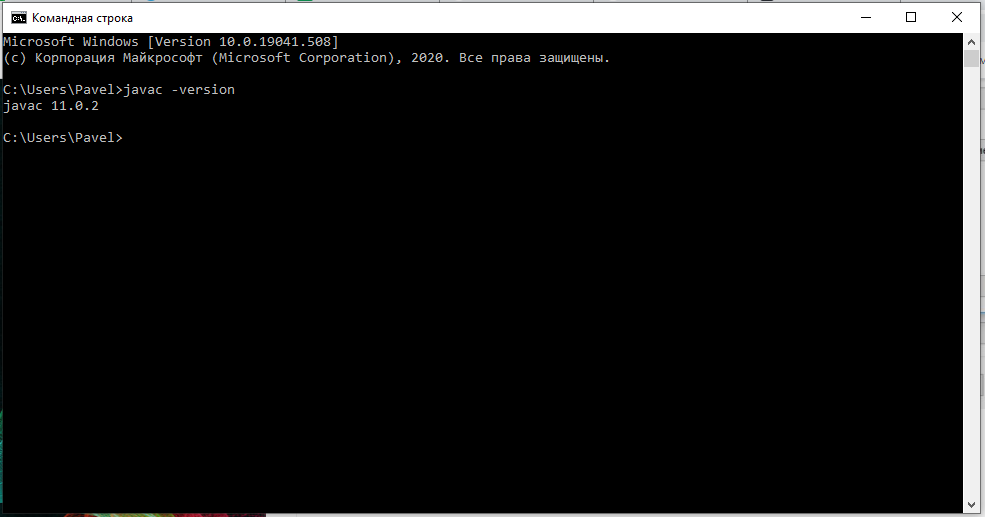
Запускаем Командную строку Windows. Для этого нажимаем Win + R, а в появившемся окне вводим cmd.exe и жмём на Enter.
В открывшейся консоли набираем javac -version и жмём ввод.
Если установка прошла успешно, то ответ покажет версию вашего компилятора:
Установка Java Development Kit в Linux (Ubuntu)
Рассмотрим установку JDK на одном из самых популярных дистрибутивов Linux — Ubuntu 20.04 ( LTS ).
Проще всего установить версию, которая входит в пакет Ubuntu. По умолчанию в Ubuntu 20.04 входит версия Open JDK 11.
1. Проверяем ранее установленные версии
Открываем терминал сочетанием клавиш Ctrl + Alt + T и обновляем базу данных пакетов с помощью APT :
Проверяем ранее установленные версии командой:
Если установка уже выполнялась, то мы увидим что-то такое:

2. Устанавливаем
Для запуска любых приложений Java нужна JRE (Java Runtime Environment — среда выполнения для языка Java). Но для компиляции и разработки программ требуется JDK (Java Development Kit).
Чтобы установить JRE, вводим в консоль:
Для установки JDK — команду:
3. Проверяем установку
Ответ должен выглядеть примерно так:
Установка Java Development Kit в Linux (macOS)
Этот способ установки использует HomeBrew (менеджер недостающих пакетов для macOS).
1. Устанавливаем
Прежде всего нужно добавить репозиторий в HomeBrew. Для этого открываем терминал (Cmd + N) и вводим:
Устанавливаем OpenJDK 11 командой:
2. Проверяем установку
Ответ должен выглядеть примерно так:
Установка среды разработки IntelliJ IDEA Community (Windows)
Intellij IDEA — это интегрированная среда разработки (IDE), то есть система программных средств для создания проектов на разных языках программирования.
Сегодня это самая популярная IDE для языка Java. А ещё есть Eclipse, NetBeans и немало других, но мы рекомендуем именно IDEA, потому что даже её бесплатная версия обладает широкой функциональностью, подходит для профессиональной разработки и вообще делает Java проще в использовании.
В IDE обязательно входят:
- текстовый редактор для написания кода (он знает синтаксис нужных языков);
- компилятор;
- отладчик.
1. Какую версию (редакцию) выбрать
Intellij IDEA доступна в бесплатной (Community) и платной (Ultimate) версиях. Чем они различаются, видно на скрине ниже:

Пока что нам хватит возможностей бесплатной версии.
На заметку: IntelliJ предлагает студентам и преподавателям свободный доступ к своим продуктам.
2. Сама установка
Заходим сюда и качаем версию для Windows.
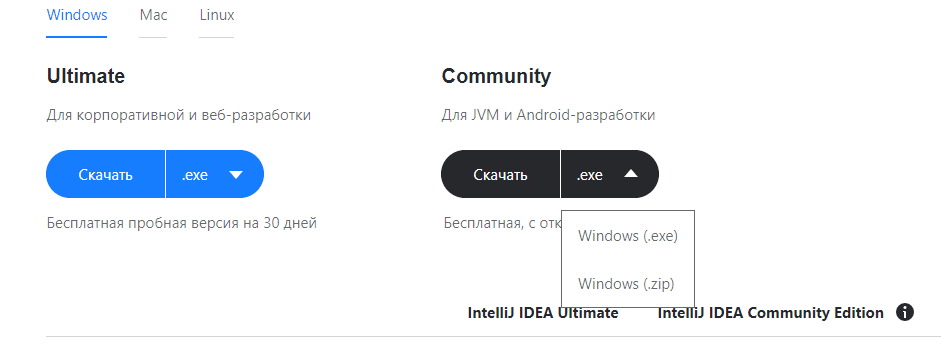
Запускаем скачанный файл .exe:
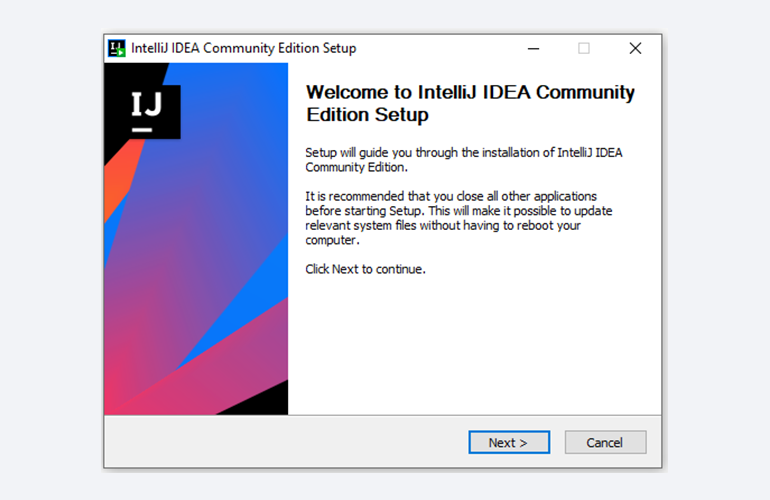
Жмём Next (Далее) и выбираем путь для установки:
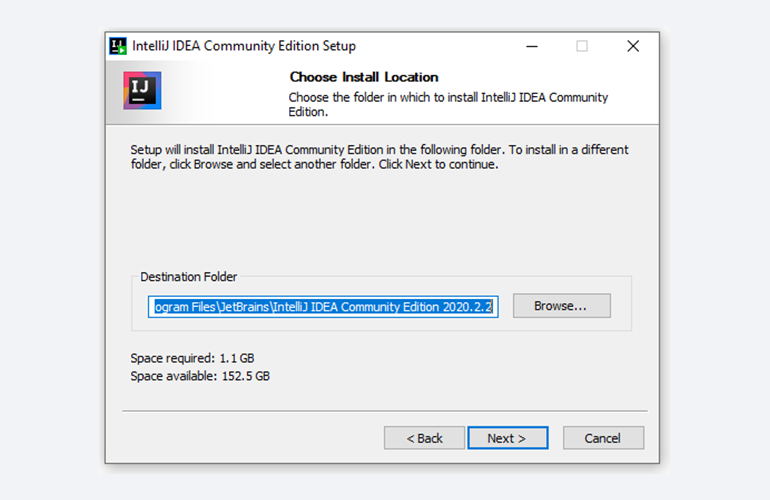
Снова Next, и настраиваем параметры установки:
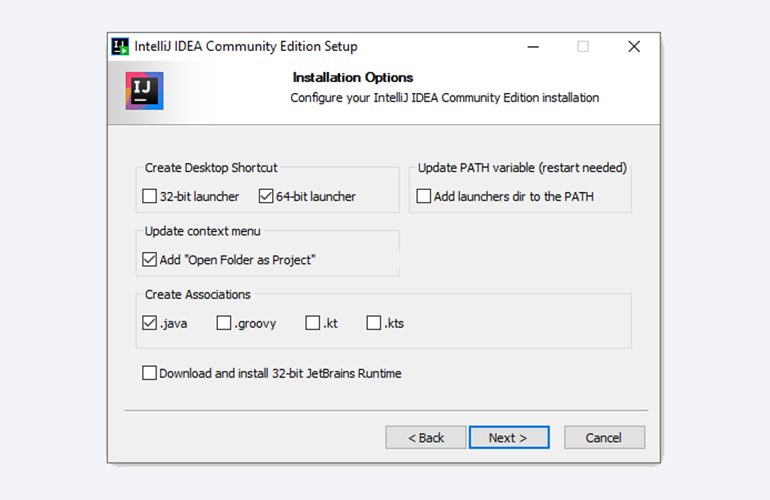
В общем случае это:
- 64-bit launcher — для запуска 64-разрядной версии приложения (будет создан ярлык на рабочем столе);
- Add ”Open Folder as Project“» — позволяет открывать папки с исходниками как проекты прямо через контекстное меню;
- .java — файлы такого типа (с таким расширением) будет открывать IDEA (по умолчанию и через контекстное меню).
Кликаем Next (Далее) и выбираем папку для ярлыков IDEA (оставляем по умолчанию):
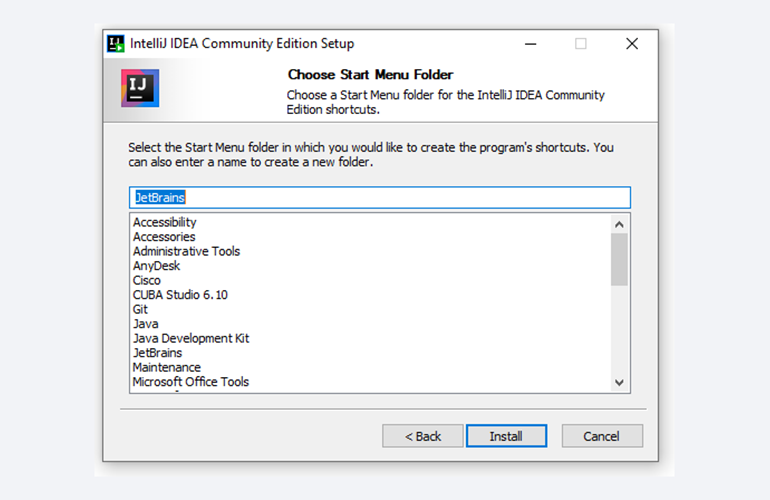
Нажимаем Install (Установить), после чего стартует установка:

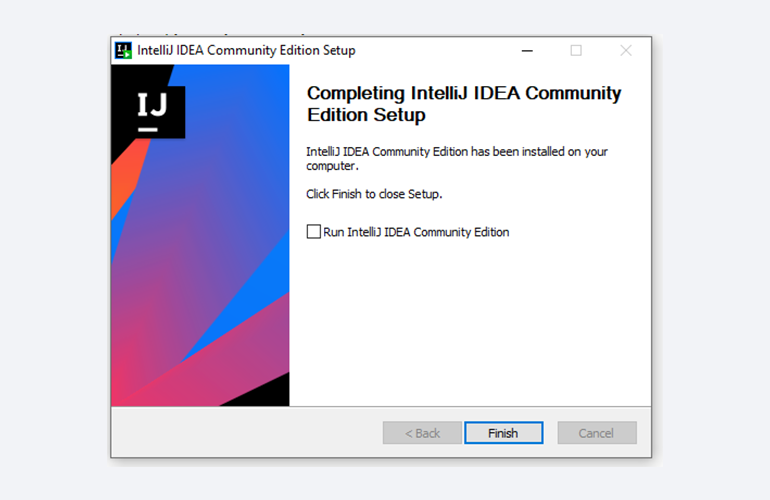
Дожидаемся её окончания и жмём Finish (Завершить):
3. Запуск IntelliJ IDEA и настройка параметров
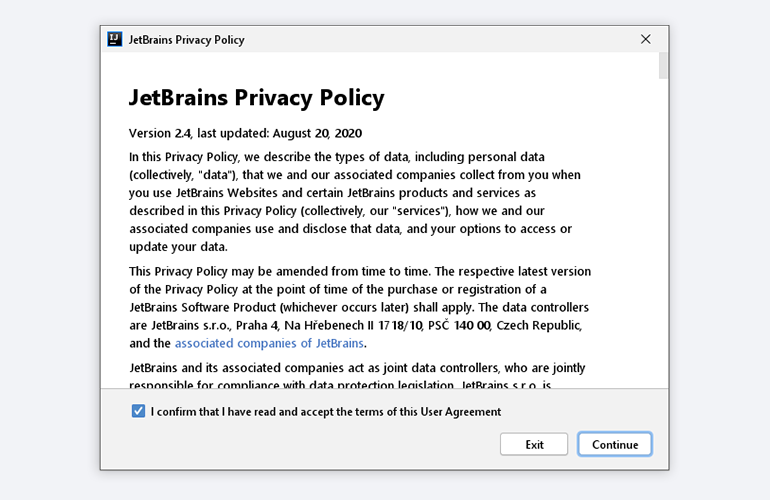
При первом запуске принимаем пользовательское соглашение и нажимаем Continue (Продолжить):
Далее выбираем тему оформления (доступны тёмная и светлая):
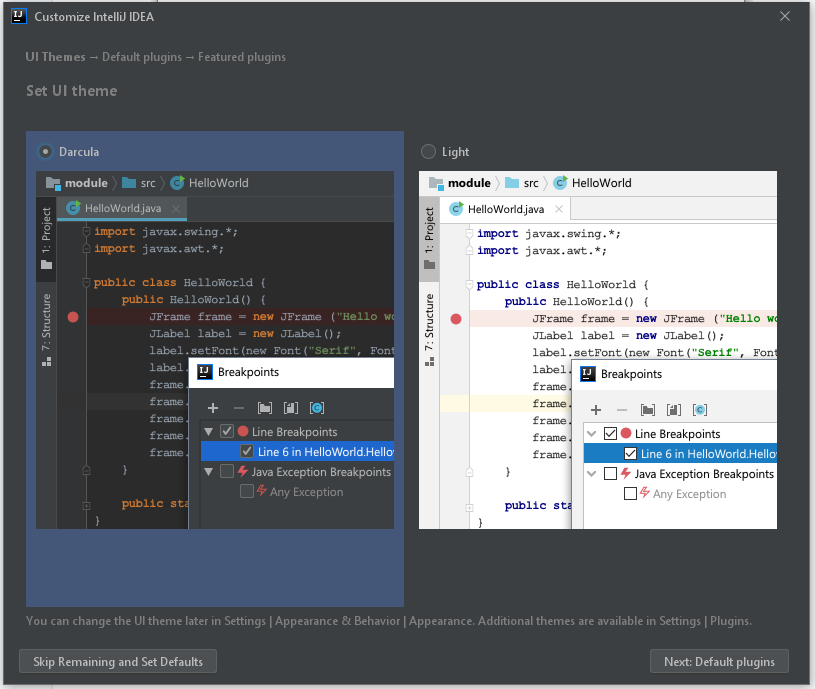
Жмём Next: Default plugins и переходим к выбору устанавливаемых плагинов:
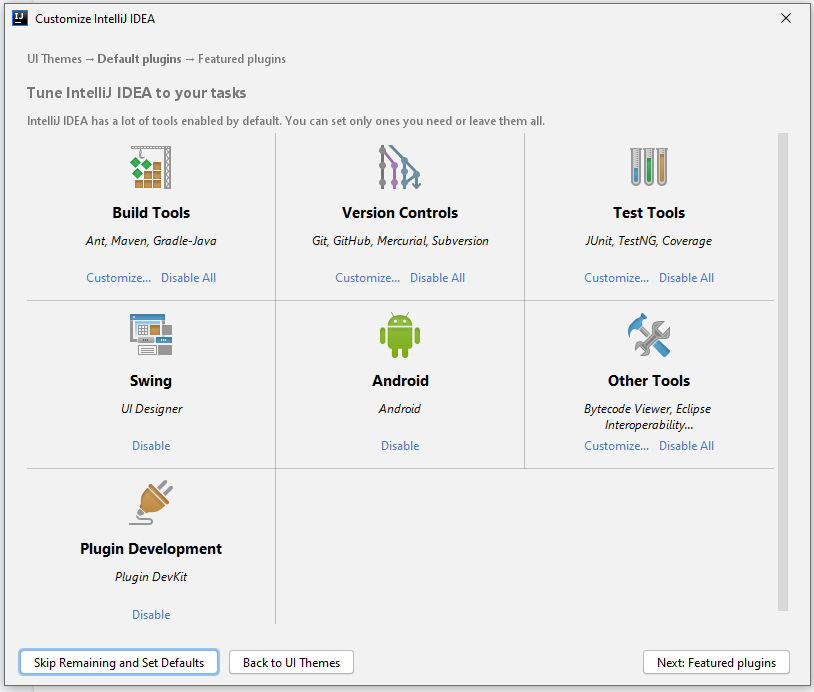
Если не знаете, что вам точно пригодится, — оставляйте всё как есть. А если, например, с Андроидом вам не работать — выключите соответствующий пункт.
Не волнуйтесь, если надобавляете лишнего или о чём-то забудете. Всё можно будет переиграть — в настройках среды.
После чего нажмите на кнопку Next: featured plugins и выберите другие нужные плагины (или оставляйте всё по умолчанию):
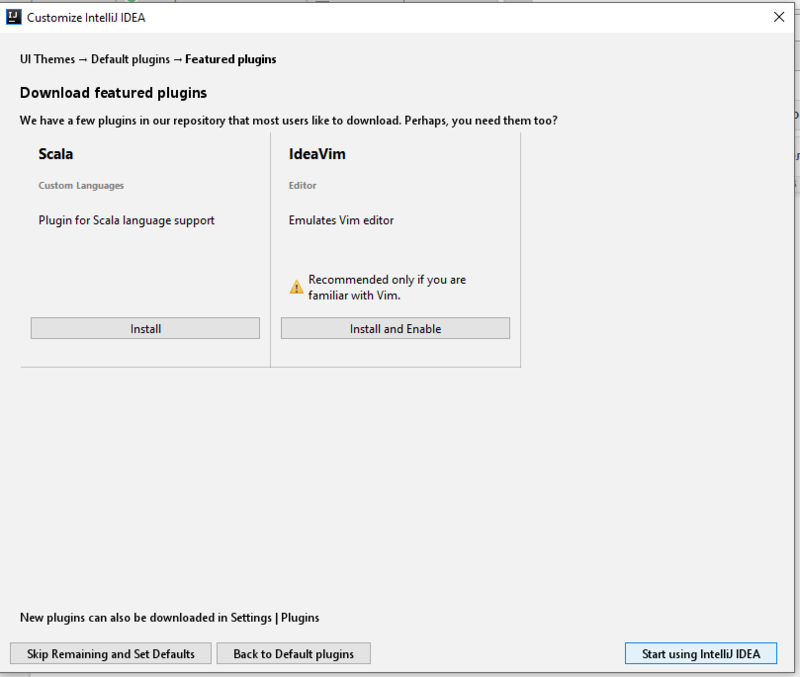
И наконец, нажимаем Start using Intellij IDEA.
Вас встретит начальный экран среды разработки (Welcome screen). Здесь можно создать новый проект, открыть или импортировать существующий, а также скачать проект из системы контроля версий:
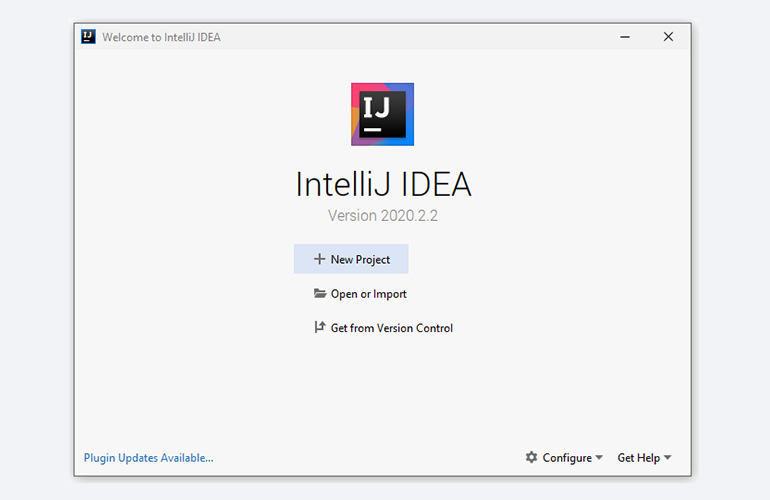
Если вы видите такой же экран — поздравляю, установка и настройка прошли успешно! Приятного обучения!
Установка среды разработки IntelliJ IDEA Community (macOS)
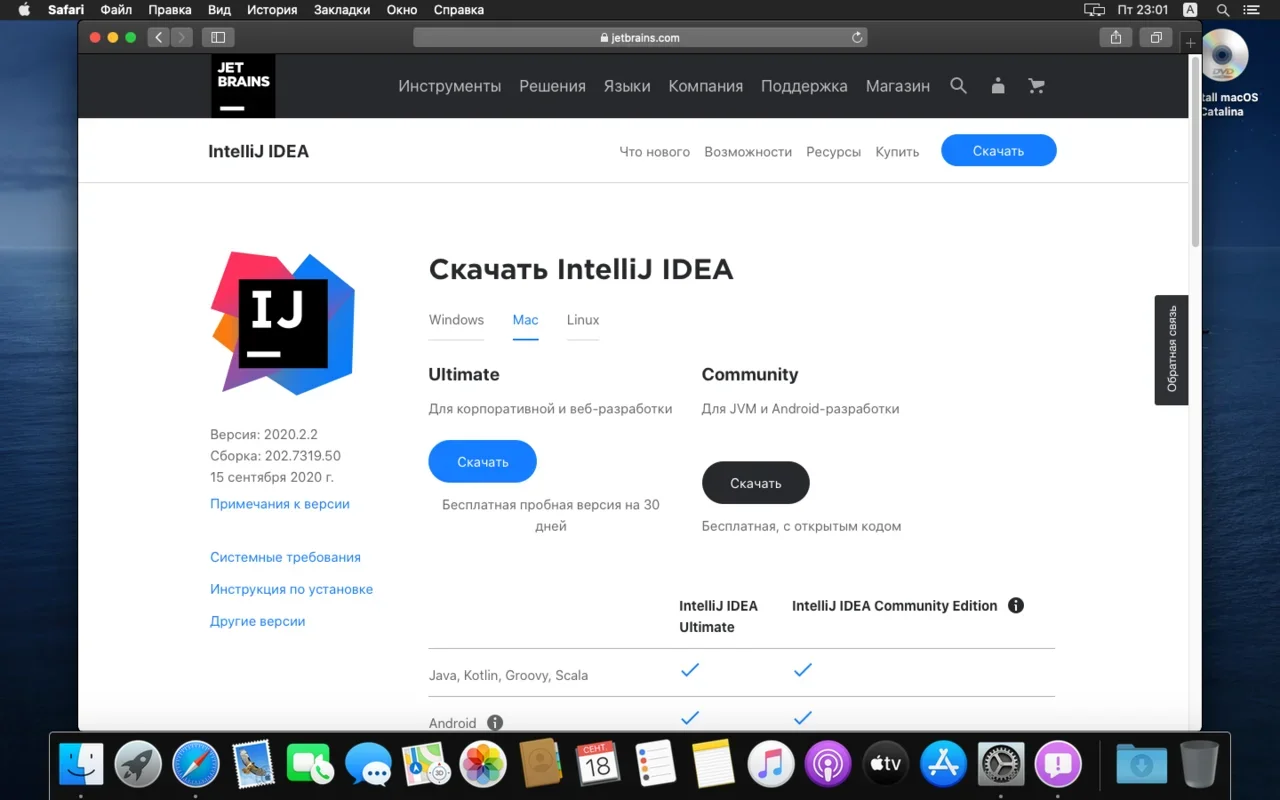
Здесь всё даже легче, чем в Windows. Для начала качаем версию для macOS отсюда (о различии между редакциями Community и Ultimate читайте выше — в пункте про установку на Windows):
Открываем скачанный файл .dmg:
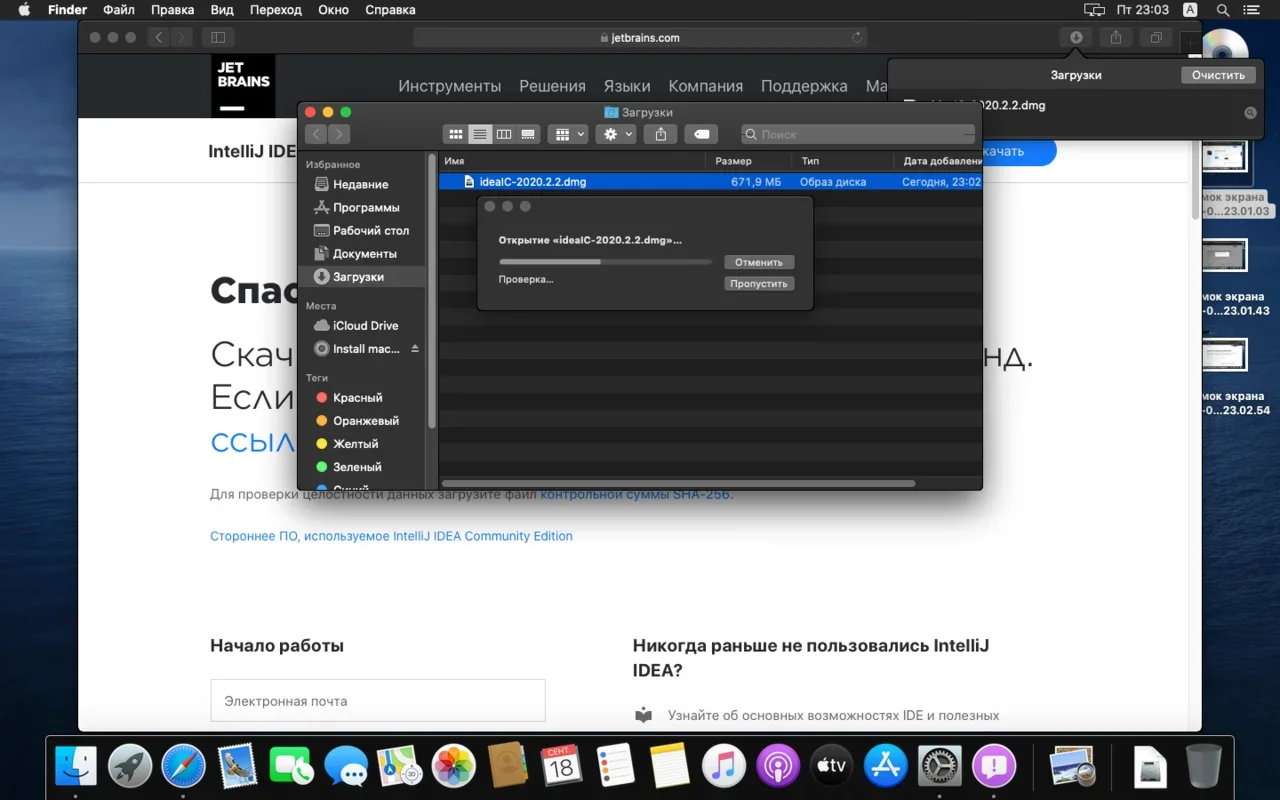
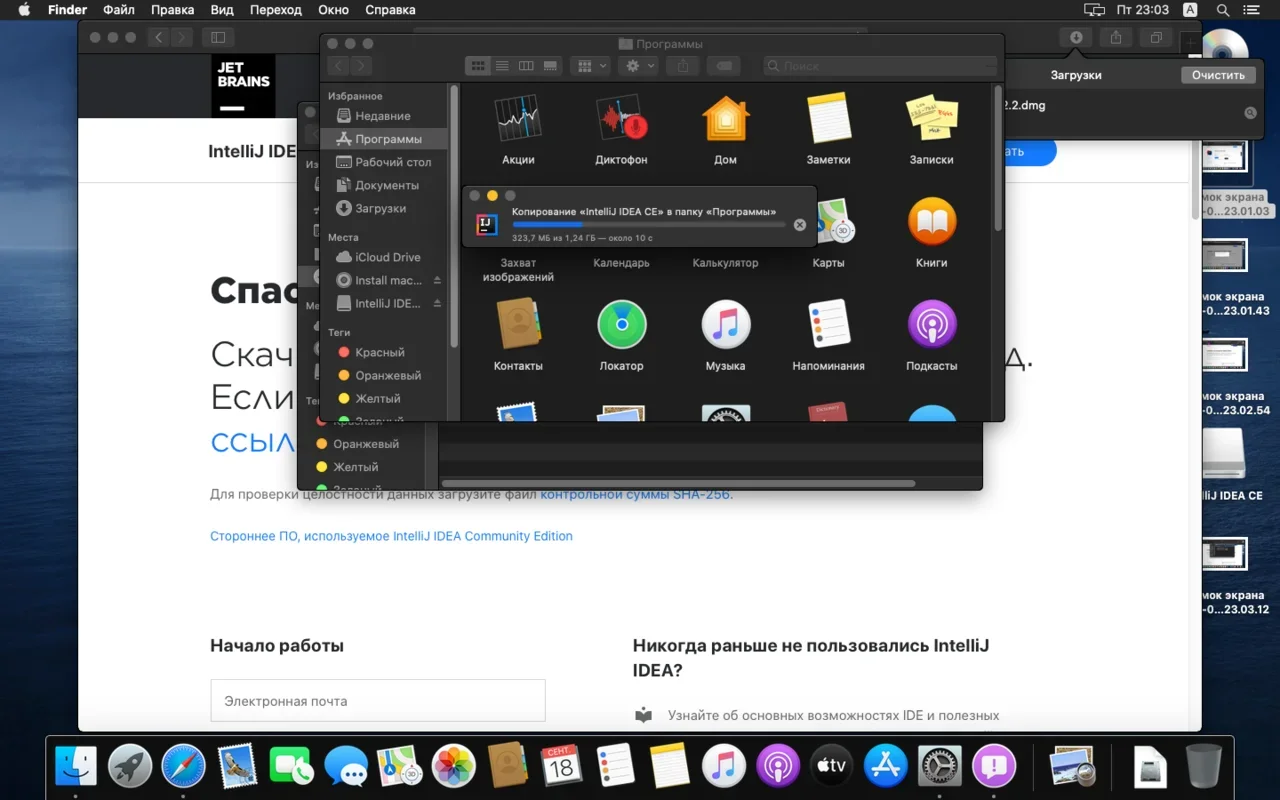
Копируем файл в « Программы»:
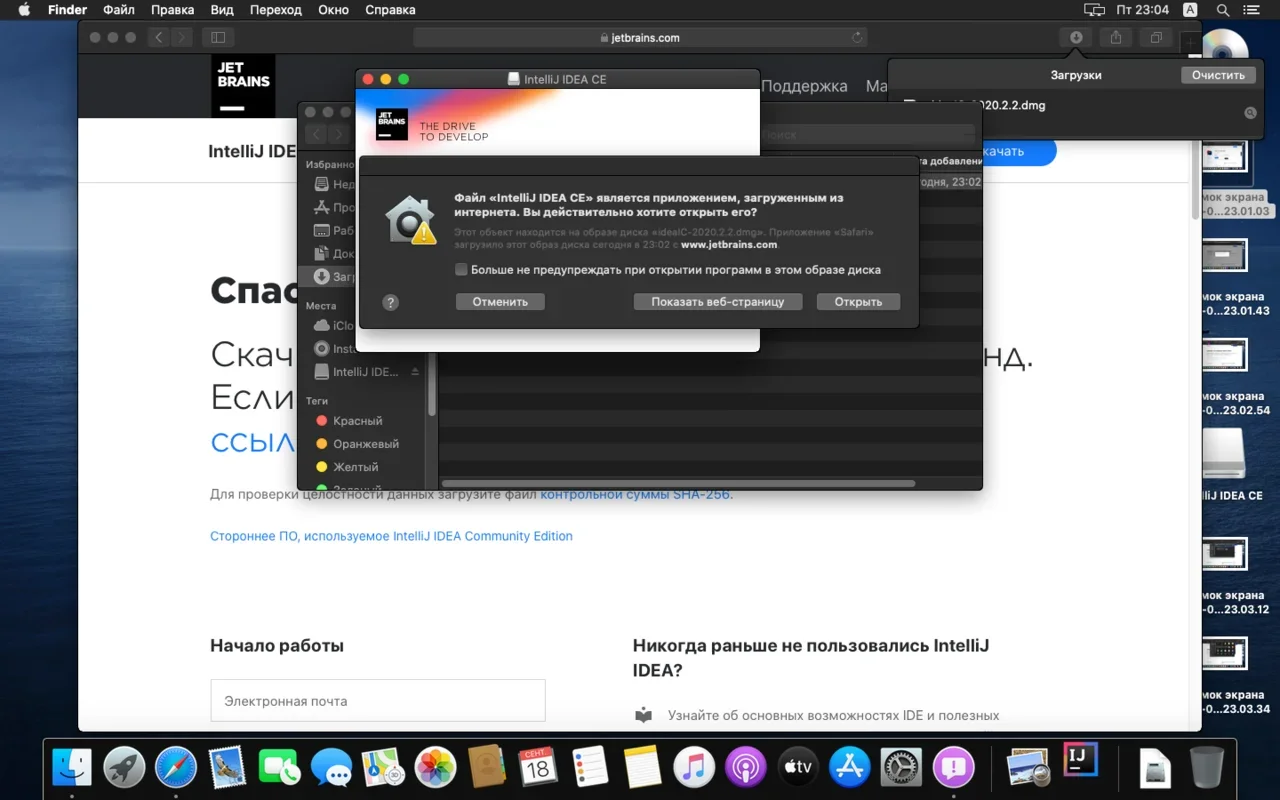
Читаем предупреждение ОС и жмём « Открыть»:
Принимаем пользовательское соглашение и жмём кнопку Continue (Продолжить):

Теперь приложением можно пользоваться. Приятного обучения!
Установка среды разработки IntelliJ IDEA Community (Ubuntu)
Для установки Intellij IDEA открываем Центр приложений Ubuntu:
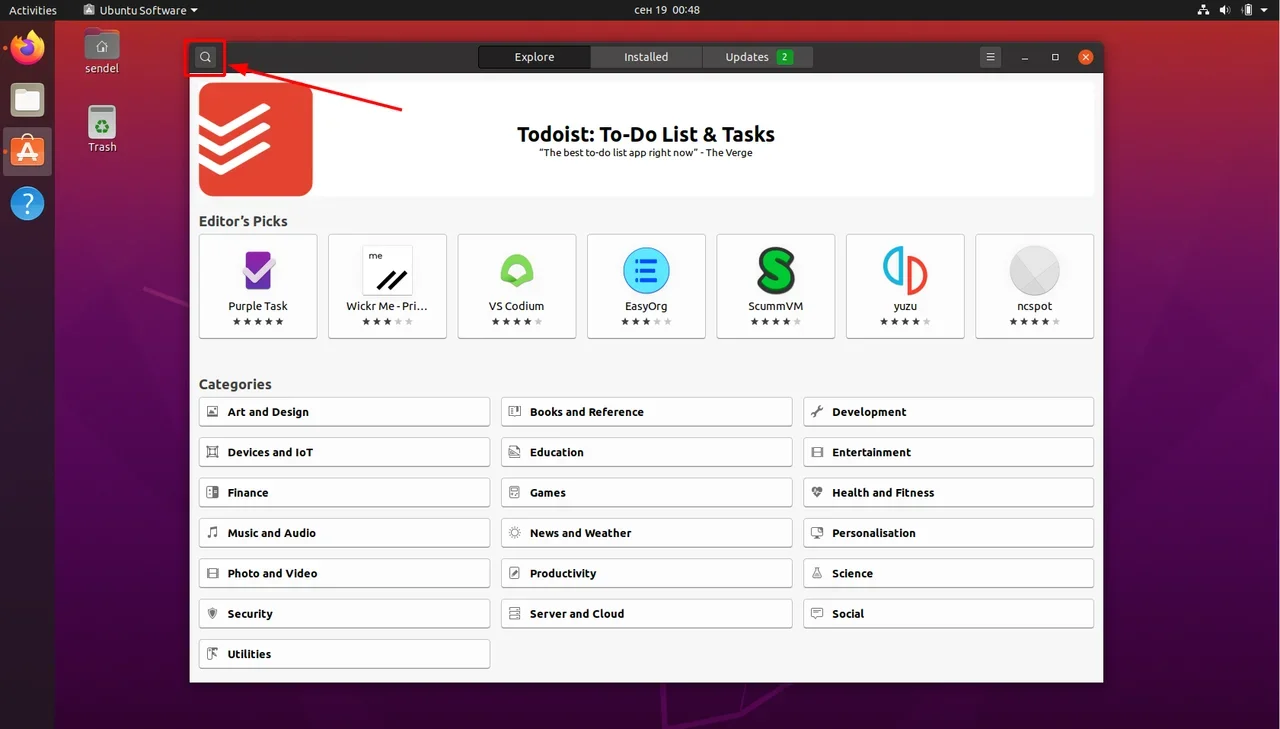
Вводим в поиск слово « Intellij» (без кавычек). Нам нужна IDEA Community (о различии между редакциями Community и Ultimate читайте выше — в пункте про установку на Windows):
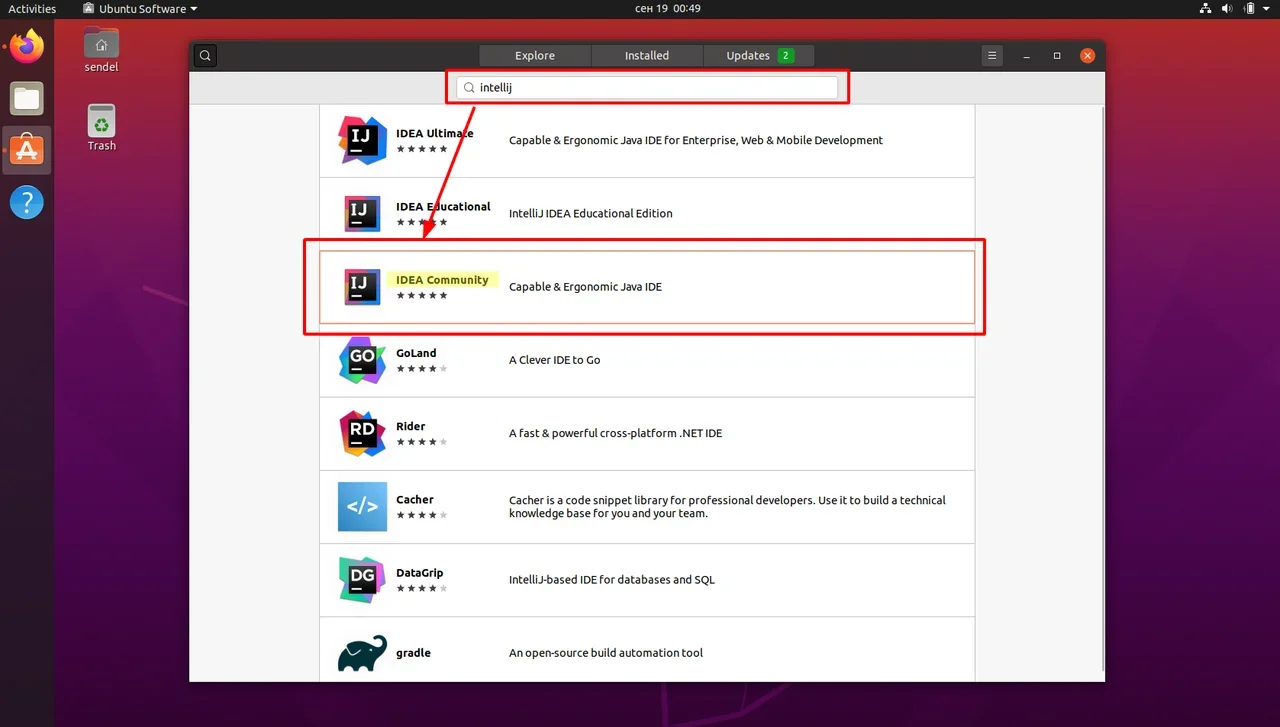
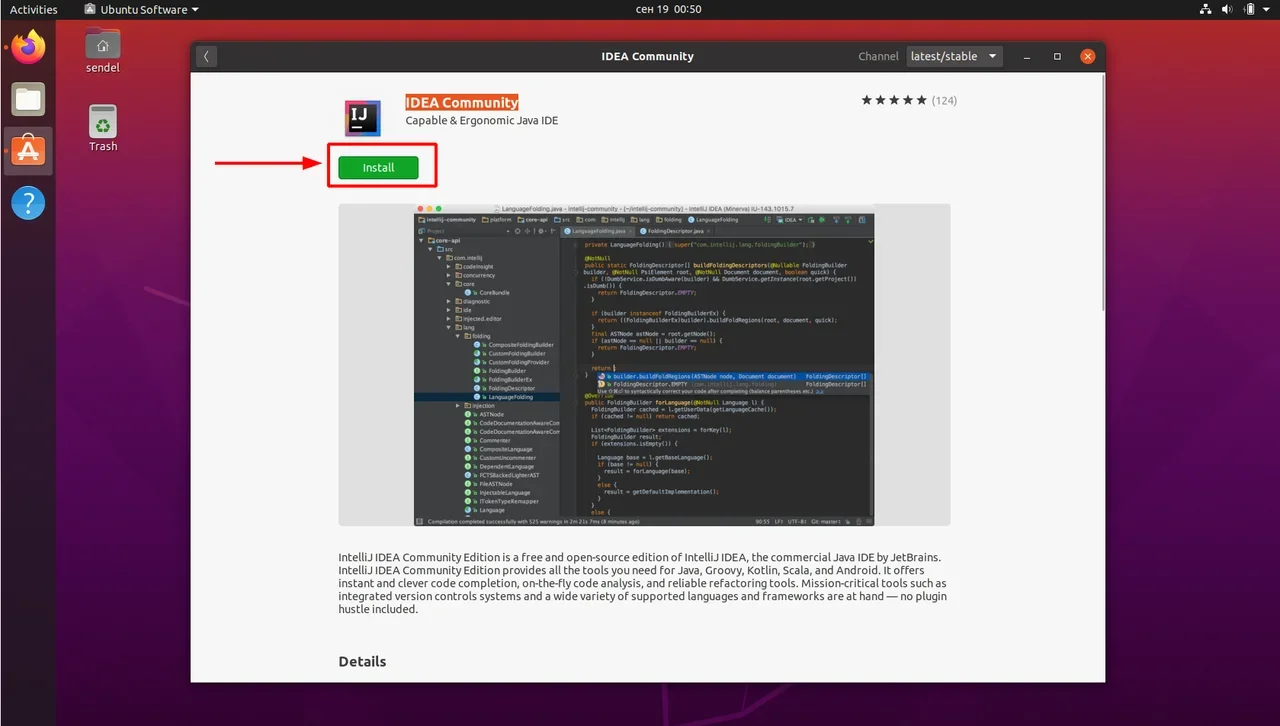
Выбираем версию и нажимаем кнопку Install (Установить):
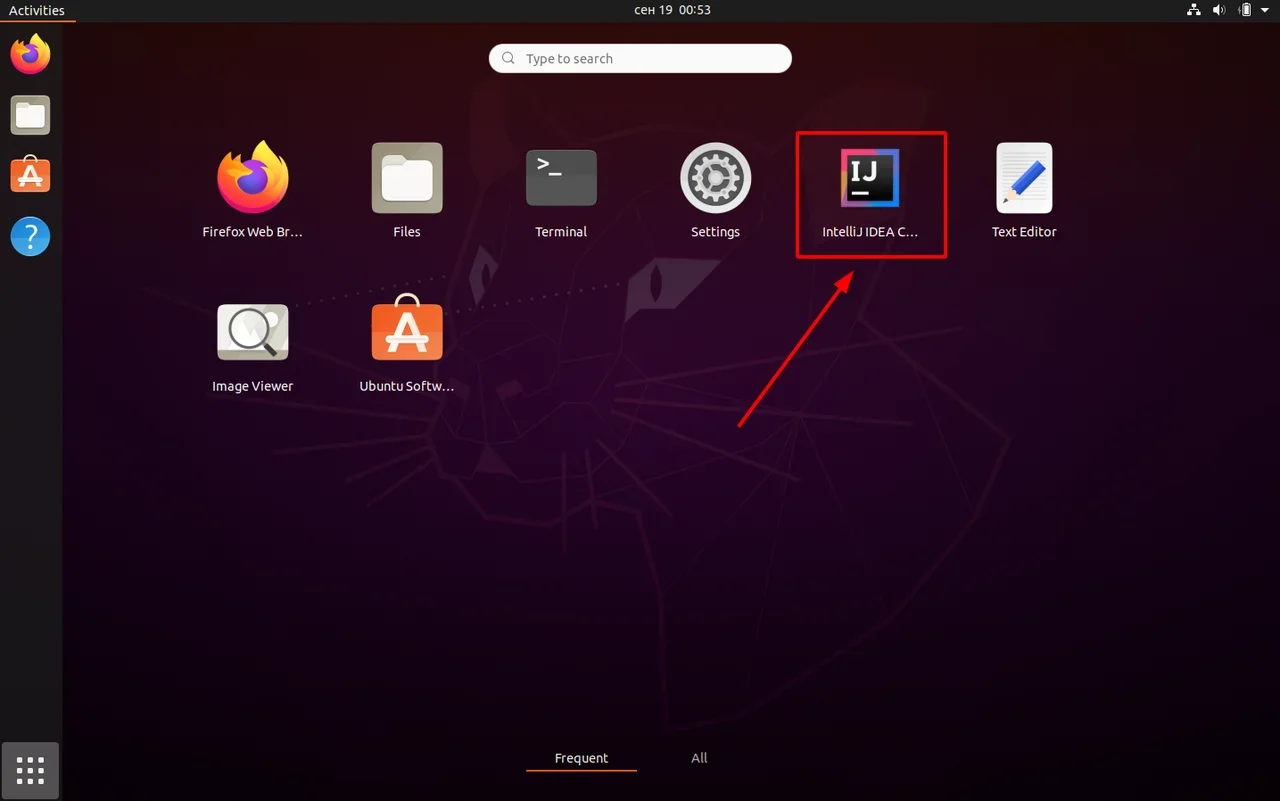
После установки видим IDEA в меню программ:
Запускаем, принимаем пользовательское соглашение и нажимаем кнопку Continue (Продолжить):
Источник


