- Configure keyboard shortcuts
- Add a keyboard shortcut
- Add a mouse shortcut
- Add an abbreviation
- Reset action shortcuts to default
- Location of user-defined keymaps
- Conflicts with global OS shortcuts
- IntelliJ IDEA keyboard shortcuts
- Choose the right keymap
- Learn shortcuts as you work
- Use advanced features
- Code completion
- Basic completion
- Invoke basic completion
- Type-matching completion
- Invoke type-matching completion
- Statement completion
- Complete a method declaration
- Complete a code construct
- Wrap a method call argument
- Hippie completion
- Expand a string at caret to an existing word
- Postfix code completion
- Enable and configure postfix completion
- Transform a statement with a postfix
- Create custom postfix templates
- Completion of tags and attributes
- Complete tag names
- Import a taglib declaration
- Insert a tag declared in a taglib
- Configure code completion settings
- Exclude a class or package from completion
- Completion tips and tricks
- Narrow down the suggestions list
- Accept a suggestion
- Negate an expression
- Completion shortcuts
- View reference
- View code hierarchy
- Use machine-learning-assisted code completion
- Troubleshooting
Configure keyboard shortcuts
IntelliJ IDEA includes several predefined keymaps and lets you customize frequently used shortcuts.
To view the keymap configuration, open the Settings/Preferences dialog Ctrl+Alt+S and select Keymap .
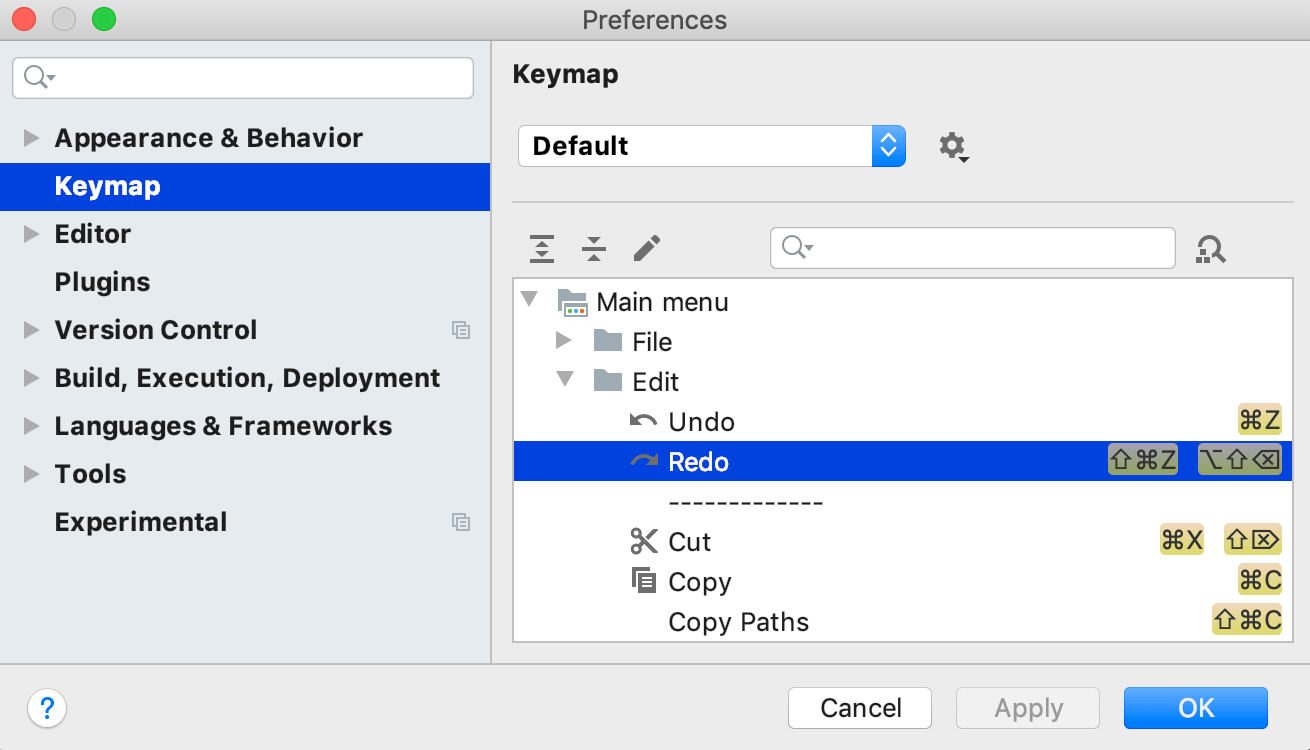
IntelliJ IDEA automatically suggests a predefined keymap based on your environment. Make sure that it matches the OS you are using or select the one that matches shortcuts from another IDE or editor you are used to (for example, Eclipse or NetBeans).
You cannot change predefined keymaps. When you modify any shortcut, IntelliJ IDEA creates a copy of the currently selected keymap, which you can configure. Click to duplicate the selected keymap, rename, remove, or restore it to default values.
A custom keymap is not a full copy of its parent keymap. It inherits unmodified shortcuts from the parent keymap and defines only those that were changed. For information about the keymap files, see Location of user-defined keymaps.
The keymap itself is a list of actions with corresponding keyboard and mouse shortcuts, and abbreviations. To find an action by name, type it in the search field. If you know the shortcut of an action, click and press the key combination in the Find Shortcut dialog.
When consulting this page and other pages in IntelliJ IDEA documentation, you can see keyboard shortcuts for the keymap that you use in the IDE — choose it using the selector at the top of a page.
To view the keymap reference as PDF, choose Help | Keymap Reference from the main menu.
Add a keyboard shortcut
On the Keymap page of the Settings/Preferences dialog Ctrl+Alt+S , right-click an action and select Add Keyboard Shortcut .

In the Keyboard Shortcut dialog, press the necessary key combination.
If you want to use Enter , Escape , or Tab , click and select the necessary key or combination. Pressing them in the Keyboard Shortcut dialog will result in the actual action, such as closing the dialog.
If necessary, select the Second stroke checkbox to define a complex shortcut with two sequential key combinations.
Click OK to save the shortcut.
The key combination that you press is displayed in the Keyboard Shortcut dialog, as well as a warning if it conflicts with existing shortcuts.
Add a mouse shortcut
On the Keymap page of the Settings/Preferences dialog Ctrl+Alt+S , right-click an action and select Add Mouse Shortcut .
In the Mouse Shortcut dialog, move the mouse pointer to the central area and click or scroll as necessary.
Click OK to save the shortcut.
The performed mouse manipulations are displayed in the Mouse Shortcut dialog, as well as a warning if it conflicts with existing shortcuts.
Add an abbreviation
An abbreviation can be used to quickly find an action without a shortcut. For example, you can press Ctrl+Shift+A and type the name of the Jump to Colors and Fonts action to quickly modify the color and font settings of the element under the current caret position. If you assign an abbreviation for this action (like JCF ), you can then type it instead of the full action name.
On the Keymap page of the Settings/Preferences dialog Ctrl+Alt+S , right-click an action and select Add Abbreviation .
In the Abbreviation dialog, type the desired abbreviation and click OK .
Reset action shortcuts to default
If you changed, added, or removed a shortcut for an action, you can reset it to the initial configuration.
On the Keymap page of the Settings/Preferences dialog Ctrl+Alt+S , right-click an action and select Reset Shortcuts .
Location of user-defined keymaps
All user-defined keymaps are stored in separate configuration files under the keymaps subdirectory in the IntelliJ IDEA configuration directory:
\keymaps Example C:\Users\JohnS\AppData\Roaming\JetBrains\IntelliJIdea2021.2\keymaps
By default, this directory contains only the default keymaps. When you modify one of them, IntelliJ IDEA actually creates a child keymap file that contains only the differences relative to the parent keymap. For example, if you modified the default Windows keymap, your custom keymap will be its child. The file will contain only the shortcuts that you added or modified, while all other shortcuts of your custom keymap will be the same as the default Windows keymap.
You can share your custom keymaps with team members or between your IDE instances. Copy the corresponding keymap file and put it in the keymaps directory on another IntelliJ IDEA installation. Then select the copied keymap on the Keymap settings page.
Conflicts with global OS shortcuts
Predefined keymaps do not cover every possible platform, version, and configuration. Some shortcuts can conflict with global system actions and shortcuts for third-party software. To fix these conflicts, you can reassign or disable the conflicting shortcut.
IntelliJ IDEA detects conflicts with system shortcuts and notifies you with a popup message:
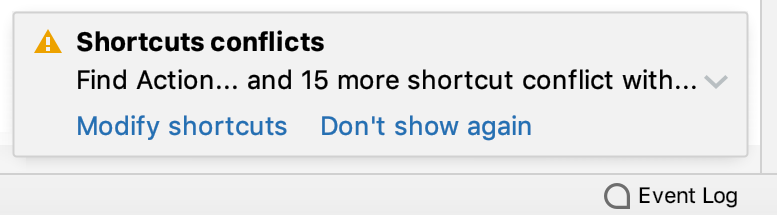
Click Modify shortcuts to open the Keymap settings dialog where you can make the necessary adjustments:
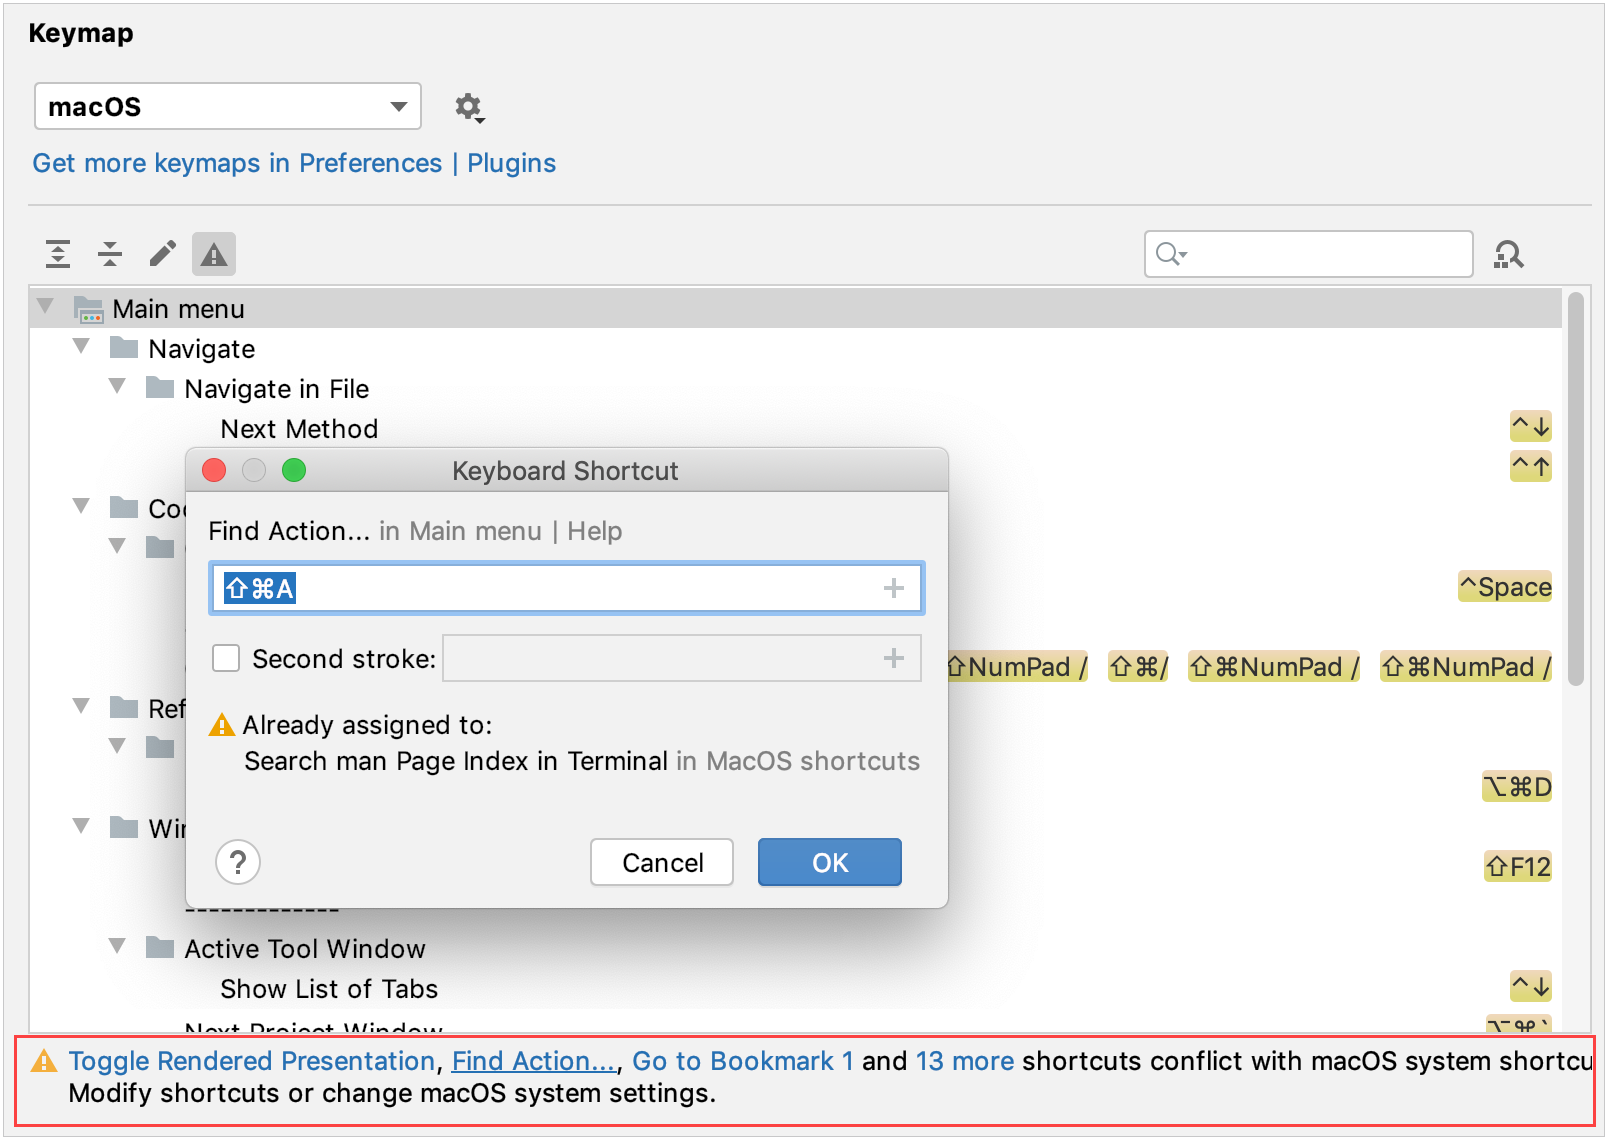
Here are a few examples of possible system shortcut conflicts with the default keymap in IntelliJ IDEA. Make sure that function keys are enabled on your system.
Источник
IntelliJ IDEA keyboard shortcuts
IntelliJ IDEA has keyboard shortcuts for most of its commands related to editing, navigation, refactoring, debugging, and other tasks. Memorizing these hotkeys can help you stay more productive by keeping your hands on the keyboard.
If your keyboard does not have an English layout, IntelliJ IDEA may not detect all of the shortcuts correctly.
The following table lists some of the most useful shortcuts to learn:
| Shortcut | Action |
|---|---|
| Double Shift | |
| Alt+1 | Focus the Project tool window |
| Escape | Focus the editor |
If you are using one of the predefined keymaps for your OS, you can print the default keymap reference card and keep it on your desk to consult it if necessary. This cheat sheet is also available under Help | Keymap Reference .
Choose the right keymap
To view the keymap configuration, open the Settings/Preferences dialog Ctrl+Alt+S and select Keymap .
Enable function keys and check for possible conflicts with global OS shortcuts.
Use a predefined keymap
IntelliJ IDEA automatically suggests a predefined keymap based on your environment. Make sure that it matches the OS you are using or select the one that matches shortcuts from another IDE or editor you are used to (for example, Eclipse or NetBeans).
When consulting this page and other pages in IntelliJ IDEA documentation, you can see keyboard shortcuts for the keymap that you use in the IDE — choose it using the selector at the top of a page.
Tune your keymap
You can modify a copy of any predefined keymap to assign your own shortcuts for commands that you use frequently.
Import custom keymap
If you have a customized keymap that you are used to, you can transfer it to your installation.
Besides the default set of keymaps, you can add more as plugins (such as, keymaps for GNOME and KDE): open the Settings/Preferences dialog Ctrl+Alt+S , select Plugins and search for keymap in the Marketplace.
If your keymap stopped working after an update, it is likely that the keymap is not available by default in the new version of IntelliJ IDEA. Find this keymap as a plugin and install it on the Plugins page as described in Manage plugins.
Learn shortcuts as you work
IntelliJ IDEA provides several possibilities to learn shortcuts:
Find Action is the most important command that enables you to search for commands and settings across all menus and tools.
Press Ctrl+Shift+A and start typing to get a list of suggested actions. Then select the necessary action and press Enter to execute it.

Key Promoter X is a plugin that shows a popup notification with the corresponding keyboard shortcut whenever a command is executed using the mouse. It also suggests creating a shortcut for commands that are executed frequently.
If you are using one of the predefined keymaps for your OS, you can print the default keymap reference card and keep it on your desk to consult it if necessary. This cheat sheet is also available under Help | Keymap Reference .
To print a non-default or customized keymap, use the Keymap exporter plugin.
If an action has a keyboard shortcut associated with it, the shortcut is displayed near the name of the action. To add a shortcut for an action that you use frequently (or if you want to change an existing shortcut), select it and press Alt+Enter .
Use advanced features
You can further improve your productivity with the following useful features:
If there is a group of actions that you often use, create a quick list to access them using a custom shortcut. For example, you can try using the following predefined quick lists:
Refactor this Ctrl+Alt+Shift+T
VCS Operations Alt+`
IntelliJ IDEA provides a lot of typing assistance features , such as automatically adding paired tags and quotes, and detecting CamelHump words.
When the focus is on a tool window with a tree, list, or table, start typing to see matching items.
Many actions in IntelliJ IDEA provide more results when you execute them multiple times. For example, when you invoke basic code completion with Ctrl+Space on a part of a field, parameter, or variable declaration, it suggests names depending on the item type within the current scope. If you invoke it again, it will include classes available through module dependencies. When invoked for the third time in a row, the list of suggestions will include the whole project.
Resize tool windows
You can adjust the size of tool windows without a mouse:
To resize a vertical tool window, use Ctrl+Alt+Shift+Left and Ctrl+Alt+Shift+Right
To resize a horizontal tool window, use Ctrl+Alt+Shift+Up and Ctrl+Alt+Shift+Down
Источник
Code completion
This section covers various techniques of context-aware code completion that allow you to speed up your coding process.
Basic completion
Basic code completion helps you complete the names of classes, methods, fields, and keywords within the visibility scope. When you invoke code completion, IntelliJ IDEA analyses the context and suggests the choices that are reachable from the current caret position (suggestions also include Live templates).
Code completion is available for custom file types. However, IntelliJ IDEA does not recognize the structure of such files, and suggests options regardless of whether they are appropriate in the current context.
Basic completion is also available for a non-English keyboard layout.
If basic code completion is applied to a part of a field, parameter, or variable declaration, IntelliJ IDEA suggests a list of possible names depending on the item type.
Invoking basic code completion for the second time shows inaccessible classes and members (these can be made public by applying an intention action).
When invoked for the third time in a row, IntelliJ IDEA will look for suggestions for classes and interface names in the entire project, regardless of dependencies. If the necessary class is not yet imported, it will be imported automatically.
Invoke basic completion
Start typing a name. By default, IntelliJ IDEA displays the code completion popup automatically as you type.
If automatic completion is disabled, press Ctrl+Space or choose Code | Code Completion | Basic from the main menu.

If necessary, press Ctrl+Space for the second time (or press Ctrl+Alt+Space ).
This shows inaccessible classes and members as well as static fields and methods.

When invoked for the third time, basic code completion expands the suggestion list to all classes throughout the project, regardless of the dependencies.
Completion in the Stream API chains is aware of type casts, so the list will not only contain items based on the existing call filter(String.class::isInstance) , but also automatically typecasted suggestions.
Type-matching completion
Smart type-matching code completion filters the suggestions list and shows only the types applicable to the current context.
Type-matching completion is useful in situations when it is possible to determine the appropriate type:
In the right part of assignment statements
In variable initializers
In return statements
In the list of arguments of a method call
After the new keyword in an object declaration
In chained expressions
Invoke type-matching completion
Start typing. By default, IntelliJ IDEA displays the code completion popup automatically as you type. If automatic completion is disabled, press Ctrl+Shift+Space or choose Code | Code Completion | Type-Matching from the main menu.

If necessary, press Ctrl+Shift+Space once again. This lets you complete:
Collections, lists and arrays. IntelliJ IDEA searches for symbols with the same component type and suggests converting them.
Static method calls or constant references. IntelliJ IDEA scans for static methods and fields, and suggests the ones suitable in the current context.

Completion for chained expressions is only available for Java and requires the project to be built with the IntelliJ IDEA compiler (not the Gradle compiler).
Statement completion
You can create syntactically correct code constructs by using statement completion. It inserts the necessary syntax elements (parentheses, braces, and semicolons) and gets you in a position where you can start typing the next statement.
Complete a method declaration
Start typing a method declaration and press Ctrl+Shift+Enter after the opening parenthesis.

Complete a code construct
Start typing a code construct and press Ctrl+Shift+Enter .
IntelliJ IDEA automatically completes the construct and adds the required punctuation. The caret is placed at the next editing position.

Wrap a method call argument
Type an expression. Then type a method call. When println gets the focus in the suggestion list, select it with Ctrl+Shift+Enter :

Hippie completion
Hippie completion is a completion engine that analyses your text in the visible scope and generates suggestions from the current context. It helps you complete any word from any of the currently opened files.
Expand a string at caret to an existing word
Type the initial string and do one of the following:
Press Alt+/ or choose Code | Code Completion | Cyclic Expand Word to search for matching words before the caret.
Press Alt+Shift+/ or choose Code | Code Completion | Cyclic Expand Word (Backward) to search for matching words after the caret and in other open files.
The first suggested value appears, and the prototype is highlighted in the source code.

Accept the suggestion, or hold the Alt key and keep pressing / until the desired word is found.
Postfix code completion
Postfix code completion helps you reduce backward caret jumps as you write code. You can transform an already-typed expression to a different one based on a postfix you type after the dot, the type of expression, and its context.
Enable and configure postfix completion
Go to Settings / Preferences | Editor | General | Postfix Completion and select the Enable postfix completion checkbox.
Select Tab , Space , or Enter to be used for expanding postfix templates.
Enable/disable a particular postfix template for the selected language.
Transform a statement with a postfix
Type an expression and then type a postfix after a dot, for example, .if:
The initial expression gets wrapped with an if statement:
You can disable certain postfix completion templates in the Editor | General | Postfix Completion page of the IDE settings Ctrl+Alt+S .
You can select Tab , Space , or Enter to expand postfix templates.
You can edit the predefined postfix templates, for example, to replace a long key with a shorter one, or to expand the list of applicable expression types.
Postfix completion options are shown as part of the basic completion suggestions list. To see a full list of postfix completions applicable in the current context, press Ctrl+J .
Create custom postfix templates
- Press Ctrl+Alt+S to open the IDE settings and select Editor | General | Postfix Completion .
Click the Add button ( ) on the toolbar.
In the popup menu that opens, choose the language that you need to create a postfix template for.
Specify Key that is a combination of symbols that will invoke the template.
Select which expression types the new template will be applicable to, and type the target expression in the following format: $EXPR$ , for example, $EXPR$ =!null .
To have IntelliJ IDEA automatically transform the topmost applicable expression when the template is invoked, select the Apply to the topmost expression checkbox.
Otherwise, if the checkbox is cleared, IntelliJ IDEA will prompt you to choose the expression when you invoke the template.
Enable Use static import if possible : select this checkbox to have IntelliJ IDEA add static import statements instead of inserting MyUtils.methodName() .
Postfix code completion is similar to live templates which allow you to create custom constructs to be used anywhere inside your code.
Completion of tags and attributes
IntelliJ IDEA automatically completes names and values of tags and attributes in many file types:
If Emmet support is enabled, Emmet templates are also completed automatically in the HTML and XML contexts.
Completion of tags and attribute names is based on the DTD or Schema the file is associated with. If there is no schema association, IntelliJ IDEA will use the file content (tag and attribute names and their values) to complete your input.
In XML/XSL and JSP/JSPX files, completion for taglibs and namespaces is available.
Complete tag names
Press and start typing the tag name. IntelliJ IDEA displays the list of tag names appropriate in the current context.

Use the Up and Down buttons to scroll through the list.
Press Enter to accept a selection from the list. If your file is associated with a schema or a DTD, IntelliJ IDEA automatically inserts the mandatory attributes according to it.
Import a taglib declaration
If you need to use tags declared in a tag library, you need to import this taglib before any custom tag from it can be used.
Start typing a taglib prefix and press Alt+Insert .
Select a taglib from the list and press Enter .

IntelliJ IDEA imports the selected taglib and adds the import statement automatically.
Insert a tag declared in a taglib
Start typing a tag and press Ctrl+Alt+Space .
Select a tag from the list. The uri of the taglib it belongs to is displayed in brackets. 
Select the desired taglib and press Enter . IntelliJ IDEA adds the declaration of the selected taglib: 
Configure code completion settings
To configure code completion options, go to the Editor | General | Code Completion page of the IDE settings Ctrl+Alt+S .
You can choose the following settings:
Select if you want to sort items in the suggestions list in the alphabetical order instead of sorting them by relevance.
You can change this behavior at any time by clicking in the suggestion list and toggling the Sort by Name option.
Select to automatically show a popup for each item in the suggestions list with the documentation for the class, method, or field currently highlighted in the lookup list.
In the field to the right, specify the delay (in milliseconds), after which the popup should appear.
Select if you want to utilize machine learning models to rank most suitable items higher in the suggestions list.
This feature is experimental, so ranking may not change noticeably.
Only type-based completion
By default, IntelliJ IDEA suggests completion for symbols regardless of their types. With this approach, in complicated cases the list shows multiple completion variants.
To make completion more precise, select this option. The completion list will strongly depend on the IntelliJ IDEA inference. As a result, the list may remain empty in case of poor inference.
By default, IntelliJ IDEA suggests completion for symbols with the optional chaining operator (?). Clear this checkbox to suppress this behavior.
Expand method bodies in completion for overrides
By default, when you want to override a method from the parent class or interface and select this method from the list of completion suggestions, IntelliJ IDEA automatically adds parameters, generates a super() call, and adds the type information, if possible.
Clear this checkbox to suppress automatic generation of method bodies for overrides during completion.
Suggest variable and parameter names : By default, the checkbox is cleared. When it is selected, IntelliJ IDEA suggests names for new variables and parameters during their declaration. These suggestions are based on the names of classes, types, and interfaces that are defined in your project, in the libraries you are using, and in standard APIs.
Suggest names for class fields
The option is turned off by default.
Add type annotations for suggested parameter names : Select this checkbox to supply each completion suggestion with information on its type.
The checkbox is available only when the Suggest variable and parameter names checkbox is selected.
Select this checkbox to have IntelliJ IDEA automatically show a popup with all available method signatures when an opening bracket is typed in the editor, or a method is selected from the suggestions list.
In the text field to the right, specify the delay (in milliseconds) after when the popup window should appear.
If this checkbox is not selected, use Ctrl+P to show parameter info.
Creates aliases for tables in the JOIN statement.

Switches operands in the ON clause. When the checkbox is cleared, the FROM table comes the first in the JOIN condition.

Creates an alias for a table name.

Suggests an alias for a table name when you use code completion ( Ctrl+Space ).

You can add a table name and the alias that you want to use for this table. To add the table-alias pair, click the Add alias button ( ).
Exclude a class or package from completion
- Press Ctrl+Alt+S to open the IDE settings and select Editor | General | Auto Import .
Under Exclude from import and completion , add the names of classes or packages that you want to exclude from completion. The classes you specify here will not appear in the suggestions list.
You can also select a completion suggestion when it appears in the editor: press Alt+Enter and select Exclude from there: 
Completion tips and tricks
Narrow down the suggestions list
You can narrow down the suggestions list by typing any part of a word (even characters from somewhere in the middle) or invoking code completion after a dot separator. IntelliJ IDEA will show suggestions that include the characters you’ve entered in any positions.
This makes the use of wildcards unnecessary:

In case of CamelCase or snake_case names, type the initial letters only. IntelliJ IDEA automatically recognizes and matches the initial letters.
Accept a suggestion
You can accept a suggestion from the list in one of the following ways:
Press Enter or double-click a list item to insert it to the left of the caret.
Press Tab to replace the characters to the right from the caret.
Use Ctrl+Shift+Enter to make the current code construct syntactically correct (balance parentheses, add missing braces and semicolons, and so on).
You can also use specific keys to insert the selected completion suggestion: go to the Editor | General | Code Completion page of the IDE settings Ctrl+Alt+S and select the Insert selected suggestion by pressing space, dot, or other context-dependent keys option. These keys depend on the language, your context, and so on. For Java, such keys include Space , Tab , [ and ] , ( and ) , and some more.
While this setting helps you save time, turning it on may result in items being inserted accidentally.
Negate an expression
You can negate an expression in Java by pressing ! after you have selected it from the suggestions list. As a result, the expression will be negated:

Negating an expression works this way if you have the Insert selected suggestion by pressing space, dot, or other context-dependent keys option enabled in the Code Completion settings page , or invoke code completion explicitly, or change a selection in the suggestions list explicitly.
Completion shortcuts
You can use the following live templates shortcuts for one of the most frequently used statements:
sout : prints System.out.printIn()
soutm : adds the current class and method names
soutp : adds method parameter names and values
soutv : adds the last variable value
soutc : inserts the System.out::printIn method reference where a consumer function is expected
View reference
You can use the Definitions by pressing Ctrl+Shift+I when you select an entry in the suggestions list:

You can use the Quick Information View by pressing Ctrl+Q when you select an entry in the suggestions list:

View code hierarchy
You can view code hierarchy when you’ve selected an entry from the suggestions list:
Ctrl+H — view type hierarchy
Ctrl+Alt+H — view call hierarchy.
Ctrl+Shift+H — view method hierarchy.
Use machine-learning-assisted code completion
You can utilize machine learning models to rank most suitable items higher in the suggestions list.
The suggestions list will change to look like the following with the arrows showing you how it was re-ordered based on ML, and the most suitable suggestion on the top marked with the star: 
To do so, press Ctrl+Alt+S to open the IDE settings and select Editor | General | Code Completion , and then enable the Sort completion suggestions based on machine learning option under Machine Learning-Assisted Completion .
This feature is experimental, so ranking might not change noticeably.
Watch this video to learn more about how completion works in IntelliJ IDEA:
Troubleshooting
If code completion doesn’t work, this may be due to one of the following reasons:
The Power Save Mode is on ( File | Power Save Mode ). Turning it on minimizes power consumption of your laptop by eliminating the background operations, including error highlighting, on-the-fly inspections, and code completion.
JDK is not configured for your project.
Your file doesn’t reside in a content root and is not bound to a build path, so it doesn’t get the required class definitions and resources needed for code completion.
A file containing classes and methods that you want to appear in completion suggestions list is marked as a plain text file.
External libraries that contain methods that you want to appear in the completion suggestions list are not added as dependencies or global libraries.
Источник


