- WIndows 10: WiFi connected but No Internet access
- WiFi connected but no internet Access Windows 10 (5 Working fixes)
- Windows 10 WiFi No internet access
- Run Network And internet troubleshooter
- Reset network configuration
- Change your DNS server address
- Obtain IP address and DNS server address automatically
- Automatically detect proxy settings
- Update or Reinstall Wireless drivers
- WiFi Connected But No Internet on Windows 10 [Solved]
- If You Can’t browse the web on any devices
- Restart your modem, router and your devices
- Restart your PC
- Can browse the web on other devices but not on the laptop
- Delete Temp Files
- Reset DNS
- Run Commands in Command Prompt
- Update Device Drivers
- Update or uninstall McAfee
WIndows 10: WiFi connected but No Internet access
I have this problem quite frequently. And when I searched Google regarding this issue, I found a lot of discussions and solutions but none seemed to give me a permanent fix.
Issue:
Wifi is connected to a network but no internet access. This happens quite frequently. Out of 10 cases, 6 cases is connected but no internet access. During this issue, my other devices connect to the wifi network and internet just fine.
System config:
OS Win10
Wifi adapter Qualcomm Atheros AR9285
Wifi modem TPLink MR 3220
Wireless Security WPA/WPA2 — Personal
Steps taken:
I have done all steps given in this link http://windows.microsoft.com/en-in/windows-10/fix-network-connection-issues .
I have done all the network troubleshoots that comes with Windows 10.
Initially when the issue started occurring very often when I upgraded to Windows 10. I changed the settings in Power management(turn off wifi) and it helped the situation to get better but not completely.
I have installed the latest WiFi driver(10.0.0.329) for the adapter compatible with Win10.
Bonjour service has been stopped.
Windows firewall has been stopped. Don’t have any antivirus or other firewalls installed.
The above steps did make the number of time the issue occur to come down, but the issue still persists.
On further troubleshooting I noticed, the issue only persists when ,in Network and Sharing center, the network fails to identify itself. So changed the settings for the network to be a private network, and that helped a lot.
So whenever, my network gets identified as a Private network, my internet works just fine. But Win10 takes a lot of time identify the network and in 40% of the time just labels it Unidentified and Public and my internet doesn’t work.
I also identified that sometimes when the network is private, suddenly the network switches itself back to a public network and then no internet access.
I have tried adding the ip of my modem as the default Gateway ip in the Wifi settings.
So, to summarise I need to know why Windows 10 doesnt recognise my network and if it does why does it switch back to Public or unindentified network.
Why does internet stops working when connected to a network classified as Public or Unidentified network.
Solve The Problem in a Network Connections :
The Following 3 Commands run it in the CMD run as administrator To Solve Your Problem .
1- ipconfig /flushdns
2- ipconfig /release
3- ipconfig /renew
4- netsh interface ipv4 uninstall . then Restart the computer
5- netsh interface ipv4 install . then Restart your Computer
6- Open the registry then check this key «IPAutoconfigurationEnabled» if exists delete it . in this path
HKLM—System—CurrenControlSet—Services—Tcpip—Parameters—IPAutoconfigurationEnabled make the value 1 Or Delete this Key
7-netsh winsock reset
WiFi connected but no internet Access Windows 10 (5 Working fixes)
Did you notice Your PC is connected to the internet but there is no internet connection, have no access to the Internet or web pages? The same problem occurs with laptop users WiFi is Connected but there is No Internet Access or Limited Access issue. There is a various reason such as incorrect network configuration, problem with the network device, outdated or incompatible network adapter driver, temporary glitch etc that cause the problem
“Limited Access”
“No Internet Access”
“Connected with Limited Access”
“This connection has limited or no connectivity. No Internet access.”
If you’re one of the “victims” of the WiFi Connected but no Internet access problem, here this post we have collected some effective solutions that fix the issue.
Windows 10 WiFi No internet access
WiFi connected, but don’t have internet access usually means either you didn’t get an IP address from the wifi access point (router). And this mostly because your machine is not configured correctly to receive an IP address from the DHCP server. apply solutions below to get rid of this problem.
First of all, if you notice all of the device (computers, mobiles, tablets etc.) connect to your WiFi just fine but you still can’t access the Internet on any one of them, then there is a chance your router causing the issue. And restarting the Device mostly resolve the problem.
- To do this Turnoff the Router, Modem (if connected), and Restart your PC. Now again Turn on the router and check.
- Also, Check the WAN Internet cable and see if it’s damaged or simply not connected to the router.
Run Network And internet troubleshooter
Windows 10 has a build in network troubleshooter, Running the tool automatically detects the issue and try to resolve the problem itself.
- type Network troubleshooter In the search box on the taskbar, and then select Identify and repair network problems from the list of results.
- Follow the steps in the troubleshooter, Restart windows and see that fixes the problem.

Reset network configuration
If Running network troubleshooter doesn’t fix your connection problem, Then perform command below to reset winsock catalog back to the default setting or clean state, flush DNS cache, release current IP and Request DHCP server for new IP address etc.
Open Command prompt as administrator and perform below commands one by one. Then after restart windows and check this helps.
- netsh winsockreset
- netsh int ip reset
- ipconfig /release
- ipconfig /renew
- ipconfig /flushdns

Change your DNS server address
Another possible cause for this problem is the unstable network connection or the misconfiguration of DNS servers settings. let’s change the DNS server address (use Google DNS or open DNS) to see if it fix the problem.
- Press Windows + R, type ncpa.cpl and ok.
- This will open Network configuration window.
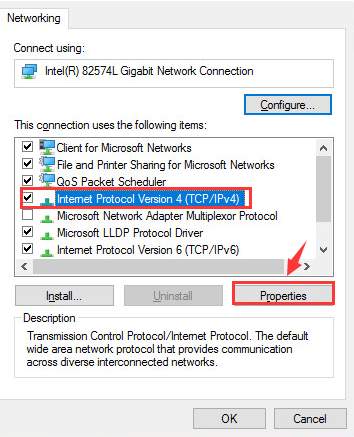
- Right click on Active network adapter (WiFi adapter) and click Properties.
- Click Internet Protocol Version 4 (TCP/IPv4) and then click Properties.
- Select radio button Use the following DNS server addresses,
- for Preferred DNS server, enter 8.8.8.8;
- for Alternate DNS server, enter 8.8.4.4.
- Then click OK.
- Check Internet connection started working.

Obtain IP address and DNS server address automatically
Due to some reason If you have manually configured IP address, DNS server address on your PC. Change the same to Obtain IP address and DNS server address automatically is another effective solution, that works for most of Users.
- First, open network configuration window using ncpa.cpl command.
- Right, click on WiFi adapter (Ethernet) and select properties.
- Here double click on Internet Protocol Version 4 (TCP/IPv4)
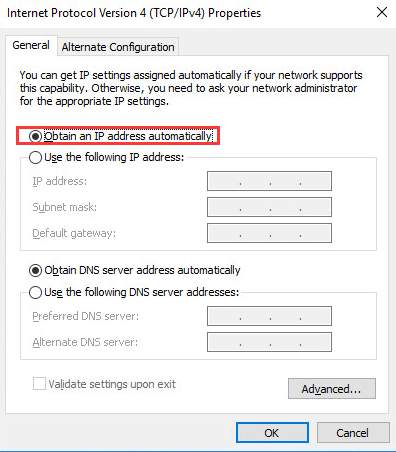
- Under the General tab, select radio button Obtain an IP address automatically and Obtain DNS server address automatically.
- Reboot your PC and check the problem Fixed or not.

Note: if you notice your PC is already set to Obtain IP address and DNS server address automatically That cause manually add IP and DNS address and check this may do the magic for you. Check how to Setup static IP address on Windows 10.

Automatically detect proxy settings
If you are using proxy or VPN connection we recommend to Disable them. And fallow steps below, set Windows to Automatically detect proxy settings
- Press Windows + R, type inetcpl.cpl and ok to open Internet properties.
- Under connection, tab click on LAN settings.
- Here make sure that “Automatically detect settings” is checked and “Use a proxy server for LAN” is unchecked.
- Click OK and then click apply.
- Finally, Reboot your PC to save changes and check the problem resolved.

Update or Reinstall Wireless drivers
Again An outdated or incompatible network adapter driver can cause connection problems. If you recently upgraded to Windows 10, it’s possible that the network driver was incompatible with current windows version as its designed for a previous version of Windows. And installing the latest Wireless (Network adapter) driver fix the problem.
- In the search box on the taskbar, type devmgmt.msc and ok to open Device manager.
- This will display all installed driver list.
- look for network adapters, Right click on installed Wireless driver select update driver.
- On next screen select Search automatically for updated driver software.
- This will automatically check for the driver update.
- If found any windows automatically download and install them for you.
- After that restart windows and check Internet connection started working.

- If update driver didn’t fix the problem, open device manager,
- Right click on network adapter driver and select Uninstall device.
- select yes, if asked for confirmation and restart windows to completely uninstall the driver.
- Again open device manager, click Action and then select ‘Scan for hardware changes.
- This will automatically install the basic driver for you to start the internet connection.
Note: If Windows can’t find a new driver for your network adapter, visit the PC/laptop manufacturer’s website and download the latest network adapter driver from there. As your PC can’t connect to the Internet, you’ll need to download a driver on a different PC and save it to a USB flash drive, so you can manually install the driver on your PC.
Did these solutions help to fix WiFi and internet connection problems, such as WiFi connected but no Internet Access, Limited Access, the connection has limited or no connectivity etc. let us know which option worked for you, still have query feel free to discuss on comments below. Also, read
WiFi Connected But No Internet on Windows 10 [Solved]
Last Updated: 4 years ago

If you’re having WiFi or wireless connection just fine, but the Internet isn’t working or you’re only with limited connectivity, you’re not alone. Many Windows 10 users are reporting this problem as well. But no worries, it’s possible to fix.
Here are some effective solutions for you to try. You don’t need to try them all, just work your way down until you find the one that works.
If You Can’t browse the web on any devices
If all your devices, laptops, mobile phones, tablets, are connected to the WiFi just fine, but have no Internet access, the problem might be your network hardware or the network itself. Try the solutions below to fix it:
Restart your modem, router and your devices
1) Remove the power cord and the batteries (if there are any) from your modem and router.
2) Wait for at least 30 seconds after the light goes out. Then plug the modem in.
3) Wait for another 60 seconds, then plug your router in.
Restart your PC
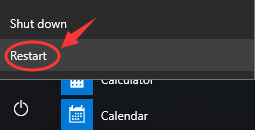
1) On your keyboard, click the Start button and Restart.
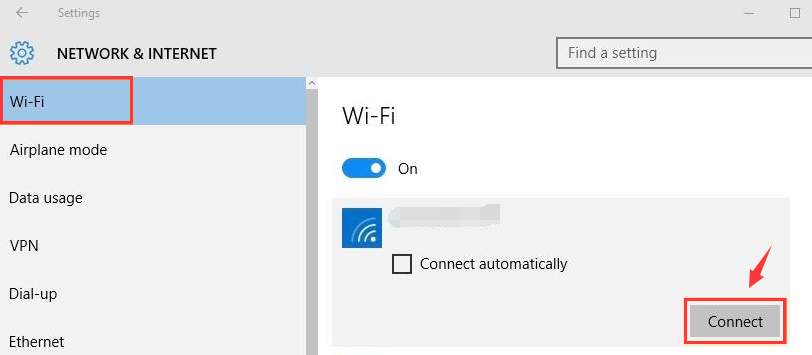
2) After your PC restarts, follow the path: click the Start button > Settings > Network & Internet > WiFi (on the left side of the pane). Select the network connection you have and click Connect.
If the problem persists, try contact your network provider or the manufacturer of your router.
Can browse the web on other devices but not on the laptop
Delete Temp Files
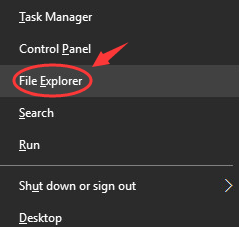
1) On your keyboard, press the Windows key and X at the same time, then click File Explorer.
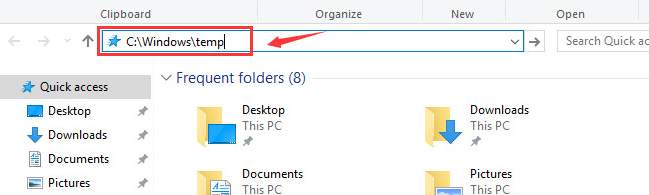
2) In the address box, type in C:\Windows\temp and press Enter.
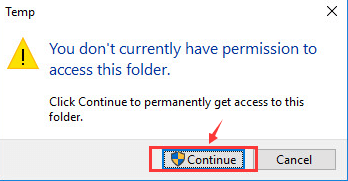
3) If you’re prompted about administrator permission, click Continue.
4) You’ll see many temp files here in this folder. Press Ctrl + A at the same time to select all the files, then right-click and click Delete.

5) Now, re-connect to the network. See if the problem persists.
Reset DNS
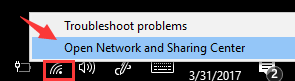
1) Right-click the network connection icon at the bottom right corner and click Open Network and Sharing Center.
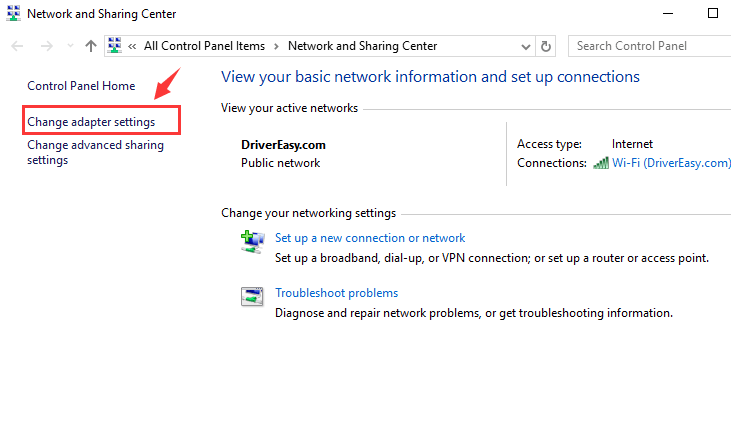
2) Click Change adapter settings.
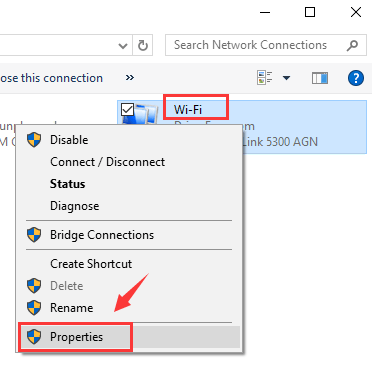
3) Right-click your WiFi adapter and click Properties.
4) Select Internet Protocol Version 4 (TCP/IPv4) and click Properties.
5) Click Obtain an IP address automatically.
6) If you still can’t connect to the internet, select Use the following DNS server addresses and fill in the address like the screen shot below:
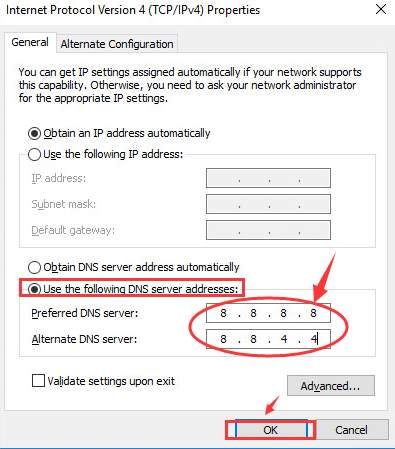
Click OK.
Run Commands in Command Prompt
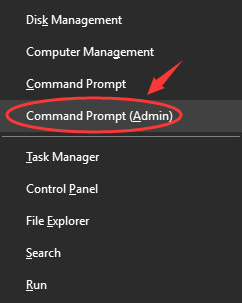
When prompted about the administrator permission, click Yes.
2) In the command prompt window, type in the following commands. Press Enter after each command.
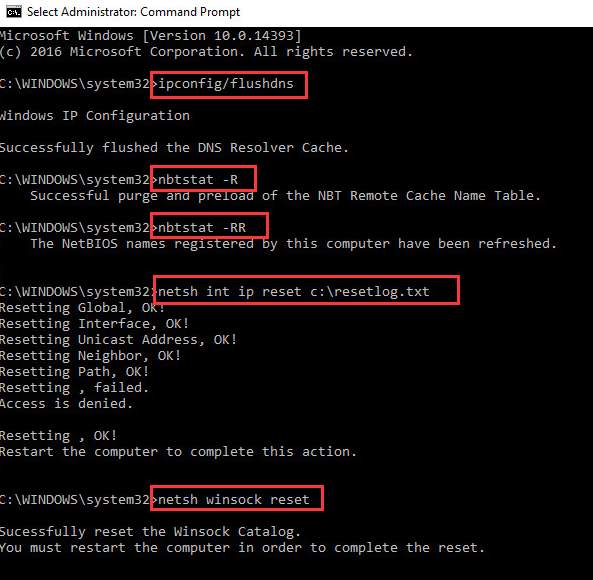
You may need to restart your computer for the changes to take effect.
3) R ight-click the WiFi connection icon at the bottom right corner and click Open Network and Sharing Center.
4) Click Change adapter settings.
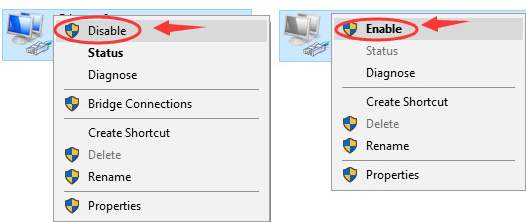
5) Right-click your WiFi adapter and click Disable. Wait for a while. Right-click your WiFi adapter and click Enable.
Update Device Drivers
If the above methods don’t help, we highly recommend you update your network adapters’ drivers.
If you don’t have the time, patience or computer skills to update your drivers manually, you can do it automatically with Driver Easy.
Driver Easy will automatically recognize your system and find the correct drivers for it. You don’t need to know exactly what system your computer is running, you don’t need to risk downloading and installing the wrong driver, and you don’t need to worry about making a mistake when installing.
You can update your drivers automatically with either the FREE or the Pro version of Driver Easy. But with the Pro version it takes just 2 clicks (and you get full support and a 30-day money back guarantee):
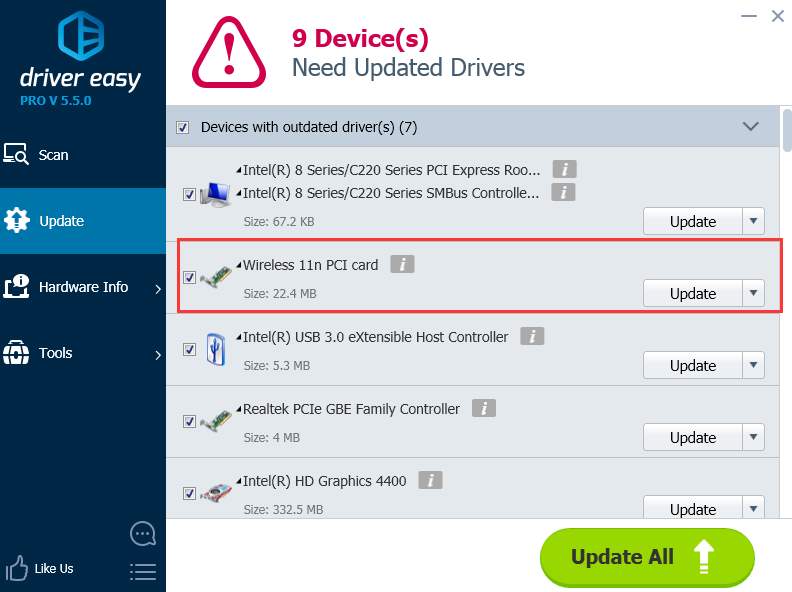
2) Run Driver Easy and click the Scan Now button. Driver Easy will then scan your computer and detect any problem drivers.
3) Click the Update button next to the flagged network card driver to automatically download and install the correct version of this driver (you can do this with the FREE version).
Or click Update All to automatically download and install the correct version of all the drivers that are missing or out of date on your system (this requires the Pro version – you’ll be prompted to upgrade when you click Update All).
Update or uninstall McAfee
Quite a number of users found that this problem was gone once they replaced their McAfee with other antivirus programs.
It’s still unknown why McAfee would hinder you from connecting to the Internet. But if you’re using McAfee as your antivirus program and the problem just won’t go away, update your McAfee to the latest version to have a try.
- network adapter
- network issue
- WiFi
- Windows 10


