- Creating an Interrupt Object
- Supporting Message-signaled Interrupts
- Почему на компьютере запущен процесс System Interrupts – как отключить
- Что такое процесс System Interrupts
- Почему System interrupts использует много ресурсов
- Можно ли отключить System interrupts
- Может ли System interrupts быть вирусом
- System Interrupts Causing High CPU Usage
- System Interrupts Causing High CPU Usage. What Is System Interrupts And How To Fix High CPU Usage Problem
- Restart Your Computer
- Check For Windows Updates
- Check Disk For Errors
- Unplug External Devices
- Update Device Drivers
- Disable Audio Enhancements
- Disable Wake on Magic Packet
- Update BIOS
- Disable Fast Startup
- Video Showing How To Fix High CPU Usage Caused By System Interrupts:
Creating an Interrupt Object
A Windows Driver Frameworks (WDF) driver that handles a device’s hardware interrupts must create a framework interrupt object for each interrupt that each device can support. In framework versions 1.11 and later running on WindowsВ 8 or later versions of the operating system, Kernel-Mode Driver Framework (KMDF) and User-Mode Driver Framework (UMDF) drivers can create interrupt objects requiring passive-level handling. Unless you are writing a driver for a System on a Chip (SoC) platform, however, your driver should use DIRQL interrupt objects.
A driver typically creates framework interrupt objects in its EvtDriverDeviceAdd callback function. A driver can also create interrupt objects from its EvtDevicePrepareHardware callback function.
The framework calls the driver’s EvtDriverDeviceAdd callback function before the Plug and Play (PnP) manager has assigned system resources, such as interrupt vectors, to the device. After the PnP manager assigns resources, the framework stores interrupt resources in the device’s interrupt object. (Drivers that do not support Plug and Play cannot use interrupt objects.)
To create a framework interrupt object, your driver must initialize a WDF_INTERRUPT_CONFIG structure and pass it to the WdfInterruptCreate method.
UMDF supports the following types of interrupts:
- Level-triggered (shared or exclusive)
- Edge-triggered (exclusive only)
- MSI (exclusive by definition)
NoteВ В UMDF does not support shared edge-triggered interrupts.
Starting in UMDF version 2.15, UMDF supports interrupts for simple devices like hardware push-buttons, usually backed by GPIO pins, that you cannot enable or disable explicitly using hardware registers. To support such devices, a UMDF driver must use exclusive edge-triggered interrupts.
Starting in KMDF version 1.15, KMDF also supports interrupts for such devices, without the workaround described in Handling Active-Both Interrupts.
Also in WDF_INTERRUPT_CONFIG, your driver supplies pointers to the following driver-supplied event callback functions:
EvtInterruptIsr
Interrupt service routine (ISR) for the interrupt.
EvtInterruptDpc
Deferred procedure call (DPC) for the interrupt.
For drivers using framework version 1.11 or later on WindowsВ 8 or later versions of the operating system, the driver can explicitly set the parent of a framework interrupt object (DIRQL or passive) to either a framework device object or a framework queue object. If the driver specifies a parent, the driver must set the AutomaticSerialization member of the interrupt object’s WDF_INTERRUPT_CONFIG structure to TRUE. (Recall that if AutomaticSerialization is TRUE, the framework synchronizes execution of the interrupt object’s EvtInterruptDpc or EvtInterruptWorkItem callback function with callback functions from other objects that are underneath the interrupt’s parent object.)
As an example, a driver might specify a queue as parent of an interrupt to synchronize the queue’s callbacks with either the interrupt’s EvtInterruptDpc or EvtInterruptWorkItem callback. In this configuration, the framework deletes the queue object when it deletes the device object.
After calling WdfInterruptCreate, the driver can optionally call WdfInterruptSetPolicy or WdfInterruptSetExtendedPolicy to specify additional interrupt parameters. Typically the driver calls these methods from its EvtDriverDeviceAdd callback function.
The framework automatically deletes the interrupt before deleting the interrupt’s parent. Optionally, a driver can call WdfObjectDelete to delete the interrupt at an earlier time.
Supporting Message-signaled Interrupts
Message-signaled interrupts (MSIs) are supported starting with Windows Vista. To enable the operating system to support MSIs for your device, your driver’s INF file must set some values in the registry. For information about how to set these values, see Enabling Message-Signaled Interrupts in the Registry.
Your driver should create a framework interrupt object for each interrupt vector or MSI message that the device can support. If the PnP manager does not grant the device all of the interrupt resources that the device can support, the extra interrupt objects will not be used and their callback functions will not be called.
In WindowsВ 7, the operating system does not support resource requests for more than 910 interrupt messages per device function. In WindowsВ 8, the operating system does not support resource requests for more than 2048 interrupts per device function.
If the device driver exceeds this limit, the device might fail to start. To operate in a computer that contains many logical processors, the driver should not request more than one interrupt per processor.
A driver must tolerate, without failures, system rebalancing of interrupt resources in which the PnP manager assigns to the device any set of alternative interrupt resources from the resource requirements list. For example, the device might be assigned a smaller number of message interrupts than the driver requested. In the worst case, the driver must be prepared to operate the device with just one line-based interrupt.
Почему на компьютере запущен процесс System Interrupts – как отключить

Если вы когда-либо заходили в диспетчер задач, вероятно, замечали процесс под названием «System Interrupts». Если Вам интересно, зачем он использует ваш процессор, то мы готовы дать Вам ответ.
Что такое процесс System Interrupts
System Interrupts является официальной частью Windows, и, хотя он отображается в списке процессов Диспетчера задач, это не совсем процесс в традиционном смысле. Скорее, это заполнитель, используемый для отображения системных ресурсов, используемых всеми аппаратными прерываниями, происходящими на вашем ПК.
Хотя «аппаратное прерывание» звучит грубо – это стандартная система связи между вашим оборудованием (и сопряженным программным обеспечением) и вашим процессором.
Скажем, вы начинаете печатать что-то на клавиатуре. Вместо того, чтобы отдавать целый процесс на отслеживание сигналов от клавиатуры, материнская плата, которая обрабатывает такого рода сигналы, действует по-другому. Когда она «замечает» что другое устройство нуждается во внимании процессора, то передает сигнал прерывания к процессору. Если это прерывание с высоким приоритетом (как это обычно бывает с пользовательским вводом), процессор приостанавливает любой другой процесс, над которым работает, обрабатывает прерывание, а затем возобновляет свой предыдущий процесс.
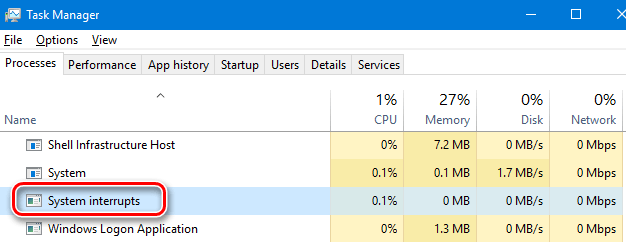
Всё это происходит молниеносно. Но, Вы даже можете увидеть этот процесс в действии. Запустите Диспетчер задач и прокрутите вниз, пока не увидите «System Interrupts». Теперь откройте блокнот и начните печатать. Вы увидите всплески потребления ресурсов процессора, как правило, на десятую часть процентного пункта или около того.

Во время обычных операций вы можете увидеть, что использование ЦП «System interrupts» ненадолго поднимается до 10%.
Почему System interrupts использует много ресурсов
Если вы видите, что System interrupts использует процессор более чем на 20% и – это главное – остаётся на таком уровне постоянно, то у вас проблемы. Так как стабильно высокая загрузка центрального процессора означает, что часть оборудования или связанный с ним драйвер «плохо себя ведёт».

Как устранить проблему с оборудованием? Это и есть сложная часть.
Первым шагом должна быть перезагрузка компьютера. Мы знаем, что вы слышали это миллион раз, но этот совет всё ещё самый актуальный. Перезапуск компьютер может исправить большинство проблем с работой оборудования, и это достаточно легкий шаг, чтобы его выполнить.
Если перезагрузка компьютера не устранит проблему использования ЦП, следующий шаг – проверить актуальность установленных обновлений на компьютере. Пусть Центр обновления Windows сделает своё дело, так Вы будете уверены, что получили все последние обновления Windows и драйверов (по крайней мере, драйверов, которыми управляет Windows).
Если обновление драйверов компьютера и оборудования не принесло результата, то нужно найти какое именно оборудование вызывает проблемы. Диагностика всего вашего оборудования выходит за рамки этой статьи, но мы дадим некоторые полезные рекомендации, чтобы помочь вам сузить круг поиска.
Начните с отключения внешних устройств по одному, таких как клавиатура, мышь, веб-камера и микрофон. Просто отключите их по одному и посмотреть, как это влияет на работу System interrupts.
Затем перейдите к внутренним устройствам. Очевидно, это немного сложнее, так как не всегда их можно просто отключить. Но вы можете отключить их через диспетчер устройств. Однако, нужно быть осторожными, чтобы не отключить устройства, критически важные для поддержания работы вашей системы, такие как жесткие диски или адаптеры дисплея. Кроме того, не отключайте ничего из перечисленного в категориях компьютер, процессоры или системные устройства. Сосредоточьтесь на сетевых адаптерах, звуковых картах и других дополнительных картах. Они является наиболее вероятными виновниками проблем.
Неотключаемое оборудование также может вызывать проблемы, но можно проверить другим путём. Сбой питания (или проблемы батареи ноутбука) может вызвать всплеск использования центрального процессора, как и отказ жесткого диска. Вы можете проверить свои жесткие диски встроенным инструментом Windows или хорошей сторонней S.M.A.R.T. утилитой. К сожалению, единственный способ проверить источник питания – заменить его.
Если вы определили устройство, которое вызывает проблемы, следующий шаг – выяснить, вызывает ли проблему само устройство или драйвер оборудования.
Опять же, это немного сложно понять и потребует некоторых проб и ошибок, но у нас есть некоторые рекомендации:
- Попробуйте использовать внешние устройства на другом компьютере.
- Если Вы абсолютно уверены в самом устройстве, то попробуйте откат драйвера к более ранней версии.
- Воспользуйтесь поиском или зайдите на веб-сайт производителя оборудования и посмотрите, имеют ли другие люди имеют аналогичные проблемы.
- Рассмотрите возможность обновление BIOS – это иногда помогает решить проблему.
Можно ли отключить System interrupts
Нет, System interrupts отключать нельзя. И тому нет никаких веских причин. Это жизненно важный компонент для производительности вашего компьютера, так как он используется для обработки аппаратных прерываний. Windows не позволит даже временно завершить задачу.
Может ли System interrupts быть вирусом
System interrupts является официальным компонентом Windows. Это почти наверняка не вирус. Поскольку это даже не процесс, System interrupts не имеет связанного .EXE или .DLL файла.
Тем не менее, возможно, что вирус вмешивается в конкретный драйвер оборудования, который, в свою очередь, может повлиять на System interrupts.
System Interrupts Causing High CPU Usage
System Interrupts Causing High CPU Usage. What Is System Interrupts And How To Fix High CPU Usage Problem
The System Interrupts process (also known as ‘Interrupts’) is a component of Microsoft Windows operating systems and is often seen running in Task Manager. It is not like many other processes that run in the background — System Interrupts occurs below operating system level and is not associated with any particular process.
Although the word ‘interrupt’ does not seem appropriate for smooth communication, hardware interrupts are a normal way for hardware and the CPU (Central Processing Unit) to communicate. For example, hardware components on your computer (such as keyboards, printers, etc.) require attention and monitoring (as with most running processes), however, not all CPU resources are dedicated to monitoring signals from any one particular hardware component. Interruption signals are sent to the CPU, and if an interrupt has a high (or higher) priority than the process currently being serviced, the CPU suspends the current process, deals with the higher priority interrupt, and then resumes the original process.
This may sound complicated, but from the user’s point of view, it is straightforward. There are many interrupts happening rapidly in normal operation. The System Interrupts process should not use too much CPU power (normally, up to five percent), however, some users have reported excessive CPU usage by this process. High CPU usage caused by System Interrupts usually means that a hardware driver is not working properly or there is an issue with the hardware itself.
There are ways to fix abnormal CPU usage problems caused by System Interrupts. Read the guide below for a number of possible solutions.
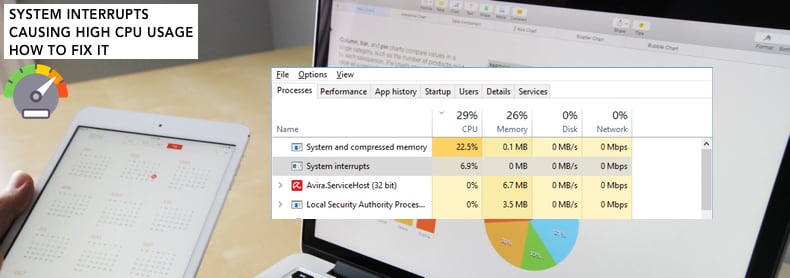
Table of Contents:
It is recommended to run a free scan with Malwarebytes — a tool to detect malware and fix computer errors. You will need to purchase the full version to remove infections and eliminate computer errors. Free trial available.
Restart Your Computer
First, we recommend that you simply restart your computer (if you have not done so already). This may sound trivial, however, many problems are solved by this simple step. Try a restart before looking at more complex solutions. If you have restarted your computer and the problem with high CPU usage caused by System Interrupts persists, you should then check that you have the latest Windows updates installed.
Check For Windows Updates
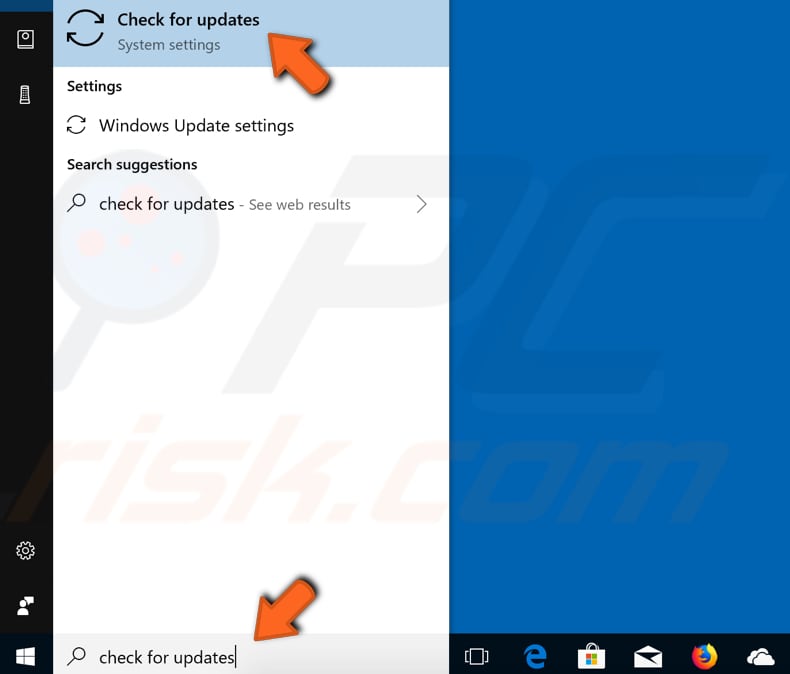
Update your current version of Windows. Checking for updates for the whole Windows operating system might help. Type «check for updates» in Search and click the «Check for updates» result.
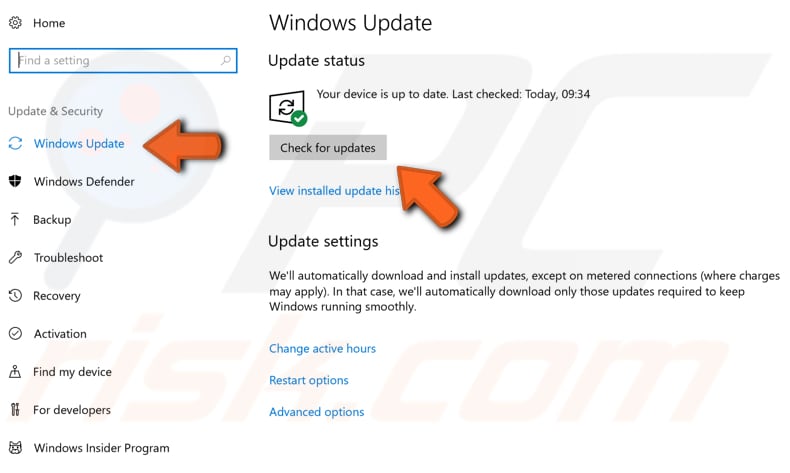
You should be automatically directed to the Windows Update section. Click «Check for updates». Windows will start checking for updates. If there are updates available, install them and try checking for updates once more (just to ensure that you have the latest updates on your operating system). After the updates are installed (if there were any to install), restart your computer and see if the problem with high CPU usage caused by System Interrupts persists.
Check Disk For Errors
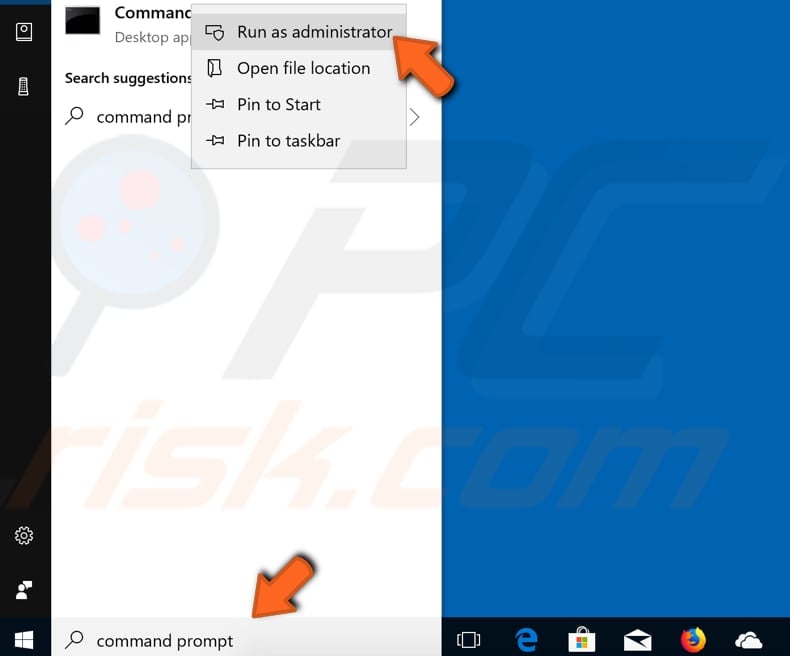
If updating the operating system does reduce high CPU usage caused by System Interrupts, check the disk for errors (it is always a good idea to periodically check hard disks for errors). A built-in Windows tool checks the integrity of disks — it examines them and corrects many common errors. You can run this tool from the command line or through a graphical interface. In this guide, we describe how to to run it through Command Prompt (running it from the command line). To open Command Prompt, type «command prompt» and right-click on the «Command Prompt» result. Select «Run as administrator» from the drop-down menu.
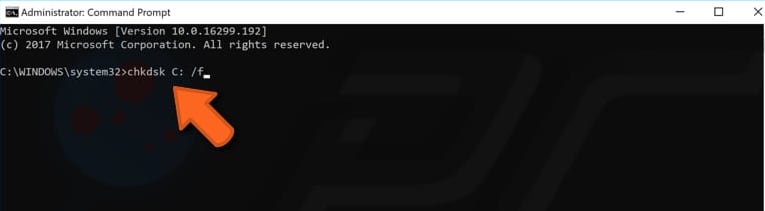
In the Command Prompt window, type the «chkdsk C: /f» command and press Enter on your keyboard. Replace «C» with the letter of your hard drive if it is not the C: drive you want to scan (or the Windows operating system is on another drive). The «chkdsk C: /f» command detects and repairs logical issues affecting your drive. To repair physical issues, also run the «chkdsk C: /r» command. You can run both commands at once by typing «chkdsk C: /f /r» (Windows will need to restart the computer to finish the scan). The disk checking process can take some time, depending on the computer power and size of hard drive. Be patient and wait until it completes.
NOTE: If you see a message stating that Chkdsk cannot run because the volume is in use by another process, and you are asked if you would like to schedule the volume to be checked the next time the system restarts, press the «Y» key on your keyboard. The disk will be checked for errors after the restart.
Unplug External Devices
As mentioned, System Interrupts causing high CPU usage are due to hardware or driver problems. We recommend that you unplug your external devices individually while Task Manager is open and showing CPU usage by System Interrupts. Unplug external devices and peripherals such as the mouse, keyboard, microphone, webcam, etc., one by one and check if the System Interrupts process starts to behave normally. If normal behavior resumes after unplugging a specific external device, you will know which device is causing the problem.
Update Device Drivers
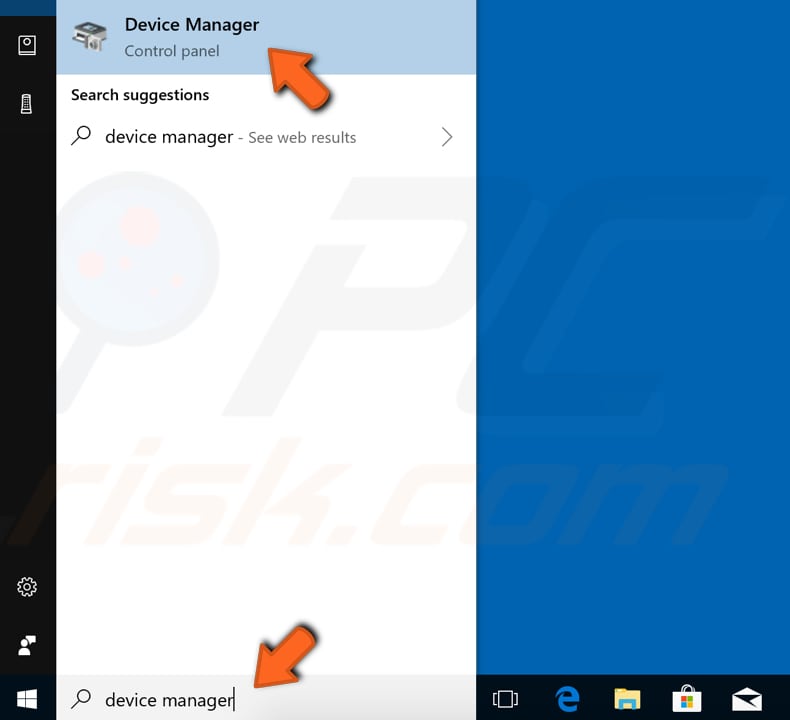
If you know which device is causing the problem, you might need to update the associated driver. A device driver is software that informs the operating system and other software how to interact with particular hardware. It is rather like a translator between software and hardware, since they often are created by different manufacturers, companies, or people. The driver facilitates smooth communication between hardware and software. In most cases, computers are unable to send and receive data correctly without drivers. If the appropriate driver is not installed, the device might not function properly. To update drivers, open Device Manager by right-clicking the Start button and selecting the «Device Manager» result from the contextual menu, or type «device manager» in Search and click the «Device Manager» result.
In Device Manager you will see a list of devices connected to your computer. If you know which hardware drivers are causing the problem, update those drivers only. If you are not sure, look for devices marked with yellow exclamation marks and update those. Expand the device category, right-click the device, and select «Update driver» from the drop-down menu.

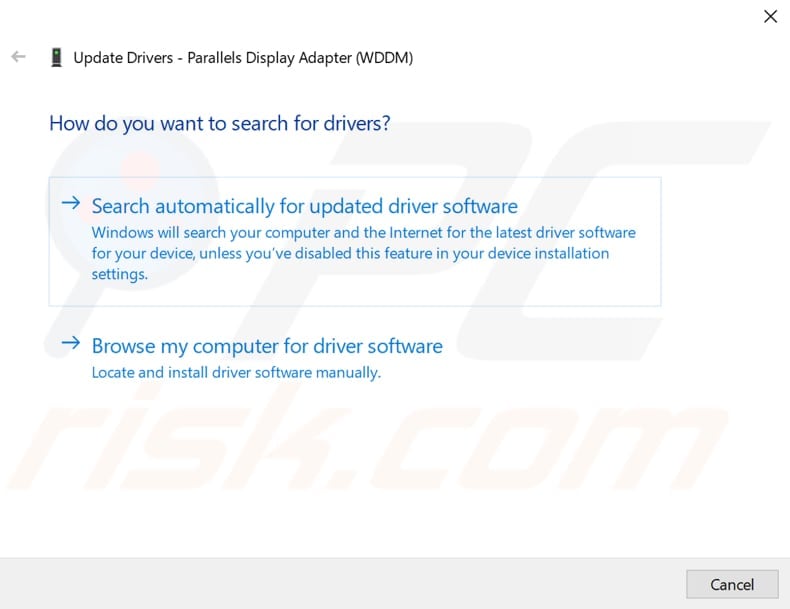
You will be asked if you want to search for updated driver software automatically or to browse your computer for driver software. If you select the first option, Windows will search your computer and the Internet for the latest driver software for your device. If you select the second option, you must locate and install drivers manually. Using this option requires having previously downloaded the driver on your computer or USB flash drive and is a longer process, since you must download the latest drivers for all devices manually by visiting the device manufacturers’ official websites. We recommend that you select the first option and follow the instructions.
If updating drivers does not solve the problem with high CPU usage caused by System Interrupts, reinstall them. Follow the same steps as above, but select «Uninstall device» rather than «Update driver». Ensure that you check the «Delete the driver software for this device» checkbox (if there is one). Restart the computer. Windows will automatically install any missing drivers the next time you start Windows.
You can also use third-party software to update drivers automatically. In this case, we recommend Snappy Driver Installer (SDI), a powerful free driver updater tool for Windows that can store its entire collection of drivers offline. Having offline drivers gives Snappy Driver Installer the ability to have access to fast driver updates, even if there is no active Internet connection on your computer. Snappy Driver works with both 32-bit and 64-bit versions of Windows 10, Windows 8, Windows 7, Windows Vista, and also works with Windows XP. Drivers are downloaded through Snappy Driver Installer in ‘driverpacks’, which are simply collections (packs) of drivers for various hardware such as sound devices, video cards, network adapters, etc. It can also show duplicate drivers and invalid drivers. It separates the updates that require you to restart your computer so that they are easier to distinguish. You can download Snappy Driver Installer from here.
Disable Audio Enhancements
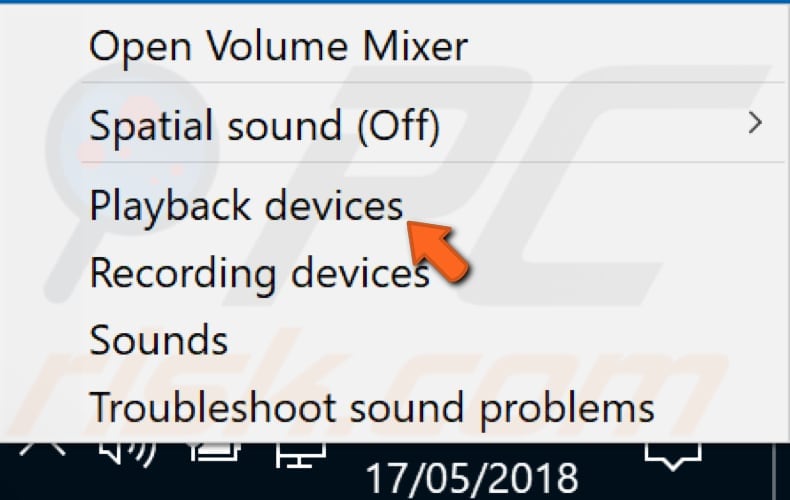
There are many different sound drivers, some of which use software enhancements designed to improve audio quality. If, however, they are not working properly, they might cause high CPU usage. To disable sound enhancements, right-click the speaker icon in the Taskbar and select the «Playback devices» option from the contextual menu.
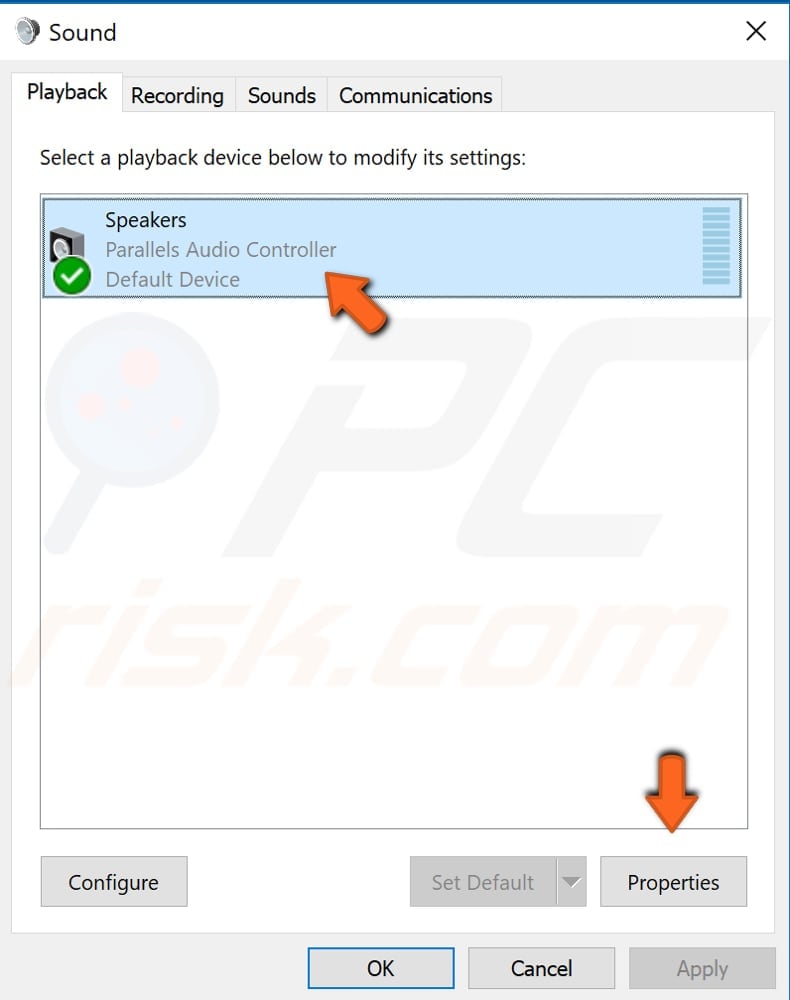
The Sound window will appear and you will be automatically directed to the Playback tab. Select the default audio device that you use for playing audio and click «Properties».
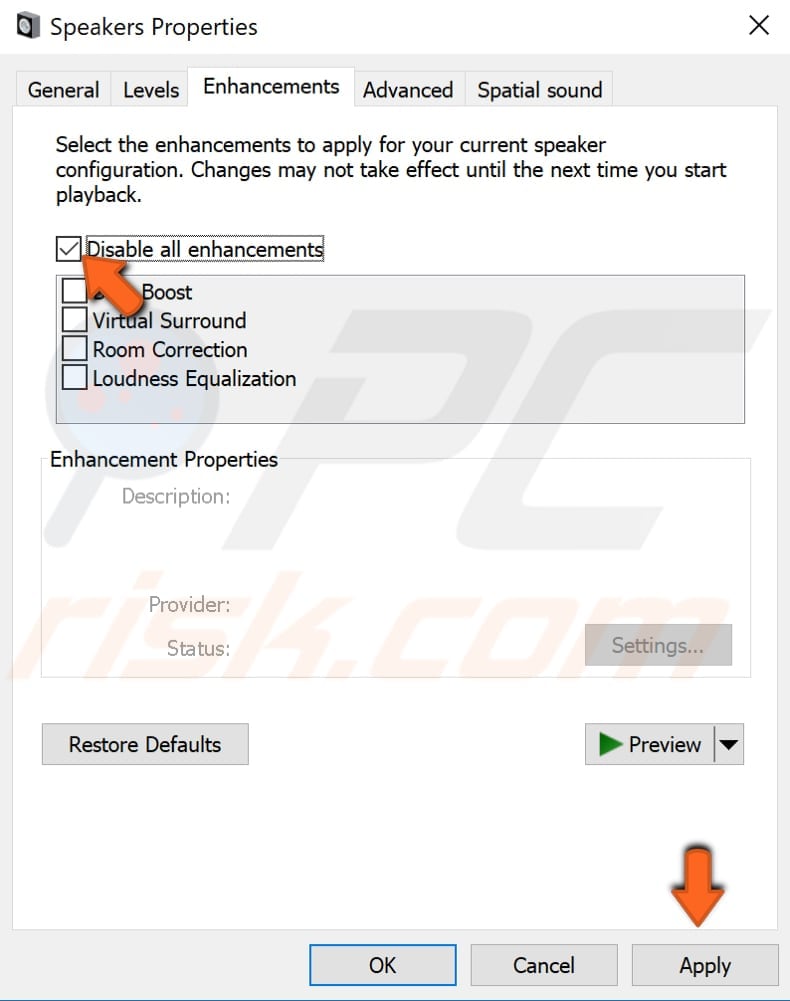
In the Speakers Properties window, select the «Enhancements» tab and ensure that none of the enhancements are enabled, or simply tick the «Disable all enhancements» checkbox and click «Apply» to save the changes.
Disable Wake on Magic Packet
Wake on Magic Packet is a Windows feature that gives the network adapter privilege to ‘wake up’ your computer upon transmission of data. This data packet is known as Wake on Magic Packet. The feature uses interrupts that can cause high CPU usage. To disable this feature, open Device Manager and select your Ethernet or Wi-Fi network adapter, right-click it and select «Properties». In the Properties window, find the «Advanced» tab and select it. You will see a list of properties available for the network adapter. To change Wake on Magic Packet settings, scroll down until you find this feature and select it. Then set its value to «Disabled» on the right side of the Properties window. Save the changes and restart your computer. See if this solves the problem and if System Interrupts CPU usage is back to normal.
Update BIOS
BIOS (Basic Input Output System) is software stored on a small memory chip on the motherboard. You might need to access the BIOS to change how the device works or to assist in troubleshooting a problem. Updating the BIOS might help to solve the problem if you cannot find other causes. It is possible that the hardware responsible for interrupts is having problems, and thus updating BIOS might fix the problem. Bear in mind that updating the BIOS is a procedure for advanced users and, if not performed properly, can cause permanent hardware damage.
To update the BIOS, go to the motherboard manufacturer’s website and download the latest BIOS version for the motherboard. There should be a manual describing how to update the BIOS — ensure that you read this carefully. If you do not know how to update the BIOS, find an expert to avoid damage to your computer.
Disable Fast Startup
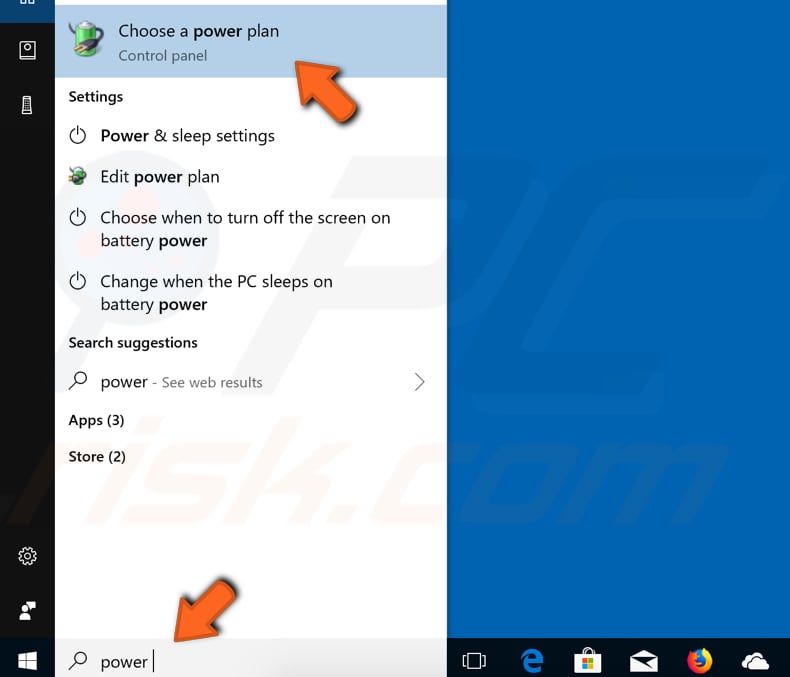
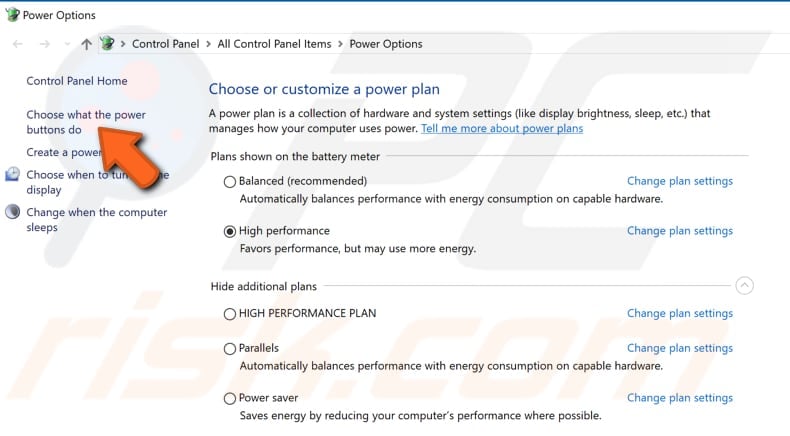
Fast startup is a feature on Windows 10 (and also Windows 8) that provides a faster boot time when starting up the computer. It is a useful feature and one that most people use without knowing. Some people disable the feature immediately when they receive a new computer with the Windows operating system. With Fast Startup enabled, shutting down the computer may seem like you are completely shutting it down, but this is not entirely true, since it moves into a state between hibernation and shutdown. Leaving Fast Startup enabled should not harm your PC, since it is a Windows feature, but this could be the reason why System Interrupts is causing high CPU usage. To disable Fast Startup, go to Search and type «power». Click on the «Choose power plan» result to open it.
In the Power Options window, click «Choose what the power button do».
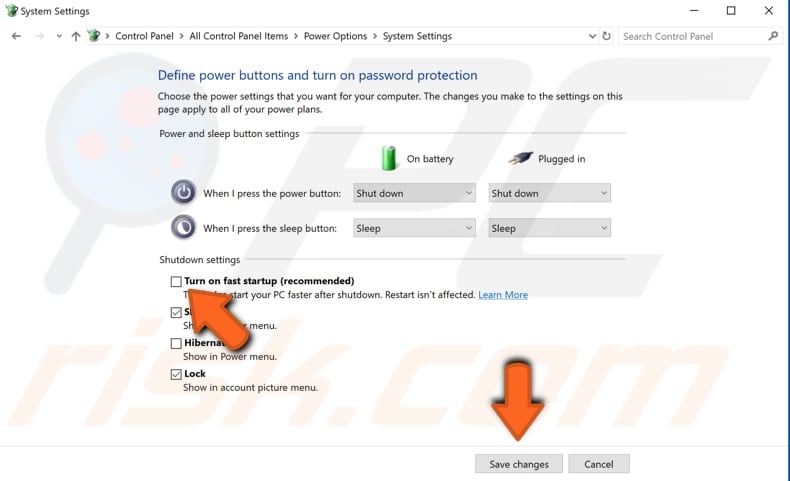
Click on «Change settings that are currently unavailable» and then uncheck the «Turn on fast startup (recommended)» option if it is enabled. Click «Save changes» to save the changes made, restart your computer and see if System Interrupts is still causing high CPU usage. If the problem persists, you can re-enable Fast Startup if needed.
We hope that this guide was useful and you were able to reduce high CPU usage caused by System Interrupts, and it is now back to normal. If you know of other solutions to this problem, not mentioned in our guide, please share them with us by leaving a comment in the section below.


