- Linux ip Command Examples
- Purpose
- Syntax
- Understanding ip command OBJECTS syntax
- ip command examples
- Displays info about all network interfaces
- Assigns the IP address to the interface
- Adding the broadcast address on the interface
- Remove / Delete the IP address from the interface
- Flush the IP address from the interface
- How do I change the state of the device to UP or DOWN?
- How do I change the txqueuelen of the device?
- How do I change the MTU of the device?
- Display neighbour/arp cache
- Add a new ARP entry
- Delete a ARP entry
- Change are state to reachable for the neighbour 192.168.1.100 on the device eth1
- Flush ARP entry
- ip route: Routing table management commands
- Show routing table
- Как узнать IP-адрес Linux
- Немного теории
- Как узнать внутренний IP Linux
- Как узнать локальный IP в Linux
- Как узнать внешний IP-адрес в Linux
- Выводы
Linux ip Command Examples

I am a new Linux system admin user. How do I use ip command line utility to display or configure networking, routing, and tunnels on Linux operating systems? How do I configures or displays network interface parameters for a network using TCP/IP on Linux operating systems?
The ip command is used to assign an address to a network interface and/or configure network interface parameters on Linux operating systems. This command replaces old good and now deprecated ifconfig command on modern Linux distributions.
| ip command details | |
|---|---|
| Description | Network configuration |
| Category | Network Utilities |
| Difficulty | Easy |
| Root privileges | Yes |
| Est. reading time | 20 mintues |
Table of contents
| |
Purpose
Use this command to display and configure the network parameters for host interfaces.
Syntax
ip OBJECT COMMAND
ip [options] OBJECT COMMAND
ip OBJECT help
Understanding ip command OBJECTS syntax
OBJECTS can be any one of the following and may be written in full or abbreviated form:
| Object | Abbreviated form | Purpose |
| link | l | Network device. |
| address | a addr | Protocol (IP or IPv6) address on a device. |
| addrlabel | addrl | Label configuration for protocol address selection. |
| neighbour | n neigh | ARP or NDISC cache entry. |
| route | r | Routing table entry. |
| rule | ru | Rule in routing policy database. |
| maddress | m maddr | Multicast address. |
| mroute | mr | Multicast routing cache entry. |
| tunnel | t | Tunnel over IP. |
| xfrm | x | Framework for IPsec protocol. |
To get information about each object use help command as follows:
ip OBJECT help
ip OBJECT h
ip a help
ip r help
Warning : The commands described below must be executed with care. If you make a mistake, you will lose connectivity to the server. You must take special care while working over the ssh based remote session.
ip command examples
Don’t be intimidated by ip command syntax. Let us get started quickly with examples.
Displays info about all network interfaces
Type the following command to list and show all ip address associated on on all network interfaces:
ip a
OR
ip addr
Sample outputs:
Fig.01 Showing IP address assigned to eth0, eth1, lo using ip command
It is also possible to specify and list particular interface TCP/IP details:
Assigns the IP address to the interface
The syntax is as follows to add an IPv4/IPv6 address:
ip a add
To assign 192.168.1.200/255.255.255.0 to eth0, enter:
ip a add 192.168.1.200/255.255.255.0 dev eth0
OR
ip a add 192.168.1.200/24 dev eth0
Adding the broadcast address on the interface
By default, the ip command does not set any broadcast address unless explicitly requested. So syntax is as follows to set broadcast ADDRESS:
ip addr add brd
ip addr add broadcast
ip addr add broadcast 172.20.10.255 dev dummy0
It is possible to use the special symbols such as + and — instead of the broadcast address by setting/resetting the host bits of the interface prex. In this example, add the address 192.168.1.50 with netmask 255.255.255.0 (/24) with standard broadcast and label “eth0Home” to the interface eth0:
ip addr add 192.168.1.50/24 brd + dev eth0 label eth0Home
You can set loopback address to the loopback device lo as follows:
ip addr add 127.0.0.1/8 dev lo brd + scope host
Remove / Delete the IP address from the interface
The syntax is as follows to remove an IPv4/IPv6 address:
ip a del
To delete 192.168.1.200/24 from eth0, enter:
ip a del 192.168.1.200/24 dev eth0
Flush the IP address from the interface
You can delete or remote an IPv4/IPv6 address one-by-one as described above. However, the flush command can remove as flush the IP address as per given condition. For example, you can delete all the IP addresses from the private network 192.168.2.0/24 using the following command:
ip -s -s a f to 192.168.2.0/24
Sample outputs:
You can disable IP address on all the ppp (Point-to-Point) interfaces:
ip -4 addr flush label «ppp*»
Here is another example for all the Ethernet interfaces:
ip -4 addr flush label «eth*»
How do I change the state of the device to UP or DOWN?
The syntax is as follows:
ip link set dev
To make the state of the device eth1 down, enter:
ip link set dev eth1 down
To make the state of the device eth1 up, enter:
ip link set dev eth1 up
How do I change the txqueuelen of the device?
You can set the length of the transmit queue of the device using ifconfig command or ip command as follows:
ip link set txqueuelen
In this example, change the default txqueuelen from 1000 to 10000 for the eth0:
ip link set txqueuelen 10000 dev eth0
ip a list eth0
How do I change the MTU of the device?
For gigabit networks you can set maximum transmission units (MTU) sizes (JumboFrames) for better network performance. The syntax is:
ip link set mtu
To change the MTU of the device eth0 to 9000, enter:
ip link set mtu 9000 dev eth0
ip a list eth0
Sample outputs:
Display neighbour/arp cache
The syntax is:
ip n show
ip neigh show
Sample outputs (note: I masked out some data with alphabets):
The last field show the the state of the “neighbour unreachability detection” machine for this entry:
- STALE – The neighbour is valid, but is probably already unreachable, so the kernel will try to check it at the first transmission.
- DELAY – A packet has been sent to the stale neighbour and the kernel is waiting for confirmation.
- REACHABLE – The neighbour is valid and apparently reachable.
Add a new ARP entry
The syntax is:
ip neigh add
In this example, add a permanent ARP entry for the neighbour 192.168.1.5 on the device eth0:
ip neigh add 192.168.1.5 lladdr 00:1a:30:38:a8:00 dev eth0 nud perm
Where,
| neighbour state (nud) | meaning |
| permanent | The neighbour entry is valid forever and can be only be removed administratively |
| noarp | The neighbour entry is valid. No attempts to validate this entry will be made but it can be removed when its lifetime expires. |
| stale | The neighbour entry is valid but suspicious. This option to ip neigh does not change the neighbour state if it was valid and the address is not changed by this command. |
| reachable | The neighbour entry is valid until the reachability timeout expires. |
Delete a ARP entry
The syntax to invalidate or delete an ARP entry for the neighbour 192.168.1.5 on the device eth1 is as follows.
ip neigh del
ip neigh del 192.168.1.5 dev eth1
Change are state to reachable for the neighbour 192.168.1.100 on the device eth1
ip neigh chg 192.168.1.100 dev eth1 nud reachable
Flush ARP entry
This flush or f command flushes neighbour/arp tables, by specifying some condition. The syntax is:
ip -s -s n f
In this example, flush neighbour/arp table
ip -s -s n f 192.168.1.5
OR
ip -s -s n flush 192.168.1.5
ip route: Routing table management commands
Use the following command to manage or manipulate the kernel routing table.
Show routing table
To display the contents of the routing tables:
ip r
ip r list
ip route list
ip r list [options] ip route
Sample outputs:
Источник
Как узнать IP-адрес Linux
Каждый компьютер в сети интернет нужно определённым образом идентифицировать. Для этого используются IP-адреса. Каждый компьютер, подключённый к интернету, имеет свой адрес, с помощью которого можно очень просто обратиться к этому компьютеру.
Если вы хотите каким-либо образом взаимодействовать с другим компьютером по Сети, вам нужно узнать его IP-адрес Linux. Очень часто приходится работать по IP-адресу с серверами, но это может быть полезно и для домашних компьютеров, и для локальных сетей. В этой небольшой статье мы рассмотрим, как узнать IP Linux разными способами. Поговорим о том, как узнать внешний IP, выданный провайдером, и внутренний IP в вашей локальной сети. Но сначала давайте попытаемся понять, что такое IP-адрес, и как всё работает.
Немного теории
Мы можем выделить три типа IP-адресов, с которыми вам придётся сталкиваться:
- Внутренний адрес (IP-адрес компьютера);
- Адрес в локальной сети;
- Внешний IP доступный во всём интернете.
Внутренний IP-адрес нужен для того, чтобы программы могли взаимодействовать между собой в пределах этого компьютера, используя сетевые протоколы. Например, так браузер может получить доступ к локальному web-серверу или mysql-серверу. Внутренний IP довольно часто используется в системных утилитах, и узнать его очень просто — он всегда одинаковый — 127.0.0.1.
Но с локальной сетью всё немного сложнее. В идеале, каждый компьютер в мире должен был бы иметь уникальный IP-адрес для полноценного доступа в интернет. Но с ростом популярности этой технологии свободные адреса скоро начали заканчиваться, и теперь уникальные IP имеют только серверы, а обычные пользователи размещаются провайдерами по несколько сотен на одном IP с помощью NAT.
Технология NAT позволяет компьютеру подключиться к любому серверу в интернете и получить от него ответ, но инициировать подключение к такому компьютеру невозможно, поскольку фактически один IP принадлежит сотне компьютеров, и система просто не знает, к какому из них обращаются.
Ваша локальная сеть тоже работает по принципу NAT, и задача у неё похожая — защитить ваши домашние устройства от несанкционированного доступа, и позволить вам подключать к сети несколько устройств, например два ноутбука. Если бы не было NAT, вам бы пришлось покупать два отдельных интернет подключения для каждого из них.
Как вы поняли, ваш домашний компьютер мог бы иметь внешний IP-адрес доступный всем, но это нецелесообразно как минимум по двум причинам. Во-первых, дорого, во-вторых, очень небезопасно. Поэтому подключение компьютера к интернету сейчас выглядит приблизительно так:
- Внешний и доступный всем IP, который принадлежит провайдеру и используется для выхода в интернет сотен пользователей;
- IP-адрес вашего роутера в локальной сети провайдера, той самой, с IP-адресом которой вы выходите в интернет. Он не доступен из интернета и, скорее всего, вам не понадобится;
- IP-адрес вашего компьютера в локальной (домашней) сети, созданной роутером, к которой вы можете подключать свои устройства. Именно он используется для взаимодействия между устройствами в локальной сети и отображается в информации о сетевом интерфейсе;
- Внутренний IP-адрес компьютера, недоступный извне и используемый только для внутренних коммуникаций в системе.
Теперь, когда вы немного начали ориентироваться в вопросе, давайте рассмотрим способы узнать свой IP Linux.
Как узнать внутренний IP Linux
Как я уже сказал, внутренний IP всегда одинаковый для каждого компьютера — 127.0.0.1, что спрведливо не только для Linux, но и для Windows и других операционных систем. Также к своему компьютеру можно обратиться по домену localhost.
Вы можете убедится в этом, выполнив nslookup:
Как узнать локальный IP в Linux
Узнать локальный IP компьютера тоже не очень сложно. Для этого вам не нужны никакие сервисы, мы можем просто посмотреть информацию об интерфейсах.
Чтобы узнать свой IP Linux в локальной сети? выполните такую команду:
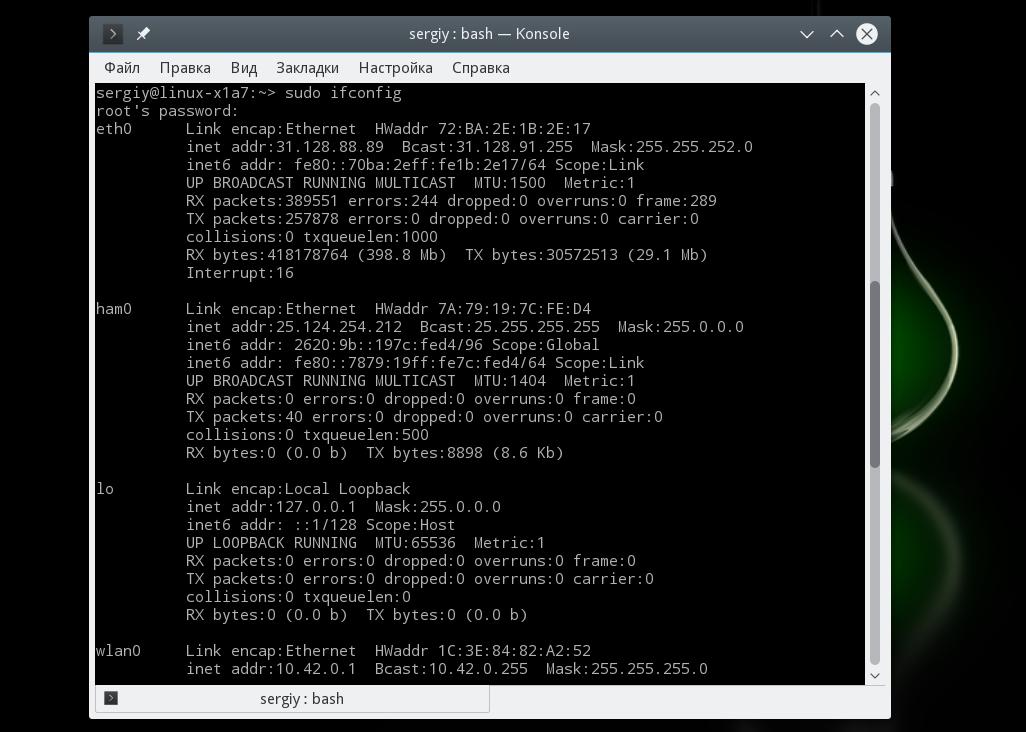
Здесь отображается довольно много информации о сетевых интерфейсах. Кроме IP, здесь можно увидеть MAC-адрес, маску сети и небольшую статистику по работе интерфейса. IP-адрес каждого интерфейса отображается после слов inet addr.
Теперь про интерфейсы: lo — это внутренний интерфейс с IP-адресом 127.0.0.1, eth0 — это проводной интерфейс, а wlan0 — интерфейс Wi-Fi. Как видите, для каждого из них установлены свои адреса.
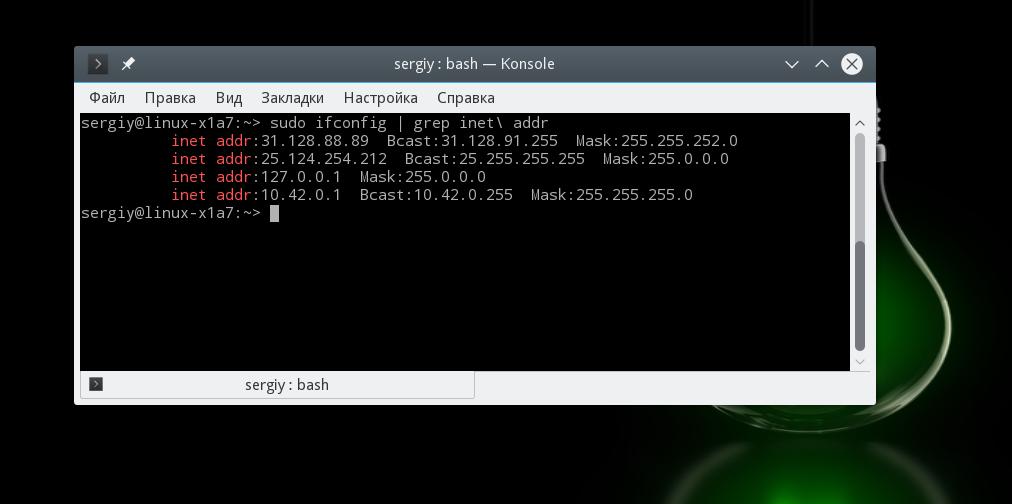
Вы можете отфильтровать лишнюю информацию и вывести только IP-адреса:
sudo ifconfig | grep «inet addr»
Утилита ifconfig уже считается устаревшей и в некоторых дистрибутивах не используется. Вместо неё предлагается новый инструмент — ip. Вы можете выполнить аналогичные действия с помощью него:

Здесь IP-адрес отображается после слова inet. Вы знаете, как посмотреть IP-адрес Linux для компьютера в локальной сети, теперь рассмотрим внешний.
Как узнать внешний IP-адрес в Linux
С внешним IP-адресом ситуация немного сложнее. Конечно, если бы у вас был доступ к серверу провайдера, вы бы могли выполнить ту же самую команду ifconfig и узнать внешний IP Linux точно так же, как и на своём компьютере.
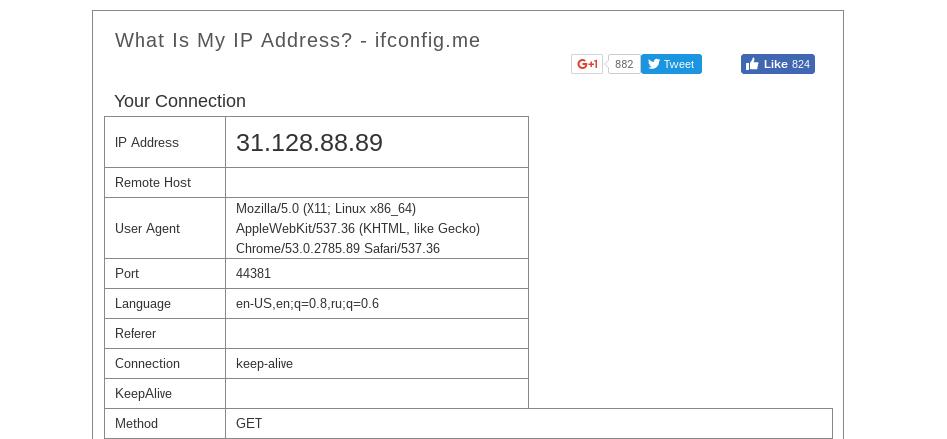
Понятное дело, что доступа к серверам провайдера у вас нет, поэтому придётся пользоваться обходными путями. Мы можем открыть специальный сайт, который посмотрит, с какого IP мы его открыли, и скажет его нам. Есть несколько таких сайтов. Проще всего сделать это с помощью браузера, например, откройте сайт ifconfig.me или eth0.me:
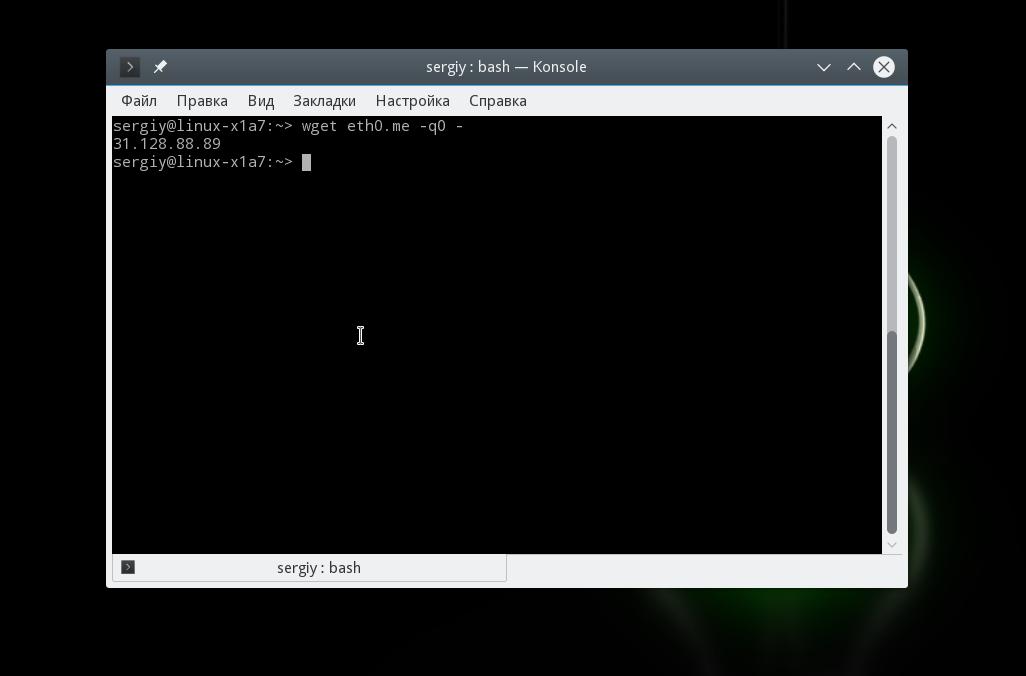
Но это не совсем удобно. Лучше сделать это с помощью терминала. Просто используйте команду wget. Сразу рассмотрим несколько таких сайтов, чтобы вы могли использовать любой понравившийся из них:
wget -qO- eth0.me
wget -qO- ipinfo.io/ip
wget -qO- ipecho.net/plain
wget -qO- icanhazip.com
wget -qO- ipecho.net
wget -qO- ident.me
wget -qO- myip.gelma.net
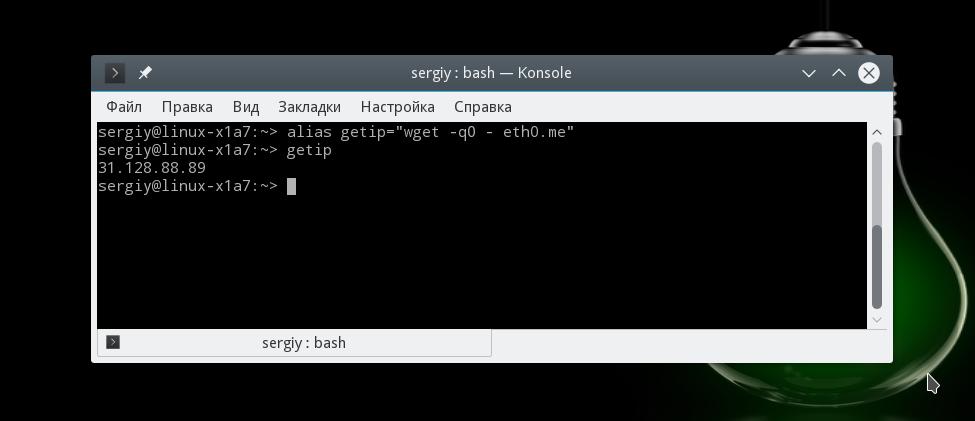
Чтобы не набирать длинную команду каждый раз, вы можете создать удобный алиас:
alias getip=»wget -qO — eth0.me»
Хочу заметить, что если вы хотите узнать не внешний IP компьютера, а именно адрес роутера в сети провайдера, то такой способ не поможет. Вам нужно посмотреть в настройках роутера или попытаться сделать это через командный интерфейс роутера, так как это описано в предыдущем варианте.
Выводы
Вот и всё, теперь вы точно знаете, как узнать IP-адрес Linux, оказывается, это не так сложно, как могло показаться сразу. Правда, во всех этих терминах можно сначала запутаться, но с практикой это проходит. Если у вас остались вопросы, спрашивайте в комментариях!
В статье мы рассмотрели, что такое IP-адрес, но маршрутизацию затронули только вскользь. Если вы хотите узнать об этом подробнее, то можете посмотреть вот это видео:
Источник


