- Reset Mac DNS Cache in MacOS Monterey, Big Sur On MacOS (Flush DNS Cache)
- How to Flush or Reset DNS Cache in MacOS Monterey On Mac
- How to clear DNS Cache in MacOS Monterey on Mac
- How to Reset And Flush DNS Cache in macOS Monterey
- Using Dig to Check Query Times
- jaysukh patel
- How to Flush DNS Cache in Mac OS X
- Flushing DNS Cache in MacOS 10.12, 10.11 newer
- Clearing DNS Cache in OS X 10.10 Yosemite
- Flush DNS in OS X 10.9 Mavericks
- Flushing DNS Cache in OS X Lion (10.7) and OS X Mountain Lion (10.8)
- Flush DNS Cache in Mac OS X 10.5, Mac OS X 10.6
- Flush DNS in Mac OS X 10.4 Tiger, & 10.3
- Как очистить кэш DNS
- Microsoft Windows
- Windows 10
- Windows 8 / Windows 8.1
- Windows Vista / Windows 7
- Windows 98/NT/2000/XP
- Apple OS X
- macOS Sierra
- Mac OS X El Capitan
- Mac OS X Yosemite
- Mac OS X Mavericks
- Mac OS X Mountain Lion
- Mac OS X Lion
- Mac OS X Snow Leopard
- Mac OS X Leopard and below
- Other Operating Systems
- Linux
Reset Mac DNS Cache in MacOS Monterey, Big Sur On MacOS (Flush DNS Cache)
Last Updated on Jun 26, 2021
flushdns mac with MacOS Monterey is easy with MacOS Monterey on All Macs (iMac, MacBook, MacBook Pro, MacBook Air, Mac Mini). Are you looking to clear and reset the DNS cache in macOS Monterey? Then we have listed some best methods to do so. Periodically users need to reset the DNS cache because sometimes a specific domain or name server is cached or Mac DNS settings have been changed. At that time you need to remove the existing DNS cache. So moving further we will see how to reset the DNS cache in macOS Monterey.
we are happy to help you, submit this Form, if your solution is not covered in this article.
Execute Command in Terminal: Below commands are case sensitive and use space where it needs
How to Flush or Reset DNS Cache in MacOS Monterey On Mac
Step 1: Launch “Terminal” directly from the Home screen using Spotlight. Or “Applications” > “Utilities” > “Terminal.app” or Type “Terminal” in Spotlight search.
Step 2: Now, enter the command below, To execute use your Mac’s system administrator password [Not an Apple ID].
sudo killall -HUP mDNSResponder; sleep 2; echo macOS DNS Cache Reset | say

Step 3: Hit “return key” and then enter the Admin password and again enter.
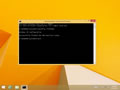
Step 4: Wait until “DNS cache has been cleared” appears on the terminal screen.
Step 5: Quit “Terminal”.
You must close all the applications running connected to the internet and wait for the changes to take place. Sometimes the changes take place through a simple refresh in the apps.
If in case the above terminal code doesn’t workout for you then you should break that command and write like this,
sudo killall -HUP mDNSResponder && echo macOS DNS Cache Reset
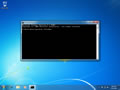
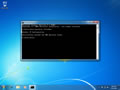
How to clear DNS Cache in MacOS Monterey on Mac
If you have made DNS servers and still you didn’t encounter any changes, then you should clear the DNS cache and again check it this workout for you. It is not necessary to close all the applications which use DNS like Firefox, Safari and other web browsers.
Step 1: Launch “Terminal” from the “Utilities” which you will find in “Applications”.
Step 2: Enter the command with accuracy,
Sudo killall –HUP mDNSResponder;say DNS cache has been flushed

Step 3: Hit return key and enter Admin password.
Step 4: It will take some time to “clear DNS cache”.
Also, you will get a kind of voice message from the system that DNS cache has been flushed.
Alternatively, we have one more command to clear DNS cache if the above one doesn’t work for you,
sudo killall -HUP mDNSResponder;sudo killall mDNSResponderHelper;sudo dscacheutil -flushcache;say MacOS DNS cache has been cleared
![]()
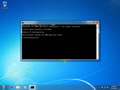
How to Reset And Flush DNS Cache in macOS Monterey
Follow the steps to Reset and flush the DNS Cache,
Step 1: Launch “Terminal”.
Step 2: Enter the following command,
sudo killall -HUP mDNSResponder && echo macOS DNS Cache Reset
Step 3: Once you enter the command tap return key and enter the Admin password.
Step 4: It will take few moments to clear cache.
Using Dig to Check Query Times
This method is used to check whether the DNS is perfectly working or not.
Step 1: Open “Terminal”.
Step 2: Type “dig howtoisolve.com”. In place of our website, you can enter any website to check query time.

Step 3: You can check result in “Query Time”.If query time is more then change macOS DNS settings to Google DNS.
After changing the DNS server to Google DNS, you can verify the query time again by the same dig command.
Hope you get pro tips, why you shouldn’t share this helpful guide with others. Share this page on your profile and recommend to your friends for more tips and guide on MacOS Monterey issues and problems.
jaysukh patel
Jaysukh Patel is the founder of howtoisolve. Also self Professional Developer, Techno lover mainly for iPhone, iPad, iPod Touch and iOS, Jaysukh is one of responsible person in his family. Contact On: [email protected] [OR] [email protected]
Источник
How to Flush DNS Cache in Mac OS X
 Whether you’re a systems administrator or a web developer, or anything in between, chances are you’ll have to flush your DNS cache every once in a while to get things straightened out server-side, or even just for testing certain configurations.
Flushing your DNS cache in Mac OS X is actually really easy, but there are actually several different commands to use, and you will find the commands are unique to different versions of Mac OS X. We’ve got you covered regardless of what version of Mac OS X you’re running, from MacOS Sierra 10.12, 10.11, 10.13, OS X 10.10, OS X 10.9, all the way back to 10.4. So find your version of OS X, open your Terminal, and follow the appropriate directions below to get started.
Remember, each of these commands must be entered into the command line, by way of the Terminal applications (found in /Applications/Utilities/ in all version of Mac OS X). Launch that app first and then you can just copy and paste the commands in if you’d like.
Flushing DNS Cache in MacOS 10.12, 10.11 newer
For Sierra, El Capitan, and newer Mac OS releases:
sudo killall -HUP mDNSResponder
Clearing DNS Cache in OS X 10.10 Yosemite
Running Yosemite? Clearing DNS caches in OS X Yosemite has changed again, split into MDNS and UDNS or combined like we’ll use below, here’s the command that is needed:
sudo discoveryutil mdnsflushcache;sudo discoveryutil udnsflushcaches;say flushed
Flush DNS in OS X 10.9 Mavericks
Rere is how to flush the DNS cache in 10.9:
dscacheutil -flushcache;sudo killall -HUP mDNSResponder
You will need to enter the admin password for this task to complete. If you notice, it combines killing mDNSResponder with the standard dscacheutil, making it a two step process to first, flush cache, then reload the DNS handling in OS X so that the changes take effect.
Flushing DNS Cache in OS X Lion (10.7) and OS X Mountain Lion (10.8)
Launch Terminal and enter the following command, you will need to enter an administrative password:
sudo killall -HUP mDNSResponder
Note the dscacheutil still exists in 10.7 and 10.8, but the official method to clear out DNS caches is through killing mDNSResponder. You can also find that process running in Activity Monitor.
One helpful trick if you find yourself flushing the DNS frequently is to setup an alias for that command string in your .bash_profile or in the profile of your shell of choice. A simple bash alias for flushing cache could be this:
alias flushdns=’dscacheutil -flushcache;sudo killall -HUP mDNSResponder’
Save that into .bash_profile, then typing “flushdns” would prevent having to use the full command string in the future.
Flush DNS Cache in Mac OS X 10.5, Mac OS X 10.6
Launch Terminal and issue the following command:
dscacheutil -flushcache
All done, your DNS has been flushed. On a side note, the dscacheutil is interesting in general and worth taking a look at, try the -statistics flag instead for some stats.
Flush DNS in Mac OS X 10.4 Tiger, & 10.3
Type the following command in the Terminal:
lookupd -flushcache
That’s it, that’s all there is to it. Now your DNS settings should be as you intended them to be, which you can easily verify with various networking tools like http, ping, nslookup, traceroute, curl, or whatever else is appropriate to your specific situation.
If you find something isn’t working and DNS does not appear to have changed, verify the version of OS X you’re running and use the appropriate commands for the latest version. If you’re still having problems after that, try a different machine ideally on a different network (like a cell phone) to verify that it’s not an issue with the remote server.
Источник
Как очистить кэш DNS

Большинство операционных систем и клиентов DNS автоматически кэшируют IP-адреса и другие результаты DNS, это делается для того, чтобы ускорить последующие запросы к тому же имени хоста. Иногда плохие результаты будут кэшироваться и поэтому должны быть удалены из кэша, чтобы вы могли правильно общаться с хостом. Все основные операционные системы позволяют форсировать этот процесс. Ниже приведены общие шаги, которые необходимо выполнить, чтобы очистить кэш DNS.
Microsoft Windows
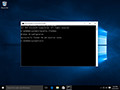
Windows 10
Очистка кеша DNS в Windows 10 — очень простой процесс. Из-за разрешений безопасности системы вы должны убедиться, что вы запускаете командную строку от имени администратора.
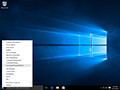
- Убедитесь, что вы на рабочем столе Windows 10.
- Щелкните правой кнопкой мыши меню «Пуск» и выберите в меню Command Prompt (Admin)
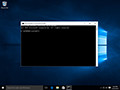
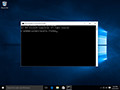
- Введите команду ipconfig /flushdns

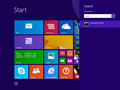
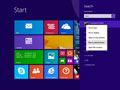
Windows 8 / Windows 8.1
Очистка кеша DNS в Windows 8 и Windows 8.1 — очень простой процесс. Из-за разрешений безопасности системы вы должны убедиться, что вы запускаете командную строку от имени администратора.
- Убедитесь, что вы находитесь на начальном экране Windows 8.
- Просто введите cmd , и справа появится панель поиска Windows с результатами поиска.
- Щелкните правой кнопкой мыши Command Prompt и выберите Запуск от имени администратора
- введите команду ipconfig /flushdns


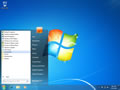
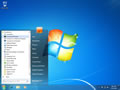
Windows Vista / Windows 7
Очистка DNS в более новых версиях Windows почти так же проста, как и в более ранних версиях, но из-за дополнений безопасности Microsoft вы должны запустить командную строку с правами администратора.
- Нажмите кнопку «Пуск» и перейдите к командной строке (Пуск> Все программы> Стандартные> Командная строка)
- Убедитесь, что вы щелкнули правой кнопкой мыши по приложению командной строки и выбрали «Запуск от имени администратора».
- Введите команду ipconfig /flushdns
Примечание. Также можно ввести cmd в поле поиска в меню «Пуск» Windows Vista / Windows 7, а затем щелкнуть правой кнопкой мыши результат cmd.exe вместо необходимости переходить по различным подпунктам, меню.
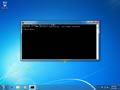
Windows 98/NT/2000/XP
Очистка DNS в Windows — это простой процесс, ниже описаны шаги, которые необходимо выполнить, если вы хотите очистить кэш DNS.
- Откройте командную строку (Пуск> Выполнить> cmd.exe > ОК).
- Введите команду ipconfig /flushdns
Apple OS X
Очистка DNS в Mac OS X — это простой процесс, но предпринятые шаги будут зависеть от того, какую версию OS X вы используете.
macOS Sierra
Если вы используете Mac OS X 10.11, вам нужно выполнить следующие шаги:
- Откройте терминал.
- Запустите команду sudo killall -HUP mDNSResponder
Mac OS X El Capitan
Если вы используете Mac OS X 10.11, вам нужно выполнить следующие шаги:
- Откройте терминал.
- Запустите команду sudo killall -HUP mDNSResponder
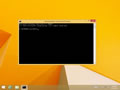
Mac OS X Yosemite
Если вы работаете в Mac OS X 10.10, вам необходимо выполнить следующие шаги:
- Откройте терминал.
- Запустите команду sudo discoveryutil udnsflushcaches
Mac OS X Mavericks
Если вы работаете в Mac OS X 10.9, вам необходимо выполнить следующие шаги:
- Откройте терминал.
- Запустите команду sudo killall -HUP mDNSResponder
Mac OS X Mountain Lion
Если вы используете Mac OS X 10.8, вам необходимо выполнить следующие шаги:
- Откройте терминал.
- Запустите команду sudo killall -HUP mDNSResponder
Mac OS X Lion
Если вы работаете в Mac OS X 10.7, вам необходимо выполнить следующие шаги:
- Откройте терминал.
- Запустите команду sudo killall -HUP mDNSResponder
Mac OS X Snow Leopard
Если вы работаете в Mac OS X 10.6, вам необходимо выполнить следующие шаги:
- Откройте терминал.
- Запустите команду sudo dscacheutil -flushcache
Mac OS X Leopard and below
Если вы используете Mac OS X 10.5.1 или ниже, вам необходимо выполнить следующие шаги:
- Откройте терминал.
- Запустите команду sudo lookupd -flushcache
Other Operating Systems
Linux
Если вы используете демон кэширования службы имен nscd и хотите очистить кэш DNS, вам потребуется выполнить следующее:
Источник


