- Настройка статического IP-адреса в Windows
- Графический интерфейс
- Командная строка
- Powershell
- Как установить статический IP-адрес в Windows 10
- Назначьте статический IP-адрес в Windows 10
- 1] Установка статического IP-адреса через панель управления
- 2] Назначить статический IP-адрес через настройки
- 3] Назначение статического IP-адреса через PowerShell
- Change TCP/IP settings
- To enable DHCP or change other TCP/IP settings
- To enable DHCP or change other TCP/IP settings
- Full Fix: IPv4 properties not working in Windows 10, 7
- What to do if IPv4 properties don’t work in Windows 10?
- 1. Check your system for malware
- Vipre Antivirus Plus
- 2. Change the rasphone.pbk files
- 3. Use a different VPN client
- Private Internet Access
- 4. Use Powershell to enable Split Tunneling
- 5. Set IPv4 properties manually via Powershell
- 6 Install the missing updates
- 7. Disable Datamngr Coordinator service
- 8. Remove the problematic applications
- 9. Flush your DNS and reset your connection
- 10. Modify your registry
Настройка статического IP-адреса в Windows
В данной инструкции речь пойдет о том, как вручную задать статический сетевой адрес в операционной системе Windows. Для настройки получения динамического IP-адреса (от DHCP сервера), читайте статью Как настроить автоматическое получение IP-адреса.
Графический интерфейс
Находим в правом нижнем углу иконку сети — кликаем по ней правой кнопкой мыши и выбираем Центр управления сетями и общим доступом:

В левой части открывшегося окна кликаем по Изменение параметров адаптера:

Теперь находим нужный сетевой адаптер — кликаем по нему правой кнопкой мыши и выбираем Свойства:

В открывшемся окне устанавливаем курсор на пункте Протокол интернета версии 4 (TCP/IPv4) и нажимаем Свойства:

Ставим переключатель в положение Использовать следующий IP-адрес и вводим его, маску подсети и шлюз:

Два раза нажимаем OK.
Командная строка
Рассмотрим работу с классической командной строкой и Powershell.
Смотрим имеющиеся сетевые соединения и IP-адреса:
netsh interface ipv4 show config
Среди полученного списка смотрим название сетевого соединения:
Настройка интерфейса » Ethernet »
DHCP включен: Да
IP-адрес 192.168.1.16
Префикс подсети: 192.168.1.0/24 (маска 255.255.255.0)
Основной шлюз: 192.168.1.1
Метрика шлюза: 0
Метрика интерфейса: 25
DNS-серверы с настройкой через DHCP: 192.168.1.1
192.168.1.2
Зарегистрировать с суффиксом: Только основной
WINS-серверы с настройкой через DHCP: Нет
И настраиваем для него сетевые параметры:
netsh interface ipv4 set address name=»Ethernet» static 192.168.1.100 255.255.255.0 192.168.10.1
* где Ethernet — имя сетевого соединения; 192.168.1.100 — новый IP-адрес; 255.255.255.0 — маска сети; 192.168.10.1 — шлюз по умолчанию.
Настраиваем первичный DNS:
netsh interface ipv4 set dns name=»Ethernet» static 77.88.8.8
Задаем вторичный DNS:
netsh interface ipv4 set dns name=»Ethernet» static 8.8.8.8 index 2
Powershell
Получаем список сетевых интерфейсов с их IP-адресами:
Среди результатов, находим нужный и запоминаем его InterfaceAlias:
IPAddress : 192.168.1.16
InterfaceIndex : 11
InterfaceAlias : Ethernet
AddressFamily : IPv4
Type : Unicast
PrefixLength : 24
PrefixOrigin : Dhcp
SuffixOrigin : Dhcp
AddressState : Preferred
ValidLifetime : 20.07:42:02
PreferredLifetime : 20.07:42:02
SkipAsSource : False
PolicyStore : ActiveStore
Задаем адрес командой:
New-NetIPAddress -InterfaceAlias «Ethernet» -IPv4Address «192.168.1.100» -PrefixLength 24 -DefaultGateway 192.168.1.1
Set-DnsClientServerAddress -InterfaceAlias «Ethernet» -ServerAddresses 8.8.8.8 77.88.8.8
Как установить статический IP-адрес в Windows 10
Если вы испытываете проблемы с сетевым подключением и настроили его на DHCP, то выяснение вашего IP-адреса может быть довольно сложной задачей. Использование статического IP-адреса помогает предотвратить конфликты IP-адресов между сетевыми устройствами и позволяет легко управлять ими. В этой статье показано, как назначить статический IP-адрес на компьютере с Windows 10.
Назначьте статический IP-адрес в Windows 10
В большинстве случаев IP-адреса для компьютеров или компьютеров автоматически настраиваются на протокол динамической конфигурации хоста (DHCP) соответствующим маршрутизатором. Это полезно, поскольку устройства подключаются к вашей сети мгновенно. Вы избавляете себя от необходимости вручную настраивать IP-адрес для каждого нового устройства. Однако с этим процессом связан один недостаток: время от времени IP-адрес устройства может меняться.
Установка статического IP-адреса может потребоваться, если вы регулярно обмениваетесь файлами, принтером или настраиваете переадресацию портов.
Мы увидим три способа сделать это:
- Через панель управления
- Через настройки Windows
- Использование PowerShell.
1] Установка статического IP-адреса через панель управления
Щелкните правой кнопкой мыши значок сети (или Wi-Fi), видимый на панели задач Windows 10.
В списке из 2-х вариантов выберите последний – Открыть настройки сети и Интернета.

Перейдите в настройки Wi-Fi и немного прокрутите вниз, чтобы найти раздел Связанные настройки . Найдя его, нажмите на ссылку Изменить параметры адаптера .
Мгновенно откроется отдельное окно, которое направит вас в раздел «Сетевые подключения» панели управления.
Щелкните правой кнопкой мыши сетевое соединение, для которого нужно установить статический IP-адрес, и выберите параметр Свойства ‘.
После этого выберите Протокол Интернета версии 4 (TCP/IPv4) на вкладке Сеть и нажмите кнопку Свойства .
Переключите селектор на « Использовать следующий IP-адрес ».
Теперь введите данные в следующие поля, соответствующие настройкам вашей сети.
- IP-адрес (найдите его с помощью команды ipconfig /all )
- Маска подсети (в домашней сети это 255.255.255.0)
- Шлюз по умолчанию (это IP-адрес вашего маршрутизатора.)
В конце не забудьте проверить параметр Проверить настройки при выходе . Это помогает Windows быстро проверить ваш новый IP-адрес и другую соответствующую информацию, чтобы убедиться, что он работает.
Если все выглядит хорошо, нажмите кнопку «ОК» и закройте окно свойств сетевого адаптера.
2] Назначить статический IP-адрес через настройки
Нажмите значок “Настройки” и выберите вкладку Сеть и Интернет .
Выберите Wi-Fi> Текущее соединение, т. Е. Сеть, к которой вы подключены.
Прокрутите страницу вниз до раздела настроек IP и нажмите кнопку Изменить .
Затем, когда появится окно Настройки IP , нажмите стрелку раскрывающегося списка и выберите параметр Вручную .
Включите тумблер IPv4 .
Теперь установите статический IP-адрес. Также установите длину префикса подсети (маска подсети). Если ваша маска подсети 255.255.255.0, то длина префикса подсети в битах равна 24.
После этого настройте адрес шлюза по умолчанию, предпочитаемый адрес DNS и сохраните изменения.
3] Назначение статического IP-адреса через PowerShell
Откройте Powershell от имени администратора и введите следующую команду, чтобы просмотреть текущую конфигурацию сети:
После этого запишите следующую информацию:
- InterfaceIndex
- IPv4-адрес
- IPv4DefaultGateway
- DNSServer.
После этого введите следующую команду, чтобы установить статический IP-адрес, и нажмите Enter.
Теперь измените DefaultGateway на адрес шлюза по умолчанию в вашей сети. Обязательно замените номер InterfaceIndex на номер, соответствующий вашему адаптеру, а IPAddress – на IP-адрес, который вы хотите назначить устройству.
Когда закончите, введите следующую команду, чтобы назначить адрес DNS-сервера и нажмите Enter.
Change TCP/IP settings
TCP/IP defines how your PC communicates with other PCs.
To make it easier to manage TCP/IP settings, we recommend using automated Dynamic Host Configuration Protocol (DHCP). DHCP automatically assigns Internet Protocol (IP) addresses to the computers on your network if your network supports it. If you use DHCP, then you don’t have to change your TCP/IP settings if you move your PC to another location, and DHCP doesn’t require you to manually configure TCP/IP settings, such as Domain Name System (DNS) and Windows Internet Name Service (WINS).
To enable DHCP or change other TCP/IP settings
Select Start , then select Settings > Network & Internet .
Do one of the following:
For a Wi-Fi network, select Wi-Fi > Manage known networks. Choose the network you want to change the settings for, then select Properties.
For an Ethernet network, select Ethernet , then select the Ethernet network you’re connected to.
Under IP assignment, select Edit.
Under Edit IP settings, select Automatic (DHCP) or Manual.
To specify IPv4 settings manually
Under Edit IP settings, choose Manual, then turn on IPv4.
To specify an IP address, in the IP address, Subnet prefix length, and Gateway boxes, type the IP address settings.
To specify a DNS server address, in the Preferred DNS and Alternate DNS boxes, type the addresses of the primary and secondary DNS servers.
To specify IPv6 settings manually
Under Edit IP settings, choose Manual, then turn on IPv6.
To specify an IP address, in the IP address, Subnet prefix length, and Gateway boxes, type the IP address settings.
To specify a DNS server address, in the Preferred DNS and Alternate DNS boxes, type the addresses of the primary and secondary DNS servers.
When you select Automatic (DHCP), the IP address settings and DNS server address setting are set automatically by your router or other access point (recommended).
When you select Manual, you can manually set your IP address settings and DNS server address.
When you’re done, select Save.
To enable DHCP or change other TCP/IP settings
Do one of the following:
In Windows 8.1, select the Start button, start typing View network connections, and then select View network connections in the list.
In Windows 7, open Network Connections by selecting the Start button, and then selecting Control Panel. In the search box, type adapter, and then, under Network and Sharing Center, select View network connections.
Right-click the connection that you want to change, and then select Properties. If you’re prompted for an administrator password or confirmation, type the password or provide confirmation.
Select the Networking tab. Under This connection uses the following items, select either Internet Protocol Version 4 (TCP/IPv4) or Internet Protocol Version 6 (TCP/IPv6), and then select Properties.
To specify IPv4 IP address settings, do one of the following:
To get IP settings automatically using DHCP, select Obtain an IP address automatically, and then select OK.
To specify an IP address, select Use the following IP address, and then, in the IP address, Subnet mask, and Default gateway boxes, type the IP address settings.
To specify IPv6 IP address settings, do one of the following:
To get IP settings automatically using DHCP, select Obtain an IPv6 address automatically, and then select OK.
To specify an IP address, select Use the following IPv6 address, and then, in the IPv6 address, Subnet prefix length, and Default gateway boxes, type the IP address settings.
To specify DNS server address settings, do one of the following:
To get a DNS server address automatically using DHCP, select Obtain DNS server address automatically, and then select OK.
To specify a DNS server address, select Use the following DNS server addresses, and then, in the Preferred DNS server and Alternate DNS server boxes, type the addresses of the primary and secondary DNS servers.
To change advanced DNS, WINS, and IP settings, select Advanced.
Note: To install IPv4, run Command Prompt as an administrator, type netsh interface ipv4 install, and then press Enter.
Full Fix: IPv4 properties not working in Windows 10, 7

- Plenty of users complain about the fact that they cannot change IPv4 properties in Windows 10.
- If you’re one of them, don’t hesitate to check your computer for malware or try a different VPN.
- For a secure system, make sure to use one of these great system portable network scanner tools.
- It takes mere seconds to bookmark our Network & Internet Hub. You’ll find it useful in the future.

Windows 10 has a lot to offer to its users, but unfortunately, there might be some bugs here and there. Some users report that they cannot change IPv4 properties in Windows 10.
If you’re setting up a network, that can be a big problem, but there are a few solutions that you want to check out. They apply to those using Windows 7 as well.
What to do if IPv4 properties don’t work in Windows 10?
1. Check your system for malware

If IPv4 properties aren’t working, the issue might be caused by malware. The problem can be caused by various toolbars and browser extensions.
So, if you’re using any suspicious extensions in your browser, be sure to remove it as soon as possible. In addition, it’s also a good idea to scan your system for malware.
There are many great antivirus tools, but if you want maximum protection that won’t interfere with your system, we strongly advise that you consider using Vipre.
This award-winning security solution for Windows computers and even Mac OS will further protect you from all computer viruses and identity theft.
Vipre Antivirus Plus
2. Change the rasphone.pbk files
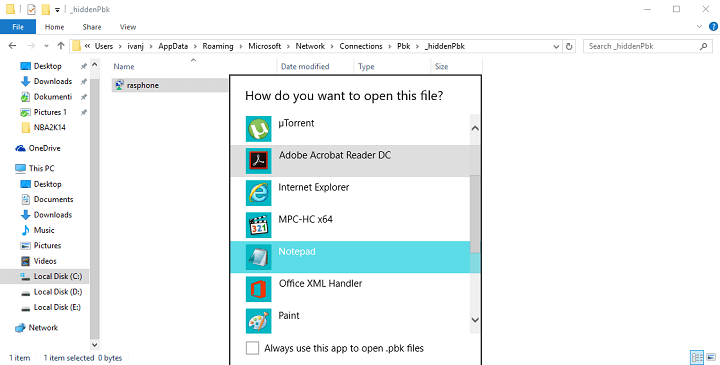
- Navigate to the following: C:\Users\yourusername\AppData\Roaming\Microsoft\Network\Connections\Pbkrasphone.Pbk\
- After you’ve found rasphone.pbk it’s a good idea to make a copy of this file and save it in a different folder in case you need to use it as a backup. This is entirely optional, but it doesn’t hurt to be a bit more careful.
- Right-click the rasphone.pbk and choose Open with. Then select Notepad from the list of suggested applications.

- After you’ve opened this file with Notepad find the IpPrioritizeRemote and set its value from 1 to 0. Some users advise to also set IPInterfaceMetric to 1, so if changing IpPrioritizeRemote doesn’t work try changing IPInterfaceMetric as well.
- Now, all that you have to do is to save the changes and IPv4 properties should be working as usual.
Properties for connections are stored in PBK files, and there is usually one PBK file per user available. To enable IPv4 properties you need to find and manually edit the PBK file, so let’s get started.
3. Use a different VPN client

This problem can occur while trying to configure a VPN. If IPv4 properties aren’t working with your current VPN, this might be a good time to consider switching to a different VPN client.
PIA is fully compatible with Windows 10, and it offers great features. So, if you’re having any problems with your VPN, we strongly recommend that you consider switching to this VPN service.
With encrypted Wi-Fi, P2P support, and SOCKS5 Proxy as part of the package, t he connection is stable and you never feel a loss in bandwidth.

Private Internet Access
4. Use Powershell to enable Split Tunneling
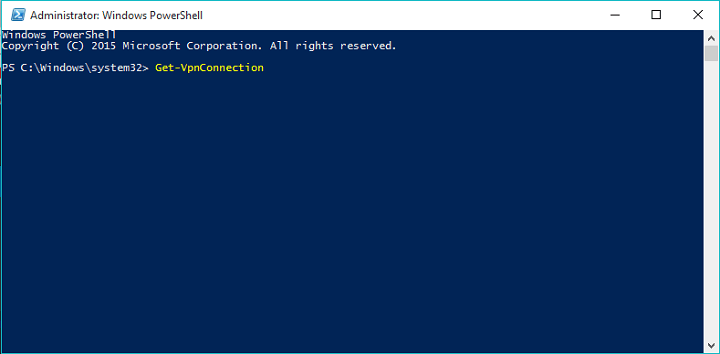
- Start Powershell. You can do so by typing Powershell in the search bar and right-clicking the Powershell icon and choosing Run as administrator from the menu.
- Enter the following command into Powershell and press Enter to run it (You should now get a detailed listing of settings for each VPN. Pay attention to the Name section and locate the name of your connection because you’ll need it in the next step):
- Get-VpnConnection
- Get-VpnConnection
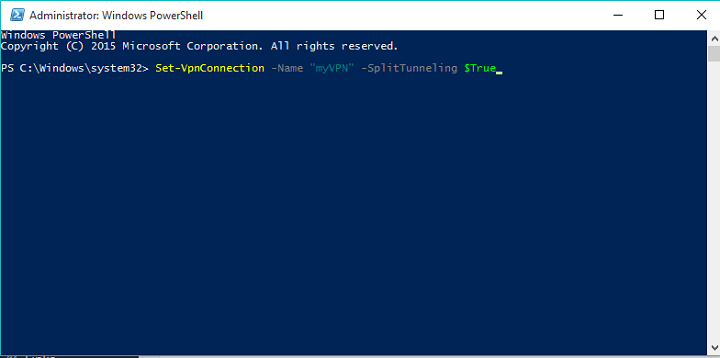
- Now, enter this into Powershell (Remember to change myVPN to the name of your connection that you’ve found in the previous step)
- Set-VpnConnection -Name “myVPN” -SplitTunneling $True
- Set-VpnConnection -Name “myVPN” -SplitTunneling $True
- Run that command by pressing Enter, and that’s it.

5. Set IPv4 properties manually via Powershell
- Run Powershell as administrator. If you don’t know how to do it, have a look at Step 1 in the previous solution.
After the Powershell starts enter this:
- set-DnsClientServerAddress -InterfaceAlias “My Connection” -ServerAddresses 208.67.222.222,8.8.8.8,208.67.220.220,8.8.4.4
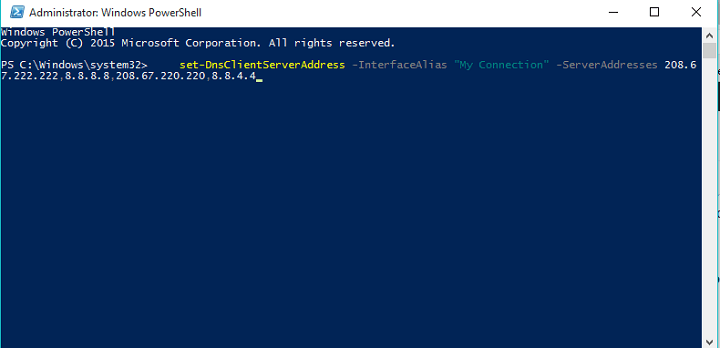
The next thing we’re going to try is another Powershell trick. Just use the above steps in that regard.
6 Install the missing updates
- Press the Windows Key + Ishortcut to open the Settings app.
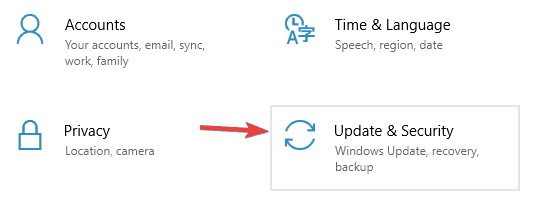
- Up next, go to the Update & Security section.
- In the right pane, click the Check for updates button.
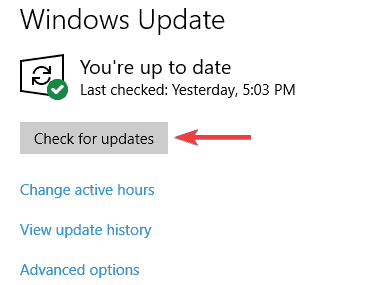
According to users, sometimes problems with IPv4 properties can occur due to certain bugs on your system.
Microsoft is working hard to fix various issues, and they are frequently releasing Windows Updates, so if you want to be sure that your PC is error-free, it’s advised to keep your system up to date.
For the most part, Windows 10 automatically downloads the latest updates in the background, but sometimes you might miss an update or two.
However, you can always check for updates manually by doing as described above.
Windows will now check for any available updates and download them automatically in the background. Once the updates are downloaded, simply restart your PC to install them.
After your system is up to date, check if the problem is still there.
7. Disable Datamngr Coordinator service
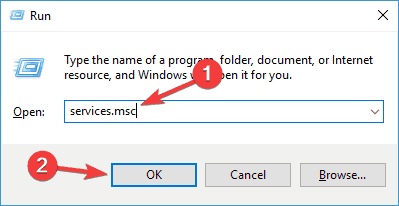
- Press Windows Key + R and enter services.msc. Press Enter or click OK.
- Now look for Datamngr Coordinator service and double-click it to check it’s properties.
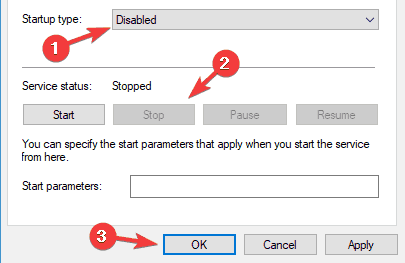
- Set Startup type to Disabled, and click the Stop button to stop the service. Now click Apply and OK to save changes.
According to users, if IPv4 properties won’t open, the issue might be the Datamngr Coordinator service. To fix the problem, it’s advised to disable this service completely.
After doing that, check if the problem is still there. Keep in mind that other services, such as Safety Nut Service, can cause this problem as well, so be sure to disable them.
8. Remove the problematic applications

According to users, sometimes a third-party application can cause IPv4 properties to stop working. To fix the problem, you need to find and remove this application from your PC.
Many users reported that applications such as Aztec Media caused this problem, so if you see any suspicious application on your PC, be sure to remove it and check if that solves the problem.
There are many ways to remove a problematic app, but the best one is to use one of these great uninstaller software tools.
In case you’re not familiar, uninstaller software is a special application that will completely remove the selected application, along with its file and registry entries.
As a result, there won’t be any leftover files or registry entries that can interfere with your system. There are many great uninstaller applications on the market, that’s true.
However, one of the best and simplest to use is Revo Uninstaller, so if you want to remove any problematic application from your PC, we suggest to try this tool.
9. Flush your DNS and reset your connection
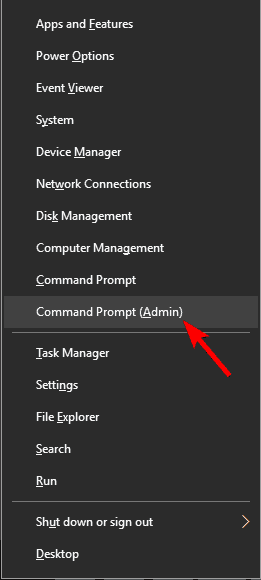
- Start Command Prompt or PowerShell as administrator. To do that, press Windows Key + X to open Win + X menu and choose PowerShell (Admin) or Command Prompt (Admin).
- When Command Prompt opens, run the following commands one by one:
- netsh winsock reset
- netsh interface ipv4 reset
- netsh interface ipv6 reset
- ipconfig /flushdns
In some cases, issues with IPv4 properties can occur due to your connection. The simplest way to fix that is to reset your connection and check if that helps.
To do this, you just need to run a couple of commands by doing as described above. After running these commands, restart your PC and check if the issue is still there.
10. Modify your registry
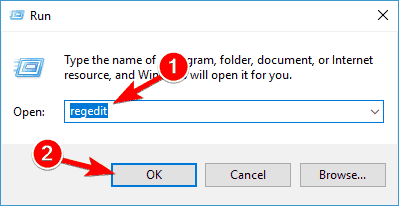
- Press Windows Key + R and enter regedit. Now press Enter or click OK.
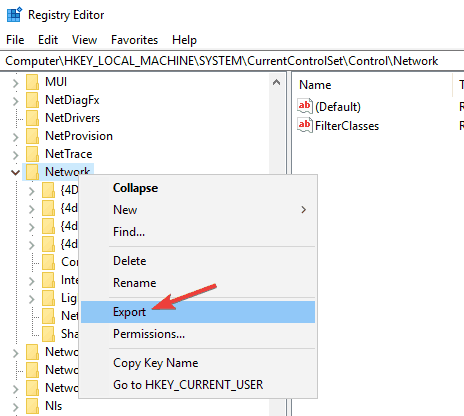
- When Registry Editor opens, navigate to this key: HKEY_LOCAL_MACHINE\SYSTEM\CurrentControlSet\ControlNetwork
- Right-click the Network key and choose Export from the menu.
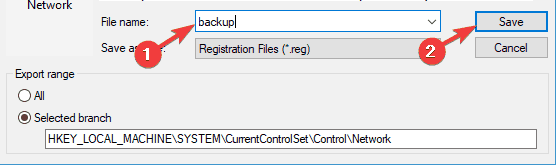
- Enter the desired name, choose a save location, and click the Save button. If anything goes wrong after modifying the registry, simply run the exported file to restore it.
- Right-click the Network key again, and this time choose Delete. Click Yes to confirm.
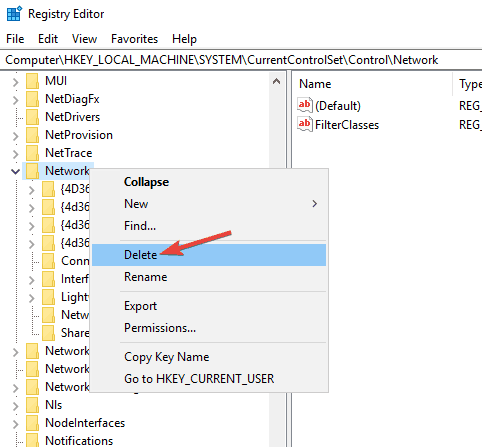
In some cases, you might have to modify your registry if IPv4 properties aren’t working. To do this, you just need to follow the procedure described above.
After this key is deleted, the issue should be resolved and everything should start working again.
Getting an error while accessing the Registry? Count on us to solve the problem with the help of this quick guide.
Sometimes you might not be able to open IPv4 properties. This isn’t the only problem, and speaking of problems, here are some similar issues that users reported:
- Network properties not opening – Sometimes you might not be able to open network properties. To fix that, be sure to install the latest updates and check if that helps.
- IPv4 not working Windows 7, Windows 10 – This issue can appear on any version of Windows, and even if you don’t use Windows 10, you should be able to apply almost all of our solutions to other versions of Windows.
- Cannot access IPv4 properties – If you can’t access IPv4 properties, be sure to scan your PC. Sometimes malware can cause this issue to appear, so be sure to perform a thorough scan.
- IPv4 properties not opening, showing, enabled, available, detected, is disabled – There are various issues that can affect IPv4 properties, but you should be able to fix most of these issues by using one of our solutions.
We hope that these solutions were helpful to you and that you have managed to successfully set IPv4 properties in Windows 10.
If you have any questions, comments, or maybe some other solutions for this problem, just reach the comments section below.


