- Easily Run Windows Applications on Mac OS X
- Installation
- Installing Windows applications
- Running Windows applications
- Conclusion
- How to run Windows apps on your Mac with CrossOver
- What’s the best way to install Windows apps?
- How to install Windows apps on your Mac using CrossOver
- What are bottles?
- How to run Windows apps on a Mac
- Boot Camp
- Installing Windows using Boot Camp
- Virtual machines
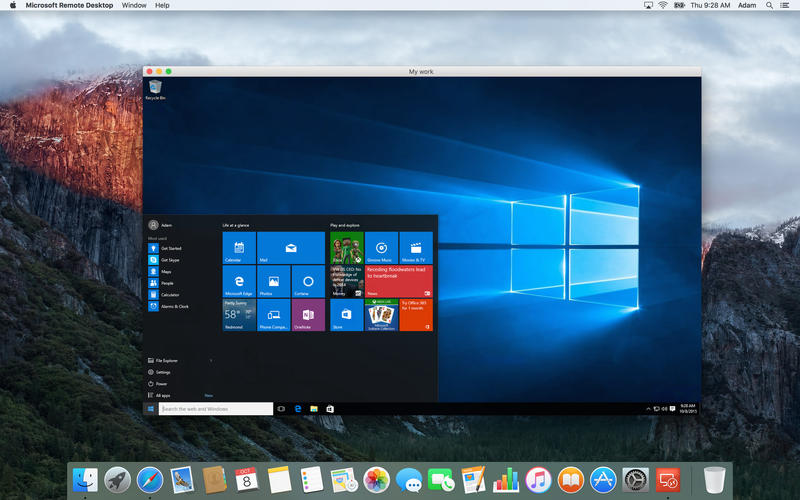
- Remote desktops
- Third-party applications
- WineBottler
- CrossOver Mac
- So, which Windows on Mac solution to choose?
Easily Run Windows Applications on Mac OS X

If you are using Mac OS X and want to run Windows applications, the most popular option is to install Windows OS using Bootcamp, or run Windows in a virtual machine. Linux users will know that you can use Wine to install and run Windows applications natively. The good news is that Mac users can run Wine to install Windows applications as well. Wineskin is a Wine-tool ported over to the Mac platform. Check out how you can run Windows applications on Mac OS X.
Wineskin is simply an implementation of Wine at its core. For those who are not sure what Wine (an acronym for “Wine Is Not an Emulator”) is, it is a compatibility layer capable of running Windows applications on several POSIX-compliant operating systems, including Linux and Mac OS X.
Installation
The installation is pretty straight-forward.
1. Download Wineskin. The latest version as of this post is 2.5.12.
2. Extract the file and move the Wineskin app to your Applications folder. Open it.

On the first run, there won’t be any engine showing up in the list. Click the “+” button to download and install the latest engine. The engine is required to make the Windows applications work.

Once the engine is installed, you are ready to install Windows applications.
Installing Windows applications
Before you start, make sure you have the executable file of the desired Windows application with you. Note that Wineskin doesn’t support all the Windows applications out there. Check out Wine’s AppDB to see if the application you want is supported.
1. Click the “Create New Blank Wrapper” button and enter a name for this wrapper. In this example, we will be installing Peazip on Mac.

While creating the wrapper, it will prompt you to install mono package for running .Net applications and Gecko package for running HTML-based apps.


2. Once the wrapper is created, open it in Finder; right click and select “Show Package Content.”

You should see two folders: “Contents” and “drive_c” and a Wineskin app. Run the Wineskin app.

3. Select “Choose Setup executable” and select the executable file of the Windows application.

The installation will proceed just like it does in Windows.

Running Windows applications
Run the Wineskin app (from the Wrapper folder) again. This time, click “Advanced.” Browse and select the installed application and click “Test Run.” This will run the Windows application.

This is what the application will look like:

Once you are happy with the test run, the next time you can just double click the Wrapper app to open this application.
Conclusion
If you need a Windows environment in Mac, your best bet would be either using Bootcamp or to run a virtual machine. However, if all you need is a particular Windows application, using Wineskin is a better option (provided that the application is supported). If you have a lot Windows game in your collection, you will be happy to know that plenty of those older games are supported by Wine, and you can now play them on your Mac machine. Enjoy!
Damien Oh started writing tech articles since 2007 and has over 10 years of experience in the tech industry. He is proficient in Windows, Linux, Mac, Android and iOS, and worked as a part time WordPress Developer. He is currently the owner and Editor-in-Chief of Make Tech Easier.
How to run Windows apps on your Mac with CrossOver

Every now and then, a Mac user is going to say, «Man I wish there was a version of (insert program here) for Mac. I’d buy that in a heartbeat.» It’s happened to me more times that I really wish to count. Thankfully, most of the apps I want to run on my Mac exist as native apps.
However, there are a couple that slip through my fingers, like Microsoft’s Visio Professional. It doesn’t exist on the Mac side and I really need it for my day job as a software quality vice president.
Thankfully, there’s more than one way to run Windows apps on your Mac.
- You can use Apple’s Boot Camp and run a full installation of Window natively on your Mac
- Use a virtual machine like Parallels Desktop
- Install Windows apps directly with CrossOver and use a Windows app like any other native Mac App
There are advantages and disadvantages to each, but that last one – installing Windows apps directly under CrossOver – is a bit different, and it offers some distinct advantages if you know how to get things going.
With CrossOver, you don’t install Windows and then the app. It’s all about the app, and only the app. Thankfully, while CrossOver is different, it’s not difficult to use. However, there are a few things you need to know. For example, CrossOver doesn’t run ALL Windows apps. Some run better than others, and some won’t run at all.
What’s the best way to install Windows apps?
When trying to determine the best way to install a Windows app, consider the advantages and disadvantages of the three different ways to run Windows on a Mac — natively, via VM or via CrossOver:
| Feature | Dual Booting | Virtual Machine | CrossOver |
|---|---|---|---|
| Run without Rebooting | No | Yes | Yes |
| Run without Windows OS License | No | No | Yes |
| Runs ALL Windows Apps | Yes | No. Not all graphic-intensive features are supported | No. Some run. Some run OK. Some won’t run at all |
| Runs Apps at Native Speed | Yes | No | Yes |
| Needed to Run an App | Windows License, App License | VM License, Windows License, App License | CrossOver License, App License |
| Approximate Costs (App not included) | $120 — $200 for Windows 10 | $80 for Parallels Desktop or VMware Fusion, $120 — $200 for Windows 10 | $40 — $60 for CrossOver |
How to install Windows apps on your Mac using CrossOver
If you want to install Windows apps on your Mac without all the overhead associated with Windows, follow these steps.
- Navigate to CodeWeavers and download CrossOver.
Go to your Downloads folder and locate the Zip file you downloaded. Double Click it to open it. Archive Utility will Open it up and decompress the contents of the archive.

Double click the CrossOver.app in your Downloads folder. It will offer to move itself to your Applications folder.
CrossOver will start for the first time. When it does, it’s going to ask you how you want it to run. By default, it runs in trial mode. However, you also enter in your registration information or buy a license right from this page.
From the screen that appears, click the Install a Windows Application button.
Type the name of the application you want to run. CrossOver will search its database and display appropriate matches.
![]()
Click the Continue button.
![]()
Click the Continue button. Remember: CrossOver will not find and download the software you want to run for you. You actually have to have the installation file for the software you want to run.
![]()
What are bottles?
CrossOver is powered by the Wine Project. As such, all Windows apps are installed in «containers» called bottles (get it?). When you install an application for the first time, CrossOver will create a bottle and automatically place your application in it. When you install new applications, CrossOver will also give you hints about which apps can work and play well in the same bottle. If your apps can be installed in the same bottle, putting them together will save some space. If they can’t, CrossOver will tell you and suggest creating a new bottle. It will also suggest a name for it. Keep the suggestion or give the bottle a name of your own choice.
Click the Continue button.
![]()
Click the Install button.
![]()
The software will install. CrossOver displays a progress screen where it will run through not only the creation of the bottle, but it will download any needed support software, and then run the installer you chose. Once the installation process completes, you should be ready to run your software.
![]()
Find the bottle you just created and run your software.
Running Windows and Windows apps on a Mac can be challenging. Finding the right method for you and your needs can be equally as challenging; however, if you think about it, there are a number of ways to run Windows on a Mac.
Some are expensive. Some aren’t.
Some take time and are complicated. Others aren’t.
CrossOver isn’t just easy to use, it’s affordable. For less than 1/4 the price of Windows plus the price of the application you need to run, you can run it on your Mac. For the odd app out, this is a total no-brainer; and it’s fairly easy to do. If you want to make sure your app works with CrossOver before you give it a shot, you can always search for it on their website.
How to run Windows apps on a Mac
Apple is on a roll, whether it’s the new iPhones or new products like its well-received AirPods. But what sometimes gets lost is Apple’s roots: It was, after all, known as Apple Computer Co. when it began in 1977. And Apple does still launch new and improved computers every year. Last year, the company launched the all-new series of MacBooks that are lighter and more compact than the MacBook Air, but are as powerful as the MacBook Pro. Apple’s Mac has a very well-polished and thriving ecosystem of software and is one of the most compact notebooks available in the market today. All Apple users can download their favorite applications from the App Store. As per recent statistics, the App Store now contains over 2.2 million apps to choose from. However, some productivity applications and many graphic-intense applications such as games are still confined to Windows. You don’t need to get disheartened that you can’t play your favorite games on a Mac. There are a lot of possible ways to run Windows-specific software on your Mac. Here are some of the preferred and widely used methods of running Windows on Mac.
Boot Camp
This is one of the simplest and widely used methods of using Windows features and apps on a Mac. Generally, a Mac’s hardware is powerful enough to handle multiple operating systems in it. To get the most of two operating systems, you can actually install Windows OS on a Mac. Accordingly, Apple provides its Mac devices with Boot Camp, which is an effective and safe way to boot multiple OS on a Mac machine simultaneously, including Windows on Mac.
Apple’s Boot Camp is an option to install multiple operating systems in a Mac-based device and comes pre-installed with Mac OS. Using Boot Camp is one of the safest options you have to boot multiple operating systems. However, in order to do so, you’ll need to purchase a valid Windows license.
Boot Camp sets up a partition on the hard drive so that you can install other operating systems of your choice. And since the installed operating system will be running directly off the hard drive, running Windows or any other OS using Boot Camp provides a far better and more fluid experience than any virtual machine can offer.
Installing Windows using Boot Camp
Before you start the process of installing Windows OS using Boot Camp, it is advisable to first install all the latest updates from Apple and take a backup of all your essential data. Running Boot Camp is very easy and is guided by on-screen prompts with OS X 10.6 or later.
Steps to follow
1) Find the Boot Camp Assistance application from the utilities and launch the assistance.
2) Click continue, and if prompted to download the latest Windows support software, do not skip it! Download the software. This will install most of the essential drivers for Windows.
3) After you’re done installing the software updates, you’ll now be taken to the partitioning screen, where you need to partition your hard drive for allocating space to the Windows OS.
4) Set up the space using the slider on the screen and click on Partition.
5) Once the partition is completed you’ll need to insert the Windows installation disk in the Mac optical drive and start the installation process.
6) The Windows installation process is also guided by simple on-screen prompts.
7) During the installation, you might be asked to select the location to install Windows OS. If prompted, select the partition made in step 3 & 4.
8) After the Windows OS is installed, you’ll need to install and set up the drivers and choose the default OS to boot.
- Safest possible option to install a fully functional Windows on Mac.
- Can use full capabilities of the hardware.
- Offers support for all the drivers and ports.
- Requires a restart every time you wish to switch between the OS.
- Limited storage limit due to disk partitioning.
- Need to purchase a Windows license key to install Windows on Mac.
Virtual machines
Virtual machines are one of the most common ways of running multiple operating systems on a single device. These VMs works on the concept of virtualization, which creates a virtual computer within your actual computer. It can provide complete access to your computer hardware. Assuming that your machine possesses the required hardware capabilities, virtual machines allow you to emulate your desired OS so you can run multiple operating systems on a single machine. However, these applications will be running in the background inside the virtual machine.
To use this service, make sure you have a valid Windows license to install on a virtual machine. Some of the most popular paid virtual machines for Mac include Parallels and VMware fusion. You can also use free and open source virtual machines such as VirtualBox and QEMU.
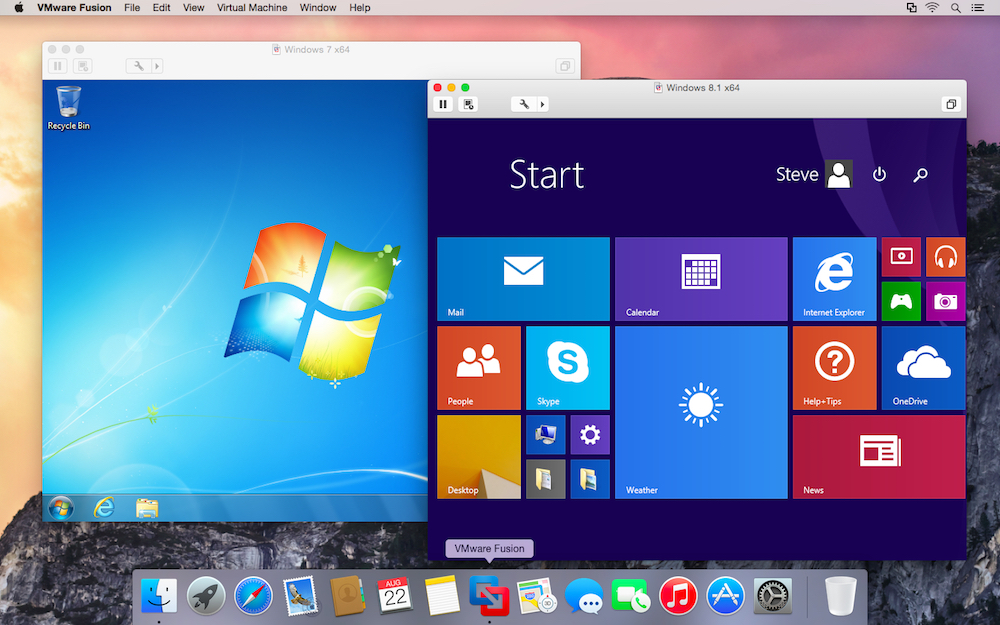
Although these virtual machines can serve your purpose by running Windows software and applications, be aware that the graphics performance isn’t at its best. So, if your primary need is to run Windows games on your Mac, virtual machines might disappoint you.
- Can run Windows software on your Mac directly without rebooting the system every time you need to switch between the OS.
- Need not purchase and install the complete Windows OS.
- Availability, easy maintenance, convenient recovery, and application provisioning.
- Unstable performance.
- Not meant for graphic-intense usage such as gaming.
- Not as efficient in accessing the hardware as that of a real OS.
Remote desktops
If you don’t want the hassle of partitioning your hard drive or installing software to emulate Windows, then accessing Windows software via a remote desktop might just be your call. Remote desktops will allow you to run any Windows application using a remote connection.
If you work with an organization or a company, then you might easily get remote access to a Windows machine for your Mac to work on. If you are a normal home user, you might need to use your old Windows PC to set a remote desktop connection with your Mac.
Most of the leading cloud platforms have already started providing remote desktop connections as per the user’s requirements. The whole concept of renting computing machinery is carried out in the cloud over the Internet.
But these remote connections are often restricted within an intranet, and if you want to use it outside your home or organization, you’ll need to set a VPN connection or use third-party software such as TeamViewer. You can also install the Chrome browser on your Mac and add Chrome Remote Desktop extension to it. Once this extension is added, you will be able to connect to a Windows PC running Chrome browser from your Mac.
Do bear in mind that these remote connection sessions do not provide an ideal environment to use graphics-intensive applications or PC games. Remote connections consume a considerable amount of time to render the content through a network.
- Very easy to set up.
- Easy to manage.
- Encrypted remote sessions make them secure.
- When the network is down, the entire concept of remote desktop fails.
- Restricted access to the remote system can hinder some functionalities while Windows on Mac.
- Can struggle with heavy tasks and applications.
Third-party applications
If you need to run only a few specific Windows applications on your Mac, then you might be able to do that without the hassle and expense of installing an entire Windows OS or renting a remote desktop. There are some applications that let you run Windows-based programs and applications directly on your Mac. And the best part about these applications is that most of them are absolutely free and are very easy to install and use.
WineBottler
WineBottler is a free Mac application that packages most of the Windows-based applications to comfortably run on your Mac. It doesn’t need to install any emulators or virtualizers. Instead, it simply runs a Windows application directly on a Mac. Internally, WineBottler repacks all the Windows-specific files such as .exe or .msi files to run on a Mac.

CrossOver Mac
If you are fine with spending a small amount of money to run almost all of the Windows software and applications with a nice graphical interface, CrossOver Mac is another application that makes your work easy. This application internally utilizes the open source Wine code to run Windows on Mac. Although CrossOver Mac provides a very polished user interface along with compatibility, it’s still based on Wine and, therefore, won’t work with everything.
Although these third-party applications relieve users from the cumbersome process of installing an OS to run Windows software, they are prone to bugs and issues.
- Very easy to setup and use.
- Cost-effective solution.
- Confined to very specific usage.
- Might contain bugs and other issues.
So, which Windows on Mac solution to choose?
If you are looking for a particular application or some other productive Windows tool to run on your Mac, then choosing a third-party application should suffice your needs. On the other hand, if your work demands the use of a Windows machine, try getting yourself a remote desktop from the organization or from a cloud solutions partner.
Both these methods work fine for low-to-moderate usage. However, if you are looking for a more powerful and durable solution to house both Windows and Mac in one device, you might have to proceed with either Boot Camp or virtual machines. To sum up, the best method for running Windows on Mac: We’d recommend you do both. Yes, you’ve read it right. Set up a complete Windows OS using Boot Camp’s disk partition and later install any of the virtualization software we mentioned in the Mac OS.
Now comes the tricky part: Configuring the virtual machine to use the Boot Camp partition of Windows OS. This way, when you need to use your device for some gaming or other high-end intense usage, you boot into the Windows OS with a restart. And when you want to perform regular Windows tasks, just use the virtual machine, skipping the hassle of restarting the device. This way, the VM will perform a lot better as it is actually mapped to a real disk partition of Windows OS. So, with this Windows on Mac solution, you get the best of both OS, depending on your requirements and needs.


