- Как установить iTunes на Linux
- PlayOnLinux
- Виртуальная машина
- Itunes для linux manjaro
- Contents
- Installation
- Connecting to a device
- Usbmux daemon
- Pairing
- Application integration
- Manual mounting
- Mounting the media directory
- Mounting application documents
- Changing iPod mountpoint
- Importing videos and pictures
- HTML5 videos
- Importing pictures and deleting them
- Converting video for devices
- Handbrake
- Avidemux
- Mencoder
- FFmpeg
- Device specific
- iPhone/iPod Touch
- The iFuse Way
- Generating HashInfo file
- Unobfuscating the Database
- iPod Classic/Nano (3rd generation)
- iPod Nano 5th generation
- iPod Nano 6th generation
- iPod Shuffle 1st and 2nd generation
- iPod Shuffle 4th generation
- iPod Video (5th and 5.5th generation)
- iPod management apps
Как установить iTunes на Linux

Интернет сильно упростил жизнь всех людей, имеющих к нему доступ. Не только благодаря быстрым и широким возможностям в сфере получения информации, но и из-за новых функций для потребителей. Будь то лицензия игры, одежда, еда, фильмы или музыка — с недавних пор всё это можно приобрести не выходя из дома. Обычно такие услуги делятся на какие-то более узкие специфики, к примеру, интернет-магазины аксессуаров или ножей. Но есть и крупные, масштабные проекты, являющейся своего рода платформой продажи, где любой продавец без труда находит своего покупателя.
Или другие площадки, где тоже можно продвигать свой товар, но с другими условиями.Показательным является iTunes Store, существующий с 2003 года, на данный момент большая часть контента, содержащегося на этой площадке — это музыка, кино и игры. Установить iTunes Store можно лишь на устройства корпорации Apple, а также на Windows. К сожалению, для GNU/Linux нет адаптивной версии, по этой причине пользователю придётся изворачиваться, если ему нужно установить онлайн-магазин корпорации Apple на какой-либо дистрибутив. Ниже будет рассказано о всех возможных способах использовать iTunes Store на Ubuntu.
PlayOnLinux
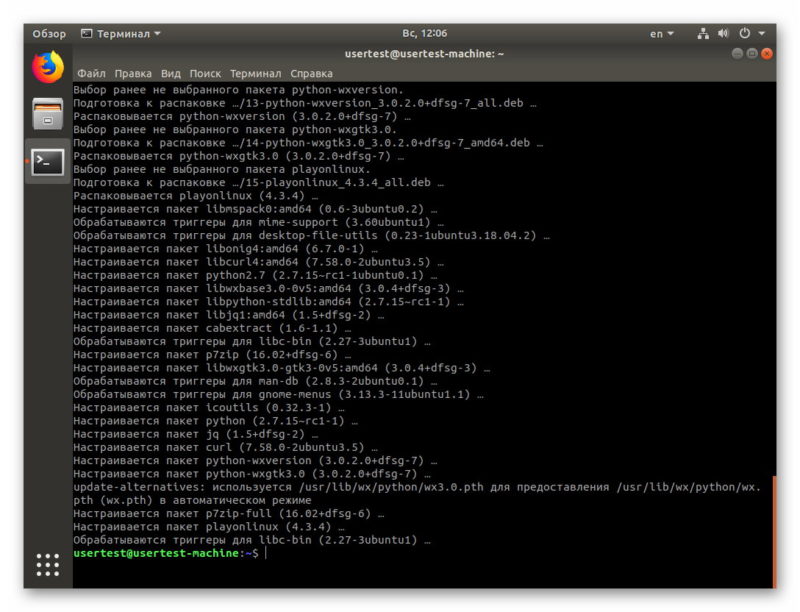
PlayOnLinux — это в некотором смысле форк Wine. Но правильнее было бы называть данный софт надстройкой. Всё удобство заключается в автоматизации установок Windows программ, что исключает необходимость ручной настройки. Инсталляция PlayOnLinux производится через добавления репозитория, всего их пять штук. Каких-то особых различий нет, разве что дата появления новой версии может разниться. Есть и другой способ — с помощью .deb файла. Но лучше использовать репозиторий, так как это обеспечит возможность автоматического обновления. Для установки PlayOnLinux необходимо написать данные команды в терминал:
wget -q «http://deb.playonlinux.com/public.gpg» -O — | sudo apt-key add —
sudo wget http://deb.playonlinux.com/playonlinux_precise.list -O /etc/apt/sources.list.d/playonlinux.list
sudo apt update
sudo apt install playonlinux
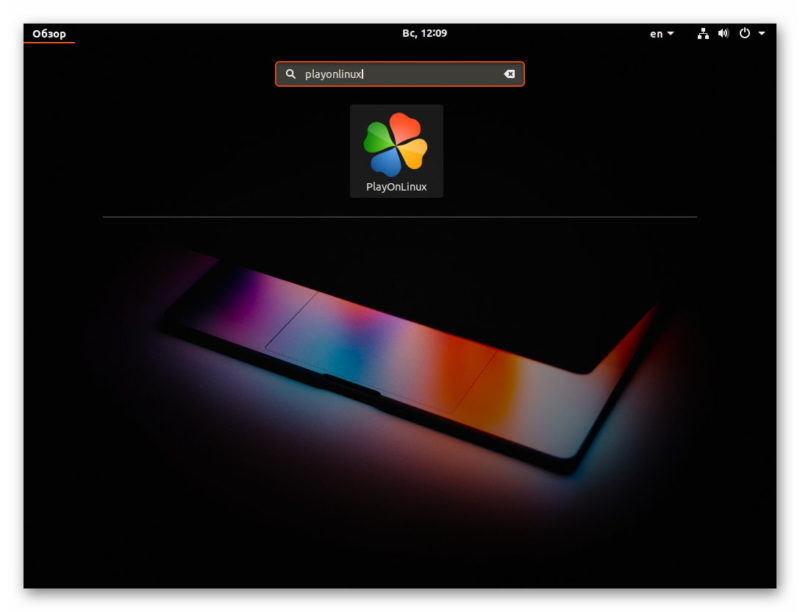
Запустить установленное приложение можно двумя способами: с помощью встроенного в систему поисковика или из терминала.
Однако, без некоторых библиотек и самого Wine ничего работать не будет. Поэтому всё это надо дополнительно установить:
sudo dpkg —add-architecture i386
sudo apt update
sudo apt install wine64
sudo apt install xterm
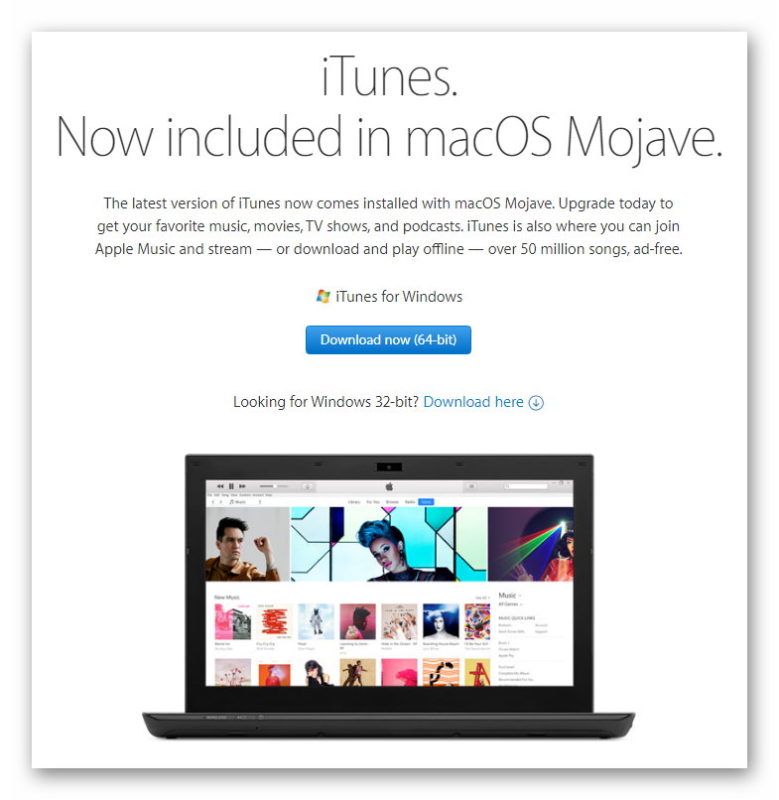
После этого PlayOnLinux будет благополучно запускаться и работать. Теперь необходим установочный файл iTunes, получить который возможно с официального веб-сайта Apple.
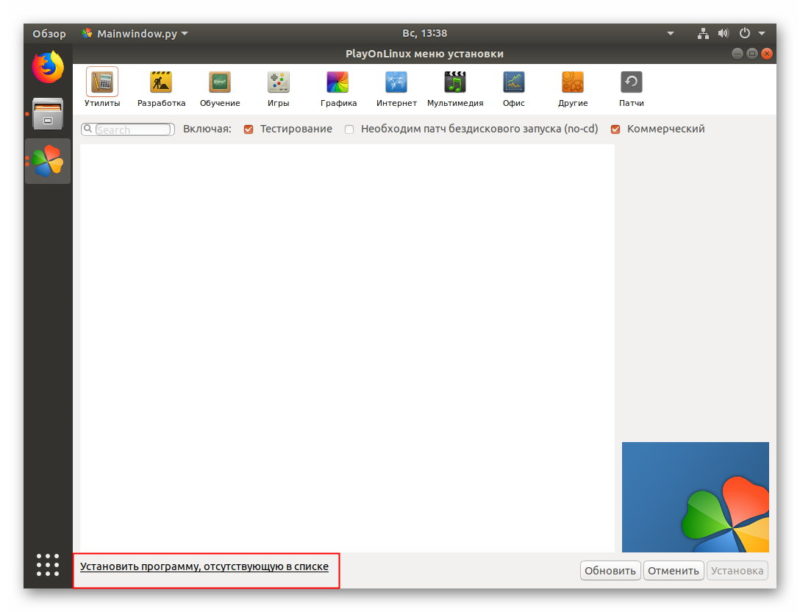
После того, как файл будет скачан, в открытом окне PlayOnLinux нужно нажать на кнопку «Установить». Откроется другое окно, в котором уже необходимо нажать на активную надпись «Установить программу, отсутствующую в списке».
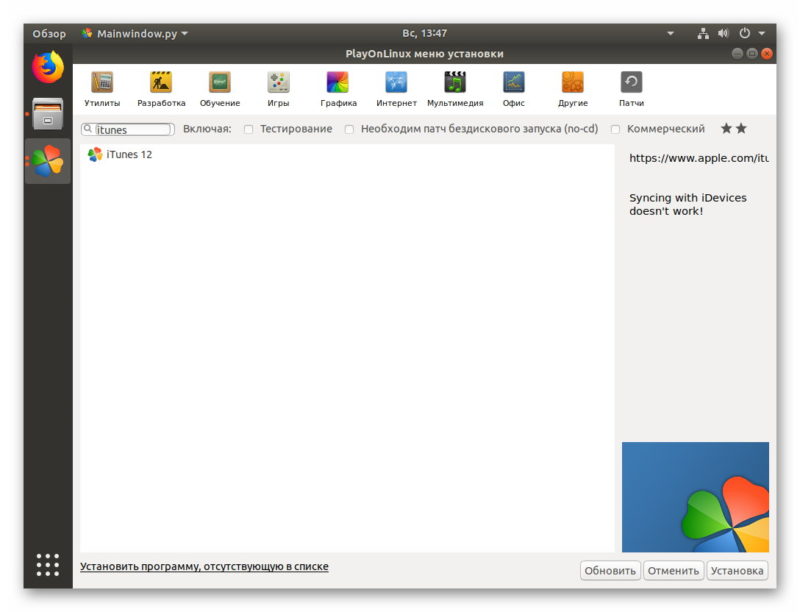
Установка iTunes на Linux происходит стандартным способом: выбирается название, директория программы и так далее. Но это старый метод, сейчас же в списке всех приложений можно найти iTunes.
Всё, что требуется, это начать установку, нажав соответствующую кнопку. Далее автоматически будет подобрана необходимая версия Wine и её настройка. Но даже так необходимо иметь скачанный 32 битный установщик iTunes.
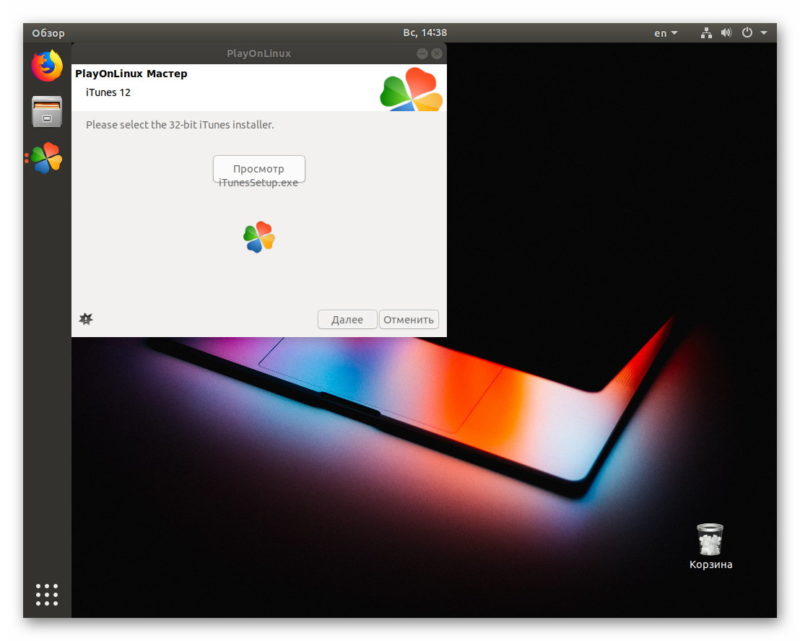
Главным отличием ручной и автоматической установки является возможность использовать 64 битную версию iTunes, а также другой Wine.
Виртуальная машина
Такой софт, как Wine чаще всего не подразумевает полную поддержку необходимого продукта. Обычно приходится мириться с различными багами или неправильной работой. Конечно, можно экспериментировать с версиями Wine или программы, но это, скорее «костыли», чем полноценное решение проблемы. По этой причине многие пользователи предпочитают альтернативу — виртуальные машины, например, VirtualBox.
Установить VirtualBox возможно с помощью загрузки .deb файла.
Инсталляция производится через менеджер приложений Ubuntu, также можно использовать любой другой менеджер.
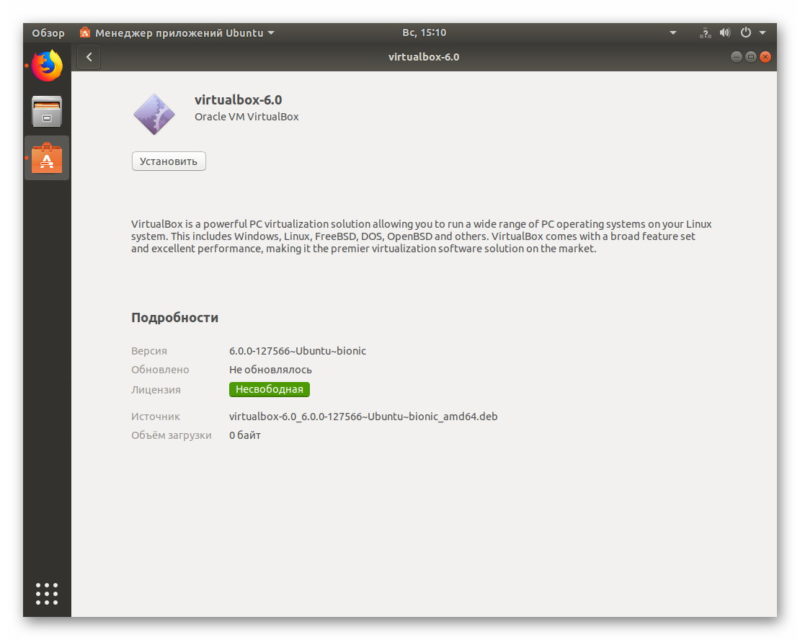
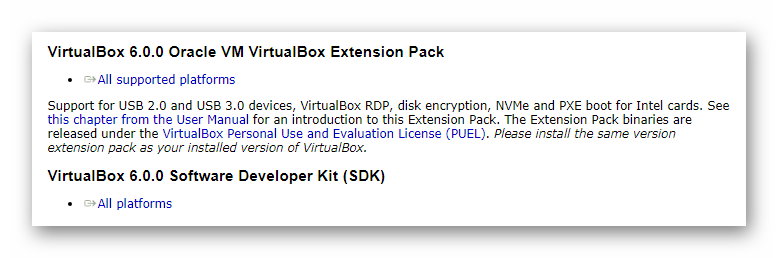
VirtualBox работает в Linux примерно по тому же принципу, что и в Windows. Для создания виртуальной операционной системы требуется лишь образ, получить который можно разными способами. В случае Windows — незаконно скачать пиратский образ или приобрести лицензию. Чтобы айТюнс мог работать с подключенным гаджетом, придётся установить дополнительный плагин. Он находится на официальном сайте. После его добавления VirtualBox сможет взаимодействовать с USB.
Также есть вариант использовать разные операционные системы. Они могут быть как на одном жёстком диске, так и на разном. Какая установка iTunes на Linux является правильной решает каждый пользователь сам для себя.
Видеоролик по установке:
Источник
Itunes для linux manjaro
![]() This article or section needs language, wiki syntax or style improvements. See Help:Style for reference.
This article or section needs language, wiki syntax or style improvements. See Help:Style for reference.![]()
The purpose of this article is to demonstrate the use of iOS devices with Arch Linux.
Contents
Installation
Install the libimobiledevice libraries and optionally ifuse AUR the mounting utility
Connecting to a device
Usbmux daemon
usbmuxd is required to make connections to iOS devices all. systemd comes with udev rule to automatically start and stop this daemon so no user interaction is required.
Insert the iOS device and verify that usbmuxd.service automatically started.
Pairing
In order to be able to connect to the iOS device, it must be connected via USB to the computer.
If you have multiple iOS devices connected —udid ios_udid parameter can be passed to target specific device.
Application integration
Applications which use GVFS, such as some file managers (GNOME Files, Thunar) or media players (Rhythmbox) can interact with iOS devices after installing the gvfs-afc and gvfs-gphoto2 packages. Restarting the file manager or application might be needed.
Manual mounting
Mounting the media directory
The simplest way to mount your iPhone’s filesystem to your mount folder, is using the following:
If you do not use the allow_other option, you will not be able to access the mountpoint folder, even if you attempt to sudo into it.
Application documents are not included in the iPhone’s media directory and are mounted separately.
Mounting application documents
To list all available applications (and their APPIDs), run the following:
For example, if VLC is installed on device, you can mount VLC’s files:
org.videolan.vlc-ios is the APPID listed in the output of the previous command.
The mountpoint field is where you want to have it mounted.
Changing iPod mountpoint
Traditional iPods are accessed just like a normal USB storage device containing a vfat file system (in rare cases hfsplus), and can be accessed as such. See the USB storage devices article for detailed instructions.
If udisks2 is installed, it will mount an attached iPod to /run/media/$USER/iPod_name .
If the volume label of the iPod is long, or contains a mixture of spaces, and/or lower-case and capital letters, it may present an inconvenience. You may easily change the volume label for more expedient access using dosfslabel from the dosfstools package:
- Get and confirm the current volume label:
- Set the new volume label:
- Unmount the device:
- Mount it again:
where /dev/sdxx is the current device node of your iPod.
Importing videos and pictures
Both videos and photos can be found in typically in /DCIM/100APPLE .
HTML5 videos
Typically you want to convert MOV files to a HTML5 video format like OGV using ffmpeg2theora . Note that the creation date metadata is not in the converted video, so you need to use a script like:
And use cp -a or rsync -t in order to preserve the file’s date & time.
Importing pictures and deleting them
You can move photos and videos out of /DCIM/100APPLE , however you need to trigger a rebuild of the «Camera Roll» database by deleting the old databases.
Converting video for devices
Handbrake
Handbrake is a nifty tool with presets for a variety of iPod versions. CLI and GTK versions are available with the handbrake-cli and handbrake packages respectively.
If you do decide to take the CLI way, a good guide is available at https://handbrake.fr/docs/en/latest/cli/command-line-reference.html.
Avidemux
This can convert to mp4 files. If you enforce a hard max of bit rate @ 700ish and keep the video size to 720×480 or 320×240 than it works fine for video file exporting.
Mencoder
Has extremely comprehensive configuration support, which will be able to spit out iPod-compatible video files. Check out mencoder(1) ; a lot of MPlayer opts will also affect encoding.
A basic guide is also available at MEncoder.
An example command to encode iPhone/iPod Touch-compatible video:
FFmpeg
Another encoder with comprehensive configuration support. Example command to encode for 5G iPod:
or iPod Touch/iPhone compatible video output:
Device specific
iPhone/iPod Touch
By default, neither the iPhone nor the iPod Touch present mass storage capability over USB, though there is a solution for accessing your files.
The proposed solution is to use a FUSE file system called ifuse AUR , which allows you to mount your device through USB, as you normally would. After installing ifuse, for instance, you should see your iPhone appear in the left navigation of Gnome Files and other supporting file managers.
Refer to this page:[1]
The iFuse Way
Now make sure that you have the fuse module loaded by doing modprobe fuse , assuming that you do not have it in /etc/modules-load.d/ already.
You can now mount your device. Make sure it is unlocked before you plug it in, or it will not be recognized.
The mountpoint field is where you want to have it mounted.
And you are done! You should be able to point your syncing software of choice to the mount point and be able to transfer files.
To unmount your device:
Members of group fuse can mount devices as regular user:
Generating HashInfo file
If you have never synced your device using iTunes, you will get error messages telling you that the HashInfo file is missing. This can be fixed by syncing once with iTunes in order to create it. Alternatively one can create this file using the site http://ihash.marcansoft.com/. Enter the serial number of the iPod on the website. It will generate a file named HashInfo which you will place under the /mnt/ipod/iPod_Control/Device/ directory. Unplug the iPod device and plug it back.
Unobfuscating the Database
Since firmware version 2.0, Apple has obfuscated the music database. If you are using recent firmware, the file /System/Library/Lockdown/Checkpoint.xml can be modified to enable use of the older, non-obfuscated database. If that file does not exist then try to copy from /System/Library/CoreServices/Checkpoint.xml to /System/Library/Lockdown/Checkpoint.xml then replace:
Then reboot your device.
If syncing fails with «ERROR: Unsupported checksum type ‘0’ in cbk file generation!», you may need to leave this at 4. libgpod seems to expect a hashed database.
iPod Classic/Nano (3rd generation)
You need to set up the iPod to make libgpod able to find its Firewire ID. For this, you will need to get your FireWire ID manually
1) Mount the iPod as a rw mount point. In the following example, use /mnt/ipod .
2 ) Find the serial number by typing
this should print a 16 character long string like 00A1234567891231 (it will have no colons or hyphens)
3) Once you have that number, create or edit /mnt/ipod/iPod_Control/Device/SysInfo . Add to that file the line below:
(replace ffffffffffffffff with the 16 digit string you obtained at the previous step and do not forget the leading 0x before the string)
Your iPod can now be managed with Amarok or gtkpod.
iPod Nano 5th generation
Follow the instructions above #Generating HashInfo file in order to set up the hash file, it is needed to write into the device music library. To be able to use the iPod Nano with libgpod , a SysInfoExtended file is also needed to be placed in the directory /mnt/ipod/iPod_Control/Device/ . It can be generated using:
iPod Nano 6th generation
By default libgpod does not seem to be able to syncronize on a iPod Nano 6th generation. It copies data, but as soon as USB is disconnected, everything is as before. The package libhashab-git AUR fix this.
iPod Shuffle 1st and 2nd generation
Due to the simple structure of the Shuffle (compared to the «big» iPods), it is possible to use the player almost like any other USB flash MP3 player. What is necessary is rebuild_db.py file stored in the iPod’s root directory. Simply copy MP3 files onto the iPod Shuffle (sub-folders are allowed too) and run:
iPod Shuffle 4th generation
In order to use this version of the iPod Shuffle under linux, you can use the python based command line tool ipod-shuffle-4g AUR . It also provides advanced voiceover and (auto)playlist generation support.
iPod Video (5th and 5.5th generation)
iPods in the mainline series up to and including this model do not support the AAC PNS feature, and will display audible artifacts when encountering it. Disable the feature in ffmpeg when encoding AAC files for these devices.
The -movflags +faststart options place the moov atom at the start of the file, which helps the iPod parse the file faster.
iPod management apps
These tools use the libgpod library:
- Strawberry — Fork of Clementine aimed at audio enthusiasts and music collectors.
https://www.strawberrymusicplayer.org/ || strawberry
- Rhythmbox — GTK clone of iTunes, used by default in GNOME.
https://wiki.gnome.org/Apps/Rhythmbox || rhythmbox
- Banshee — iTunes clone, built with GTK and Mono, feature-rich.
http://banshee.fm/ || bansheeAUR
- gtkpod — GUI for Apple’s iPod using GTK. It allows you to import your existing iTunes database, add songs, podcasts, videos and cover art, and to edit ID3 tags.
https://sourceforge.net/projects/gtkpod/ || gtkpodAUR
- Amarok — Mature Qt-based player known for its plethora of features.
https://amarok.kde.org/ || amarokAUR
- Yamipod — Lightweight application for managing ONLY music on your iPod (not on your computer)
http://www.yamipod.com ||
These tools use their own implementation to communicate with the iPod:
Источник


