- How To Start, Stop and Enable, Disable Iptables or Ufw In Ubuntu, Debian, Kali, Mint
- Ufw or Ubuntu Firewall
- Install Ufw
- Install Iptables
- Remove, Uninstall Iptables
- ufw Help
- List Iptables/Ufw Service Status
- Start Iptables/Ufw Service
- Stop Iptables/Ufw Service
- Enable Iptables/Ufw Service
- Disable Iptables/Ufw Service
- Allow Port Or Service with ufw
- Allow Port Range
- Deny Port
- List Rules
- Delete Rules
- Check ufw Status
- Reset All Rules In ufw
- 4 thoughts on “How To Start, Stop and Enable, Disable Iptables or Ufw In Ubuntu, Debian, Kali, Mint”
- How To Turn Off Firewall On Kali Linux?
- Method To Turn Off Firewall On Kali Linux
- Conclusion
- Фаерволл Кали Линукс: настройка iptables
- Знакомство с таблицами iptables
- ВНИМАНИЕ!
- Фаерволл Кали Линукс: основные правила
- Фаерволл Кали Линукс: добавляем правила
- Фаерволл Кали Линукс: сохраняем настройки
How To Start, Stop and Enable, Disable Iptables or Ufw In Ubuntu, Debian, Kali, Mint
Ubuntu is popular Linux distribution used in different enterprise or personal IT environment. Security is important part of the today IT. We can use firewall services like iptables in order to tighten security of our Ubuntu system. In this tutorial we will look how to install, remove, enable, disable, start and stop Ubuntu iptables. This tutorial can be used for Kali, Debian, Mint distributions too.
Ufw or Ubuntu Firewall
Ubuntu rebranded iptables as ufw or Ubuntu firewall in its distrbution. So we will use ufw for different operations according to iptables in this tutorial.
Install Ufw
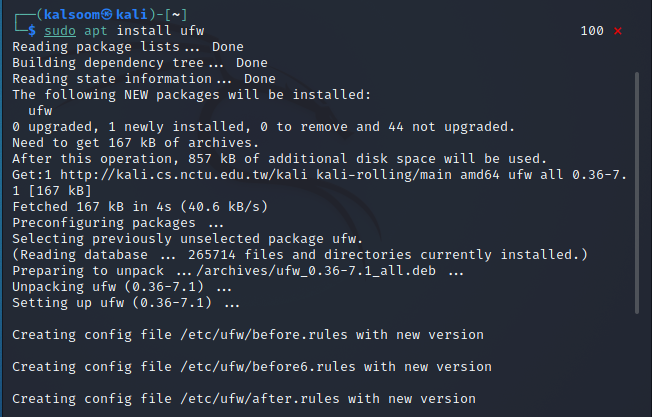
We can install ufw package for Ubuntu, Debian, Mint and Kali like below.
Install Iptables
Actually iptables package and related tools are installed by default for Ubuntu, Kali, Debian and Mint. But if they are removed accidentally or intentionally we may need to install iptables with the following command. Most of the operations like iptables installation examined in this tutorial will require root privileges.
Remove, Uninstall Iptables
Or we may want to uninstall iptables package and related tools. I generally uninstall iptables in my kali systems because use cases do nor requires iptables .
ufw Help
We can get help about ufw command with -h option. This will list most common commands provided by ufw .
 ufw Help
As we can there are commands and their summary descriptions. There is also Applications profiles.
List Iptables/Ufw Service Status
Now in order to manage iptables we should list the status of the service. We will use systemctl status command with ufw for Ubuntu and iptables for other distributions. As default behaivour ufw is enable by default in Ubuntu.
Start Iptables/Ufw Service
We can start ufw or iptables service in Ubuntu and related distributions by using systemctl start command like below.
OR we can use ufw command to start the related service like below.
Stop Iptables/Ufw Service
We can stop with the same command systemctl and stop option.
OR we can use command ufw to start the related service like below.
Enable Iptables/Ufw Service
Services may be enabled inorder to start after a reboot or fresh start. We can enable iptables ufw with the following commands.
Disable Iptables/Ufw Service
If we do not want to remove iptables or ufw but we do not want to start related services automatically at the system start we can disable related services with the following command.
Allow Port Or Service with ufw
ufw provides simple way to manage ports. We may need to allow some ports. We will use allow option. In this example we will allow TCP port 22 which is SSH default port.
We need to provide the tcp as protocol too.
 Allow Port Or Service with ufw
We can also allow just providing the service or protocol name. Following command will also allow SSH port like above command.
Allow Port Range
In some cases, some applications or services may use multiple ports in a range. We may need to allow a given port range. We can use : in order to specify the range. For example 2000:3000 can be used to specify ports between 2000 and 3000 .
In this example we will allow ports between 2000 and 3000 .
Deny Port
The default policy or setup of the ufw is denying all ports. This is more secure way to setup and manage firewalls. During the management of the firewall we may enable some ports. After some time we may need to disable these enabled ports. We can use deny option in order to prevent traffic for given port. In this example we will deny TCP port 22.
 Deny Port
List Rules
Over time some rules will be added to the ufw. In order to check, remove or update this rules we need to list them. We can list existing firewall tules with the status verbose options. In order to work this command ufw should be enabled and running.
 List Rules
As we see there are rules we have been added previously.
Delete Rules
In order to remove previously defined rules we need to delete them . Like addding new rule we just need to change allow with delete . In this example we will delete the TCP 22 or ssh rule. We should provide the allow or deny of the rule.
 Delete Rules
As we can see we delete the rule deny 22/tcp
Check ufw Status
We can check the status of the ufw with status option. Event the ufw service is running ufw may be disabled.
 Check ufw Status
As we can see the line Status:active shows that the ufw is actively working.
Reset All Rules In ufw
If we want to remove all rules deleting or removing them one by one is very tedious task. We can remove all added rules with a single option named reset . Keep in mind that this will remove all rules and revert back to default configuration.
 Reset All Rules In ufw
As we can see from screenshot it will ask us wheter we are sureto remove. Event we remove the rules they are saved automatically to the /etc/ufw/ directory with rules category and date by ufw.
4 thoughts on “How To Start, Stop and Enable, Disable Iptables or Ufw In Ubuntu, Debian, Kali, Mint”
FYI:
In the “Stop Iptables/Ufw Service” section, the code given is “systemctl start ufw” and “systemctl start iptables”, which obviously doesn’t stop the services.
Thanks for your suggestion. I have corrected the commands.
Have a nice day
Thanks for the sentences “Ubuntu is popular Linux distribution used in different enterprise or personal IT environment. Security is important part of the today IT. ” Even though I googled Kali Firewall, i would have been completely lost had you not included those at the beginning.
ufw does not stand for “Ubuntu Firewall.” It stands for “Uncomplicated Firewall.”
Источник
How To Turn Off Firewall On Kali Linux?
Internet intruders can acquire our information; therefore, firewalls safeguard our computers from them. It is sometimes misunderstood as being unnecessary for Linux. The Linux operating system has been rigorously designed to provide optimum security. For example, these include numerous levels of authorization to prevent viruses and malicious software from being installed. Unlike Windows, the Linux system has no open ports by configuration, which means that no external devices or programs may access your machine without opening ports. Furthermore, because Linux is the least common operating system, viruses and spyware designed for it are extremely rare. Cyber attackers will find it nearly unprofitable to attack it as a result. Despite this, there are still severe security flaws that might expose your Linux system.
Furthermore, because most Linux users believe they don’t require additional security, they are more exposed if an assault is conducted. As a result, it makes sense to invest in a trustworthy Linux Firewall that will provide you with the necessary protection. However, there are instances when you are working on an important activity and your Firewall obstructs your progress by preventing genuine efforts to access your system. You may feel compelled to disable your Firewall in such circumstances. As a result, we will learn how to disable the Firewall today.
Method To Turn Off Firewall On Kali Linux
First, we’ll set up the Kali Linux firewall. We can use the command to build a firewall in Kali Linux because it does not come preinstalled. UFW is a simple software for administering a Linux firewall that seeks to give a user-friendly interface. It’s the default on Ubuntu, and it is also available for Debian, CentOS, and other Linux distributions.
Our Kali Linux Firewall has been successfully deployed, and now we can use the status command to verify its status. Run the following stated instruction in the terminal of Kali Linux to verify the initial status of the ufw firewall.

Currently, the status is “Active”. As the purpose of this tutorial is to teach how to disable a firewall, you can use the disable command to turn it off. Run the following stated instruction in the terminal of Kali Linux to disable the firewall:

As it is already displayed in the above screenshot that “Firewall stopped and disabled on system startup”. We can again use the status command to verify its status.
Your Kali Linux system’s Firewall has now been effectively disabled. However, we need to double-check it. We can quickly check this by using the following stated command to verify the current state of our Firewall:

Currently, the status is “inactive”. In most cases, a user disables the Firewall only when he/she is attempting to complete a critical operation and the Firewall is obstructing that task. However, once the user has completed the task, it is strongly recommended that the Firewall be enabled again. If your Firewall has already been disabled, you can re-enable it by first performing the following command.

Conclusion
In this discussion, we learned how to use firewalls, as well as their importance on a computer system. However, we also found that there are times when we need to disable the system’s Firewall to do some critical tasks. You can disable the Firewall in the Kali Linux system using the method described above, depending on your specific situation. It also is advised that you enable the Firewall once you have finished the process for which you sought to disable it so that it can easily safeguard your computer from any malicious software and hackers. Hopefully, this guide will be productive for you to enable and disable the firewall in Kali Linux operating system.
Источник
Фаерволл Кали Линукс: настройка iptables
В статье рассмотрены основные правила настройки и принципы построения того, что принимается за фаерволл Кали Линукс.
Перед тем, как приступить к настройкам безопасности в Дебиан, необходимо уяснить, что таблицы iptables строго говоря не являются сервисом или службой. Речь идёт о специфической команде, которая позволяет манипулировать фаерволлом сетевого фильтра ядра системы. Она позволяет лишь выдавать, сохранять и, соотвественно, удалять соответствующие команды.
Знакомство с таблицами iptables
Возможности этой команды в Дебиан и других системах различны. Так, в Redhat и Fedora вроде как существует конкретный скрипт в /etc/init.d, который призван изменять конфигурацию iptables (напрямую его останавливать и запускать). Так что, работая в Кали Линукс, пользователи ошибочно пытаются применять подобную технику, но неизменно сталкиваются с отказом системы на такие действия. Нет, скрипт, конечно, можно написать и впоследствии им пользоваться. Но по умолчанию пользователи Дебиан этого скрипта не найдут.
Проверим наличие таблиц командой:
Бывает, что терминал молчит. Тогда доустановим таблицы командой
Чтобы приступить к настройкам таблиц, предлагаю вам создать пустой файл firewall.rules , который затем можно будет конфигурировать вручную из терминала или в любом текстовом редакторе. Сделаем это командой:

Сразу запоминаем ещё одну команду:
которая позволит вернуть предыдущие настройки (ей можно с успехом воспользоваться и для того же создания нового файла конфигурации; вновь введённая, она равнозначна предыдущей).
Для реализации следующих команд нам понадобятся root права. Вводим их последовательно, внося изменения в созданный только что файл:
Теперь сохраняем данные в файле firewall.rules уже знакомой вам командой:
Можете открыть и полюбопытствовать на проделанные изменения:

Или прямо из терминала:
ВНИМАНИЕ!
Теперь фаерволл Кали сконфигурирован теперь так, что ВСЯКИЙ может попасть КУДА УГОДНО. Подобная конфигурация — лёгкий способ настроить Кали для начала тестирования на проникновения при сетевой настройке виртуальных операционных систем. Открытые настройки позволяют пинговать Кали из гостевой ОС (в качестве которых у вас на хозяйской Кали могут присутствовать гостевые системы семейства Windows). Вариант, когда виртуальная машина настраивается таким образом, чтобы и гостевая и хост-система взаимопинговались, рассмотрен в статье Сетевые настройки VirtualBox в Кали Линукс.
Фаерволл Кали Линукс: основные правила
Интересующие нас в файле firewall.rules содержат следующие пустые цепочки. Откройте их список командой:
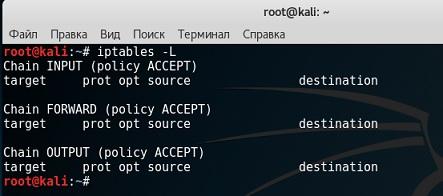
Эти цепочки показывают установки (запрет или разрешения) на типы сетевого трафика. Так, input отвечает за соединения, прибывающий на облачный сервер, output отвечает за исходящий трафик, а forward — за данные, пропускаемые системой. Каждая из цепочек,, как видно, имеет свой параметр с именем policy, которым определяется как сетевой трафик следует обработать. По умолчанию никаких фильтров на траф не предусмотрено (стоит значение accept).
Фаерволл Кали Линукс: добавляем правила
Фаерволл Кали Линукс обычно рекомендуется конфигурировать одним из двух традиционных вариантов. Либо установить правило по умолчанию принимать, и затем блокировать нежелательный трафик с помощью специальных правил, либо использовать правила для определения разрешённого трафика, обрабатывать его должным образом, а остальной поток данных просто блокировать. За основу принят именно второй вариант.
Чтобы приступить к работе с таблицами, сначала нужно добавить правила для того, чтобы фаерволл пропускал входящий трафик для нужных служб. Iptables в состоянии отслеживать трафик соединения. Вот команда на Разрешить установленные соединения:
Сейчас и потом проверяйте проделанные изменения командой:
Теперь разрешим трафик для конкретного порта для работы по защищённому каналу:
Флаг ssh в команде переводит защищённый трафик на предназначенный по умолчанию для этого порт за номером 22. Кстати, запомните эту команду. Она вам пригодится, если вы задумаете открыть для трафика другие порты. Давайте воспользуемся это командой прямо сейчас: разрешим соединение с HTTP сервером. Получается (вместо HTTP можно сразу указать номер порта), что команда примет такой вид:
И так далее по мере надобности. После добавления разрешающих правил, на остальные наложим запрет командой:
Подобные правила для политик настраиваются похожим образом для каждой из цепочек по принципу «имя_цепочки — DROP/ACCEPT«.
Фаерволл Кали Линукс: сохраняем настройки
После перезагрузки сервера, настройки исчезнут. Чтобы сохранить работу, не забывайте сохраняться командой в начале статьи:
перепишет существующие правила
добавит новое правило к существующим. Вот так выглядит простой набор команд в числе работы с фаерволом Кали.
Источник


