Как сделать live usb kali linux с сохранением данных
Kali Linux “Live” has two options in the default boot menu which enable persistence — the preservation of data on the “Kali Live” USB drive — across reboots of “Kali Live”. This can be an extremely useful enhancement, and enables you to retain documents, collected testing results, configurations, etc., when running Kali Linux “Live” from the USB drive, even across different systems. The persistent data is stored in its own partition on the USB drive, which can also be optionally LUKS-encrypted.
To make use of the USB persistence options at boot time, you’ll need to do some additional setup on your “Kali Linux Live” USB drive; this article will show you how.
This guide assumes that you have already created a Kali Linux “Live” USB drive as described in the doc page for that subject. For the purposes of this article, we’ll assume you’re working on a Linux-based system.
You’ll need to have root privileges to do this procedure, or the ability to escalate your privileges with the command “sudo su”.
In this example, we assume:
- you are running as the root user. As of Kali Linux 2020.1, we do not use root user by default. You can switch to root using the command “sudo bash”
- your USB drive is /dev/sdb
- your USB drive has a capacity of at least 8GB — the Kali Linux image takes over 3GB, and for this guide, we’ll be creating a new partition of about 4GB to store our persistent data in
- you are running on a separate Linux system (cannot be Live Boot Kali)
In this example, we’ll create a new partition to store our persistent data into, starting right above the second Kali Live partition and ending at 7GB, put an ext3 file system onto it, and create a persistence.conf file on the new partition.
First, begin by imaging the latest Kali Linux ISO (currently 2021.3) to your USB drive as described in this article. We’re going to assume that the two partitions created by the imaging are /dev/sdb1 and /dev/sdb2 . This can be verified with the command fdisk -l .
Create and format an additional partition on the USB drive. First, let’s create the new partition in the empty space above our Kali Live partitions. We have to do this from the command line as gparted will read the imaged ISO as a large block. The following command will, as a short explanation, shrink that block to only be the Kali Live partition.
The parted command may advise you that it can’t use the exact start values you specified; if so, accept the suggested value instead. If advised that the partition isn’t placed at an optimal location, “ignore” it. When parted completes, the new partition should have been created at /dev/sdb3 ; again, this can be verified with the command fdisk -l .
- Next, create an ext3 file system in the partition and label it persistence .
- Create a mount point, mount the new partition there, and then create the configuration file to enable persistence. Finally, unmount the partition.
Adding USB Persistence with LUKS Encryption
Alternatively, you can create a LUKS-encrypted persistent storage area. This adds an extra layer of security to your sensitive files when traveling with Kali Live on USB devices. In the following example, we’ll create a new partition to store our persistent data into, starting right above the second Kali Live partition and ending at 7GB, set up LUKS encryption on the new partition, put an ext3 file system onto it, and create a persistence.conf file on it.
- Image the latest Kali Linux ISO (currently 2021.3) to your USB drive as described in this article.
- Create the new partition in the empty space above our Kali Live partitions.
The parted command may advise you that it can’t use the exact start value you specified; if so, accept the suggested value instead. If advised that the partition isn’t placed at an optimal location, “ignore” it. When parted completes, the new partition should have been created at /dev/sdb3 ; again, this can be verified with the command fdisk -l .
- Initialize the LUKS encryption on the newly-created partition. You’ll be warned that this will overwrite any data on the partition. When prompted whether you want to proceed, type “YES” (all upper case). Enter your selected passphrase twice when asked to do so, and be sure to pick a passphrase you’re going to remember: if you forget it, your data will still be persistent, just irretrievable (and unusable).
- Create the ext3 filesystem, and label it “persistence”.
- Create a mount point, mount our new encrypted partition there, set up the persistence.conf file, and unmount the partition.
- Close the encrypted channel to our persistence partition.
That’s really all there is to it! To use the persistent data features, simply plug your USB drive into the computer you want to boot up Kali Live on — make sure your BIOS is set to boot from your USB device — and fire it up. When the Kali Linux boot screen is displayed, choose the persistent option you set up on your USB drive, either normal or encrypted.
Updated on: 2021-Sep-27
Author: g0tmi1k
Источник
Установка Кали Линукс Live USB

Когда нужно аккуратно проверить систему и оставить жесткий диск нетронутым, выручит Kali Linux Live USB. Но у него есть один недостаток – некуда сохранять найденную информацию. К счастью, возможна установка Kali Linux Live USB на носитель с сохранением данных на нем же.
Установка Kali Linux Live USB
Для хранения данных потребуется создать не только Kali Linux Live USB, но и дополнительный раздел под данные (найденный password, например).
Как скачать дистрибутив
Для создания Kali Linux Live USB потребуется загрузить образ со страницы загрузок на официальном ресурсе https://www.kali.org.

Образы для установки Kali Linux Live USB можно сохранить напрямую с сайта по http-ссылке или использовать торрент.

Запись носителя
Если бы требовалось создать Live CD Kali Linux, то скачанный ISO файл было бы достаточно прожечь на диск. Для USB потребуется специальная утилита – например, можно взять WinSetupFromUSB.
В главном окне нужно выбрать носитель для установки, подключить автоформатирование и затем в поле Linux ISO открыть загруженный образ.

Внимание! Лучше использовать накопитель от 8 ГБ – сам полный образ занимает порядке 3 ГБ, так что при меньшем размере места под раздел с сохранением данных остается совсем мало.
Если отметить пункт «Test in QEMU», то после записи утилита проведет тестирование на возможность загрузки и установки.
Перед записью программа предупредит о стирании данных.

Затем будет показана информация по форматированию.

Затем образ установки будет записан.

При отмеченном тесте появится окно эмулятора со стартовым меню. Но пока еще флешка не умеет работать с сохранением данных.

Добавление раздела с сохранением данных
Дальнейшие действия выполняются уже из самого Линукса (можно загрузиться из полной установки или с Лайв-версии). Для работы с разделами используем утилиту gparted, запустив ее из командной строки.

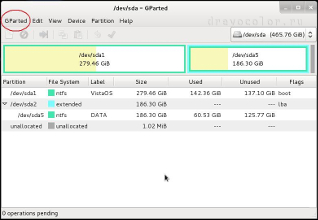
Откроется основное окно программы. Нужно в выпадающем списке справа выбрать Kali Linux Live USB.

Откроется просмотр структуры разделов. Чтобы можно было работать с Kali Linux Live USB, следует размонтировать раздел.

Теперь нужно сжать его через соответствующую команду в меню «Раздел».

Откроется окно с установкой параметров.

Нужно указать новый размер раздела. Свободное место пересчитывается автоматически.

Затем на освободившемся месте нужно создать раздел, с которым Kali будет работать с сохранением данных.

Следует выбрать файловую систему ext4, в качестве метки прописать persistence и нажать «Добавить».

В результате получится примерно такая структура Kali Linux Live USB.

Теперь нужно применить все установки через меню Правка.

Приложение предупредит о возможном риске.

Затем операции будут выполнены.

Теперь нужно создать в разделе с сохранением данных конфигурационный файл. Для этого открываем диспетчер файлов.

И затем кликаем по разделу Kali Linux Live USB, чтобы он примонтировался.

Запустим текстовый редактор и в новом документе напишем «/ union» (чтобы использовать с сохранением данных).

После этого его нужно сохранить с именем persistence.conf на созданном разделе с сохранением данных.

Если его открыть, будет виден файл.

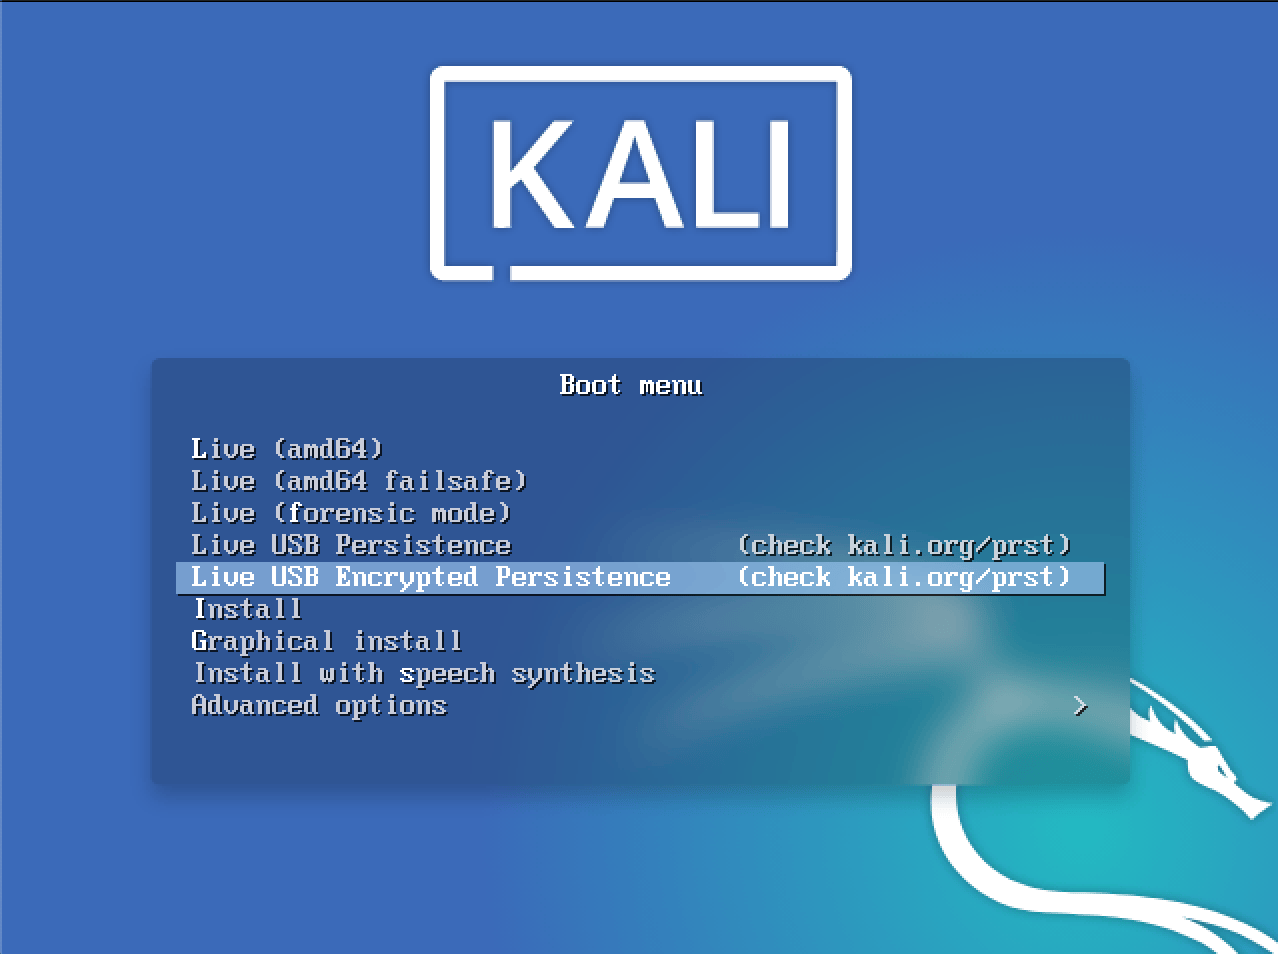
При загрузке с Kali Linux Live USB нужно будет выбрать пункт Live USB Persistence. Пароль для раздела не требуется.
Источник
Как сделать Kali Linux 2.0 и 1. — persistence !
Статьи и темы, не относящиеся к основной тематике сайта. В разделах этой страницы Вы найдёте проверенную информацию, рабочий софт и ссылки на заинтересовавшую Вас тему. drevocolor.ru
Kali Linux Live с возможностью постоянного сохранения (persistence).
Для того, чтобы добавить возможность постоянного сохранения на USB-флэшку с Kali Linux на борту, Вам потребуются:
1) Загрузочный DVD-CD диск либо флешка, с установленной О.С. Kali.
2) Сама флешка, нуждающаяся в persistence.
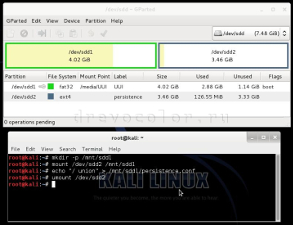
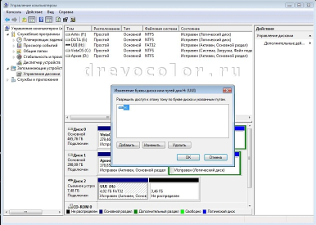
В этих примерах для постоянного сохранения, Пришло время подмонтировать к Вашей USB, раздел persistence. См. фото 3 слева. Открываем ещё терминал. Следуя логике этого примера (касается названий разделов) все команды будут идти в таком порядке: Всё закрываем и загружаемся с USB-persistence флешки. В Boot menu при загрузке выбрать Live USB Persistence! Остаётся проверить работают ли сохранения. Давайте для проверки создадим на рабочем столе папку, тем же образом перезагрузимся и посмотрим. Если папка на месте значит всё сделано правильно! Кстати разделить USB-флешку можно в windowsе с помощью программы — Acronis Disk Director Suite. Скачать торрент файл. Также, можно полностью подготовить USB-флэшку для сохранения изменений, не используя программу gparted. Воплотить в жизнь данный пример, нам поможет очень полезная программа Partition Wizard 9.1 — СКАЧАТЬ торрент файл: Если Вам нужна установка Kali Linux на USB Флешку из образа ISO, воспользуйтесь простой и удобной программой Universal-USB-Installer 1.9.4.9 — СКАЧАТЬ и См. фото 6 справа. А если нужна установка Kali Linux на DVD или CD диск, возьмите пустую болванку не менее 3Гб. и прожгите её с помощью Nero. Услуги частного мастера: Написать письмо Обратная связь |


 |  | |
| • Спутниковое телевидение своими силами • Защити Dedicated Server • Необходимый софт! by andreyonohov & leha342 Источник |


