Setting up a Linux server with LGSM
UltimateByte
«Native» Linux support for Rust is back since February 2016! Garry Newman on Twitter
That allowed us to add a Rust Server Script into LGSM.
Modded server with Oxide
In this guide, we’re going to go through the Rust install process, correcting your system to handle multiple Rust servers, installing Oxide and keeping it updated easily.
UPDATE 2017-01-29: LGSM now supports downloading, updating, or removing Oxide with the «mods-install», «mods-update» and «mods-remove» commands! It also adds a new «wipe» command. Run «update-functions» command to get the new features!
System requirements
RAM
A Rust game server uses from 6 to 12GB RAM, depending on your map size.
For that matter, LGSM warns you if you have less than 4GB available.
CPU
It will use constantly around 50% of one core from a Xeon E5-1650V3 (6 cores 12 threads, 3.8Ghz), or around 30% of one core from an I7 4870K, regardless of the amount of people connected and with very few constructions on it. As most game servers, it seems like it’s mainly monothreaded, so you’d better have some good monothread performance.
Bandwidth
Bandwidth shouldn’t be an issue, aim for a 10mb/s+ upload speed minimum
Other notes
The server autosave can cause lags, depending on your CPU and disk speed. An SSD server with a very good CPU can help.
It is highly recommended a dedicated server is used with Rust because of its high system requirements.
Conclusion
Don’t take an inappropriate server with 150 cores @1,2Ghz, prefer a quad/hexa core @+3,3Ghz, check benchmarks before choosing your server. CPU: good monothread performance ;RAM: 12-16GB and more; avoid VPS.
Linux Distribution
You will need Glibc greater or equal to v2.15 (more info glibc · GameServerManagers/LinuxGSM Wiki · GitHub )
So you need:
- Debian 8 or greater (advised)
- Ubuntu 12.04 LTS or greater
- CentOS 7 or greater
Useful Links
Manual Installation and general information
- If you wish to use the manual way, I (UltimateByte) updated the Valve Rust wiki (that still needs some work): Rust Dedicated Server — Valve Developer Community
LGSM Installation
- If you wish to use LGSM, grab the script provided here: rustserver: Rust |
Oxide Support
Setting up a Rust server with Linux and LGSM | Oxide
LGSM Support
- See Support · GameServerManagers/LinuxGSM Wiki · GitHub
Oxide for Linux
- Oxide for linux : wget https://github.com/OxideMod/Snapshots/raw/master/Oxide-Rust.zipRusty Rcon Tool
Rusty
- Server RCON administration tool Rusty — Server RCON administration tool | Oxide
Rust Server with LGSM Video tutorial
Here is a quick tour of Rust special features, and install guide for Rust and Oxide.
If you need more help, here is a video that shows a bit more into depth how to use LGSM, how the directory structure works, it also explains the basics of a Rust Server and other stuff, that’s why it’s 20 minutes long, otherwise, if you’re experienced, you can get your server up and running in around 5 minutes without any mods.
LGSM Tutorial
0) Make sure you have all the dependencies
And make sure you match the distro requirement by carefully reading instructions at: rustserver: Rust |
1) Make a new user and login to it
As root, do:
adduser rust
[. ]
su — rust
2) Get LGSM and make it executable
wget https://gameservermanagers.com/dl/rustserver
chmod +x rustserver
3) Run the installer and follow the instructions
./rustserver install
4) Edit rustserver to fit your needs
You’d better use nano or vim, but you could also use a text editor like notepad++, which is way less convenient. If you need help about what to configure, watch the video.
nano rustserver
5) Edit server.cfg
nano serverfiles/server/rust-server/cfg/server.cfg
6) Make sure everything is alright
Start your server
./rustserver start
Then check your logs
cat serverfiles/game*.log
Since Rust have no console, you can use this workaround to display the log in real time:
tail -f serverfiles/game*.log`
Since Rust don’t allow setting a custom log location, the log file will be called game-
Note: The Rust console is empty under Linux. You’ll have to use an RCON tool and/or watch your logs.
7) Install Oxide
As a reminder, Oxide is an API allowing you to run mods for you Rust server.
LGSM now handles Oxide for Rust natively, with mods-install and mods-update commands.
./rustserver mods-install
rustoxide
Then you’d better check your logs again after restarting the server to check that Oxide is loading properly.
If a Rust update has been released, then an Oxide update will soon follow. To update Oxide, you can then run:
./rustserver mods-update
8) Install Oxide addons
Just put them into serverfiles/server/rust-server/oxide/plugins They will load automatically.
If you need to edit their configs, it will be located in : serverfiles/server/rust-server/oxide/config
If you updated an addon and wish to reload it without restarting the server, you’ll need to input it in an RCON tool. Once you’ve got it, run :
9) Send RCON commands:
You will need a tool to send RCON. Here are 3 of them:
- Rusty: Rusty — Server RCON administration tool | Oxide
- Rustadmin: RustAdmin — Rust server RCON administration tool
- Facepunch web tool: Websocket Rcon
To use an external software like Rusty or Rustadmin, you need to alter rustserver script with rconweb=»0″. To use Facepunch tool, leave it at default rconweb=»1″
Note: Facepunch web tool currently don’t accept domain names, you need to enter server IP.
If you can’t remember the RCON port you set or password (that you MUST change), just use:
./rustserver details
Essential commands:
save ; will save the server state (useful before a stop or restart)
oxide.reload PluginName ; will reload a plugin after updating it
server.writecfg ; to save config commands you ordered into Rusty, including new admins
ownerid STEAMID64 «Nickname» «Reason» ; to add an owner
moderatorid STEAMID64 «Nickname «Reason» ; to add a moderator
10) Avoid a security breach and allow you to run multiple servers
By default, a user can see all started processes from other users, which is bad, but also their start parameters, which is pretty dangerous. Those start parameters can contain sensitive information, such as RCON password, Steam API keys, GSLTokens. Upon start, a Rust dedicated server is checking if the process name started by any user, and will prevent you from running it again if it finds it, displaying «Player is already running».
To avoid that, run:
mount -o remount,rw,hidepid=2 /proc
And to keep the changes upon machine reboot:
nano /etc/fstab
# Here are the modification to apply to the «proc» line
proc /proc proc defaults,hidepid=2 0 0
Of course, you still need to make one user per server, change ports, and repeat the install process. (See Multiple Servers · GameServerManagers/LinuxGSM Wiki · GitHub for more info)
11) Setup automated tasks (reboot, update. )
You will need to use Linux Cronjobs. For more information, see Cronjobs · GameServerManagers/LinuxGSM Wiki · GitHub
Basically, I advise you to setup root cronjobs. The syntax for root cronjobs is (replace things between <> by the actual value)
* * * * * su — -c ‘/home/ /rustserver ‘ > /dev/null 2>&1
Example for a restart every day at 5: Login to Root (su command), then do:
crontab -e
0 5 * * * su — rust -c ‘/home/rust/rustserver restart’ > /dev/null 2>&1
# save and exit (ctrl +x, y, enter if using nano)
You can run a monitor cronjob every few minutes to make sure your server is up and runing.
*/3 * * * * su — rust -c ‘/home/rust/rustserver monitor’ > /dev/null 2>&1
12) Updating Rust
Just run
./rustserver update
If needed, run
./rustserver validate
To wipe the server run
./rustserver wipe
To update Oxide, that your previously installed with LGSM, run
./rustserver mods-update
Special Thanks :
- UltimateByte for Rust support into LGSM and documentation
- Wulf and Oxide team for enlightening about Rust and Oxide
- Daniel Gibbs, Founder of LGSM, for his help making this work
- CedarLUG, LGSM Support, for his help dealing with Rust’s weirdness
Brandjuh
Will probably jump to linux soon since I use Debian most of my time in work
Great job on this tutorial! Thumbs up for sticky post
UltimateByte
Well, seems like it’s been granted ! ^^
Hopefully «Wine for Linux setup for Rust » will one day no longer be required for anyone as there is now a good native support !
Wise choice bro ! As long as you’re comfortable with Linux, this is certainly the fastest and most powerful way to manage a server !
Here are some piece of advice for the beginners, those who know nothing about Linux.
I started Linux by hosting a forum (it required SSH and domain names knowledge, and FTP/PHP/Apache2 server deployments) and a TeamSpeak server, then a Garry’s Mod server (needed SteamCMD knowledge). It took me one or two sleepovers to be happy with my machine which i firstly reinstalled a few times before even considering it stable enough to host a website and a TS. But I didn’t start with the easiest system, I was using ESXI which is very powerful but a pain to set up for the first time. It allowed me to run several Debian Linux virtual machines under the same server, and allowed me to save snapshots of my system to be able to rollback after critical mistakes. That way i could test risky commands that i would have never tried otherwise. I’d advise not to do that but to prefer buying a cheap VPS or making a Linux VM (with no interface) to run all tests you want, just to get comfy with Linux First.
Then, I discovered LGSM, which changed my life and the way i was managing my game servers quite a bit by simplifying deployment and maintenance, and started making more and more servers.
If you’re jumping into Linux for the first time, get ready to Google a lot, (documentation for Linux is very abundant) to first learn the basics of SSH. That will also help you understanding the basics of Shell (scripts). Don’t bother with a remote interface, it will be useless because you’ll end up using only a command prompt for a server anyways. And you’d better spend a few hours or even a few days to learn the basics of Linux (Installing packages, updating your server, monitor and manage your server -munin / webmin — setup a proper FTP server, configure some stuff for safety. ), then you’ll probably continue to learn stuff about Linux every day for quite a while. ![]()
For the distribution, i can only advise Debian or Ubuntu, which are very stable, very updated, and very well documented with a great community.
Welcome and good luck to all Linux beginners !
Источник
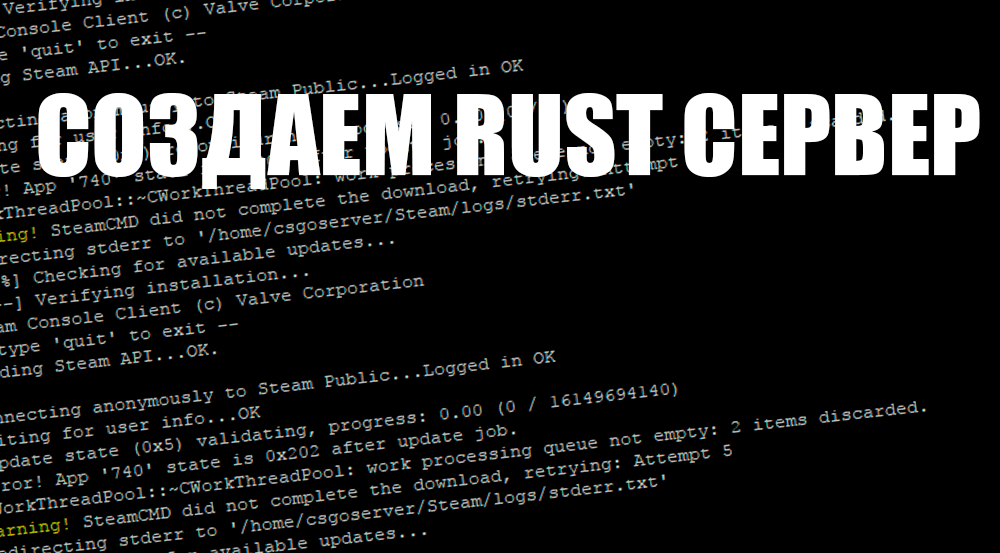
Как сделать сервер rust linux
Вы когда-нибудь задавались вопросом, как сделать свой собственный RUST сервер, но столкнулись с ограничениями ОС Windows? Больше нет смысла переживать! В этом руководстве мы уделим настройке сервера под Linux, в особенности дистрибутиву Debian 8 x64. Вместо того, чтобы сосредоточиться только на RUST VANILLA, мы распишем настройки под Oxide и научим как обезопасить ваш сервер.
Начальная настройка
Это наверное будет самой длинной частью руководства, но поможет вам с точки зрения настройки безопасности сервера. В основном, этот мануал нацелен на людей, которые не знакомы с понятиями безопасности серверов и Debian в целом.
- Подключитесь к серверу с помощью SSH клиента (рекомендуем использовать PuTTY).
- Перейдите на сайт ГенераторПаролей и создайте случайный пароль длиной 50+ и скопируйте его. Затем введите в консоль «passwd root», щелкните правой кнопкой мыши дважды в терминале.
- Теперь когда у вас установлен безопасный пароль, можно сделать обновление системы: напишите в терминале “apt-get update -y && apt-get upgrade -y”, нажмите Enter, затем “apt-get install fail2ban nano -y” и опять Enter.
- Теперь скачайте программу PuTTYgen и сгенерируйте ключ. Теперь введите следующие команды друг за другом нажимая Enter для перехода на новую строку в PuTTY:
/.ssh/authorized_keys
chmod 0644
Теперь вернитесь к PuTTYgen, затем щелкните правой кнопкой мыши внутри окна с большим количеством символов и нажмите выбрать все, а затем скопировать. Теперь вернитесь к PuTTY, где вы открыли редактор nano, и щелкните правой кнопкой мыши, чтобы вставить свой открытый ключ, затем нажмите ctrl + o -> enter -> ctrl + x.
Теперь введите «nano /etc/ssh/sshd_config», затем ctrl + w, затем введите «PasswordAuth». Теперь удалите хэш и измените yes в конце на no. Теперь прокрутите страницу вниз и измените UsePAM на no. Теперь ctrl + w и введите тип PermitRootLogin и просто измените его на «without-password». Теперь нажмите ctrl + p (сохранить) и ctrl + x (выйти), а затем введите «service ssh reload».
Возвращаемся обратно к PuTTYgen: нужно сохранить в безопасном месте открытый и закрытый ключи. Закрываем PuTTY и снова открываем его, с левой стороны выбираем Подключение -> SSH -> Авторизация, и указываем файл с приватным ключем, который вы только что сохранили. После возврата к сеансу, нажмите «Настройки по умолчанию», затем «Сохранить», затем «Открыть» для входа в систему без пароля.
SteamCMD
Valve имеет собственную документацию для настройки SteamCMD, которую вы можете найти здесь. После того, как вы перейдете в разделе app_update введите «app_update 258550». Это как раз идентификатор сервера RUST.
VANILLA
После того, как вы выполнили все пункты со SteamCMD, можно переходить к настройке VANILLA. Делаем «cd ДиректорияСоSteamCMD», а затем пишем nano startrust.sh и вставляем это: «258550».
#!/bin/sh
clear while : do
exec ./RustDedicated -batchmode -nographics \
-server.ip IPAddressHere \
-server.port 28015 \
-rcon.ip IPAddressHere \
-rcon.port 28016 \
-rcon.password «rcon password here» \
-server.maxplayers 75 \
-server.hostname «Server Name» \
-server.identity «my_server_identity» \
-server.level «Procedural Map» \
-server.seed 12345 \
-server.worldsize 3000 \
-server.saveinterval 300 \-server.globalchat true \
-server.description «Description Here» \
-server.headerimage «512x256px JPG/PNG headerimage link here» \
-server.url «Website Here»
echo «\nRestarting server. \n» done
Вам нужно будет заполнить свои собственные значения, такие как seed (для этого можно воспользоваться генератором предварительного просмотра карт) и т.д. Теперь делаем «chmod u + x startrust.sh», затем «./startrust.sh» и ваш сервер запустится. Если во время старта проблем не возникнет, то вы сможете подключиться к серверу через RCON. В игре вы сможете подключиться к серверу нажав F1, выбрав консоль и напечатав следующее: «connect IPАдресСервера:28015». Как настроить свой статус администратора в игре мы опишем в следующих руководствах.
Oxide
Эта надстройка над сервером Rust очень популярна. Здесь мы опишем процесс ее настройки. Прежде всего вам нужно сделать «wget https://github.com/OxideMod/Snapshots/raw/master/Oxide-Rust_Linux.zip». Затем, если вы еще не установили unzip «apt-get install unzip -y», после «unzip Oxide-Rust_Linux.zip». Это нужно сделать в каталоге сервера RUST, который вы установили через SteamCMD (нужно соглашаться со всем что будут предлагать). Затем нужно настроить права на запуск для компилятора: «chmod u + x CSharpCompiler», чтобы он мог компилироваться плагины для RUST сервера с расширением cs (вспомните про плагин Kits). Поздравляем с созданием полностью работающего Oxide сервера игры RUST. В следующих гайдах мы затронем такие аспекты, как «Разрешения» и текущих проблемах серверов RUST.
Обновление
Это очень просто. Нужно повторить шаги, которые вы делали когда устанавливали RUST через SteamCMD. Если вы используете Oxide, то придется повторно загрузить его после обновления. Используйте ссылку выше, затем разархивируйте его. Возможно, снова придется поменять права для CSharpCompiler.
Фаервол (для продвинутых пользователей)
Для дополнительной безопасности сервера RUST, можно настроить фаервол. Внимание: Внесение изменений в настройки сервера на системе Debian может привести к полной неработоспособности, ограниченному или полному отсутствию доступа к серверу.
Напишите “nano iptables.sh” затем скопируйте следующее:
iptables -P INPUT ACCEPT
iptables -P OUTPUT ACCEPT
iptables -F
iptables -A INPUT -m conntrack —ctstate ESTABLISHED,RELATED -j ACCEPT
iptables -A INPUT -p tcp —dport 22 -j ACCEPT
iptables -A INPUT -p tcp —dport 28016 -j ACCEPT
iptables -A INPUT -p udp —dport 28015 -j ACCEPT
iptables -I INPUT 1 -i lo -j ACCEPT
iptables -P INPUT ACCEPT
iptables -A INPUT -j DROP
apt-get install iptables-persistent -y
invoke-rc.d iptables-persistent save
Затем введите «chmod u + ux iptables.sh», затем введите «./iptables.sh». Она выполнит кучу команд, которые в конечном итоге просто откроют стандартный порт ssh (22), а затем два стандартных порта для сервера RUST.
Дополнительная информация
Более подробно о том как настроить IPTable’ы и ключи SSH:
SSH ключи
IPTable’ы
Источник


