- How to Uninstall Adobe Creative Cloud Completely in 2021
- Part 1. Why Need to Uninstall Adobe Creative Cloud?
- Part 2. How Do I Completely Remove Adobe Creative Cloud?
- Step 1. Download, Install and Launch PowerMyMac
- Step 2. Choose Uninstaller And Click Scan
- Step 3. Choose Apps To Uninstall
- Step 4. Repeat For Creative Cloud
- Part 3. How To Uninstall Adobe Creative Cloud on Mac Manually
- 1. Log In Adobe CC And Remove Apps
- 2. Delete The Desktop App For Adobe CC
- 3. Delete All Folders Associated With Adobe
- Part 4. Remove The Adobe CC Desktop App (For Enterprise Versions)
- Step 1. Make A Folder And Place The Executable File
- Step 2. Create a New Package
- Step 3. Run The Program
- Part 5. Conclusion
- Как удалять программы на компьютере Mac
- Удаление программы с помощью Launchpad
- Удаление программ с помощью Finder
- Дополнительная информация
- Как отключить автоматический запуск приложения Adobe Core Sync в OS X?
How to Uninstall Adobe Creative Cloud Completely in 2021

Written By Jordan Baldo Last updated: August 30, 2021
Almighty writing expert who is proficient in analyzing Mac issues and providing efficient solutions.
If you want to know how to uninstall Creative Cloud Mac, you probably realize that it’s not the same as doing it on a Windows PC. The process is different and somewhat more tedious compared to Windows operating systems.
Windows PCs usually come with uninstaller applications. However, with macOS, you usually have to move the application towards the Trash Bin. And after that, you have to delete leftover files by searching for them within the computer. If you don’t delete them, it will take up much space on your Mac and lead to your system running out of application memory.
Adobe Creative Cloud makes it harder to uninstall apps with its complicated process. That’s a double whammy! It’s difficult to remove apps with macOS and it’s made even more difficult with Adobe’s whole вЂanother process.
How do I completely remove Adobe Creative Cloud? Fortunately, if you’re looking for ways on how to uninstall Adobe Creative Cloud on Mac, you’re on the right page. We’ll let you go through our guide which will help you solve the problem in the first place. Let’s get started.
Part 1. Why Need to Uninstall Adobe Creative Cloud?
Are you a person working in the creative industry? Then, you have probably heard of Adobe’s new offering, the Creative Cloud. Essentially, Adobe Creative Cloud is a subscription-based service that can be paid on a monthly or annual basis. This subscription enables you to access creative software from Adobe. And, it allows you to transfer files among various desktop, mobile, and web applications.
If your subscription has lapsed and you have no plans to renew it, there doesn’t seem to be much point in keeping Creative Cloud on your Mac. Keeping it in the background is fine, but it could be taking up a lot of memory space, especially if you installed other apps and programs using Creative Cloud.
Another thing to consider is that even if they are not being used, Creative Cloud could be updated in the background taking up some much-needed processing space, which you definitely do not want happening. So there is necessary to know how to uninstall Adobe Creative Cloud on Mac.

Part 2. How Do I Completely Remove Adobe Creative Cloud?
As stated previously, uninstalling applications within macOS can be tedious. It’s not as easy as it may seem compared to Windows PCs. However, you can use third-party uninstallers and choose a good one for you.
Want to uninstall adobe creative cloud without login? We recommend that you use iMyMac PowerMyMac and its Uninstaller Module. The reason behind this is twofold. First, the program doesn’t contain sneaky ads that can point you to malicious sites. In addition, it doesn’t sneakily install other harmful software on your macOS computer.
PowerMyMac’s Uninstaller module can help you to automatically and completely uninstall applications within macOS devices. Plus, it can be used to delete unnecessary files within your system making your computer run faster.
Here’s how to use the this adobe uninstaller mac tool to help you understand how to uninstall Adobe Creative Cloud on Mac:
Step 1. Download, Install and Launch PowerMyMac
Download PowerMyMac from its official website here. Install the software on your Mac and follow the prompts on the screen to complete the process. Then, launch the tool on your computer device.
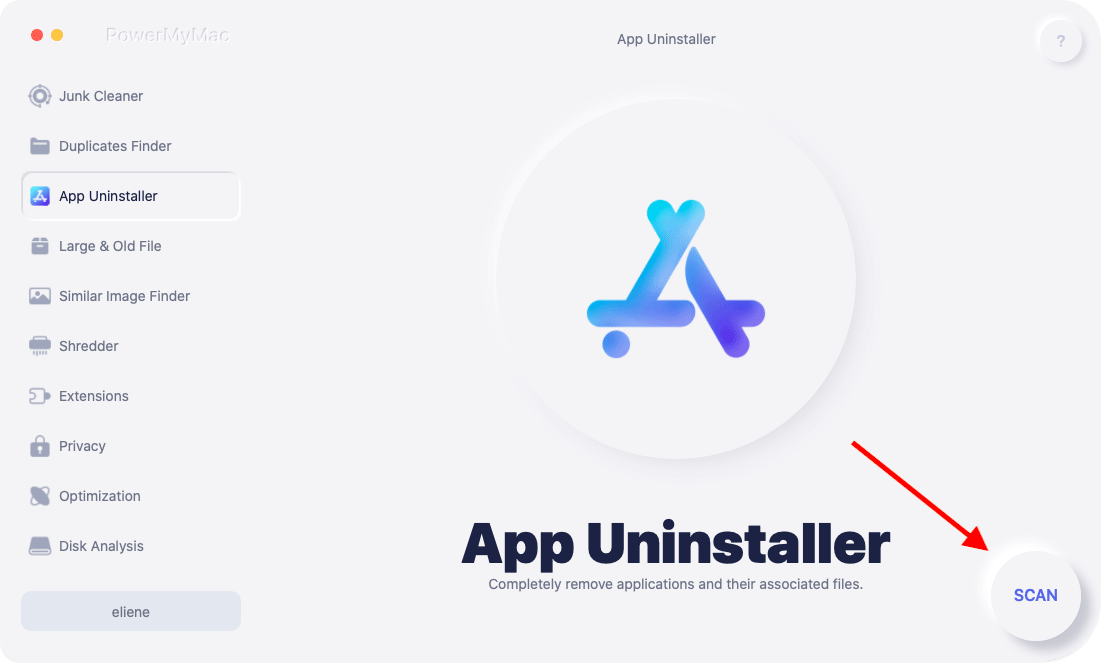
Step 2. Choose Uninstaller And Click Scan
After this, you have to choose “Uninstaller” on the left side of the panel. Then, click the “Scan” option to check out all the apps from your computer.
Step 3. Choose Apps To Uninstall
First, you have to choose apps to uninstall. In this case, you have to uninstall all programs associated with Creative Cloud first. These include Photoshop, Lightroom, Premiere Pro, etc. Click “Clean” to start the uninstallation process.

Step 4. Repeat For Creative Cloud
Repeat the steps in the process and uninstall “Adobe Creative Cloud” from the platform. After this is done, you have completely gotten rid of the entire Adobe suite of software from your macOS computer device.
Part 3. How To Uninstall Adobe Creative Cloud on Mac Manually
A lot of people run Adobe Creative Cloud from their Mac laptops and desktops. There are various steps you should follow (in a particular order) to remove Adobe Creative Cloud from your macOS computer.
Below are the steps to check out in order to remove the app completely from your computer:
1. Log In Adobe CC And Remove Apps
Similar to Windows PC, the first thing you have to do is to log in to the desktop application of Adobe Creative Cloud. This is done only if you’re not currently signed into the app. Then, go through every app within Adobe CC and delete each of them (or uninstall them). Make sure no app is left because it is necessary to remove them all before you can actually learn how to uninstall Adobe Creative Cloud on Mac.
2. Delete The Desktop App For Adobe CC
After you have gone through the first step, you should go to the official support website of Adobe CC here. Use your browser to do so. On this page, you should download the uninstallation software for Adobe CC. Make sure you get the macOS version.
Once you open the tool, it will ask you to input the login username and corresponding password for your system. Make sure you type them in. Another screen will pop up. It will warn you that the particular app was downloaded from the net. Press “Open”.

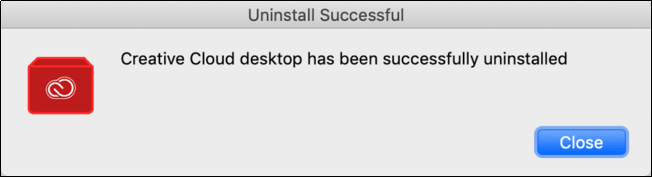
Another screen will be displayed. It will ask you if you are sure that you want to delete the Adobe CC desktop app. If you want to uninstall it, click “Uninstall”. This will start the process of removing the app. It takes a bit of time. However, if it is completed successfully, you should see the following pop-up on your screen:
3. Delete All Folders Associated With Adobe
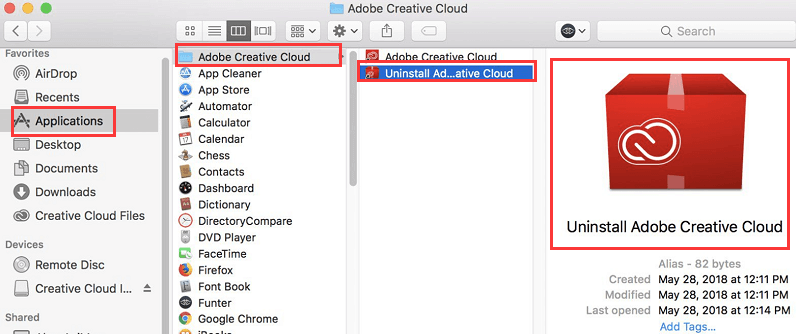
- When the desktop app has been deleted, go to the “Application” folder.
- Once there, you should move every Adobe folder you see. Drag them towards the Trash Bin. You should see these folders have the name “Adobe” within them.
- After removal, you have to delete Adobe applications located within the Utilities folder. This folder can be seen within the “Applications” main folder.
- Navigate towards that folder, then choose folders such as “Adobe Installers” and “Adobe Application Manager”.
- Move these associated folders toward the Trash Bin as well.
- Again, there are a lot of Adobe-associated folders within Application Support (under Library). And, there might be more in other locations. Before moving these folders and dragging them to the Trash Bin, ensure that no Adobe software is leftover on your Mac computer.
- Finally, you have to empty your Trash Bin to make sure everything is deleted from the system.
By this time you have finished on how to uninstall Adobe Creative Cloud on Mac. Congratulations! Your system is free from Adobe CC.
Part 4. Remove The Adobe CC Desktop App (For Enterprise Versions)
Couldn’t uninstall Creative Cloud for desktop Mac? This is a bonus guide on how to uninstall the Adobe CC app for enterprise versions. First, you have to make sure that all files have been synced or backed up before running the uninstallation software. Files that aren’t synced can possibly be lost due to uninstallation.
Here are the steps to uninstall enterprise versions of Adobe CC:
Step 1. Make A Folder And Place The Executable File
First, make a folder within the machine that contains the SCCM server. Put the executable file of the uninstaller within it. This executable file can be picked from any type of machine which contains the desktop app of Creative Cloud installed in it.
Usually, the executable file is contained within this place in your macOS:

Step 2. Create a New Package
Now, you have to make a brand new package. Utilize the folder you created in Step 1. Use it as a specific source. Now, make a program and then utilize the following command: Creative Cloud Uninstaller.exe -u . This is in order to uninstall the desktop app for Creative Cloud.
Step 3. Run The Program
Launch this program from its distribution point on every client machine you want the desktop app for Creative Cloud to be uninstalled.
It is important to note that you can only uninstall the desktop app for Creative Cloud if you have removed associated apps such as Photoshop, Illustrator, and Premiere Pro from the system. If not, do this first, and then go through the steps above again.
Part 5. Conclusion
We have given you two different methods on how to uninstall Adobe Creative Cloud on macOS computer versions (individual). In addition, the enterprise version of uninstalling the said software was also given.
As you can see, doing it manually is a tedious process. This is because you still have to look for leftovers within the computer. As such, you should use iMyMac PowerMyMac and its Uninstaller module to make sure you delete the app plus its leftovers (and associated files) within your computer.
If you wish to get PowerMyMac for free, you should do so here. Experience a faster macOS computer that runs in optimum performance!
Excellent Thanks for your rating.
Источник
Как удалять программы на компьютере Mac
Удаление программы приводит к ее удалению с жесткого диска компьютера Mac, и использовавшееся ею пространство становится доступно для других объектов. Программы можно удалять с помощью Launchpad или Finder.
Удаление программы с помощью Launchpad
Launchpad предоставляет удобный способ удаления программ, которые были загружены из App Store.
- Чтобы открыть Launchpad, щелкните соответствующий значок на панели Dock или откройте соответствующий файл в папке «Программы». Также можно свести вместе большой и три других пальца на трекпаде.
- Если нужная программа не отображается в Launchpad, введите ее название в поле поиска вверху экрана. Либо смахните двумя пальцами вправо или влево на трекпаде, чтобы отобразить следующую или предыдущую страницу.
- Нажмите и удерживайте клавишу Option (⌥) или щелкните и удерживайте значок любой программы, пока значки не начнут дрожать.
- Щелкните рядом с программой, которую требуется удалить, затем нажмите кнопку «Удалить» для подтверждения. Программа будет удалена незамедлительно. Программы, в которых не отображается, либо были получены не из App Store, либо обязательны для компьютера Mac. Для удаления программ, полученных не из App Store, используйте Finder.

Удаление программы не приводит к отмене каких-либо подписок, которые могли быть приобретены с помощью этой программы. Узнайте, как отменять подписки для программ, которые были загружены из магазина App Store.
Удаление программ с помощью Finder
- Найдите нужную программу в программе Finder. Большинство программ находится в папке «Программы», которую можно открыть, щелкнув «Программы» на боковой панели любого окна Finder. Либо используйте Spotlight для поиска программы, затем дважды щелкните эту программу в окне Spotlight, удерживая нажатой клавишу Command (⌘).
- Перетащите программу в корзину либо выделите программу и выберите «Файл» > «Переместить в Корзину».

- При запросе имени пользователя и пароля введите имя и пароль учетной записи администратора на компьютере Mac. Скорее всего, это имя и пароль, обычно используемые вами для входа в систему на компьютере Mac.
- Чтобы удалить программу, выберите Finder > «Очистить Корзину».

Дополнительная информация
Чтобы снова использовать программу после ее удаления, установите ее повторно или восстановите из резервной копии.
- Для повторной установки программ, которые были установлены как часть macOS, переустановите macOS. Это относится к таким программам, как Safari, iTunes, «Книги», «Сообщения», «Почта», «Календарь», «Фото» и FaceTime.
- Также можно повторно загружать программы, музыку, фильмы, телешоу и книги, установленные из App Store, iTunes Store или Apple Books.
Источник
Как отключить автоматический запуск приложения Adobe Core Sync в OS X?
Я заметил, что многие процессы Adobe запускаются в фоновом режиме при запуске на компьютере с OS X 10.11.4 (15E65) с установленным Adobe Creative Cloud (CC).
Чтобы избавиться от этого, я удалил все с «*adobe*» в имени файла из каталогов , используемых launchd , которые являются:
/Library/LaunchAgents , /Library/LaunchAgents , /Library/LaunchDaemons , /System/Library/LaunchAgents , /System/Library/LaunchDaemons .
Нет ничего плохого в том, чтобы просматривать эти каталоги вручную, чтобы узнать, что автоматически настраивается или может быть настроено для автоматического запуска на вашем компьютере.
Однако, используя этот подход, я избавился от всех процессов Adobe, кроме одного с именем процесса Core Sync Helper . UID процесса — это я, а не root.
Используя монитор активности OS X, чтобы получить больше информации об этом процессе, он сообщает нам, что его родительский процесс launchd . Путь процесса:
«/Applications/Utilities/Adobe Creative Cloud/CoreSync/Core Sync.app/Contents/PlugIns/ACCFinderSync.appex/Contents/MacOS/ACCFinderSync»
Как Adobe запускает этот процесс автоматически?
И как остановить его автоматический запуск?
Обновить:
Согласно ответу YoshiBotX, я использовал, launchctl list а также App launchControl, чтобы найти сервис, который запускает Core Sync Helper . Для этого я искать службу с adobe , accf или core*sync в его названии. К сожалению, нет такого сервиса с очевидным названием. Все службы в системе принадлежат com.apple. сторонним приложениям или не имеют к ним никакого отношения.
Также launchctl list перечисляет PID каждой метки. Но PID запущенного ACCFinderSync процесса там вообще не указан. Тем не менее, как уже упоминалось ранее, его родительский процесс все еще, launchd поэтому мне интересно, как это может быть.
Обновление 2:
Используя launchctl, я смог собрать больше информации о сервисе, используя его PID ( пропущенные строки отмечены как . ):
Но это не сервис, который я могу удалить с помощью launchctl.
Обновление 3:
Основываясь на ответе chiggsy , я смог найти больше следов сервиса ( пропущенные строки помечены как . ):
Но это все равно не помогло мне отключить его.
Обновление 4:
Кирб прибил это!
Чтобы остановить процесс:
- Отключите флажок в системных настройках
- Выйдите из системы и снова войдите в нее (или перезапустите, если на вашем Mac зарегистрировано более одного пользователя)
В OS X точка расширения Finder Sync позволяет вам аккуратно и безопасно изменять пользовательский интерфейс Finder, чтобы выразить состояние синхронизации файлов и управление ими. В отличие от большинства точек расширения, Finder Sync не добавляет функции в хост-приложение. Вместо этого он позволяет вам изменить поведение самого Finder.
Расширения — это части приложения, которые могут интегрироваться с определенными основными компонентами ОС. В частности, расширения Finder Sync обеспечивают более тесную интеграцию с Finder с помощью значков состояния синхронизации и позволяют добавлять кнопки на панель инструментов, боковую панель и меню правой кнопки мыши.
OS X хранит базу данных всех известных приложений на вашем компьютере, а также включает любые расширения ( .appex связки). Когда Finder запускается, он запрашивает в этой базе данных расширения Finder Sync и запускает их. По соображениям безопасности каждое расширение живет в своем собственном процессе.
К счастью, вы можете легко отключить это в панели System Preferences → Extensions (серый значок кусочка головоломки) — просто снимите флажок Finder под соответствующим названием приложения.
Источник


