- Как удалить программу в Кали Линукс?
- В чём разница между remove и purge ?
- Инструменты Kali Linux
- Список инструментов для тестирования на проникновение и их описание
- Fluxion
- Описание Fluxion
- Справка и руководство по Fluxion
- Примеры запуска Fluxion
- Установка Fluxion
- Ethical hacking and penetration testing
- InfoSec, IT, Kali Linux, BlackArch
- Fluxion 4 Usage Guide
- What is Fluxion for?
- How to install Fluxion in Kali Linux
- New Fluxion 4 manual
- Additional skins for Captive Portals
- How to create a new Captive Portal mockup from the web interface of your router
Как удалить программу в Кали Линукс?
Как быстро удалить программу в Кали Линукс из терминала?
Линукс предлагает несколько способов удаления программ. Нередко пользователи, пришедшие на Кали из Ubuntu и привыкшие к Ubuntu Software Center, предварительно и сразу после установки Кали ставят менеджер пакетов synaptic
а затем уже оттуда устанавливают или удаляют программы и пакеты оттуда, выставляя/снимая чек-боксы с выбранного. От себя добавлю — очень часто использую подобный метод лично, ибо он выручает не раз в те моменты, когда привычными командами из терминала удаляемая программа не вычищается. Так что начните с Synaptic.
Однако, если вы успели привыкнуть к консоли, воспользуемся парой простых команд, которые помогут удалить программу в Кали Линукс. Если желание удалить пакет появилось, но с точным его названием возникли затруднения, есть простой способ найти его в списке установленных.

Список получится большим, однако оттуда вы сможете заполучить то имя программы, под которым оно значится в системе. После этого воспользуйтесь традиционной командой apt-get. Я удаляю пакеты из-под root и она — команда — примет вид:
Если вы работаете из-под другой учётной записи, добавьте слева sudo и введите пароль:
Пароль в терминале, напомню, не отображается. Однако, если вы собираетесь оставить файлы конфигурации пакета, флаг —purge нужно опустить, и команда удаления программы примет вид:
Также согласитесь с изменениями, выбрав д. Однако большинство программ в Линукс устанавливается вместе с пакетами необходимых зависимостей для нормальной работы. Без некоторых библиотек они просто работать не будут. И после удаления программы они становятся безхозными, лишь отнимая пространство диска. И с течением времени таких библиотек становится немало. Так что сразу приучитесь подчищать за удалённым пакетом оставшийся в системе «мусор». Это делает команда
Обе команды можно совместить, объединив их усилия ещё на этапе деинсталляции пакета:
И завершить всё это дела зачисткой:
Последней командой мы убираем кэш в хранилище менеджера пакетов в каталоге по адресу/var/cache/apt/archives. Если вы помните, то в тот момент, когда вы программу устанавливаете, файл сначала помещается именно туда. Постоянно там лежать ему не обязательно. Единственное, о чём следует помнить, то, что пакет, возможно, придётся скачать снова при установке очередного приложения.
В чём разница между remove и purge ?
Функция remove файлы конфигурации оставит нетронутыми. Такой вариант удаления подходящий для приложений типа MySQL или Apache. Тем более, что настройки удаляемых приложений могут быть завязаны с оставшимися в системе. Однако именно команда purge позволит установить приложение с чистого листа. Здесь главное не переусердствовать.
Источник
Инструменты Kali Linux
Список инструментов для тестирования на проникновение и их описание
Fluxion
Описание Fluxion
Fluxion — это римейк linset от vk496 с меньшим количеством багов и большим количеством функций. Скрипт пытается получить пароль (ключ WPA/WPA2) от целевой точки доступа Wi-Fi, используя при этом социальную инженерию (фишинг). Она совместима с последним релизом Kali (Rolling).
Авторы: Cyberfee, l3op, dlinkproto, vk496, MPX4132
Справка и руководство по Fluxion
Управление осуществляется из текстового (диалогового) интерфейса, но также имеются опции для автоматизации.
Как она работает
- Сканирует в поисках целевой сети.
- Запускает атаку Handshake Snooper.
- Захватывает рукопожатие (необходимо для верификации пароля).
- Запускает атаку Captive Portal.
- Поднимает мошенническую (фальшивую) ТД, которая притворяется оригинальной точкой доступа.
- Запускает DNS сервер, перенаправляющий все запросы на хост атакующего, где запущен captive portal (перехватывающий портал).
- Запускает веб-сервер, на котором размещён перехватывающий портал, с запросом к пользователю ввести его WPA/WPA2 ключ.
- Запускает глушилку, деаутентифицирующую всех клиентов от оригинальной ТД, заманивая их в мошенническую ТД.
- Все попытки аутентификации на перехватывающем портале проверяются по ранее захваченному рукопожатию.
- Как только введён верный ключ, атака автоматически завершиться.
- Ключ будет записан и клиентам будет позволено подсоединиться к целевой точке доступа.
Рекомендуется использовать в Kali Linux, также необходима внешняя Wi-Fi карта.
Примеры запуска Fluxion
Программу нужно запускать с правами root:
а далее следовать подсказкам текстового интерфейса.
Установка Fluxion
Установка в Kali Linux
Установка в BlackArch
Программа предустановлена в BlackArch.
Информация об установке в другие операционные системы будет добавлена позже.
Источник
Ethical hacking and penetration testing
InfoSec, IT, Kali Linux, BlackArch
Fluxion 4 Usage Guide
What is Fluxion for?
Fluxion is a security auditing and social-engineering research tool. It is a remake of linset by vk496 with (hopefully) less bugs and more functionality. The script attempts to retrieve the WPA/WPA2 key from a target access point by means of a social engineering (phishing) attack. It’s compatible with the latest release of Kali (rolling). Fluxion’s attacks’ setup is mostly manual, but experimental auto-mode handles some of the attacks’ setup parameters.
The advantage of this approach is that it does not require a long-time brute-force on a powerful hardware. The downside is social engineering attacks work not every time.
- Scan for a target wireless network.
- Launch the Handshake Snooper attack.
- Capture a handshake (necessary for password verification).
- Launch Captive Portal attack.
- Spawns a rogue (fake) AP, imitating the original access point.
- Spawns a DNS server, redirecting all requests to the attacker’s host running the captive portal.
- Spawns a web server, serving the captive portal which prompts users for their WPA/WPA2 key.
- Spawns a jammer, deauthenticating all clients from original AP and luring them to the rogue AP.
- All authentication attempts at the captive portal are checked against the handshake file captured earlier.
- The attack will automatically terminate once a correct key has been submitted.
- The key will be logged and clients will be allowed to reconnect to the target access point.
How to install Fluxion in Kali Linux
To install Fluxion in Kali Linux run the commands:

Note that we did not manually install the dependencies of Fluxion, because the first time you run the program, it will check the missing dependencies and install them.
When downloading the program files, you can specify the —recursive flag and then the program will be downloaded, as well as additional skins for Captive Portals (those web pages that victims see on their devices during the attack):
About installation in Ubuntu and its derived distributions, see the article ‘How to install Fluxion in Linux Mint or Ubuntu’.
New Fluxion 4 manual
The program has an automatic mode, but it is rather experimental. The program has interactive text menu.
Stop Network Manager and processes that can interfere:
Typical launch of the program, go to its folder:
The program is updated very often, so to download the latest version, run the command:
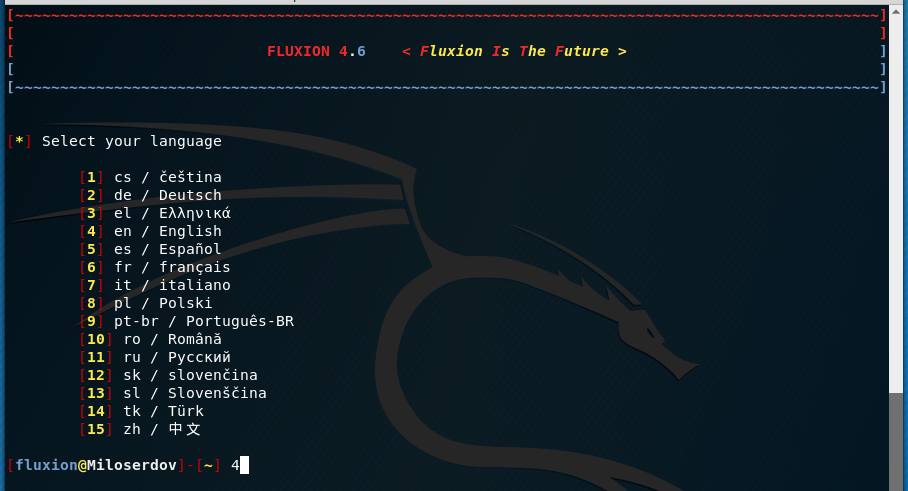
We need to grab a handshake. It will not be used for brut-force (there will not be brut-force at all). But it is necessary to check if the user entered the correct password. Therefore, we select item two:
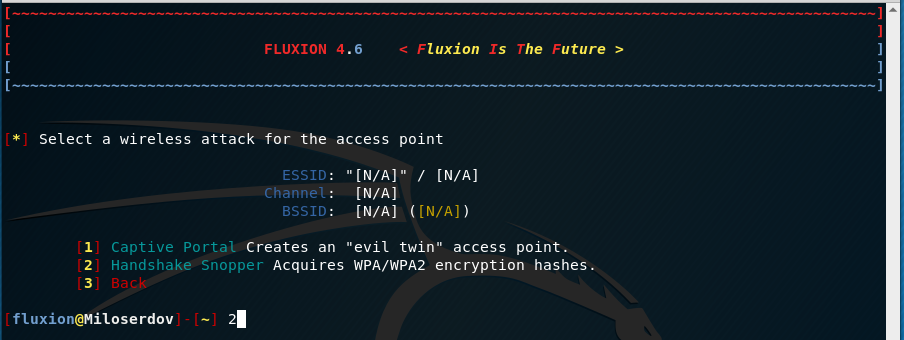
Select a wireless interface for target searching:

Select the channel where you want to search for targets:
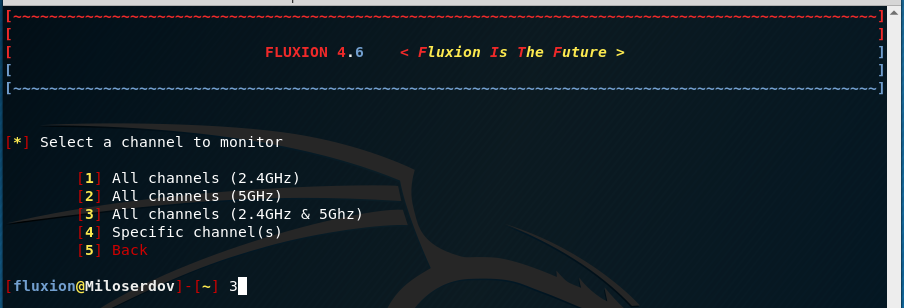
Five seconds after the target AP appears, close the FLUXION Scanner (ctrl+c).
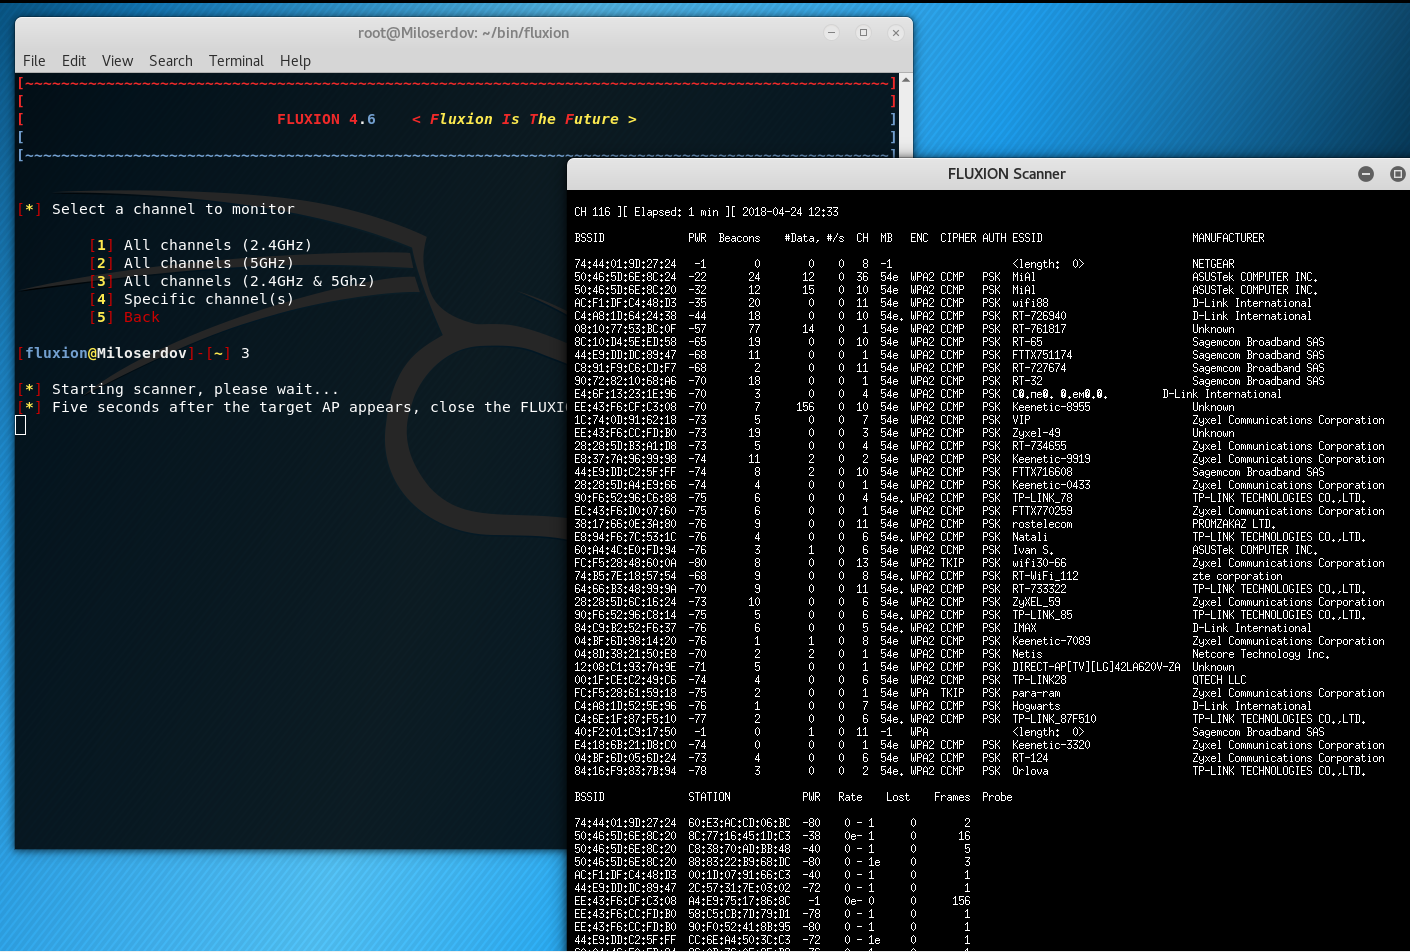
When you see the desired target, close the new window, the list of access points will be displayed in the main program window:
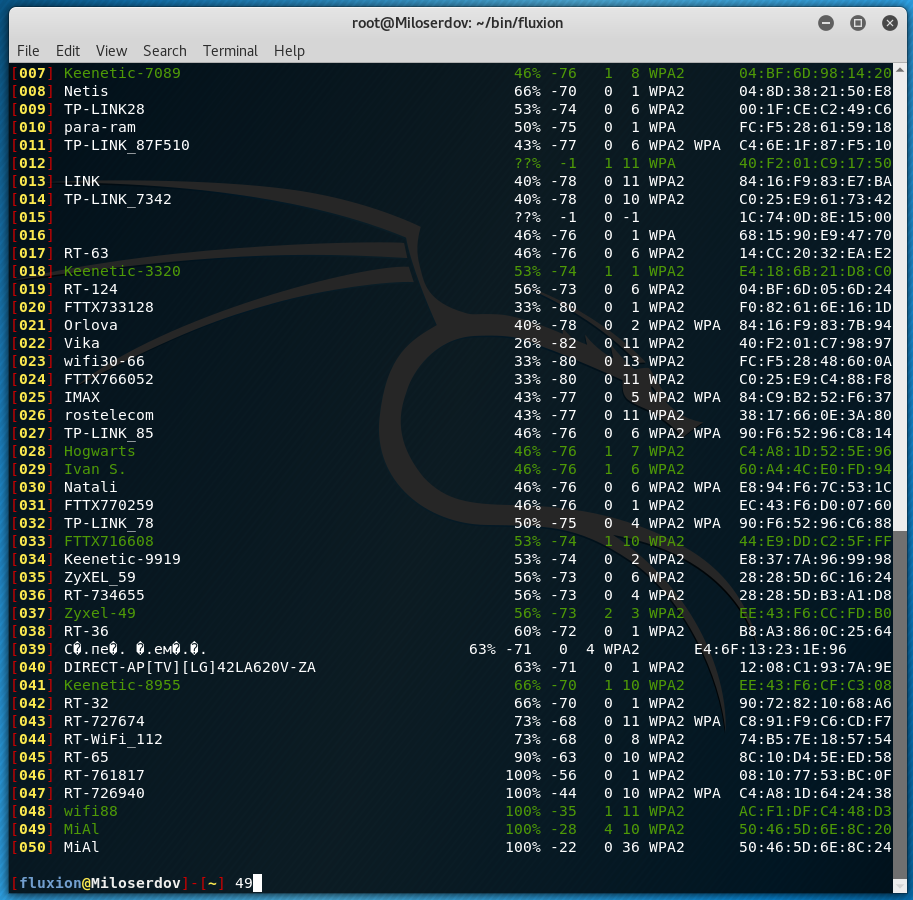
When entering the number of an access point, which we will attack, DO NOT enter leading zeros.
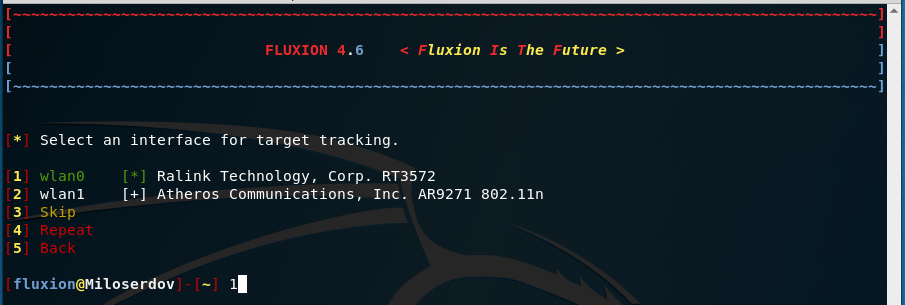
Select an interface for target tracking.
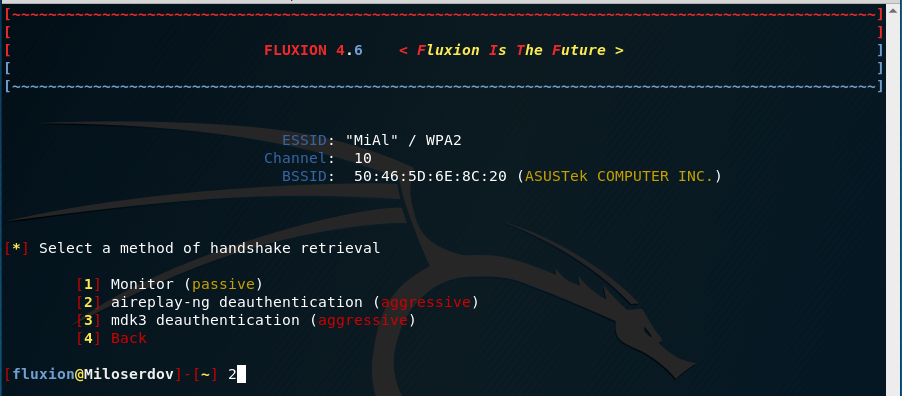
A passive method of attack forces the radio to go completely silent, making the attack subtle (undetectable), and allowing for better listening. This method should work best for situations where the target is far away. The downside is the fact the radio must keep listening until someone connects to the target access point, which could take a very long time.
An aggressive method of attack uses a deauthenticator, either aireplay-ng or mdk3, and sends deauthentication packets to the target access point’s clients. This method is considered aggressive because it is essentially jamming the connection between the target access point and its clients, effectively cutting the connection between the two. Once the connection has been broken, some devices will automatically attempt to reconnect, sending a 4-way handshake which fluxion’s radio could catch. This method could be considered illegal. Make sure to follow governing laws applying to you. We’re not liable for your irresponsibility.
Select a method of verification for the hash. Here we select the program with which help it will be determined whether enough frames have already been captured to verify the password or not:
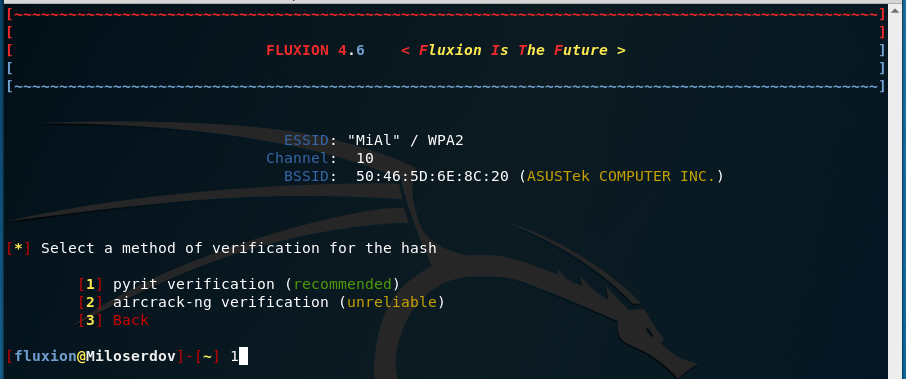
How often should the verifier check for a handshake?
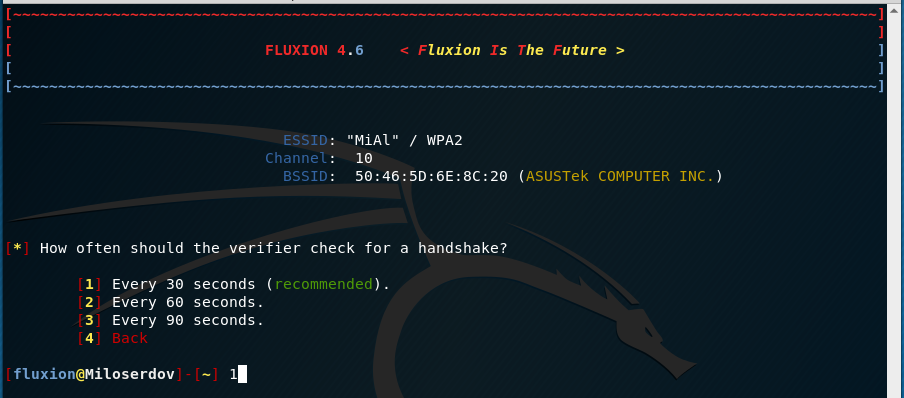

This sets how verification occurs in relation to capturing data, either simultaneously (asynchronously), or back-to-back (synchronously).
The asynchronous option will run the verifier while the computer is still capturing data. This could cause an issue in slow systems, because pyrit … stripLive might be interrupted by the captor overwriting data too early. The probability of encountering that problem increases over time, since more data needs to be examined by pyrit … stripLive. I suggest avoiding this if possible, or to limit its use to places were the handshake file will be caught relatively quickly.
The synchronous option will halt data capturing before attempting to check for a handshake, to prevent the issues described before. The downside of this method is the fact it’ll stop listening while checking for handshakes, meaning it could miss a handshake while checking for one.
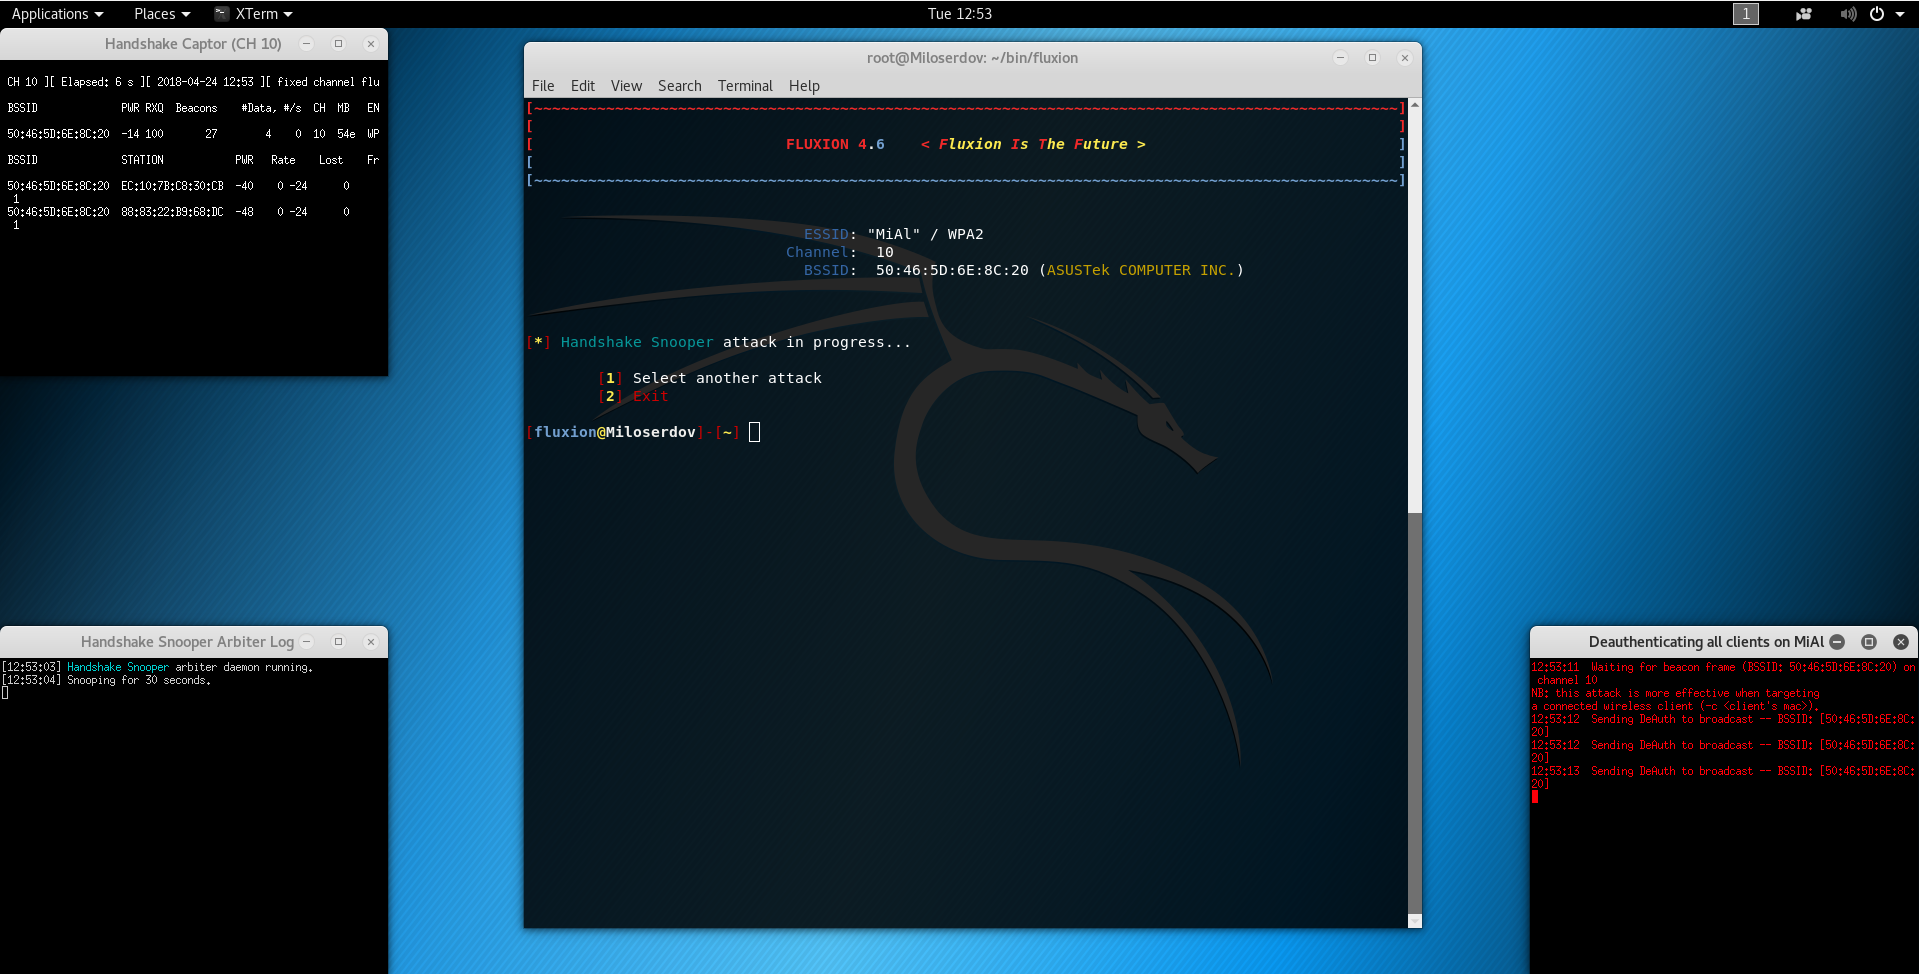
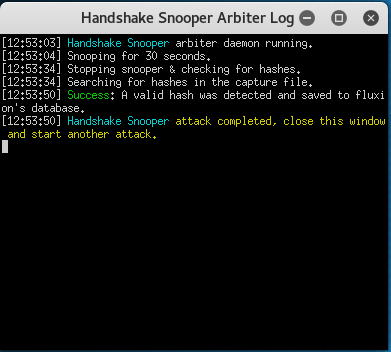
Three additional windows will appear periodically. If a handshake is captured, i.e. the attack succeeded, then one of the windows will have such an entry, and the other windows will be closed and the attack stopped:
Now go to the Captive Portal attack.
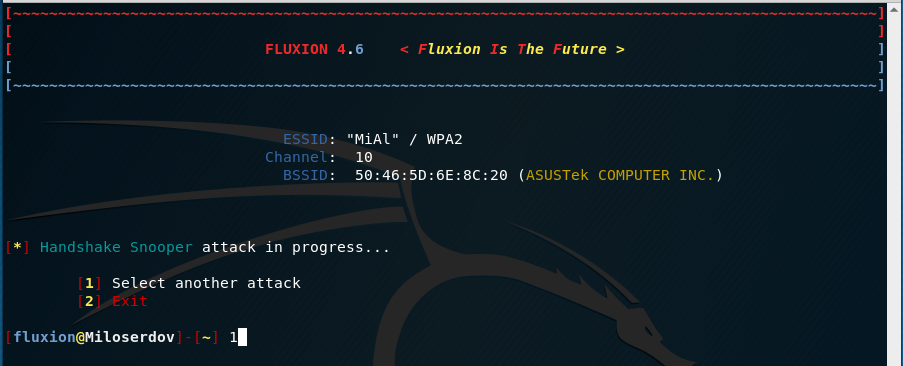
Many of the wireless adapters used in penetration testing support the addition of a virtual wireless interface. This interface can be in monitor mode or in AP mode. Due to this possibility, when creating a fake access point and simultaneously jamming a real access point, you can use one single Wi-Fi card. And Fluxion knows how to do it.
But since the fourth version, Fluxion has added one more function — to follow the attacked access point. The problem is that some access points, when a deauthentication attack is conducted against them, change the channel on which they operate. As a result, they become immune to our attack, you have to stop Fluxion, re-select the target and launch the attack again. The essence of the new function is that Fluxion regularly checks which channel the access point is operating on, and if it changes the channel, Fluxion automatically restarts the attack on the correct channel.
So, if you want to use the pursuit function, then you need a second wireless card, which supports monitor mode. If you do not have one, you can skip using this function.
We launch the another attack:

Fluxion is targetting the access point above. Agree:

Select an interface for target tracking. This is the new function, about which I spoke just above. If you have two wireless interfaces, select the one you want to use with this feature. If the interface is one, then select ‘Skip’:

Now choose the interface for jamming (choose a different one than the one chosen for the pursuit, otherwise there will be problems):

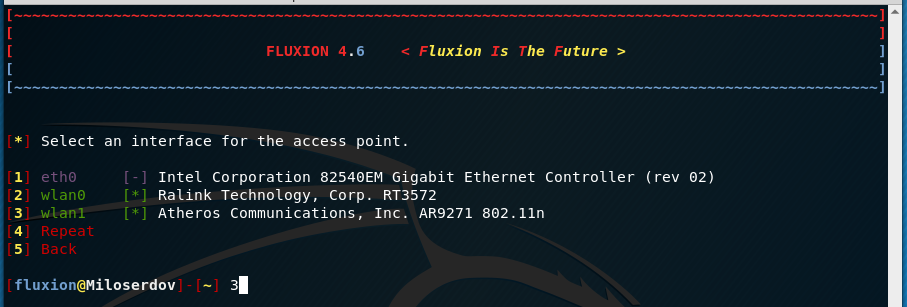
Select an interface for the access point. If you do not have a separate wireless card to create an access point, then select the same interface that is selected for jamming (this is normal and if the wireless card supports adding a virtual interface, everything will work fine):
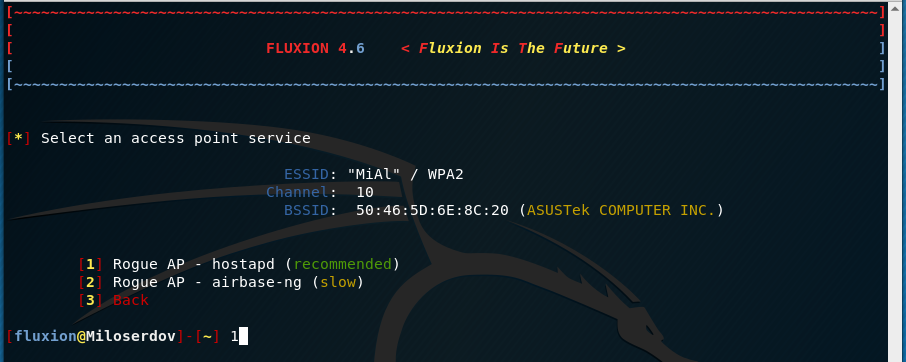
Select the program that will create the access point. The authors recommend avoiding airbase-ng if you use the same Wi-Fi card both for creating an access point and for deauthentication (jamming):
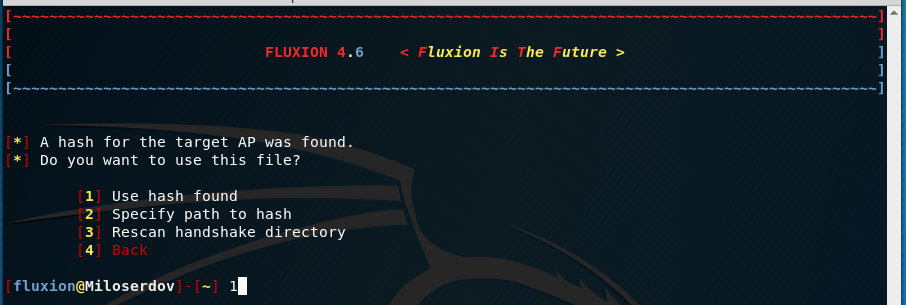
If you have already captured a handshake, a message will appear that it has been found. You can use it or specify a path to another:
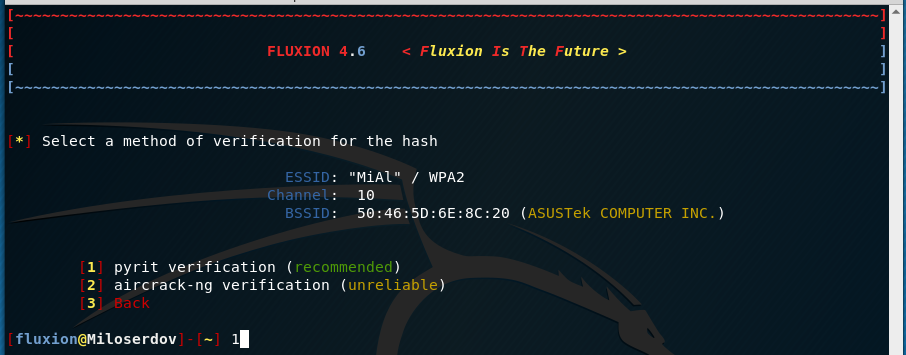
Again select a method of verification for the hash:
Next, we select the source of the SSL certificate for the captive portal. Options:

When prompted, select an SSL certificate source for the captive portal, or select to disable SSL.
SSL is a method of encryption used to establish a secure connection between two points. In this case, the two points are the captive portal’s web server, and the target client.
If you’ve got a personal certificate, you must save it at fluxion/attacks/Captive Portal/certificate/server.pem and the attack will automatically detect it and auto-select it.
If you don’t have a personal certificate, you may select to automatically generate one. The downside is that the certificate, having been created by a random individual, will not be trusted by any device, which will likely trigger warnings for clients attempting a secure connection to the captive portal.
If you would rather not bother with SSL, you can choose to disable it. Once disabled, the captive portal’s web server will only accept unencrypted connections, which exposes the information clients send to fluxion. This can be particularly unsafe if someone’s spying on network traffic. This might also trigger warnings for some clients, since the browser will need to send forms over an unencrypted connection.
In my opinion, in nowadays realities it is better to use SSL, since majority of web sites using HTTPS, and more likely that a user selects using an unsafe protocol than wait for a chance that he will try to open a site using HTTP.
Select an internet connectivity type for the rogue network.

When prompted, select wheather the captive portal web server should attempt emulating an internet connection.
This option only affects iOS clients, and some Android clients.
This could be useful for people that don’t want to make the captive portal obvious. The clients will connect, but will be fooled into believing internet access is available. This will cause all iOS clients, and some Android clients to not show the captive portal immediately upon connecting to the rogue network, however, the captive portal will still show up once the clients try accessing any web site.
Warning: This could cause clients to hang while trying to load sites, including iOS clients. The issue occurs when this option is selected, and SSL is disabled. The cause is clients attempting to access an SSL capable site, such as google.com, but hanging while waiting for a connection from the captive portal’s web server. The hanging is caused by the clients believing there’s internet access, but no responses received for SSL enabled sites.
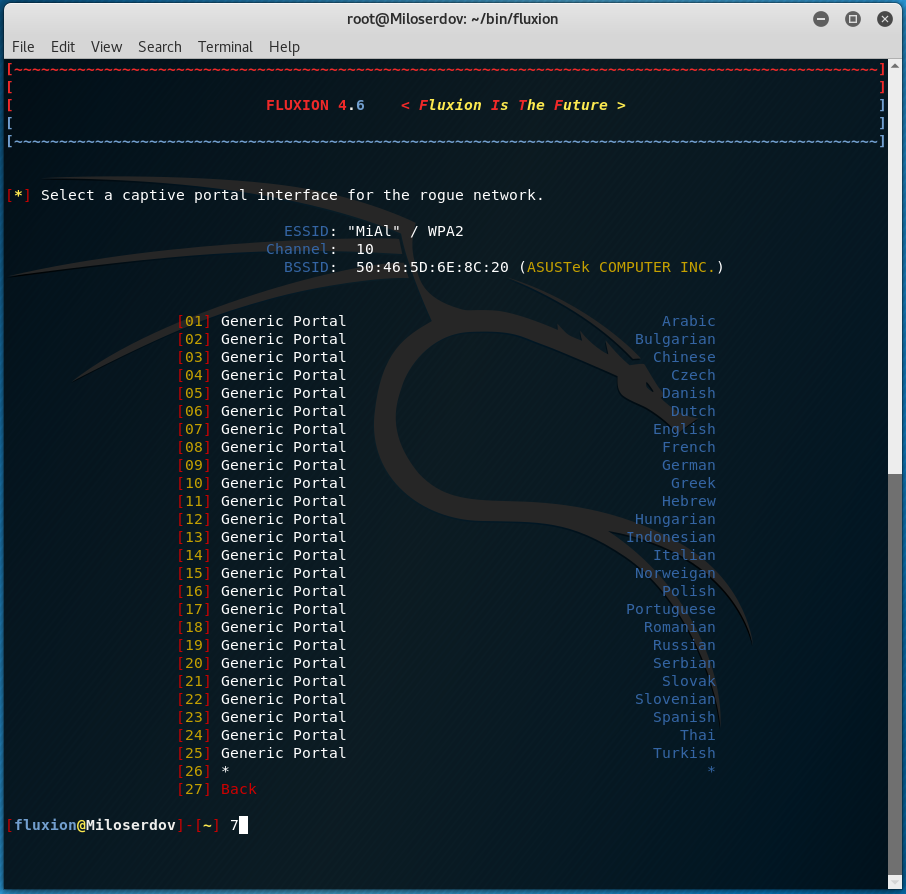
Select a captive portal interface for the rogue network. By default, Generic Portal are available, suitable for all cases in different languages:
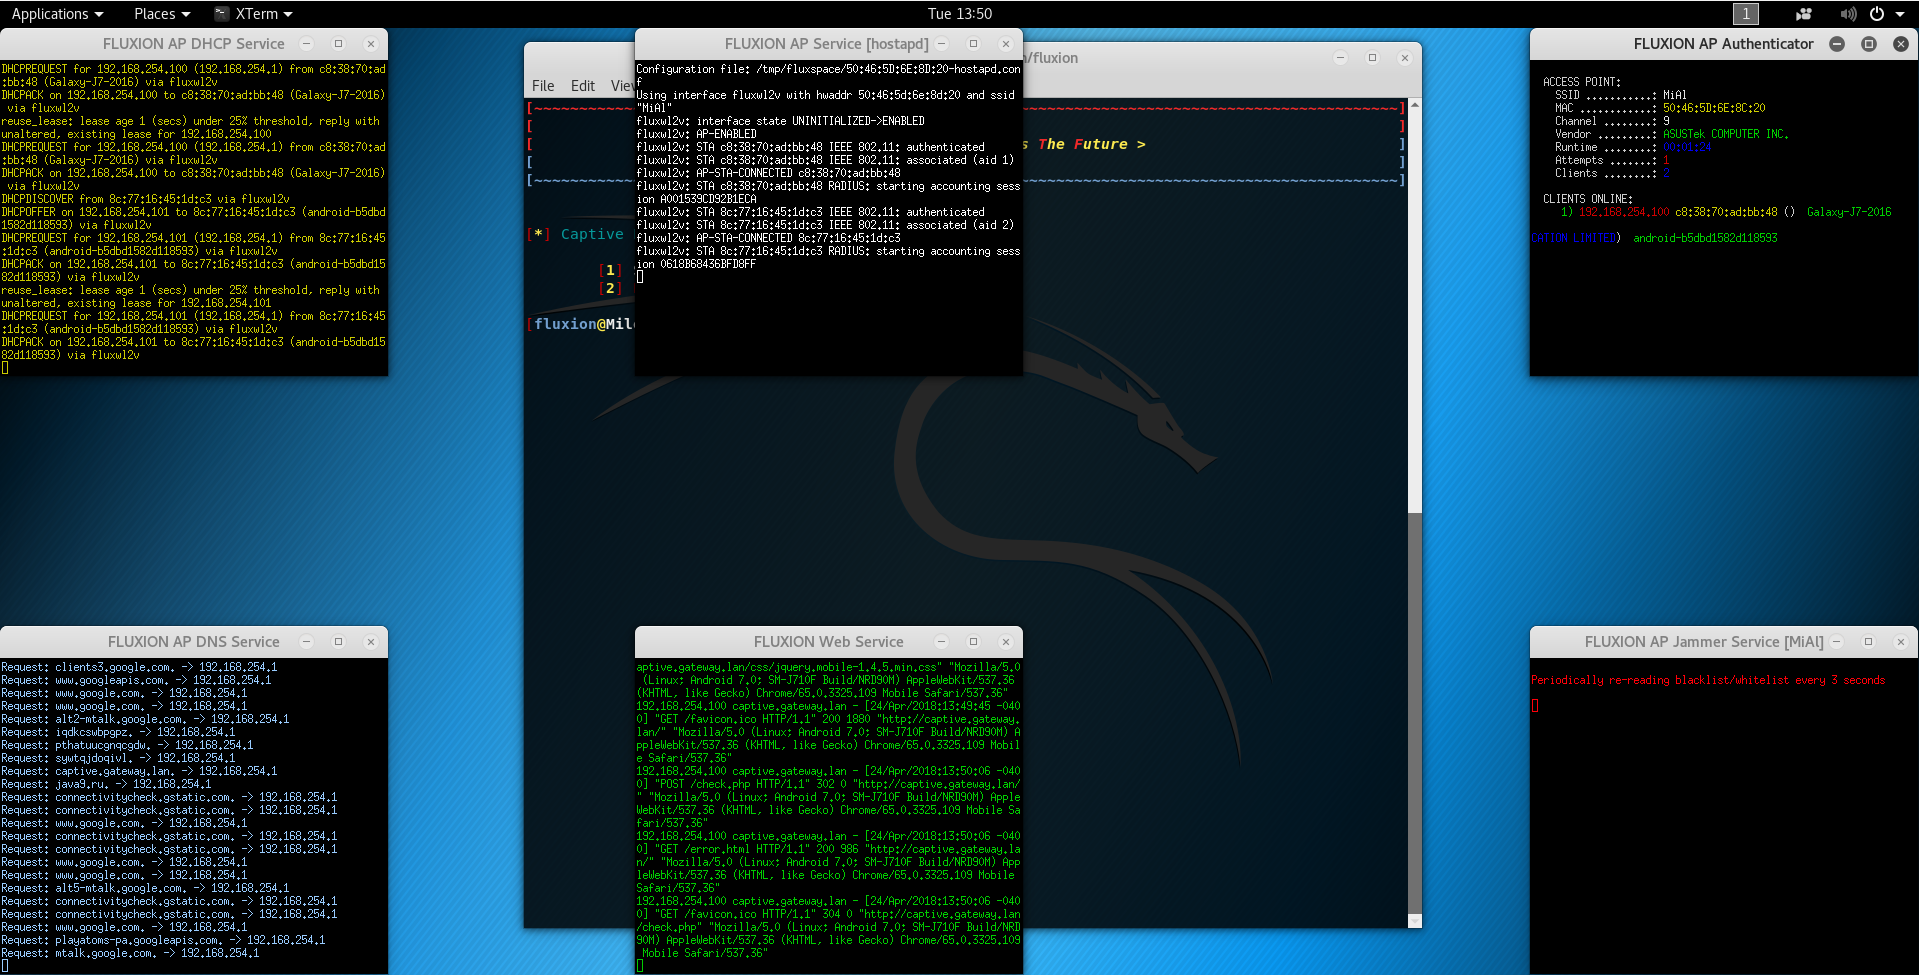
Now the attack starts, many windows will open.
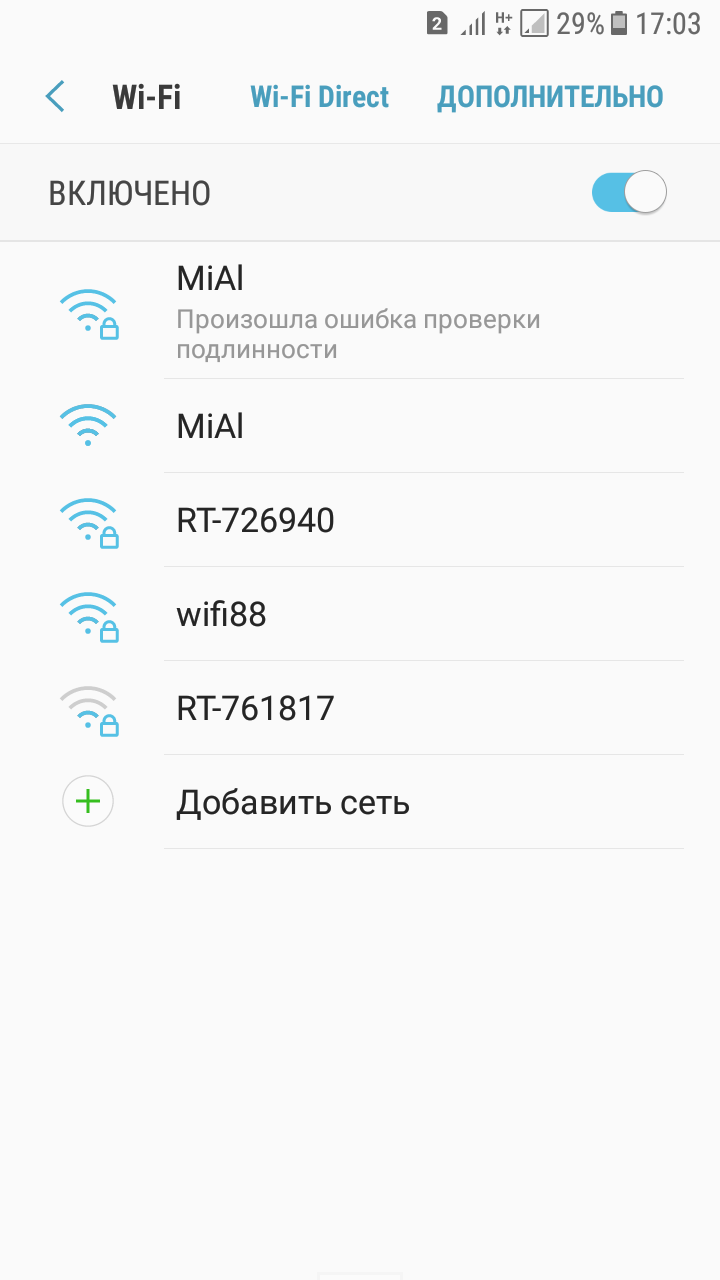
Clients will be disconnected, and they will not be able to connect to the true network during the entire duration of the attack. But for them there will be another network, it is without a password, to which you can connect with one tap:
If the client does this, then when he tries to open any site, he will be redirected to the Captive Portal:
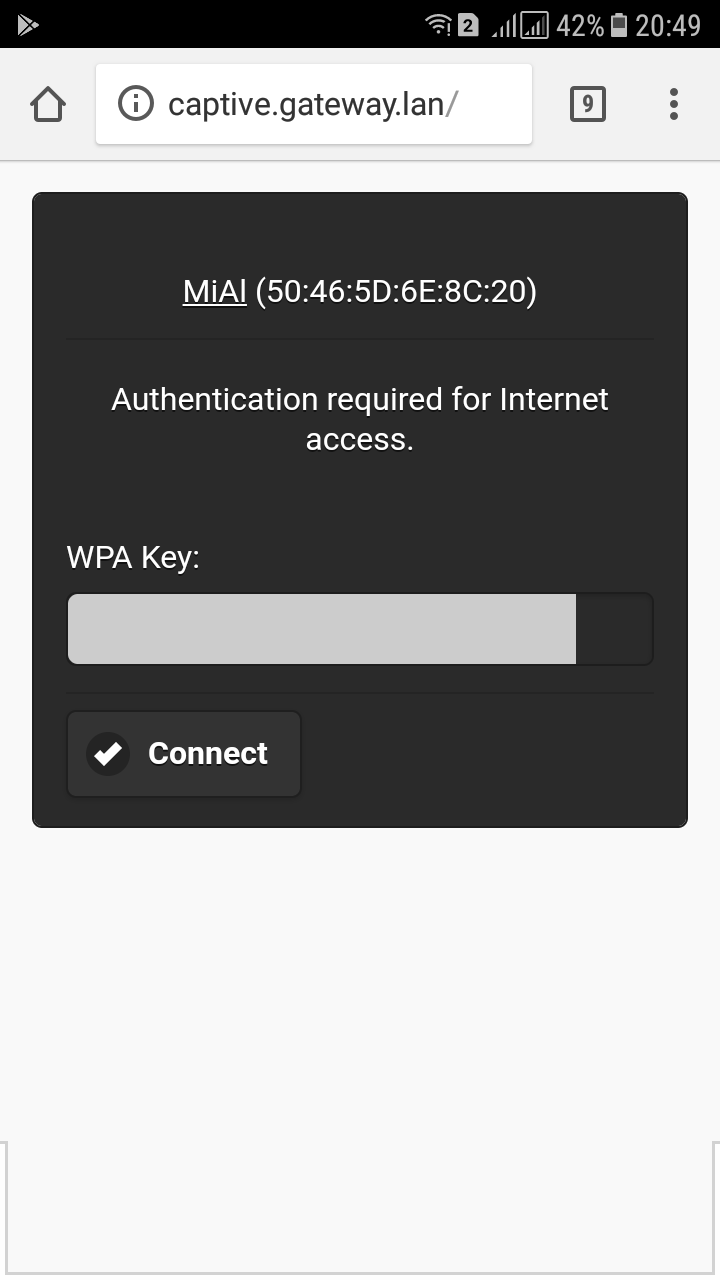
All the data entered is transmitted to Fluxion, which checks in real-time whether the password is correct or not. If the password is not correct, then such a window is displayed, and the attack continues:

If the password is correct, then it is shown to the attacker, and the attack ceases immediately. After that, the client (victim) device will automatically connect to the original access point and he will receive his normal Internet connection.
Additional skins for Captive Portals
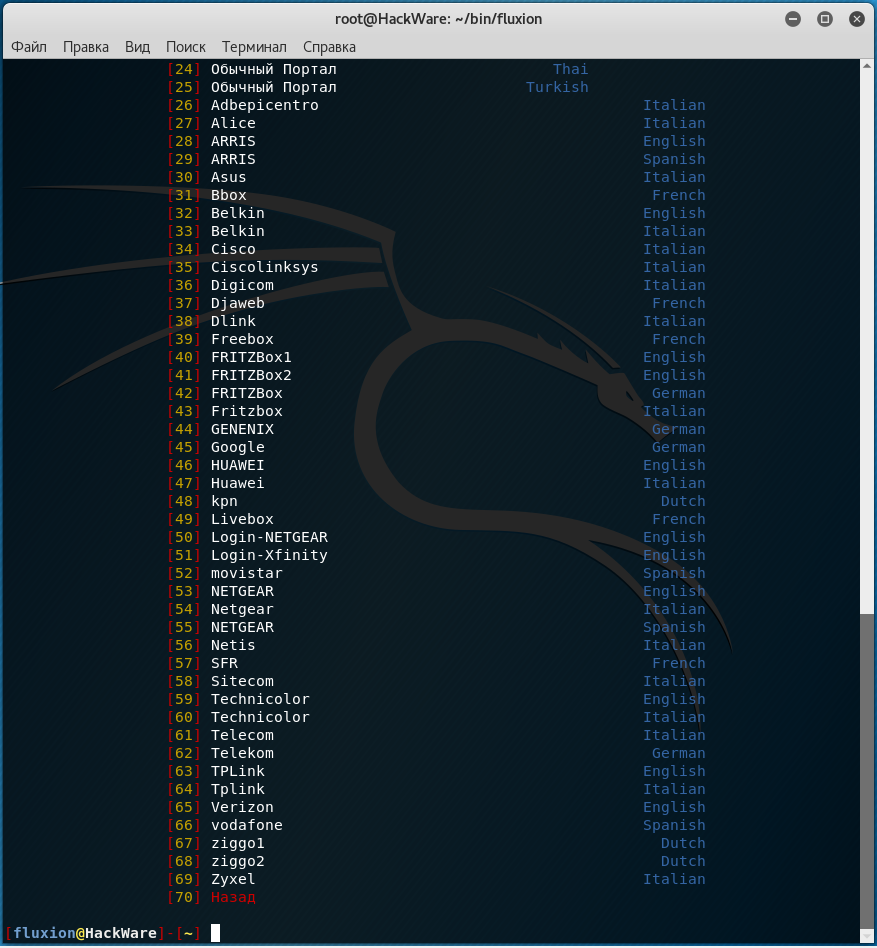
There are variants of the Portals simulating different models of routers in different languages, they are in this repository: https://github.com/FluxionNetwork/sites
When you are in the Fluxion folder, you can install them all with the command:
OR with this command:
OR initially download Fluxion with the —recursive flag:
It is not necessary to download them all, you can download some manually, after that place them in the fluxion/attacks/Captive Portal/sites/ folder.
How to create a new Captive Portal mockup from the web interface of your router
You can create your own site of the Captive Portal using your router’s login page as a source. How to make a clone page and how to prepare it for working with Fluxion is written in their Wiki:
You need to know HTML and understand how data is sent via web forms.
Clients are not automatically connected to the fake access point
This is a social engineering attack and it’s pointless to drag clients in automatically. The script relies on the fact that users are present in order to connect to the fake accesspoint and enter the wireless credentials.
There’s no Internet connectivity in the fake access point
There shouldn’t be one. All of the traffic is being sinkholed to the built in captive portal via a fake DNS responder in order to capture the credentials.
The Captive Portal doesn’t show up on my devices!
This can be caused by several things for example:
- The DNS rerouting script doesn’t work properly
- if this is the case, the yellow window handling DNS requests will not show any rerouting entries
- The clients are not connected to the FAKE AP
- The clients recognized that the fake ap has no internet connection and use their cellular data instead.
If this is fixable depends on what is causing it. Check Issue # for reference.
Is my wifi card compatible?
Check the output of iw list it should contain something like this:
The important ones are AP and monitor if one of those is missing your wifi card is most likely incompatible. If you are looking for advice on which card to buy, check below.
No access point is generated by the Captive Portal attack
The most common cause for this is using a driver that does not support virtual interfaces. Fluxion’s Captive Portal attack may use a virtual interface to simulate a secondary wireless adapter, one is used for jamming the target access point, while the other is used for generating the «evil twin» access point. The realtek-rtl88xxau-dkms is a relatively popular driver that does not support virtual interfaces.
I need to sign in (on Android)
This is how the script works. The fake captive portal is set up by the script itself to collect the credentials. Don’t freak, it’s all okay.
The MAC address of the fake access point differs from the original
The MAC address of the fake access point differs by one octet from the original in order to prevent fluxion de-authenticating clients from itself during the session.
Why are all my interfaces purple/negative (-)?
Interfaces with a negation symbol are currently being used by other processes.
To force the usage of busy interfaces start fluxion with the FLUXIONWIKillProcesses flag:
What if I want to run fluxion with multiple flags?
Separate the flags with command delimiters (semicolons ‘;‘):
Where is the temporary folder?
You can find that folder in:
Fluxion 2 and older
This directory only exists WHILE fluxion is actually running an attack. It will be cleaned up during the exit routine of fluxion unless debug mode is turned on.
Where are the handshakes?
You can find every saved handshake in:
Which wireless card should I buy?
It’s required you use network adapters supporting master (access point) mode. If you don’t currently own an adapter, you can select any from this list.
Источник


