- Как установить geckodriver linux
- Install Selenium and Chromedriver, Geckodriver, and Phantomjs, etc. drivers under Ubuntu.
- Linux firefox + geckodriver environment to build
- Linux firefox + geckodriver environment to build
- Firefox and geckodriver version compatibility issues
- More Recommendation
- JAVA selenium drives firefox-geckodriver
- Firefox browser driver Geckodriver installation
- ubuntu install any version of Firefox
- ubuntu firefox install falsh plugin
- Installing browser drivers
- Adding Executables to your PATH
- Quick reference
- Chromium/Chrome
- Installing the Firefox web driver on Linux for selenium
- Downloading the Firefox webdriver
- Understanding the PATH environmental variable
- Unzip to the directory in PATH
- Add the chosen geckodriver directory to PATH
- Open a web page with Python
- cgoldberg / geckodriver-install.sh
- This comment has been minimized.
- yogesh-desai commented Sep 12, 2017
- This comment has been minimized.
- diemol commented Oct 9, 2017 •
- This comment has been minimized.
- zhisme commented Feb 2, 2018
- This comment has been minimized.
- ORESoftware commented Feb 11, 2018
- This comment has been minimized.
- maxpeterson commented Apr 18, 2018
- This comment has been minimized.
- Jambon1510 commented Jun 23, 2018 •
- This comment has been minimized.
- yaamas commented Jul 20, 2018 •
- This comment has been minimized.
- manosnoam commented Jan 14, 2020
- This comment has been minimized.
- manosnoam commented Jan 15, 2020
- Скачать geckodriver для Linux, Windows и Mac
- Установка geckodriver под Ubuntu, Windows и Mac
- Инструкция установки
- Для Windows
- Минусы такого подхода
- Установка geckodriver в Ubuntu, Debian и ArchLinux
- Установка geckodriver в Mac OS
- Установка geckodriver в Windows
Как установить geckodriver linux
Install selenium Install geckodriver (for Firefox) Download here: https://github.com/mozilla/geckodriver/releases.
Install Selenium and Chromedriver, Geckodriver, and Phantomjs, etc. drivers under Ubuntu.
surroundings: system: Ubuntu14.04 64-bit Google Browser Version: chrome60 Firefox browser version: firefox54 Do Python crawler, some data need to click on the page before you can get it, so you need t.
Linux firefox + geckodriver environment to build
Inhttp://www.firefox.com.cn/download/#moreDownload the latest firefox browser linux64-bit version 2. Copy Firefox-latest-x86_64.tar.bz2 to linux environment 3. Execute tar -xjvf Firefox-.
Linux firefox + geckodriver environment to build
Inhttp://www.firefox.com.cn/download/#moreDownload the latest firefox browser linux64-bit version 2. Copy Firefox-latest-x86_64.tar.bz2 to linux environment 3. Execute tar -xjvf Firefox-latest-x86_64.

Firefox and geckodriver version compatibility issues
Firefox and geckodriver version compatibility issues Open the python shell and execute the following script: from selenium import webdriver driver = webdriver.Firefox() driver.maximize_window() driver.
More Recommendation

JAVA selenium drives firefox-geckodriver
The first error: The path to the driver executable must be set by the webdriver.gecko.driver system property. Error stack: the driver must be initialized with the «webdriver.gecko.driver» sy.

Firefox browser driver Geckodriver installation
1. If you prompt you as a screenshot, you need to install Geckodriver. 2. Download address: https://github.com/mozilla/geckodriver/releases 3. Unzip the zip file, place the Scripts folder of the Pytho.
ubuntu install any version of Firefox
Version download address: After downloading, unzip to the target directory Set desktop shortcut: Copy: can be.
ubuntu firefox install falsh plugin
ubuntu 20.04 LTS firefox install falsh plugin Article Directory ubuntu 20.04 LTS firefox install falsh plugin Just execute the following command, but the running time may be a bit long Environment: ub.
Источник
Installing browser drivers
Through WebDriver, Selenium supports all major browsers on the market such as Chrom(ium), Firefox, Internet Explorer, Opera, and Safari. Where possible, WebDriver drives the browser using the browser’s built-in support for automation, although not all browsers have official support for remote control.
WebDriver’s aim is to emulate a real user’s interaction with the browser as closely as possible. This is possible at varying levels in different browsers.
Even though all the drivers share a single user-facing interface for controlling the browser, they have slightly different ways of setting up browser sessions. Since many of the driver implementations are provided by third parties, they are not included in the standard Selenium distribution.
Driver instantiation, profile management, and various browser specific settings are examples of parameters that have different requirements depending on the browser. This section explains the basic requirements for getting you started with the different browsers.
Adding Executables to your PATH
Most drivers require an extra executable for Selenium to communicate with the browser. You can manually specify where the executable lives before starting WebDriver, but this can make your tests less portable as the executables will need to be in the same place on every machine, or include the executable within your test code repository.
By adding a folder containing WebDriver’s binaries to your system’s path, Selenium will be able to locate the additional binaries without requiring your test code to locate the exact location of the driver.
- Create a directory to place the executables in, like C:\WebDriver\bin or /opt/WebDriver/bin
- Add the directory to your PATH:
- On Windows — Open a command prompt as administrator and run the following command to permanently add the directory to your path for all users on your machine:
- Bash users on macOS and Linux — In a terminal:
You are now ready to test your changes. Close all open command prompts and open a new one. Type out the name of one of the binaries in the folder you created in the previous step, e.g.:
If your PATH is configured correctly, you will see some output relating to the startup of the driver:
You can regain control of your command prompt by pressing Ctrl+C
Quick reference
| Browser | Supported OS | Maintained by | Download | Issue Tracker |
|---|---|---|---|---|
| Chromium/Chrome | Windows/macOS/Linux | Downloads | Issues | |
| Firefox | Windows/macOS/Linux | Mozilla | Downloads | Issues |
| Edge | Windows 10 | Microsoft | Downloads | Issues |
| Internet Explorer | Windows | Selenium Project | Downloads | Issues |
| Safari | macOS El Capitan and newer | Apple | Built in | Issues |
| Opera | Windows/macOS/Linux | Opera | Downloads | Issues |
Chromium/Chrome
To drive Chrome or Chromium, you have to download chromedriver and put it in a folder that is on your system’s path.
On Linux or macOS, this means modifying the PATH environmental variable. You can see what directories, separated by a colon, make up your system’s path by executing the following command:
To include chromedriver on the path, if it is not already, make sure you include the chromedriver binary’s parent directory. The following line will set the PATH environmental variable its current content, plus an additional path added after the colon:
When chromedriver is available on your path, you should be able to execute the chromedriver executable from any directory.
To instantiate a Chrome/Chromium session, you can do the following:
Источник
Installing the Firefox web driver on Linux for selenium
Installing the Firefox web driver on Linux for selenium
I found this cool Python tutorial for beginners on web scraping using the selenium module. However, in the book, there is a part where the author says «If you encounter the error message: «‘geckodriver’ executable needs to be in PATH» you will have to manually install the webdriver to get selenium working».
I was one of the lucky ones that got to learn how to install the driver manually, hence this guide was born.
In this guide, I will explain the steps I took to manually install the Firefox webdriver on Linux(Debian) and configure the PATH to get selenium working correctly.
Specifically, I will explain the following steps:
- Downloading the Firefox web driver
- Understanding the PATH environmental variable
- Configuring the webdriver to work with selenium
- Testing selenium with Python.
- You have the Firefox web browser installed. (If you don’t you can download it for free from https://getfirefox.com/.)
- You have Python installed.
- You have selenium installed. (You can install selenium by running pip install —user selenium from the command line terminal.)
Downloading the Firefox webdriver
Go to https://github.com/mozilla/geckodriver/releases and scroll down to assets. There you will find the gecko driver for the different operating systems.
Click on «geckodriver-v0.27.0-linux64.tar.gz» to download the Linux 64bit driver. Choose the directory where you want to save the zipped file and start the download.
Understanding the PATH environmental variable
In order for selenium to execute the webdriver successfully, it needs to know where the executable file “geckodriver” is located. To accomplish this there is an environmental variable called PATH in which your program looks for the address of executable files.
PATH is an environmental variable in Linux that tells the shell in which directories to search for executable files in response to commands given through the command line or shell scripts. This is also the reason you can type a command like ls (list) without having to specify its directory /bin/ls .
PATH (upper case letters) is different from path (lower case letters) where the latter refers to the address of a file or directory. ie. /home/user/file.txt
Next, I will explain two ways that you can set up the webdriver to work with the PATH variable. The first is a permanent solution where you place the executable within a directory already in the PATH variable. The second is a temporary solution where you add the directory of the webdriver executable to the PATH variable. With the latter, the PATH resets when a new session is started.
Unzip to the directory in PATH
The easiest method is to unzip the geckodriver.tar into the /usr/local/bin directory, which is already in the PATH by default. To achieve this enter the following command into your command line from within the directory where the geckodriver.tar file is located. Note the name of your file should match that of which you downloaded.
Exit fullscreen mode
This places an unzipped copy within the /usr/local/bin folder that is already listed in the PATH variable. You will now be able to run the geckodriver command to test it out.
This change will remain in place even after the session is restarted.
Add the chosen geckodriver directory to PATH
To temporarily add the geckodriver, add the directory where the geckodriver executable is located to the PATH variable. Enter the following command where YourDirectory is the directory of the geckodriver executable:
This adds the directory where the executable is located to the PATH variable. You can check this by looking at the PATH variable values. Enter the following command:
This will show all the directories that are currently listed within the PATH variable separated by semicolons. You will now also see your geckodriver directory listed there and will be able to run the geckodriver command to test it out.
Open a web page with Python
Now you will be able to use selenium from within Python. You can test it out by opening a web page from the interactive Python shell. Type python3 to open the python interactive shell then enter the following commands:
Источник
cgoldberg / geckodriver-install.sh
| #! /bin/bash |
| # download and install latest geckodriver for linux or mac. |
| # required for selenium to drive a firefox browser. |
| install_dir= » /usr/local/bin « |
| json= $( curl -s https://api.github.com/repos/mozilla/geckodriver/releases/latest ) |
| if [[ $( uname ) == » Darwin » ]] ; then |
| url= $( echo » $json » | jq -r ‘ .assets[].browser_download_url | select(contains(«macos»)) ‘ ) |
| elif [[ $( uname ) == » Linux » ]] ; then |
| url= $( echo » $json » | jq -r ‘ .assets[].browser_download_url | select(contains(«linux64»)) ‘ ) |
| else |
| echo » can’t determine OS « |
| exit 1 |
| fi |
| curl -s -L » $url » | tar -xz |
| chmod +x geckodriver |
| sudo mv geckodriver » $install_dir « |
| echo » installed geckodriver binary in $install_dir « |
This comment has been minimized.
Copy link Quote reply
yogesh-desai commented Sep 12, 2017
This comment has been minimized.
Copy link Quote reply
diemol commented Oct 9, 2017 •
Hi, thanks for this script! Very helpful.
I copied and used it for Chromedriver as well, here it is:
I’ll create a gist with both and quote you as the source, thanks!
This comment has been minimized.
Copy link Quote reply
zhisme commented Feb 2, 2018
Before I could run this script, I had to install jq.
brew install jq
macos. System version.
This comment has been minimized.
Copy link Quote reply
ORESoftware commented Feb 11, 2018
put set -e; at the top of your bash scripts
This comment has been minimized.
Copy link Quote reply
maxpeterson commented Apr 18, 2018
You could also use Python:
This comment has been minimized.
Copy link Quote reply
Jambon1510 commented Jun 23, 2018 •
This is not working for me, url return is empty
This comment has been minimized.
Copy link Quote reply
yaamas commented Jul 20, 2018 •
Working in Ubuntu 18.04.
sudo apt install jq was necessary.
This is not working for me, url return is empty.
Well, you might be on a 32-bit machine. Try changing linux64 in this line :
10 : url=$(echo «$json» | jq -r ‘.assets[].browser_download_url | select(contains(» linux64 «))’)
to linux32 .
This comment has been minimized.
Copy link Quote reply
manosnoam commented Jan 14, 2020
Without using jq command, you can simply grep for the file address:
(The tar checkpoint option is to print dots progress)
This comment has been minimized.
Copy link Quote reply
manosnoam commented Jan 15, 2020
Hi, thanks for this script! Very helpful.
I copied and used it for Chromedriver as well
For chrome driver, it is a ZIP not GZ archive, so you can use JAR command to extract:
curl -L $chromedriver_zip_url | jar xv
Источник

Firefox до 46 версии поставляется с поддержкой WebDriver. Geckodriver требуется для Firefox выше 47+ версии. Нужно установить geckodriver отдельно от браузера.
Скачать geckodriver для Linux, Windows и Mac
Зайдите на github страницу с релизами чтобы выбрать нужный вам файл для скачивания в зависимости от вашей операционной системы и версии браузера Firefox.
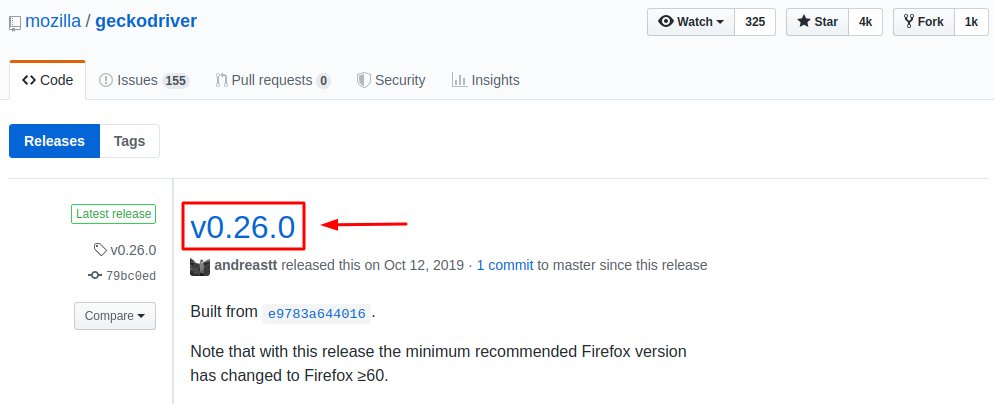
На текущий момент, актуальная версия geckodriver является v0.26.0.
Установка geckodriver под Ubuntu, Windows и Mac
Ниже мы приводим примеры более «правильной» установки драйвера, но есть и более быстрый способ. Примените данный метод в двух случаях.
- Вам нужны разные версии geckodriver.
- У вас не получилось ничего из того, что мы предлагаем ниже под каждую операционную систему.
Инструкция установки
- Заходим на сайт https://github.com/mozilla/geckodriver/releases/
- Скачиваем архив под вашу операционную систему
- Распаковываем файл и запоминаем где находится файл geckodriver или geckodriver.exe (Windows)
Если у вас Linux дистрибутив или Mac, вам нужно дать файлу geckodriver нужные права на выполнения. Открываем терминал и вводим команды одна за другой.
Теперь, когда вы будете запускать код в Python, вы должны указать Selenium на этот файл.
Для Windows
Минусы такого подхода
- Нужно помнить где у вас лежит geckodriver;
- Нужно не забывать указывать в конструктор класса webdriver.Firefox путь к драйверу.
Установка geckodriver в Ubuntu, Debian и ArchLinux
Выбираем (в зависимости от архитектуры процессора x32 или x64) нужный tar архив. В моем случае будет файл geckodriver-v0.26.0-linux64.tar.gz у меня Ubuntu 18.04.3 LTS.
Вытаскиваем файл из архива.
Даем нужные права драйверу.
Отправляем драйвер в папку где его будет искать Selenium.
Установка geckodriver в Mac OS
Пожалуй, самая простая установка в Mac. Выполняем в терминале:
Проблема такого подхода в том, что может быть старая версия. Для новой версии смотрите на страницу github с релизами и скачиваем архив geckodriver-v0.26.0-macos.tar.gz.
Заходим через терминал в папку где будет лежать архив и сам драйвер.
Даем драйверу права на выполнения.
/.bashrc» с помощью VIM или NANO.
Добавляем в конец файла следующие строки. ВНИМАНИЕ! Заменяем «/your/path/» указывая реальный путь к geckodriver файлу.
Возможно вы не поймете как выйти из VIM. Такое бывает.
- Нажимаем клавишу ESC
- Вводим символы :wq
- Enter
Теперь у вас будет последняя версия geckodriver на вашем новеньком маке.
Установка geckodriver в Windows
Windows пользователи возможно не слышали о таким виде архивов как tar.gz это нормально. Скачиваем и устанавливаем программу 7-Zip.
Программа для распаковки tar.gz в Windows: http://www.7-zip.org/
Полная инструкция по установки geckodriver в Windows показана в видео. Смотрим с 40 секунды и повторяем. Помните что не нужно скачивать именно ту версию, что указана в видео. По указанной ссылке с github последняя версия 0.19.1 когда в самом видео 12-я версия. Скачивайте самую новую версию, возможно когда вы сейчас читаете эту статью уже вышла новая версия — скачиваем её.
Скрипт теста ниже откроет веб-сайт в новом окне Firefox.
Источник


