- Как изменить курсор мыши в Windows 10 (+ создать свой!). Скачать набор курсоров: более 200 штук!
- Настройка курсора
- Замена стандартной стрелки-курсора на что-то иное
- Вариант 1 (штатный)
- Вариант 2 (универсальный)
- Как создать свой курсор
- Как сбросить все настройки по изменению курсора
- Как использовать Custom Cursor для Windows 10
- Q: How to install Custom Cursor for Windows 10 app?
- Go to Windows download page of Custom Cursor website
- Installation of Custom Cursor for Windows 10
- Installation
- Installed Custom Cursor for Windows 10
- Q: How to use Custom Cursor for Windows 10 app?
- Custom Cursor home menu
- Setting the cursor
- Changing the size
- Default Cursor
- Q: How to download cursors from site?
- Accessing Custom Cursor website
- Adding cursors to Custom Cursor for Windows 10
- Setting a cursor from out website
- Q: How to add your own cursors to Custom Cursor for Windows app?
- Opening add own cursors interface
- Add own cursors interface
- Uploading new cursors and other pointers
- Activating own cursor packs
- Q: How to manage your Custom Cursor for Windows app?
- Deleting downloaded cursor packs
- Editing own cursor packs
- У вас все еще не установлено расширение Custom Cursor для Chrome?
- У вас все еще не установлен аддон Custom Cursor для Edge?
- У вас все еще не установлен аддон Custom Cursor для Opera?
- У вас все еще не установлен аддон Custom Cursor для Yandex браузера?
- У вас все еще не установлен аддон Custom Cursor для Firefox?
Как изменить курсор мыши в Windows 10 (+ создать свой!). Скачать набор курсоров: более 200 штук!
 Здравствуйте!
Вообще, сам я немного скептически смотрю на замену курсора (кроме отдельных случаев: когда он сливается с фоном, например) , но вопросов таких получаю массу. 😉
Сегодня решил набросать небольшую заметку с парочкой простых способов сделать это (покажу, как обычную стрелку  «превратить» во что-то более оригинальное).
Кстати, для тех кто хочет немного позаниматься «творчеством» — есть вариант создать свой курсор (благо, это доступно большинству, причем, даже если вы совсем не умеете рисовать).

Пример — на что можно поменять стрелку.

Настройка курсора
Замена стандартной стрелки-курсора на что-то иное
Вариант 1 (штатный)
Если у вас установлена современная обновленная версия Windows 10 — то в арсенале ее функций есть возможность поменять курсор. Выбор, конечно, не самый большой — но есть!
Как это делается:
- зайти в параметры ОС (сочетание Win+i / либо через меню ПУСК);
- перейти в раздел «Специальные возможности / указатель мыши» ;
- задать размер указателя, и выбрать его цвет (кое-какие варианты есть 👌).
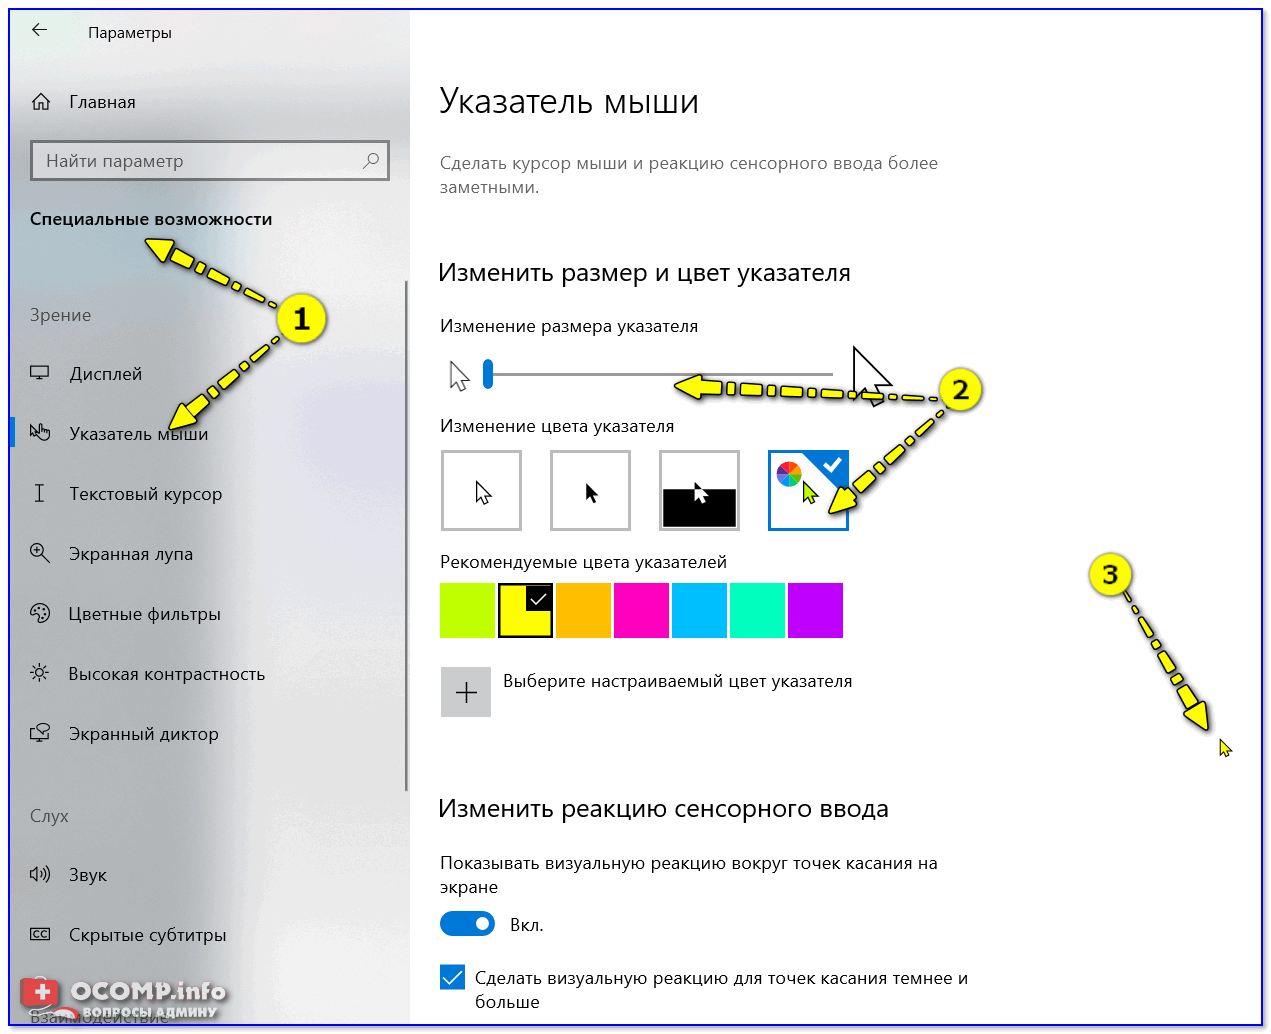
Windows 10 — указатель мышки
Вариант 2 (универсальный)
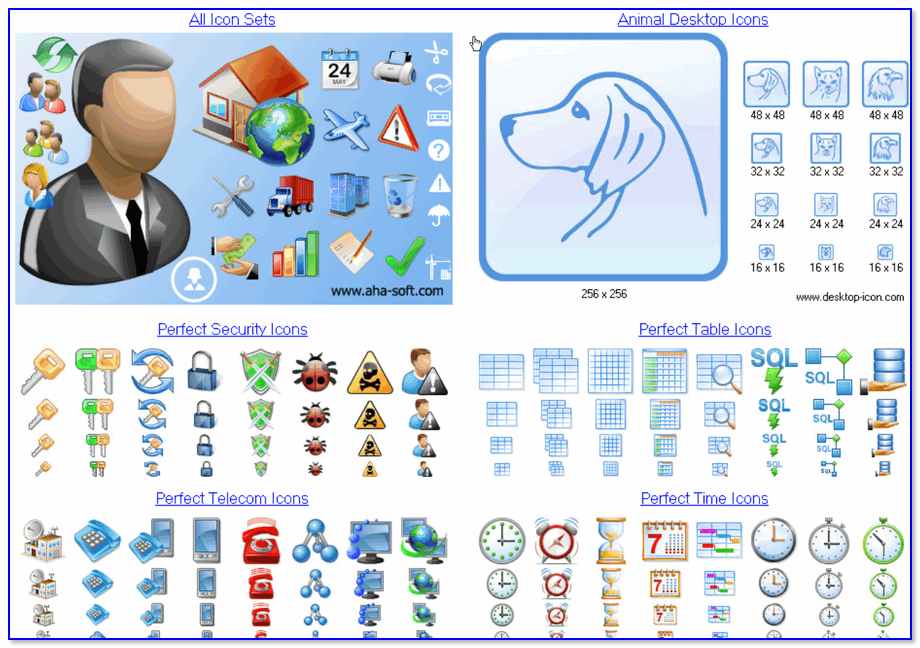
Сейчас в сети можно найти сотни и тысячи самых разных курсоров — что называется на любой вкус. В рамках этой заметке я предложу свой «старый» архив (ссылка ниже 👇. В нем собраны сотни разных курсоров, думаю, что для первого знакомства это должно хватить 😉).
👉 Ссылка на большой пакет курсоров: «Скачать Курсоры.rar» (запаковано WinRAR).
- загружаем архив с курсорами;
- копируем его в папку «C:\Windows\Cursors» и извлекаем всё, что в нем есть (архиваторы в помощь);
- нажимаем Win+R и используем команду control mouse ;
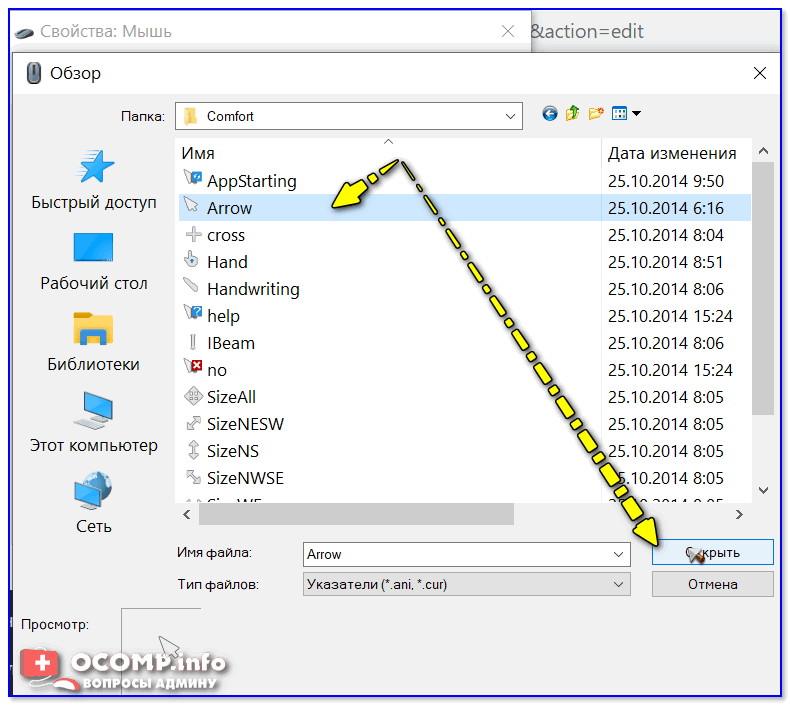
- должны открыться настройки мышки. В разделе «Указатели» выбираем основной режим и нажимаем «Обзор» ;

Свойства мышки — выбор указателя
выбираем один из курсоров, которые мы загрузили в шаге 1;
Для того, чтобы изменения вступили в силу — осталось только нажать на кнопку «Применить» . На этом всё, курсор должен быть изменен!
Выбор указателя для справки
Как создать свой курсор
Для этого лучше и легче всего использовать спец. программу — ArtCursors . По своему внешнему виду — она очень напоминает стандартный Paint.
Единственное отличие : поле, на котором вы будете рисовать курсор (указатель), представляет из себя прямоугольник, разделенный на небольшие квадратики (пиксели). Слева (справа) представлены инструменты, которыми и можно «творить» свой шедевр. 👌 👇
ArtCursors
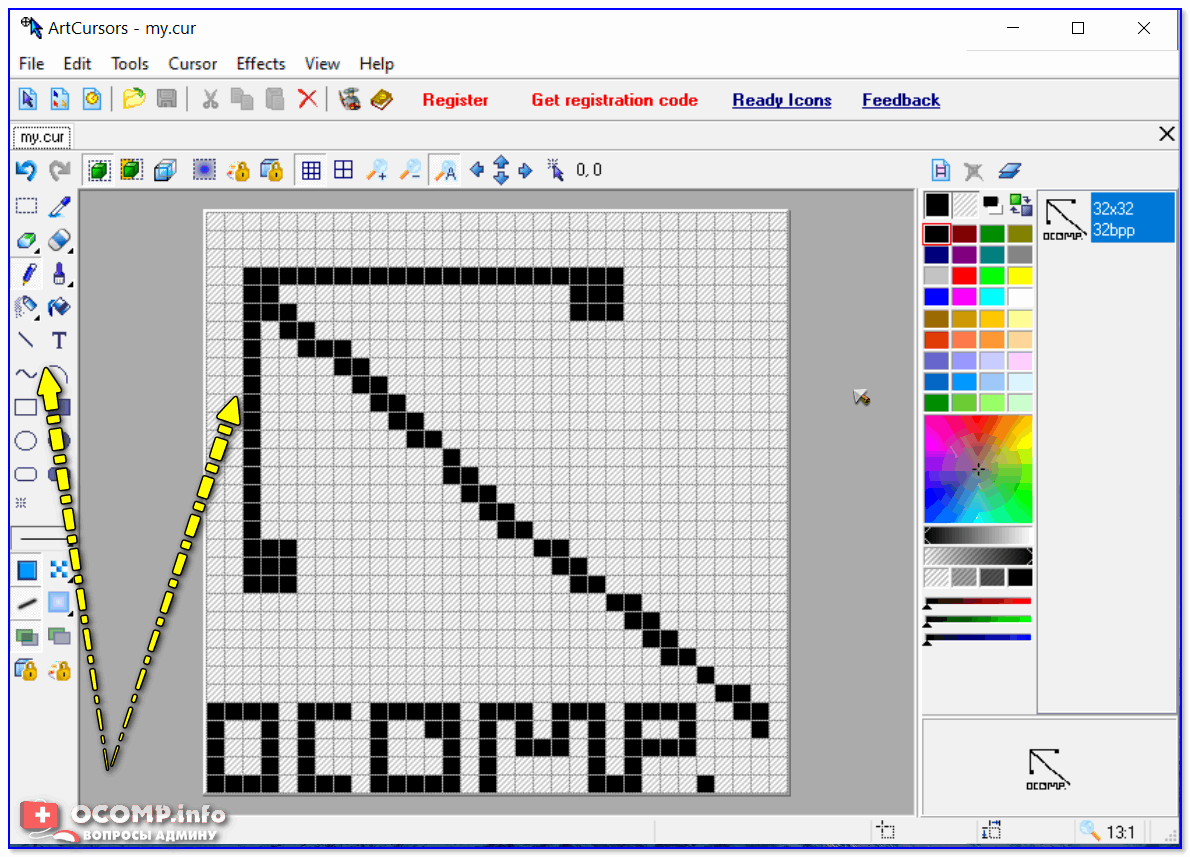
Создаем свой курсор в ArtCursors
ArtCursors позволяет нарисованную картинку сразу же сохранить в формат «.CUR». А ее потом достаточно разместить в папку «C:\Windows\Cursors» и выбрать в настройках курсора (как мы это делали чуть выше. ).
И будет «бегать» по экрану свой рисунок (вместо стандартной стрелки).

Что у меня получилось!
Кстати, эта программа позволяет «побаловаться» не только с курсорами, но и другими иконками Windows. Но в рамках этой статьи на этом не останавливаюсь.
Что дает проф. версия программы
Как сбросить все настройки по изменению курсора
👉 Способ 1
Необходимо открыть настройки мышки: нажать Win+R и в окне «Выполнить» использовать команду control mouse .
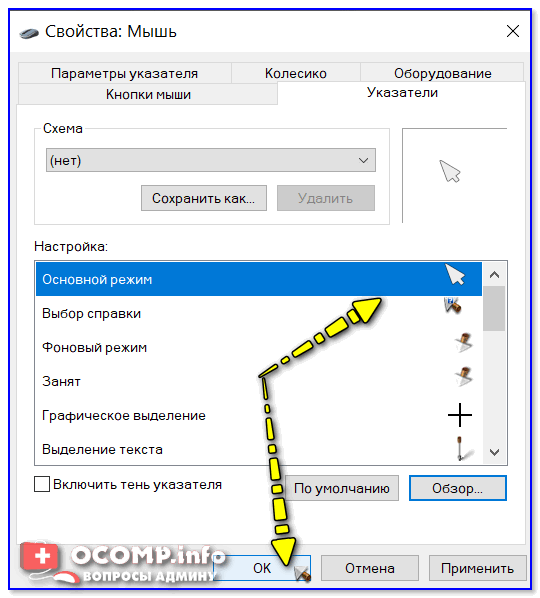
Далее в открывшемся окне перейти во вкладку «Указатели» , выбрать «Основной режим» и нажать кнопку «По умолчанию» . См. скриншот ниже. 👇

Задать курсор по умолчанию
👉 Способ 2
Еще один хороший способ изменить курсор (да и вообще оформление ОС) — установить новую тему (которая включает в себя всё сразу: обои, цвет, звуки, указатель и пр.).
Сделать это можно в параметрах ОС (сочетание Win+i) в разделе «Персонализация / темы» .
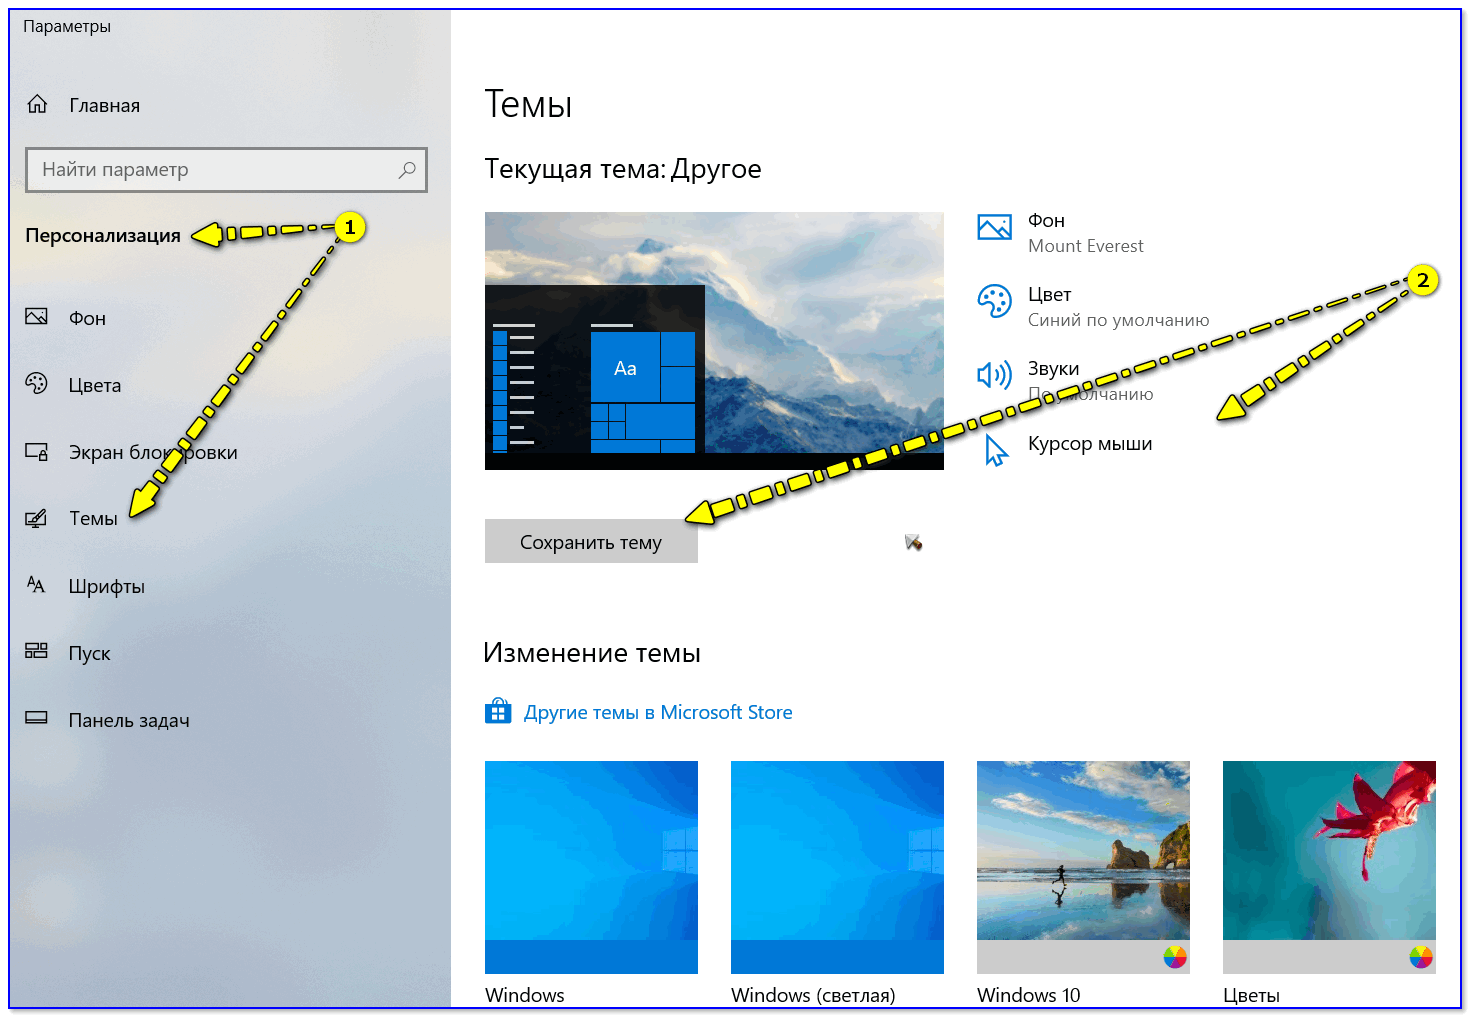
Меняем тему / Windows 10
👉 Способ 3
В некоторых случаях (например, когда вы использовали какие-то спец. утилиты) способ 1/2 может не сработать.
Тогда можно попробовать откатить систему (если, конечно, у вас сохранилась хотя бы одна точка восстановления).
Для просмотра точек восстановления:
- нажмите Win+R (чтобы появилось окно «Выполнить»),
- используйте команду rstrui .
Как видите из примера ниже — в моей ОС есть только одна точка (впрочем, этого достаточно для восстановления системы).
Как работать с точками восстановления в Windows 10 — подробная инструкция

Есть только одна точка.
Если точек для отката ОС нет — то восстановить норм. работу Windows можно через сброс параметров и настроек (в дефолтные). Сейчас Windows 10 предлагает это сделать через меню «Обновление и безопасность / Восстановление» .
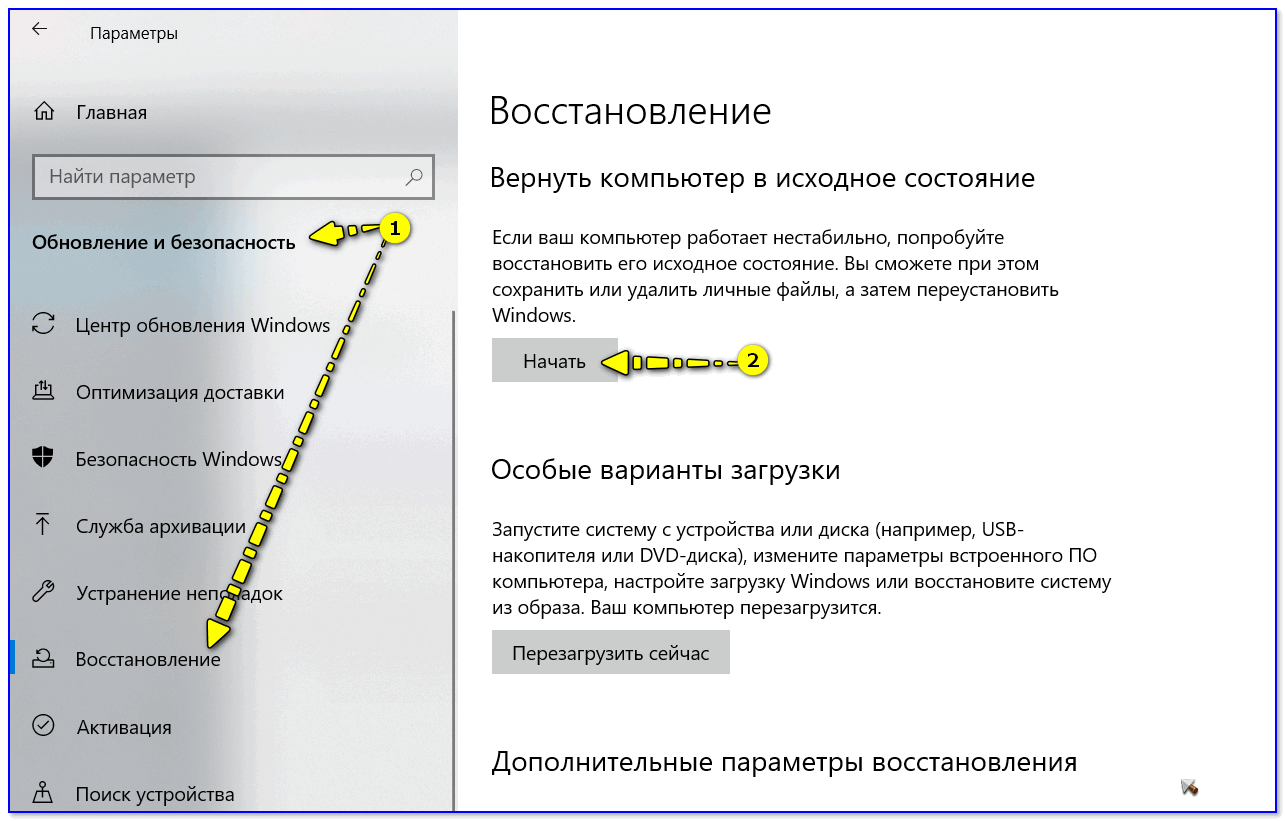
Вернуть ПК в исходное состояние
На сим пока всё. Дополнения были бы кстати!
Как использовать Custom Cursor для Windows 10
Q: How to install Custom Cursor for Windows 10 app?
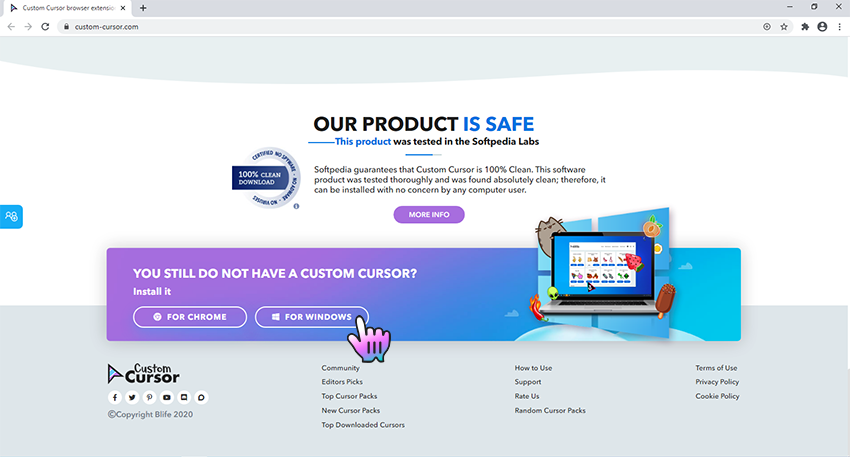
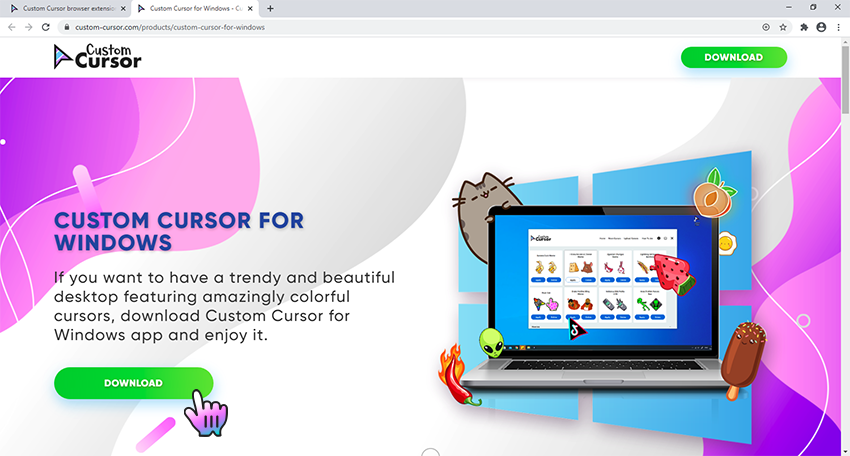
Go to Windows download page of Custom Cursor website
Follow the Windows download link on the banner in the lower part of the page or open this link and click the «DOWNLOAD» button.
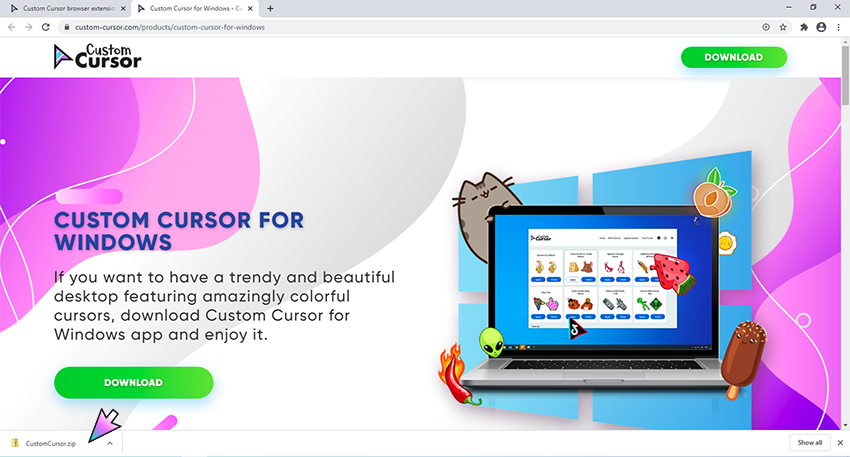
Installation of Custom Cursor for Windows 10
Once you have successfully downloaded the installer — unpack and run it. Click on it in browsers downloads and double click the Custom Cursor.msi in opened window, it will run the installer.
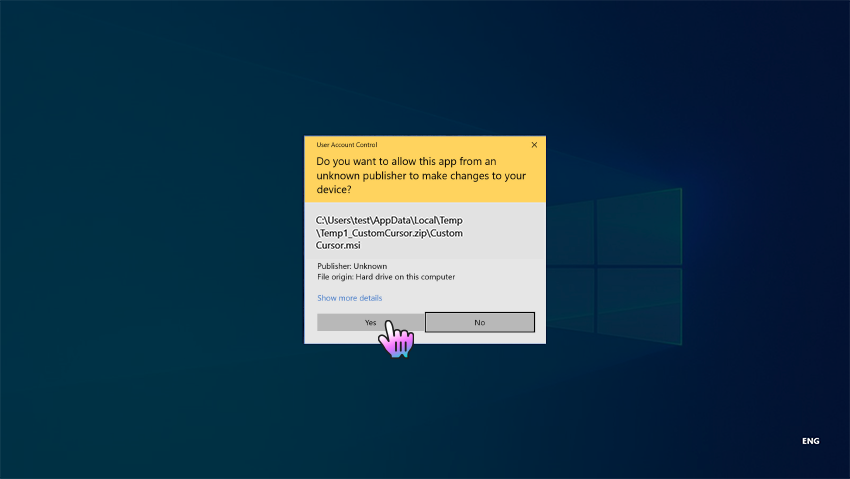
Installation
Follow the steps in the Custom Cursor setup wizard to install Custom Cursor for Windows 10 app. Make sure to agree when UAC window will appear.
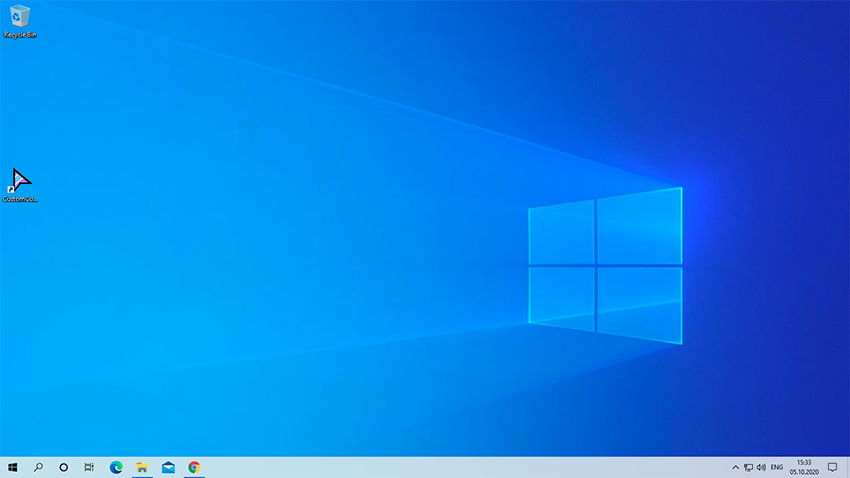
Installed Custom Cursor for Windows 10
Once you have successfully completed the installation a Custom Cursor link will appear on your Windows desktop, same as a link in Windows Run menu. To launch the Custom Cursor app simply double click one of those links.
Q: How to use Custom Cursor for Windows 10 app?
Custom Cursor home menu
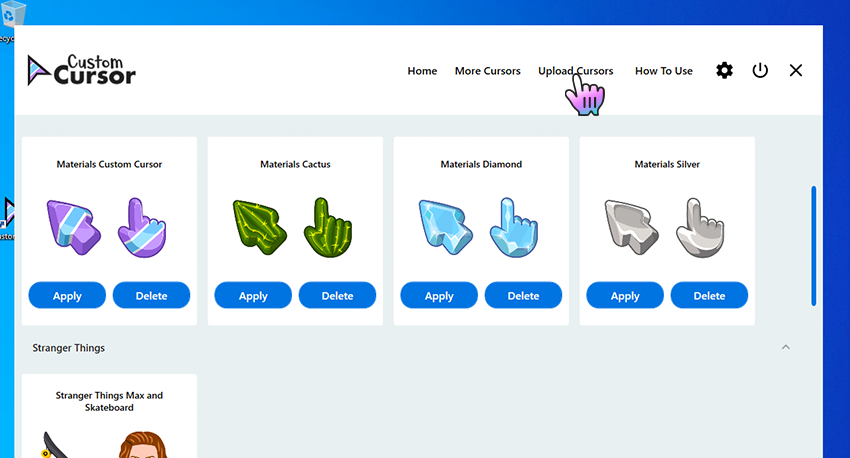
On the home screen of the app you can find many useful buttons that will help you using Custom Cursor for Windows 10 app, as you can see on a screenshot.
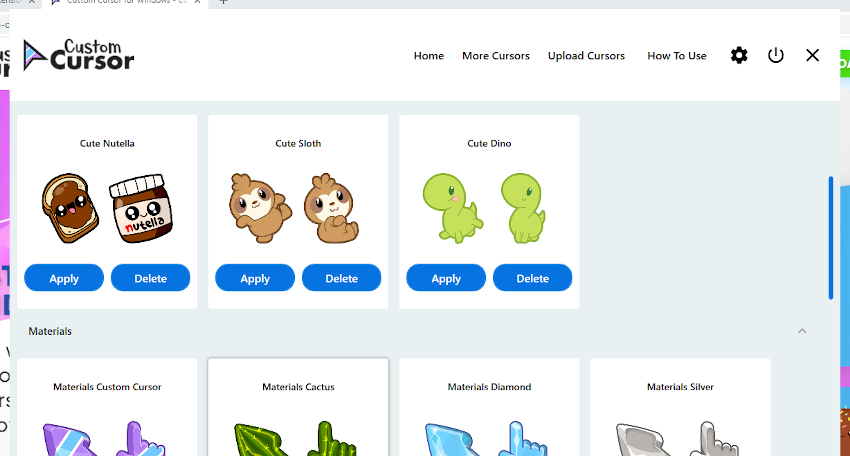
Here you can find:
- Custom Cursor logo — this button leads to our website in case you want to check for updates or browse our cursor.
- Home — this button lets you return to home/cursor selection page at any time.
- More Cursors — is a link to Custom Cursor website to download new cursors to play with.
- Upload Cursors — is a link to page where you can upload your cur files you use with the Custom Cursor for Windows app.
- How to Use — link to Custom Cursor website, this how to use. or Settings button — Opens Custom Cursor app Settings page where you can change language, cursor size and make other customisations to the app. or Default Cursor — this button lets you return to Windows Default cursor settings. or Exit — Just exits the Custom Cursor for Windows 10 application.
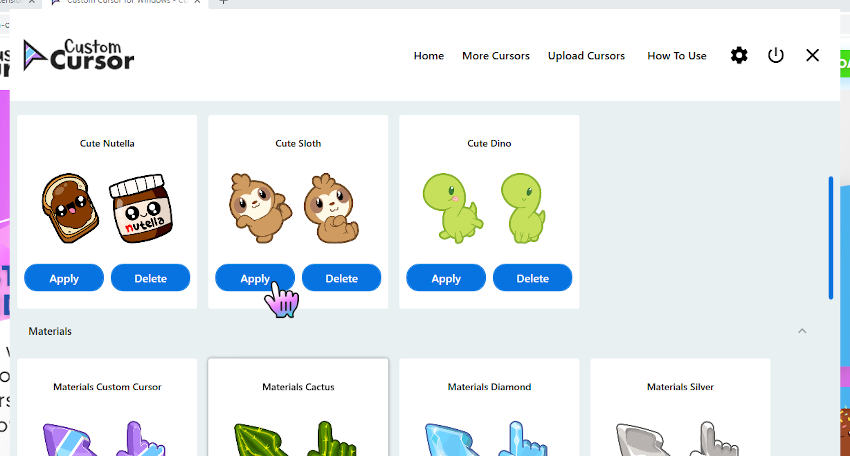
Setting the cursor
On the home screen of the Custom Cursor for Windows 10 app, scroll down and choose a cursor pack that you like and press the “Apply” button to make it the active cursor.
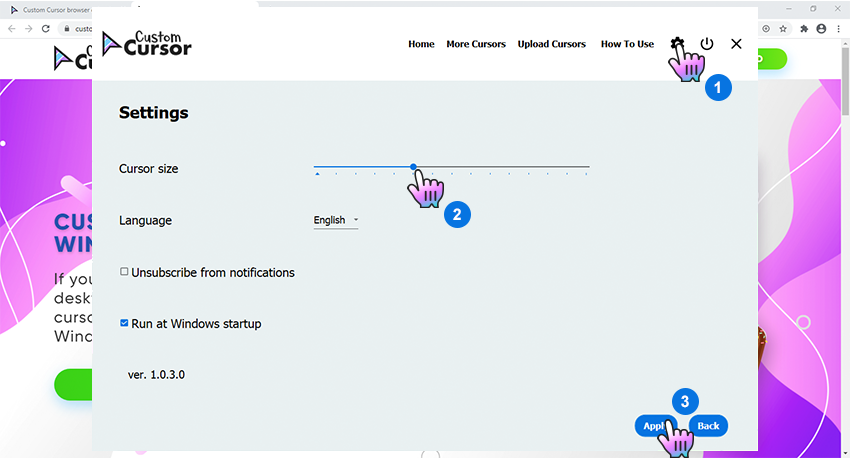
Changing the size
To change the size of your cursor you need to open Custom Cursor for Windows 10 app window. In the upper menu press the Settings button. On the settings page use size slider to choose the cursor size you like and press “Apply”.
Default Cursor
To return to default cursor at any moment open Custom Cursor for Windows 10 app window and press “Default cursor” button. Alternatively, you can open your Windows Mouse setting and select any other system cursor that you like. Custom Cursor will not be active until you hit the Apply on another cursor again.

Q: How to download cursors from site?
Accessing Custom Cursor website
Use the «More Cursors» button in main window of the Custom Cursor for Windows 10 app or follow this link to access the website cursor collections.

Adding cursors to Custom Cursor for Windows 10
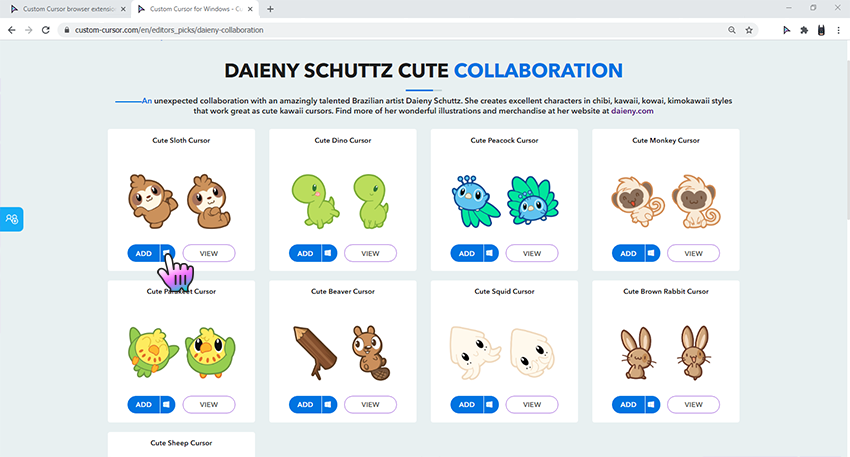
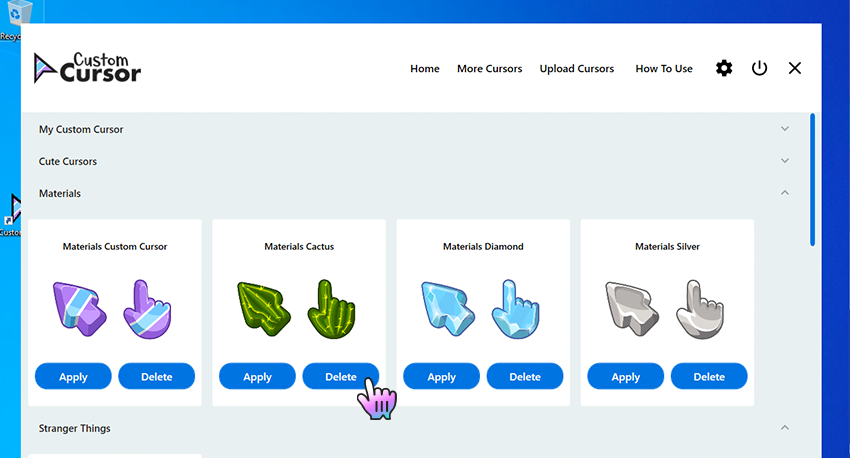
On the pack list page you can find all cursor packs of the chosen collection.
Once you found cursor pack you like, you can click “Add to Custom Cursor for Windows 10 app» button under it.
It will be added to Custom Cursor for Windows app.
Setting a cursor from out website
On the home screen of the Custom Cursor for Windows 10 app, scroll down and choose a cursor pack that you like and press the “Apply” button to make it the active cursor.
Q: How to add your own cursors to Custom Cursor for Windows app?
Custom Cursor for Windows 10 app has the ability to work with third-party .cur files. You can add, manage, and set your favorite cursor files as your Windows cursor, even if those were downloaded from the internet or gifted to you by a friend.
Opening add own cursors interface
To create your own cursor pack in the Custom Cursor for Windows app you need to open the Custom Cursor app main window and click the “Upload Cursors” button on the top menu. This will open the upload cursors page.
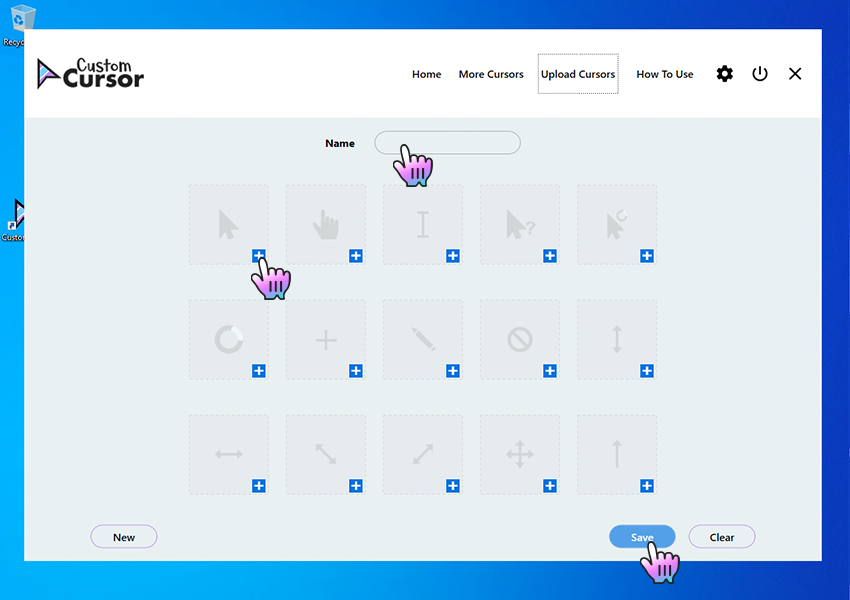
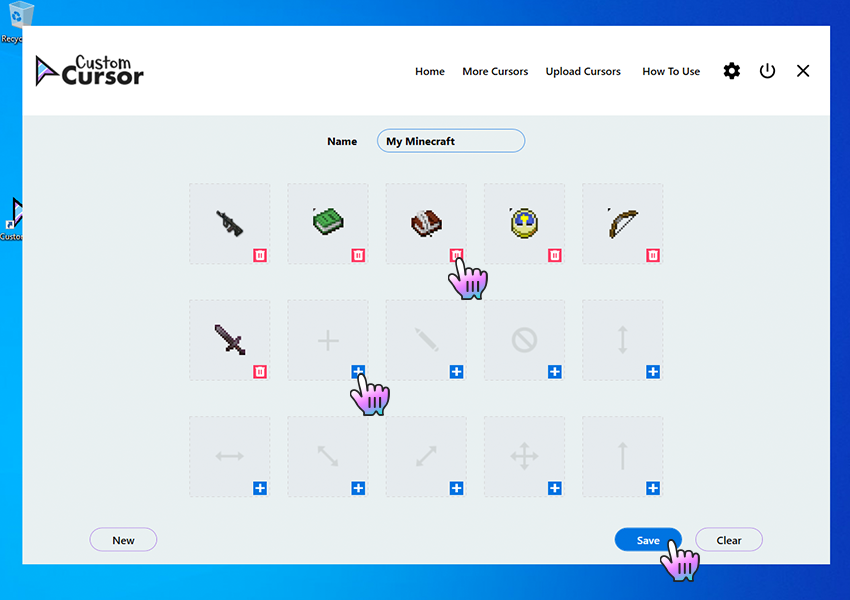
Add own cursors interface
Once on the Upload Cursors page you will see a cursor pack name input field called “Name”, a cursor elements upload cells with an image of the element you are setting and a “+” button to add that element. Buttons: “New” to clear the fields and start creating a new own cursor pack; “Save” to save your current progress, and “Clear” to clean the page forms.
Remember to save your progress before switching to home page and activating you new own cursor pack.
Uploading new cursors and other pointers
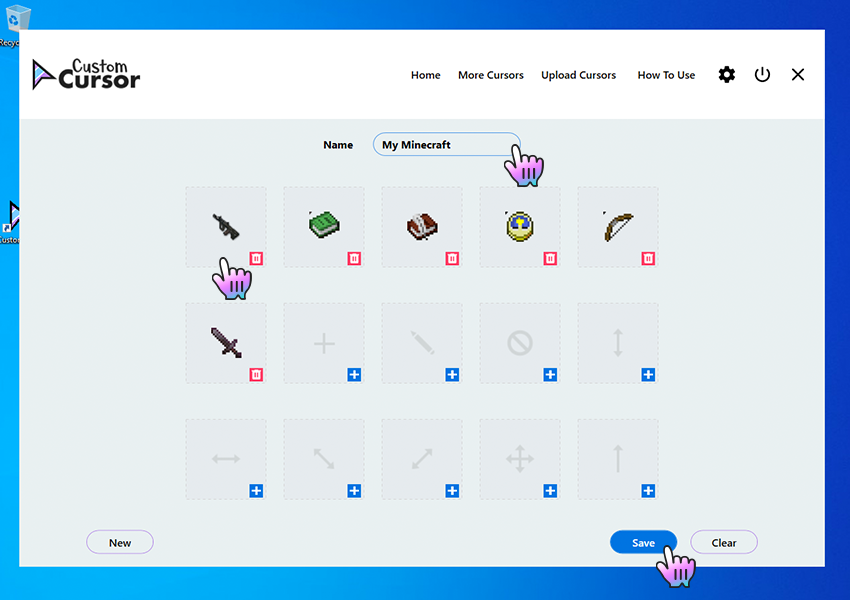
To create your own cursor pack, once you are on the Upload Cursors page, you must complete the following actions:
- Set a Name for a pack you are creating.
- Add cursor elements you have in the .cur file format, to be used in your cursor pack.
- Press Save when you are done adding elements.
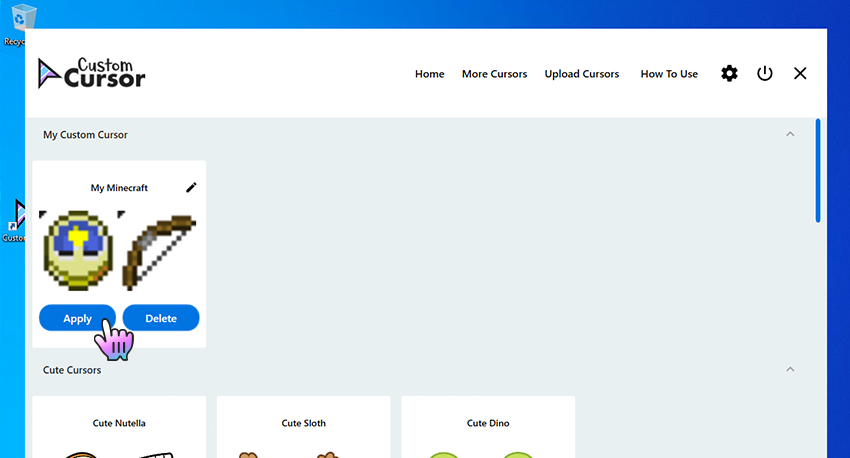
The cursor pack you created will appear on the Home page, in the My Custom Cursor section, with a Name you have set for the pack and can be activated there by hitting the “Apply” button.
Activating own cursor packs
To Apply the uploaded cursor pack navigate to the Home screen of the Custom Cursor for Windows 10 app, find “My Custom Cursor” section, choose a cursor pack that you created and press the “Apply” button to make it the active cursor.
Q: How to manage your Custom Cursor for Windows app?
When you’ve downloaded all cursor packs in your Custom Cursor for Windows 10 app and want to clean up a little bit 🙂
Deleting downloaded cursor packs
To create your own cursor pack in the Custom Cursor for Windows app you need to open the Custom Cursor app main window and click the “Upload Cursors” button on the top menu. This will open the upload cursors page.
Editing own cursor packs
If you added your own cursor pack from .cur files to the Custom Cursor for Windows 10 app — you can edit them to fit your current needs. To do so, you need to navigate to Custom Cursor for Windows home page, find the cursor pack tile you like to edit. In the top right corner of the own cursor tile, you can find a pencil icon, click on it to open own cursor pack edit mode.
n the edit mode you can change own cursor pack name and add or remove its elements like cursors or pointers. Please note that if you delete some of the elements your Windows defaults will be used.
- To add an element you need to press “Blue plus icon” on the tile you wish to assign a custom cursor element.
- To remove an element you just need to press the “Red trash can icon” for it to be removed.
*Please note that you need to save your progress before exiting the “Edit own cursor” section by clicking the “Save” button.
У вас все еще не установлено расширение Custom Cursor для Chrome?
Установите его с официального Интернет-Магазина Chrome
У вас все еще не установлен аддон Custom Cursor для Edge?
Установите его с официального сайта Microsoft Edge Addons
У вас все еще не установлен аддон Custom Cursor для Opera?
Установите его с официального сайта Opera addons
У вас все еще не установлен аддон Custom Cursor для Yandex браузера?
Установите его с официального сайта Opera addons для Yandex браузера
У вас все еще не установлен аддон Custom Cursor для Firefox?
Установите его с официального сайта Firefox Browser Add-ons


