- Программное средство – Monodevelop: как установить и запустить систему, а также другие полезные советы
- Для чего предназначена система?
- Как загрузить и установить?
- Установка на Windows
- Как запустить программу?
- Возможные проблемы
- Install Mono on Windows
- Mono in the Windows 10 Bash
- Download
- Mono for macOS is available as a Mac Package (.pkg)
- 1 Add the Mono repository to your system
- Ubuntu 20.04 (amd64, armhf, arm64, ppc64el)
- Ubuntu 18.04 (i386, amd64, armhf, arm64, ppc64el)
- Ubuntu 16.04 (i386, amd64, armhf, arm64, ppc64el)
- 2 Install Mono
- 3 Verify Installation
- Notes
- 1 Add the Mono repository to your system
- Debian 10 (i386, amd64, armhf, arm64, armel, ppc64el)
- Debian 9 (i386, amd64, armhf, arm64, armel, ppc64el)
- 2 Install Mono
- 3 Verify Installation
- Notes
- 1 Add the Mono repository to your system
- Raspbian 10 (armhf)
- Raspbian 9 (armhf)
- 2 Install Mono
- 3 Verify Installation
- Notes
- 1 Add the Mono repository to your system
- CentOS/RHEL 8 (x86_64)
- CentOS/RHEL 7 (x86_64)
- CentOS/RHEL 6 (x86_64, i686)
- 2 Install Mono
- 3 Verify Installation
- 1 Add the Mono repository to your system
- Fedora 29 (x86_64)
- Fedora 28 (x86_64)
- 2 Install Mono
- 3 Verify Installation
- Mono for Windows is available as a Windows Installer file
- Mono is available on Docker Hub
- Available tags
- Release Notes
- MonoDevelop IDE
- Older releases
Программное средство – Monodevelop: как установить и запустить систему, а также другие полезные советы

Разработка программ требует много знаний и времени, но при этом широко востребована и неплохо оплачивается. Свободная среда разработки даст возможность попробовать себя в роли программиста или поможет с практикой уже опытным специалистам. MonoDevelop – это один из таких инструментов, позволяющих создавать собственное ПО.
Для чего предназначена система?
Свободная система программных средств MonoDevelop предназначена для написания настольных и веб-приложений C#, C, C++, Vala, CIL, Visual Basic .NET. Nemerie, Boo, Java. Будучи портом SharpDevelop на Mono/GTK+ проект начал активно развиваться и сильно отошёл от своих первых версий.
Основные возможности:

- подсветка синтаксиса;
- автоматическое дополнение кода;
- выделение блоков кода с возможностью сворачивания/разворачивания;
- поддержка плагинов;
- браузер классов;
- встроенный отладчик;
- визуальный конструктор форм (GTK#);
- модульное тестирование;
- множество стандартных шаблонов;
- автоматическое создание бинарных пакетов и архивов по завершению компиляции.
Как загрузить и установить?
Загружать MonoDevelop рекомендуется с официального сайта разработчика в разделе «Download», где пользователю доступны на выбор три платформы:
Кликаем на нужную нам и следуем инструкции (раздел на английском языке!). Владельцам Linux доступны репозитории Mono для каждой версии операционной системы, которые позволяют установить пакет MonoDevelop. Для работы с macOS достаточно загрузить последнюю доступную Visual Studio.
Установка на Windows
Для работы MonoDevelop необходимо сначала подготовиться:

- Устанавливаем свежую версию .NET Framework.
- Заходим на официальный сайт MonoDevelop в раздел «Download».
- Выбираем ОС.
- Нажимаем кнопку скачки и переходим на сайт проекта Mono.
- Загружаем и устанавливаем файлы GTK# и Mono на компьютер.
- Скачиваем Visual Studio и Xamarin от Microsoft, которые понадобятся для этой среды разработки.
Теперь необходимо вручную собрать MonoDevelop из исходника. Для этого и понадобится как минимум Visual Studio 2017:
- git clone https://github.com/mono/monodevelop —recursive -j8;
- открываем main/Main.sln;
- выбираем конфигурацию DebugWin32 и платформу AnyCPU (это важно!);
- получаем готовое ПО.
Как запустить программу?
Запуск программы происходит либо через сторонние универсальные программы для разработки, где MonoDevelop используется в качестве инструмента написания кода, либо из установленного вручную билда. В случае с MSBuild, например, процесс происходит напрямую с помощью скрипта winbuild.bat (запускаем monodevelop\main\build\bin\monodevelop.exe).
Возможные проблемы
Что делать, если система не запускается? Существует множество возможных причин, которые помешают запуску MonoDevelop, и каждая из них требует индивидуального подхода. Если выяснить проблему невозможно, то лучше всего:
- полностью удалить MonoDevelop и установить на чистую ОС;
- проверить наличие всех необходимых программ и обновлений;
- переустановить утилиту, которая связана с MonoDevelop (Unity или Visual Studio, к примеру).
Процесс работы с языком C# сложен и доступен не для многих. Тем не менее, если вам приглянулась идея научиться писать код, то открытая среда разработки MonoDevelop станет отличным решением, особенно для владельцев Linux и macOS.
Install Mono on Windows
Mono runs on Windows, this page describes the various features available for users who want to use Mono on Windows as well as using Mono-based technologies on Windows without Mono (like Gtk#).
- Download the latest Windows installer from the download page.
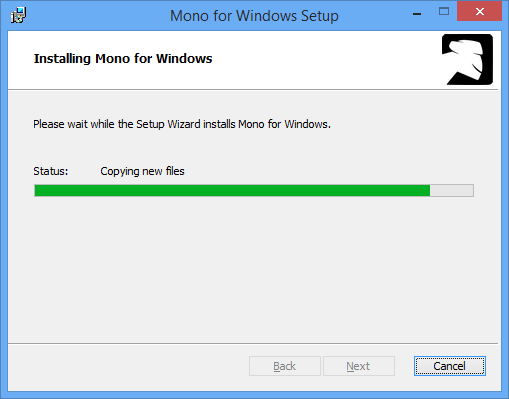
Run the installer and accept the terms of the license. Mono is now installing:
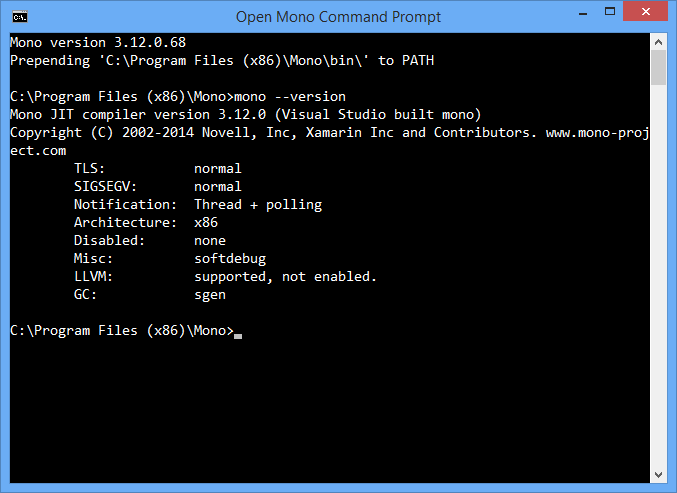
The installer creates a “Open Mono Command Prompt” shortcut under the Mono program group in the start menu. This shortcut starts a command shell with Mono-relevant path information already configured, which means all the Mono tools “just work”.
At this point, it’s a good idea to run through the basic hello world examples on this page to verify Mono is working correctly.
Gtk# is included as part of the Mono installation, this will allow you to create Gtk# applications on Windows with the Mono runtime which you can later deploy into Linux. See the Gtk# page for more details about the toolkit, or go directly to the Gtk# beginner’s guide.
Alternatively, if you only want to use Gtk# on Windows, without Mono, you can use the Gtk# installer for the .NET Framework.
Mono in the Windows 10 Bash
Windows 10 Anniversary Update and greater come with an experimental, optional Linux subsystem that exposes bash as an alternative shell. This can be used to install the Debian/Ubuntu version of Mono alongside or instead of the Windows version. Note that this feature is in beta and you need to manually enable it. For more information about how to install Mono inside Windows Bash and known problems, refer to this issue.
Download
The latest Stable Mono release is: 6.12.0 Stable (6.12.0.122)
Please choose your operating system to view the available packages. Source code is available on GitHub (viewing only) or as a Tarball.
macOS Linux Windows Docker
Mono for macOS is available as a Mac Package (.pkg)
Please refer to the installation guide for more information about how to install and configure your Mono environment.
Supported on macOS 10.9 and later. Check the uninstall instructions if you want to remove Mono from your Mac.
* We recommend this package if you’re using Visual Studio for Mac since the stability of Visual Studio for Mac is only guaranteed with the Visual Studio channel releases.
1 Add the Mono repository to your system
The package repository hosts the packages you need, add it with the following commands.
Note: the packages should work on newer Ubuntu versions too but we only test the ones listed below.
Ubuntu 20.04 (amd64, armhf, arm64, ppc64el)
Ubuntu 18.04 (i386, amd64, armhf, arm64, ppc64el)
Ubuntu 16.04 (i386, amd64, armhf, arm64, ppc64el)
2 Install Mono
The package mono-devel should be installed to compile code.
The package mono-complete should be installed to install everything — this should cover most cases of «assembly not found» errors.
The package mono-dbg should be installed to get debugging symbols for framework libraries — allowing you to get line numbers in stack traces.
The package referenceassemblies-pcl should be installed for PCL compilation support — this will resolve most cases of «Framework not installed: .NETPortable» errors during software compilation.
The package ca-certificates-mono should be installed to get SSL certificates for HTTPS connections. Install this package if you run into trouble making HTTPS connections.
The package mono-xsp4 should be installed for running ASP.NET applications.
3 Verify Installation
After the installation completed successfully, it’s a good idea to run through the basic hello world examples on this page to verify Mono is working correctly.
Notes
Mono on Linux before 3.12 by default didn’t trust any SSL certificates so you got errors when accessing HTTPS resources. This is not required anymore as 3.12 and later include a new tool that runs on package installation and syncs Mono’s certificate store with the system certificate store (on older versions you had to import Mozilla’s list of trusted certificates by running mozroots —import —sync ). Some systems are configured in a way so that the necessary package isn’t pulled in when Mono is installed, in those cases make sure the ca-certificates-mono package is installed.
1 Add the Mono repository to your system
The package repository hosts the packages you need, add it with the following commands.
Note: the packages should work on newer Debian versions too but we only test the ones listed below.
Debian 10 (i386, amd64, armhf, arm64, armel, ppc64el)
Debian 9 (i386, amd64, armhf, arm64, armel, ppc64el)
2 Install Mono
The package mono-devel should be installed to compile code.
The package mono-complete should be installed to install everything — this should cover most cases of «assembly not found» errors.
The package mono-dbg should be installed to get debugging symbols for framework libraries — allowing you to get line numbers in stack traces.
The package referenceassemblies-pcl should be installed for PCL compilation support — this will resolve most cases of «Framework not installed: .NETPortable» errors during software compilation.
The package ca-certificates-mono should be installed to get SSL certificates for HTTPS connections. Install this package if you run into trouble making HTTPS connections.
The package mono-xsp4 should be installed for running ASP.NET applications.
3 Verify Installation
After the installation completed successfully, it’s a good idea to run through the basic hello world examples on this page to verify Mono is working correctly.
Notes
Mono on Linux before 3.12 by default didn’t trust any SSL certificates so you got errors when accessing HTTPS resources. This is not required anymore as 3.12 and later include a new tool that runs on package installation and syncs Mono’s certificate store with the system certificate store (on older versions you had to import Mozilla’s list of trusted certificates by running mozroots —import —sync ). Some systems are configured in a way so that the necessary package isn’t pulled in when Mono is installed, in those cases make sure the ca-certificates-mono package is installed.
1 Add the Mono repository to your system
The package repository hosts the packages you need, add it with the following commands.
Note: the packages should work on newer Raspbian versions too but we only test the ones listed below.
Raspbian 10 (armhf)
Raspbian 9 (armhf)
2 Install Mono
The package mono-devel should be installed to compile code.
The package mono-complete should be installed to install everything — this should cover most cases of «assembly not found» errors.
The package mono-dbg should be installed to get debugging symbols for framework libraries — allowing you to get line numbers in stack traces.
The package referenceassemblies-pcl should be installed for PCL compilation support — this will resolve most cases of «Framework not installed: .NETPortable» errors during software compilation.
The package ca-certificates-mono should be installed to get SSL certificates for HTTPS connections. Install this package if you run into trouble making HTTPS connections.
The package mono-xsp4 should be installed for running ASP.NET applications.
3 Verify Installation
After the installation completed successfully, it’s a good idea to run through the basic hello world examples on this page to verify Mono is working correctly.
Notes
Mono on Linux before 3.12 by default didn’t trust any SSL certificates so you got errors when accessing HTTPS resources. This is not required anymore as 3.12 and later include a new tool that runs on package installation and syncs Mono’s certificate store with the system certificate store (on older versions you had to import Mozilla’s list of trusted certificates by running mozroots —import —sync ). Some systems are configured in a way so that the necessary package isn’t pulled in when Mono is installed, in those cases make sure the ca-certificates-mono package is installed.
1 Add the Mono repository to your system
The package repository hosts the packages you need, add it with the following commands in a root shell.
Note: the packages should work on newer CentOS/RHEL versions too but we only test the ones listed below.
CentOS/RHEL 8 (x86_64)
CentOS/RHEL 7 (x86_64)
CentOS/RHEL 6 (x86_64, i686)
2 Install Mono
The package mono-devel should be installed to compile code.
The package mono-complete should be installed to install everything — this should cover most cases of «assembly not found» errors.
The package referenceassemblies-pcl should be installed for PCL compilation support — this will resolve most cases of «Framework not installed: .NETPortable» errors during software compilation.
The package xsp should be installed for running ASP.NET applications.
3 Verify Installation
After the installation completed successfully, it’s a good idea to run through the basic hello world examples on this page to verify Mono is working correctly.
1 Add the Mono repository to your system
The package repository hosts the packages you need, add it with the following commands in a root shell.
Note: we’re using the CentOS/RHEL repositories on Fedora.
Fedora 29 (x86_64)
Fedora 28 (x86_64)
2 Install Mono
The package mono-devel should be installed to compile code.
The package mono-complete should be installed to install everything — this should cover most cases of «assembly not found» errors.
The package referenceassemblies-pcl should be installed for PCL compilation support — this will resolve most cases of «Framework not installed: .NETPortable» errors during software compilation.
The package xsp should be installed for running ASP.NET applications.
3 Verify Installation
After the installation completed successfully, it’s a good idea to run through the basic hello world examples on this page to verify Mono is working correctly.
Mono for Windows is available as a Windows Installer file
Please refer to the installation guide for more information about how to install and configure your Mono environment.
Supported on Windows 7, 8, 10 or later.
GTK# for .NET
Installer for running Gtk#-based applications on Microsoft .NET:
Mono is available on Docker Hub
The simplest way to get started is:
This will download the latest Mono Docker image, create a container and put you into an interactive shell.
Available tags
There are several tags for selecting the desired Mono version:
- latest — Always points to the latest release
- X.X.X.X — points to a specific version, e.g. 5.8.0.108
- X.X.X — points to the latest version in the X.X.X series, e.g. 5.8.0
- X.X — points to the latest version in the X.X series, e.g. 5.8
- X — points to the latest version in the X series, e.g. 5
The latest version, one minor version before that and the last version before a major version bump are periodically rebuilt by Docker Hub to pull in updates from the base Debian image.
All other version tags are still available, but won’t get those updates so you need to keep your images up to date by running apt update yourself. We encourage you to move to latest Mono releases as soon as they’re available.
Starting with Mono 5.2 we provide a slim variant (e.g. latest-slim ) which only contains the bare minimum to run a simple console app. You can use this as a base and add just what you need.
Release Notes
Check out the release notes of all Mono versions here.
MonoDevelop IDE
Please visit the MonoDevelop website for more details about our cross-platform IDE.
Older releases
To access older Mono releases for macOS and Windows, check the archive on the download server. For Linux, please check the «Accessing older releases» section in the installation guide.


