- Install GoLand
- System requirements
- Install using the Toolbox App
- Install the Toolbox App
- Install the Toolbox App
- Install the Toolbox App
- Standalone installation
- Silent installation on Windows
- Silent configuration file
- Install as a snap package on Linux
- Установка Go в Ubuntu 20.04
- Что такое Go?
- Установка Go на Ubuntu
- 1. Установка из официальных репозиториев
- 2. Установка из официального сайта
- 3. Установка из PPA
- Тестирование языка Go
- Выводы
- Оцените статью:
- Об авторе
- 5 комментариев
Install GoLand
GoLand is a cross-platform IDE that provides consistent experience on the Windows, macOS, and Linux operating systems.
System requirements
| Requirement | Minimum | Recommended |
|---|---|---|
| RAM | 2 GB of free RAM | 4 GB of total system RAM |
| CPU | Any modern CPU | Multi-core CPU. GoLand supports multithreading for different operations and processes making it faster the more CPU cores it can use. |
| Disk space | 2.5 GB and another 1 GB for caches | SSD drive with at least 5 GB of free space |
| Monitor resolution | 1024×768 | 1920×1080 |
| Operating system | Latest 64-bit version of Windows, macOS, or Linux (for example, Debian, Ubuntu, or RHEL) |
You do not need to install Java to run GoLand because JetBrains Runtime is bundled with the IDE (based on JRE 11).
Install using the Toolbox App
The JetBrains Toolbox App is the recommended tool to install JetBrains products. Use it to install and manage different products or several versions of the same product, including Early Access Program (EAP) and Nightly releases, update and roll back when necessary, and easily remove any tool. The Toolbox App maintains a list of all your projects to quickly open any project in the right IDE and version.
For more information about Nightly builds, see What are nightly builds? in the FAQ section.
Install the Toolbox App
Download the installer .exe from the Toolbox App web page.
Run the installer and follow the wizard steps.
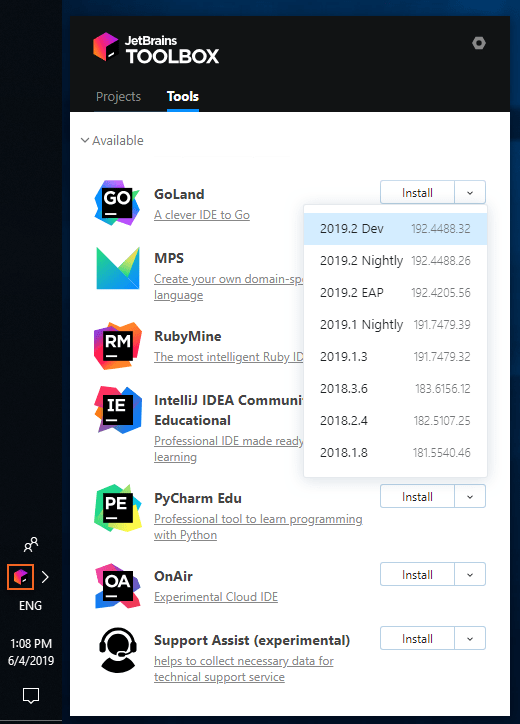
After you run the Toolbox App, click its icon in the notification area and select which product and version you want to install.
To install a nighltly build, select the version that has Nightly in its name from the list of versions (for example, 2021.1 Nightly).
Log in to your JetBrains Account from the Toolbox App and it will automatically activate the available licenses for any IDE that you install.
Install the Toolbox App
Download the disk image .dmg from the Toolbox App web page.
There are separate disk images for Intel and Apple Silicon processors.
Mount the image and drag the JetBrains Toolbox app to the Applications folder.
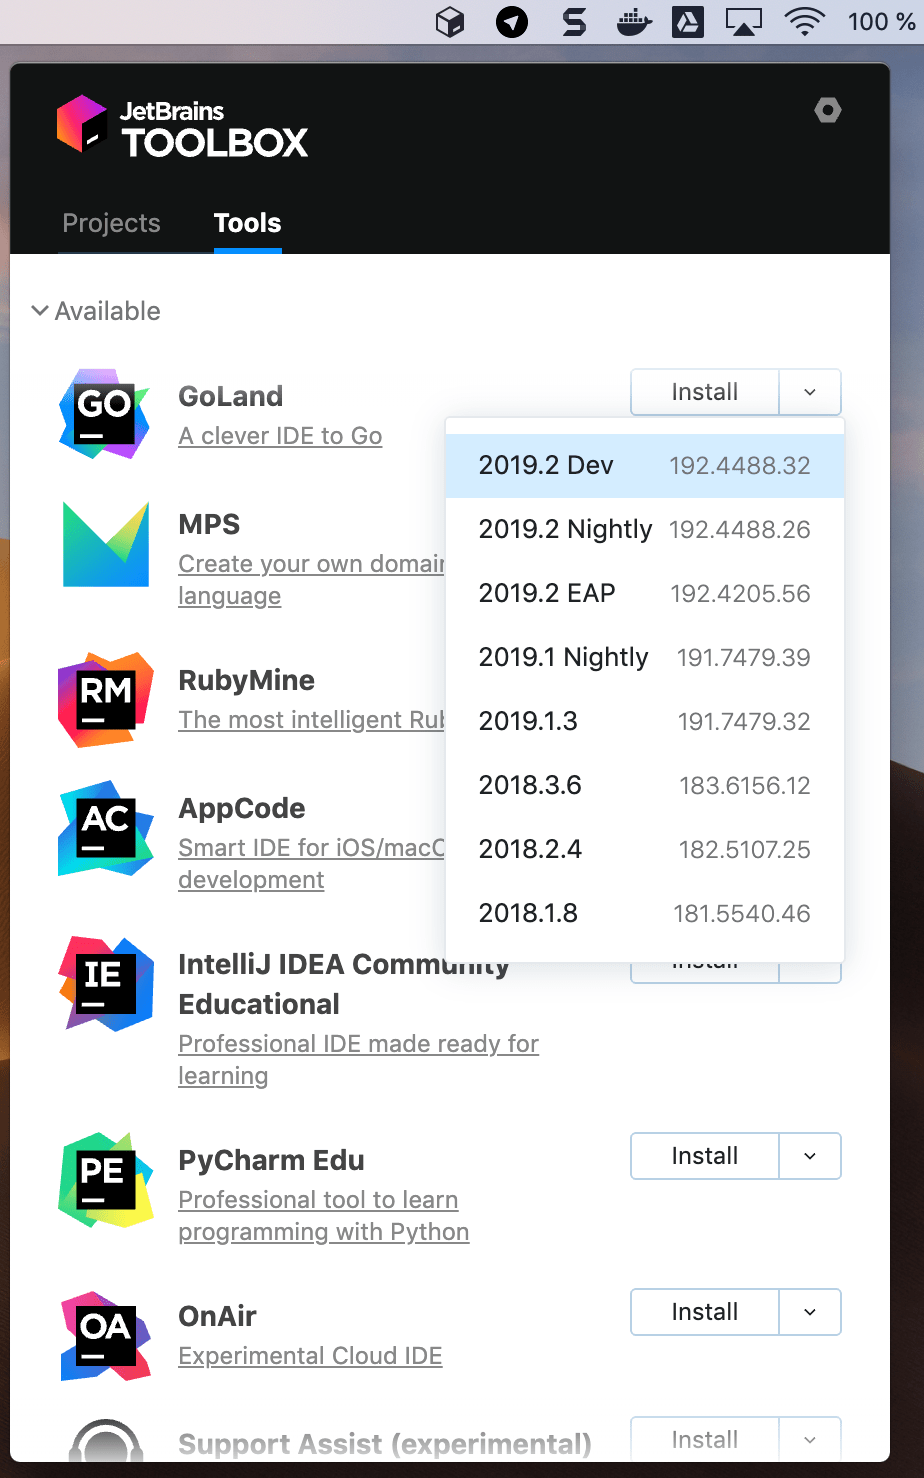
After you run the Toolbox App, click its icon in the main menu and select which product and version you want to install.
To install a nighltly build, select the version that has Nightly in its name from the list of versions (for example, 2021.1 Nightly).
Log in to your JetBrains Account from the Toolbox App and it will automatically activate the available licenses for any IDE that you install.
Install the Toolbox App
Download the tarball .tar.gz from the Toolbox App web page.
Extract the tarball to a directory that supports file execution.
For example, if the downloaded version is 1.17.7391, you can extract it to the recommended /opt directory using the following command:
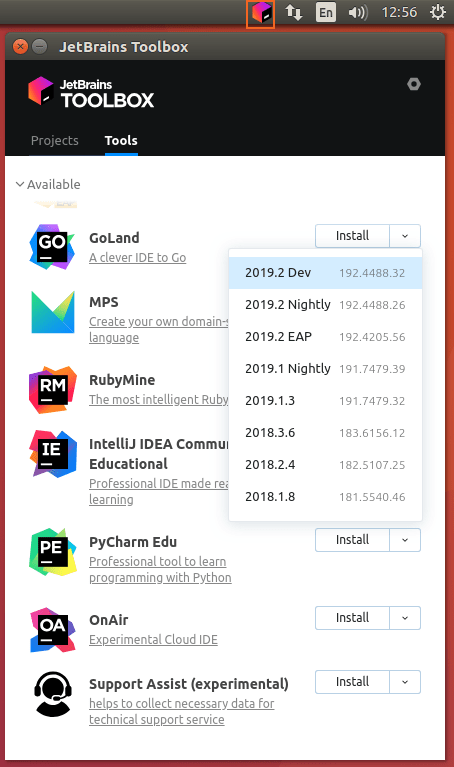
Execute the jetbrains-toolbox binary from the extracted directory to run the Toolbox App and select which product and version you want to install. After you run the Toolbox App for the first time, it will automatically add the Toolbox App icon to the main menu.
To install a nighltly build, select the version that has Nightly in its name from the list of versions (for example, 2021.1 Nightly).
Log in to your JetBrains Account from the Toolbox App and it will automatically activate the available licenses for any IDE that you install.
You can use this shell script that automatically downloads the tarball with the latest version of the Toolbox App, extracts it to the recommended /opt directory, and creates a symbolic link in the /usr/local/bin directory.
Standalone installation
Install GoLand manually to manage the location of every instance and all the configuration files. For example, if you have a policy that requires specific install locations.
Run the installer and follow the wizard steps.
To run GoLand, find it in the Windows Start menu or use the desktop shortcut. You can also run the launcher batch script or executable in the installation directory under bin .
There are separate disk images for Intel and Apple Silicon processors.
Mount the image and drag the GoLand app to the Applications folder.
Run the GoLand app from the Applications directory, Launchpad, or Spotlight.
Extract the tarball to a directory that supports file execution.
For example, to extract it to the recommended /opt directory, run the following command:
Do not extract the tarball over an existing installation to avoid conflicts. Always extract it to a clean directory.
To create a desktop entry, do one of the following:
On the Welcome screen, click Configure | Create Desktop Entry
From the main menu, click Tools | Create Desktop Entry
When you run GoLand for the first time, some steps are required to complete the installation, customize your instance, and start working with the IDE.
Silent installation on Windows
Silent installation is performed without any user interface. It can be used by network administrators to install GoLand on a number of machines and avoid interrupting other users.
To perform silent install, run the installer with the following switches:
/S : Enable silent install
/CONFIG : Specify the path to the silent configuration file
/D : Specify the path to the installation directory
This parameter must be the last in the command line and it should not contain any quotes even if the path contains blank spaces.
To check for issues during the installation process, add the /LOG switch with the log file path and name between the /S and /D parameters. The installer will generate the specified log file. For example:
Silent configuration file
You can download the default silent configuration file for GoLand at https://download.jetbrains.com/go/silent.config
The silent configuration file defines the options for installing GoLand. With the default options, silent installation is performed only for the current user: mode=user . If you want to install GoLand for all users, change the value of the installation mode option to mode=admin and run the installer as an administrator.
The default silent configuration file is unique for each JetBrains product. You can modify it to enable or disable various installation options as necessary.
It is possible to perform silent installation without the configuration file. In this case, omit the /CONFIG switch and run the installer as an administrator. Without the silent configuration file, the installer will ignore all additional options: it will not create desktop shortcuts, add associations, or update the PATH variable. However, it will still create a shortcut in the Start menu under JetBrains .
Install as a snap package on Linux
You can install GoLand as a self-contained snap package. Since snaps update automatically, your GoLand installation will always be up to date.
To use snaps, install and run the snapd service as described in the installation guide.
On Ubuntu 16.04 LTS and later, this service is pre-installed.
GoLand is distributed via two channels:
The stable channel includes only stable versions. To install the latest stable release of GoLand, run the following command:
The —classic option is required because the GoLand snap requires full access to the system, like a traditionally packaged application.
The edge channel includes EAP builds. To install the latest EAP build of GoLand, run the following command:
When the snap is installed, you can launch it by running the goland command.
To list all installed snaps, you can run sudo snap list . For information about other snap commands, see the Snapcraft documentation.
Источник
Установка Go в Ubuntu 20.04
Язык программирования Go или как его еще называют Golang, это относительно новый язык от корпорации Google, который по своим возможностям стремится заменить Си и С++. Он создан одним из разработчиков Си и здесь уже были учтены все ошибки, допущенные при создании того языка. Go имеет улучшенную безопасность, мультипоточность, полностью кросплатформенен и многое другое. На Go можно даже писать приложения для Android.
В этой статье мы рассмотрим как выполняется установка Go в Ubuntu 20.04 и более поздних версиях. Рассмотрим установку компилятора с официального сайта или PPA, а также запустим небольшую программу чтобы проверить как все работает.
Что такое Go?
Сначала важно понять что же все-таки такое Go. Этот язык был создан сотрудниками корпорации Google в 2009 году. В этом процессе принимал участие Кен Томпсон, один из разработчиков Си. В первую очередь это компилируемый язык системного программирования, который подходит для создания высокоэффективных программ. Хотя в Go возможен запуск программ в интерпретаторе, они компилируются в объектный код и не требуют виртуальной машины.
Основные возможности языка — это строгая типизация, поддержка указателей, поддержка юникода, динамические массивы, хэш таблицы, автоматическое управление памятью, потоки для параллельного программирования, а также каналы для связи между потоками. Синтаксис Go очень похож на Си, с тем лишь отличием, что некоторые компоненты позаимствованы из других скриптовых языков. Язык постоянно развивается и получает новые возможности. А теперь рассмотрим как выполняется установка языка в Ubuntu.
Установка Go на Ubuntu
Есть несколько способов установки этого языка. Вы можете загрузить файл с бинарными файлами компилятора с официального сайта и распаковать его в какой-либо директории. Затем останется только установить несколько переменных окружения. Так вы можете получить самую последнюю версию.
1. Установка из официальных репозиториев
Сначала обновите систему до самой новой версии:
sudo apt update
sudo apt upgrade
Затем для установки достаточно выполнить такую команду:
sudo apt install golang
На этом установка завершена. Для просмотра версии выполните:

После этого вы можете переходить к настройке рабочего окружения для языка.
2. Установка из официального сайта
Как видите, на момент написания статьи в репозиториях находится версия 1.13. В то же время на официальном сайте уже можно найти версию 1.15. Если вы хотите получить именно её, надо устанавливать компилятор языка из официального сайта.

Просто выберите нужную операционную систему и дождитесь окончания загрузки. Для скачивания версии 1.15 можете воспользоваться такой командой:
После окончания загрузки расспакуйте полученный архив в папку /opt:
sudo tar -C /opt -xzf go1.15.2.linux-amd64.tar.gz
Тут тоже установка завершена. Осталось добавить путь к исполняемым файлам go в переменную среды PATH:
Теперь можно проверить версию Golang:

Если всё хорошо, отредактируйте файл /etc/environment и добавьте в строку объявления PATH путь /opt/go/bin:

Изменения будут применены только после перезагрузки.
3. Установка из PPA
В последнее время PPA один за другим перестают обновляться и поддерживать новые версии Ubuntu, но этот всё ещё работает и содержит довольно свежую версию компилятора Golang — 1.15. Для добавления PPA в систему выполните такие команды:
sudo add-apt-repository ppa:longsleep/golang-backports
Затем для установки достаточно выполнить:
sudo apt install golang
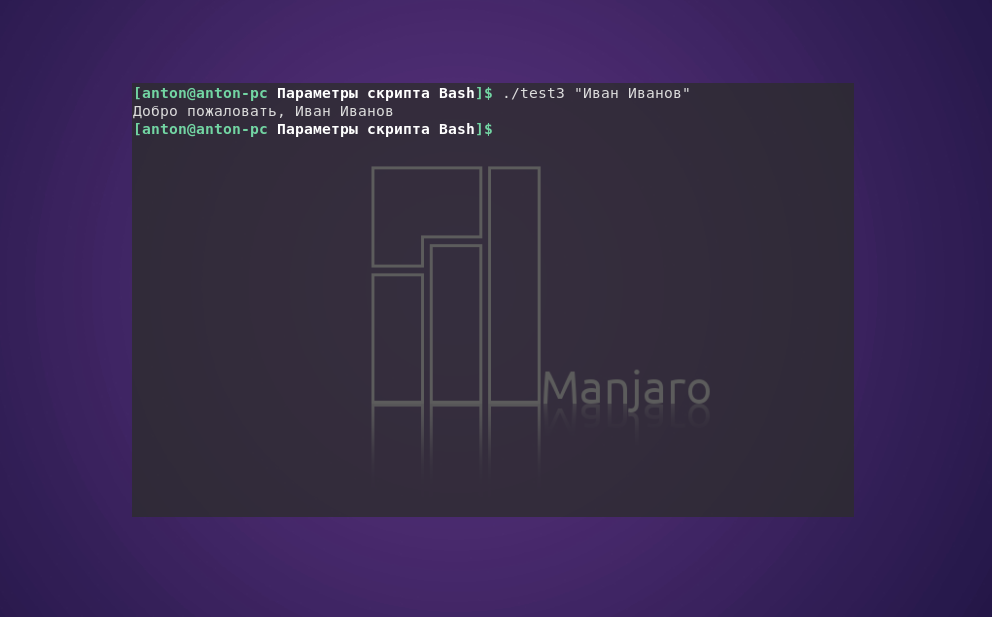
Тестирование языка Go
Особенность Go в том, что все пакеты, которые вы создаете должны находится в определённой папке. Go не будет искать пакеты сначала в текущей папке проекта, как это делается обычно, а будет пытаться их найти в папке указанной в переменной окружения GOPATH. Поэтому сначала создадим рабочую папку для исходников в домашней папке:
Дальше нужно сообщить Go, где находится наша папка для проектов, для этого с помощью GOPATH:
Эту же строку можно добавить в /etc/profile, чтобы не вводить её каждый раз. Обратите внимание, что в рабочей папке есть папка src, а уже в ней нужно создавать папки проектов, для каждого проекта отдельная папка. Дальше создадим небольшую программу, которая будет выводить только одну строчку на экран:
package main
import «fmt»
func main() <
fmt.Println(«hello, world»)
>

Теперь соберем программу:
Затем программу можно выполнить такой командой:

Программу можно не только собрать, но и установить с помощью команды install:
Тогда исполняемый файл программы будет создан не в текущей папке а в данном примере в $HOME/work/bin. Если эта папка не существует, то она будет создана.
Выводы
В этой статье мы рассмотрели как выполняется установка go на ubuntu, здесь есть целых два метода и вы обязательно подберете тот, который подходит для вас больше всего. Если у вас остались вопросы, спрашивайте в комментариях!


Оцените статью:
Об авторе
Основатель и администратор сайта losst.ru, увлекаюсь открытым программным обеспечением и операционной системой Linux. В качестве основной ОС сейчас использую Ubuntu. Кроме Linux, интересуюсь всем, что связано с информационными технологиями и современной наукой.
5 комментариев
Рекомендую использовать Go Version Manager https://github.com/moovweb/gvm
вот такую фигню пишет:
adminofsystem@Admin-PC
/work/src/hello $ go install hello.go
go install: no install location for .go files listed on command line (GOBIN not set)
и что с этим делать?
Я вчера тоже устанавливал и настраивал GO по этой статье и тоже столкнулся с таким сообщением. Для решения сперва просто набрал GO, получил такой ответ:
Go is a tool for managing Go source code.
go command [arguments]
The commands are:
build compile packages and dependencies
clean remove object files
doc show documentation for package or symbol
env print Go environment information
bug start a bug report
fix run go tool fix on packages
fmt run gofmt on package sources
generate generate Go files by processing source
get download and install packages and dependencies
install compile and install packages and dependencies
list list packages
run compile and run Go program
test test packages
tool run specified go tool
version print Go version
vet run go tool vet on packages
Use «go help [command]» for more information about a command.
Additional help topics:
c calling between Go and C
buildmode description of build modes
filetype file types
gopath GOPATH environment variable
environment environment variables
importpath import path syntax
packages description of package lists
testflag description of testing flags
testfunc description of testing functions
Use «go help [topic]» for more information about that topic.
——————————————————————————————
Здесь меня привлекла команда env и я набрал go env и получил:
GOARCH=»amd64″
GOBIN=»»
GOEXE=»»
GOHOSTARCH=»amd64″
GOHOSTOS=»linux»
GOOS=»linux»
GOPATH=»/home/user_name/work/»
GORACE=»»
GOROOT=»/usr/lib/go-1.9″
GOTOOLDIR=»/usr/lib/go-1.9/pkg/tool/linux_amd64″
GCCGO=»gccgo»
CC=»gcc»
GOGCCFLAGS=»-fPIC -m64 -pthread -fmessage-length=0 -fdebug-prefix-map=/tmp/go-build068158681=/tmp/go-build -gno-record-gcc-switches»
CXX=»g++»
CGO_ENABLED=»1″
CGO_CFLAGS=»-g -O2″
CGO_CPPFLAGS=»»
CGO_CXXFLAGS=»-g -O2″
CGO_FFLAGS=»-g -O2″
CGO_LDFLAGS=»-g -O2″
PKG_CONFIG=»pkg-config»
————————————————————
Здесь видно, что переменная GOBIN пустая. Вот поэтому. думаю я, в нашем сообщении об ошибке пишется GOBIN not set. Я у себя в ручную установил её значение в «/usr/lib/go-1.9/bin/» и стало работать. Правда, это привело к тому, что скомпилированные файлы GO помещает в этот же каталог:
$ ls -ls /usr/lib/go-1.9/bin/
итого 11016
7044 -rwxr-xr-x 1 root root 7209352 окт 31 12:38 go
2144 -rwxr-xr-x 1 root root 2194888 окт 31 12:38 gofmt
1828 -rwxr-xr-x 1 root root 1868367 дек 11 17:55 hello
А это наверно не совсем правильно. Как я понимаю, результаты компиляции должны помещаться в каталог
Смог решить эту проблему по этой статье.
Ключевой была эта строчка:
«Note: Set the GOBIN path to generate a binary file when go install is run.
export GOBIN=$HOME/work/bin»
Крч, пишем в консоль «go install hello(или другое имя вашего файла)»,
вам выдает ошибку: «go install: no install location for .go files listed on command line (GOBIN not set)»,
сразу же пишем: «export GOBIN=$HOME/work/bin».
Теперь вновь прописываем: «go install hello(или другое имя вашего файла)» и если компилятор не найдет ошибок, то ваша прога будет готова;)
Также проще запускать уже скомпилированные програмы командой: «go run hello.go»
Как у меня все выглядит в консоли:
/work/src $ go install hello.go
go install: no install location for .go files listed on command line (GOBIN not set)
do-while@NewGenius
/work/src $ export GOBIN=$HOME/work/bin
do-while@NewGenius
Источник


