- Ethical hacking and penetration testing
- InfoSec, IT, Kali Linux, BlackArch
- Kali Linux post-installation tips and settings
- 1. How to install VirtualBox Guest OS Add-ons for Kali Linux
- 2. How to use Windows drives in Kali Linux. How to solve the problem with the error ‘The disk contains an unclean file system (0, 0). Metadata kept in Windows cache, refused to mount’
- 3. Regular system updates
- 4. Regular system cleaning
- 5. How to install the analogue of Total Commander
- 6. How to run commands without a password
- 7. How to enable root user in Kali Linux
- 8. How to disable screen lock in Kali Linux
- 9. How to enable login without password at system boot
- 10. How to switch to a light or dark theme?
- 11. How to change the Kali Linux language?
- 12. How to change the keyboard layout?
- 13. How to enable the language bar in the top menu of Kali Linux
- 14. Install pip
- 15. How to disable window grouping in Kali Linux
- Как перевести Кали Линукс на русский?
- Пару слов в предисловие
- Чтобы перевести Кали Линукс на русский…
- 5 thoughts on “ Как перевести Кали Линукс на русский? ”
Ethical hacking and penetration testing
InfoSec, IT, Kali Linux, BlackArch
Kali Linux post-installation tips and settings
Here you can find tips on how to make the system more convenient for work by configuring the installed Kali Linux to your habits.
You do not need to do everything that is written here – select only those recommendations that will make your work in Kali Linux more comfortable. Moreover, from a security point of view, all recommendations related to passwords (for example, setting up logging in without a password, executing commands without a password, turning off the screen lock) are very harmful. But personally, this annoys me more than the potential protection gives (when an outsider physically accesses the computer, password protection does not give anything, see the article “How to reset a forgotten login password in Linux”).
1. How to install VirtualBox Guest OS Add-ons for Kali Linux
No longer required. VirtualBox guest OS add-ons are now installed automatically during the installation of the system itself.
2. How to use Windows drives in Kali Linux. How to solve the problem with the error ‘The disk contains an unclean file system (0, 0). Metadata kept in Windows cache, refused to mount’
This is needed if you have problems accessing Windows drives from Kali Linux. This can happen when you installed Kali Linux as a second system or on a USB flash drive.
We look at the disks and look for the problematic one that interests us:
The found disk (I have it for example /dev/sdb1) we fix by the ntfsfix command:
3. Regular system updates
Updates fix bugs in the system and bring new features. To perform a full update, run the command:
4. Regular system cleaning
From time to time it is recommended to execute commands to remove packages that were installed automatically (since they were dependencies of other programs), but are no longer needed.
To do this, use the command:
Its use is safe and should not cause problems.
Each program update, package files are downloaded to the package cache. After the update, downloaded files (you can call them installation files) are not deleted, and gradually the package cache grows to large sizes. This was done intentionally with the idea that if after the next update you find that the new package has problems and the old version is no longer available in the online repository, then you can roll back to the old version by installing it from a file saved in the package cache.
For rolling distributions, the cache grows very quickly, and if you are not qualified enough to roll back to the old version using the installation package which is stored in the cache, then for you these hundreds of megabytes or even several gigabytes are a waste of space on your hard drive. Therefore, from time to time you can execute commands
clean – delete downloaded archive files
clean cleans the local repository from received package files. It removes everything except the lock file from /var/cache/apt/archives/ and /var/cache/apt/archives/partial/.
autoclean – delete old downloaded archive files
Like clean, autoclean cleans downloaded package files from the local repository. The only difference is that it only removes package files that can no longer be downloaded and are largely useless.
This allows you to maintain the cache for a long period without growing too much. APT::Clean-Installed configuration option will not allow the installation files of those packages that are currently installed to be deleted.
The following command is not directly related to cleaning, but helps maintain system health.
The -f, —fix-broken option tries to normalize a system with broken dependencies. This option, when used with install/remove, may skip any packages to allow APT to find a likely solution. If packages are listed, this should completely fix the problem. This option is sometimes necessary when starting APT for the first time; APT alone does not allow packages with broken dependencies to exist on the system. It is possible that the structure of the system dependencies can be so broken that manual intervention will be required (which usually means using dpkg —remove to eliminate some of the intruder packages). Using this option with -m may cause an error in some situations. Item in the configuration file: APT::Get::Fix-Broken.
5. How to install the analogue of Total Commander
Total Commander is a two-panel, cross-platform file manager, a complete analogue of Double Commander. To install it, do:
6. How to run commands without a password
Until recently, in Kali Linux, the root user was the main user, you did not need to use sudo and enter a password when executing commands that require elevated privileges. If you do not want to enter a password each time you use sudo, then run the following command:
7. How to enable root user in Kali Linux
The root user in Kali Linux is still there. If you want to use it instead of a regular user to log in, then just set the password for it with the following command:
8. How to disable screen lock in Kali Linux
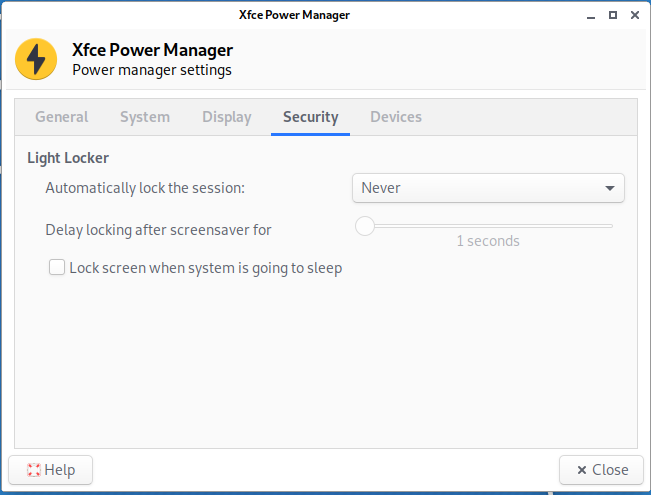
Click on the battery icon next to the clock and select “Power Manager Settings” from the menu:

In the Xfce Power Manager, go to the “Security” tab and select “Never” for “Automatically lock the session”. Also uncheck “Lock screen when system is going to sleep”.
9. How to enable login without password at system boot
Here is considered how to enable automatic login when the desktop is XFCE and the display manager is LightDM.
Open the /etc/lightdm/lightdm.conf file:
and edit (don’t forget to uncomment) or just add the lines:
In the previous lines, replace USERNAME with your username. If you accidentally forgot it, then look with the command:
You also need to create an autologin group and add your user to it:
10. How to switch to a light or dark theme?
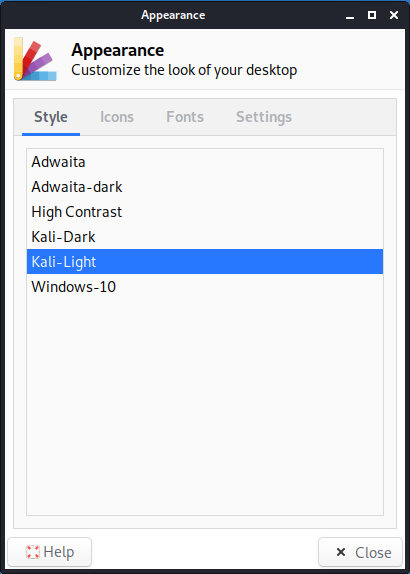
Kali Linux provides two default themes: dark and light. To switch to a light theme, go to “Settings” → “Appearance” and on the “Style” tab, select “Kali-Light”. And on the “Icons” tab, select “Flat-Remix-Blue-Light”.
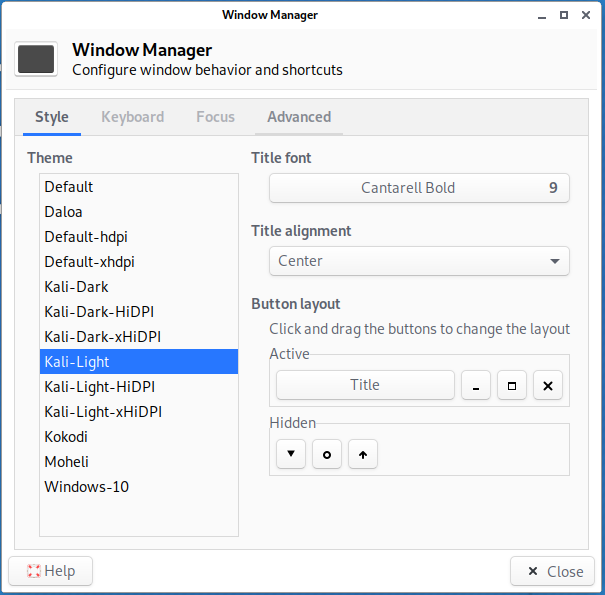
Then go to “Settings” → “Window Manager” and on the “Style” tab, select “Kali-Light”.
To switch from Light to a Dark theme, simply select Dark themes in the same settings.
11. How to change the Kali Linux language?
In the LightDM login screen, select your preferred language on the right side of the top panel.

12. How to change the keyboard layout?
Go to Settings → Keyboard → Layout:
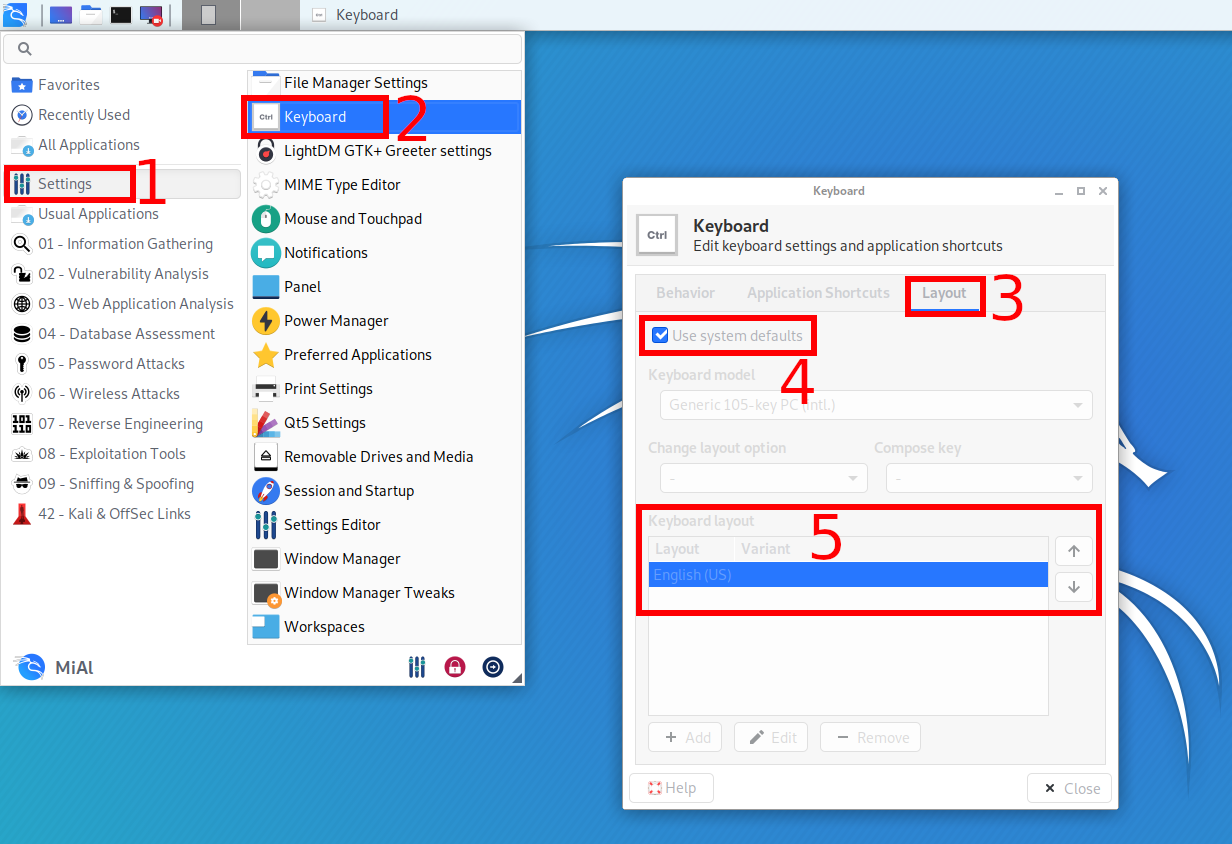
To configure, uncheck “Use system defaults”, as a result, you can add new keyboard layouts, select the default keyboard layout, change the key combination to change the keyboard.
To change and set other keyboard shortcuts, see the adjacent Application Shortcuts tab.
13. How to enable the language bar in the top menu of Kali Linux
Kali Linux does not have a keyboard layout indicator, that is, the language that is currently selected for input is not shown.
To display the language panel in the form of a button with a flag, when you click on it the keyboard layout will be switched, do the following:
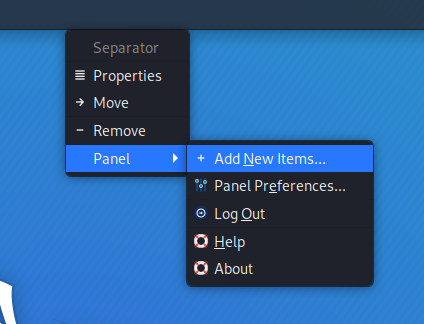
1) Click on the top panel with the right mouse button and in the context menu that opens select Panel → “Add New Items…”:
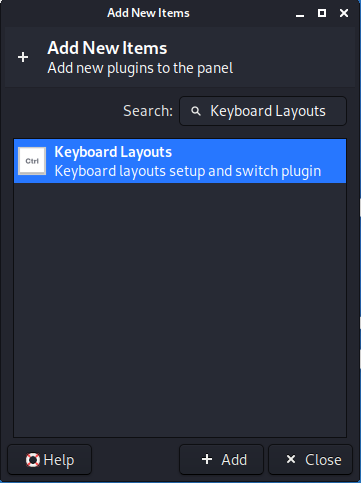
2) Find the “Keyboard Layouts” and click the “Add” button:
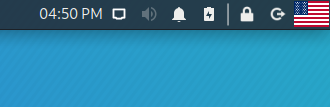
After that, the language bar appears in the form of a flag:
14. Install pip
pip is a package manager for the Python programming language. The pip command is heavily used to install tools or to install tool dependencies. You will almost certainly need pip.
To install, run the commands:
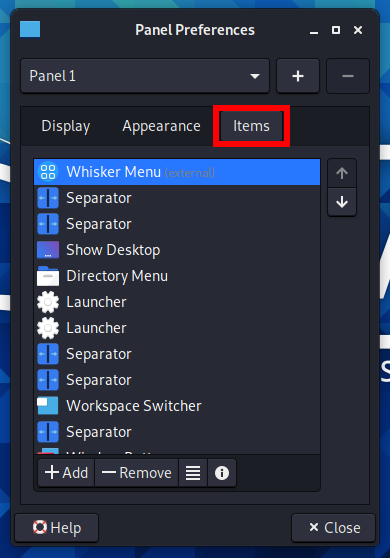
15. How to disable window grouping in Kali Linux
Window grouping is a combination of icons of open applications of the same type into one. Grouping saves space on your control panel.

But not everyone likes the grouping of windows, because in this form, more actions are needed to switch to the desired window. You can also get confused in the windows and waste time switching between them.
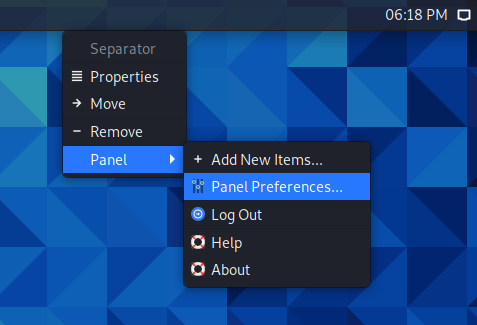
Start by right-clicking on the taskbar.
In the context menu that opens, select “Panel” → “Panel Preferences”:
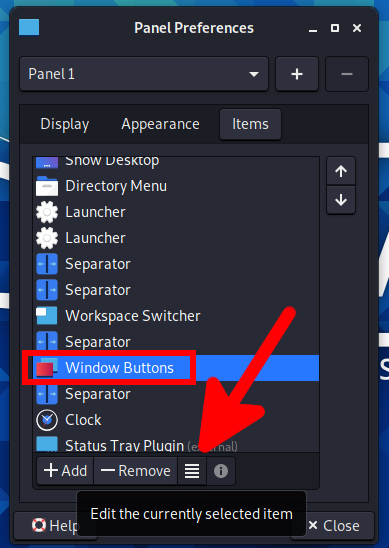
Switch to the “Items” tab:
Find “Window Buttons” and click the “Edit the currently selected item” button.
In the “Windows grouping” drop-down list, select “Never”:
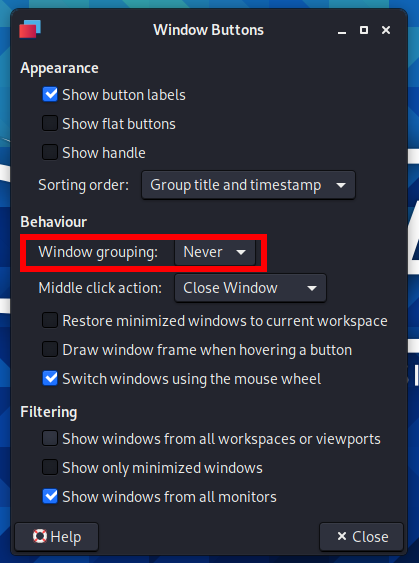
After that, the windows will no longer be assembled into one icon.
Источник
Как перевести Кали Линукс на русский?

Можно ли перевести Кали Линукс на русский язык, и как это сделать? В статье рассматривается вопрос о русификации устанавливаемой Кали Линукс 2019.4 на виртуальной машине VirtualBox. Здесь мы рассмотрим настройки, позволяющие перевести Кали Линукс на русский: именно виртуальные машины на основе готовых образов VMDK тем и грешат, что на первых порах понимают только английский.
Всем привет, в очередной статье К76 мы проводим первостепенные настройки виртуальной Кали Линукс. И, как многие уже успели убедиться, без базовых знаний английского языка на большинстве Линукс-Юникс сборках делать нечего. Но с другой стороны, в т.ч. и для Кали, многие из них неплохо переведены на родной язык почти любого пользователя. Чем глупо не воспользоваться. Однако по неизвестным причинам некоторые группы разработчиков Debian продолжают придерживаться политики «а не усложнить ли юзерам жизнь», и в версии 2019.Х исчезла возможность через графический интерфейс сменить язык текущей локали.
Исчезновение кнопки, конечно, не означает удаление самой возможности смены языка. Так что заставим Кали Линукс говорить по-русски прямо сейчас.
Пару слов в предисловие
В качестве виртуальной машины будет использоваться VirtualBox, а в качестве установочного диска — готовый образ .vmdk, предлагаемый для скачивания на официальном сайте Offensive Security. Процесс установки мало чем отличается от описанного мной же для предыдущей версии Установка виртуальной Кали Линукс:

Ссылка прямая, со временем может измениться. Вам лишь стоит проявить чуток внимания, обратив взор на нужную разрядность версии, правильную среду установки (у меня VirtualBox) и приемлемый способ закачки: я это делаю через торрент-клиент. В общем, устанавливаем виртуальную Кали, указав на скачанный файл, предварительно перенеся его в удобное и надёжное место (я оставил в Загрузках):

Чтобы перевести Кали Линукс на русский…
После установки и первого запуска после ввода логина и пароля:
Сейчас, вероятно, вы вводите уже другие пароль и логин:
Меня встречает (ещё на этапе ввода оных) англоязычный интерфейс:

Отсутствующий звук, непонятно как настраивающиеся часы в Кали Линукс этой версии и прочие «мелкие» недоработки откровенно отталкивают. Да, я не устаю повторять — Debian это не та сборка, с какой стоит начинать знакомство начинающим линуксоидам. И это на фоне ко всему прочему англоязычного интерфейса, что ситуацию нисколь не упрощает. Исправляем.
- запускаем терминал ( вы работаете от root-а, так что префикс sudo сейчас и в дальнейшем нам не понадобится; если нет, не забывайте вставлять префикс sudo перед каждой из команд)
- редактируем файл языковых настроек
выставляя единственной строчкой вот эту
Сохранимся Ctrl + S. Теперь раскомментируем строчку с нашим языком в файле
сняв символ «решётки» — # :
Снова сохраняемся Ctrl + S. Терминал не закрываем.
- вводим команду выбора и настройки языковых локалей системы
- спускаемся клавишей PageDown до русского UTF-8 (для корректного указания на него воспользуйтесь стрелочками вверх-вниз), к клавише ОК переходим клавишей TAB. Проверьте, что звёздочка выбора напротив нужного пакета устанавливается :

Жмём Enter. Может вылезти окно с предупреждением, что интерфейс системы не всегда будет доступен на любом «неанглийском». Нам пофиг.
Жмём ОК. А в это время терминал сформирует обновлённый список локалей Кали:
русский язык в кали линукс
- В строке терминала откроем с помощью текстового редактора файл /etc/profile
в котором добавим строчку
где ru_RU.UTF8 — название локали, которая будет загружаться по умолчанию. Сохраним изменения Ctrl + S .
 я вставил строку в верхнюю часть текста, отбросив остальную часть документа парой щелчков клавиши ввода
- «Ребутим» «линуху»:
У меня ситуация сложилась так: по-русски сначала заговорило лишь окно ввода пароля и логина…

Но тут же после очередной перезагрузки и вся остальная система приняла русскоязычную оболочку. Вероятно, что появится окно с предупреждением о смене языка Кали:

Кстати, русскую раскладку я добавил ещё на этапе первоначальных настроек через графический интерфейс. Можете сделать также, у вас же теперь всё на русском:


Не забудьте (1) снять галку с чек-бокса Использовать стандартные системные параметры и (2) уточнить в настройках принцип смены раскладки клавиатуры — для одного лишь английского сочетания клавиш назначено не было. Я использую привычные и традиционные для Windows клавиши Alt + Shift:

Всё. Так мне удалось перевести Кали Линукс на русский язык. А вам?
5 thoughts on “ Как перевести Кали Линукс на русский? ”
Боже мой! Линукс действительно должен быть таким сложным?! Я руку на сердце положу сейчас!! Ничего не помогает! Язык в линуксе (KALI) Не меняется!! Мне каких то прав не хватает, в итоге у меня изменения в текстовых документах не сохраняются. В ютубе меня считают за идиота (у них же там всё легко ставится, даже русский язык у них есть) а я скачал себе образ линукса для VMware, распаковал, добавил через wmx в VMware и линукс запустился, я ввёл там kali и kali и всё! Ничего там особо не смог я поменять. Жутко бесит, что там даже никак не подменить файл en-US на ru-RU. Я попал в жопу мира ОС?! да?
Ну я себе каким-то чудом поменял оформление и иконки на виндовс 10 и всё! =( Я крайне недоволен линуксом и не могу положительно либо отрицательно от комментировать статью.
—
P.P.S.S: Я пользователь системы Windows! Который может легко поменять язык интерфейса у Windows! Даже если в виндовсе будут иероглифы! Но линукс — это жопа мира какая-то! =( Я даже не знаю, как эту статью воспринимать!! При любой установке/переустановки ОС Windows я получаю ПОЛНЫЕ права и имею возможность более тонко настроить Windows под себя, а с этим kali 1 геморр! =(
Респект!! Тем кому линукс не нравится пробуйте поставить в телефон Windows.
Источник


