- Kali linux live usb password
- Multiple Persistence Stores
- Emergency Self Destruction of Data in Kali
- Kali linux live usb password
- What You’ll Need
- Kali Linux Live USB Install Procedure
- Creating a Bootable Kali USB Drive on Linux (DD)
- Creating a Bootable Kali USB Drive on Linux (DD with status)
- Creating a Bootable Kali USB Drive on Linux (Etcher)
- Какой пароль по умолчанию в Кали Линукс
- Какой в Kali Linux пароль по умолчанию
- Что делать, чтобы сбросить пароль и установить свой
- Создание зашифрованной флешки Kali Linux Encrypted Persistence
- 1. Создание загрузочной флешки
- 2. Создание зашифрованного раздела и установка его параметров
- 3. Проверка работоспособности
Kali linux live usb password
In this workshop, we will examine the various features available to us when booting Kali Linux from USB devices. We will explore features such as persistence, creating LUKS encrypted persistence stores, and even dabble in “LUKS Nuking” our USB drive. The default Kali Linux ISOs (from 1.0.7 onwards) support USB encrypted persistence.
0x01 — Start by imaging the Kali ISO onto your USB drive (ours was /dev/sdb). Once done, you can inspect the USB partition structure using parted /dev/sdb print:
For ease of use, please use a root account. This can be done with “sudo su”.
0x02 — Create and format an additional partition on the USB drive. In our example, we create a persistent partition of about 7 GB in size:
0x04 — Encrypt the partition with LUKS:
0x05 — Open the encrypted partition:
0x06 — Create an ext3 filesystem and label it:
0x07 — Mount the partition and create your persistence.conf so changes persist across reboots:
Now your USB drive is ready to plug in and reboot into Live USB Encrypted Persistence mode.
Multiple Persistence Stores
At this point we should have the following partition structure:
We can add additional persistence stores to the USB drive, both encrypted or not…and choose which persistence store we want to load, at boot time. Let’s create one more additional non-encrypted store. We’ll label and call it “work”.
0x01 — Create an additional, 4th partition which will hold the “work” data. We’ll give it another 5GB of space:
0x02 — Format the fourth partition, label it “work”:
0x03 — Mount this new partition and create a persistence.conf in it:
Boot the computer, and set it to boot from USB. When the boot menu appears, edit the persistence-label parameter to point to your preferred persistence store!
Emergency Self Destruction of Data in Kali
As penetration testers, we often need to travel with sensitive data stored on our laptops. Of course, we use full disk encryption wherever possible, including our Kali Linux machines, which tend to contain the most sensitive materials. Let’s configure a nuke password as a safety measure:
The configured nuke password will be stored in the initrd and will be usable with all encrypted partitions that you can unlock at boot time.
Backup you LUKS keyslots and encrypt them:
Now boot into your encrypted store, and give the Nuke password, rather than the real decryption password. This will render any info on the encrypted store useless. Once this is done, verify that the data is indeed inacessible.
Lets restore the data now. We’ll decrypt our backup of the LUKS keyslots, and restore them to the encrypted partition:
Our slots are now restored. All we have to do is simply reboot and provide our normal LUKS password and the system is back to its original state.
Updated on: 2021-Sep-27
Author: g0tmi1k
Источник
Kali linux live usb password
Our favourite way, and the fastest method, for getting up and running with Kali Linux is to run it “live” from a USB drive. This method has several advantages:
- It’s non-destructive — it makes no changes to the host system’s hard drive or installed OS, and to go back to normal operations, you simply remove the “Kali Live” USB drive and restart the system.
- It’s portable — you can carry Kali Linux in your pocket and have it running in minutes on an available system
- It’s customizable — you can roll your own custom Kali Linux ISO image and put it onto a USB drive using the same procedures
- It’s potentially persistent — with a bit of extra effort, you can configure your Kali Linux “live” USB drive to have persistent storage, so the data you collect is saved across reboots
In order to do this, we first need to create a bootable USB drive which has been set up from an ISO image of Kali Linux.
What You’ll Need
A verified copy of the appropriate ISO image of the latest Kali build image for the system you’ll be running it on: see the details on downloading official Kali Linux images.
If you’re running under Linux, you can use the dd command, which is pre-installed, or use Etcher.
A USB thumb drive, 4GB or larger. (Systems with a direct SD card slot can use an SD card with similar capacity. The procedure is identical.)
Kali Linux Live USB Install Procedure
The specifics of this procedure will vary depending on whether you’re doing it on a Windows, Linux, or macOS/OS X system.
Creating a Bootable Kali USB Drive on Linux (DD)
Creating a bootable Kali Linux USB drive in a Linux environment is easy. Once you’ve downloaded and verified your Kali ISO file, you can use the dd command to copy it over to your USB drive using the following procedure. Note that you’ll need to be running as root, or to execute the dd command with sudo. The following example assumes a Linux Mint 17.1 desktop — depending on the distro you’re using, a few specifics may vary slightly, but the general idea should be very similar. If you would prefer to use Etcher, then follow the same directions as a Windows user. Note that the USB drive will have a path similar to /dev/sdb.
WARNING: Although the process of imaging Kali Linux onto a USB drive is very easy, you can just as easily overwrite a disk drive you didn’t intend to with dd if you do not understand what you are doing, or if you specify an incorrect output path. Double-check what you’re doing before you do it, it’ll be too late afterwards.
Consider yourself warned.
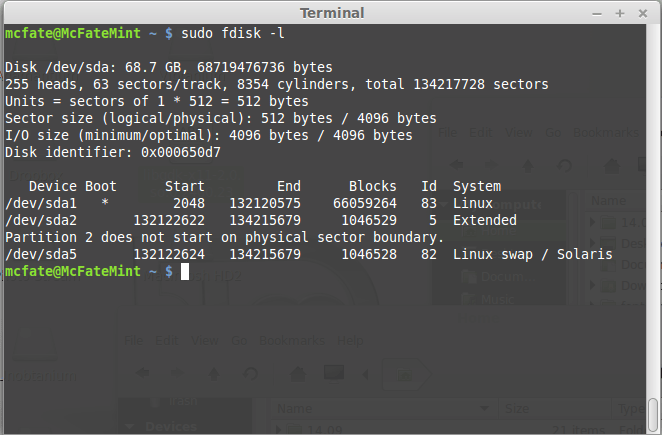
- First, you’ll need to identify the device path to use to write the image to your USB drive. Without the USB drive inserted into a port, execute the command sudo fdisk -l at a command prompt in a terminal window (if you don’t use elevated privileges with fdisk, you won’t get any output). You’ll get output that will look something (not exactly) like this, showing a single drive — “/dev/sda” — containing three partitions (/dev/sda1, /dev/sda2, and /dev/sda5):
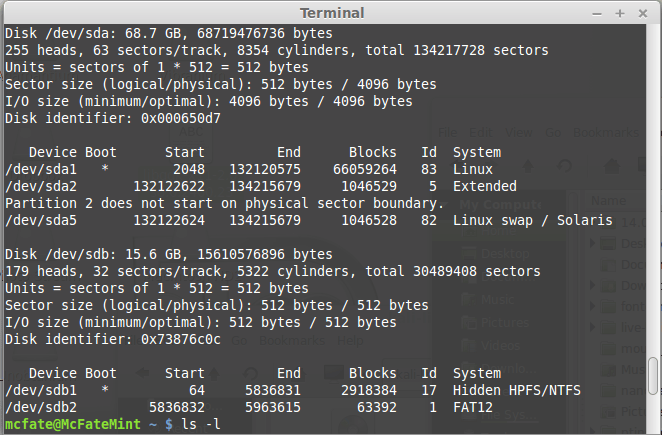
 2. Now, plug your USB drive into an available USB port on your system, and run the same command, “sudo fdisk -l” a second time. Now, the output will look something (again, not exactly) like this, showing an additional device which wasn’t there previously, in this example “/dev/sdb”, a 16GB USB drive:
 3. Proceed to (carefully!) image the Kali ISO file on the USB device. The example command below assumes that the ISO image you’re writing is named “kali-linux-2021.3-live-amd64.iso” and is in your current working directory. The blocksize parameter can be increased, and while it may speed up the operation of the dd command, it can occasionally produce unbootable USB drives, depending on your system and a lot of different factors. The recommended value, “bs=4M”, is conservative and reliable.
Imaging the USB drive can take a good amount of time, over ten minutes or more is not unusual, as the sample output below shows. Be patient!
The dd command provides no feedback until it’s completed, but if your drive has an access indicator, you’ll probably see it flickering from time to time. The time to dd the image across will depend on the speed of the system used, USB drive itself, and USB port it’s inserted into. Once dd has finished imaging the drive, it will output something that looks like this:
That’s it, really!
Creating a Bootable Kali USB Drive on Linux (DD with status)
Alternatively there are a few other options available for imaging.
The first option is dd with a status indicator. This is only available on newer systems however. To do this, we simply add the status flag.
Another option is to use pv . We can also use the size flag here to get an approximate timer. Change the size depending on the image being used.
Creating a Bootable Kali USB Drive on Linux (Etcher)
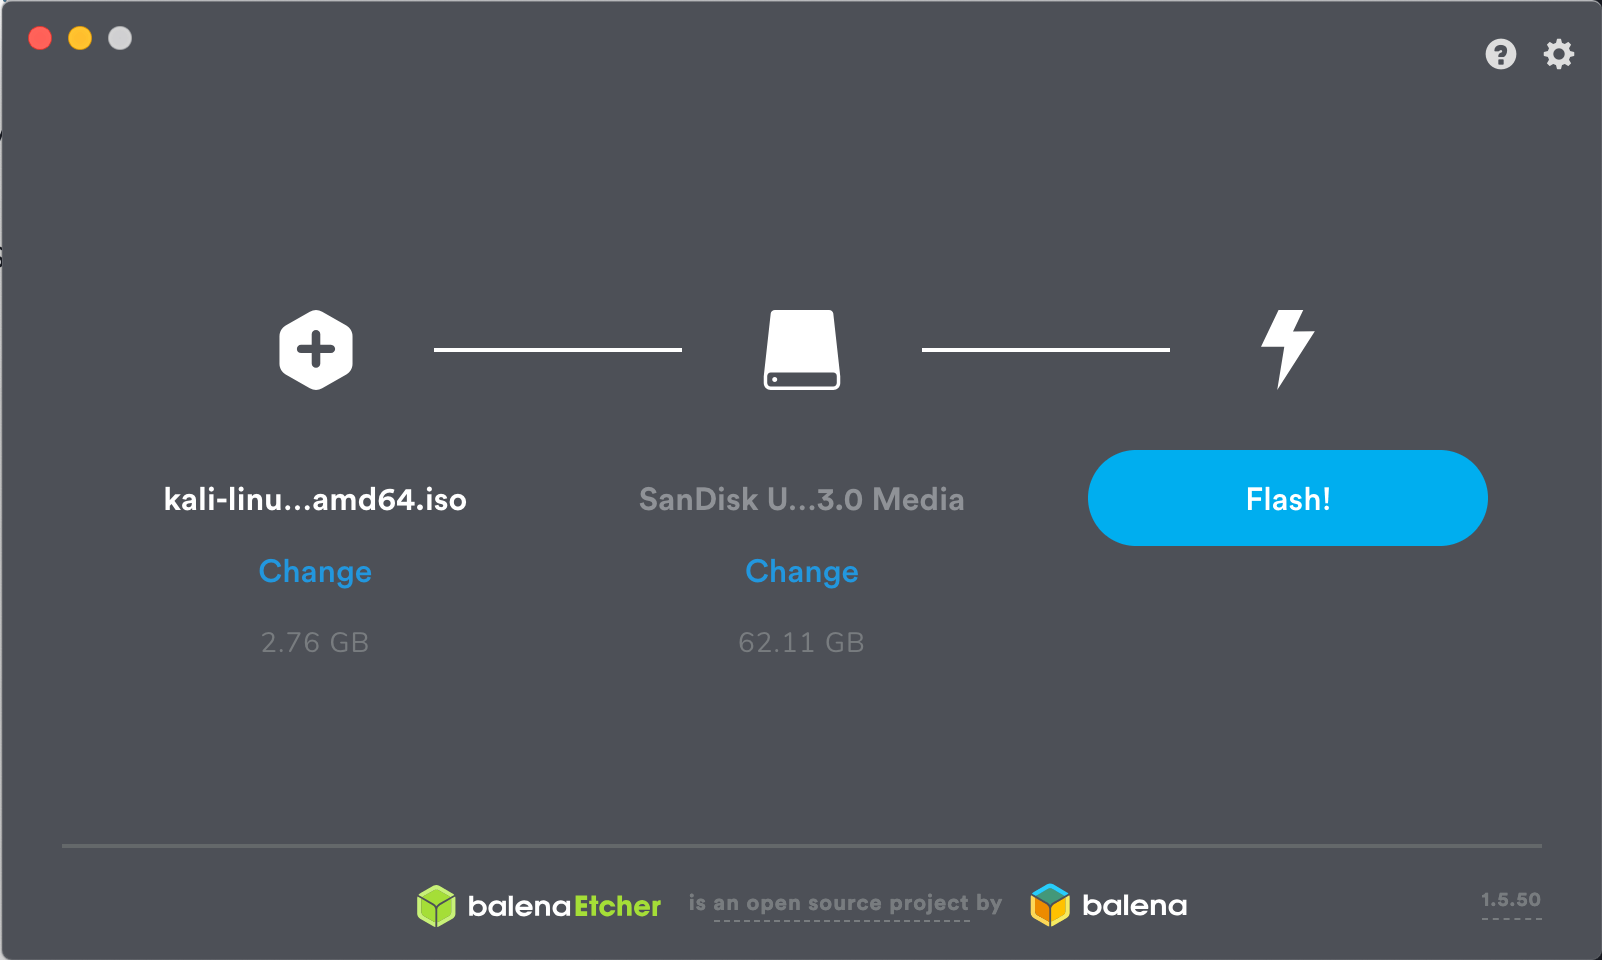
Download and run Etcher.
Choose the Kali Linux ISO file to be imaged with “select image” and verify that the USB drive to be overwritten is the correct one. Click the “Flash!” button once ready.
 3. Once Etcher alerts you that the image has been flashed, you can safely remove the USB drive.
You can now boot into a Kali Live / Installer environment using the USB device.
Updated on: 2021-Sep-27
Author: g0tmi1k
Источник
Какой пароль по умолчанию в Кали Линукс

Иногда работать в Kali Linux не получается: у root пользователя по умолчанию используется парольный вход. И если не знать, что вводить, добраться до рабочего стола не получится. Давайте разберемся, как в таком случае поменять пароль root пользователя.
Какой в Kali Linux пароль по умолчанию
Сначала следует определиться, идет ли речь о Live-версии Kali Linux или же используется установленная на жесткий диск система.
Если используется «живой» носитель, то операционная система загружается без установки каких-либо частей на диск. В актуальной версии для входа нужно использовать слово «toor», то есть root, написанный задом наперед, без кавычек.
Такой стандартный пароль используется для дистрибутивов i386 и amd64, а также для образов ARM и готовых виртуальных машин. Имя пользователя или логин, соответственно, остается root.
Другой вопрос, если пароль был забыт уже после установки Kali Linux. Можно попробовать вспомнить, какой пароль был введен при установке. Но не всегда это получается. Подбор пароля наугад – не лучший выход.
Что делать, чтобы сбросить пароль и установить свой
Если пользователь забыл пароль, нужно перезагрузить компьютер. Откроется меню GRUB. В нем есть две строки: обычная загрузка и запуск с настройкой параметров.

Следует войти в пункт с дополнительными параметрами Kali Linux. Далее следует подсветить вариант с «recovery mode» в конце – это специальный режим восстановления.

После этого необходимо нажать клавишу «e», чтобы перейти к редактированию параметров загрузки Kali Linux. Откроется экран, на котором отобразятся различные команды.

Нужно найти строку, в которой есть фрагмент ro (на скриншоте выше курсор указывает как раз на него). Букву «o» следует заменить на «w» — это позволит системе запуститься в режиме записи, чтобы можно было поменять пароль пользователя root.
В конце этой же строки надо через пробел дописать запуск командной строки: « init=/bin/bash».

Далее нажать F10 и подождать, пока Kali Linux загрузится.

В командной строке нужно запустить утилиту passwd. Через пробел нужно указать root.

Утилита предложит ввести новый пароль.
Внимание! Символы не будут показываться, поэтому набирать их нужно аккуратно и без ошибок.

После повторного ввода будет установлен обновленный пароль.
Можно перезагрузиться в обычном режиме, без перехода в recovery и правки параметров, и войти в Kali Linux под паролем root.
Источник
Создание зашифрованной флешки Kali Linux Encrypted Persistence
В данной статье описывается метод создания загрузочной флешки с системой Kali Linux, функционал которой позволяет создать зашифрованный раздел, где будут храниться все её параметры, установленные программы и данные. Шифрование производится посредством алгоритма aes c ключом 256 бит (настроить шифрование вы можете на свой вкус, изучив команду cryptsetup).
1. Создание загрузочной флешки
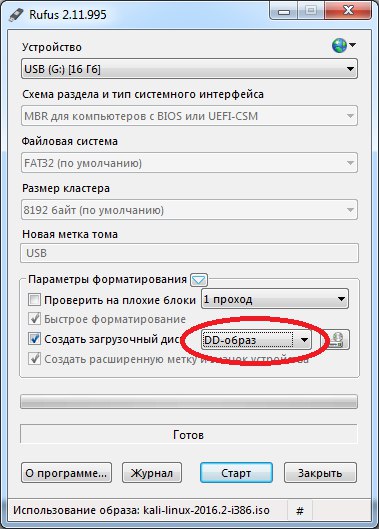
Для записи образа используйте программу Rufus. Выберите устройство, на которое будет распакован образ, далее выберите iso-образ системы и из выпадающего списка выберите DD-образ.
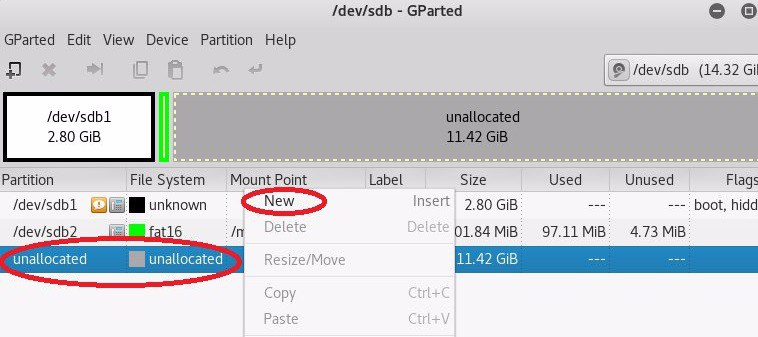
После развертывания образа структура разделов флешки примет следующий вид:

Структура разделов:
— 2.80 ГБ – образ системы Kali Linux;
— 102 Мб – загрузчик;
— 11,42 Гб – нераспределённая область, которая будет использоваться для шифрования.
2. Создание зашифрованного раздела и установка его параметров
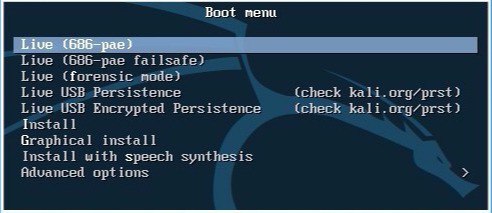
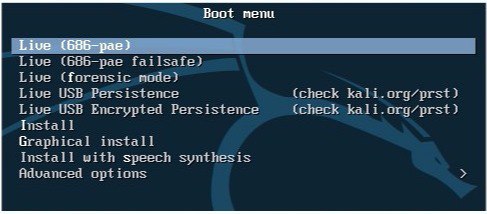
Выполните загрузку с флешки и выберите пункт меню Live(686-pae).
Запустите терминал и выполните команду gparted для запуска редактора разделов.

В открывшемся окне из выпадающего списка выберите флешку, с которой вы загрузились.
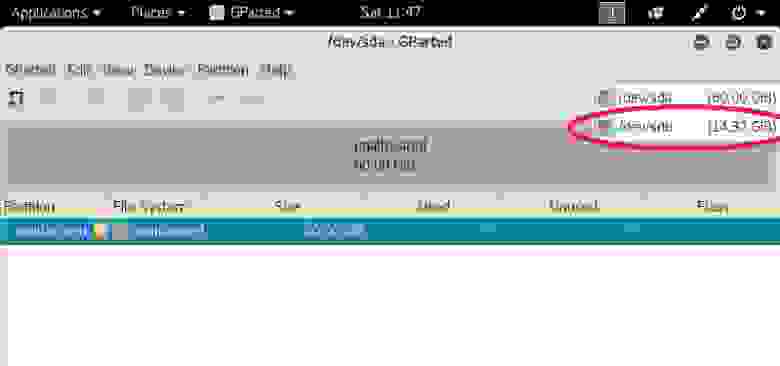
Далее выберите нераспределённое место на диске и создайте новый раздел(ext4).
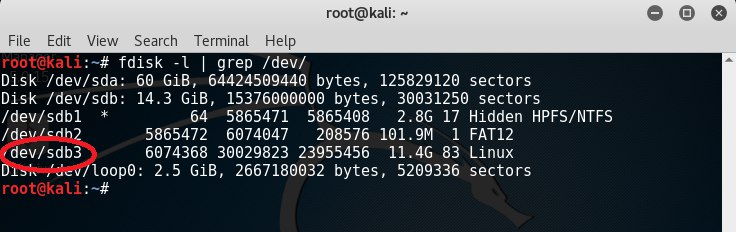
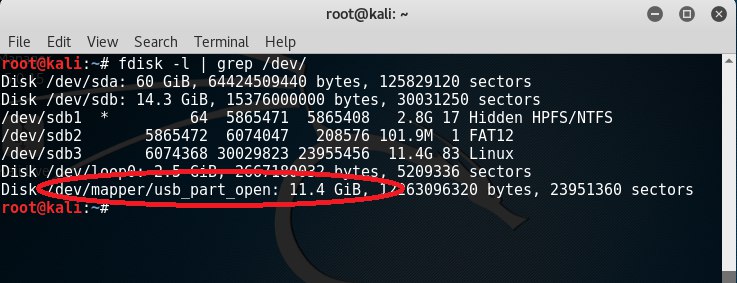
После создания раздела откройте терминал и выполните команду fdisk –l | grep /dev/ для отображения доступных устройств. Нас интересует устройство /dev/sdb3.
Для шифрования раздела введите команду cryptsetup —verbose —verify-passphrase luksFormat /dev/sdb3, далее введите YES.
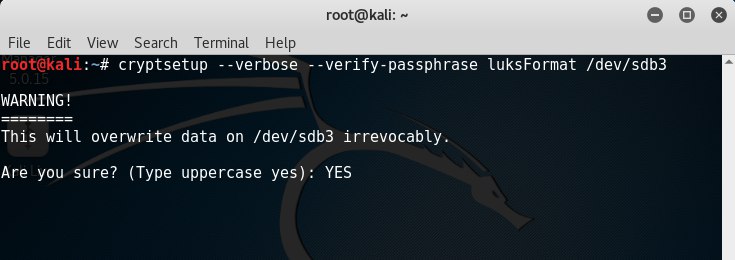
После этого программа потребует ввести пароль, под которым осуществится шифрование раздела и предложит его подтвердить.
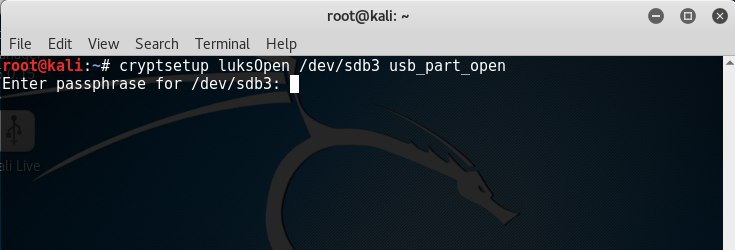
Подключите зашифрованный раздел командой cryptsetup luksOpen /dev/sdb3 usb_part_open, введите пароль. Раздел инициализируется, как устройство с именем usb_part_open.
Выполните команду fdisk –l | grep /dev/ и убедитесь, что устройство /dev/mapper/usb_part_open подключено.
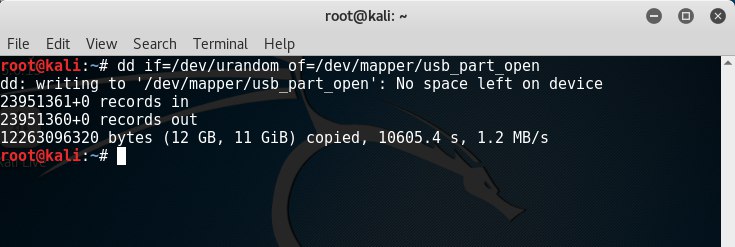
Заполните устройство случайными, псевдослучайными числами либо нулями выполнив одну из команд на ваше усмотрение:
— dd if=/dev/random of=/dev/mapper/usb_part_open — данная команда заполнит устройство случайными числами. Операция будет выполняться продолжительное время(считать в днях);
— dd if=/dev/urandom of=/dev/mapper/usb_part_open — данная команда заполнит устройство псевдослучайными числами. Операция будет выполняться продолжительное время(считать в часах);
— dd if=/dev/zero of=/dev/mapper/usb_part_open — заполнение нулями.
Выполните форматирование заполненного случайными числами раздела командой mkfs.ext4 /dev/mapper/usb_part_open.
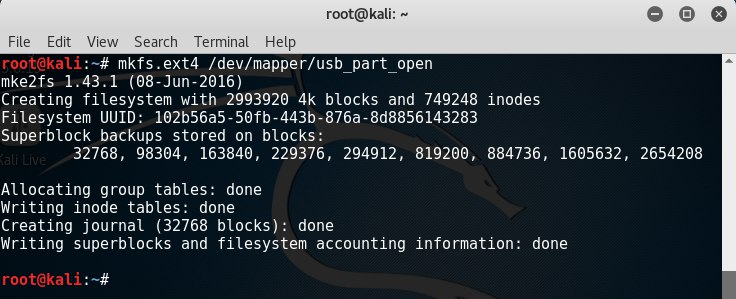
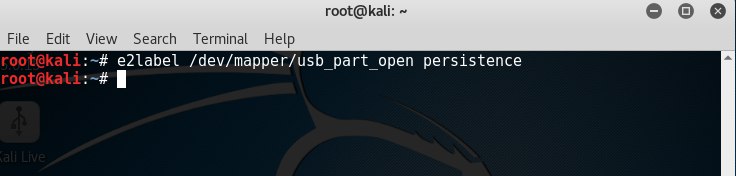
Присвойте разделу название “persistence” командой e2label /dev/mapper/usb_part_open persistence.
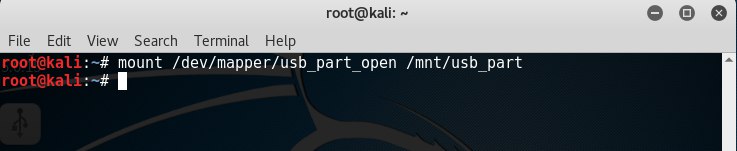
Монтируйте данный раздел к заранее созданной папке, к примеру, /mnt/usb_part командой mount /dev/mapper/usb_part_open /mnt/usb_part (обычно в новых версиях системы данная команда не требуется, раздел автоматически подключается после форматирования и определяется в проводнике).
Создайте конфигурационный файл в корне зашифрованного раздела командой echo “/ union” > /mnt/usb_part/persistence.conf.

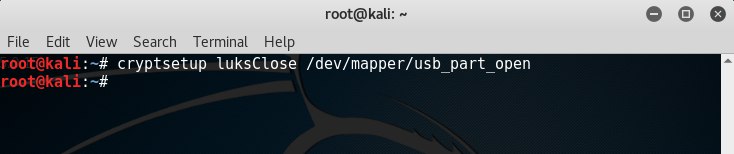
Закройте зашифрованный раздел командой cryptsetup luksClose /dev/mapper/usb_part_open.
Перезагрузите систему и выполните вход под Live USB Encrypted Persistence.
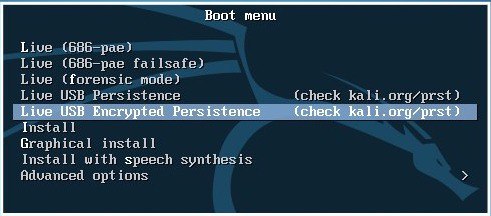
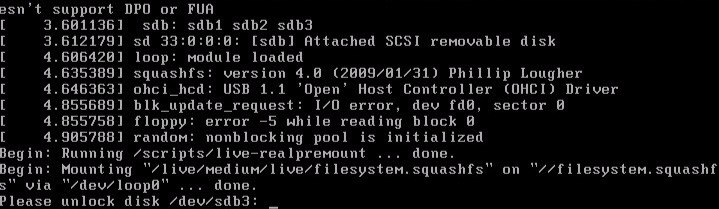
При загрузке потребуется ввести пароль от зашифрованного раздела (при вводе пароля символы не отображаются).
Создание зашифрованной системы завершено.
3. Проверка работоспособности
При первой загрузке ОС в режиме Encrypted Persistence на зашифрованном разделе создаются системные файлы и папки, для их просмотра выполните следующие действия:
— Перезагрузите систему в незашифрованном режиме Live(686-pae).
— подключите зашифрованный раздел как устройство командой cryptsetup luksOpen /dev/sdb3 usb_part_open.

— Откройте проводник и выберите подключенное устройство persistence. Вы увидите созданный ранее конфигурационный файл persistence.conf и системные папки. В папке rw находится наша зашифрованная система, под которой мы загружаемся. Следовательно, в папке rw сохраняются все изменения произведённые в системе загруженной в зашифрованном режиме.
Если вы загружаетесь в обычном(незашифрованном) режиме, то после перезагрузки все изменения и файлы удаляются.
Источник


