- Как скачать и установить Кали Линукс на Андроид
- Как скачать и установить Kali Linux на Android
- Как установить для поддерживающихся устройств
- Если устройства нет в списке
- Kali Linux on Android using Linux Deploy
- Kali Linux on any Android Phone or Tablet
- Kali linux on mobile
- Content:
- Overview
- 1.0 NetHunter Editions
- 2.0 NetHunter Supported Devices and ROMs
- 3.0 Downloading NetHunter
- 4.0 Building NetHunter
- 5.0 Installing NetHunter on top of Android
- 6.0 Post Installation Setup
- 7.0 Kali NetHunter Attacks and Features
- Kali NetHunter Application
- 3rd Party Android Applications in the NetHunter App Store
- 8.0 Porting NetHunter to New Devices
- 9.0 Known Working Hardware
- 10.0 NetHunter Apps
Как скачать и установить Кали Линукс на Андроид

Если хочется проверить ближайшее IT окружение на прочность, а под рукой только смартфон, пригодится Kali Linux для Android. Вот только установка на мобильное устройство имеет свои нюансы. Давайте рассмотрим, как поставить популярный хакерский дистрибутив на Android.
Как скачать и установить Kali Linux на Android
Есть два варианта: поддерживается модель устройства на Андроид разработчиками или же нет. Установка Kali будет сильно отличаться.
Как установить для поддерживающихся устройств
- на Андроиде активирован root;
- поставлен TWRP (скачать из магазина https://play.google.com/store/apps/details?id=me.twrp.twrpapp);
- сделан бэкап (желательно).
Доступные варианты специального дистрибутива Kali Linux Android под названием NetHunter представлены на странице https://www.offensive-security.com/kali-linux-nethunter-download/ . Их не так много – для линейки Nexus и для OnePlus One.

У совпадающего по модели и версии ОС варианта нужно кликнуть по ZIP (прямая загрузка) или Trnt (скачивание через торрент). Во втором случае потребуется torrent клиент вроде доступного на https://www.utorrent.com/ μTorrent. Скачанный файл необходимо открыть в клиенте (например, через меню Файл) и указать место для сохранения.

Начнется процесс скачивания Kali Линукс (на русском).

После завершения нужно скопировать архив SD карту или внутренний накопитель устройства и прошить его через TWRP (в режиме recovery). Детальную информацию на русском по этой программе можно найти на 4pda.ru, там же есть инструкции для различных аппаратов.
Также советуем узнать как скачать образ Кали Линукс ISO. А если вы являетесь владельцем Samsung Galaxy S4 mini и не знаете как установить Кали Линукс, тогда вам сюда.
Если устройства нет в списке
Куда интересней рассмотреть вариант универсальный, который подойдет практически для любого смартфона на Android. Тут тоже потребуются дополнительные приложения – Linux Deploy (не работает без рут) и VNC Viewer. Можно скачать из Google Play.
Сначала потребуется Linux Deploy. Обратите внимание на адрес в заголовке, он еще потребуется, чтобы все заработало.

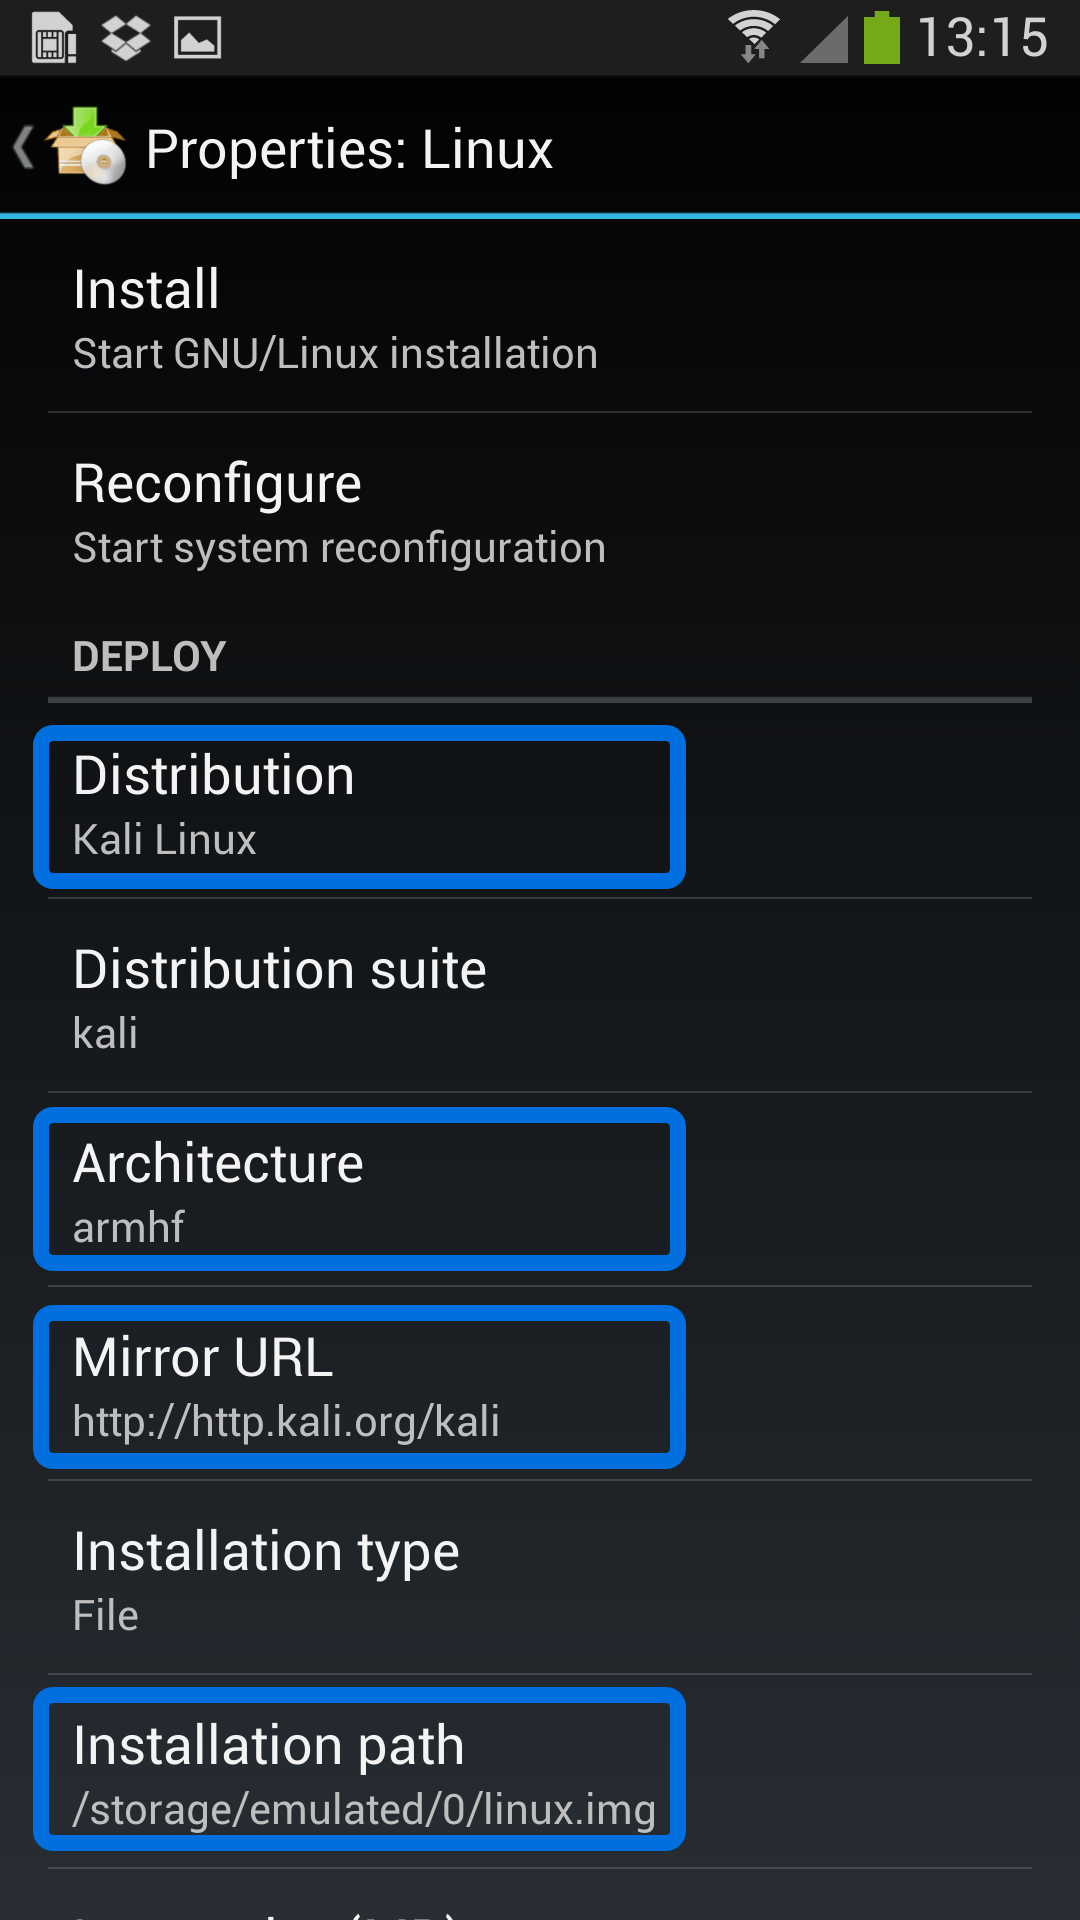
Надо перейти в настройки (иконка с ползунками) и выбрать Kali Linux в разделе «Дистрибутив».

Затем прокрутить параметры настройки будущего Kali Linux Android вниз и поставить галочки возле SSH и графики, чтобы VNC могла к нему подключаться.

Если потребуется, можно переключить архитектуру, но обычно программа сама корректно выставляет остальные настройки для распаковки на Андроид. Также запишите логин и пароль для входа в Linux. Далее нужно установить дистрибутив на Android. Для этого на главной странице приложения следует нажать «Установить» в выпадающем меню.

Во всплывающем окне нужно согласиться.

Дальше требуется подождать: системе нужно скачать все пакеты для Kali Linux Android.

Указанием на завершение установки будет надпись 
Появится еще одно предупреждение.

После завершения можно нажать Start – это запустит дистрибутив Kali в программном контейнере на Android.

Запуск Kali Линукс Android обычно происходит быстрее установки.

После этого нужно перейти в VNC Viewer. Если приложение на смартфоне Android включается впервые, появится приветственная страница.

После них откроется основное окно. Подключение к Kali Linux добавляется нажатием на плюс.

Потребуется ввести тот самый адрес из Linux Deploy, а также имя, чтобы находить подключение в адресной книге на Андроид.

Выглядит это так.

Чтобы увидеть Kali Linux, нужно нажать на подключение и затем на Connect.

Если VNC спросит пароль для подключения, надо указать changeme. Логин и пароль для установленного на Android дистрибутива Kali можно найти в настройках Linux Deploy.
Наконец, откроется рабочий стол Kali Linux Android.
Источник
Kali Linux on Android using Linux Deploy
Kali Linux on any Android Phone or Tablet
Getting Kali Linux to run on ARM hardware has been a major goal for us since day one. So far, we’ve built native images for the Samsung Chromebook, Odroid U2, Raspberry Pi, RK3306, Galaxy Note 10.1, CuBox, Efika MX, and BeagleBone Black to name a few. This however does not mean you cannot install Kali Linux in a chroot on almost any modern device that runs Android. In fact, the developers of Linux Deploy have made it extremely easy to get any number of Linux distributions installed in a chroot environment using a simple GUI builder.
Prerequisites
- A device running Android 2.1 and above, rooted.
- At least 5 GB free space on internal or external storage.
- A fast, wireless internet connection.
- Patience to wait for a distribution to bootstrap from the network.
Configuring Linux Deploy for Kali
There’s actually very little to be done to get Kali installed. By choosing Kali Linux in the “Distribution” tab, you’ve pretty much covered the important stuff. Optionally, you can choose your architecture, verify that the Kali mirror is correct, set your installation type and location on your Android device, etc. Generally speaking, the defaults provided by Linux Deploy are good to begin with.
Building the Kali Image
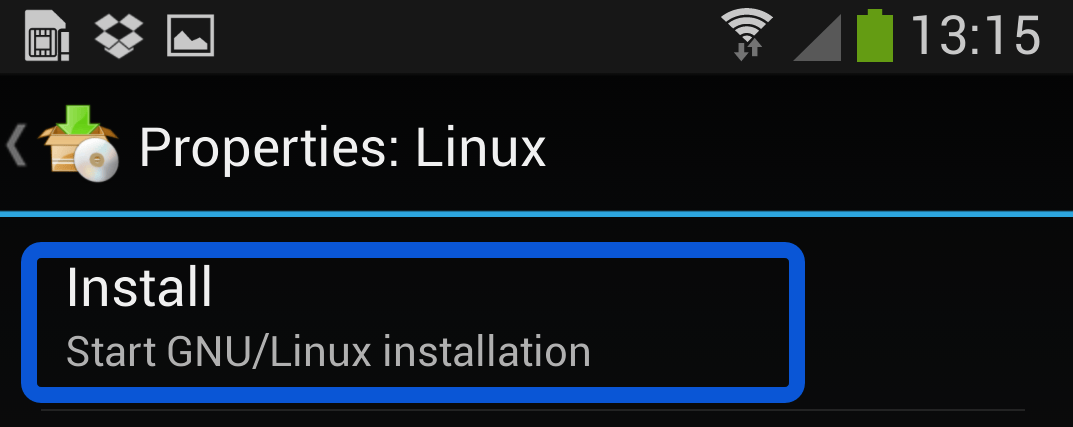
Once you are happy with all the settings, hitting the “install” button will start a Kali Linux bootstrap directly from our repositories. Depending on your Internet connection speed, this process could take a while. You’ll be downloading a base install of Kali Linux (with no tools) at minimum.
Starting up your chrooted Kali
Once the installation is complete, you can have Linux Deploy automatically mount and load up your Kali Linux chroot image. This also includes the starting of services such as SSH and VNC for easier remote access. All of this is automagically done by hitting the “start” button. You should see Linux Deploy setting up your image with output similar to the following:
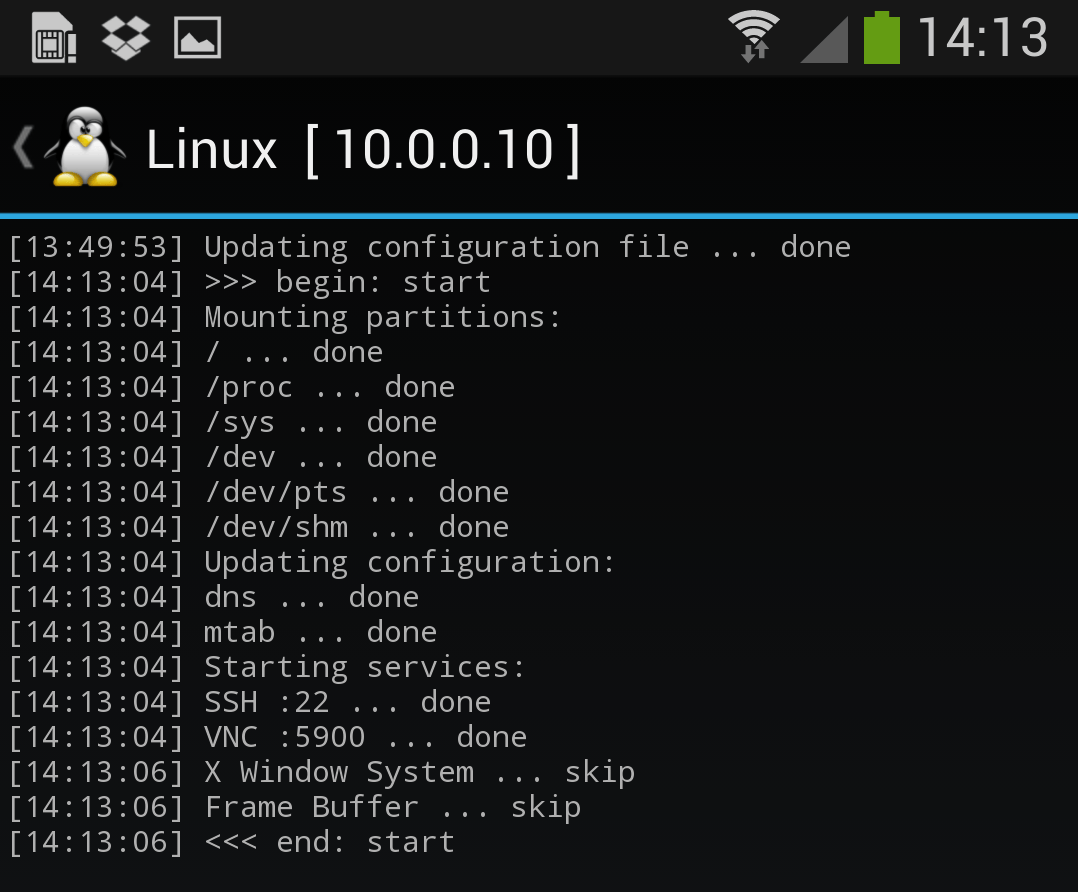
At this stage, Linux Deploy has started a VNC and SSH server inside your chrooted Kali image. You can connect to the Kali session remotely using the IP address assigned to your Android device (in my case, 10.0.0.10).
Logging in to your chrooted Kali
Now you can use either a SSH or VNC client to access your Kali instance. The VNC password is “changeme” and the SSH credentials are “android” for the username (configured via Linux Deploy) and “changeme” as the password.
Image Size Considerations
If left unchanged, Linux Deploy will automatically set an image size of around 4 GB, for a “naked” installation of Kali. If you would like to install additional Kali tools down the road, you might want to consider using a larger image size, which is configurable via the settings in Linux Deploy.
Local VNC Connections
We had to try a couple of VNC clients to get one to work properly. Although controlling Kali through a local VNC client isn’t the most convenient of tasks, it certainly is possible. However, we suspect that most people will be SSH’ing into this instance. The picture below was overlayed with a Kali Linux desktop screenshot taken from a Galaxy S4.
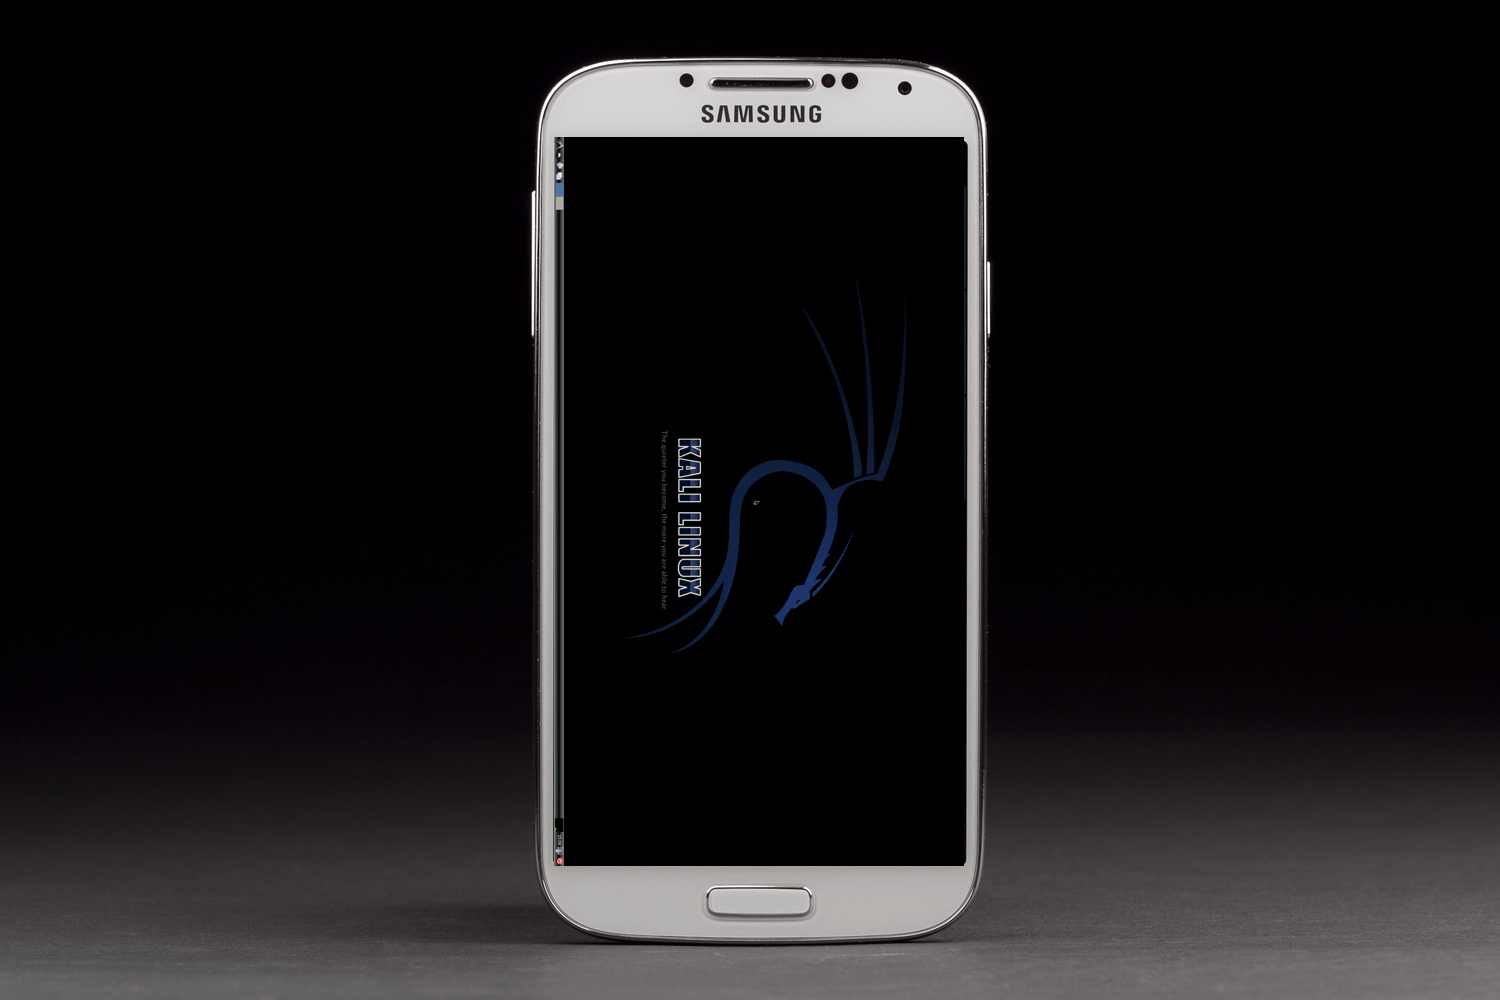
Anyone fancy a simple smartphone hardware backdoor?
Источник
Kali linux on mobile

Content:
Overview
Kali NetHunter is available for un-rooted devices (NetHunter Rootless), for rooted devices that have a custom recovery (NetHunter Lite), and for rooted devices with custom recovery for which a NetHunter specific kernel is available (NetHunter).
The core of Kali NetHunter, which is included in all three editions, comprises of:
Kali Linux container that includes all the tools and applications that Kali Linux provides
Kali NetHunter App Store with dozens of purpose-built security apps
Android client to access the Kali NetHunter App Store
Kali NetHunter Desktop Experience (KeX) to run full Kali Linux desktop sessions with support for screen mirroring via HDMI or wireless screen casting
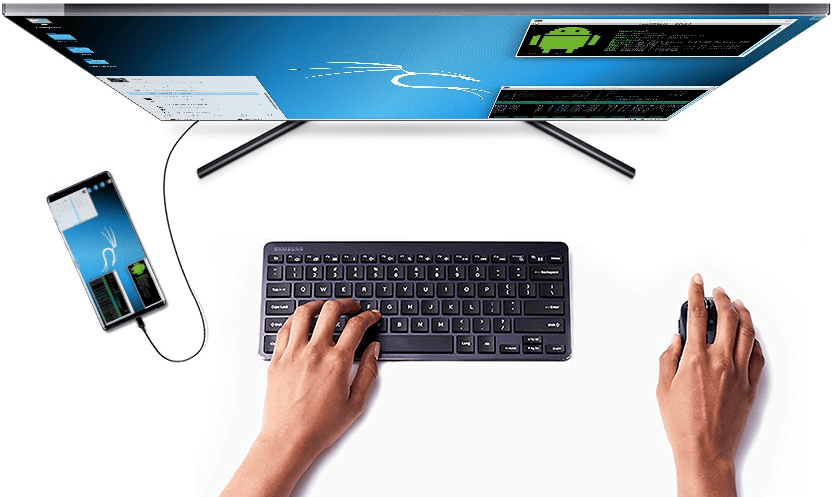 Figure 2: Kali NetHunter Desktop Experience (KeX) outputting to an HDMI monitor
The Kali NetHunter App Store can be accessed through the dedicated client app or via the web interface.
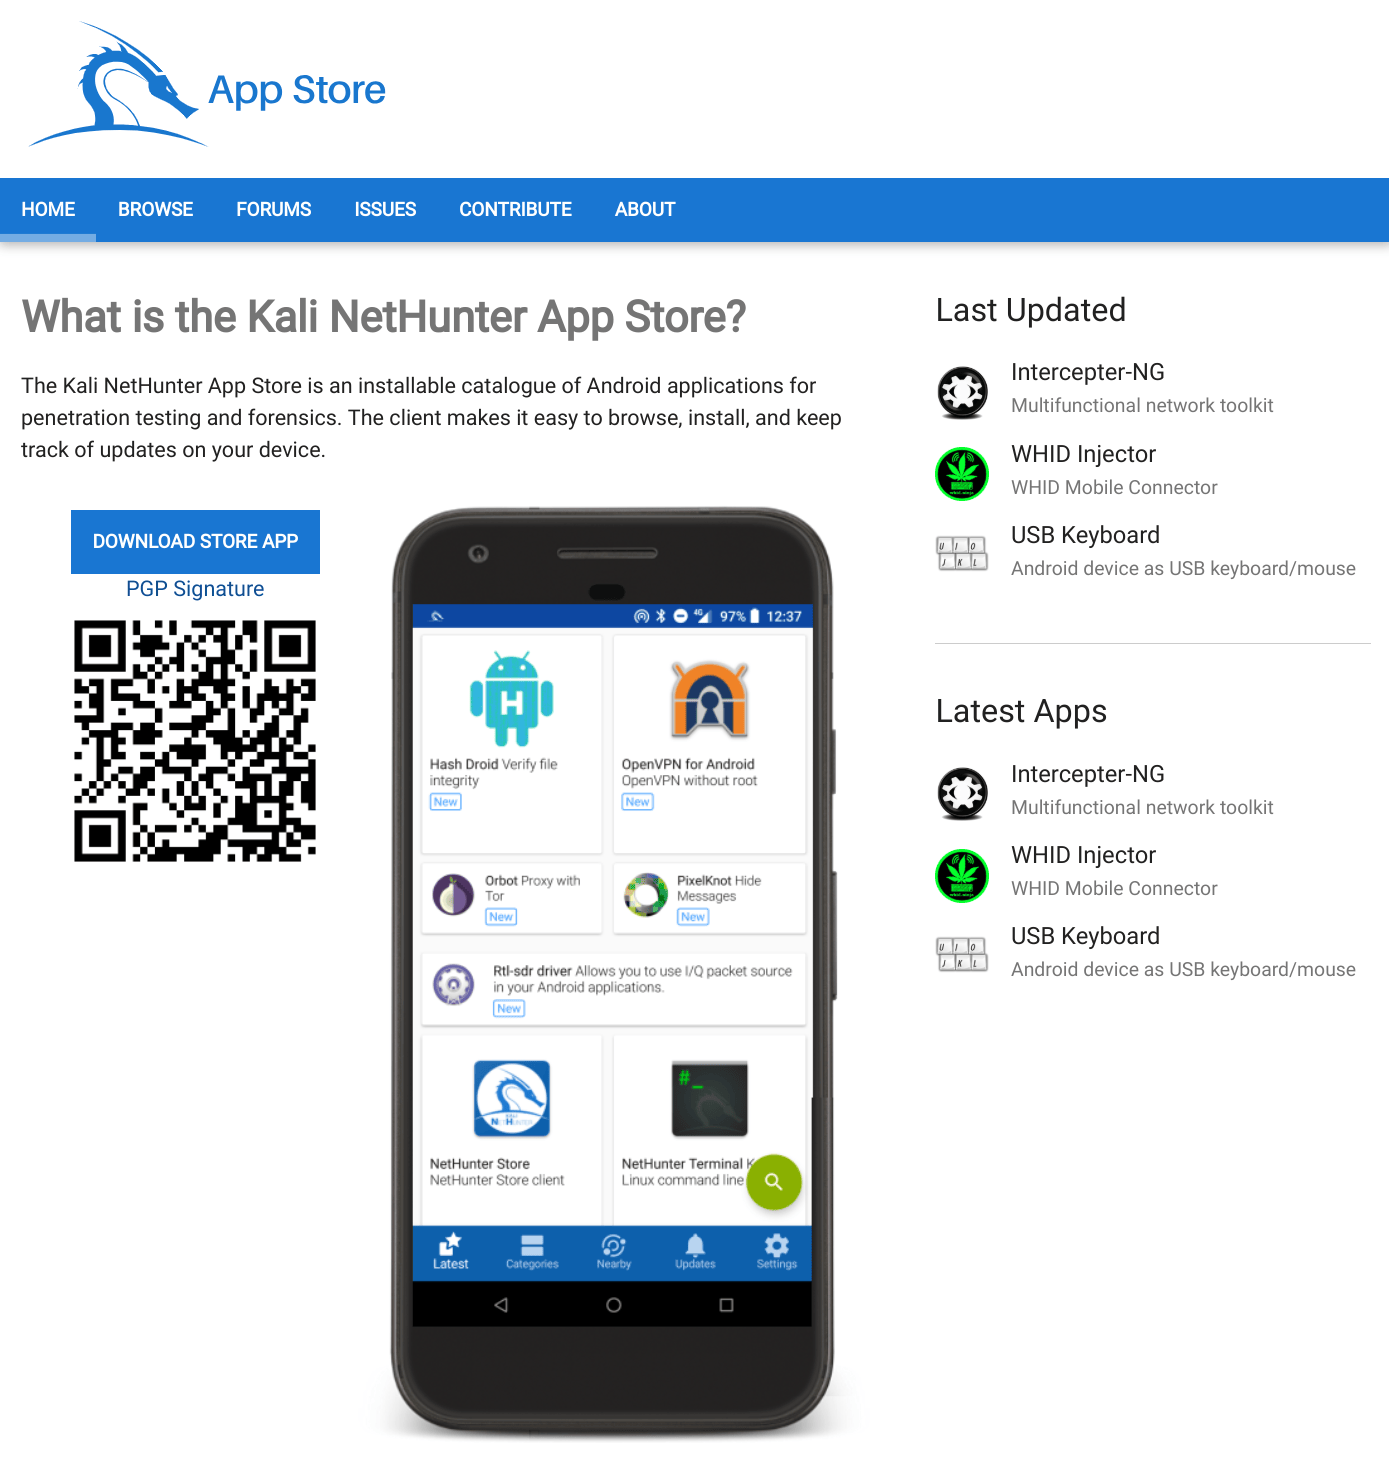 Figure 3: Kali NetHunter App Store
Both rooted editions provide additional tools & services. A custom kernel can extend that functionality by adding additional network and USB gadget drivers as well as wifi injection support for selected wifi chips.
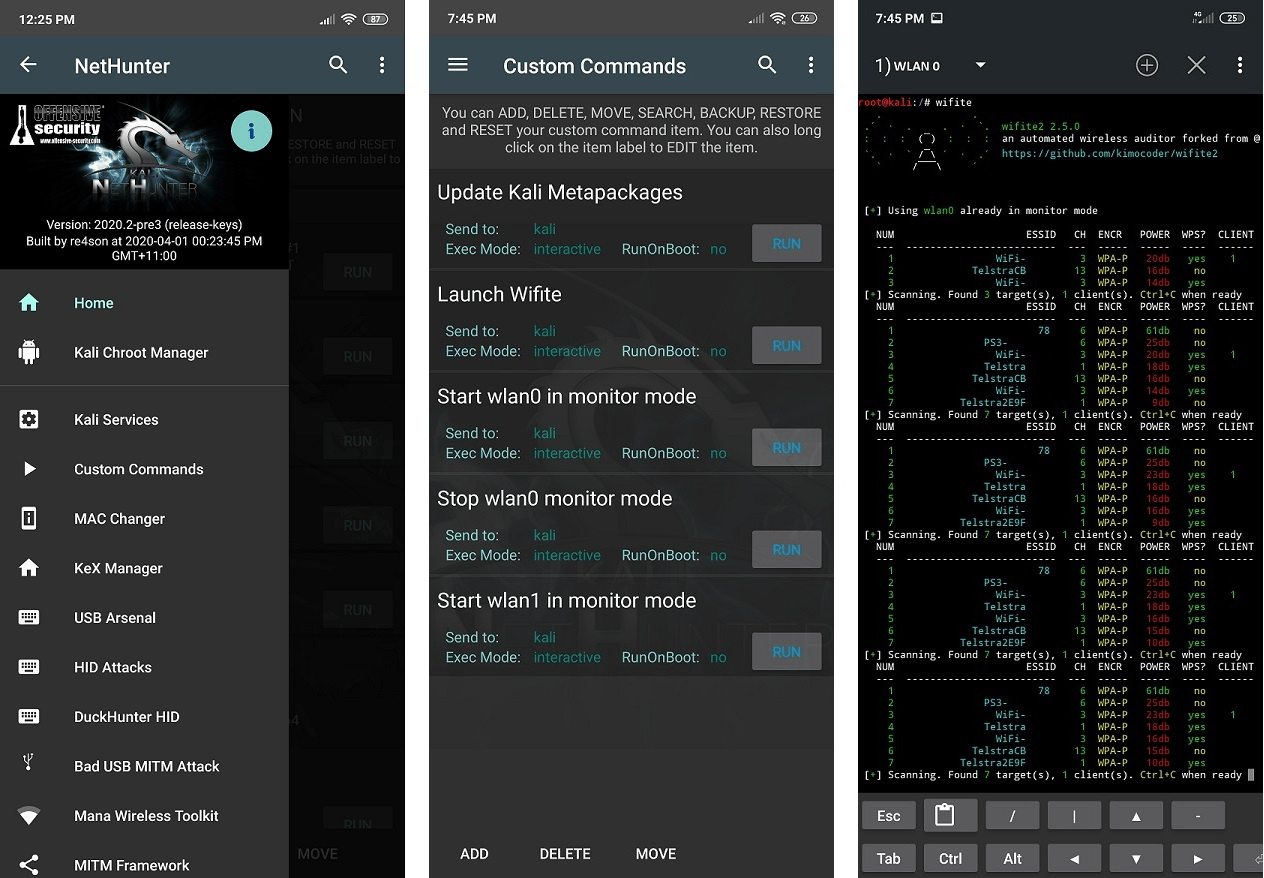 Figure 3: The Kali NetHunter App is available in both rooted editions (NetHunter Lite & NetHunter).
Beyond the penetration testing tools included in Kali Linux, NetHunter also supports several additional classes, such as HID Keyboard Attacks, BadUSB attacks, Evil AP MANA attacks, and many more.
For more information about the moving parts that make up NetHunter, check out our NetHunter Components page. Kali NetHunter is an Open-source project developed by Offensive Security and the community.
1.0 NetHunter Editions
NetHunter can be installed on almost every Android device under the sun using one of the following editions:
| Edition | Usage |
|---|---|
| NetHunter Rootless | The core of NetHunter for unrooted, unmodified devices |
| NetHunter Lite | The full NetHunter package for rooted phones without a custom kernel. |
| NetHunter | The full NetHunter package with custom kernel for supported devices |
The following table illustrates the differences in functionality:
| Feature | NetHunter Rootless | NetHunter Lite | NetHunter |
|---|---|---|---|
| App Store | Yes | Yes | Yes |
| Kali cli | Yes | Yes | Yes |
| All Kali packages | Yes | Yes | Yes |
| KeX | Yes | Yes | Yes |
| Metasploit w/o DB | Yes | Yes | Yes |
| Metasploit with DB | No | Yes | Yes |
| NetHunter App | No | Yes | Yes |
| Requires TWRP | No | Yes | Yes |
| Requires Root | No | No | Yes |
| WiFi Injection | No | No | Yes |
| HID attacks | No | No | Yes |
The installation of NetHunter Rootless is documented here: NetHunter-Rootless
The NetHunter-App specific chapters are only applicable to the NetHunter & NetHunter Lite editions.
The Kernel specific chapters are only applicable to the NetHunter edition.
2.0 NetHunter Supported Devices and ROMs
NetHunter Lite can be installed on all Android devices that are rooted and have a custom recovery. The full NetHunter experience requires a devices specific kernel that has been purpose built for Kali NetHunter. The NetHunter gitlab repository contains over 164 kernels for over 65 devices. Offensive Security publishes over 25 images for the most popular devices on the NetHunter download page. The following live reports are generated automatically by GitLab CI:
3.0 Downloading NetHunter
Official release NetHunter images for your specific supported device can be download from the Offensive Security NetHunter project page located at the following URL:
Once the zip file has downloaded, verify the SHA256 sum of the NetHunter zip image against the values on the Offensive Security NetHunter download page. If the SHA256 sums do not match, do not attempt to continue with the installation procedure.
4.0 Building NetHunter
Those of you who want to build a NetHunter image from our Gitlab repository may do so using our Python build scripts. Check out our Building NetHunter page for more information. You can find additional instructions on using the NetHunter installer builder or adding your own device in the README located in the nethunter-installer git directory.
5.0 Installing NetHunter on top of Android
Now that you’ve either downloaded a NetHunter image or built one yourself, the next steps are to prepare your Android device and then install the image. “Preparing your Android device” includes:
- unlocking your device and updating it to stock AOSP or LineageOS (CM). (Check point 2.0 for supported roms)
- installing Team Win Recovery Project as a custom recovery.
- installing Magisk to root the device
- disabling force encryption may be required if TWRP cannot access the data partition
- Once you have a custom recovery, all that remains is to flash the NetHunter installer zip file onto your Android device.
6.0 Post Installation Setup
- Open the NetHunter App and start the Kali Chroot Manager.
- Install the Hacker Keyboard from the NetHunter Store using the NetHunter Store app.
- Install any other apps from the NetHunter Store as required.
- Configure Kali Services, such as SSH.
- Set up custom commands.
- Initialize the Exploit-Database.
7.0 Kali NetHunter Attacks and Features
Kali NetHunter Application
- Home Screen — General information panel, network interfaces and HID device status.
- Kali Chroot Manager — For managing chroot metapackage installations.
- Kali Services — Start / stop various chrooted services. Enable or disable them at boot time.
- Custom Commands — Add your own custom commands and functions to the launcher.
- MAC Changer — Change your Wi-Fi MAC address (only on certain devices)
- KeX Manager — Set up an instant VNC session with your Kali chroot.
- USB Arsenal — Control the USB gadget configurations
- **HID [Attacks]** — Various HID attacks, Teensy style.
- DuckHunter HID — Rubber Ducky style HID attacks
- BadUSB MITM Attack — Nuff said.
- MANA Wireless Toolkit — Setup a malicious Access Point at the click of a button.
- MITM Framework — Inject binary backdoors into downloaded executables on the fly.
- NMap Scan — Quick Nmap scanner interface.
- Metasploit Payload Generator — Generating Metasploit payloads on the fly.
- Searchsploit — Easy searching for exploits in Exploit-Database.
3rd Party Android Applications in the NetHunter App Store
8.0 Porting NetHunter to New Devices
If you’re interested in porting NetHunter to other Android devices, check out the following links. If your port works, make sure to tell us about it so we can include these kernels in our releases!
9.0 Known Working Hardware
10.0 NetHunter Apps
All apps can be installed through the NetHunter Store client.
- The NetHunter Store App can be downloaded here
- The NetHunter Web Store can be found here
- The source code for building the NetHunter Apps can be found on GitLab here
Updated on: 2021-Sep-27
Author: Re4son
Источник


