- Ethical hacking and penetration testing
- InfoSec, IT, Kali Linux, BlackArch
- How to change the desktop environment in Kali Linux without reinstalling the operating system
- Table of contents
- Kali Linux desktop environments
- GNOME 3
- By the way, where is Cinnamon?
- Desktop environment selection during Kali Linux installation
- How to change Kali Linux desktop environment without reinstalling the system. Desktop environment metapackages
- How to install a new desktop in Kali Linux
- How to switch between desktop environments
- How to remove the desktop environment
- How to install a desktop for which the meta-package is missing
- What Changes When Switching Desktop Environment
- Установка окружения LXDE в Kali Linux
- Устанавливаем окружение LXDE в Kali Linux
- Шаг 1: Загрузка необходимых компонентов
- Шаг 2: Вход в систему и конфигурация
- Шаг 3: Удаление старого окружения
- Решение неполадок с работой LXDE
Ethical hacking and penetration testing
InfoSec, IT, Kali Linux, BlackArch
How to change the desktop environment in Kali Linux without reinstalling the operating system
Table of contents
In Linux, the appearance of the operating system (desktop environment) is just a package with a set of programs, so on any Linux distribution, you can change the default desktop environment. This is done by literally a few commands.
Kali Linux desktop environments

This desktop environment is currently installed by default.
This, as well as the next two, are lightweight environments – they are not demanding on resources and are recommended for low-power (legacy) computers.


On a cursory acquaintance (booted just to take a screenshot) – this desktop environment seemed very cute.
GNOME 3

Previously, it was the default (“classic”) desktop environment. GNOME 3 has strange limitations (for example, you cannot create a shortcut on the desktop in the usual way), and in general (in my opinion) it is the most inconvenient and unfortunate desktop environment.

This environment gives room for customization and various custom widgets and plugins.

Mate is, in fact, the actual GNOME 2. The transition to GNOME 3 brought too drastic changes that not everyone accepted. For example, I personally still don’t like GNOME 3. By the way, GNOME 3 is also used in Ubuntu.
So, developers who did not agree with the concept of GNOME 3 forked GNOME 2 and called it Mate. This environment is still kept up to date and has a classic and possibly a bit outdated look.
If you ask my opinion which desktop environment is better, then I will answer, the best desktop environment is Cinnamon.
By the way, where is Cinnamon?
Cinnamon is not among the desktops offered during installation, but this desktop can be installed later.
Desktop environment selection during Kali Linux installation
Therefore, when installing Kali Linux, you can choose any of the available desktops or window managers:

How to change Kali Linux desktop environment without reinstalling the system. Desktop environment metapackages
Desktop environments are full-fledged graphical shells like GNOME, Cinnamon, KDE and others.
Window managers perform only some of the functions of the graphical interface, in fact, they only allow you to open a few windows, add a desktop background, and can have a simple menu. Due to this simplicity, window managers consume a minimum of resources. But from the point of view of user convenience, they are inferior to a full-fledged desktop environment.
Kali Linux has the following metapackages that make it easy to install desktops:
- kali-desktop-e17: Enlightenment (window manager)
- kali-desktop-gnome: GNOME (desktop environment)
- kali-desktop-i3: i3 (window manager)
- kali-desktop-kde: KDE (desktop environment)
- kali-desktop-lxde: LXDE (window manager)
- kali-desktop-mate: MATE (desktop environment)
- kali-desktop-xfce: XFCE (window manager)
How to install a new desktop in Kali Linux
Installing a new desktop environment is done with a command like:
For example, to install GNOME, run the following command:
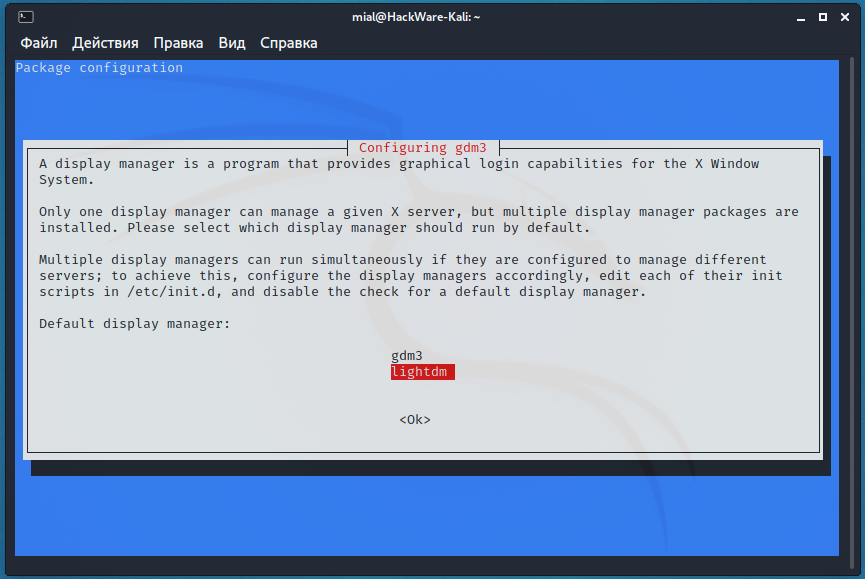
During installation, you will be prompted to select Display Manager, which is a program that provides graphical login capabilities for the X Window System. Basically, it launches in front of a graphical desktop environment (GNOME, XFCE, and others), shows a user login form and prompts you to select the desired desktop.
You can switch between Display Managers at any time by running the command:
How to switch between desktop environments
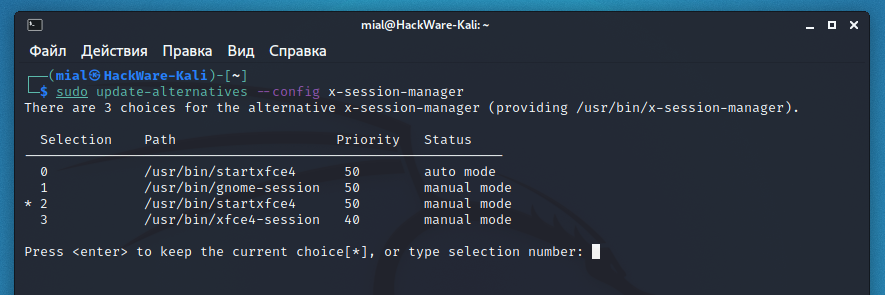
To switch to the new desktop environment, run the command:
Enter the number corresponding to the desired desktop.
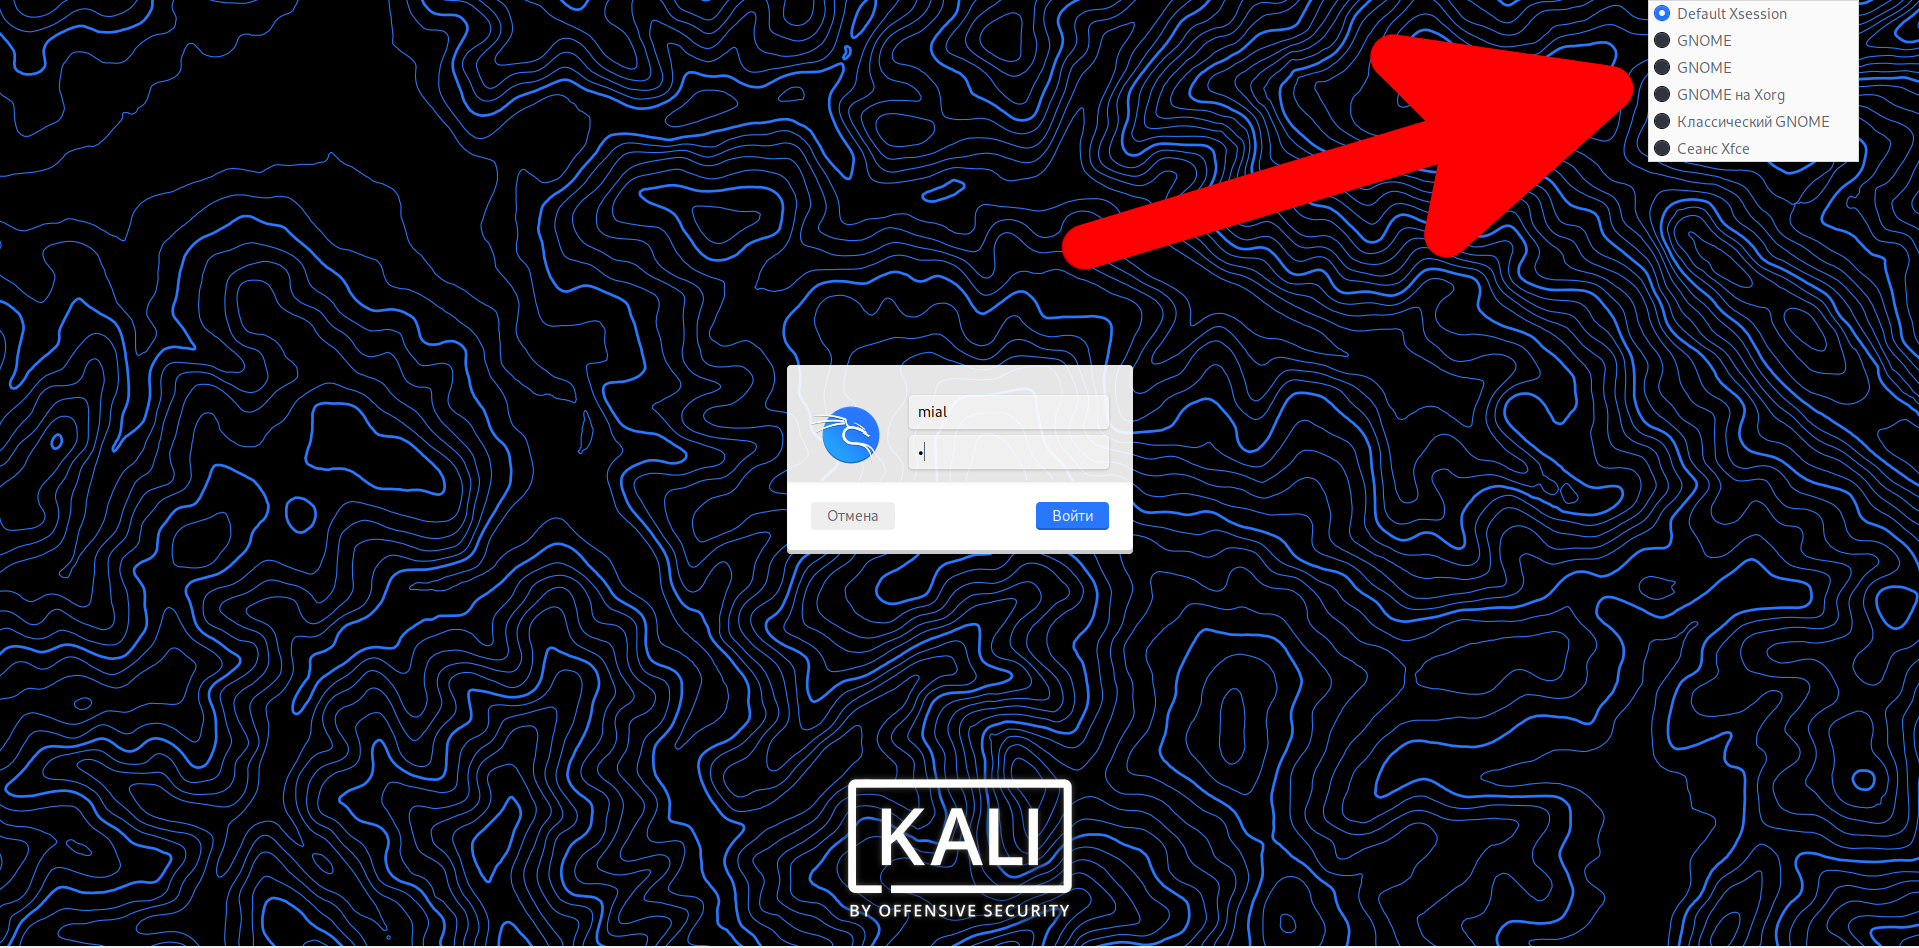
You can also select the desktop environment when the user logs on to the system.
How to remove the desktop environment
If you want to be able to switch between different window managers and desktop environments, then you do not need to uninstall previously installed packages – you can have as many graphical shells on one system as you like.
But if you finally switched to a new desktop and want to free up space, then run a command like:
For example, to remove XFCE:
How to install a desktop for which the meta-package is missing
If the Kali Linux maintainers did not provide a meta-package for any desktop environment, this does not mean that this desktop cannot be installed. If it is in the distribution repository, then it can be installed like any other package.
For example, there is no meta-package for Cinnamon (for some reason, Kali Linux maintainers don’t like Cinnamon), but you can install this desktop and switch to it, see the article “How to replace Default Desktop Environment with Cinnamon in Kali Linux” for details.
What Changes When Switching Desktop Environment
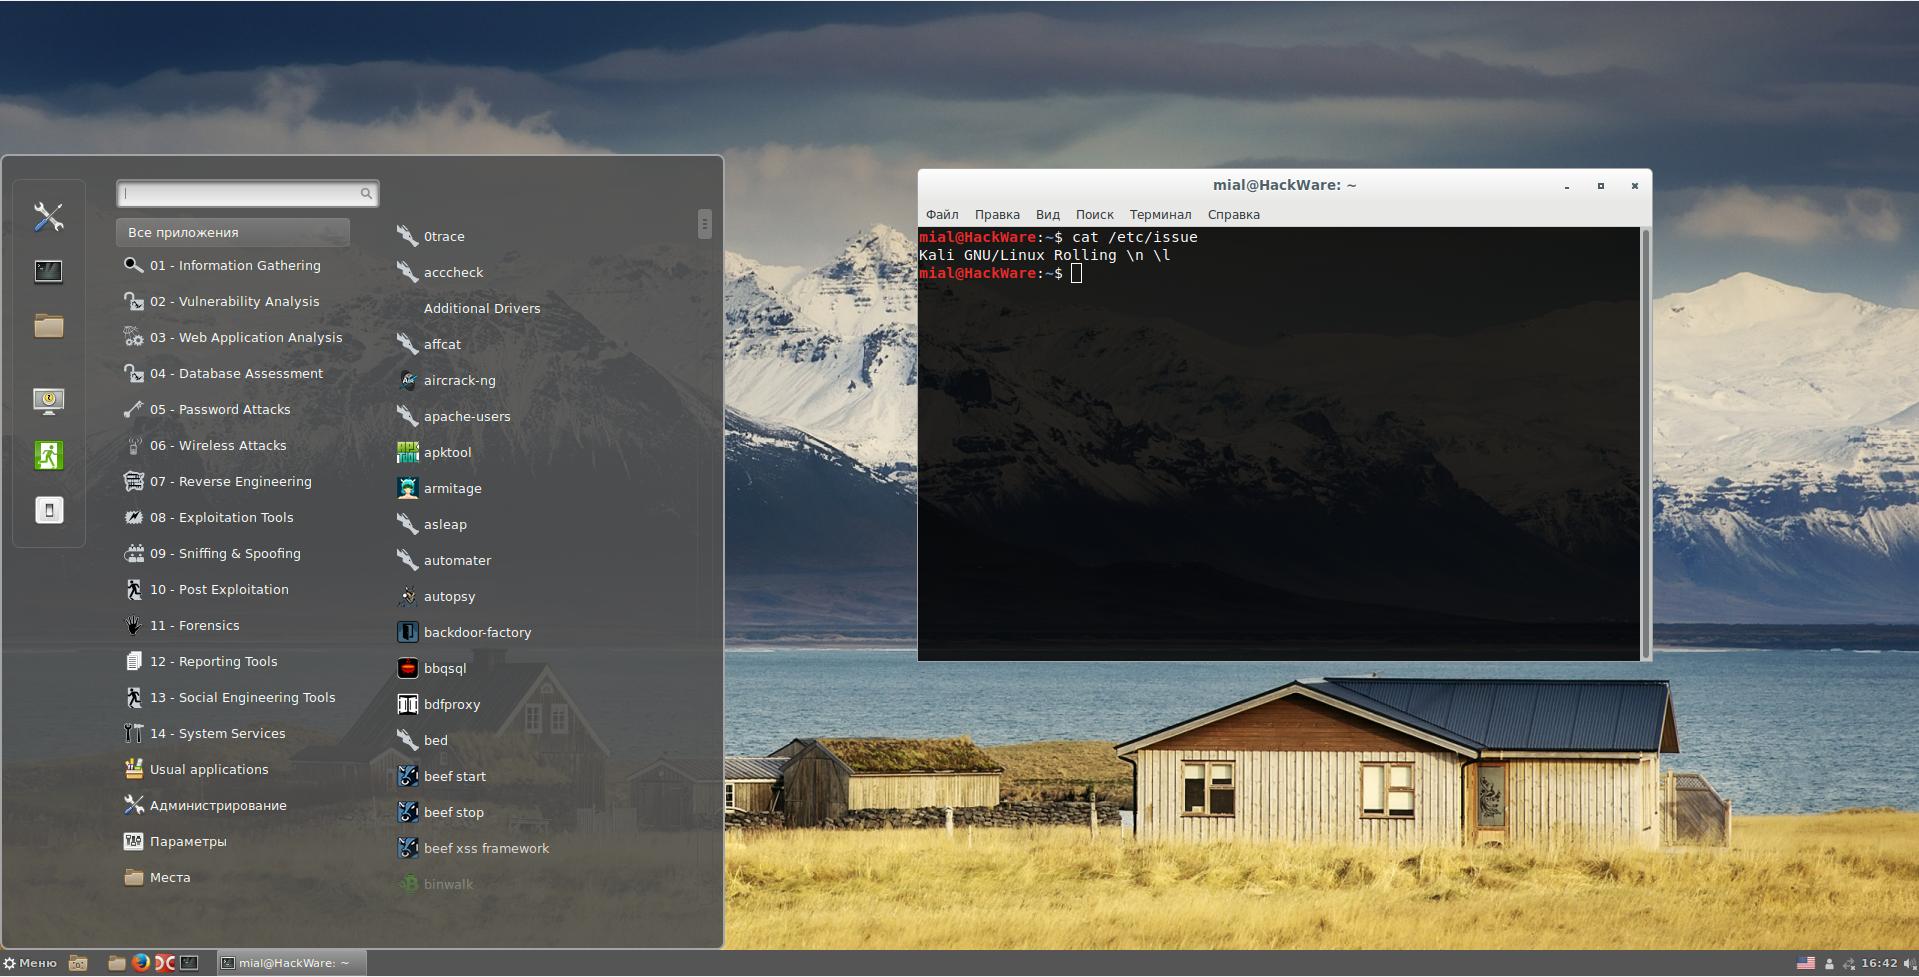
Despite the fact that when you change the desktop environment, the OS starts to look completely different, in fact, apart from the appearance, not much changes.
The most important thing is that all user files and manually installed programs remain in place, even the history of commands entered into the console remains.
But a change can happen with the tools that come with the desktop environment. Terminal, network management software, System settings can be changed. Familiar programs such as System Monitor and Screenshot may look different or may not be available in some desktop environments.
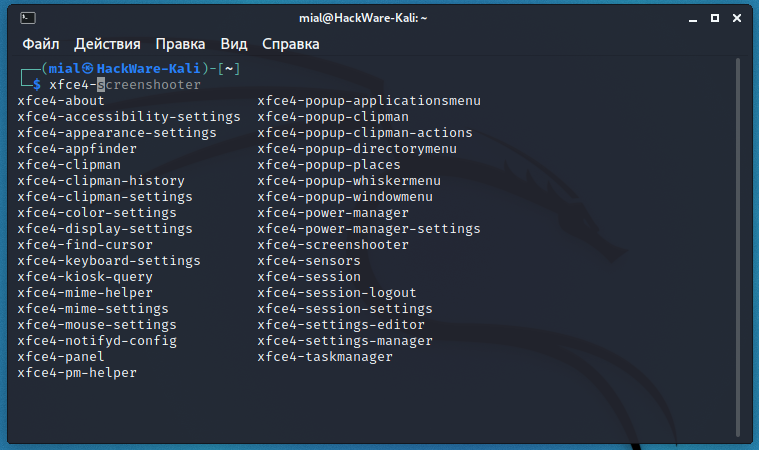
To find out, for example, which applications will be affected when moving from Xfce, type in a terminal
and press Enter.
You will be shown programs specific to Xfce.
To view GNOME-specific programs, type in a terminal:
and press Enter.
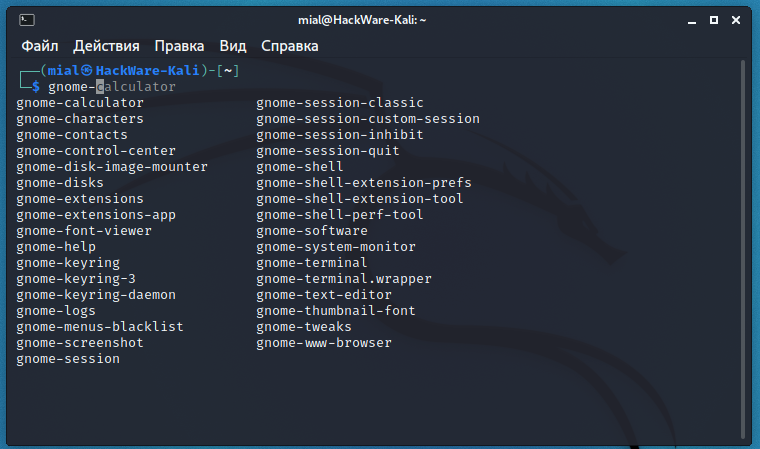
Similarly, you can check for other installed desktop environments.
In fact, if you have not removed the previous desktop environment, then you can run the programs included in it. For example, while working in Xfce, you can run programs included with GNOME:
The menu may also change if the Kali Linux developers have not created a menu for this desktop (window manager) or close to it. For example, Kali Linux maintainers do not make menus for Cinnamon, but when switching to Cinnamon, you may find that it still has a structured Kali Linux menu in which all the tools are collected and organized. Apparently Cinnamon uses a menu made for Mate, or Kali Linux has a universal menu that works in any desktop environment.
The set of wallpapers in different desktop environments may differ.
Different desktops consume a different amount of computer resources (primarily, it refers to RAM).
In all other respects, the operating system does not change and you can always return to the old desktop or try a new one.
By the way, the above applies not only to Kali Linux, that is, on any Linux distribution, you can change the desktop to your liking. If you downloaded Linux Mint with Cinnamon, you can install MATE, Xfce, Enlightenment, and others there.
Источник
Установка окружения LXDE в Kali Linux

LXDE — одна из самых распространенных свободных сред рабочего стола для операционных систем на Linux, которая подходит компьютерам с ограниченным объемом оперативной памяти и слабым процессором. Некоторые обладатели дистрибутива Kali хотят установить это окружение на свою платформу в качестве основного или дополнительного. Далее мы бы хотели пошагово рассмотреть выполнение поставленной задачи.
Устанавливаем окружение LXDE в Kali Linux
Вместе с изменением внешнего вида юзер получает множество дополнительных преимуществ и уникальных приложений LXDE. Именно из-за этого она пользуется таким спросом. Если же вы еще не установили ОС, обратите внимание на уже готовую сборку с этим окружением, которая доступна для скачивания с официального сайта Kali Linux. Только обратите внимание на то, что разрядность платформы при этом будет 64-бит.
Шаг 1: Загрузка необходимых компонентов
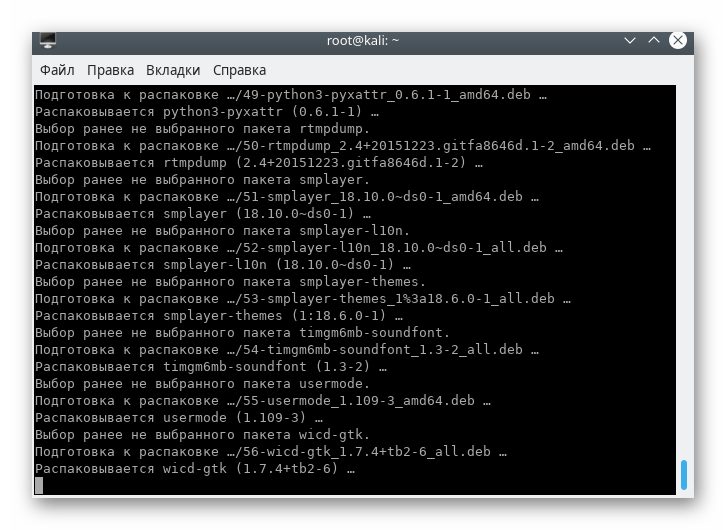
В первую очередь всегда производится загрузка всех составляющих окружения рабочего стола. Туда входят элементы внешнего вида, различные настройки и дополнительные фирменные программы. Стандартная инсталляция осуществляется в консоли следующим образом:
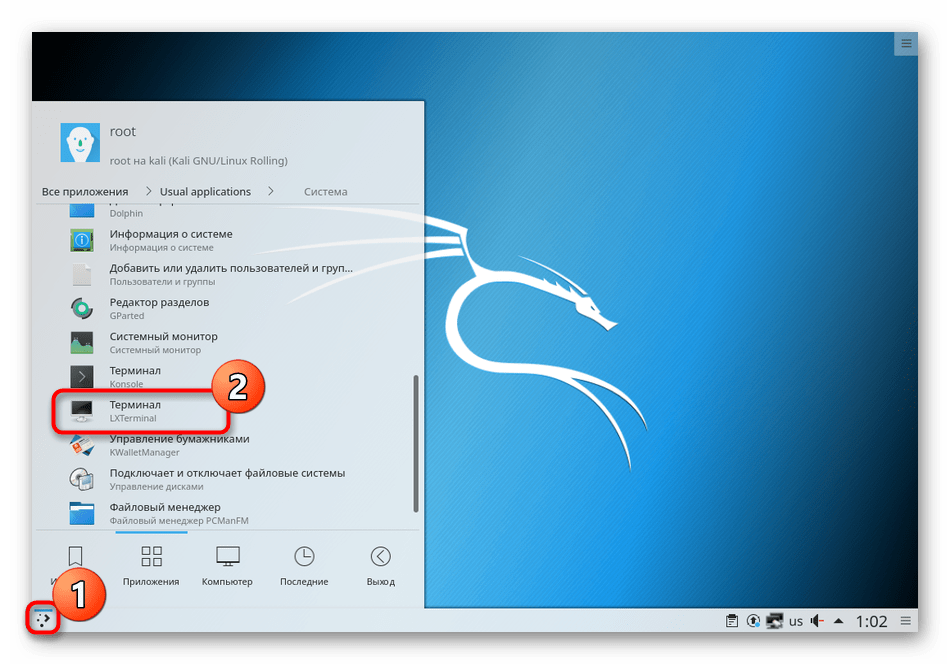
- Откройте меню и запустите «Терминал», найдя его в списке утилит.
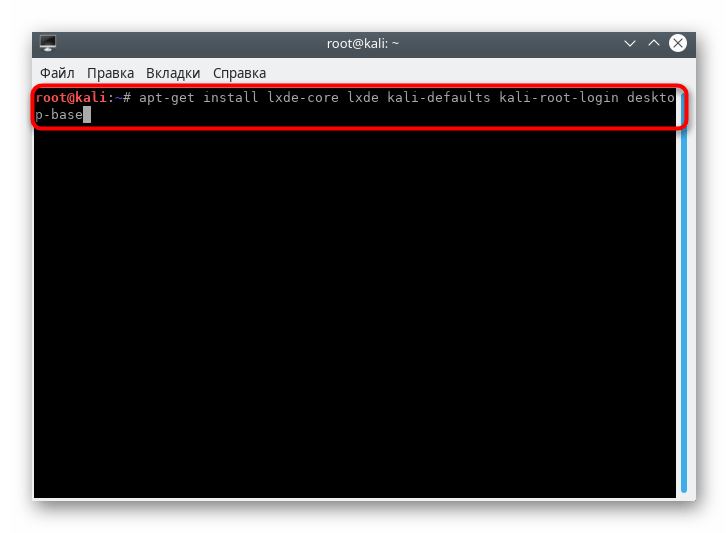
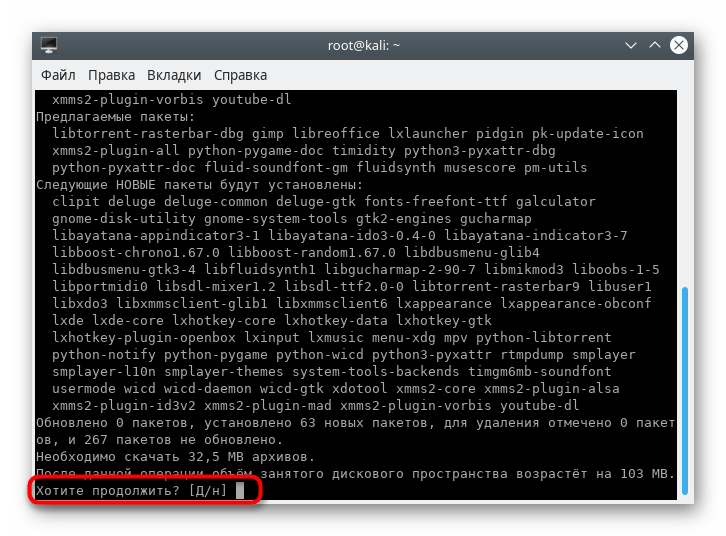
Введите команду apt-get install lxde-core lxde kali-defaults kali-root-login desktop-base , а затем нажмите на клавишу Enter.
Подтвердите добавление новых файлов и увеличение занятого на диске пространства, написав букву Д при запросе.
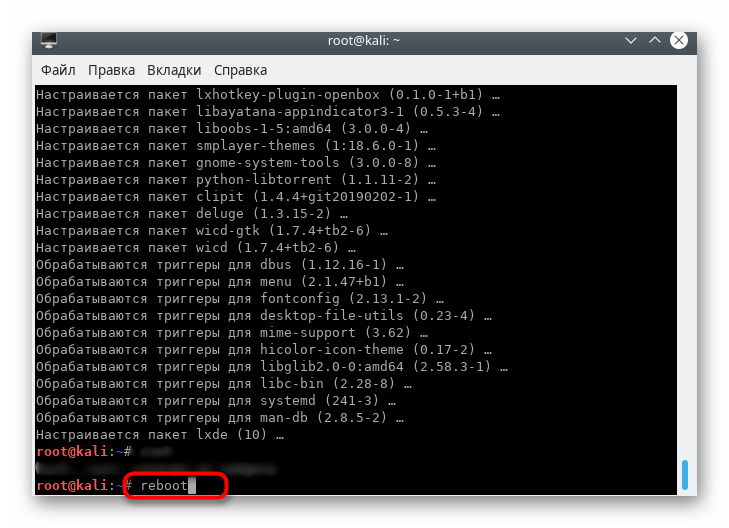
По завершении обязательно перезагрузите операционную систему любым удобным методом, например, через команду —reboot . Только тогда изменения вступят в силу.
На этом процедура инсталляции окончена, осталось только выполнить вход в систему и произвести первичные настройки, которые позволят конфигурировать окружение под свои нужды.
Шаг 2: Вход в систему и конфигурация
Если до установки LXDE в Kali Linux уже было окружение рабочего стола, тогда потребуется выбрать необходимое для загрузки из списка. Помимо этого, присутствуют и другие системные настройки, поэтому рекомендуем ознакомиться со следующей инструкцией.
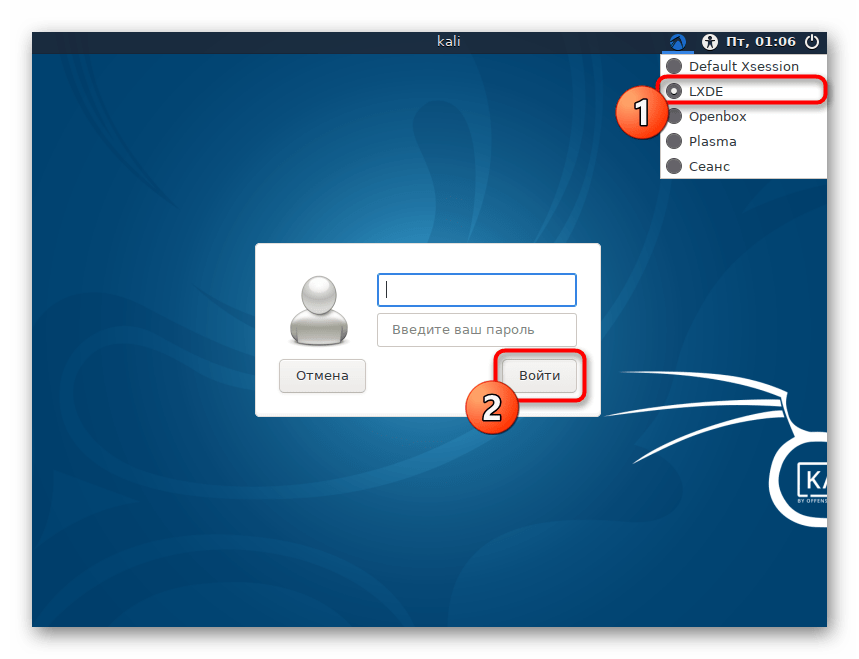
- Во время входа в ОС кликните на панели сверху на соответствующую кнопку для выбора окружения.
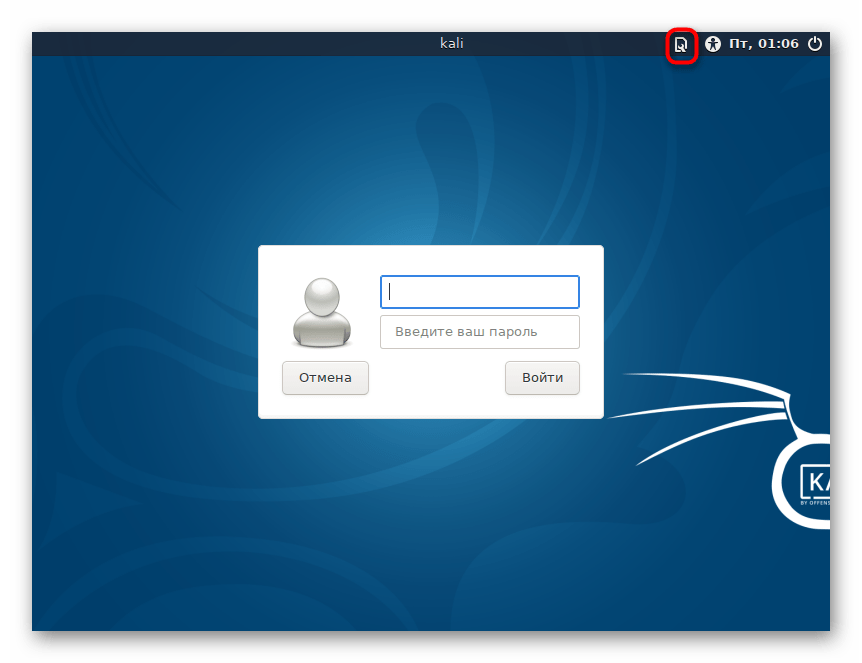
Отметьте маркером LXDE, а затем осуществляйте вход в учетную запись.
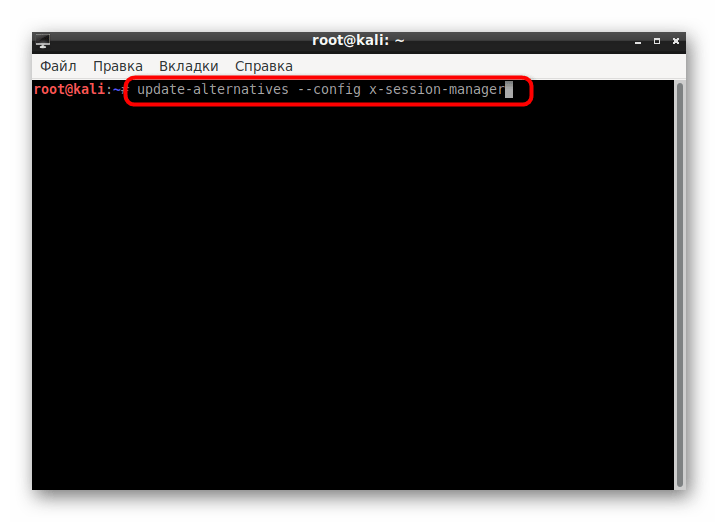
Рекомендуем открыть консоль и прописать там update-alternatives —config x-session-manager .
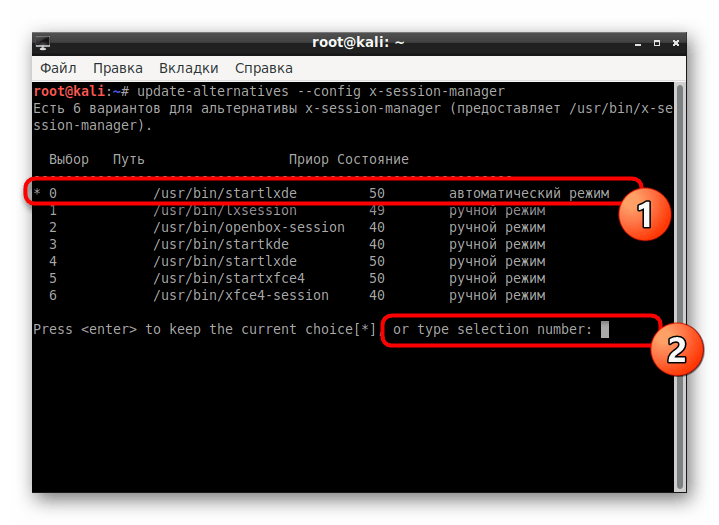
Откроется меню выбора, где вы можете переключаться между оболочками и назначать любую из них в качестве по умолчанию.
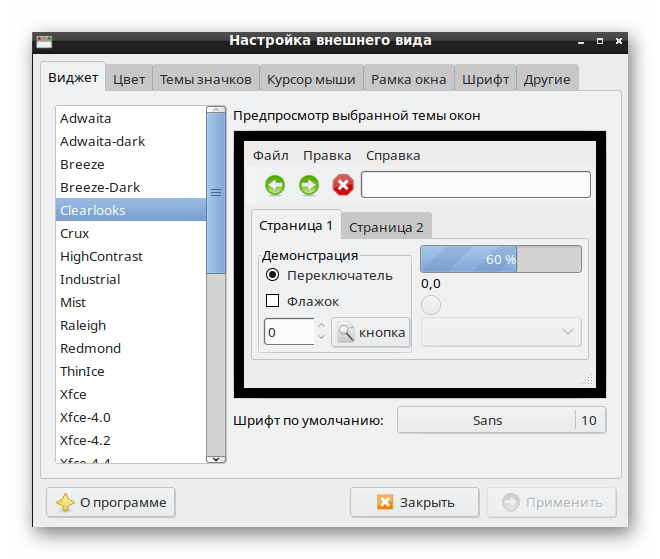
Затем перейдите в «Настройки внешнего вида» через раздел «Параметры» в меню.
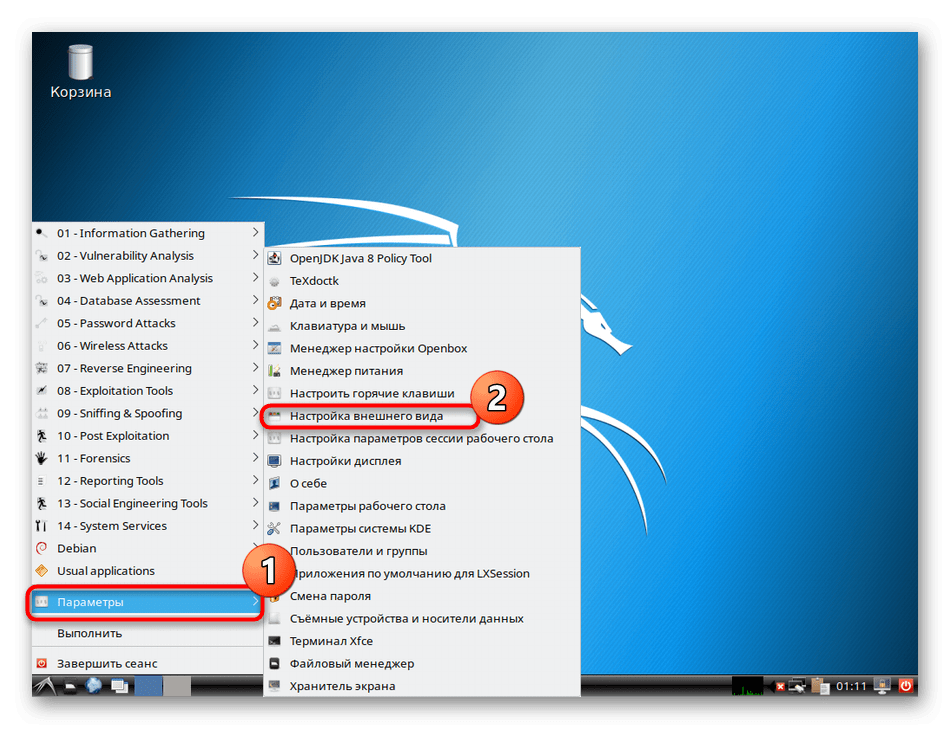
Здесь присутствует множество полезных пунктов, позволяющих выбрать подходящее оформление интерфейса.
Шаг 3: Удаление старого окружения
Если вы не желаете удалять старую графическую оболочку, просто пропустите данный шаг и переходите к использованию LXDE. Другим же пользователям мы предлагаем воспользоваться одной из представленных ниже команд:
- Cinnamon — apt-get remove cinnamon
- Xfce — apt-get remove xfce4 xfce4-places-plugin xfce4-goodies
- Gnome — apt-get remove gnome-core
- MATE — apt-get remove mate-core
- KDE — apt-get remove kde-plasma-desktop kde-plasma-netbook kde-standard
Они помогут очистить систему от популярных сейчас окружений. В случае наличия другой среды рабочего стола обратитесь к официальной документации, чтобы отыскать команду для удаления. Во время деинсталляции подтверждайте уведомления об очищении, а по окончании обязательно перезагрузите ОС.
Решение неполадок с работой LXDE
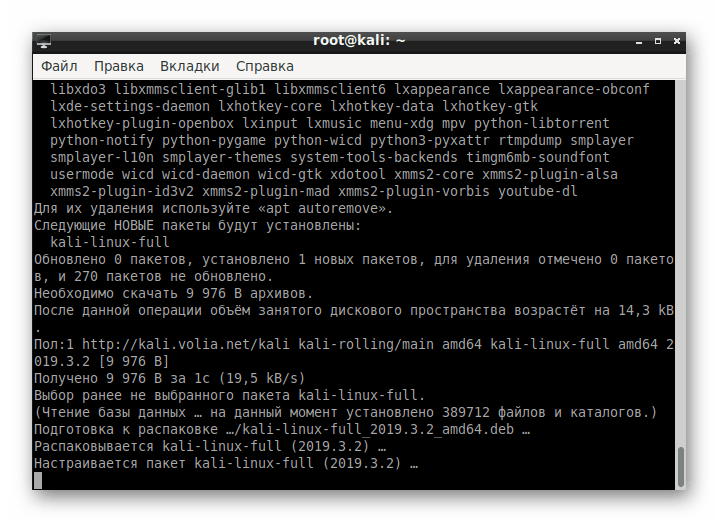
Иногда пользователи сталкиваются с ошибками или неполадками при переходе на оболочку LXDE. Чаще всего они возникают после обновления самой Kali Linux, поэтому требуется исправить именно саму сборку, что выполняется так:
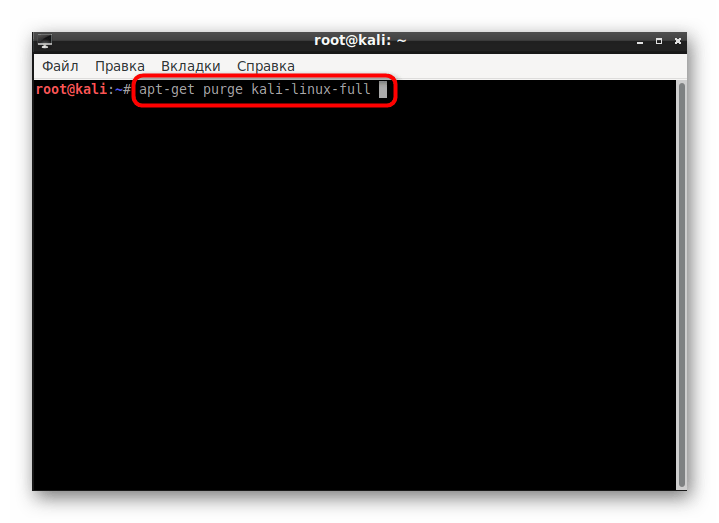
- Введите команду apt-get purge kali-linux-full , а затем нажмите на клавишу Enter.
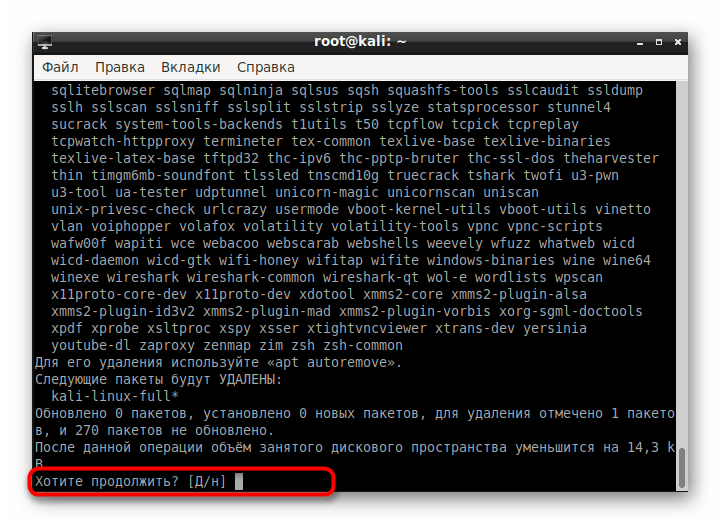
Подтвердите выполнение действия.
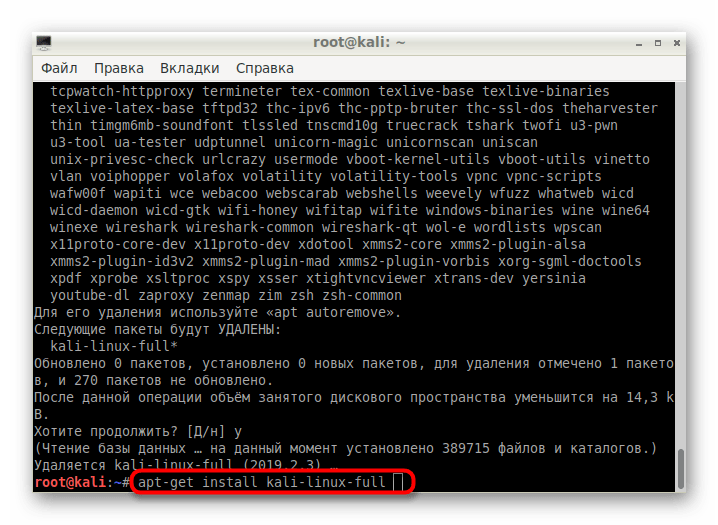
После появления новой строки ввода вставьте apt-get install kali-linux-full .
Ожидайте окончания настройки пакета.
Если же какие-либо ошибки возникают еще на стадии инсталляции окружения через консоль, внимательно читайте описание неполадок, ведь в тексте зачастую указан и метод исправления. При появлении других проблем обращайтесь за помощью к официальной документации окружения или самой операционной системы. Удалить все файлы, связанные с LXDE, поможет команда apt-get remove lxde-core lxde .
Кроме LXDE существует еще множество похожих и улучшенных окружений рабочего стола, которые могут стать отличной заменой для основной оболочки или выступать в роли дополнительной. В другой нашей статье по следующей ссылке вы найдете описание всех этих сред и сможете оценить преимущества каждой.
Помимо этой статьи, на сайте еще 12315 инструкций.
Добавьте сайт Lumpics.ru в закладки (CTRL+D) и мы точно еще пригодимся вам.
Отблагодарите автора, поделитесь статьей в социальных сетях.
Источник


