Ошибка установки на VirtualBox
Пробовал два варианта KaliLinux x64 и 32. В графическом режиме и обычном. Когда идет шаг копирования файлов вроде нормально потом сразу ошибка.
Install the system
Installation step failed An installation step failed. You can try to run the failing item again from the menu, or skip it and choose something else. The failing step is: Install the system
Раньше я ставил на другом компе без ошибок. Разница только в том что версия VirtualBox и Kali новее и теперь у меня две VM уже созданы с виндовс. Это могло как-то помешать?
ответ
Вот по этой инструкции все получилось. С форума Кали: How much space do you asigned to the HDD? at least it must be 15GB
In my Kali Vbox config is like, in the Kali config -> System:
Tab: Motherboard RAM 1024MB Chipset: ICH9 Enable IO APIC Enable UTC clock hardware Enable pointer device
Tab: Procesor CPUs: 2 enable PAE/NX
Tab: Accelaration The two options here are enabled
всё хорошо, но надо показывать как ставил и конфиг проги в след. раз.

Если ставишь KALI LINUX на Virtual BOX и выбираешь создать динамический виртуальный жесткий диск — то в процессе установки выбьет ошибку (примерно на 80-85%) «не удалось выполнить установку, попробуйте установить заново» ну и дальше предложит вернутся в какой то из этапов установки. Создаешь фиксированный виртуальный диск (не динамический) и все работает.
Источник
Не запускается Kali Linux на VirtualBox
 Не загружается Kali Linux в VirtualBox
После выбора OC в GRUB загрузка зависает и на экране написано «Loading. Please wait. «. Я долго.
Непонятки при установке Kali Linux на VirtualBox
Нажимаю продолжить, но всё равно не она устанавливается.
Настройка USB WiFi Kali Linux в Virtualbox
Добрый вечер, поставил значит kali linux на virtualbox, собстна сам virtualbox нужен для проверки.
Kali Linux (VirtualBox) : где скачать и как установить драйвера на wi-fi карту?
Здравствуйте, на днях установил Kali Linux на Virtual Box. Можете помочь, где скачать и как.
Решение
Загрузиться с установочного носителя в Live и примерно так
Помощь в написании контрольных, курсовых и дипломных работ здесь.
Не запускается kali linux 2016.2
Установил с виртуальной машины kali linux 2016.2 на флешку. При загрузки выкидывает на initramfs.
Не запускается Kali Linux на RPi Zero w
Записывал образ на флешку через win32diskimager и через balenaEtcher результат одинаковый. Образ.
Не запускается kali linux с загрузочной флешки (возможно виновен удалённый mint)
Доброго времени суток, есть такая проблема: при перезагрузке вызываю окно с выбором варианта с чего.
VirtualBox + Kali Linux
Устанавливал Kali Linux на вм VirtualBox. После утвердительного ответа на вопрос (при установке).
Источник
Kali linux virtualbox error
You can install VirtualBox on Kali Linux, allowing you to use virtual machines (VMs) inside of Kali Linux. However if you are wanting to install Kali Linux as a VM, you want our Kali Linux Guest VirtualBox guide.
VMs are great. There are many upsides with using them. One of the being, able to run multiple Operating Systems (OSs) at the same time. You can have your host machine “untouched”, and then only interact with the guest VMs. Another is when something is going right, take a snapshot. When something goes wrong, revert back.
VirtualBox is free and open source. There are a few other software such as QEMU, KVM/Xen with virt-manager. Then there is also VMware Workstation & Fusion, which is a commercial software (there is VMware Player which is free but it is limited in features).
Preparation
Before trying to install VirtualBox, please make sure your version of Kali Linux is up-to-date, and if required, reboot the machine.
Download
The first thing we are going to do is import VirtualBox’s repository key.
We then move onto adding VirtualBox’s repository. We add this to a separate file, so it does not interfere with Kali Linux’s main repository. We also will be making sure to state where the keyring is at so the files can be properly signed. Our CPU architecture is amd64. You may need to alter the example below if yours is different.
One thing to bare in mind, Kali Linux is based on Debian, so we need to use Debian’s current stable version (even though Kali Linux is a rolling distribution). At the time of writing, its “buster”:
As we have altered our network repository, we need to re-build the cache.
As VirtualBox has various kernel modules (e.g. vboxdrv , vboxnetflt and vboxnetadp ), we need to make sure they are kept up-to-date when Kali Linux’s kernel gets updated. This can be achieved using dkms.
Setup
Now its time to install VirtualBox itself (along with its Extension Pack to expand VirtualBox’s advanced features).
When prompted, read and accept the license.
You can now find VirtualBox in the menu or start it via the command line.
If you now wish, you are able to install Kali Linux in a VirtualBox VM (on Kali Linux).
Updated on: 2021-Sep-27
Author: g0tmi1k
Источник
Kali linux virtualbox error
This guide is about virtualizing Kali Linux inside of VirtualBox, allowing you to have a Kali VM. This is a great way to use Kali, as it is completely separate from the host, allows you to interact with other VMs (as well as the host machine and other machines on the network), and allows you to revert to snapshots.
You may wish to follow our other guide if you are trying to install VirtualBox on Kali Linux (as a host).
The guide below is what we use to generate our pre-made Kali Linux VirtualBox images. You may alter this to your needs. We always generate the images using the latest version of VirtualBox.
You may need to enable virtualization in your BIOS/UEFI for (e.g. Intel VT-x/AMD-V)
Wizard
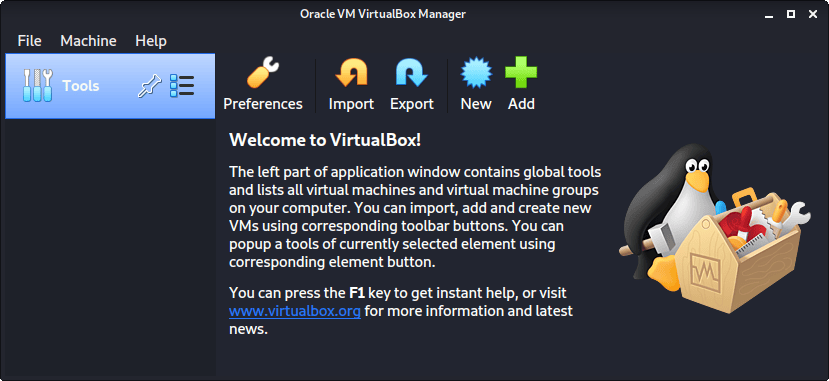
Upon starting up VirtualBox, select “New” (Machine -> New).
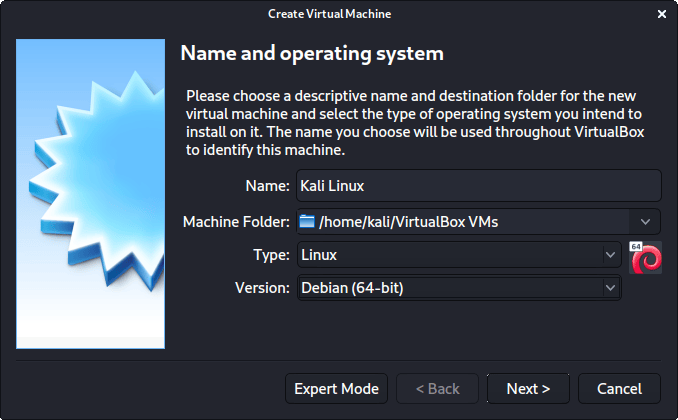
The next screen is “Name and operating system” which is where you name the VM. This name is also used in any filenames (such as the configuration, hard disk and snapshot — which isn’t changed from this point).
We are keeping it generic in this guide (as Kali is a rolling distribution, and we update it), however for our releases, we use the version number in the name as it is a fixed release ( kali-linux-YYYY.N-vbox-ARCH . Example: kali-linux-2021.3-vbox-amd64 ).
For the “Type”, we set it as Linux . For the “Version”, we are going to be using the x64 desktop image, so we are going to select Debian (64-bit) .
“Memory size” is the next section, where we can define how much RAM to use. Again, the higher the amount of RAM, the more applications can be open and at increased performance. Various tools inside of Kali can be demanding of resources. When we make the general VMs, we select 2048 MB (2GB) for RAM, but we often increase this for our personal machines as we have high-performing devices with spare RAM which Kali can utilize.

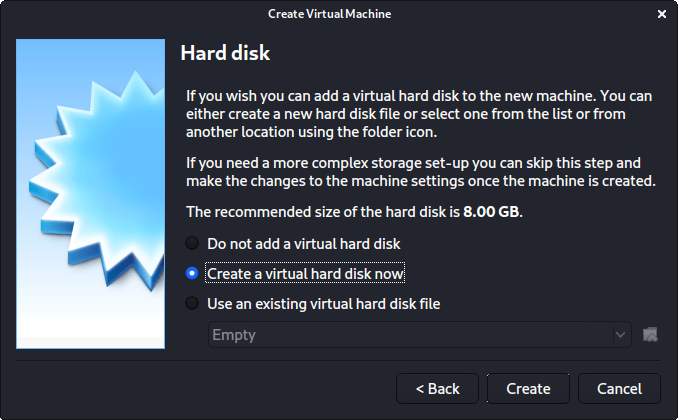
This screen below, “Hard disk”, allows us to Create a new virtual disk now .
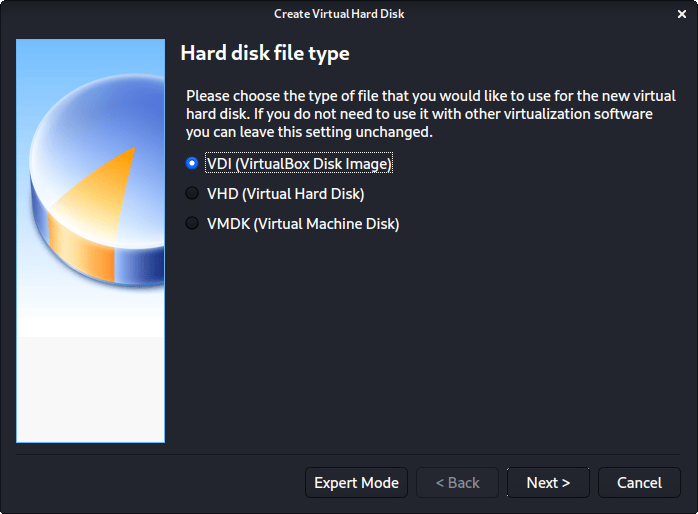
For the “Hard disk file type”, we select VDI (VirtualBox Disk Image) (and its the default option).
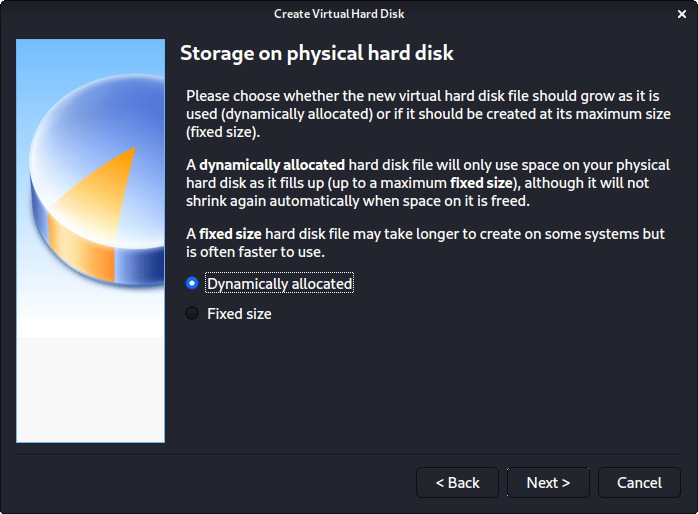
For the following screen, “Storage on physical hard disk”, we go with the default option of Dynamically allocated .
Now with “File location and size”, we can now define how large the virtual hard disk will be. We use 80.00 GB for our VMs.
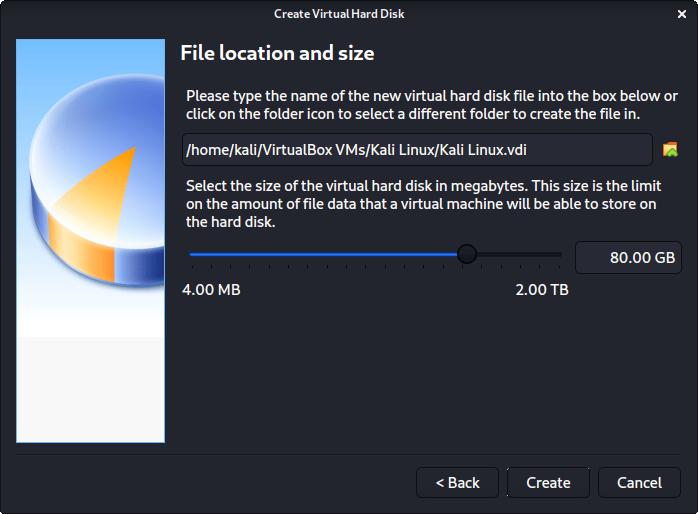
After clicking on “Create”, the wizard is complete.
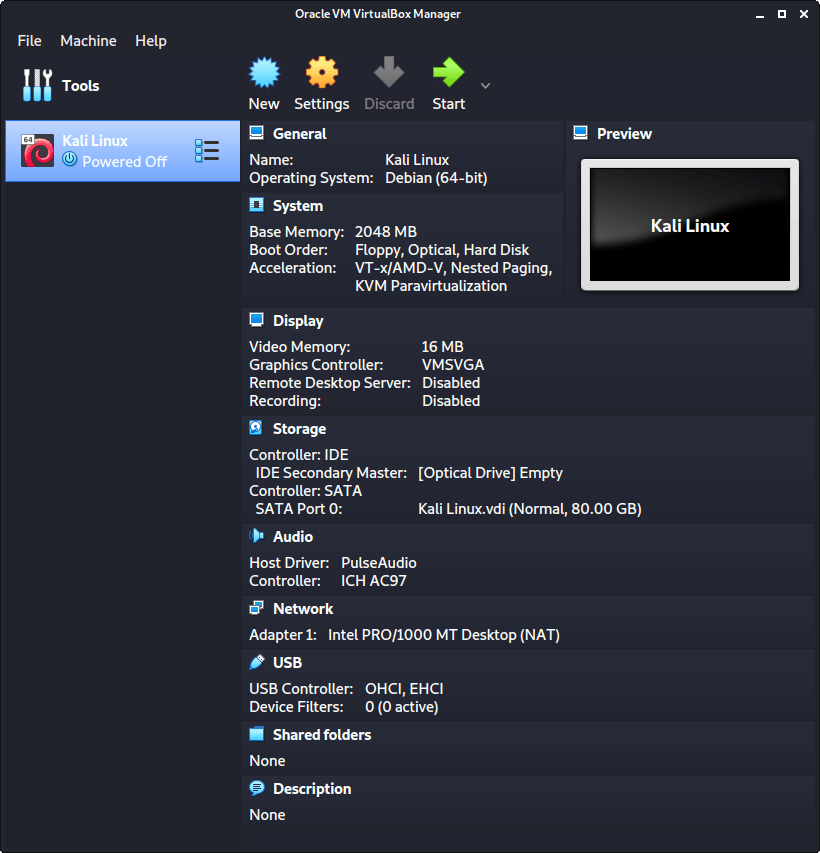
Now we click on “Settings”, to customize the VM further.
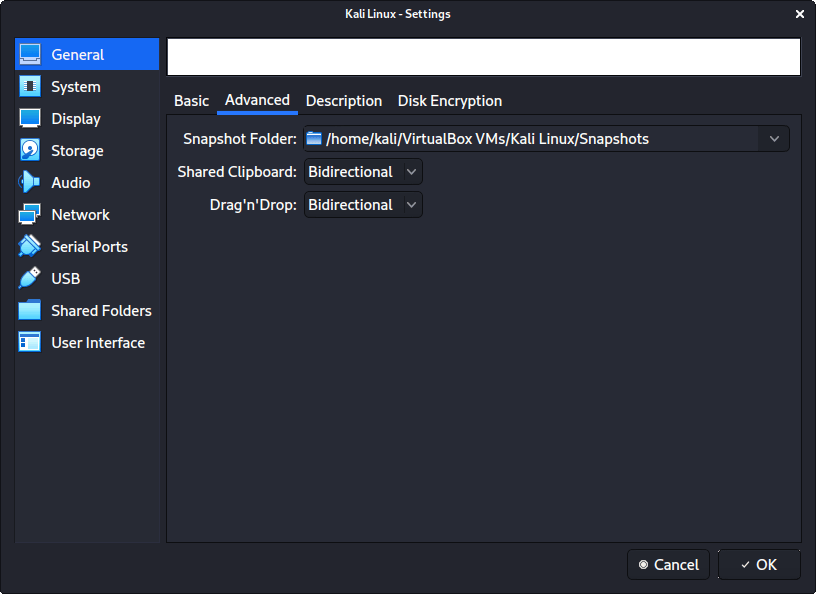
In “General” -> “Advanced”, we make sure to set “Shared Clipboard” to bidirectional , as well as “Drag’n’Drop” to bidirectional
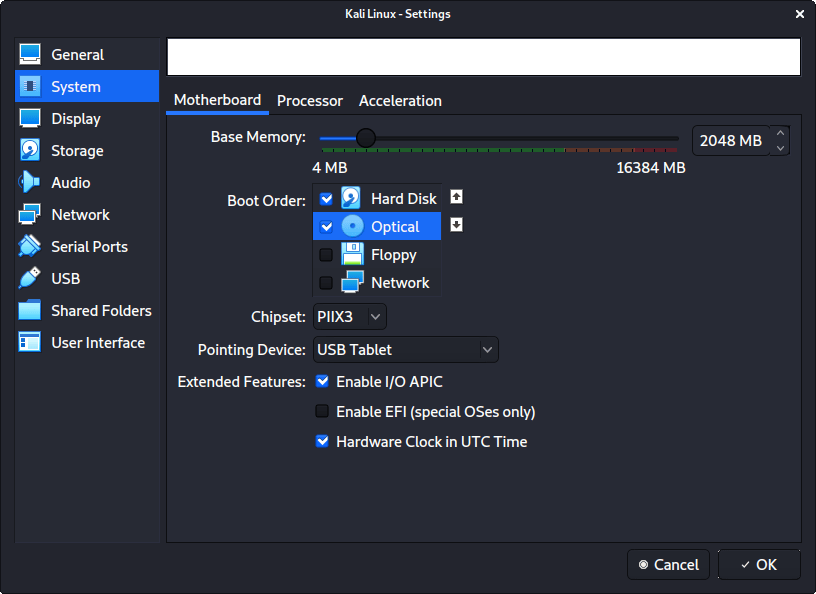
In “System” -> “Motherboard”, we change the “Boot Order” to make sure Hard Disk is top and Optical is the second. Everything else is disabled.
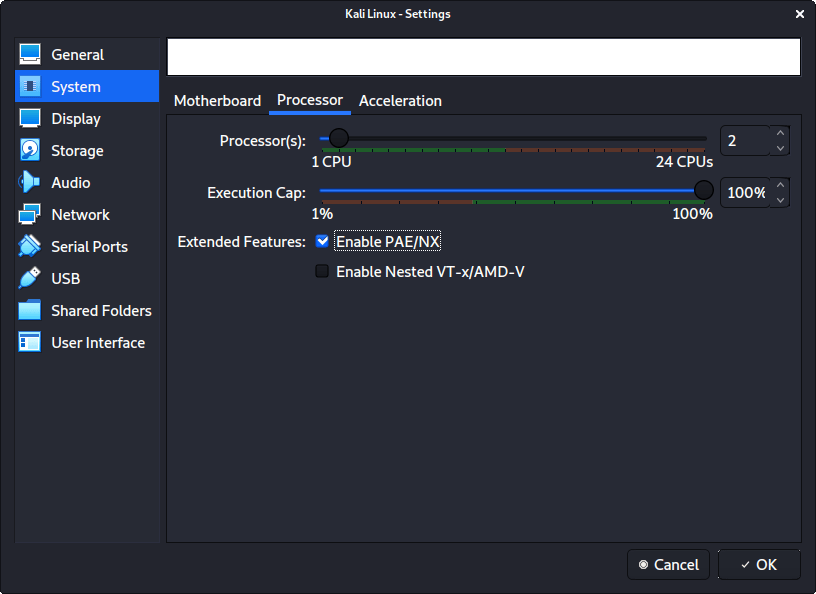
In “System” -> “Processor”, we increase the “Processor(s)” to be 2 .
At the same time, we also enable “Extended Features” for Enable PAE/NX .
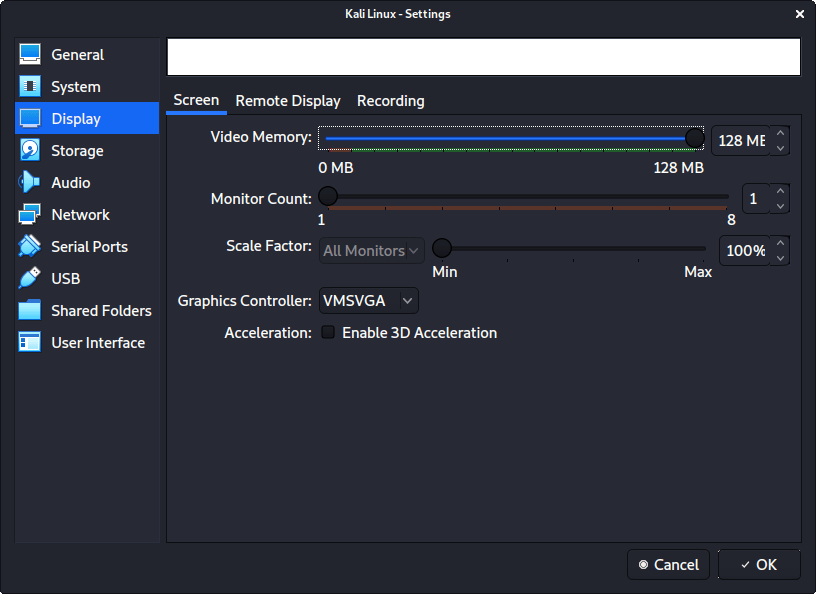
In “Display” -> “Screen”, we make sure to have “Video Memory” set to 128 MB
Another item to point out is to make sure that “Accelerated 3D graphics” is disabled, as people have reported that causes issues.
The final settings view looks like the following:
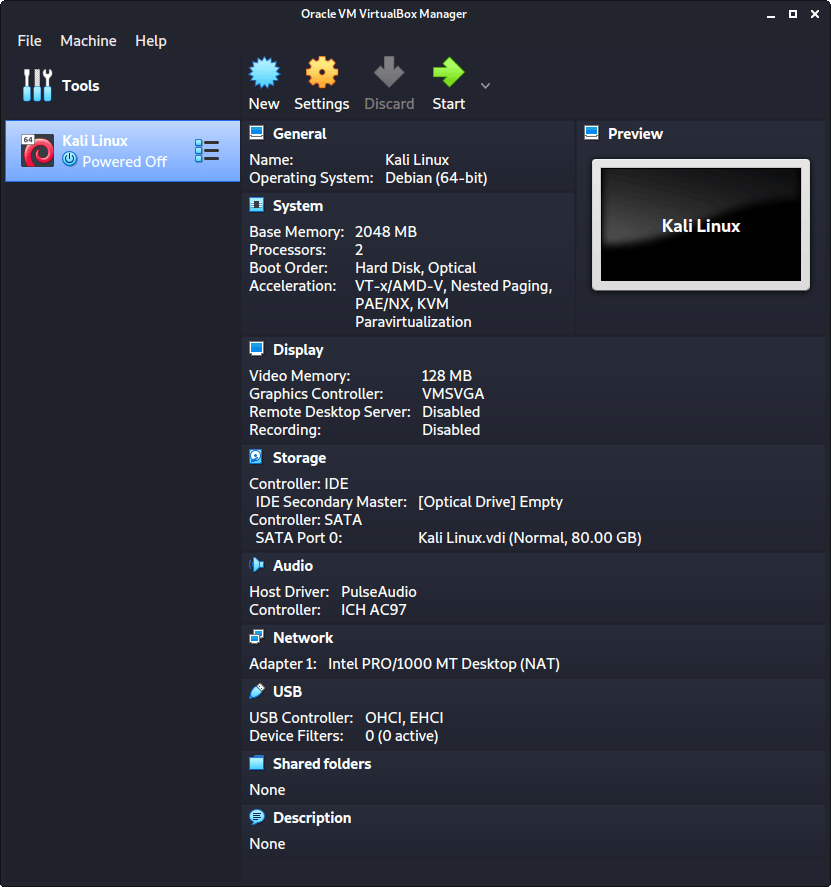
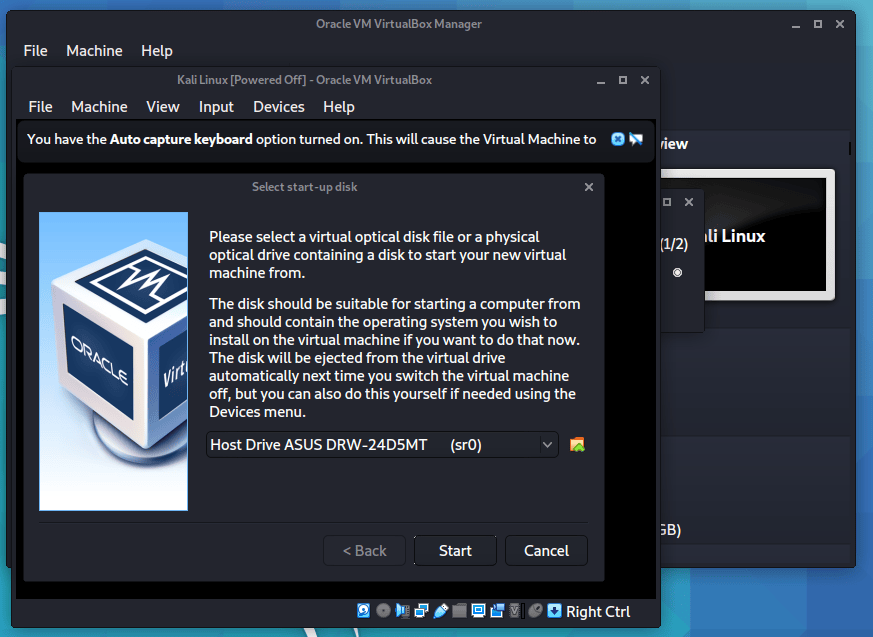
When we are ready to go, press “Start”.
The first time we run it, we will get a prompt saying do we wish to mount an image to use as a “start-up disk”. We want to use our Kali image, rather than a physical drive, so we select the icon to the side of the drop down.
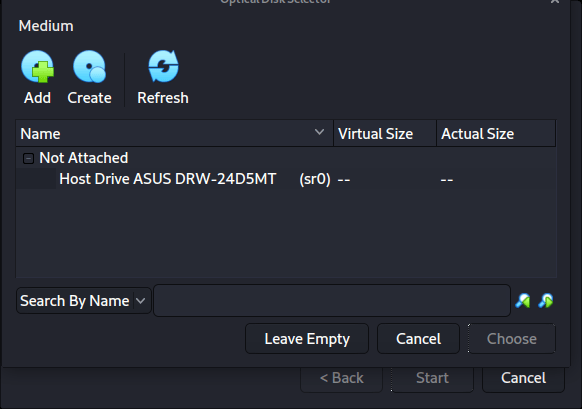
A new pop up will open, “Optical Disk Selector”. We will now press “Add”, then navigate to where our ISO is located.
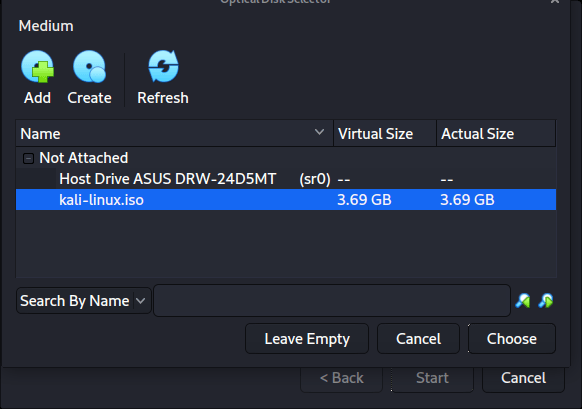
After pressing “Open”, we can see its been added, so we make sure its selected and press “Choose”.
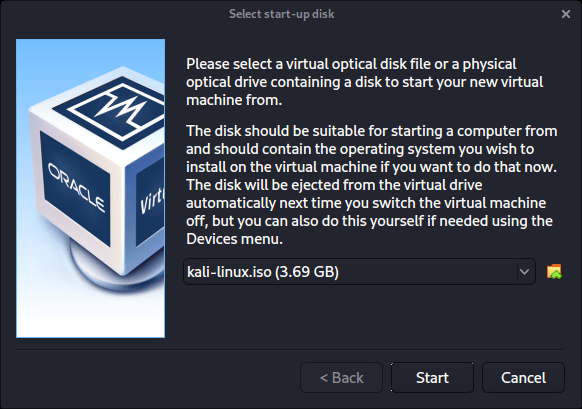
All that is left now to do is press “Start”.
After all this is done, we save, start up the VM, and then continue installing Kali Linux as we normally would for a bare metal install.
During Kali Linux setup process, the install wizard should detect if its inside a VM. If it is, should then automatically install any additional tools (such as virtualbox-guest-x11 ) to give a better user experience. If you want to manually re-install it, you can see our VirtualBox Guest Guide.
Updated on: 2021-Sep-27
Author: g0tmi1k
Источник
Проблема проблемы с kali linux на VirtualBox
MamkinHascker
Начал изучать кали, поставил её на виртуалку.
Устанавливал и настраивал по гайдам в инете, вроде всё правильно и работает, только столкнулся с проблемами:
- Кали видит сеть не как вайфай, а как кабель, не понимаю почему. От этого не работают сканы сети и всё что с этим связано.
- Не видит наличие блютуза на ноуте, hcitool scan пишет что «device is not available».
Есть подозрение на драйвера, я хз (сам чайник).
Какие вообще ограничения в работе с кали через виртуальную машину? В чем может быть проблема и как это исправить?
Заранее спасибо за помощь.
andr975
Начал изучать кали, поставил её на виртуалку.
Устанавливал и настраивал по гайдам в инете, вроде всё правильно и работает, только столкнулся с проблемами:
- Кали видит сеть не как вайфай, а как кабель, не понимаю почему. От этого не работают сканы сети и всё что с этим связано.
- Не видит наличие блютуза на ноуте, hcitool scan пишет что «device is not available».
Есть подозрение на драйвера, я хз (сам чайник).
Какие вообще ограничения в работе с кали через виртуальную машину? В чем может быть проблема и как это исправить?
Заранее спасибо за помощь.

ghostphisher
местный
[основная машина на которой у вас wifi модуль]=======типо вирутальный кабель сетевой мост======[виртуальная машина которая принимает виртуальный кабелб за физический]
Хотите отдельнонго инета по WiFi в виртуалке — ставим usb адаптер, в виртуалке отключаем Wired соеденение ( кабель ) и находим там точку доступа, к которой хотим подключиться. 1 и тот же адапетр не работает одновременно в виртуалке и основе
Виртуальная машина не будет видить ваши ВСТРОЕННЫЕ wifi блутуз видеокарты. Только визические подключенные через USB.
Если у Вас есть USB адаптер, который подключен к виртуальной машине и ей определяется , то в менеджере сетей можно найти точки доступа и к ним подключиться. БЕЗ ПРОВОДА. можно воспользоваться утилитой wicd. В итоге мы получаем свой инет на своей виртуалке, который не зависит от инета на основной машине.
andr975
ghostphisher
местный


открыть консоль ( терминал ) написать airmon-ng , сделать скрин и показать его тут.
Vm2di
New member
[основная машина на которой у вас wifi модуль]=======типо вирутальный кабель сетевой мост======[виртуальная машина которая принимает виртуальный кабелб за физический]
Хотите отдельнонго инета по WiFi в виртуалке — ставим usb адаптер, в виртуалке отключаем Wired соеденение ( кабель ) и находим там точку доступа, к которой хотим подключиться. 1 и тот же адапетр не работает одновременно в виртуалке и основе
Виртуальная машина не будет видить ваши ВСТРОЕННЫЕ wifi блутуз видеокарты. Только визические подключенные через USB.
Если у Вас есть USB адаптер, который подключен к виртуальной машине и ей определяется , то в менеджере сетей можно найти точки доступа и к ним подключиться. БЕЗ ПРОВОДА. можно воспользоваться утилитой wicd. В итоге мы получаем свой инет на своей виртуалке, который не зависит от инета на основной машине.
Источник


