- HackWare.ru
- Этичный хакинг и тестирование на проникновение, информационная безопасность
- Kali Linux в магазине приложений Windows (Microsoft Store)
- Как установить Kali Linux на WSL
- Как запустить Kali Linux на WSL
- Установка программ в Kali Linux на WSL
- Как запустить программу в Kali Linux на WSL
- Как восстановить Kali WSL
- Графический интерфейс Kali Linux на WSL
- Заключение
- Kali org windows app
- Installation Prerequisites
- Resize Windows Procedure
- Kali Linux Installation Procedure
- Post Installation
- Time/System Clock
- Kali Linux in the Windows App Store
- Getting Kali Linux Installed on WSL
- Updating Kali Linux on WSL
- Installing Penetration Testing tools on Kali
- Recovering from a failed Kali WSL instance
- Food for thought
HackWare.ru
Этичный хакинг и тестирование на проникновение, информационная безопасность
Kali Linux в магазине приложений Windows (Microsoft Store)
Теперь Kali Linux появилась в Microsoft Store. Работает на основе Windows Subsystem for Linux (WSL). Если вы поленились перейти по ссылке, то WSL – это такой Wine наоборот, позволяет нативно (без виртуального компьютера) запускать приложения Linux в ОС Microsoft. Из плюсов – улучшенная производительность (по сравнению с работой в виртуальной ОС). И много разных минусов: отсутствие поддержки сырых сокетов, оборудования, частичная поддержка графического интерфейса, не реализован ряд интерфейсов ядра и прочее.
Мне не особенно близка концепция WSL (в том виде, как это реализовано сейчас). Поэтому эта заметка будет небольшой: мы рассмотрим установку Kali Linux из магазина приложений Windows, запустим её, установим пару приложений, сделаем их пробный запуск, установим графический интерфейс и подключимся к нему. А для чего вам это всё нужно делать именно через WSL – вы уже придумывайте сами.
Как установить Kali Linux на WSL
1. WSL доступна на обновлённой Windows 10. Поэтому обновите ваш Windows, откройте окно PowerShell (Win+x) и выполните там команду

2. После перезагрузки, откройте Microsoft Store и найдите там приложение «Kali Linux». Или просто кликните эту ссылку, чтобы сразу перейдите туда. Установите приложение и наслаждайтесь Kali!
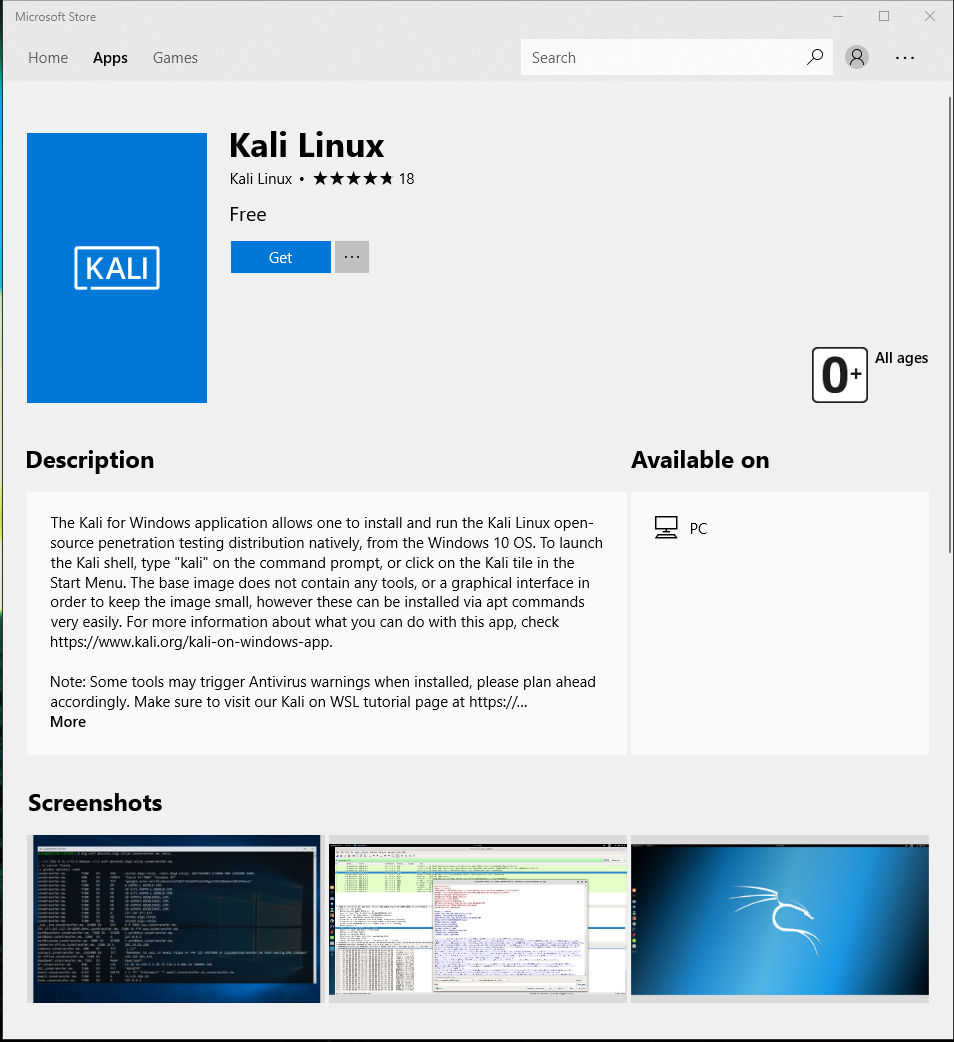
Для установки нажмите кнопку Get.
Как запустить Kali Linux на WSL
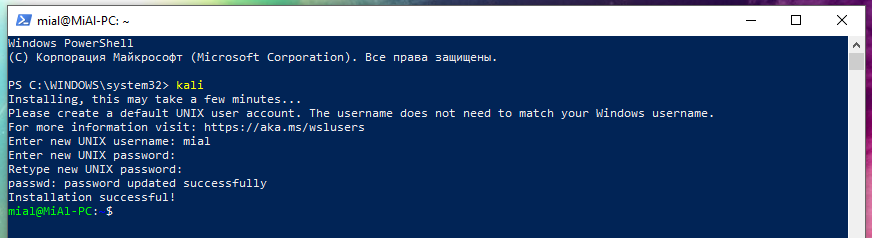
Чтобы «наслаждайтесь Kali» вам её нужно хотя бы запустить. Для этого опять откройте PowerShell и выполните команду
При первом запуске происходит инициализация – на это требуется некоторое время.
Затем нас просят создать дефолтный аккаунт UNIX. Он может никак не соотносится с вашим пользователем ОС Windows:
По умолчанию установлено минимальное количество пакетов. Поэтому вам нужно самостоятельно установить нужные вам программы.
Изменившаяся командная строка – это и есть ваша новая Kali Linux.
Установка программ в Kali Linux на WSL
Всё похоже на обычную работу в консоли. Начнём с обновления системы:
Установим WPScan и WhatWeb:
При установки некоторых программ, по понятным причинам, могут возникнуть проблемы с антивирусом. Вам нужно решать эти проблемы в индивидуальном порядке (возможно, добавить всю папку с Kali Linux — C:\Users\Alex\AppData\Local\Packages\KaliLinux.54290C8133FEE_ey8k8hqnwqnmg\ — в исключения антивируса).
Как запустить программу в Kali Linux на WSL
Если вы привыкли к меню Kali Linux, то вам придётся переучиваться запускать программы из консоли. Если вы и так их запускаете в консоли, то запуск программ ничем не отличается:
К примеру, обновим базу данных wpscan
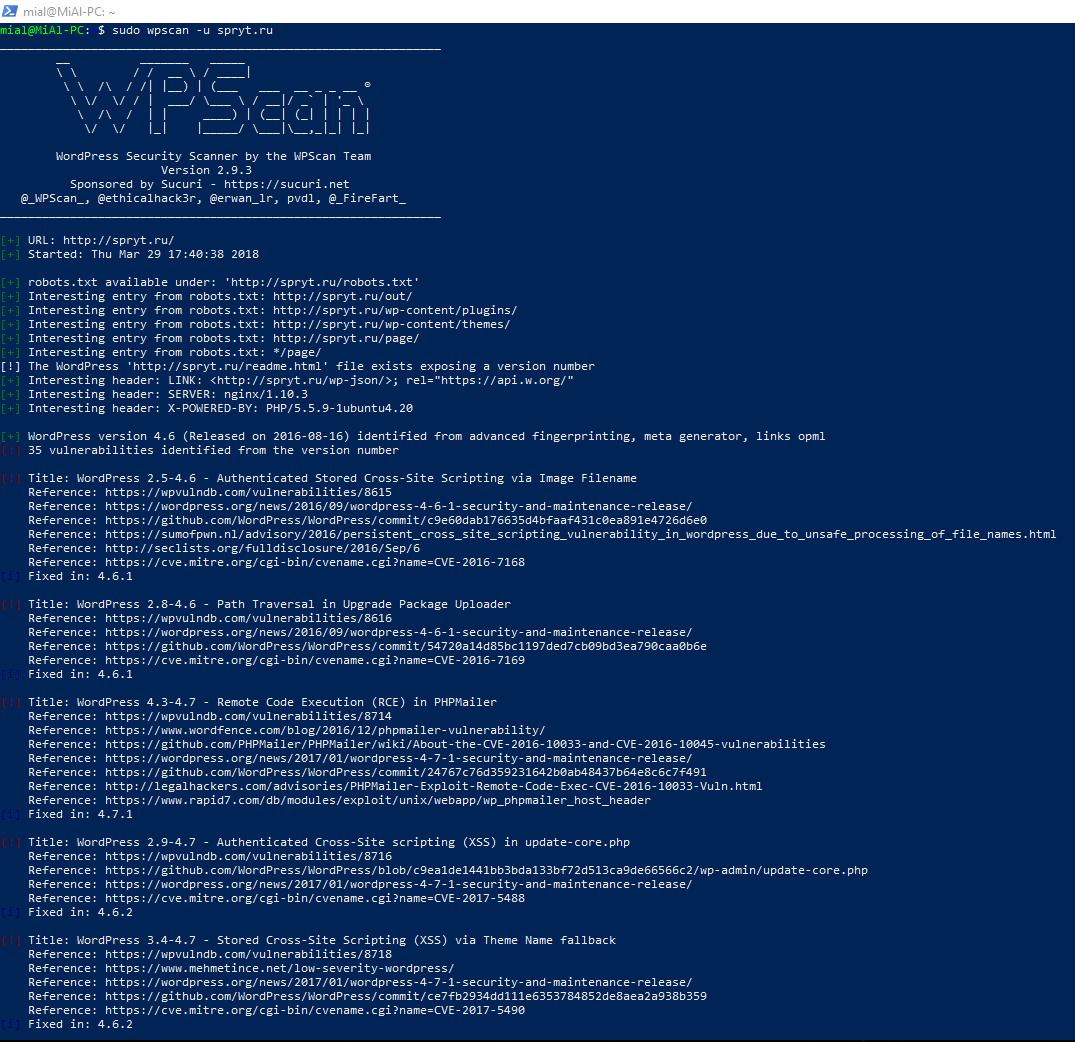
Сделаем проверку какого-нибудь сайта на WordPress:
Соберём некоторую информацию о сайте с помощью whatweb:

Как восстановить Kali WSL
Если вы испортили операционную систему (удалили необходимые для работы ОС файлы и т.п.), либо просто хотите начать с «чистого листа», то имеется возможность сбросить установку Kali Linux в WSL до исходного состояния.
С помощью Win+x откройте «Приложения и возможности», найдите Kali Linux:
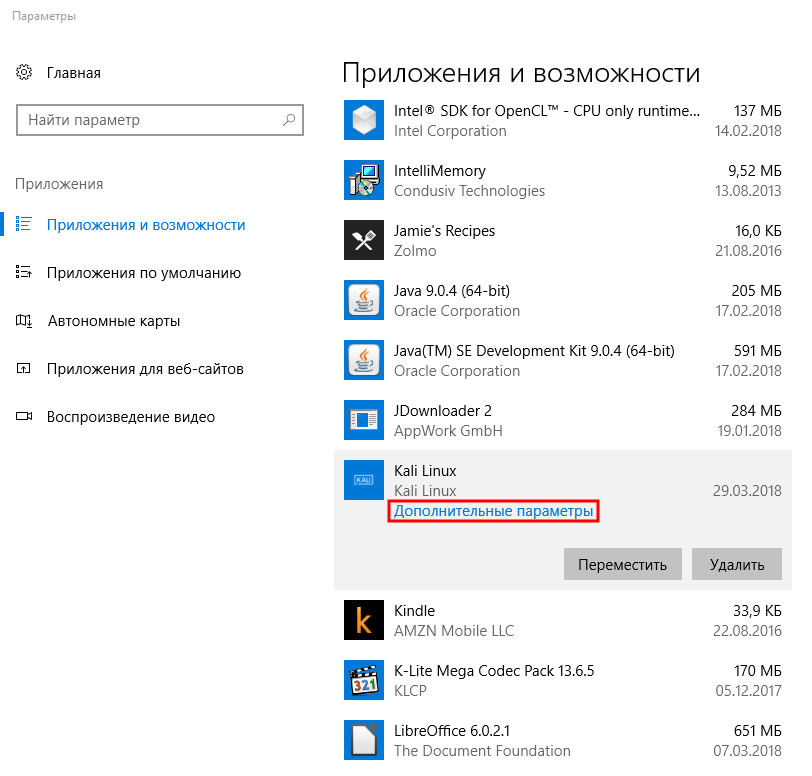
Нажмите «Дополнительные параметры», на новой странице нажмите кнопку «Сбросить»:
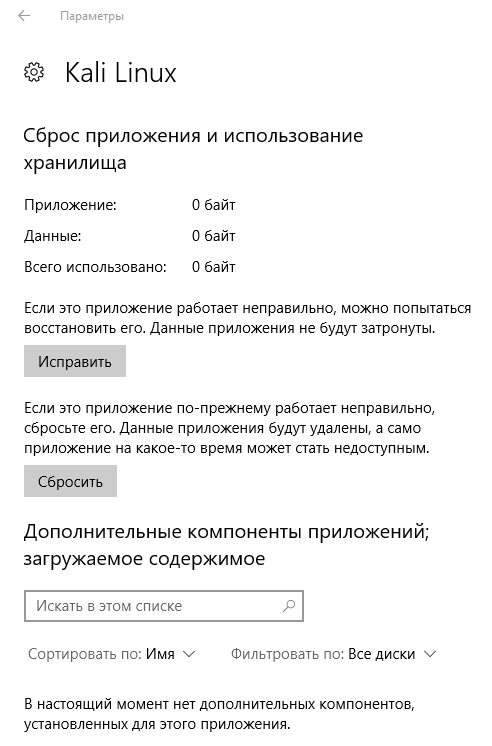
Система будет удалена и развёрнут новый экземпляр. Соответственно, все сделанные ранее изменения исчезнут.
Графический интерфейс Kali Linux на WSL
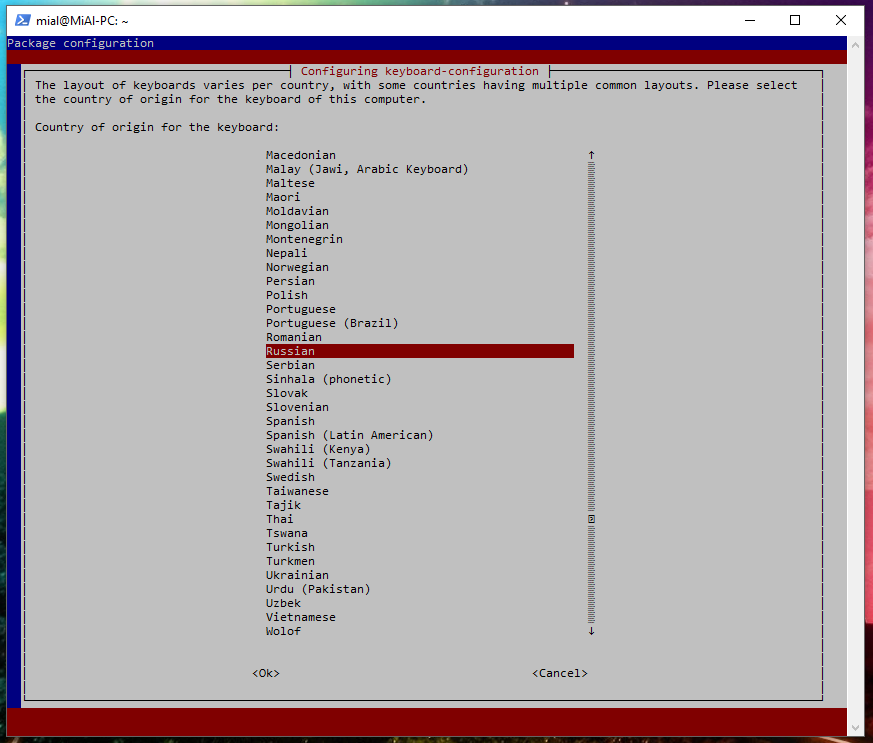
В процессе установки выберите язык раскладки клавиатуры и способ переключения раскладок (для перехода между элементами используйте клавишу TAB):
В конце появится сообщение, что XRDP настроена на прослушивание порта 3390, но сама служба не запущена.
Для запуска службы выполняем:
При успешном запуске будет выведено примерно следующее:
Теперь в Windows нажмите Win+x и выберите «Выполнить». В открывшемся окне введите:
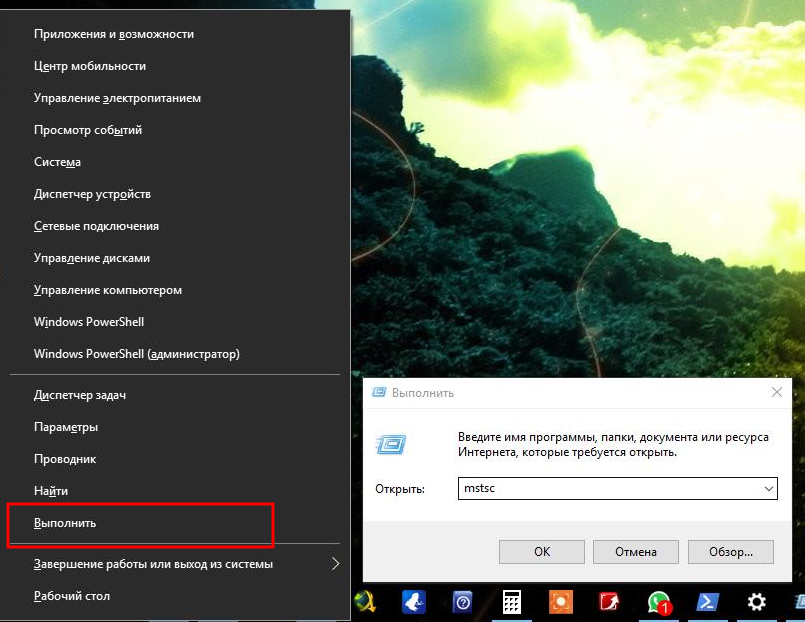
Откроется новое окно, там введите
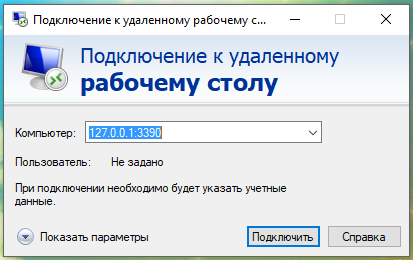
И нажмите кнопку «Подключить».
Будет выведено окно с сообщением:
Не удается проверить подлинность удаленного компьютера. Вы хотите установить подключение в любом случае?
Эта проблема может возникнуть, если на удаленном компьютере используется более ранняя версия Windows, чем Windows Vista, или не настроена поддержка проверки подлинности на сервере.
Обратитесь за помощью к администратору сети или владельцу удаленного компьютера.
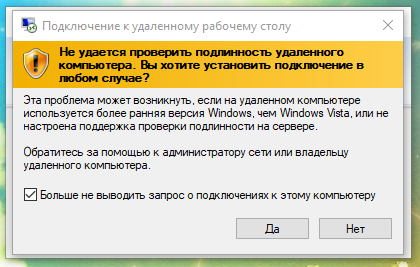
Поставьте галочку на пункте «Больше не выводить запрос о подключениях к этому компьютеру» и нажмите «Да».
Появится окно входа в систему, введите ваш логин и пароль от Kali Linux:

После входа появится запрос, выберите «Use default config»:
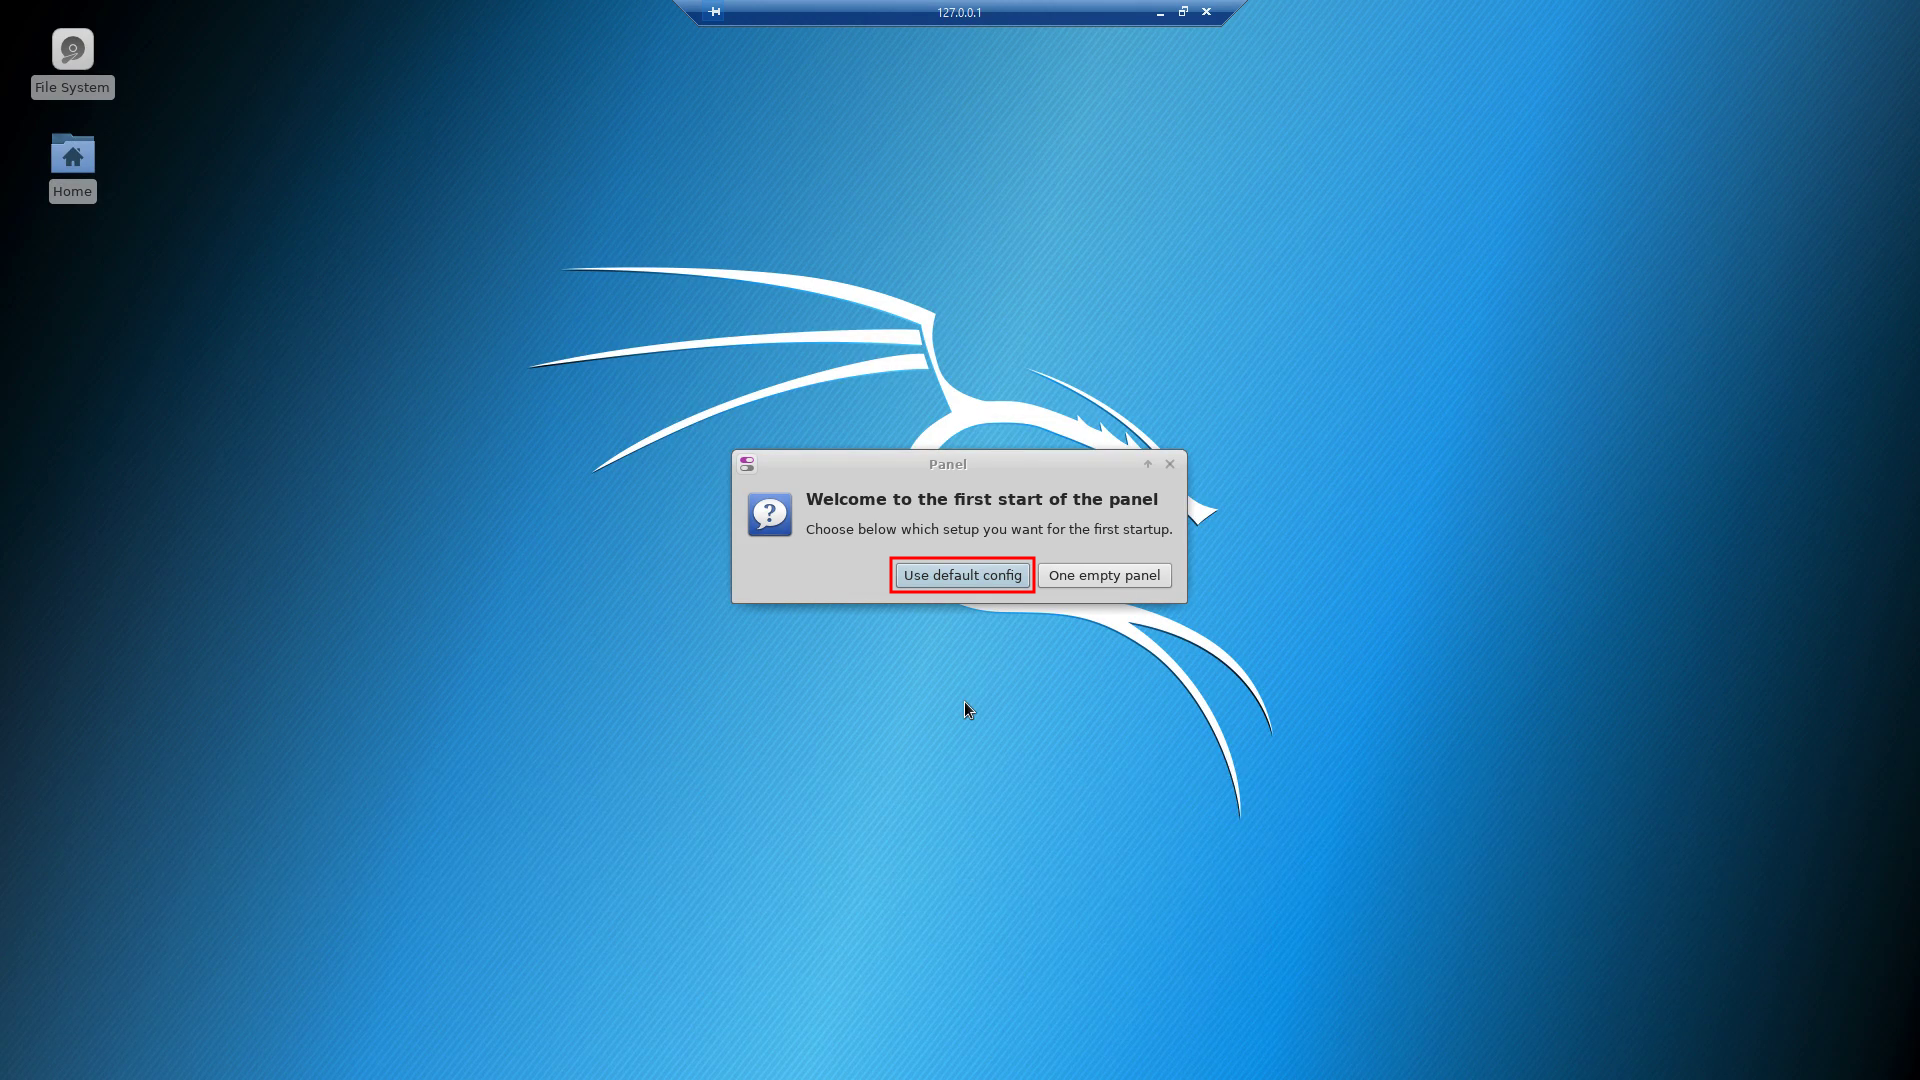
Используя графическое окружение рабочего стола, можно запускать программы с графическим интерфейсом (после их установки).
Для выхода явно завершите службу, для этого кликните на имя пользователя, нажмите «Log Out…»:
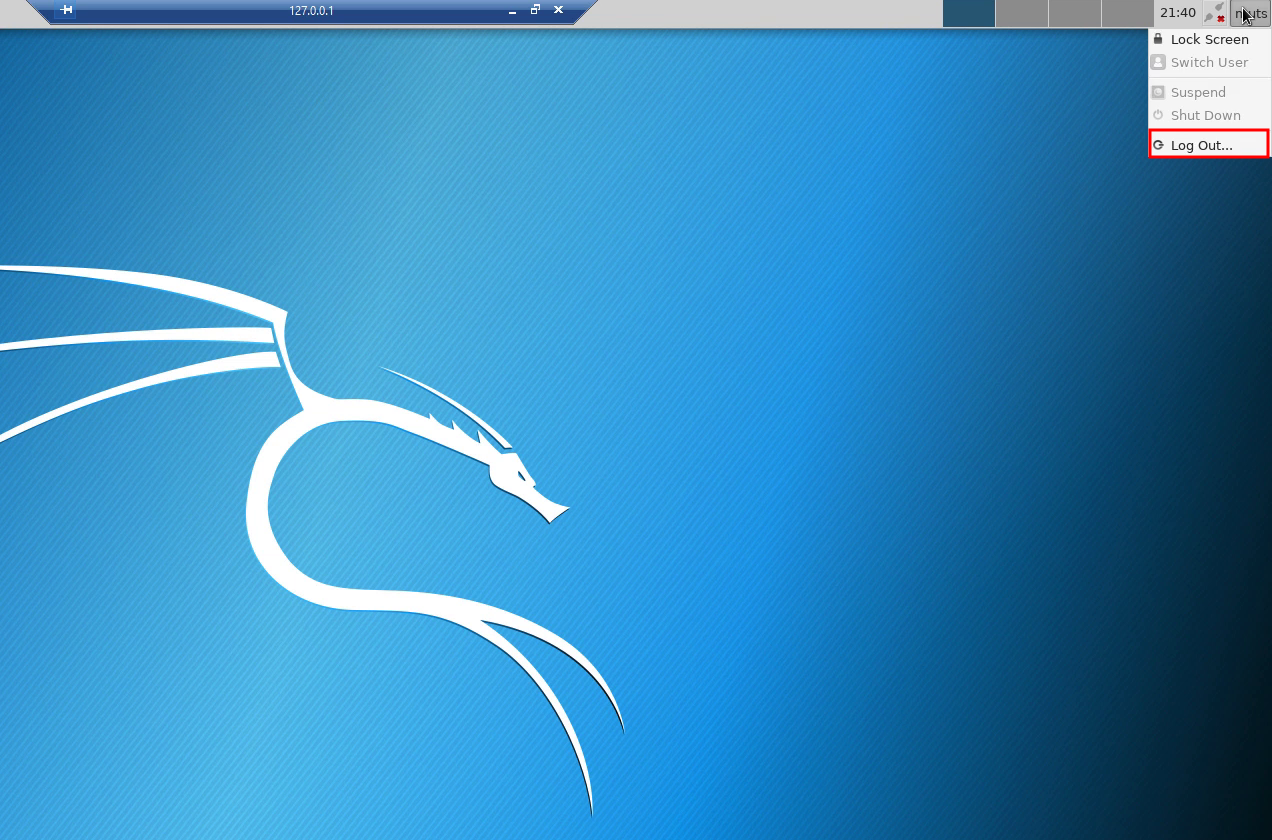
Затем снимите галочку с «Save session for future logins» и нажмите «Log Out»:


Заключение
К сожалению, из-за особенностей реализации архитектуры WSL, некоторые инструменты Kali Linux работать не будут. Но те, которые работают (различные сканеры сайтов, брут-форсеры, анализаторы файлов захвата сетевого трафика и другие), довольно удобно использовать прямо из командной строки Windows, без необходимости запускать целую виртуальную машину с Kali Linux, либо перезагружаться во вторую систему (если Kali не является вашей основной ОС).
Kali org windows app
Installing Kali Linux next to a Windows installation has its benefits. However, you need to exercise caution during the setup process. First, make sure that you’ve backed up any important data on your Windows installation. Since you’ll be modifying your hard drive, you’ll want to store this backup on external media. Once you’ve completed the backup, we recommend you peruse our Kali Linux Hard Disk install guide, which explains the normal procedure for a basic Kali Linux install.
In our example, we will be installing Kali Linux alongside an installation of Windows (10), which is currently taking up 100% of the disk space in our computer. We will start by resizing our current Windows partition to occupy less space and then proceed to install Kali Linux in the newly-created empty partition.
Installation Prerequisites
This guide will make the following assumptions:
- You have read our single boot Kali Linux install guide, as this has the same Installation Prerequisites (System requirements & setup assumptions).
- When downloading Kali Linux, pick the live image, rather than the installer option.
- A single disk to install to (rather than a dedicated disk per operating system).
We need to use a different image from the single boot Kali Linux install guide, as we need the live image. This is because we need to edit the disk structure without mounting any partitions (otherwise they would be in-use). After we have finished altering the disk layout, we can still install Kali Linux using the live image, but there will be a few differences such as:
Both of these can be addressed post installation, as it saves swapping to the installer image (as you will need either multiple CD/DVD/USBs or to re-image half way though).
This installation has the potential to go wrong very easily as it involves editing existing partitions. Be aware of what partitions you are modifying and where you are installing Kali Linux to.
Having a backup of your Linux files available is a good idea in the event something goes wrong.
Resize Windows Procedure
Before we can install Kali Linux, there needs to be room on the hard disk. By booting into a live Kali Linux session with your chosen installation medium, we can resize the partition to our desired size, as the disk will not be in use because Kali Linux will all be in memory.
To start resizing, make sure you insert your Kali Linux installation medium and power on the device. If needed, press any keyboard shortcuts for a “boot order menu” (depends on each manufacture) or boot into BIOS/UEFI and change the boot order to point to the installation medium first.
When the boot menu/options appears, you should see at least one new option. Depending on the manufacture, hardware, how the system is configured and install medium, you may see more options (e.g. Can you boot into non-UEFI?).
You may need to try a few different options in order to find success.
You may need to disable secure boot
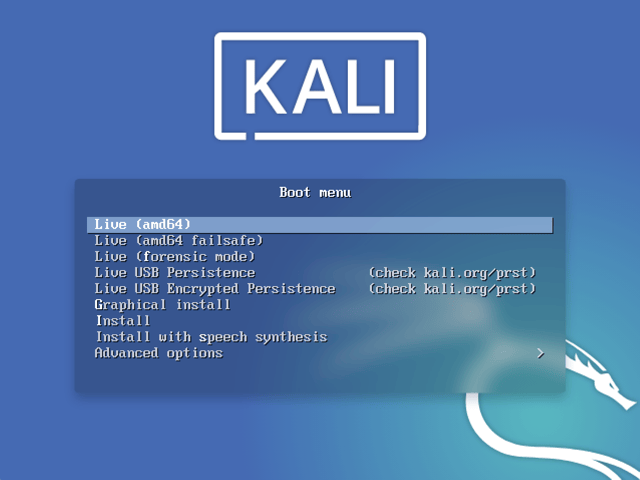
- You should be greeted with the Kali Linux boot screen. Select Live, and you should be booted into the Kali Linux default desktop.
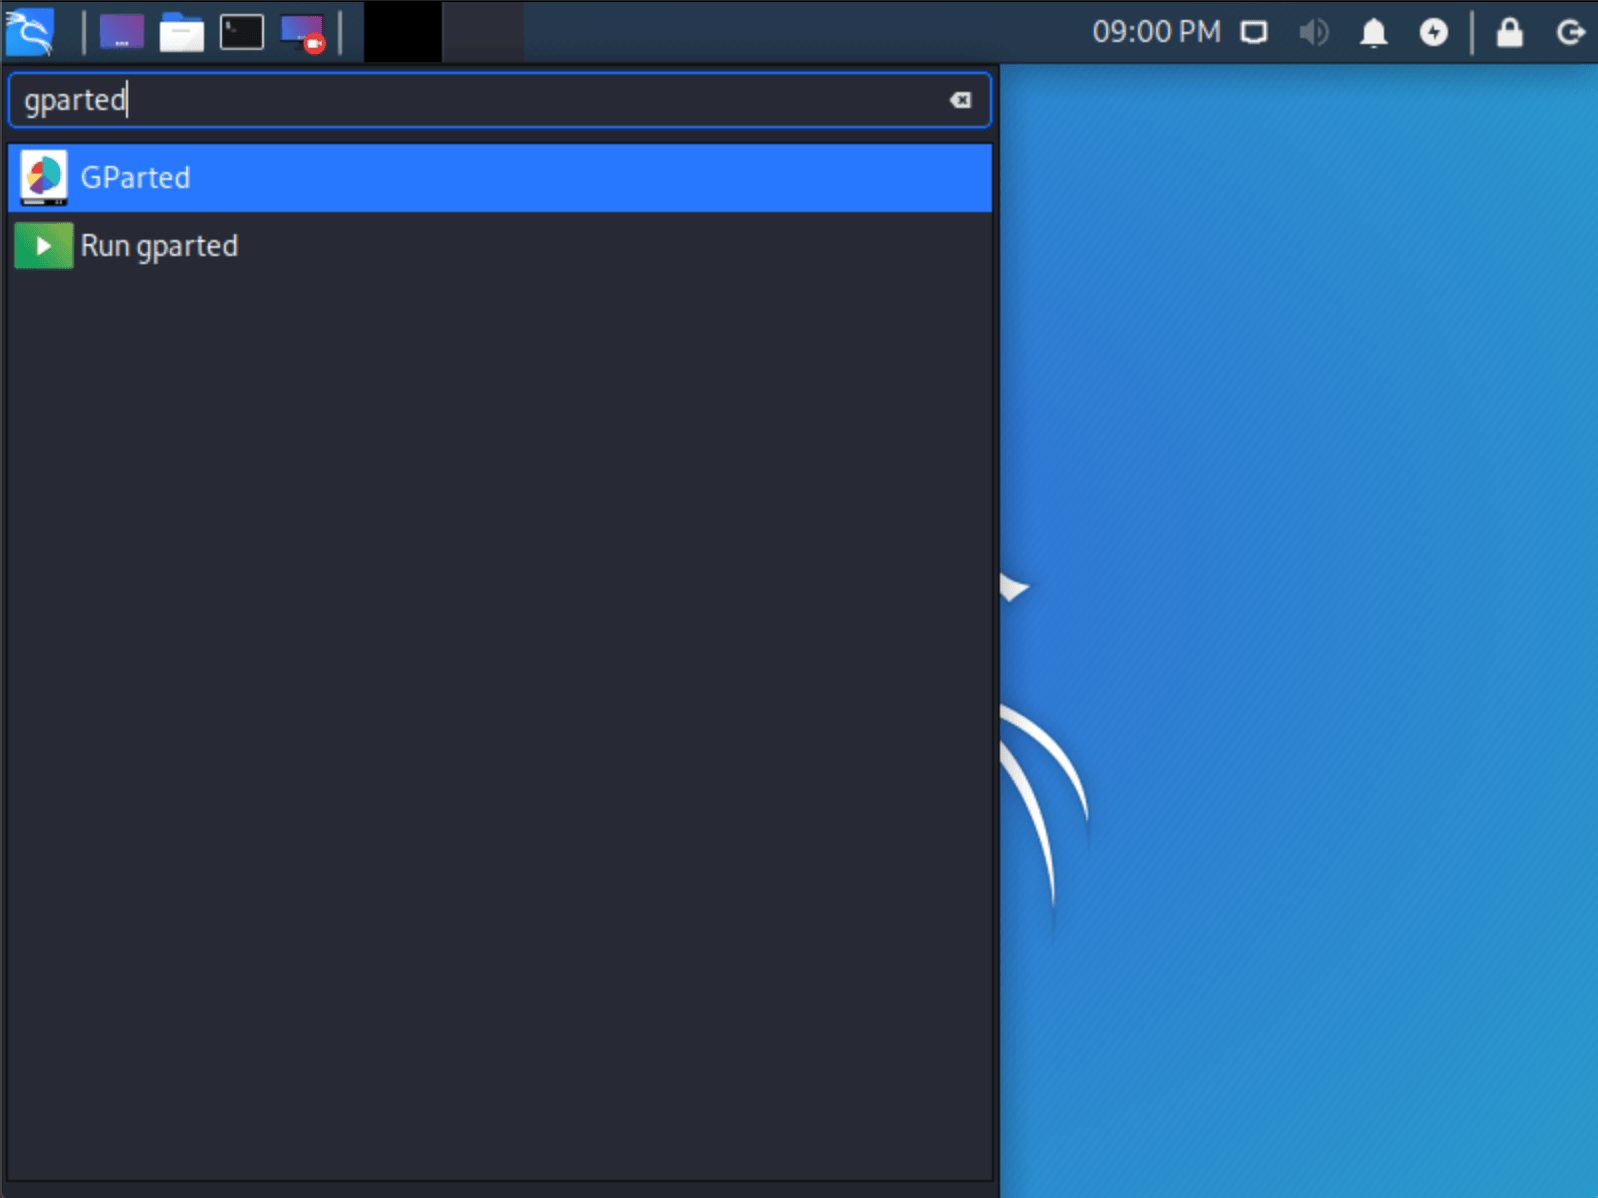
- Now launch GParted, which we’ll use to shrink the existing Windows partition to give us enough room to install Kali Linux in the free space.
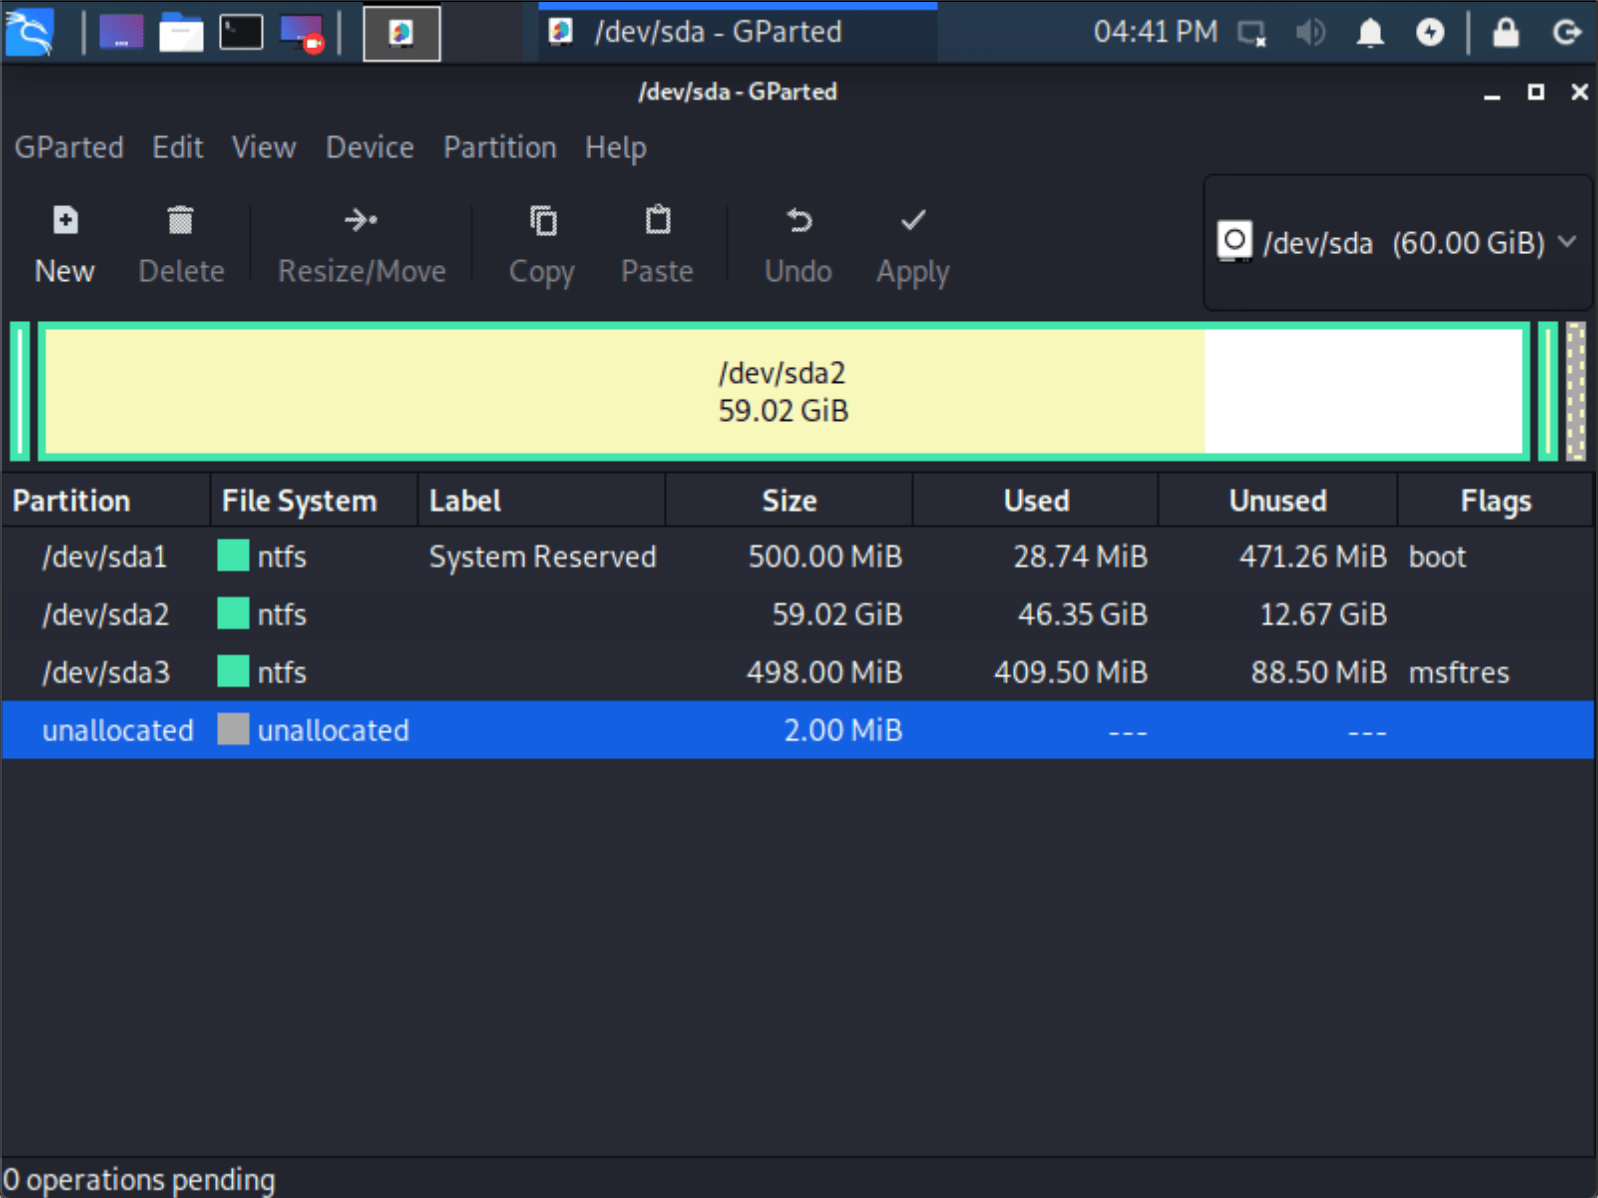
- Once GParted has opened, select your Windows partition ( /dev/sda2 ) & resize it leaving enough space (we recommend at least 20 GB) for the Kali Linux installation.
Depending on your setup, it is often the second option (the largest partition). In our example, there are three partitions:
- Window’s boot partition ( /dev/sda1 )
- Window’s main operating system itself ( /dev/sda2 )
- Window’s System Recovery partition ( /dev/sda3 )
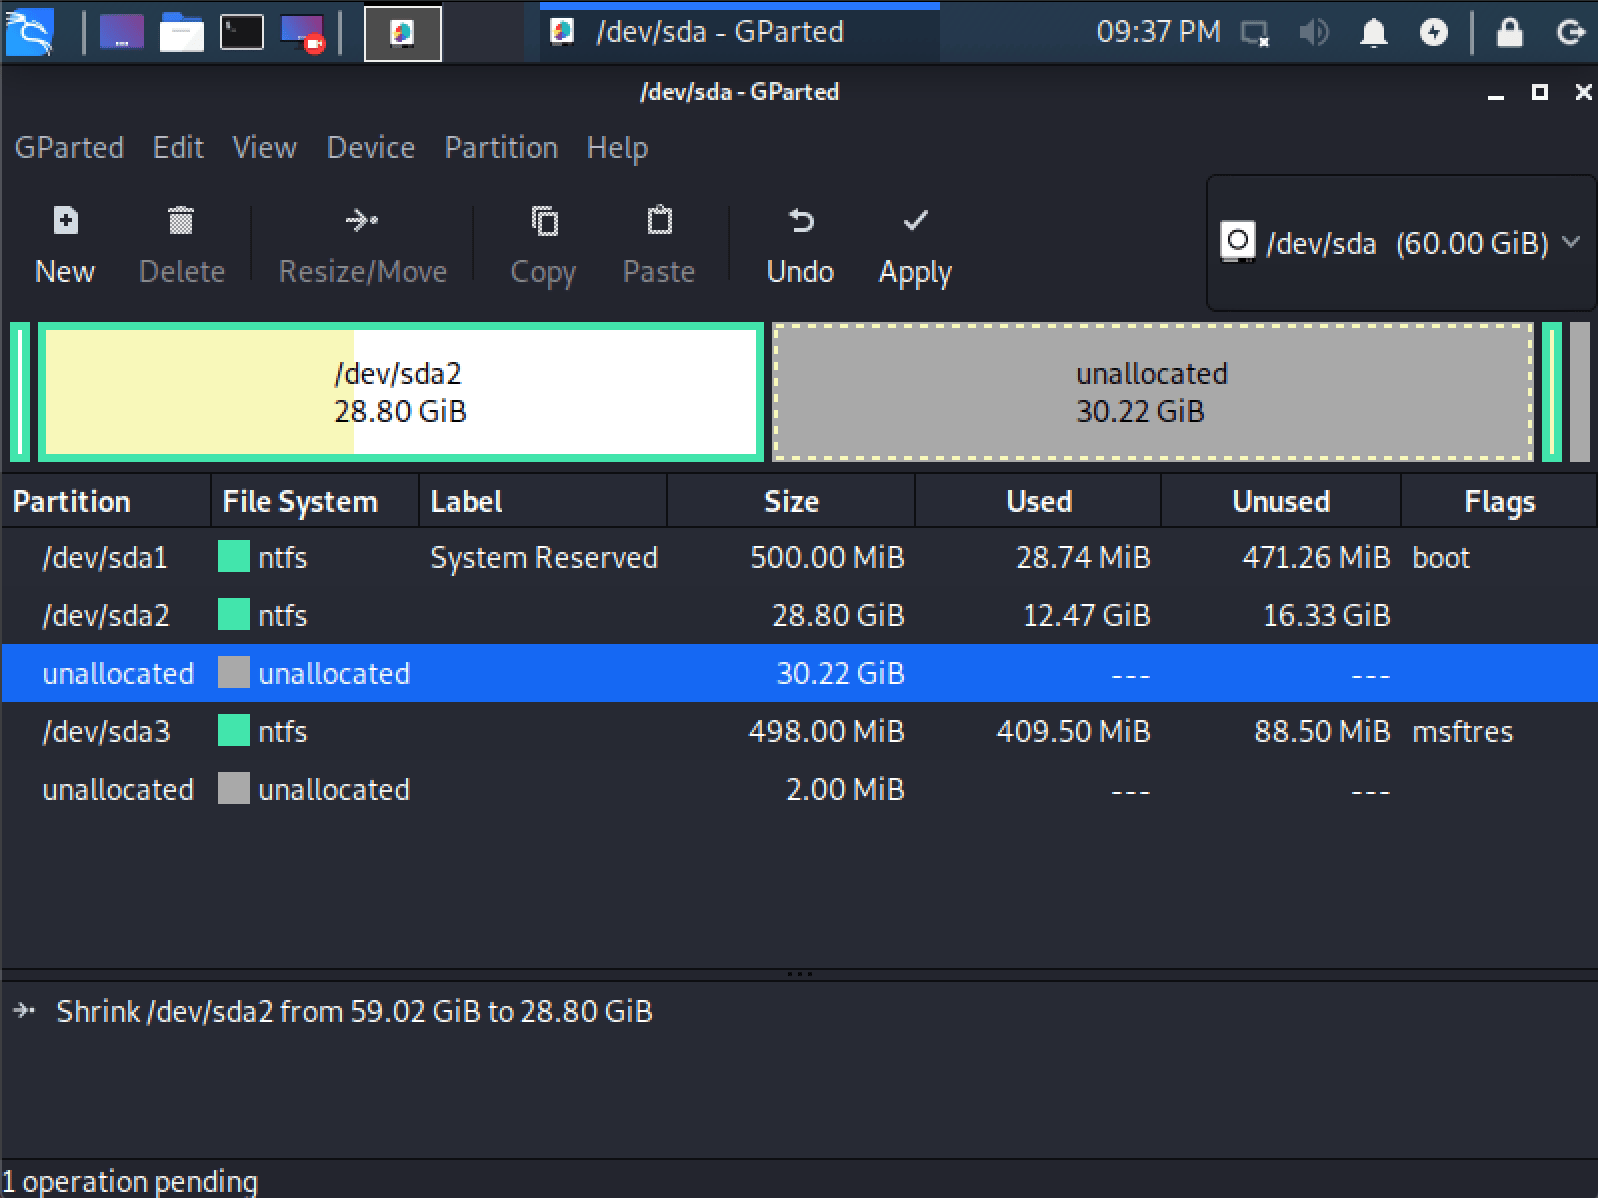
If you are moving past into any non-white in the partition then you are editing a section that is in use.
Only remove from the area of the partition that is not in use.
It is normal to leave the third partition ( /dev/sda3 ), and only shrink the actual install ( /dev/sda2 ).
If you wish to organize the partition to group all the Windows partitions together, placing the free space at the end, you may do so.
- Once you have resized your Windows partition, ensure you “Apply All Operations” on the hard disk. Exit gparted and reboot.
Kali Linux Installation Procedure
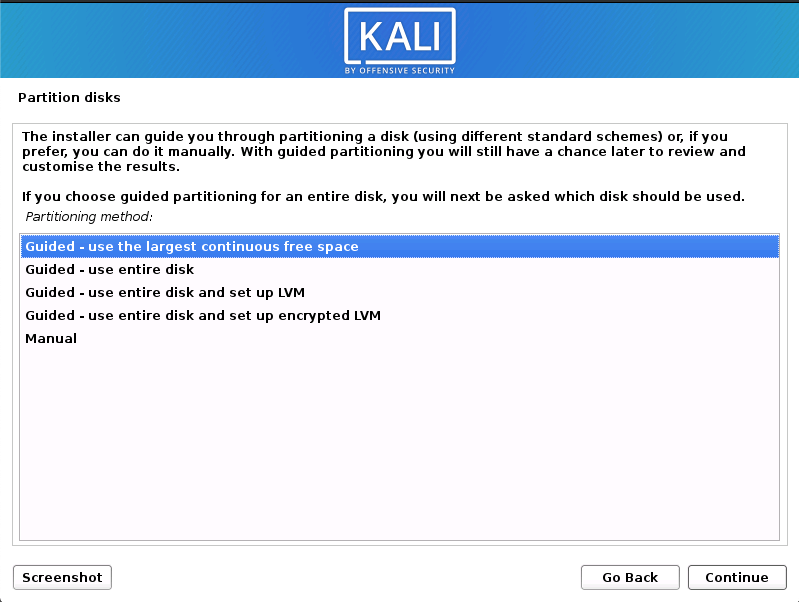
- The installation procedure from this point onwards is similar to a Kali Linux Hard Disk install, until the point of the partitioning. At this point, you need to select “Guided — use the largest continuous free space” (rather than “Guided — the entire disk”) which got created earlier with gparted.
- You can carry on following the single boot Kali Linux install guide, except you will not have the option to select desktop environment or metapackages as you are using the live image. Once the installation is done, reboot.
You should be greeted with a GRUB boot menu, which will allow you to boot either into Kali Linux or Windows.
Post Installation
Now that you’ve completed installing Kali Linux, it’s time to customize your system.
The General Use section has more information and you can also find tips on how to get the most out of Kali Linux in our User Forums.
Time/System Clock
One thing that may be worth knowing about is that occasionally the time will get changed between the Windows and the Linux system. To fix this, we can do the following:
To undo this we can simply do:
Updated on: 2021-Apr-03
Author: g0tmi1k
Kali Linux in the Windows App Store
No, really…this isn’t clickbait. For the past few weeks, we’ve been working with the Microsoft WSL team to get Kali Linux introduced into the Microsoft App Store as an official WSL distribution and today we’re happy to announce the availability of the “Kali Linux” Windows application. For Windows 10 users, this means you can simply enable WSL, search for Kali in the Windows store, and install it with a single click. This is especially exciting news for penetration testers and security professionals who have limited toolsets due to enterprise compliance standards.
While running Kali on Windows has a few drawbacks to running it natively (such as the lack of raw socket support), it does bring in some very interesting possibilities, such as extending your security toolkit to include a whole bunch of command line tools that are present in Kali. We will update our blog with more news and updates regarding the development of this app as it’s released.
We’d like to take this opportunity to thank the WSL team at Microsoft, and specifically @tara_msft and @benhillis for all the assistance and guidance with which this feat would not be possible. We hope you enjoy WSL’d Kali on Windows 10!
And now, a quick guide on getting Kali installed from the Microsoft App Store:
Getting Kali Linux Installed on WSL
Here’s a quick description of the setup and installation process. For an easier copy / paste operation, these are the basic steps taken:
1. Update your Windows 10 machine. Open an administrative PowerShell window and install the Windows Subsystem with this one-liner. A reboot will be required once finished.
2. Once rebooted, open the Windows App store and search for the “Kali Linux” application, or alternatively click here to go there directly. Install the app and enjoy Kali!
Updating Kali Linux on WSL
Updating Kali Linux on WSL is no different from any other instance of Kali:
Here’s a quick video of the process:
Installing Penetration Testing tools on Kali
Installing tools from the Kali Linux repository is usually done via apt commands. For example, to install the Metasploit Framework, you can simply:
Note: Some Kali tools are identified by anti-virus software as malware. One way to deal with this situation is to allow anti-virus exceptions on the directory in which the Kali chroot resides in. The following video walks you through this process:
Recovering from a failed Kali WSL instance
Sometimes, you can inadvertently kill your Kali WSL instance, due to an overzealous command, an unintentional action, or even due to Kali or WSL bugs. If this happens, here is a quick recovery guide to get back on top of things. Note: this process will wipe your Kali WSL chroot, and re-extract a new copy. Any changes made to the filesystem will be gone, and reset to default.
Food for thought
The availability of the Kali Linux platform and toolset on Windows 10 brings with it many exciting possibilities which we haven’t even begun to grasp — here’s one example that got us scratching our heads. While not officially supported by WSL yet, we’ve tested running a desktop manager such as XFCE on WSL’d Kali…and it seems to work quite well:


