- Обзор Kali Linux 2021.2
- Установка
- ▍ Обычное железо и Live boot
- ▍ Виртуальные машины
- ▍ Мобильные средства
- ▍ Контейнеры
- ▍ Облако
- Особенности и характеристики Kali 2021.2
- ▍Kaboxer
- ▍ Kali-Tweaks v1.0
- ▍ Bleeding-Edge
- ▍ Привилегированные порты
- ▍ Kali NetHunter
- ▍ Новые приложения
- ▍ Графика и рабочий экран
- ▍ Raspberry Pi
- ▍ Разное
- Keepnote kali linux install
- System Requirements
- Installation Prerequisites
- Preparing for the Installation
- Kali Linux Installation Procedure
- Language
- Network
- User Accounts
- Clock
- Encrypted LVM
- Proxy Information
- Metapackages
- Boot Information
- Reboot
- Post Installation
Обзор Kali Linux 2021.2

В начале июня состоялся релиз дистрибутива для цифровой криминалистики и тестирования систем безопасности Kali Linux 2021.2. Эта операционная система является клоном Debian, используя репозиторий Testing с наиболее свежими пакетами. Новые iso образы становятся доступными для загрузки каждые три месяца, предыдущим релизом был 2021.1, а следующим будет 2021.3. Собственные наработки, созданные в рамках проекта, выложены на Гитлабе.
Kali Linux вобрал в себя солидный опыт разработки операционных систем для проверки возможностей несанкционированного доступа к ресурсам ИТ. Начало было положено в августе 2004-го с выходом WhiteHat Knoppix. Затем было несколько выпусков WHAX и BackTrack, под капотом SlackWare Live CD. С марта 2013 г․ под руководством Мати Ахарони и Девона Кернса из Offensive Security выходит Kali Linux v1.0, уже на базе Debian.
Установка
Kali Linux предоставляет множество вариантов для установки, начиная простой рабочей станцией и заканчивая мобильными и встроенными устройствами. Рабочим столом по-умолчанию является Xfce, однако можно выбрать и другие DE:
▍ Обычное железо и Live boot
Имеются iso образы и торренты для платформ:
- AMD64 ;
- Intel 386 ;
- ARM64 iso образ для чипов Apple M1 .
Все образы доступны в трех вариантах:
- weekly, самые свежие и в то же время нестабильные пакеты;
- installer, стандартный оффлайновый набор ПО;
- netinstaller, все пакеты скачиваются во время установки. Не доступен для установки с Live USB;
▍ Виртуальные машины
Можно скачать 64-битные образы и торренты для VMWare и Virtualbox . Для беглого ознакомления с возможностями Kali Linux это пожалуй самый оптимальный вариант. Образ для VMWare имеет размер в 2.6 GiB, для Virtualbox — чуть побольше, 3.8 GiB. Кроме того доступны образы VM для Vagrant.
На данный момент имеются образы для следующих устройств на чипах ARM:
- 1 (Original);
- 2, 3, 4 и 400 (32-бит);
- 2 (v1.2), 3, 4 и 400 (64-бит);
- Zero;
- Zero W.
❒ Pine64
▍ Мобильные средства
Проект Kali NetHunter — это первая платформа тестирование на проникновение с открытым исходным кодом для устройств под управлением ОС Android. В наборе имеется множество уникальных функций, недоступных на других аппаратных платформах. Специфика NetHunter состоит в том, что с его помощью можно осуществлять проверки безопасности и попытки проникновения на мобильных устройствах. Примеры использования могут включать в себя следующие сценарии:
- Точка доступа Mana Evil в один клик.
- BadUSB атака типа MITM через эмуляцию работы USB устройства. Подключив NetHunter к компьютеру жертвы, тот перенаправляет сетевой трафик через себя.
- Взлом Bluetooth;
Рис. 1 Kali NetHunter.
Кали NetHunter может быть установлен на эти мобильные устройства:
❒ Gemini PDA (Nougat 5.x)
❒ Nexus, все модели начиная с 5-й модели и заканчивая 10-й (Lollipop)
- OnePlus One (11);
- OnePlus 2 (Nougat 5.x);
- OnePlus 2 (Pie 9.0);
- OnePlus (AnyKernel Pie 9.0);
- OnePlus (AnyKernel 10);
- OnePlus (OxygenOS 10);
- OnePlus 7;
- OnePlus 7 Pro (OxygenOS 10);
- OnePlus Nord (11).
❒ Samsung
- Galaxy Tab S4 (LTE)(Oreo 8.0);
- Galaxy Tab S4 (WiFi)(Oreo 8.0).
❒ Sony XPeria Z1
- Davinci Miui (10);
- Xiaomi Mi A3 (LineageOS 18.1).
❒ ZTE
▍ Контейнеры
Есть сборки для Docker и LXC/LXD, установка производится штатными средствами контейнерного ПО.
Kali-docker образы доступны для платформ arm64 , armhf и amd64 .
▍ Облако
Образы Kali Cloud можно по-быстрому развернуть в инфраструктуре различных облачных провайдеров:
Особенности и характеристики Kali 2021.2
Главная особенность Kali Linux — наличие полноценной подборки специальных приложений для проверки взлома и проникновения. Их общее количество превышает 600 и они разнесены по следующим категориям:
- Сбор информации: nmap и его разновидности, goofile, p0f и пр․;
- Анализ уязвимости: cisco-torch, BED, DotDotPwn и пр․;
- Атаки на беспроводное соединение: Aircrack-ng, Kismet, Pyrit и пр․;
- Веб-приложения: Blind Elephant, hURL, Nikto, Paros, и пр․;
- Инструментарий эксплуатации: commix, routersploit, Social-Engineer Toolkit и пр․;
- Стресс-тесты: DHCPig, t50, Reaver и пр․;
- Аналитический инструментарий: ddrescue, pdf-parser, iPhone-Backup-Analyzer и пр․;
- Охота на пароль: Hashcat, THC-Hydra, John the Ripper, wordlists и пр․;
- Прослушивание и подделка: _hexinject, mitmproxy, Wireshark и пр․;
- Обратная разработка: apktool, javasnoop, Valgrind и пр․;
- Поддержание доступа: dns2tcp, HTTPTunnel, pwnat и пр․;
- Аппаратный взлом: Arduino, dex2jar, smali и пр․;
- Средства для отчетности: cherrytree, dos2unix, Metagoofil и пр.
Одно из новых впечатлений, еще на этапе установки ОС, это замена супер-пользователя root с паролем tor на kali / kali. Объективности ради надо заметить, что изменение произошло в предыдущем релизе Kali. Это не так просто, как кажется, так как многие серверные приложения крепко привязаны к привилегиям root-а. Некоторые операционные системы давно уже отказались от root, в частности Ubuntu Linux обесточила супер пользователя с незапамятных времен.
▍Kaboxer
Представлен Kaboxer 1.0, (от Kali Application Boxeri), с помощью которого громоздкие приложения можно упаковать в контейнер и далее интегрировать с ОС и штатным менеджером пакетов. Вся прелесть в том, что для пользователя всё прозрачно, программа скомпонованная таким образом устанавливается точно так же из aptitude install package-name . На данный момент с помощью Kaboxer распространяются лишь эти приложения:
- Covenant — клиент-серверная сетевая служба;
- Firefox Developer Edition — тяжелое графическое приложение для веб-разработчиков;
- Zenmap — приложение использует Python 2.
▍ Kali-Tweaks v1.0
Анонсирована утилита Kali-Tweaks в помощь пользователям дистрибутива для легкой и корректной настройки операционной системы под свои нужды. Это вполне согласуется с философией Kali Linux — полностью отдавать себе отчет в своих действиях. С помощью Kali-Tweaks можно задать конфигурацию для компонент:
Рис 2. Kali-Tweaks.
- мета-пакеты;
- сетевые репозитории, это позволяет добавить, или удалить установку новейших и экспериментальных пакетов из древа;
- командная строка и консоль, например выбрать между Bash и Zsh;
- виртуализация.
▍ Bleeding-Edge
Ветка репозитория Bleeding Edge существует с марта 2013 г. В дословном переводе это означает кровоточащий край, смысл термина в обозначении самого острого края (острие науки передовой край), отдаленной границы, там где опасно. Соответственно, пакеты из этой ветки никак нельзя назвать стабильными. В текущем выпуске Kali Linux полностью переработан бэкенд репозитория.
Рис. 3 В kali-tweaks можно подключить репозиторий bleeding-edge.
▍ Привилегированные порты
В Unix/Linux системах по умолчанию только root имеет доступ на открытие TCP/IP портов в интервале 1-1024, их еще называют привилегированными. Можно по-разному обходить это ограничение, например перенаправлять привилегированный порт на обычный.
Но этот способ плохо масштабируем и может привести к путанице. Благо, теперь не надо перебрасывать порты, так как обычный пользователь может запускать приложения, которые открывают сокет на привилегированных TCP/IP портах. Это стало возможным благодаря специальному патчу на ядро Linux, без него функционал не будет доступен.
▍ Kali NetHunter
В новой версии были такие обновления:
- поддержка Android 11;
- улучшение в работе Magisk root;
- повышена совместимость благодаря динамическим партициям;
- улучшения в модуле Bluetooth;
- включены патчи rtl88xxau для более старых версий ядра.
▍ Новые приложения
Вот список новинок текущего релиза:
- CloudBrute — Разузнать об инфраструктуре компании, найти файлы и приложения в облачной среде.
- Dirsearch — Обнаружить файлы и директории на веб-серверах.
- Feroxbuster — Простое, быстрое, рекурсивное обнаружение содержимого интернет ресурса.
- Ghidra — Платформа обратной разработки.
- Pacu — Платформа для эксплойтов AWS.
- Peirates — Проникновение в среду Kubernetes.
- Quark-Engine — Рейтинговая система оценки вредоносных программ для Android.
- VSCode a.k.a. Visual Studio Code Open Source, редактор кода с открытыми исходниками.
▍ Графика и рабочий экран
В терминале появилось возможность быстрого переключения по горячей клавише Ctrl+p между однострочным и двустрочным приглашением PS1.
Рис 4. Переключение режимов PS1 терминала Xfce.
Переработана панель быстрого запуска Xfce, из нее убрали экранный рекордер kazam, добавив текстовый редактор и веб-браузер. Появились новые обои рабочего стола и экрана входа в DE. Для приложений терминала Xfce и файлового менеджера Thunar появилась опция запуска с правами root.
Рис 5. Root терминал Xfce.
▍ Raspberry Pi
- kalipi-config — своего рода raspi-config на стероидах для облегчения начальной настройки Kali Linux на Raspberry Pi.
- kalipi-tft-config — для облегчения начальной настройки TFT дисплеев на Rapberry Pi.
- Заявлено повышение производительности на 1500%.
- Ядро Linux обновилось до версии 5.4.83.
- На Raspberry Pi 4 и Raspberry Pi 400 полноценно заработал Bluetooth.
- Время первой загрузки сократилось с 20 до 15 с.
▍ Разное
Помимо этого были и другие изменения и исправления в разных местах. Устранены дефекты в приложении терминала и pkexec. Помимо этого:
- Wireshark теперь могут запускать и непривилегированные пользователи;
- новый Win-Kex v2.10 теперь поддерживает многоэкранный режим;
- пакет Parallels Tools вышел из Technical Preview для устройств на чипах Apple M1.
Источник
Keepnote kali linux install
Installing Kali Linux (single boot) on your computer is an easy process. This guide will cover the basic install (which can be done on bare metal or guest VM), with the option of encrypting the partition. At times, you may have sensitive data you would prefer to encrypt using Full Disk Encryption (FDE). During the setup process you can initiate an LVM encrypted install on either Hard Disk or USB drives.
First, you’ll need compatible computer hardware. Kali Linux is supported on amd64 (x86_64/64-Bit) and i386 (x86/32-Bit) platforms. Where possible, we would recommend using the amd64 images. The hardware requirements are minimal as listed in the section below, although better hardware will naturally provide better performance. You should be able to use Kali Linux on newer hardware with UEFI and older systems with BIOS.
Our i386 images, by default use a PAE kernel, so you can run them on systems with over 4 GB of RAM.
In our example, we will be installing Kali Linux in a fresh guest VM, without any existing operating systems pre-installed. We will explain other possible scenarios throughout the guide.
System Requirements
The installation requirements for Kali Linux will vary depending on what you would like to install and your setup. For system requirements:
- On the low end, you can set up Kali Linux as a basic Secure Shell (SSH) server with no desktop, using as little as 128 MB of RAM (512 MB recommended) and 2 GB of disk space.
- On the higher end, if you opt to install the default Xfce4 desktop and the kali-linux-default metapackage, you should really aim for at least 2 GB of RAM and 20 GB of disk space.
- When using resource-intensive applications, such as Burp Suite, they recommend at least 8 GB of RAM(and even more if it large web application!) or using simultaneous programs at the same time.
Installation Prerequisites
This guide will make also the following assumptions when installing Kali Linux:
- Using the amd64 installer image.
- CD/DVD drive / USB boot support.
- Single disk to install to.
- Connected to a network (with DHCP & DNS enabled) which has outbound Internet access.
We will be wiping any existing data on the hard disk, so please backup any important information on the device to an external media.
Preparing for the Installation
Download Kali Linux (We recommend the image marked Installer).
Burn The Kali Linux ISO to DVD or image Kali Linux Live to USB drive. (If you cannot, check out the Kali Linux Network Install).
Backup any important information on the device to an external media.
Ensure that your computer is set to boot from CD/DVD/USB in your BIOS/UEFI.
Kali Linux Installation Procedure
- To start your installation, boot with your chosen installation medium. You should be greeted with the Kali Linux Boot screen. Choose either Graphical install or Install (Text-Mode). In this example, we chose the Graphical install.
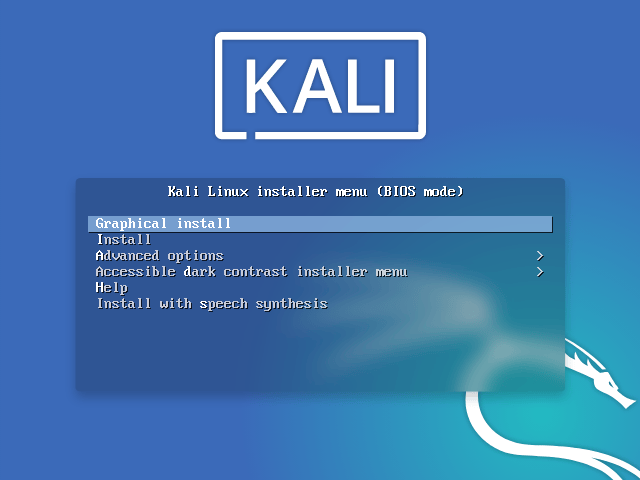
If you’re using the live image instead, you will see another mode, Live, which is also the default boot option. 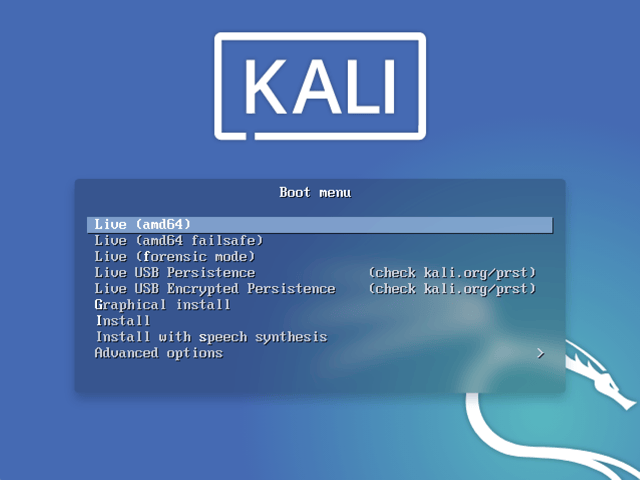
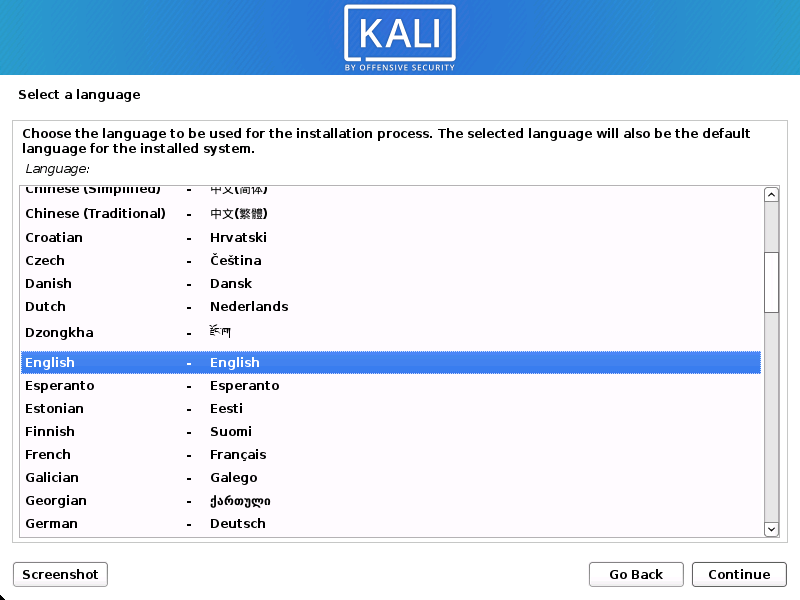
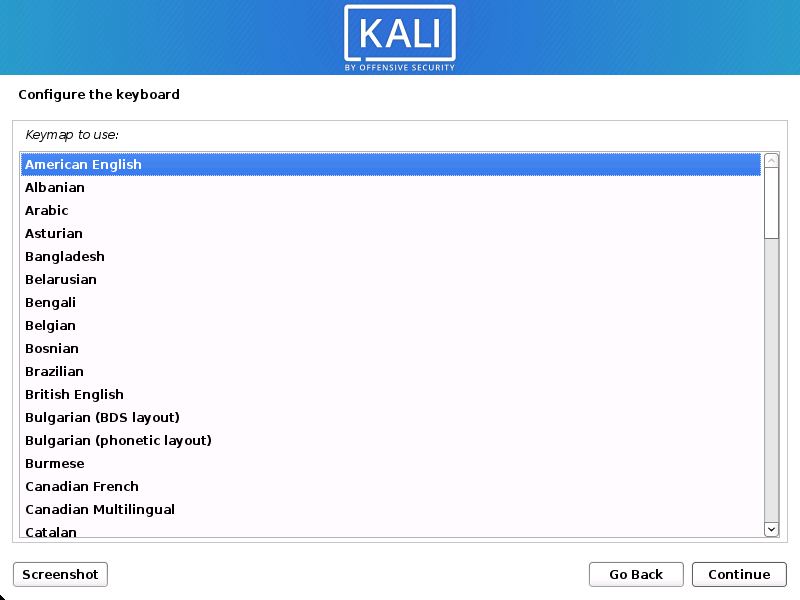
Language
- Select your preferred language. This will be used for both the setup process and once you are using Kali Linux.
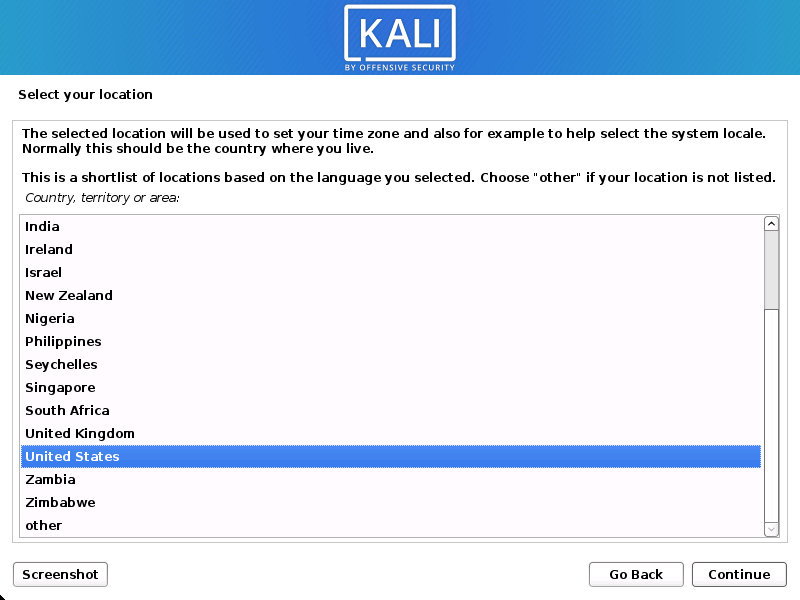
- Specify your geographic location.
- Select your keyboard layout.
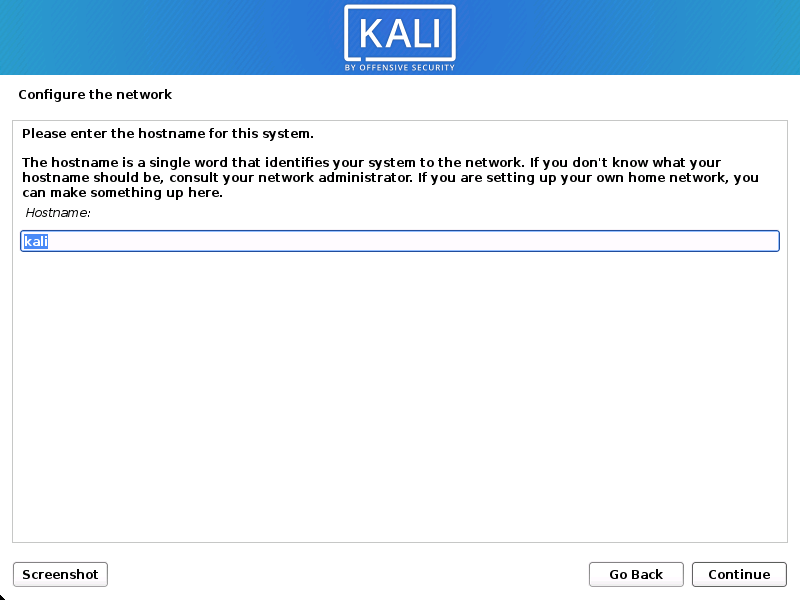
Network
- The setup will now probe your network interfaces, looks for a DHCP service, and then prompt you to enter a hostname for your system. In the example below, we’ve entered kali as our hostname.
If there is no network access with DHCP service detected, you may need to manually configure the network information or do not configure the network at this time.
- If there isn’t a DHCP service running on the network, it will ask you to manually enter the network information after probing for network interfaces, or you can skip.
- If Kali Linux doesn’t detect your NIC, you either need to include the drivers for it when prompted, or generate a custom Kali Linux ISO with them pre-included.
- If the setup detects multiple NICs, it may prompt you which one to use for the install.
- If the chosen NIC is 802.11 based, you will be asked for your wireless network information before being prompted for a hostname.
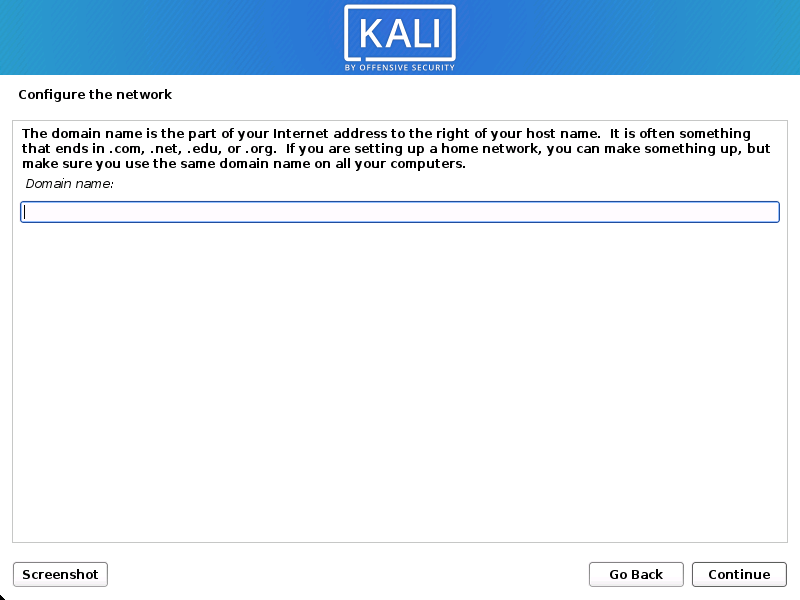
- You may optionally provide a default domain name for this system to use (values may be pulled in from DHCP or if there is an existing operating systems pre-existing).
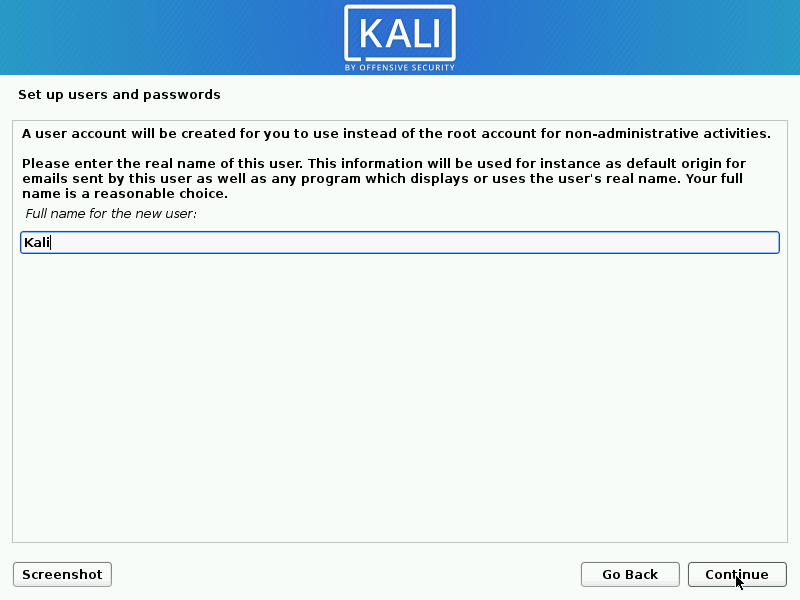
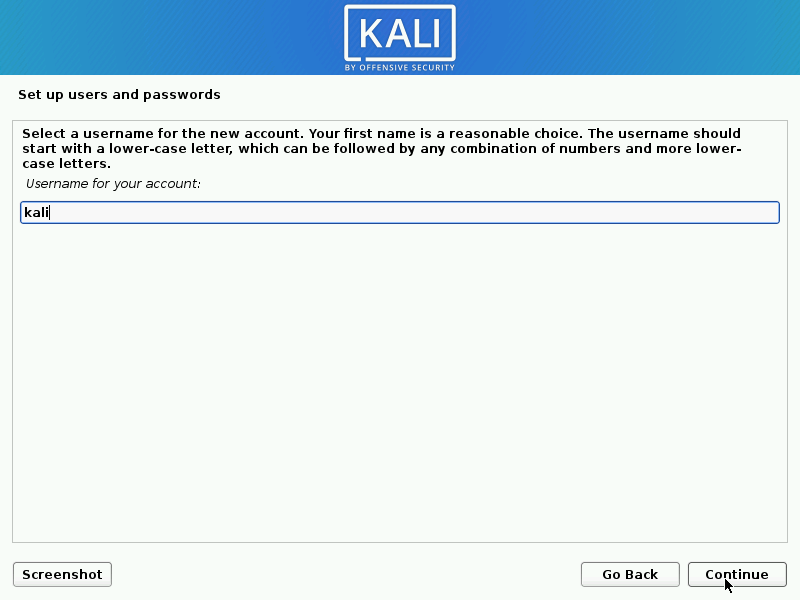
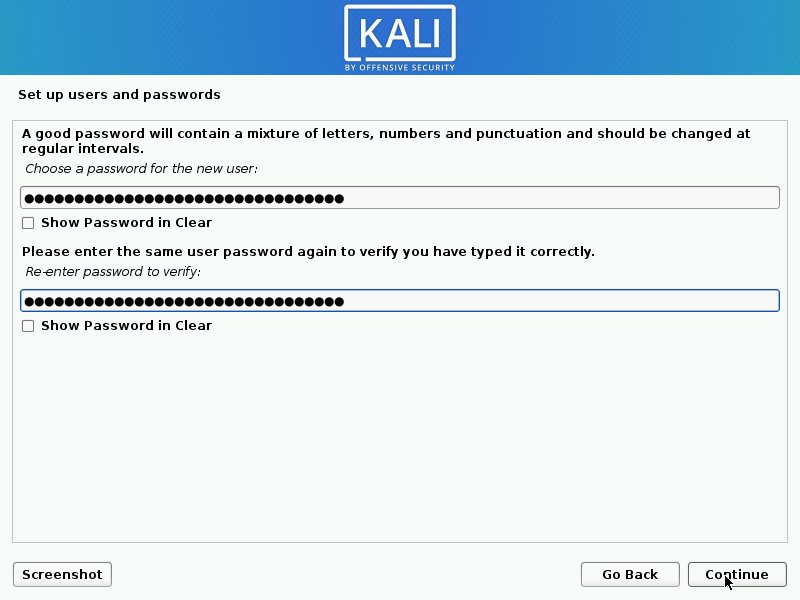
User Accounts
- Next, create the user account for the system (Full name, username and a strong password).
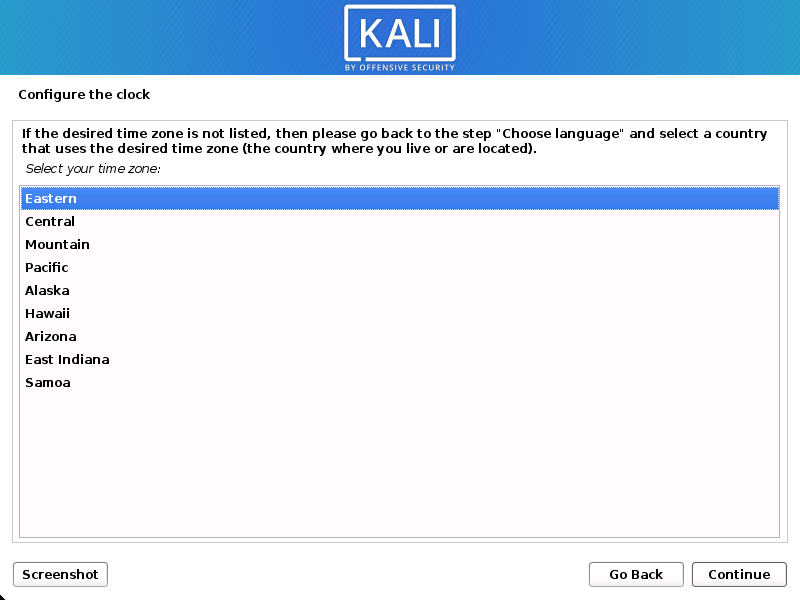
Clock
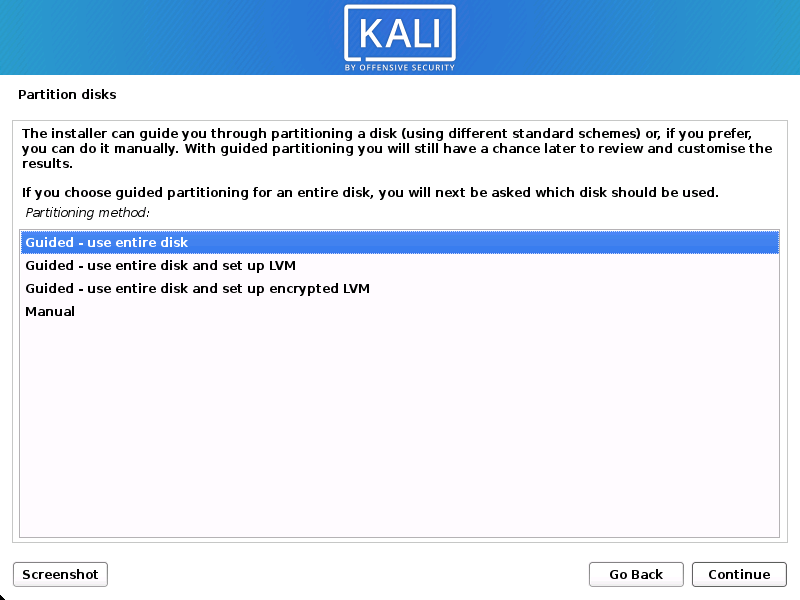
- The installer will now probe your disks and offer you various choices, depending on the setup.
In our guide, we are using a clean disk, so we have four options to pick from. We will select Guided — the entire disk, as this is the single boot installation for Kali Linux, so we do not want any other operating systems installed, so we are happy to wipe the disk.
If there is an pre-existing data on the disk, you will have have an extra option (Guided — use the largest continuous free space) than the example below. This would instruct the setup not to alter any existing data, which is perfect for for dual-booting into another operating system. As this is not the case in this example, it is not visible.
Experienced users can use the “Manual” partitioning method for more granular configuration options, which is covered more in our BTRFS guide.
If you want to encrypt Kali Linux, you can enable Full Disk Encryption (FDE), by selecting Guided — used entire disk and setup encrypted LVM. When selected, later on in the setup (not in this guide) prompt you to enter a password (twice). You will have to enter this password every time you start up Kali Linux.
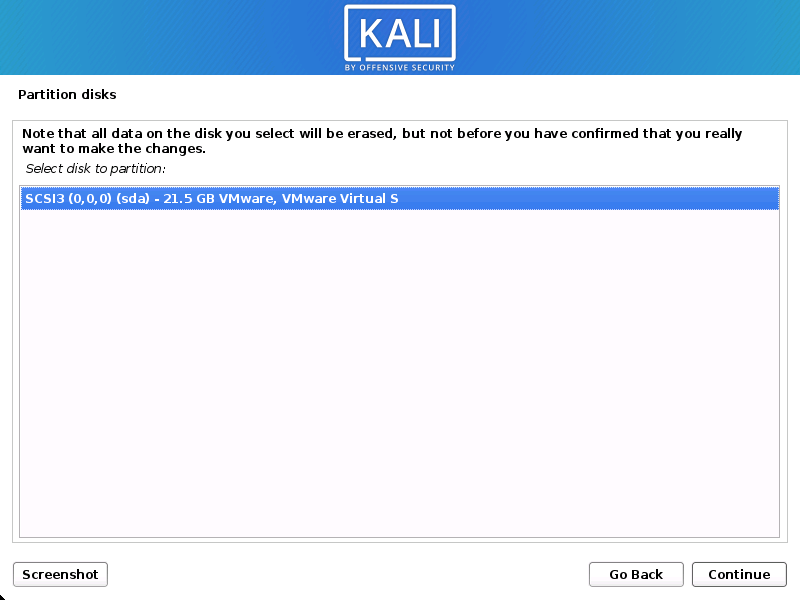
- Select the disk to be partitioned.
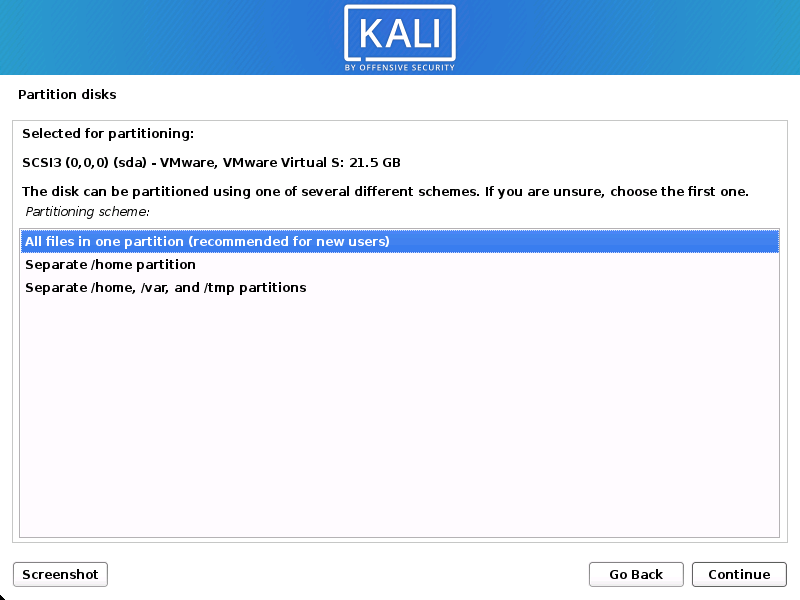
- Depending on your needs, you can choose to keep all your files in a single partition — the default — or to have separate partitions for one or more of the top-level directories.
If you’re not sure which you want, you want “All files in one partition”.
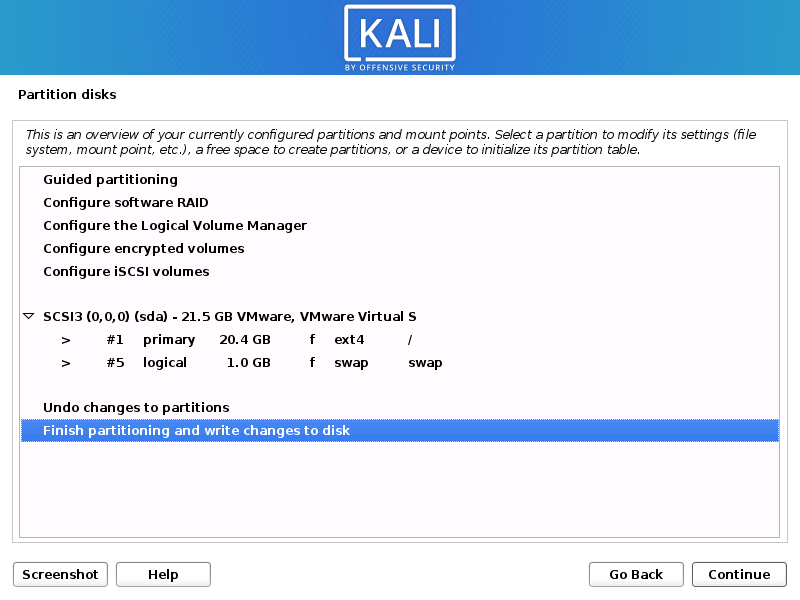
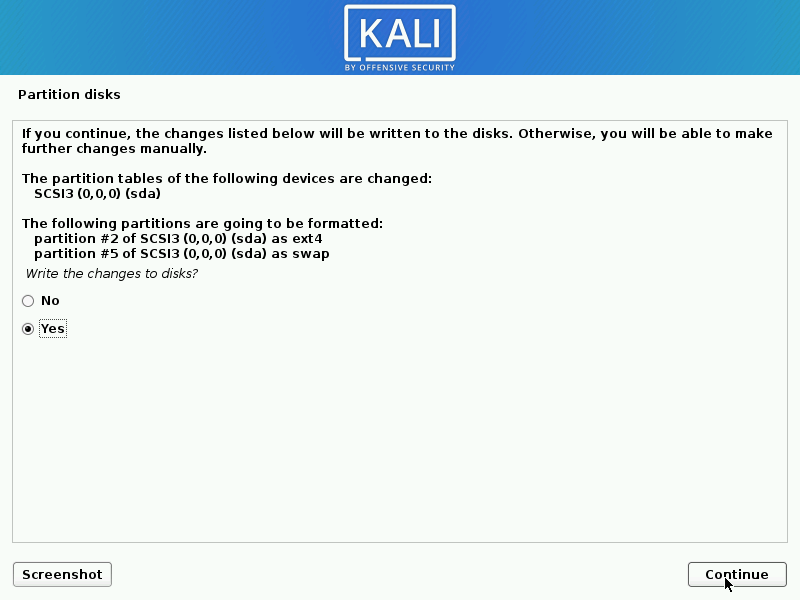
- Next, you’ll have one last chance to review your disk configuration before the installer makes irreversible changes. After you click Continue, the installer will go to work and you’ll have an almost finished installation.
Encrypted LVM
If enabled in the previous step, Kali Linux will now start to perform a secure wipe of the hard disk, before asking you for a LVM password.
Please sure a strong password, else you will have to agree to the warning about a weak passphrase.
This wipe may take “a while” (hours) depending on the size and speed of the drive.
If you wish to risk it, you can skip it.
Proxy Information
- Kali Linux uses a central repository to distribute applications. You’ll need to enter any appropriate proxy information as needed.

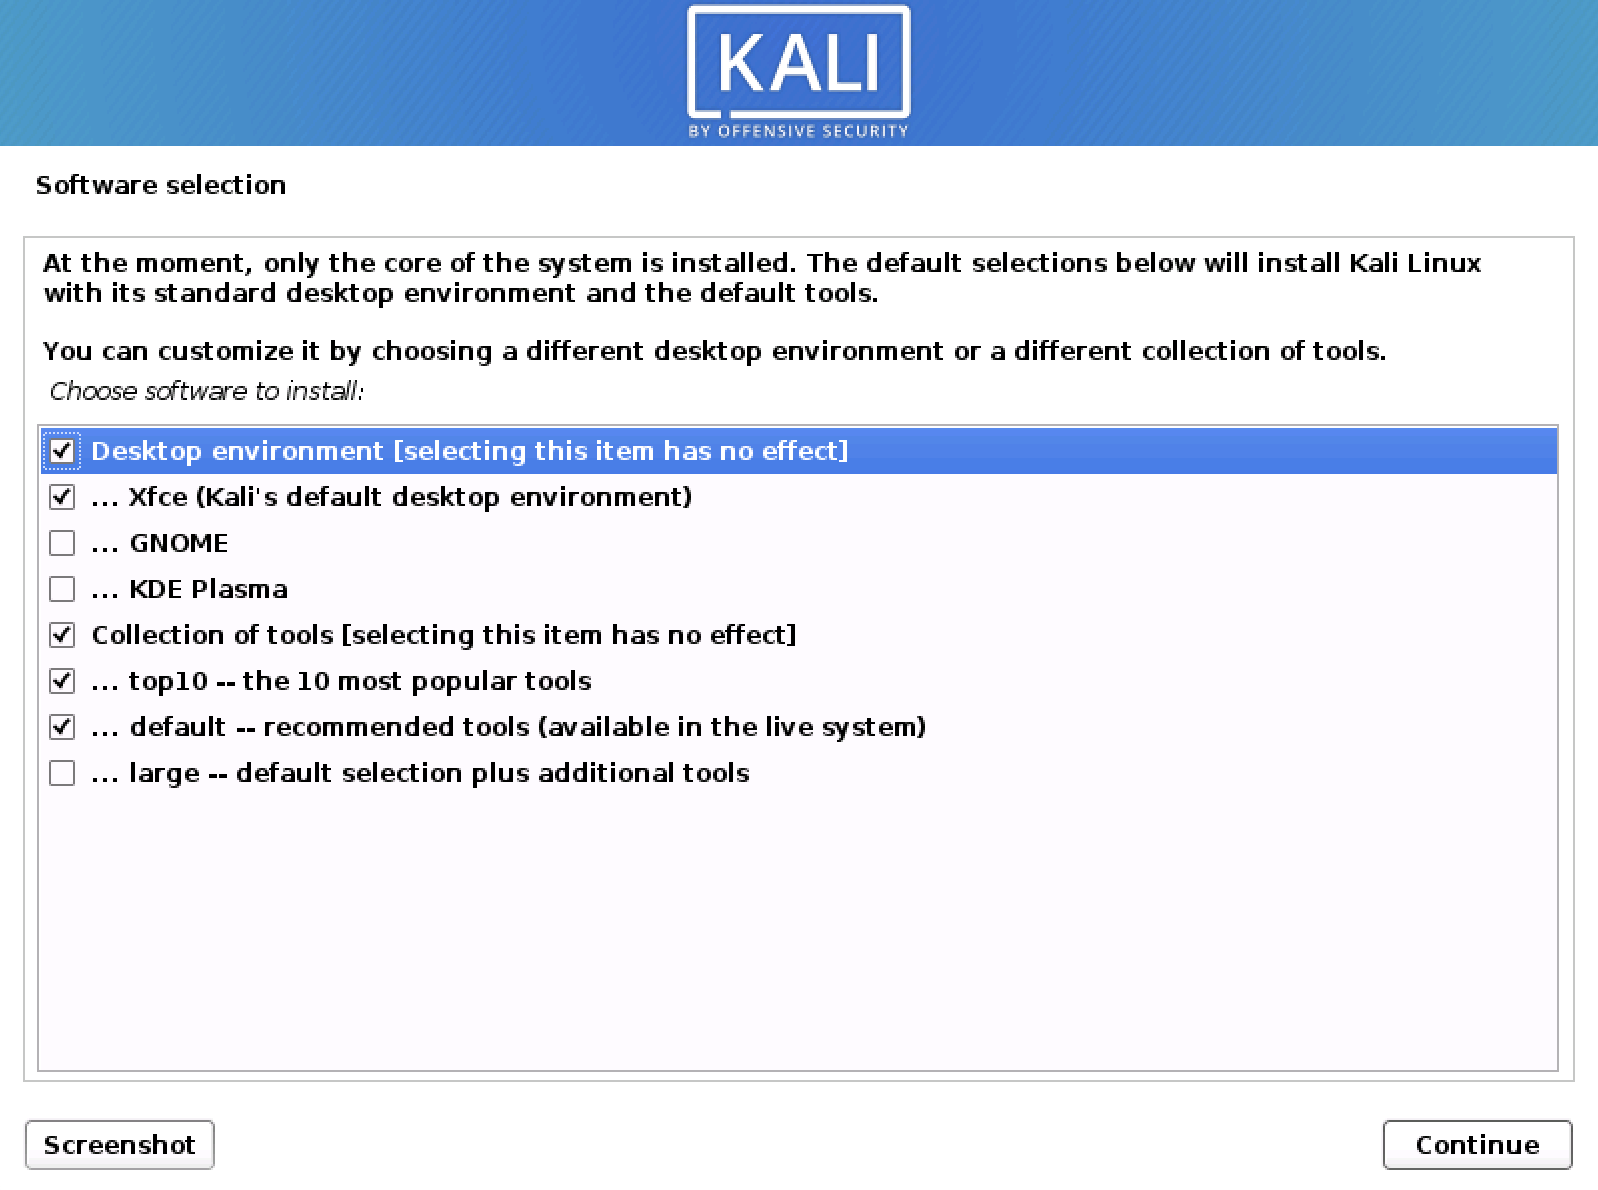
Metapackages
If network access was not setup, you will want to continue with setup when prompt.
If you are using the Live image, you will not have the following stage.
- Next you can select which metapackages you would like to install. The default selections will install a standard Kali Linux system and you don’t really have to change anything here.
Please refer to this guide if you prefer to change the default selections.
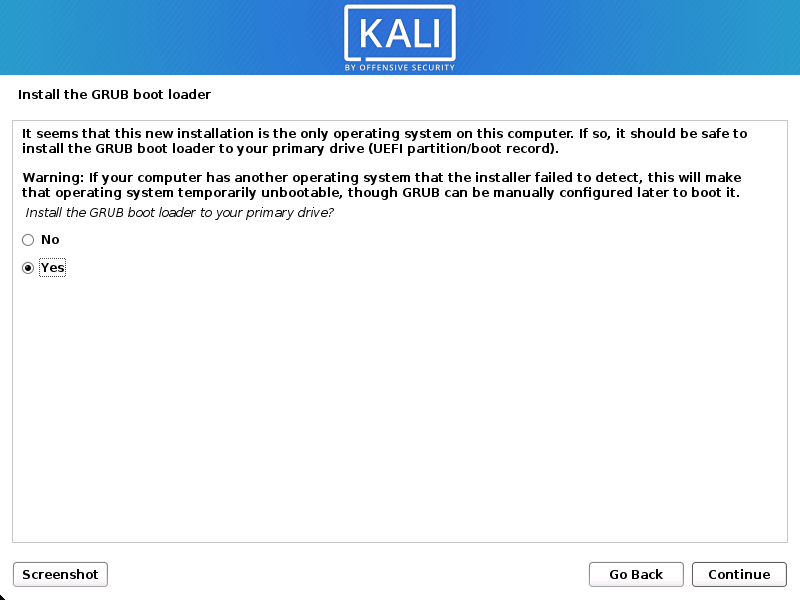
Boot Information
- Next confirm to install the GRUB boot loader.
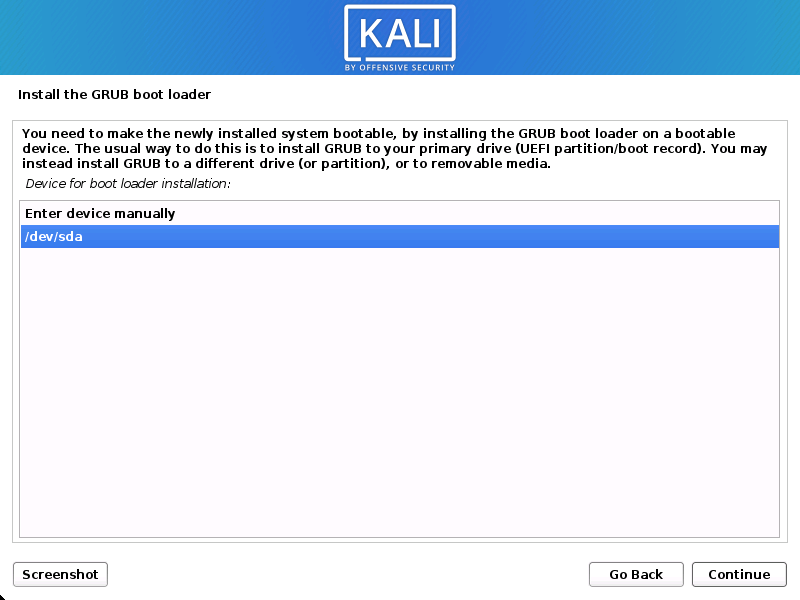
- Select the hard drive to install the GRUB bootloader in (it does not by default select any drive).
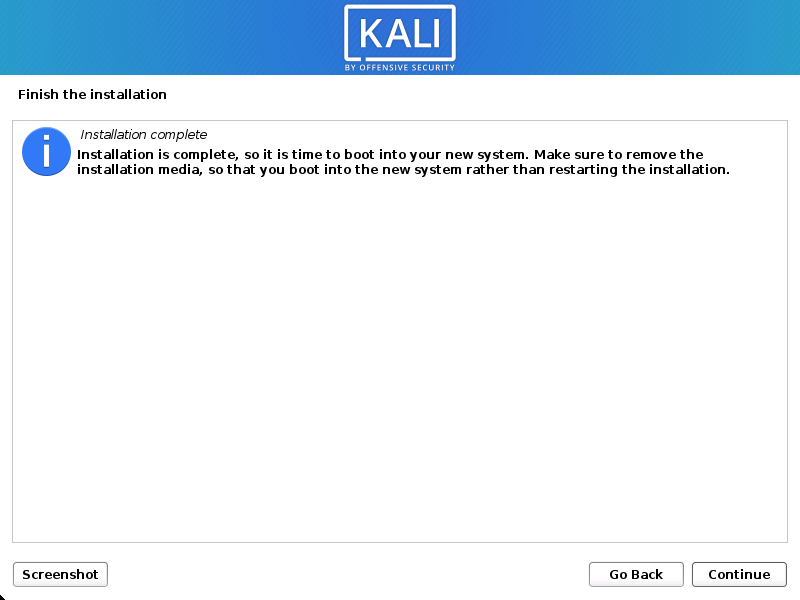
Reboot
- Finally, click Continue to reboot into your new Kali Linux installation.
Post Installation
Now that you’ve completed installing Kali Linux, it’s time to customize your system.
The General Use section has more information and you can also find tips on how to get the most out of Kali Linux in our User Forums.
Updated on: 2021-Sep-27
Author: gamb1t
Источник


