- Kitematic user guide
- Overview
- Log in with your Docker ID
- Container list
- Creating a new container
- Working with a container
- Viewing container logs
- Starting a terminal in a container
- Managing Volumes
- Changing Volume Directories
- Setting the container name
- Adding Environment variables
- Delete container
- List the exposed Ports and how to access them
- Docker Command-line Access
- Example: Creating a new Redis container
- Next Steps
- Kitematic windows что это
- Launching GitHub Desktop
- Launching GitHub Desktop
- Launching Xcode
- Launching Visual Studio
- Latest commit
- Git stats
- Files
- README.md
- About
- Краткий сравнительный обзор GUI решений для работы с Docker
Kitematic user guide
Legacy desktop solution. Kitematic is a legacy solution, bundled with Docker Toolbox. We recommend updating to Docker Desktop for Mac or Docker Desktop for Windows if your system meets the requirements for one of those applications.
Estimated reading time: 7 minutes
Overview
Kitematic is an open source project built to simplify and streamline using Docker on a Mac or Windows PC. Kitematic automates the Docker installation and setup process and provides an intuitive graphical user interface (GUI) for running Docker containers. Kitematic integrates with Docker Machine to provision a VirtualBox VM and install the Docker Engine locally on your machine.
Once installed, the Kitematic GUI launches and from the home screen you are presented with curated images that you can run instantly. You can search for any public images on Docker Hub from Kitematic just by typing in the search bar. You can use the GUI to create, run and manage your containers just by clicking on buttons. Kitematic allows you to switch back and forth between the Docker CLI and the GUI. Kitematic also automates advanced features such as managing ports and configuring volumes. You can use Kitematic to change environment variables, stream logs, and single click terminal into your Docker container all from the GUI.
First, if you haven’t yet done so, download and install Kitematic in one of the following ways:
Choose Kitematic from the Docker Desktop for Mac or Docker Desktop for Windows menu to get started with the Kitematic install.
Download Kitematic directly from the Kitematic releases page.
Start Kitematic. (On desktop systems, click on the app.)
Log in with your Docker ID
Provide your Docker ID and user name and click LOG IN or click Skip for now to browse Docker Hub as a guest.
Container list
Kitematic lists all running and stopped containers on the left side, underneath the “New Container” link.
The container list includes all containers, even those not started by Kitematic, giving you a quick over-view of the state of your Docker daemon.
You can click on any container to view its logs (the output of the main container process), restart, stop or exec sh in that container. See Working with a container for more details.
Creating a new container
The “New Container” page lets you search for and select from images on the Docker Hub. When you’ve found the image you want to run, you can click “Create” to pull, create, and run the container.

Working with a container
If you select a non-running container, either stopped, or paused, you can “Restart” or “Stop” the container using the icons. You can also view the entire main container process’ output logs, and in the Settings section you can make changes which are used if you “Restart” this container.
By selecting a running container from the left list, you can see some state information for your container — either a preview of the HTML output for a container that has a web server, the main container process’ logs, and any container volumes that have been configured.

The summary page shows different things depending on the image metadata. If a known “web” port (see below) is EXPOSED , then Kitematic assumes its a web page, and shows a preview of the site at / . If other ports are exposed, then it shows a list of those ports, and the Docker daemon IP and port they are mapped to. If there are any VOLUMES , then these are shown. At minimum, the summary screen shows the main container process’ log output.
The currently detected “web” ports are, 80 , 8000 , 8080 , 3000 , 5000 , 2368 , 9200 , and 8983 .
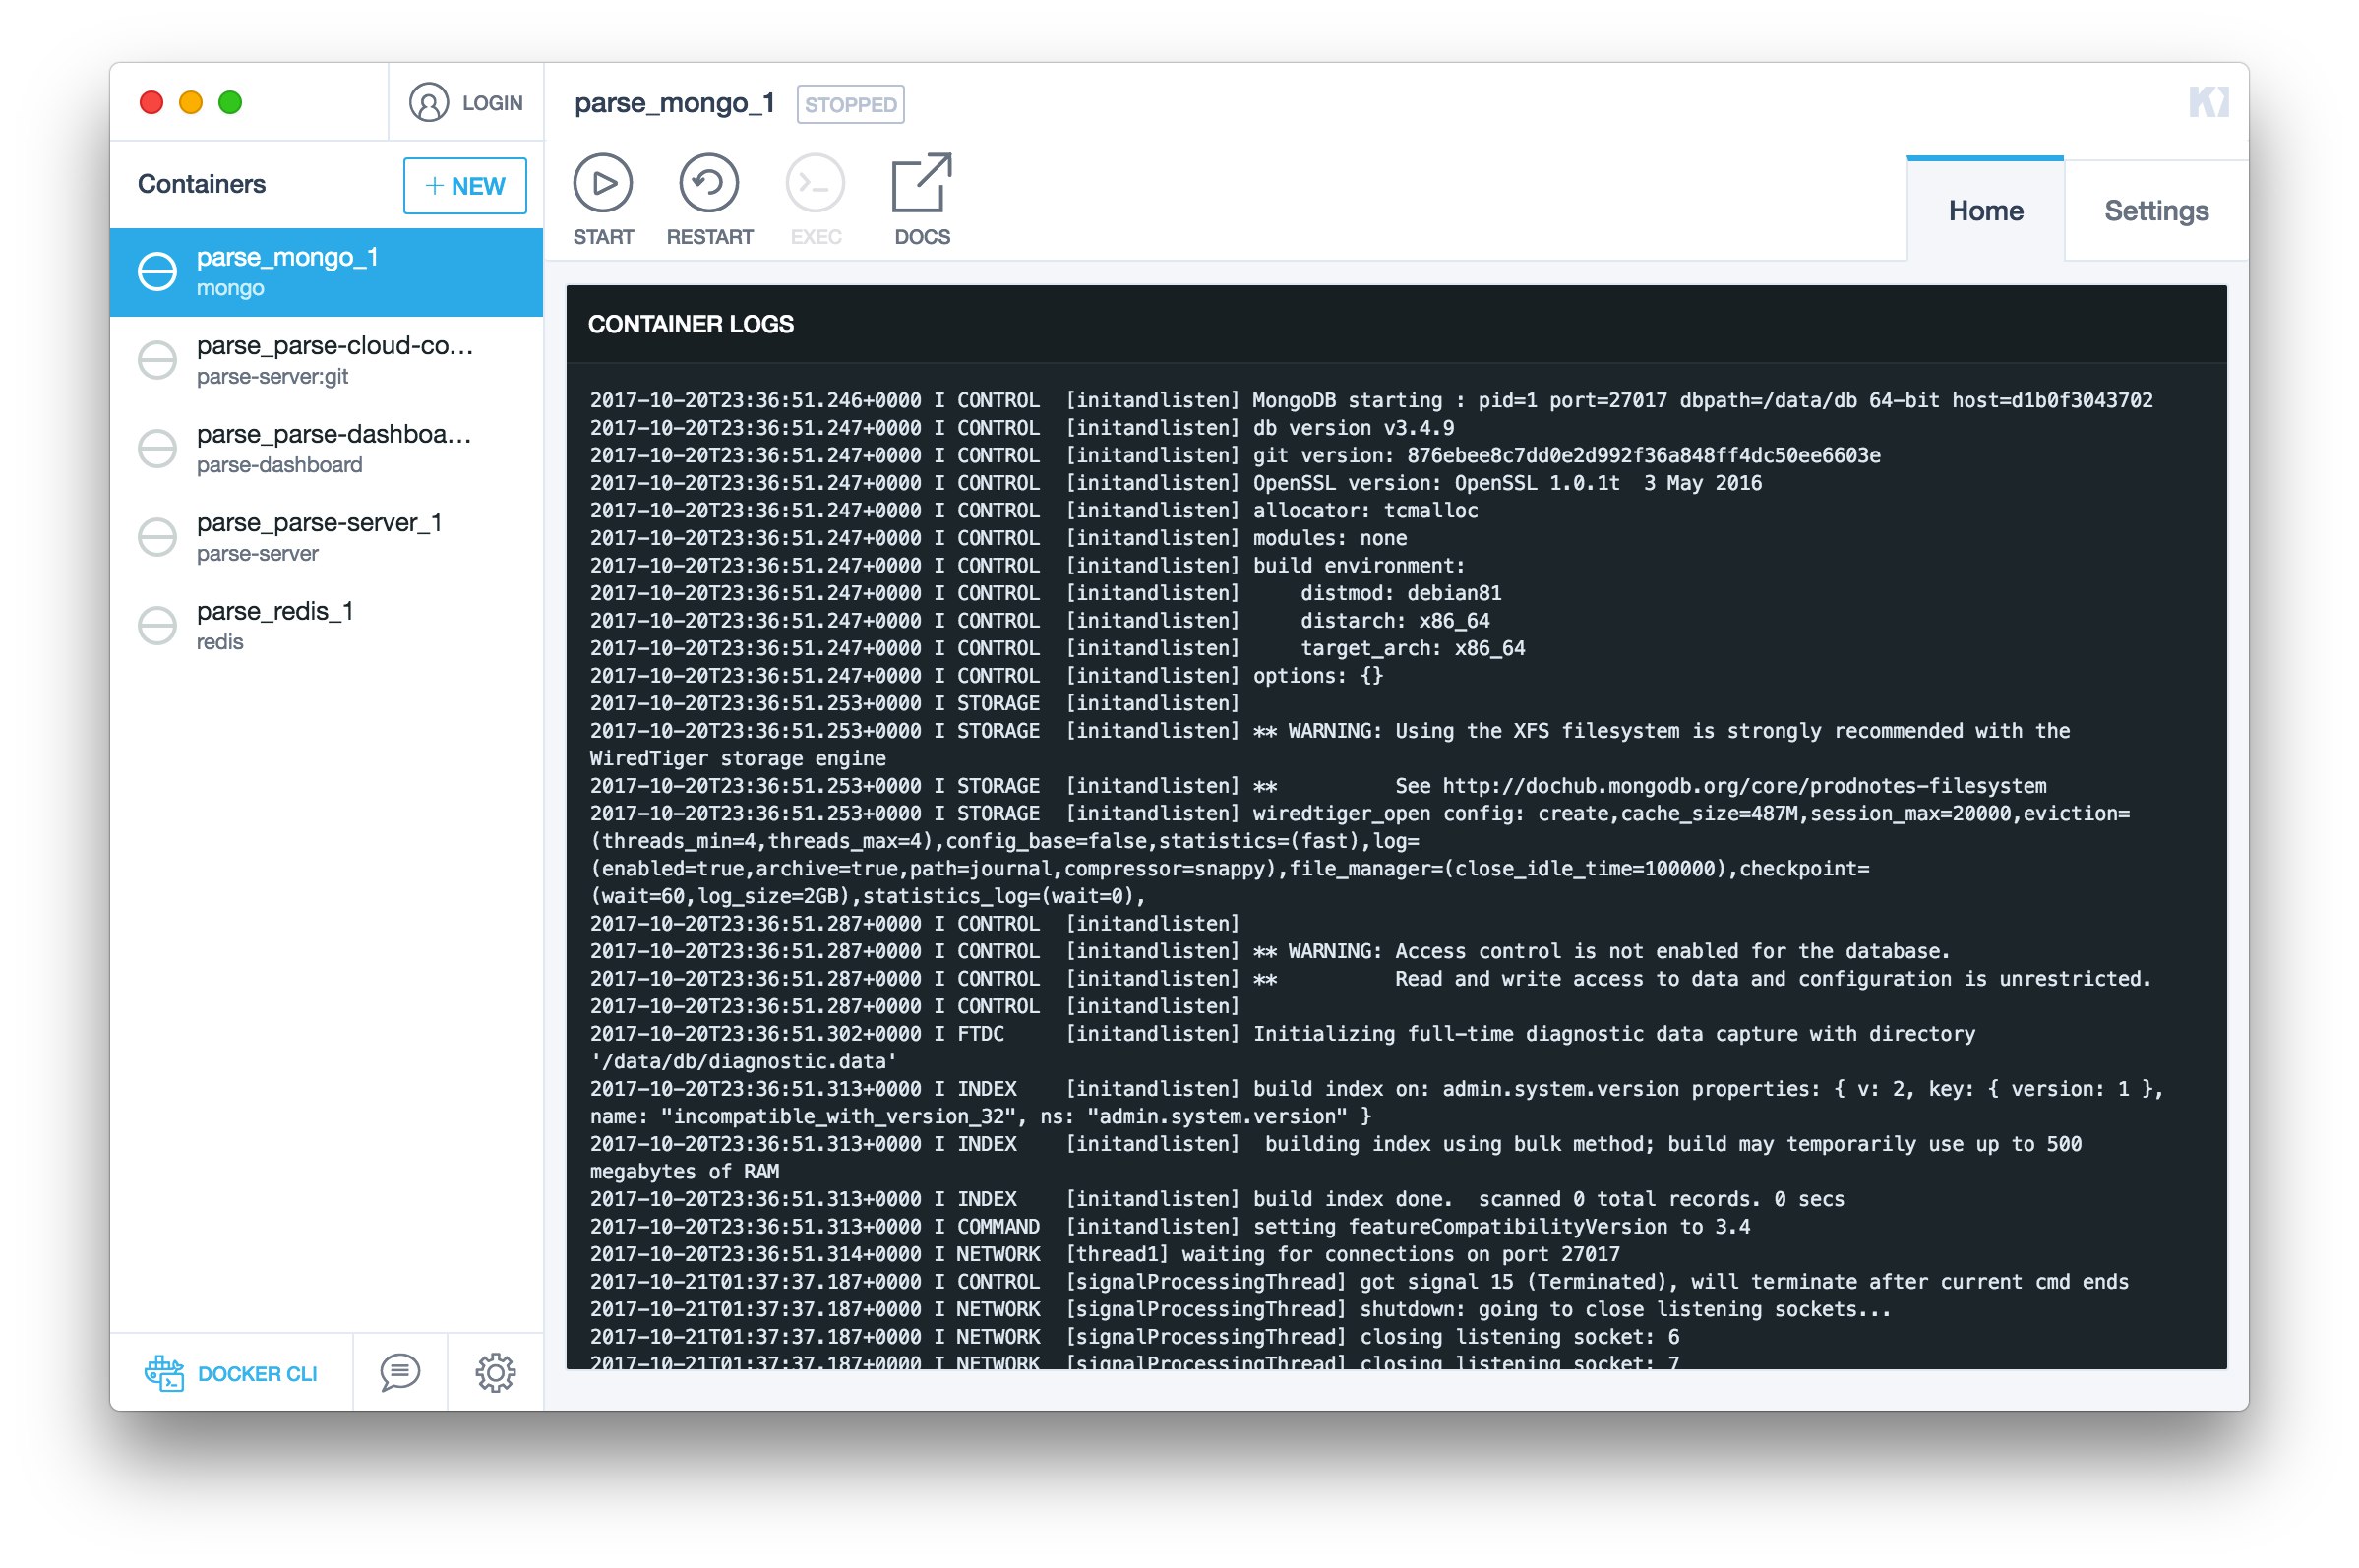
Viewing container logs
You can view the entire main container process’ log output either by clicking on the “Logs” preview image, or by clicking on the “Logs” tab.
You can then scroll through the logs from the current running container. Note that if you make changes to the container settings, then the container is restarted, so this resets this log view.
Starting a terminal in a container
The “Terminal” icon at the top of the container summary runs docker container exec -i -t sh . This allows you to make quick changes, or to debug a problem.
Note: Your exec’ed sh process does not have the same environment settings as the main container process and its children. Get the environment commands for your shell: docker-machine env default .
Managing Volumes
You can choose to make all of a container’s volumes mapped to directories on on your Mac by clicking on the folders in the “Edit Files” section of the container summary screen.
This allows you to manage files in volumes via the Finder. Kitematic exposes a container’s volume data under
/Documents/Kitematic/ / . Quick access to this folder (or directory) is available via the app:

Note: When you “Enable all volumes to edit files in Finder”, the Docker container is stopped, removed and re-created with the new volumes flag.
Changing Volume Directories
Let’s say you have an Nginx webserver running via Kitematic (using the kitematic/hello-world-nginx image on DockerHub). However, you don’t want to use the default directory created for the website_files volume. Instead, you already have the HTML, Javascript, and CSS for your website under
Navigate to the “Settings” tab of the container, and go to the “Volumes”. This screen allows you to set the mappings individually.

Note: When you “Change Folders”, the Docker container is stopped, removed and re-created with the new volumes flag.
Setting the container name
By default, Kitematic sets the container name to the same as the image name (or with a — if there are more than one. To simplify administration, or when using container linking or volumes, you may want to rename it.
Note: When you rename the container it is stopped, removed and re-created with the new name (due to the default volumes mapping).
Adding Environment variables
Many images use environment variables to let you customize them. The “General” “Settings” tab allows you to add and modify the environment variables used to start a container.
The list of environment variables shows any that have been set on the image metadata — for example, using the ENV instruction in the Dockerfile.
When you “Save” the changed environment variables, the container is stopped, removed and re-created.
Delete container
On the “General” “Settings” tab, you can delete the container. Clicking “Delete Container” also stops the container if necessary.
You can also delete a container by clicking the X icon in the container list.
Kitematic prompts you to confirm that you want to delete.
List the exposed Ports and how to access them
To see the complete list of exposed ports, go to “Settings” then “Ports”. This page lists all the container ports exposed, and the IP address and host-only network port that you can access use to access that container from your macOS system.
Docker Command-line Access
You can interact with existing containers in Kitematic or create new containers via the Docker Command Line Interface (CLI). Any changes you make on the CLI are directly reflected in Kitematic.
To open a terminal via Kitematic, just press the whale button at the bottom left, as shown below:
Example: Creating a new Redis container
Start by opening a Docker-CLI ready terminal by clicking the whale button as described above. Once the terminal opens, enter docker run -d -P redis . This pulls, creates, and runs a new Redis container via the Docker CLI.

Note: If you’re creating containers from the command line, use docker run -d so that Kitematic can re-create the container when settings are changed via the Kitematic user interface. Containers started without -d fails to restart.
Now, go back to Kitematic. The Redis container is now visible.
Next Steps
For an example using Kitematic to run a Minecraft server, take a look at the Minecraft server page.
Kitematic windows что это
Visual Docker Container Management on Mac & Windows
Use Git or checkout with SVN using the web URL.
Work fast with our official CLI. Learn more.
Launching GitHub Desktop
If nothing happens, download GitHub Desktop and try again.
Launching GitHub Desktop
If nothing happens, download GitHub Desktop and try again.
Launching Xcode
If nothing happens, download Xcode and try again.
Launching Visual Studio
Latest commit
Git stats
Files
Failed to load latest commit information.
README.md


Please give us feedback on the new Docker Desktop Dashboard!
In the latest Edge release of Docker Desktop we have introduced the new Docker Desktop Dashboard. As part of this, Docker is working on providing a common user experience to developers and bringing the best Kitematic features to its Desktop customers.
As a result, we plan on achieving feature parity and archiving the Docker Kitematic Project during 2020. After we archive the Kitematic Project there will be no new releases of Kitematic.

Kitematic is a simple application for managing Docker containers on Mac, Linux and Windows.
Download the latest version of Kitematic via the github release page.
Kitematic’s documentation and other information can be found at http://kitematic.com/docs.
Security is very important to us. If you have any issue regarding security, please disclose the information responsibly by sending an email to security@docker.com and not by creating a github issue.
Why are you archiving Kitematic? We are learning from the capabilities in Kitematic and incorporating them into a common developer User experience and benefit all Docker Desktop users.
When will this happen? Once we have reached feature parity and provided the most important capabilities from the existing Kitematic UI. We aim to achieve this and then to archive Kitematic in 2020.
What can I do if the new UI doesn’t support something I need? Tell us! Please add requests on the Kitematic repo. We need you to tell us what features you use so we can bring them across into the new UI. We are very interested in your feedback starting with the Edge release.
Bugs and Feature Requests
Have a bug? Please first read the Issue Guidelines and search for existing and closed issues.
If your idea is not in the new UI, please open a new issue.
If your problem is not addressed yet, please open a new issue.
Mac
- Remove Kitematic.app
- Remove any unwanted Virtual Machines in VirtualBox
Windows
Open Programs and Features from Control Panel
- Uninstall Kitematic
- Uninstall Oracle VM VirtualBox
Copyright and License
Code released under the Apache license. Images are copyrighted by Docker, Inc.
About
Visual Docker Container Management on Mac & Windows
Краткий сравнительный обзор GUI решений для работы с Docker
Хотелось сделать пометку, что все эти инструменты затрагивают проблемы по взаимодействию с Docker. Если Вы DevOps и у вас стоит задача развертывания, деплоя, масштабирования и т.п., то вышеописанные решения маловероятно что чем-то смогут вам помочь. Но наверняка вам сможет помочь Rancher.
DockStation — мощный функциональный комбайн для работы с Docker. Главным преимуществом является ориентация на проектную разработку под Docker и работа с Docker Compose.
Преимущества: Работа с Docker Compose. Нативная поддержка Compose конфигураций, в следствие чего получается полноценная поддержка всех возможностей Docker функционала. Очень богатый функционал в виде возможностей работы над Docker проектами в целом, работа с удаленными нодами, мониторинг ресурсов и многое, многое другое. Очень быстрая и дружелюбная поддержка.
Недостатки: Закрытый исходный код.

Portainer — мощное решение для работы и конфигурирования Docker контейнеров. Представляет из себя Web приложение которое позволяет проводить настройку и манипуляции с контейнерами. В отличие от Kitematic и Shipyard имеет очень богатый функционал, который позволяет проводить очень качественную и полноценную настройку.
Преимущества: OpenSource. Богатый функционал, который позволяет как полноценно настроить проект, так и управлять контейнерами этого проекта. Позволяет подключаться к удаленным нодам и просматривать статистику контейнеров.
Недостатки: Непродуманный и перегруженный UI. Работа в веб версии для многих может быть неудобной. Неудобен если работа происходит более чем с 1-м проектом.

Kitematic — официальное приложение от Docker. Kitematic это OpenSource решение которое было выкуплено компанией Docker в 2015-м году. Основное назначение и применение — управление и конфигурирование отдельных контейнеров.
Преимущества: OpenSource. Официальное приложение.
Недостатки: Приложение очень ограниченное в возможностях. Очень слабое покрытие функционала Docker-а. Неудобен если работа происходит более чем с 1-м проектом.
Shipyard — решение для работы с контейнерами Docker. Представляет из себя Web приложение которое позволяет проводить настройку и базовые манипуляции с Docker контейнерами.
Преимущества: OpenSource. Простой в использовании.
Недостатки: Так же как и Kitematic имеет ограниченный функционал. Работа в веб версии для многих может быть неудобной. Неудобен если работа происходит более чем с 1-м проектом.
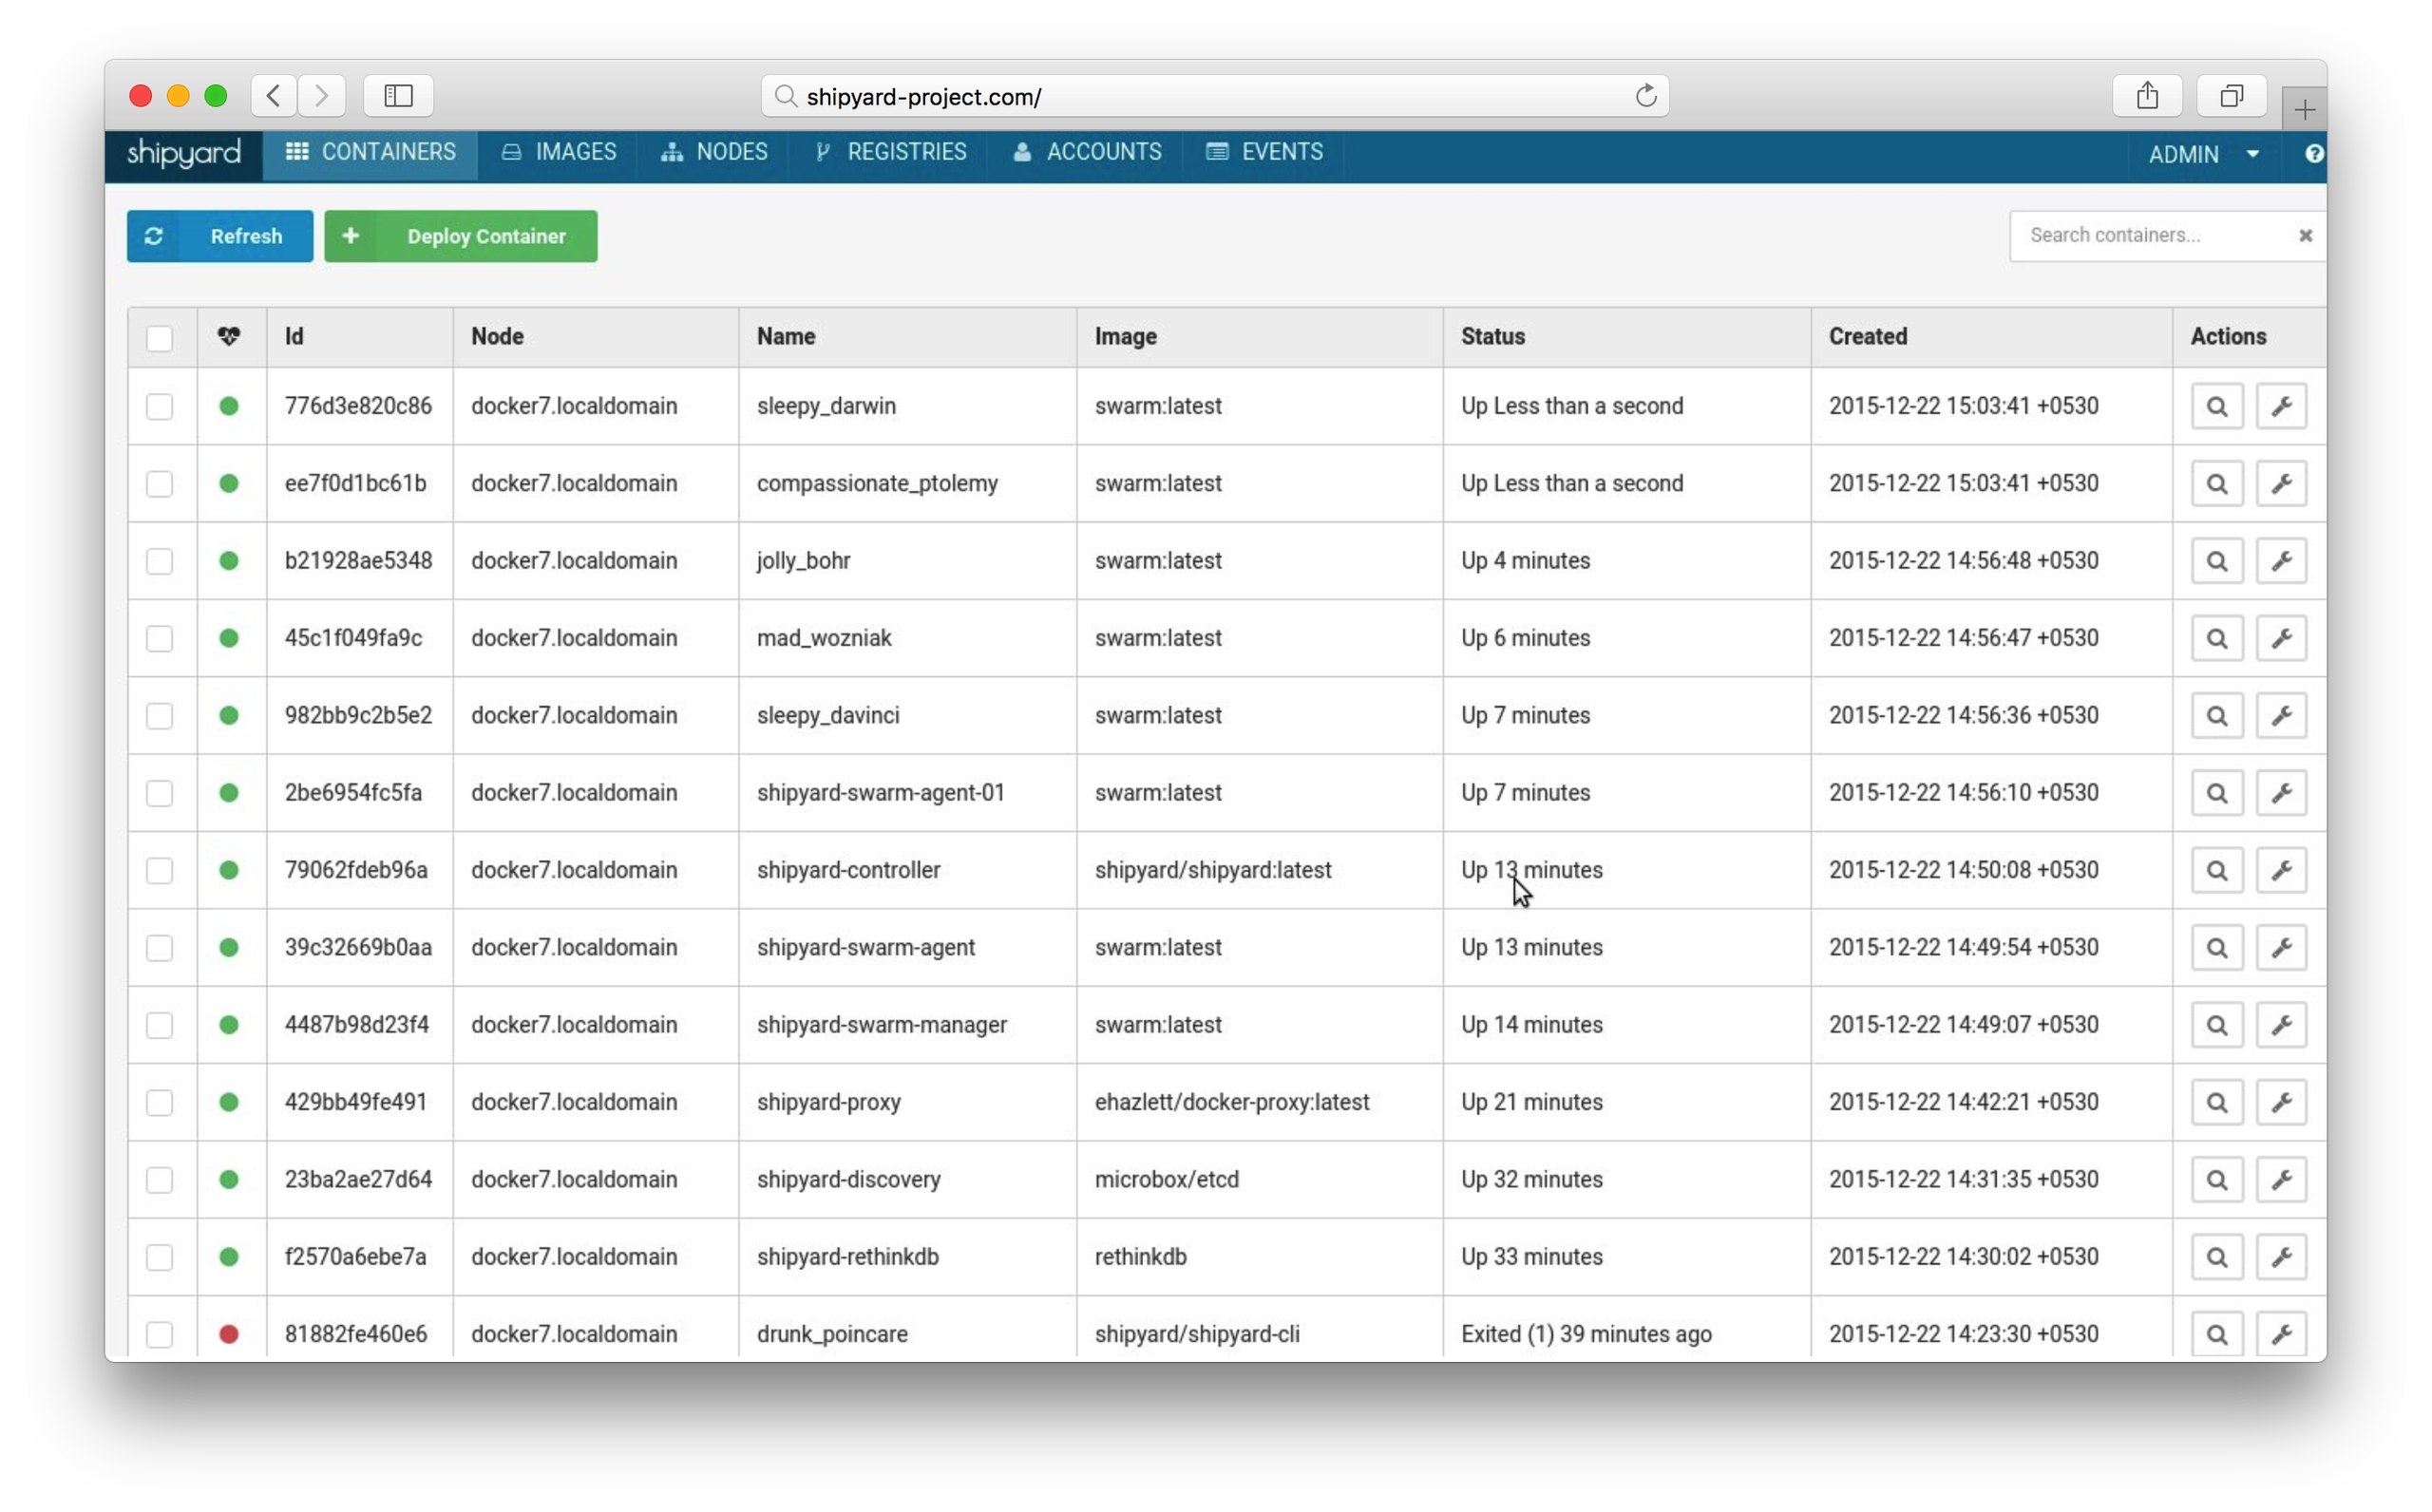
Таблица функций, которые вы наверняка будете использовать:
| DockStation | Kitematic | Portainer | Shipyard | |
|---|---|---|---|---|
| Работа с Docker Compose | + | — | — | — |
| Работа с Docker Machine | + | + | + | + |
| Конфигурирование отдельных контейнеров | — | + | + | + |
| Базовые манипуляции с контейнерами (старт, стоп, рестарт, . ) | + | + | + | + |
| Вывод логов контейнеров | + | + | + | + |
| Поиск по логам | + | — | — | — |
| Группировка и поиск контейнеров | + | — | — | — |
| Мониторинг потребления ресурсов | + | — | + | + |
| Работа с удаленными нодами | + | — | + | — |
| Шаблоны приложений | — | — | + | — |
| Работа с кастомными хабами | — | — | + | — |
Выводы:
Каждый инструмент имеет свои плюсы и минусы. Подходить к выбору инструмента необходимо из поставленной задачи. Если у вас всего один проект в работе и на локальной машине, вам не нужен функционал больше чем запустить, остановить, перезагрузить контейнер, посмотреть его логи или настроить что-то примитивное, то Kitematic будет являться хорошим решением. Если же стоят такие же условия, но нужно это делать на удаленной машине, то для этого вполне подойдет Shipyard.
Если же у вас более серьезные проекты, то остановиться можно на 2-х решениях DockStation и Portainer. По своим функциональным возможностям эти решения очень мощные. Если вы не любите заморачиваться с развертыванием приложений, если на ваших проектах используется Docker Compose или собираетесь переходить на Docker Compose, если вы работаете более чем с 1-м проектом на Docker, если есть необходимость мониторинга состояния и потребления ресурсов как отдельных контейнеров, так и проектов в целом, то однозначно для работы более подходящим решением будет являться DockStation. На случай если работа ведется над одним проектом и вам необходима веб панель и возможность конфигурирования отдельных контейнеров, то Portainer будет являться хорошим выбором.
На момент написания статьи произошло неприятное событие. Проект Shipyard официально мертв.


