- ChapterВ 4В Upgrading an Oracle Linux System
- 4.1В Conditions for Performing an In-Place Upgrade
- 4.2В Performing an In-Place Upgrade
- How to upgrade from Oracle Linux 6 to Oracle Linux 7
- Issue with tool version
- ChapterВ 1В Yum DNF
- 1.1В About DNF
- 1.1.1В About the Oracle Linux Yum Server
- 1.1.2В About Using ULN With Yum
- 1.2В DNF Configuration
- 1.2.1В Configuring the Use of a Proxy Server
- 1.2.2В Yum Repository Configuration
- 1.2.3В Downloading Oracle Linux Yum Server Repository Files
- 1.2.3.1В Configuring Oracle Cloud Infrastructure Compute Instances for access to the regional yum server repositories
- 1.2.4В Using the DNF config-manager Plugin
- 1.3В Using DNF From the Command Line
- 1.4В DNF Groups
- 1.5В DNF Modules and Application Stream
- 1.5.1В Displaying Available Modules
- 1.5.2В Module Installation Commands
- 1.5.3В About Modular Dependencies and Stream Changes
- 1.5.4В Removing Installed Modules
- 1.5.5В Switching Module Streams
- 1.6В Using DNF Security Options
- 1.7В Using the DNF Automatic Tool to Keep Your System Up To Date
- 1.8В Creating a Local Yum Repository by Using an ISO Image
- 1.9В Setting up a Local Yum Server by Using an ISO Image
- 1.10В More Information About DNF
ChapterВ 4В Upgrading an Oracle Linux System
Typically, you upgrade an Oracle Linux system by performing a fresh installation. However, starting with Oracle Linux 7, there is support for in-place upgrades. This chapter describes the conditions and method for performing an in-place upgrade.
4.1В Conditions for Performing an In-Place Upgrade
In-place upgrades are supported for systems that run Oracle Linux 6 Update 5 or later only . The following conditions must also be met:
The system to be upgraded must meet the minimum installation requirements for Oracle Linux 7, see Section 1.1, “System Requirements”.
The Oracle Linux 6 system has been completely updated from the ol6_x86_64_latest channel or the ol6_latest repository.
Either the Unbreakable Enterprise Kernel Release 3 (UEK R3) or the Unbreakable Enterprise Kernel Release 4 (UEK R4) release must be installed on the system and it must be the default boot kernel. Upgrading from Unbreakable Enterprise Kernel Release 2 is not supported.
The Oracle Linux 6 system must have been installed with the Minimal set of software.
No Oracle product stack is present on the system.
If the RHCK is installed, it is upgraded as part of the process, but it must not be set as the default boot kernel.
If the system to be upgraded contains valuable data, make a backup or snapshot of the system so that you can recover it to its previous state if the upgrade fails.
Before you upgrade, check the release notes for any known issues with upgrades. See Oracle В® Linux 7 Documentation and Unbreakable Enterprise Kernel Documentation libraries.
To perform an in-place upgrade you must install some additional packages and their dependencies. The system should have access to the Unbreakable Linux Network (ULN), Oracle Linux yum server, or a local yum server.
4.2В Performing an In-Place Upgrade
If the system is registered with ULN, make sure that it is subscribed to the ol6_x86_64_latest and ol6_x86_64_addons channels.
If the system is using the Oracle Linux yum server or a local mirror, make sure that the ol6_latest and ol6_addons repositories are enabled.
Use the yum update command to update the system to the latest Oracle Linux 6 release.
Install the latest versions of the following required packages:
If the system is registered with ULN, delete the system from ULN and disable yum plugins.
You can only delete a system if it is registered to your user name on ULN.
Log in to https://linux.oracle.com with your ULN user name and password.
On the Systems tab, click the link for the system in the list of registered machines.
On the System Details page, click Delete .
When prompted to confirm the deletion, click OK .
On the system, edit the yum configuration file /etc/yum.conf file and disable yum plugins by setting plugins=0 .
Run the preupg command to perform an upgrade assessment:
Examine the upgrade assessment results file /root/preupgrade/result.html .
If the assessment reports any fail , needs_action , or needs_inspection issues, read the remediation instructions for these issues and perform any required actions before proceeding with the upgrade.
You might also need to perform some actions after performing the upgrade.
You can run the preupg command as often as you like to check the system’s readiness for upgrading. A backup of each assessment is stored in the /root/preupgrade-results directory. You might want to back up this directory before performing the upgrade.
The /root/preupgrade directory (and its contents) must be present for the upgrade to proceed.
Run the redhat-upgrade-tool-cli command to perform the upgrade.
For example, to upgrade using an Oracle Linux 7 installation ISO, you might use the following command:
Substitute OL7_ISO with the path to the installation ISO. Alternately, use the —device option to point to a burned media copy of the installation ISO. For example:
Substitute /dev/cdrom with the device where the installation media is accessible.
If you wish to use a network-based resource to perform the upgrade, you can use the —network option in conjunction with the —instrepo to specify the URL where the ISO contents are located. For example:
Substitute OL7_repo_url with the URL where the installation media is accessible. Note that an installation repository must contain a .treeinfo file that provides metadata for the installation. Currently, you cannot use the standard yum repositories exposed on the Oracle Linux yum server directly. If you wish to install from a network resource, you can copy the contents of an installation ISO to a locally hosted web server.
The —cleanup-post option ensures that there are no Oracle Linux 6 packages remaining on the system after the upgrade. If you do not use this option, check the system after the upgrade and manually remove any Oracle Linux 6 packages, for example, by using the yum remove `rpm -qa | grep el6` .
For more information, use the —help option with the redhat-upgrade-tool-cli command.
If you require use of a proxy server to access a network resource where your installation repository is located, set the appropriate command line variables before running the command. For example:
Reboot the system to start the upgrade.
After the reboot, the upgrade tool installs the required packages, reconfigures the system, and then reboots. Depending on the number of packages, this may take some time.
After the upgrade completes, perform any post-upgrade actions identified by the upgrade assessment.
If the system was previously registered with ULN, check that yum plugins are enabled and re-register the system with ULN.
On the system, edit the yum configuration file /etc/yum.conf file and enable yum plugins by setting plugins=1 .
Run the uln_register command.
Alternatively, if you use the GNOME graphical user desktop, select Applications , System Tools , and then ULN Registration .
When prompted, enter your ULN user name, password, and customer support identifier (CSI).
Copyright В© 2014, 2020, Oracle and/or its affiliates. Legal Notices
Источник
How to upgrade from Oracle Linux 6 to Oracle Linux 7
Published: July 23, 2020 | Modified: September 5, 2020
In this quick walk-through we will upgrade OL 6.8 to OL 7.6
All outputs under this article are from the EC2 server running on AWS. I am using Oracle Linux Yum server public repo hence reference the names from it. If your system is registered to ULN then use respective repos accordingly.
First you need to prepare system for upgrade. Below are pre-requisites :
- Make sure you have a proper backup of your data, disabled monitoring of server, stopped all applications on the server, etc.
- Make sure the system is subscribed to ol6_latest repository
- Update system completely using yum update
- Subscribe system to ol6_addons repo
- Make sure the system meets all OL7 system requirements.
Once you are ready you can go ahead with running pre-upgrade checks to verify if your system is compatible to move on. For that, you need to install the below packages. Those are available from ol6_addons repo.
Once packages are installed you are ready to run a pre-upgrade check. Note: In my case, preupgrade-assistant-el6toel7-data-0 was not available from my repo but it did not hurt my upgrade.
Now run below command to run checks –
Once the tool completes checks, download, and review /root/preupgrade/result.html It will be something like below –
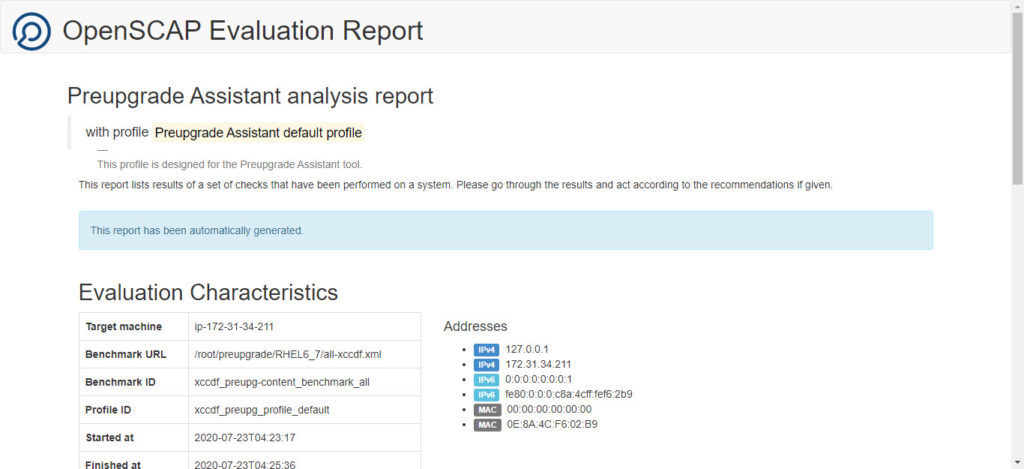 Pre-upgrade report
It will be having all the checks, their results, what is actionable and what actions to be taken.
Spare some time to read the report thoroughly, read the actionable, action on it if it suits your environment/needs, etc. and then move ahead with the upgrade. Since I am running a test instance on AWS, I did not care to consider actionable and I moved ahead with the upgrade.
The upgrade needs an ISO or network path from where it can read OL7 packages for an upgrade. I downloaded OL7 ISO from Oracle using get. To start upgrade with ISO use below command –
Once again it will list out risks of upgrade and ask your confirmation to move ahead. Once you confirm it with Y , the upgrade starts.
Once command completes it will ask you to reboot the server. Reboot will take a while since upgrade process completes during reboot and then login to system to check.
And we are upgraded to Ol7.6! You have to read all the reports and messages before you actually hit confirmation to upgrade. This will make your life easy post upgrade!
Issue with tool version
Redhat upgrade tool always looks for the latest OS that is known to it for an upgrade. So if you are using newer tool version and trying to upgrade OS to old version than the version known to the tool then you will see below error –
I was trying to upgrade to OL 7.4 and tool was looking for 7.5 only. So in such case, you have to downgrade tool version and try.
For OL 7.4 upgrade below version worked for me –
If you use any version below 0.7.50, it will land you up in issue where you see lots of couldn’t add media errors and failed to open file errors in the console –
If you use any version above 0.7.50, you will land in the issue explained above. Decompress kernel modules capability introduced in 0.7.50 makes it best bet in the above-explained scenario.
Few redhat-upgrade-tool versions mapping with their supported upgrades.
Источник
ChapterВ 1В Yum DNF
This chapter describes how to use the yum or dnf utility to install and upgrade software packages. Note that the yum command provided with Oracle Linux 8 is a symbolic link to the dnf command.
1.1В About DNF
The yum utility that is provided with Oracle Linux 8 is based on Dandified Yum (DNF). You can use dnf to install or upgrade RPM packages, while automatically handling package dependencies and requirements. The dnf command can be used to download the packages from repositories such as those that are available on the Oracle Linux yum server, but you can also set up your own repositories on systems that do not have Internet access. You can also use the dnf command on systems that are registered with the Unbreakable Linux Network (ULN) to install additional software that is limited to Oracle Linux Premier Support customers.
DNF provides significant improvements in functionality and performance when compared to the traditional yum command. DNF also brings a host of new features, including support for modular content and a more stable and well documented API. DNF is compatible with Yum v3, when used from the command line or when editing or creating configuration file. You can use the dnf command and all of its options similarly to how you used the yum command on previous releases of Oracle Linux.
The yum command that is provided with Oracle Linux 8 is a symbolic link to the dnf command. The commands are completely interchangeable. This implementation provides a level of backward compatibility that enables you to perform similar tasks to those that you performed in earlier releases of Oracle Linux, while at the same time, facilitating the wider range of new features that are available in dnf , such as improved package management and performance. Syntax differences between dnf and legacy yum commands are described in detail in Oracle В® Linux 8: Release Notes for Oracle Linux 8.
1.1.1В About the Oracle Linux Yum Server
The Oracle Linux yum server is a convenient way to install Oracle Linux packages, including bug fixes, security fixes and enhancements, rather than installing them from installation media. You can access the server at https://yum.oracle.com/.
You can also subscribe to the Oracle Linux mailing list to be notified when new packages are released. You can access the mailing list at https://oss.oracle.com/mailman/listinfo/el-errata.
1.1.2В About Using ULN With Yum
The repositories that are available on the Oracle Linux yum server are aligned with the channels that are available from the Unbreakable Linux Network (ULN). Exceptions are any ULN channels that are limited to Oracle Linux Premier Support customers, for example, channels for products such as Ksplice.
Compute nodes running Oracle Linux on Oracle Cloud Infrastructure and that are connected to a service gateway automatically have access to ULN content via the regional yum servers available on the Oracle Services Network. These yum servers differ from the publicly available Oracle Linux yum server in that they also mirror content available on restricted ULN channels.
Access to ULN content is provided by virtue of the support contract that you have for your Oracle Cloud Infrastructure account. You are able to access content on ULN without any requirement to register or use alternate tools to manage channel access, simplifying any software management that you need to perform on a compute node.
To enable access to restricted content via the regional yum servers, ensure that you have installed the appropriate release-el8 packages and enabled the repositories that you require access to.
1.2В DNF Configuration
The main configuration file for DNF is /etc/dnf/dnf.conf . The global definitions for DNF are located under the [main] section heading of the DNF configuration file. The following table describes the important directives for DNF.
Directory used to store downloaded packages.
Logging level, from 0 (none) to 10 (all).
A space separated list of packages to exclude from installs or updates, for example: exclude=VirtualBox-4.? kernel* .
If set to 1, verify the authenticity of the packages by checking the GPG signatures. You might need to set gpgcheck to 0 if a package is unsigned, but you should be wary that the package could have been maliciously altered.
Path to the GPG public key file.
Maximum number of versions that can be installed of any one package.
If set to 0, remove packages after installation.
Path to the yum log file.
If set to 1, replace obsolete packages during upgrades.
If set to 1, enable plugins that extend the functionality of yum .
URL of a proxy server including the port number. See Section 1.2.1, “Configuring the Use of a Proxy Server”.
Password for authentication with a proxy server.
User name for authentication with a proxy server.
Directories where yum should look for repository files with a .repo extension. The default directory is /etc/yum.repos.d .
See the dnf.conf(5) manual page for more information.
The following listing shows an example [main] section from the DNF configuration file.
It is possible to define repositories below the [main] section in /etc/dnf/dnf.conf or in separate repository configuration files. By default, dnf expects any repository configuration files to be located in the /etc/yum.repos.d directory, unless you use the reposdir directive to define alternate directories.
Note that for backward-compatibility purposes, a symbolic link to /etc/dnf/dnf.conf is created at /etc/yum.conf . The configuration syntax is generally the same; although, some configuration options have been deprecated and some new configuration options have been added. See Oracle В® Linux 8: Release Notes for Oracle Linux 8 for a breakdown of the differences between configuration options and syntax.
1.2.1В Configuring the Use of a Proxy Server
If your organization uses a proxy server as an intermediary for Internet access, specify the proxy setting in /etc/dnf/dnf.conf as shown in the following example.
If the proxy server requires authentication, additionally specify the proxy_username , and proxy_password settings.
If you use the yum plugin ( yum-rhn-plugin ) to access the ULN, specify the enableProxy and httpProxy settings in /etc/sysconfig/rhn/up2date as shown in this example.
If the proxy server requires authentication, additionally specify the enableProxyAuth , proxyUser , and proxyPassword settings.
All dnf users require read access to /etc/dnf/dnf.conf or /etc/sysconfig/rhn/up2date . If these files must be world-readable, do not use a proxy password that is the same as any user’s login password, and especially not root ‘s password.
1.2.2В Yum Repository Configuration
Yum repository configuration files are used by DNF to determine where different packages and their dependencies can be installed from.
The yum configuration file or yum repository configuration files can contain one or more sections that define repositories.
The following table describes the basic directives for a repository.
Location of the repository channel (expressed as a file:// , ftp:// , http:// , or https:// address). This directive must be specified.
If set to 1, permit yum to use the channel.
Descriptive name for the repository channel. This directive must be specified.
Any other directive that appears in this section overrides the corresponding global definition in the [main] section of the DNF configuration file. See the dnf.conf(5) manual page for more information.
The following listing shows an example repository section from a configuration file.
In this example, the values of gpgkey and gpgcheck override any global setting. dnf substitutes the name of the current system’s architecture for the variable $basearch .
The dnf command automatically searches the /etc/yum.repos.d directory for files with the suffix .repo and appends these to the configuration when it is processing. Use this directory to define repository files for repositories that you want to make available.
1.2.3В Downloading Oracle Linux Yum Server Repository Files
The Oracle Linux yum server provides a direct mapping of all of the ULN channels that are available to the public, without any specific support agreement. The repository labels that are used for each repository on the Oracle Linux yum server map directly to the channel names on ULN. See ChapterВ 2, Unbreakable Linux Network for more information about channel names and common suffixes that are used for channels and repositories.
Oracle Linux 8 uses modular yum repository configuration files released as packages that can be maintained through yum, which helps simplify repository management and also ensure that your yum repository definitions are kept up to date automatically whenever you update your system.
A list of all available RPM files to manage all of the possible yum repository configurations for your release can be obtained by running the following command:
To install the yum repository configuration for a particular set of software that you wish to use, use the dnf command to install the corresponding package.
If, for some reason, you manage to remove all configuration to access the Oracle Linux yum server repositories, you should create a temporary yum repository configuration file at /etc/yum.repos.d/ol8-temp.repo with the following as the minimum required content:
Then, reinstall the oraclelinux-release-el8 package to restore the default yum configuration:
For more information about manually setting up Oracle Linux yum server repository configuration files, see https://yum.oracle.com/getting-started.html.
You can enable or disable repositories in each repository configuration file by setting the value of the enabled directive to 1 or 0 , for each repository that is listed in the file, as required. The preferred method of enabling or disabling repositories under Oracle Linux 8 is to use the dnf config-manager command, as described in Section 1.2.4, “Using the DNF config-manager Plugin”.
1.2.3.1В Configuring Oracle Cloud Infrastructure Compute Instances for access to the regional yum server repositories
Compute instances in Oracle Cloud Infrastructure have access to regional yum servers via the service gateway. Regional yum servers on Oracle Cloud Infrastructure differ from the Oracle Linux yum server in that they also mirror content available on restricted ULN channels.
Yum repository configuration in Oracle Linux makes use of a yum variable in the baseurl for managing appropriate yum server access. For example, the baseurl to the ol8_baseos_latest repository for Oracle Linux 8 is:
The $ociregion variable can be set by populating content in /etc/dnf/vars/ociregion . If this file does not exist, or the file is empty, the baseurl is expanded to point to the publicly accessible Oracle Linux yum server. In the case of a typical Oracle Cloud Infrastructure compute instance, the value of variable is set when the instance is created so that the baseurl is expanded to point to the closest regional yum server on the Oracle Cloud Infrastructure service network. For example, if $ociregion is set to -phx , the baseurl expands to point to the regional yum server located in Phoenix.
By using variables, configuration can remain relatively standard across Oracle Linux deployments but provide access to the additional resources available to Oracle Cloud Infrastructure customers.
1.2.4В Using the DNF config-manager Plugin
The dnf-plugins-core package includes several utilities that can help you to manage configuration and safely apply updates to your existing configuration. Most significant of these is the dnf config-manager plugin.
You can use dnf config-manager to add repositories, either at a specified URL or within a specified repository file. For example, to add a repository configuration file for Oracle Linux 8 that is hosted on a remote server, you can run the following command:
You can use the same command to automatically generate a repository configuration file for a valid yum repository by pointing to the URL for which the repository is hosted. For example, to create a new configuration file in /etc/repos.d for an example repository, run the following command:
To enable a repository by using dnf config-manager , use the —enable option. For example, to enable the ol8_appstream repository, run the following command:
You can use the —disable option in a similar way to disable a repository.
You can also use the dnf config-manager tool to set other configuration options by specifying the —setopt and —save options. See the dnf.plugin.config_manager(8) manual page for more information.
1.3В Using DNF From the Command Line
The following table shows examples of some of the common tasks that you can perform by using the dnf command.
dnf repolist
Lists all of the enabled repositories.
dnf list
Lists all of the packages that are available in all enabled repositories and all packages that are installed on your system.
dnf list installed
Lists all of the packages that are installed on your system.
dnf list available
Lists all of the packages that are available to be installed in all enabled repositories.
dnf search string
Searches the package descriptions for the specified string.
dnf provides feature
Finds the name of the package to which the specified file or feature belongs, for example:
dnf provides /etc/dnf/automatic.conf
dnf info package
Displays detailed information about a package, for example:
dnf info dnf-automatic
dnf repoquery -l package
dnf repoquery -l dnf-automatic
dnf install package
Installs the specified package, including packages on which it depends, for example:
dnf install dnf-automatic
dnf check-update
Checks whether updates exist for packages that are already installed on your system.
dnf upgrade package
Updates the specified package, including packages on which it depends, for example:
dnf upgrade dnf-automatic
DNF also interprets the dnf update package command as synonymous with the upgrade syntax; however, this syntax is considered deprecated.
dnf upgrade
Updates all packages, including packages on which they depend.
DNF also interprets the dnf update package command as synonymous with the upgrade syntax; however, this syntax is considered deprecated.
dnf remove package
Removes the specified package. For example:
dnf remove dnf-automatic
dnf clean all
Removes all cached package downloads and cached headers that contain information about remote packages. Running this command can help to clear problems that are a result of unfinished transactions or out-of-date headers.
dnf help
Displays help about dnf usage.
dnf help command
Displays help about the specified dnf command, for example:
dnf help upgrade
dnf shell
Runs the dnf interactive shell.
See the dnf(8) manual page for more information.
dnf makes no distinction between installing and upgrading a kernel package. dnf always installs a new kernel regardless of whether you specify upgrade or install .
1.4В DNF Groups
A set of packages can be organized and managed as a group . Groups can be nested so that a parent group contains a set of sub-groups that can be installed. Examples include the groups for setting up a virtualization host, a graphical desktop, a collection of fonts, or core system administration tools. The following table shows the dnf commands that you can use to manage these groups.
dnf group list
Lists Environment Groups, that contain many sub-groups; and base groups of packages that are available for installation.
dnf group info groupname
Displays detailed information about a group. If the group is a parent group, this command lists all sub-groups that it contains, alternately the command lists all packages that are in the group.
dnf group install groupname
Installs all of the packages in a group.
dnf group update groupname
Updates all of the packages in a group.
dnf group remove groupname
Removes all of the packages in a group.
1.5В DNF Modules and Application Stream
DNF introduces the concepts of modules, streams and profiles to allow for the management of different versions of software applications within a single operating system release. Modules can be used to group together many packages that comprise a single application and its dependencies. Streams can be used to provide alternate versions of the same module. Profiles can be used to define optional configurations of any single module so that a module can be limited only to developer packages or can be scoped to include additional packages for enhanced functionality.
Modular content is made available separately to core operating system packages so that these user-space applications can be installed in a variety of user-space environments, including virtual machines, containers as well as the base operating system. Modular content for Oracle Linux 8 is typically shipped within the Application Stream (AppStream) repository. For a list of application stream packages in the latest Oracle Linux 8 version, see AppendixВ A, Application Stream Module Life Cycle.
Modules : Are a set of RPM packages that are grouped together and must be installed together. They can contain several streams that consist of multiple versions of applications that you can install. You enable a module stream to provide system access to the RPM packages that are contained in that module stream.
A typical module can contain the following types of packages:
Packages with an application
Packages with the application’s specific dependency libraries
Packages with documentation for the application
Packages with helper utilities
Module streams : Hold different versions of content contained within a module.
Modules can have multiple streams, where each stream contains a different version of packages and their dependencies. Each stream receives updates independently. A module can have more than one stream. However, note that for each module, only one of its streams can be enabled to provide access to its packages. Frequently, the stream with the latest version is selected as the default stream and is used when operations do not specify a particular stream or a different stream has not been enabled previously.
Module streams can be thought of as virtual repositories within the physical repository. For example, the postgresql module provides the PostgreSQL database, in streams 9.6 and 10, respectively, with version 10 being the current default stream.
Oracle recommends that you use the latest stream for any module that is installed, even though other streams may continue to receive limited support.
Module profiles : Provide a list of certain packages that are to be installed at the same time for a particular use case. At the same time, profiles are also a recommendation by the application packagers and experts. Note that each module can have one or more profiles.
You install packages by using a module’s profile as a one-time action. Using a module’s profile to install packages does not prevent you from installing or uninstalling any of the packages that are provided by the module. Furthermore, it is possible to install packages by using multiple profiles of the same module without any further preparation. Also, a module’s package list can contain packages from outside of the module stream, usually from BaseOS or stream’s dependencies. Note that modules in Application Stream always have a default profile. This default profile is used for installations, when no other profile has been explicitly specified.
For example, The httpd module that includes the Apache web server supports the following profiles for installation:
common : This profile is a hardened production-ready deployment and is the default profile.
devel : This profile installs the packages that are necessary to make modifications to httpd .
minimal : This profile installs the smallest set of packages that provide a running web server.
Unlike software collections that were included in previous releases of Oracle Linux, applications that are installed from Application Streams are installed into standard locations and do not require additional commands or actions to run. You can run any version of an installed application the same way as any other version, regardless of the stream from which it was installed. After it is installed, the application behaves exactly as any other native application that you have installed by using DNF.
1.5.1В Displaying Available Modules
You can list available modules, typically within the Application Stream repository, by using the dnf module list command. Further module information can be obtained using the dnf module info command.
The following table describes some of the more commonly used commands for viewing and displaying content details in Application Stream.
Description of Action
dnf module info module-name
Displays information about a module.
dnf module info —profile module-name
Displays information about the packages that are installed by the profiles of a module using the default stream.
dnf module info —profile module-name : stream
Displays information about the packages that are installed by the profiles of a module using a specified stream.
dnf module list
Lists all of the available modules and displays the module name, stream, profiles, and a summary. Each module and stream is listed on a separate line. Profiles are indicated using comma separated values for each module and stream.
Default values are indicated with the characters [d] . Modules that are enabled are indicated with the characters [e] , while those that are disabled are indicated with the characters [x] . Installed modules, streams and profiles are indicated with the characters [i] .
dnf module list module-name
Lists the current status of a module.
dnf module provides package
Displays information about which modules provide a specified package.
If the package is only available outside of any modules, the command output is empty.
1.5.2В Module Installation Commands
The following table describes the commands that are used to install content from Application Stream.
Description of Action
dnf install package
Installs the specified package.
If a package is provided by a module stream, the dnf command resolves the required module stream and enables it automatically during package installation. In addition, the process is recursive for any package dependencies. Note that if more module streams satisfy the requirement, the default streams are used.
If the package is provided by a module stream that is not marked as default or is not enabled, that package is not recognized until you manually enable the applicable module stream.
dnf module enable module-name : stream
Enables a module or stream.
Use this command when you want to enable a module so that the packages are available to the system, but you do not necessarily want to install the module immediately.
Note that some modules might not define default streams. In this case, you must explicitly specify the stream. If you explicitly specify a stream and an alternate stream is set as the default, the enabled stream overrides the default stream for subsequent install requests.
dnf install @module-name
Alternatively, you can use:
dnf module install module-name
Installs a module. The @ character is shorthand to indicate that you intend to install a module.
If the module defines a default stream, or you have enabled a particular stream, you do not need to include stream and colon in the command syntax.
Be aware that some modules do not define default streams.
dnf install @module-name : stream
Alternatively, you can use:
dnf module install module-name : stream
Installs a module by using a specific stream and default profiles.
dnf install @module-name : stream / profile
Alternatively, you can use:
dnf module install module-name : stream / profile
Installs a module by using a specific stream and profile.
1.5.3В About Modular Dependencies and Stream Changes
Typically, packages that provide content depend on other packages, and they usually specify the desired dependency versions. This same mechanism also applies to packages that are contained within modules. The grouping of packages and their particular versions into modules and streams has some additional constraints. For example, module streams can declare dependencies on the streams of other modules, independent of the packages that are contained and provided by them. After any package or module operation, the entire dependency tree for all of the underlying installed packages must satisfy all of the conditions that the packages declare. Also, all of the module stream dependencies must satisfied.
These additional constraints require that you carefully consider any package operations prior to performing them, as changing the enabled module streams does not automatically manipulate packages to enable you to have complete control over the changes. However, the tool always provides a summary of the actions to take.
When performing package operations on modules and streams, keep the following guidelines, caveats, and warnings in mind:
Enabling a module stream might also require the enabling of streams of additional modules.
Installing a module stream profile or packages from a stream might also require the enabling of streams of additional modules and the installation of additional packages.
Disabling a stream of a module might also require the disabling of other module streams, as no packages are removed automatically.
Removing a package can require the removal of additional packages. If any of the packages are provided by modules, the module streams remain enabled in preparation for further installation, even if no packages from these streams are installed subsequently; thereby, mirroring the behavior of an unused yum repository.
Switching the stream that is enabled for a module is the same as resetting the current stream and enabling a new stream.
Switching an enabled stream does not automatically change any of the installed packages. Also, removing packages that are provided by a previous stream, and any of the packages that depend on them, as well as the installation of packages in a new stream are all tasks that must be performed manually.
Due to potential upgrade scripts that run during an installation, directly installing a stream of a module, other than one that is currently installed by default, is not recommended.
Module dependencies include regular package dependencies that are similar to RPM dependencies. For modules, however, availability can also depend on the enabling of module streams; module streams can also depend on other module streams.
Dependencies of non-modular packages on modular packages is used in Application Stream only when a modular package is provided by a module stream that is marked as the default. When a modular package depends on a non-modular package, the system always retains the module and stream choices, unless you provide explicit instructions to change them. A modular package receives updates from the currently enabled stream of the module that provides this package and does not upgrade to a version from a different stream.
1.5.4В Removing Installed Modules
Before removing an installed module, carefully review the information in Section 1.5.3, “About Modular Dependencies and Stream Changes”.
When you remove an installed module, all of the packages that are installed by the profiles of the currently enabled module stream, and any further packages and modules that depend on them, are also removed. Note that any packages installed from this module stream that are not listed in any of its profiles remain installed on the system and can be removed manually.
A prerequisite to removing installed modules requires that the module to be removed already has some profiles installed.
To remove an installed module, follow these steps:
Remove the module.
In the previous example, module-name specifies the name of the module to remove.
The dnf module remove command removes all of the packages that are installed from this module. You are presented with a summary of the changes to be made and a request for confirmation.
Disable the module stream.
In the previous example, module-name is the name of the module to disable.
You are presented with a summary of the changes to be made and a request for confirmation.
Remove any packages that you manually installed from the module stream.
In the previous example, package . is the name of the package, or packages, to be removed.
You are presented with a summary of the changes to be made and a request for confirmation.
1.5.5В Switching Module Streams
Before switching module streams, carefully review the information in Section 1.5.3, “About Modular Dependencies and Stream Changes”.
When you switch to a different module stream, you are usually upgrading or downgrading the content to a different version than the version that is currently installed on the system.
The module stream that you want to switch must already be enabled, and , another stream of the same module must already exist.
Reset the module to make it possible to install an alternate stream:
If you fail to reset the module before attempting to install an alternate stream, an error is returned to notify you that it is not possible to switch enabled streams of a module.
Install the profiles of a different stream of the module as follows:
In the previous example, module-name is the name of the module and stream is the desired stream.
You are presented with a summary of the changes to be made and a request for confirmation.
Running the previous command enables the new stream and disables the current stream. Note that it might be necessary to make changes to additional module streams and packages.
Update or downgrade any packages installed from the previous module stream that were not listed in the profiles installed in the previous step.
You are presented with a summary of the changes to be made and a request for confirmation.
Manually remove any remaining packages that were installed from the previous module stream.
In the previous example, package . is the name of the package, or packages, to be removed.
You are presented with a summary of the changes to be made and a request for confirmation.
1.6В Using DNF Security Options
DNF includes integrated options to handle any requirement for managing security and errata updates that are available for packages installed in Oracle Linux 8.
List the errata that are available for your system as follows:
The output from the command sorts the available errata in order of their IDs, and it also specifies whether each erratum is a security patch ( severity /Sec. ), a bug fix ( bugfix ), or a feature enhancement ( enhancement ). Security patches are listed by their severity: Important , Moderate , or Low .
You can use the —sec-severity option to filter the security errata by severity, for example:
To list the security errata by their Common Vulnerabilities and Exposures (CVE) IDs instead of their errata IDs, specify the keyword cves as an argument:
Similarly, the keywords bugfix , enhancement , and security filter the list for all bug fixes, enhancements, and security errata.
You can use the —cve option to display the errata that correspond to a specified CVE, for example:
To display more information, specify info instead of list , for example:
To update all of the packages for which security-related errata are available to the latest versions of the packages, even if those packages that include bug fixes or new features but not security errata, use the following command:
To update all packages to the latest versions that contain security errata, ignoring any newer packages that do not contain security errata, use the following command:
To update all kernel packages to the latest versions that contain security errata, use the following command:
To update only those packages that correspond to a CVE or erratum, use the dnf update —cve and dnf update —advisory commands, for example:
Some updates might require that you reboot the system. By default, the boot manager automatically enables the most recent kernel version.
For more information, see the dnf(8) manual page.
1.7В Using the DNF Automatic Tool to Keep Your System Up To Date
The DNF Automatic tool is provided as an additional package that you can use as an alternative to manually running dnf upgrade to keep your system up to date with the latest security patches and bug fixes. The tool can provide automatic notifications of updates, download updates, and then install them automatically by using systemd timers.
You can install the dnf-automatic package and enable the systemd dnf-automatic.timer timer unit to start using this service:
You configure the DNF Automatic tool by editing the /etc/dnf/automatic.conf configuration file and then restarting the timer unit.
Note that additional alternate timer units are available and can override the default configuration that is specified in the configuration file. Frequently, these timer units are used as handy shortcuts to perform a specific behavior:
dnf-automatic-notifyonly.timer : Notifies for available updates
dnf-automatic-download.timer : Downloads package updates, but does not install them
dnf-automatic-install.timer : Downloads and automatically installs package updates
You enable the required behavior by running:
1.8В Creating a Local Yum Repository by Using an ISO Image
The system must have sufficient storage space to host a full Oracle Linux Media Pack DVD image (approximately 6.6 GB for Oracle Linux 8).
To create a local yum repository (for example, if a system does not have Internet access):
On a system with Internet access, download a full Oracle Linux DVD image from the Oracle Software Delivery Cloud at https://edelivery.oracle.com/linux onto removable storage (such as a USB memory stick).
You can verify that the ISO was copied correctly by comparing its checksum with the digest value that is listed on edelivery.oracle.com , for example:
Transfer the removable storage to the system on which you want to create a local yum repository, and copy the DVD image to a directory in a local file system.
Create a suitable mount point, for example /var/OSimage/OL8_x86_64 , and mount the DVD image on it.
Include the read-only mount option ( ro ) to avoid changing the contents of the ISO by mistake.
Create an entry in /etc/fstab so that the system always mounts the DVD image after a reboot.
Disable all existing yum repositories.
In the /etc/yum.repos.d directory, edit any existing repository files and disable all entries by setting enabled=0 . Alternately, as described in Section 1.2.4, “Using the DNF config-manager Plugin”, you can disable all repositories by running:
Create the following entries in a new repository file (for example, /etc/yum.repos.d/OL8.repo ), for example:
Note that the correct GPG key file must exist at the path specified for the gpgkey parameter. You can download the GPG keys used to sign all of the Oracle Linux release packages from the Oracle Linux yum server, but the key is also provided on the ISO itself. See https://yum.oracle.com/faq.html#a10 for more information.
Clean up the dnf cache.
Test that you can use the dnf command to access the repository.
1.9В Setting up a Local Yum Server by Using an ISO Image
To set up a local yum server (for example, if you have a network of systems that do not have Internet access):
Choose one of the systems to be the yum server, and create a local yum repository on it as described in Section 1.8, “Creating a Local Yum Repository by Using an ISO Image”.
Install the Apache HTTP server from the local yum repository.
If SELinux is enabled in enforcing mode on your system, do the following:
Use the semanage command to define the default file type of the repository root directory hierarchy as httpd_sys_content_t :
Use the restorecon command to apply the file type to the entire repository:
The semanage and restorecon commands are provided by the policycoreutils-python and policycoreutils packages.
Create a symbolic link in /var/www/html that points to the repository:
Edit the HTTP server configuration file ( /etc/httpd/conf/httpd.conf ) as follows:
Specify the resolvable domain name of the server, in the argument to ServerName .
If the server does not have a resolvable domain name, enter its IP address instead.
Verify that the setting of the Options directive in the section specifies Indexes and FollowSymLinks to allow you to browse the directory hierarchy, for example:
Save your changes to the file.
Start the Apache HTTP server, then configure it to start after a reboot.
If you have enabled a firewall on your system, configure it to allow incoming HTTP connection requests on TCP port 80, for example:
Disable all of the existing yum repositories on the server and each client system.
In the /etc/yum.repos.d directory, edit any existing repository files and disable all entries by setting enabled=0 . If you have the yum-utils package installed, as described in Section 1.2.4, “Using the DNF config-manager Plugin”, you can disable all repositories by running the following command:
Edit the repository file on the server, for example, /etc/yum.repos.d/OL8.repo :
Replace server_addr with the IP address or resolvable host name of the local yum server.
On the server and on each client, copy the repository file and copy and import the GPG key file that is used to sign these packages. You can either import the key included on the ISO, or you can download and install it from the Oracle Linux yum server.
On each client, copy the repository file from the server to the /etc/yum.repos.d directory.
On the server and each client, test that you can use the dnf command to access the repository:
1.10В More Information About DNF
Frequently asked questions about the Oracle Linux yum server are answered at https://yum.oracle.com/faq.html.
Copyright В© 2019, 2021, Oracle and/or its affiliates. Legal Notices
Источник


