- О маршрутизации простыми словами. Как посмотреть, добавить или удалить маршрут в macOS
- Как посмотреть, добавить или удалить маршрут в macOS
- Маршрутизация в Mac OS при VPN подключении
- HOWTO quickly add a route in Mac OSX
- Rate this:
- Share this:
- Like this:
- Related
- 26 responses to HOWTO quickly add a route in Mac OSX
- Adding a Static Route to macOS
- Command
- Examples
- Purpose
О маршрутизации простыми словами. Как посмотреть, добавить или удалить маршрут в macOS

Я давно заметил, что многих пользователей пугает само слово «маршрутизация». Да чего там говорить про обычных пользователей, когда даже админы (особенно те, кто кроме Windows ничего другого не видели) с трудом понимают что это такое.
И я сейчас не преувеличиваю. Иногда требуется прописать статический маршрут на клиенте, а не на роутере и мне приходилось объяснять не пользователю, а админу зачем это нужно, как это делается и в чём отличие от маршрута по умолчанию.
Мальчик сказал маме: “Я хочу кушать” и мама отправила его к папе.
Мальчик сказал папе: “Я хочу кушать” и папа отправил его назад к маме.
Мальчик сказал маме: “Я хочу кушать” и мама снова отправила его к папе.
Так мальчик бегал туда-обратно, пока не упал.
Что случилось с мальчиком? TTL кончился.
Скажете бессмысленный анекдот? Чтобы его понять нужно изучить как работают сети, а пока давайте объясню простыми словами что такое «маршрутизация» (routing), чтобы это слово вас больше не пугало.
Если вы когда-либо настраивали свой роутер или смотрели свойства подключения к сети, то наверняка видели что кроме адреса вашего компьютера, есть ещё адрес шлюза (ещё одно непонятное слово).
Всё просто. Интернет можно представить как разветвлённую дорожную сеть с кучей направлений. Каждая из дорог может привести куда угодно и не факт что нам туда вообще нужно. Так вот, ваш шлюз — это отправная точка во всемирную сеть, откуда вы начинаете свой путь и, в большинстве случаев, он становится для вас маршрутом по умолчанию.
То есть, когда вы открываете какие-то сайты, качаете торренты или проверяете почту, все ваши данные проходят через устройство с данным адресом. Он знает куда нужно дальше передавать пакеты данных. Таких отправных точек может быть превеликое множество и каждая из них обладает информацией о своём сегменте сети, компьютерах и других устройствах, расположенных за ней. Собственно, маршрутизация — это процесс определения лучшего маршрута.
Когда мы знаем точный маршрут следования (его ещё называют статическим), то можем сразу начать движение по нему, в противном случае используется маршрут по умолчанию, который как бы говорит: всё, что не знаешь, куда послать — шли сюда.
В каком случае может потребоваться указывать статический маршрут? Например, при использовании VPN-соединений, когда не желательно гонять весь трафик в защищённом канале. Но это уже выходит за рамки простого описания, да и про VPN я уже много рассказывал ранее. Кому интересно что это такое, можете почитать тут, а сейчас расскажу как управлять статическими маршрутами на примере macOS (если вы хотите узнать как управлять маршрутами в Windows и Linux, оставляйте комментарии и в одном из следующих постов я постараюсь изложить данную тему подробнее).
Как посмотреть, добавить или удалить маршрут в macOS
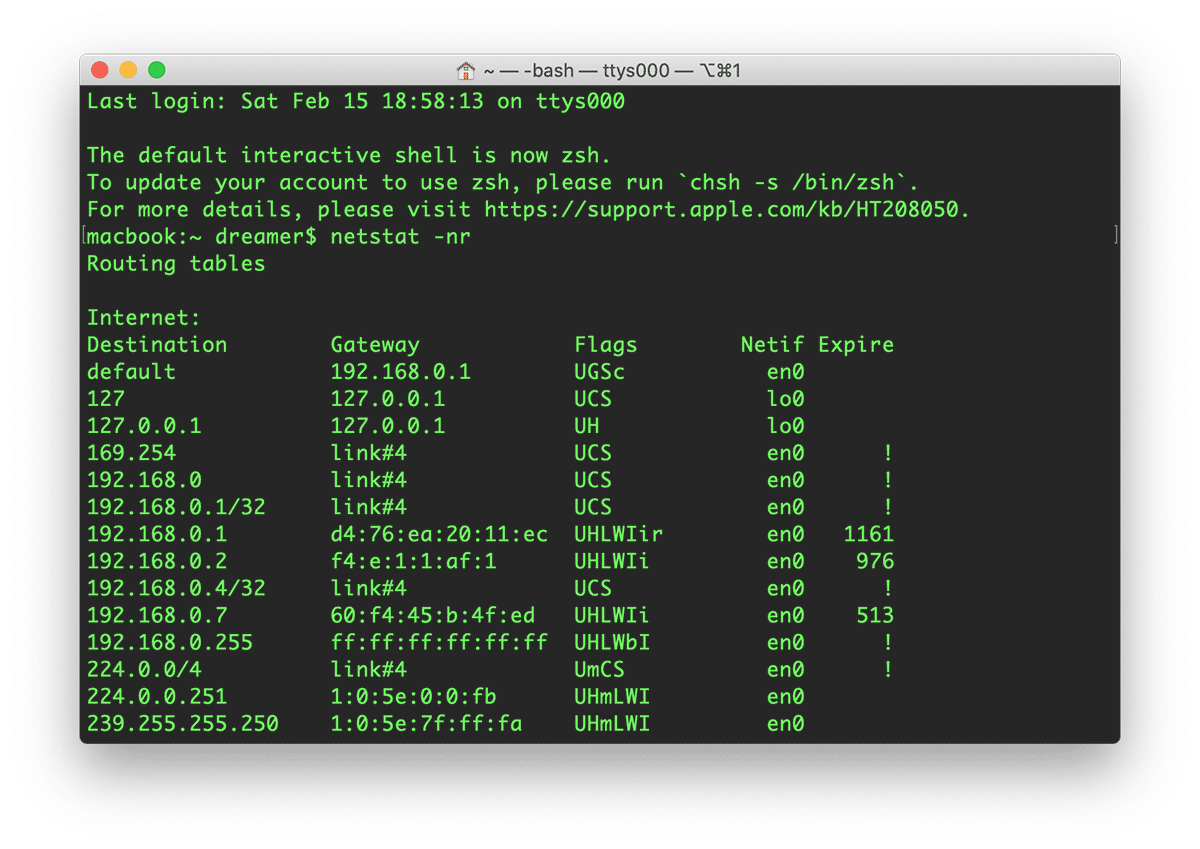
Чтобы посмотреть все действующие маршруты, отрываем Терминал и вводим следующую команду:
Добавить статичный маршрут можно следующей командой:
sudo route -n add 192.168.10.0/24 10.8.0.9
Здесь мы указали что для доступа к сети 192.168.10.0 с маской 255.255.255.0 (24) следует использовать шлюз 10.8.0.9.
Теперь удалим созданный статичный маршрут:
sudo route -n delete 192.168.10.0/24 10.8.0.9
Если считаете статью полезной,
не ленитесь ставить лайки и делиться с друзьями.
Источник
Маршрутизация в Mac OS при VPN подключении
Появилась как-то задача подключатся по VPN к рабочей сети, чтобы иметь доступ к внутренним ресурсам.
Средствами Мака это можно сделать создав VPN подключение и 2 варианта:
1. поставить галочку «Слать весь трафик через VPN подключение»
2. статически прописать статически route add -net 192.168.10.0/24 192.168.44.1, где 192.168.10.0/24 — сеть в которой находятся компьютеры на работе, 192.168.44.1 VPN шлюз к которому я подключаюсб.
Итак после каждого подключения нужно делать вторую манипуляцию, так как общий доступ в интернет ограничен и скорость не ахты. Или задача состоит в том чтобы ходить на сайты (например youtube) через более быстрый канал VPN…
Итак задачу я решил следующим образом:
создал скрипт: touch /etc/ppp/ip-up
дал ему прав на исполнение: chmod +x /etc/ppp/ip-up
создал файл для логов: touch /tmp/ppp.log
Содержимое скрипта:
#!/bin/sh
VPNWORK=»192.168.44.1″; #обьявляем переменную (например по названию VPN подключения)
if [ $IPREMOTE = $VPNWORK ] #проверяем, если совпадает добавляем маршрут
then
/sbin/route -n add -net 192.168.10.0/24 $IPREMOTE > /tmp/ppp.log 2>&1
fi
Таким образом после подключения к сети добавляется маршрут, и нет необходимости добавлять его вручную, так-же при отключении от VPN он удаляется сам.
При необходимости добавлять DNS сервер можно дописать текст между then и fi:
echo «nameserver 4.2.2.1» > /etc/resolv.conf
Вместо 4.2.2.1 укажите свой основной DNS и второй записью рабочий.
Но при этом после отключения нам надо вернуть предыдущий DNS конфиг на место, для этого создаем: touch /etc/ppp/ip-down && chmod +x /etc/ppp/ip-down
Перед началом работы делаем бекап:
cp /etc/resolv.conf /etc/resolv.conf_original
и добавляем в скрипт /etc/ppp/ip-down:
#!/bin/sh
cat /etc/resolv.conf_original > /etc/resolv.conf
Собственно всё. При каждом подключении VPN прописывается маршрут, работаете сколько надо, после отключения удаляется, при этом у вас не будет загвоздок с DNS.
Источник
HOWTO quickly add a route in Mac OSX
Adding a route manually can be necessary sometimes. When on Linux, I know the command by head:
On the Mac the command is similar, but a bit different 🙂 Just as a note to myself and anyone else interested:
This sets up a route to the 10.67.0.0/16 net through gateway 192.168.120.254. First one on Linux, second one on Mac OSX.
Rate this:
Share this:
Like this:
Related

26 responses to HOWTO quickly add a route in Mac OSX
Hi
I have connected my Mac to a Linux box directly using a cable (no home router involved).
In Mac, I am setting a static IP address to 10.10.11.13 with subnet mask 255.255.255.0 and in Linux 10.10.11.16 with same mask. My Mac has two NICs (2nd one is connected to router and WWW). How can I add a route in Mac so all the traffic intended for the Linux box goes through first NIC? I am interested in waking the Linux machine up using something like:
$ wakeonlan -i 10.10.11.16 00:AA:BB:XX:XX
Is this routing possible?
Since you have the Mac and the Linux box in the same subnet (10.10.11.x) and have a subnet of /24 you do not need a route to be able to talk to each other. The mac wil automatically use the correct interface due to the netmask being used.
If you have a specific error message, please post it and I will have a look. From the info I have now I’d say this just works. The first thing that comes to mind when you’d encounter a problem is the cable connection. Did you use a cross-cable? Are the LEDs turned on?
My mac mini is connected to the web through wifi (192.168.17.x). I don’t have control over the wifi net. I started playing with a router and connected it to the wired interface en0. I have a hard time connecting to 192.168.1.1 which is the routers default address. I set en0 manually to 192.168.1.10. I tried adding a route, but no go. Can you help?
Did you already solve this issue? It does sound like a routing or netmask issue. If you tell a little more I might be able to help.
Hi Remi, I have the exact same basic question as Hamid although for a different purpose, i.e. How to route traffic destined for a specific ip through a specific interface when everything is on the same subnet. In my case I would like to use my mac’s wifi interface to connect to a network share as it is faster than using an ethernet cable for file transfers, but keep the rest of the traffic prioritised according to the order the interfaces are listed in Network system preferences.
I forgot to mention that I would like to be able to fallback to the ethernet interface if the wifi interface is disabled, thanks.
I figured that you can do this with an ip address using ‘sudo route add -host 192.168.1.2 -interface en1’ but that doesn’t work as the network share is accessed using it’s hostname myshare.local. Trying to route add -host myshare.local does not seem to work as although netstat -r shows a single entry for 192.168.1.2 assigned to en1, myshare.local only has an entry assigned to en0 😦
Hi Leo,
Connecting to the same network multiple times, with the same ip addressing is confusing the OS and might give mixed results. The quick and dirty way to solve this, is to add another ip address to your server (say 10.0.0.1) and one to your wifi interface (say 10.0.0.2) and have the two communicate using the 10.0.0.0/24 network. That will assure the routing is correct. You can use the same interface cards and same wires. Just add these as alias ip addresses and you’ll be fine.
Nice of you to share your knowledge, I have had something that’s been a consistent problem along the lines of this post that I’m hoping you have a suggestion about.
I have two networks:
a gigabit ethernet video editing network on a 192.168.1.x network (direct network, no outside connection)
our standard corporate network on 10.130.x.x.
Two Mac Pro’s have the network service order setup with the corporate network interface first (en1:DHCP) and the media network second (en0: 192.168.1.5 and 192.168.1.6). If I don’t put them in this order the internet doesn’t seem to work.
The media server is also a Mac Pro with the en0 (192.168.1.2) and en1 (10.130.178.90) similarly setup.
About 40% of the time the Mac Pros would connect to the media network over the slower 10.130 network… we figured out that if we used a GUI app called WaterRoof we could inject an ipfw command into the Mac Pros that blocks any connection to the media server on the corporate network (10.130.178.90).
This worked great for a while, then suddenly today, the video started playing choppy again and I ended up having to disable the media server’s en1 to the corporate network to force the connection over the 192.168 network. Don’t know how it found it’s away around the IP block (perhaps connecting by share name ?) but I was wondering if creating a route would be a better answer… could you show me the syntax for that…
do I need to do it on the Mac Pros AND the media server? Do I need to save it in some file for it to be permanent?
Any help would be HUGELY appreciated!
Interesting case! You could indeed add a route, so that even the corporate ip address will be reachable over the gigabit network.
Try this on the Mac PRO’s:
sudo route -n add -net 10.130.178.90/32 192.168.1.2
And reversed on the Media server:
sudo route -n add -net 10.130.178.x/32 192.168.1.5
sudo route -n add -net 10.130.178.y/32 192.168.1.6
netstat -nr gives an overview of current routes.
This should make the Media server’s corporate ip address reachable through the gigabit network and vice versa.
Hope this helps 🙂
Hi, This only works until you reboot the machine. Then the route is lost.
My office has restricted access to Internet sites such as Skype & Dropbox. I also have access to an unrestricted Wi-Fi.
The laptop is connected to both access points. Now my problem is, when en0 (ethernet) is my preferred channel then blocked sites like Skype won’t work though I have an active Wi-Fi connection. If I change the preferred channel to en1 (Wi-Fi) then Skype works but I cannot browse any of the company Intranet sites.
Why does the fallback to Wi-Fior visa versa does not work?
Here are my routing table entries using command netstat -nr:
$ netstat -nr
Routing tables
Internet:
Destination Gateway Flags Refs Use Netif Expire
default 192.168.2.1 UGSc 23 0 en1
default 172.16.8.1 UGScI 0 0 en0
default link#6 UCSI 1 0 en3
default link#8 UCSI 1 0 en14
127 127.0.0.1 UCS 0 0 lo0
127.0.0.1 127.0.0.1 UH 3 151425 lo0
169.254/30 link#6 UC 0 0 en3
169.254 link#11 UCS 3 0 en1
169.254 link#5 UCSI 0 0 en0
169.254 link#6 UCSI 1 0 en3
169.254 link#8 UCSI 1 0 en14
169.254.0.1 36:bb:1f:5:b7:d6 UHLSW 1 498 en3 889
169.254.0.2/32 link#6 UCS 0 0 en3
169.254.0.4/30 link#8 UCS 0 0 en14
169.254.0.5 96:eb:cd:3:8f:e4 UHLSW 5 38380 en14 325
169.254.0.6/32 link#8 UCS 0 0 en14
169.254.1.1 link#11 UHRLSW 0 16 en1
169.254.1.5 link#11 UHRLSW 0 8 en1
169.254.81.175 0:26:b9:9e:c6:e3 UHLSW 0 0 en0 1193
172.16.8/23 link#5 UCS 2 0 en0
172.16.8.1/32 link#5 UCS 1 0 en0
172.16.8.1 68:5:ca:10:18:5 UHLWIir 1 0 en0 1073
172.16.8.225 c:4d:e9:c3:51:8c UHLWI 0 0 en0 1190
172.16.9.233/32 link#5 UCS 1 0 en0
172.16.9.233 0:25:0:a4:fa:de UHLWI 0 1 lo0
192.168.2 link#11 UCS 1 0 en1
192.168.2.1/32 link#11 UCS 2 0 en1
192.168.2.1 74:31:70:6f:c6:58 UHLWIir 26 224 en1 1160
192.168.2.103 44:d8:84:8:85:e2 UHLWI 0 0 en1 692
192.168.2.104/32 link#11 UCS 1 0 en1
192.168.2.104 0:23:6c:97:46:a3 UHLWI 0 1 lo0
239.255.255.250 1:0:5e:7f:ff:fa UHmLWI 0 5 en3
239.255.255.250 1:0:5e:7f:ff:fa UHmLWI 0 19 en14
Источник
Adding a Static Route to macOS
Command
Executed from Terminal
x.x.x.x is the IP address of the Cisco/Luxul switch with Just Add Power devices attached
Examples
1. For a J+P Network of 10.0.0.0, subnet mask 255.0.0.0 and switch IP 192.168.0.254
2. For a J+P Network of 172.16.0.0, subnet mask 255.255.0.0 and switch IP 192.168.1.49
Purpose
Whether setting up or troubleshooting a system, there are some situations where adding a static route to the computer’s internal routing table is necessary:
- If there is not a static route already added to the network router. Perhaps because one is not needed for the day-to-day operation of the system (switching only) or the router does not support adding a static route.
- Changing the computer’s default gateway to the switch IP would conflict with the ability to connect the computer to the internet for Remote Desktop Support.
- The installer has to connect to the internet using the WiFi connection, while hard wiring into the Just Add Power system in situations where the Just Add Power switch is not connected to the rest of the customer’s network.
While adding a static route to a computer can be a great testing and troubleshooting tool, it will not enhance the actual operation of the system as the static route is only tied to the computer that the route is applied to. This method should not serve as a replacement for adding a Static Route to a system to access Layer 3 Features.
Источник


