- Элемент управления Label (Windows Forms) Label Control (Windows Forms)
- в этом разделе In This Section
- Справочник Reference
- Связанные разделы Related Sections
- Расширение файла LABEL
- Оглавление
- ✅ FreeSurfer Label
- 🔴 Не удается открыть файл .label?
- 🔴 Можно ли изменить расширение файлов?
- метка label
- Синтаксис Syntax
- Параметры Parameters
- Комментарии Remarks
- Примеры Examples
- Label files in windows
- label
- Syntax
- Parameters
- Remarks
- Examples
Элемент управления Label (Windows Forms) Label Control (Windows Forms)
ToolStripLabelЭлемент управления заменяет и расширяет функциональные возможности Label элемента управления. The ToolStripLabel control replaces and adds functionality to the Label control. Можно использовать ToolStripLabel с другими новыми элементами управления, такими как ToolStripDropDown . You can use the ToolStripLabel with other new controls such as the ToolStripDropDown. Однако этот Label элемент управления сохраняется как для обратной совместимости, так и для использования в будущем, если вы решили. However, the Label control is retained for both backward compatibility and future use, if you choose.
LabelЭлементы управления Windows Forms используются для вывода текста или изображений, которые не могут быть изменены пользователем. Windows Forms Label controls are used to display text or images that cannot be edited by the user. Они используются для обнаружения объектов в форме — для предоставления описания того, что может делать определенный элемент управления, например, или для вывода сведений в ответ на событие или процесс во время выполнения в приложении. They are used to identify objects on a form—to provide a description of what a certain control will do if clicked, for example, or to display information in response to a run-time event or process in your application. Поскольку Label элемент управления не может получать фокус, он также может использоваться для создания ключей доступа для других элементов управления. Because the Label control cannot receive focus, it can also be used to create access keys for other controls.
в этом разделе In This Section
Общие сведения об элементе управления Label Label Control Overview
Описание элемента управления, его основных возможностей и свойств. Explains what this control is and its key features and properties.
Практическое руководство. Определение клавиш доступа с помощью элементов управления Label в Windows Forms How to: Create Access Keys with Windows Forms Label Controls
Описывает использование метки для определения ключа доступа для другого элемента управления. Describes how to use a label to define an access key for another control.
Справочник Reference
Label
Описание класса и всех его членов. Describes this class and has links to all its members.
Связанные разделы Related Sections
Элементы управления для использования в формах Windows Forms Controls to Use on Windows Forms
Полный список элементов управления Windows Forms со ссылками на информацию об их применении. Provides a complete list of Windows Forms controls, with links to information on their use.
Расширение файла LABEL
В таблице ниже предоставляет полезную информацию о расширение файла .label. Он отвечает на вопросы такие, как:
- Что такое файл .label?
- Какое программное обеспечение мне нужно открыть файл .label?
- Как файл .label быть открыты, отредактированы или напечатано?
- Как конвертировать .label файлов в другой формат?
Оглавление
- ✅ FreeSurfer Label
- 🔄 Конвертеры файлов .label
- 🚫 Ошибки, связанные с файла .label
Мы надеемся, что вы найдете на этой странице полезный и ценный ресурс!
1 расширений и 0 псевдонимы, найденных в базе данных
✅ FreeSurfer Label
Другие типы файлов могут также использовать расширение файла .label.
🔴 Не удается открыть файл .label?
Если дважды щелкнуть файл, чтобы открыть его, Windows проверяет расширение имени файла. Если Windows распознает расширение имени файла, файл открывается в программе, которая связана с этим расширением имени файла. Когда Windows не распознает расширение имени файла, появляется следующее сообщение:
Windows не удается открыть этот файл:
Чтобы открыть этот файл, Windows необходимо знать, какую программу вы хотите использовать для его открытия.
Если вы не знаете как настроить сопоставления файлов .label, проверьте FAQ.
🔴 Можно ли изменить расширение файлов?
Изменение имени файла расширение файла не является хорошей идеей. Когда вы меняете расширение файла, вы изменить способ программы на вашем компьютере чтения файла. Проблема заключается в том, что изменение расширения файла не изменяет формат файла.
Если у вас есть полезная информация о расширение файла .label, напишите нам!
метка label
Создает, изменяет или удаляет метку тома (то есть имя) диска. Creates, changes, or deletes the volume label (that is, the name) of a disk. Если используется без параметров, команда Label изменяет метку текущего тома или удаляет существующую метку. If used without parameters, the label command changes the current volume label or deletes the existing label.
Синтаксис Syntax
Параметры Parameters
| Параметр Parameter | Описание Description |
|---|---|
| /mp /mp | Указывает, что том следует рассматривать как точку подключения или имя тома. Specifies that the volume should be treated as a mount point or volume name. |
| Указывает букву диска (за которой следует двоеточие), точку подключения или имя тома. Specifies a drive letter (followed by a colon), mount point, or volume name. Если указано имя тома, параметр /MP не требуется. If a volume name is specified, the /mp parameter is unnecessary. | |
| Указывает метку для тома. Specifies the label for the volume. | |
| /? /? | Отображение справки в командной строке. Displays help at the command prompt. |
Комментарии Remarks
Windows отображает метку тома и серийный номер (если они есть) в составе списка каталогов. Windows displays the volume label and serial number (if it has one) as part of the directory listing.
Длина метки тома NTFS может составлять до 32 символов, включая пробелы. An NTFS volume label can be up to 32 characters in length, including spaces. Метки томов NTFS содержат и отображают вариант, который использовался при создании метки. NTFS volume labels retain and display the case that was used when the label was created.
Примеры Examples
Чтобы пометить диск в дисководе A, который содержит сведения о продажах за Июль, введите: To label a disk in drive A that contains sales information for July, type:
Чтобы просмотреть и удалить текущую метку для диска C, выполните следующие действия. To view and delete the current label for drive C, follow these steps:
В командной строке введите: At the command prompt, type:
Должны отобразиться выходные данные, аналогичные приведенным ниже. Output similar to the following should be displayed:
Нажмите клавишу ВВОД. Press ENTER. Должен отобразиться следующий запрос: The following prompt should be displayed:
Нажмите клавишу Y , чтобы удалить текущую метку, или N , если хотите, чтобы она оставалась существующей. Press Y to delete the current label, or N if you want to keep the existing label.
Label files in windows


![]()
![]()
![]()
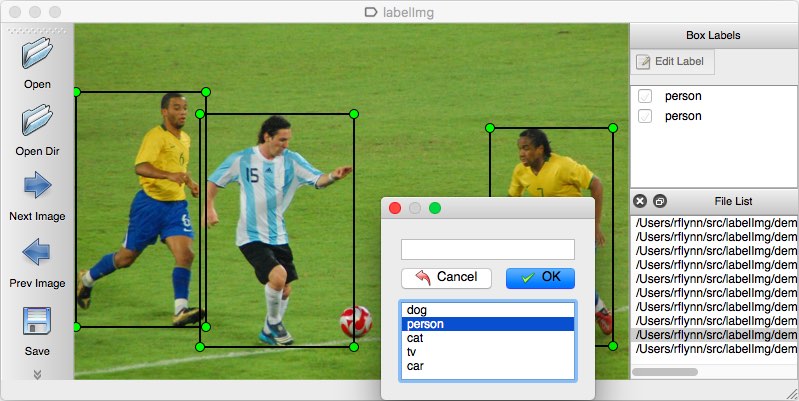
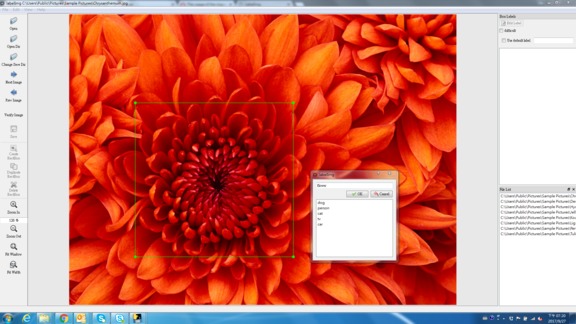
LabelImg is a graphical image annotation tool.
It is written in Python and uses Qt for its graphical interface.
Annotations are saved as XML files in PASCAL VOC format, the format used by ImageNet. Besides, it also supports YOLO and CreateML formats.
Build from source
Linux/Ubuntu/Mac requires at least Python 2.6 and has been tested with PyQt 4.8. However, Python 3 or above and PyQt5 are strongly recommended.
Python 3 Virtualenv (Recommended)
Virtualenv can avoid a lot of the QT / Python version issues
Note: The Last command gives you a nice .app file with a new SVG Icon in your /Applications folder. You can consider using the script: build-tools/build-for-macos.sh
Open cmd and go to the labelImg directory
Download and install Anaconda (Python 3+)
Open the Anaconda Prompt and go to the labelImg directory
Get from PyPI but only python3.0 or above
This is the simplest (one-command) install method on modern Linux distributions such as Ubuntu and Fedora.
You can pull the image which has all of the installed and required dependencies. Watch a demo video
- Build and launch using the instructions above.
- Click ‘Change default saved annotation folder’ in Menu/File
- Click ‘Open Dir’
- Click ‘Create RectBox’
- Click and release left mouse to select a region to annotate the rect box
- You can use right mouse to drag the rect box to copy or move it
The annotation will be saved to the folder you specify.
You can refer to the below hotkeys to speed up your workflow.
- In data/predefined_classes.txt define the list of classes that will be used for your training.
- Build and launch using the instructions above.
- Right below «Save» button in the toolbar, click «PascalVOC» button to switch to YOLO format.
- You may use Open/OpenDIR to process single or multiple images. When finished with a single image, click save.
A txt file of YOLO format will be saved in the same folder as your image with same name. A file named «classes.txt» is saved to that folder too. «classes.txt» defines the list of class names that your YOLO label refers to.
- Your label list shall not change in the middle of processing a list of images. When you save an image, classes.txt will also get updated, while previous annotations will not be updated.
- You shouldn’t use «default class» function when saving to YOLO format, it will not be referred.
- When saving as YOLO format, «difficult» flag is discarded.
Create pre-defined classes
You can edit the data/predefined_classes.txt to load pre-defined classes
| Ctrl + u | Load all of the images from a directory |
| Ctrl + r | Change the default annotation target dir |
| Ctrl + s | Save |
| Ctrl + d | Copy the current label and rect box |
| Ctrl + Shift + d | Delete the current image |
| Space | Flag the current image as verified |
| w | Create a rect box |
| d | Next image |
| a | Previous image |
| del | Delete the selected rect box |
| Ctrl++ | Zoom in |
| Ctrl— | Zoom out |
| ↑→↓← | Keyboard arrows to move selected rect box |
Verify Image:
When pressing space, the user can flag the image as verified, a green background will appear. This is used when creating a dataset automatically, the user can then through all the pictures and flag them instead of annotate them.
Difficult:
The difficult field is set to 1 indicates that the object has been annotated as «difficult», for example, an object which is clearly visible but difficult to recognize without substantial use of context. According to your deep neural network implementation, you can include or exclude difficult objects during training.
How to reset the settings
In case there are issues with loading the classes, you can either:
label
Creates, changes, or deletes the volume label (that is, the name) of a disk. If used without parameters, the label command changes the current volume label or deletes the existing label.
Syntax
Parameters
| Parameter | Description |
|---|---|
| /mp | Specifies that the volume should be treated as a mount point or volume name. |
| Specifies a drive letter (followed by a colon), mount point, or volume name. If a volume name is specified, the /mp parameter is unnecessary. | |
| Specifies the label for the volume. | |
| /? | Displays help at the command prompt. |
Remarks
Windows displays the volume label and serial number (if it has one) as part of the directory listing.
An NTFS volume label can be up to 32 characters in length, including spaces. NTFS volume labels retain and display the case that was used when the label was created.
Examples
To label a disk in drive A that contains sales information for July, type:
To view and delete the current label for drive C, follow these steps:
At the command prompt, type:
Output similar to the following should be displayed:
Press ENTER. The following prompt should be displayed:
Press Y to delete the current label, or N if you want to keep the existing label.


