- Frequently asked questions about classification and labeling in Azure Information Protection
- Which client do I install for testing new functionality?
- Where can I find information about using sensitivity labels for Office apps?
- How do I prevent somebody from removing or changing a label?
- When an email is labeled, do any attachments automatically get the same labeling?
- How can DLP solutions and other applications integrate with Azure Information Protection?
- Labeling files in windows
- How can I mark files with badges in Windows?
- 5 Answers 5
- Tag/label folders in Windows using a Windows File Explorer alternative
- What is RecentX?
- Tagging folders using Windows File Explorer
- Tagging folders from Windows File Explorer using RecentX
- Conclusion
- Способы восстановления флеш-накопителей
- Восстановление флеш-накопителя
- Способ 1: HP USB Disk Storage Format Tool
- Способ 2: EzRecover
- Способ 3: Фирменные утилиты
Frequently asked questions about classification and labeling in Azure Information Protection
To provide a unified and streamlined customer experience, the Azure Information Protection classic client and Label Management in the Azure Portal are deprecated as of March 31, 2021. While the classic client continues to work as configured, no further support is provided, and maintenance versions will no longer be released for the classic client.
We recommend that you migrate to unified labeling and upgrade to the unified labeling client. Learn more in our recent deprecation blog.
Have a question about Azure Information Protection that is specifically about classification and labeling? See if it’s answered here.
Which client do I install for testing new functionality?
We recommend installing the Azure Information Protection unified labeling client. The unified labeling client downloads labels and policy settings from one of the following admin centers:
- Office 365 Security & Compliance Center
- Microsoft 365 security center
- Microsoft 365 compliance center.
This client is now in general availability, and might have a preview version for you to test additional functionality for a future release.
If you still configured labels in the Azure portal that you haven’t yet migrated to the unified labeling store, use the Azure Information Protection classic client instead.
For more information, including a feature and functionality comparison table, see Choose your Windows labeling solution.
The Azure Information Protection client is supported on Windows only.
To classify and protect documents and emails on iOS, Android, macOS, and the web, use Office apps that support built-in labeling.
Where can I find information about using sensitivity labels for Office apps?
See the following documentation resources:
For information about other scenarios that support sensitivity labels, see Common scenarios for sensitivity labels.
How do I prevent somebody from removing or changing a label?
To prevent users from removing or changing a label, the content must already be protected and the protection permissions do not grant the user the Export or Full Control usage right.
When an email is labeled, do any attachments automatically get the same labeling?
No. When you label an email message that has attachments, those attachments do not inherit the same label. The attachments remain either without a label or retain a separately applied label. However, if the label for the email applies protection, that protection is applied to Office attachments.
How can DLP solutions and other applications integrate with Azure Information Protection?
Because Azure Information Protection uses persistent metadata for classification, which includes a clear-text label, this information can be read by DLP solutions and other applications.
For examples of using this metadata with Exchange Online mail flow rules, see Configuring Exchange Online mail flow rules for Azure Information Protection labels.
Labeling files in windows


![]()
![]()
![]()
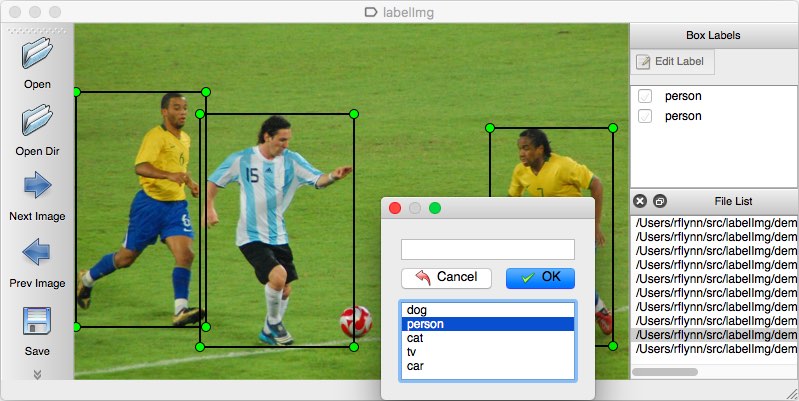
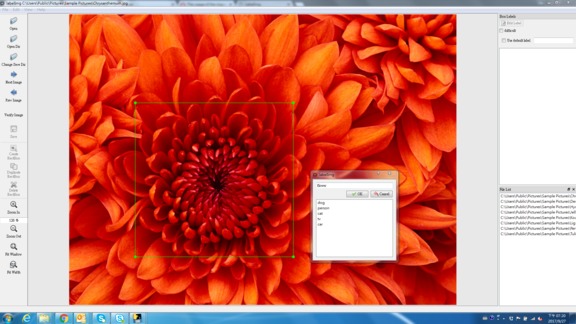
LabelImg is a graphical image annotation tool.
It is written in Python and uses Qt for its graphical interface.
Annotations are saved as XML files in PASCAL VOC format, the format used by ImageNet. Besides, it also supports YOLO and CreateML formats.
Build from source
Linux/Ubuntu/Mac requires at least Python 2.6 and has been tested with PyQt 4.8. However, Python 3 or above and PyQt5 are strongly recommended.
Python 3 Virtualenv (Recommended)
Virtualenv can avoid a lot of the QT / Python version issues
Note: The Last command gives you a nice .app file with a new SVG Icon in your /Applications folder. You can consider using the script: build-tools/build-for-macos.sh
Open cmd and go to the labelImg directory
Download and install Anaconda (Python 3+)
Open the Anaconda Prompt and go to the labelImg directory
Get from PyPI but only python3.0 or above
This is the simplest (one-command) install method on modern Linux distributions such as Ubuntu and Fedora.
You can pull the image which has all of the installed and required dependencies. Watch a demo video
- Build and launch using the instructions above.
- Click ‘Change default saved annotation folder’ in Menu/File
- Click ‘Open Dir’
- Click ‘Create RectBox’
- Click and release left mouse to select a region to annotate the rect box
- You can use right mouse to drag the rect box to copy or move it
The annotation will be saved to the folder you specify.
You can refer to the below hotkeys to speed up your workflow.
- In data/predefined_classes.txt define the list of classes that will be used for your training.
- Build and launch using the instructions above.
- Right below «Save» button in the toolbar, click «PascalVOC» button to switch to YOLO format.
- You may use Open/OpenDIR to process single or multiple images. When finished with a single image, click save.
A txt file of YOLO format will be saved in the same folder as your image with same name. A file named «classes.txt» is saved to that folder too. «classes.txt» defines the list of class names that your YOLO label refers to.
- Your label list shall not change in the middle of processing a list of images. When you save an image, classes.txt will also get updated, while previous annotations will not be updated.
- You shouldn’t use «default class» function when saving to YOLO format, it will not be referred.
- When saving as YOLO format, «difficult» flag is discarded.
Create pre-defined classes
You can edit the data/predefined_classes.txt to load pre-defined classes
| Ctrl + u | Load all of the images from a directory |
| Ctrl + r | Change the default annotation target dir |
| Ctrl + s | Save |
| Ctrl + d | Copy the current label and rect box |
| Ctrl + Shift + d | Delete the current image |
| Space | Flag the current image as verified |
| w | Create a rect box |
| d | Next image |
| a | Previous image |
| del | Delete the selected rect box |
| Ctrl++ | Zoom in |
| Ctrl— | Zoom out |
| ↑→↓← | Keyboard arrows to move selected rect box |
Verify Image:
When pressing space, the user can flag the image as verified, a green background will appear. This is used when creating a dataset automatically, the user can then through all the pictures and flag them instead of annotate them.
Difficult:
The difficult field is set to 1 indicates that the object has been annotated as «difficult», for example, an object which is clearly visible but difficult to recognize without substantial use of context. According to your deep neural network implementation, you can include or exclude difficult objects during training.
How to reset the settings
In case there are issues with loading the classes, you can either:
How can I mark files with badges in Windows?
Is there a way or a program that marks the icon of a file with a badge, similar to how Dropbox marks synced files with a green checkmark, and files that are currently syncing blue?
I’d use that to mark videos I’ve watched in a series.
5 Answers 5
I couldn’t find a better solution, so I’ve created an open-source project for that. Available at https://github.com/csomakk/IWatchSeriez Its nothing special yet, but it does the trick, and I’ll try to work more on it. I Watch Seriez, IWatchSeriez 🙂

Select some files or folders, assign icons for them, and add a description to be displayed in Explorer’s popup windows.
You can easily notice the marked files among other files and recognize their types by the icons.


Of course, nothing prevents you from creating an Icon Overlay Handler of your own. You can get started by using TortoiseSVN’s code, but remember that there’s a 15 overlay limit (which will get exhausted in no time if multiple programs attempt to set overlays), and icon overlays are not even recommended by people such as Raymond Chen.
You can use Rating in Windows Explorer as work around. Mark * as read.
From File’s Properties, it allows me to do file Rating from (zero star
5 stars). Since I’m not using the rating feature to really rate a file, instead I use it for the purpose of marking it as a read file, no matter what file type it was. I also can sort out those read vs. unread files if I want.

5 stars), since I’m not using the rating feature to really rate a file, instead I use it for the purpose of marking it as a read file, no matter what file type it was. I also can sort out those read vs. unread files if I want. – Jimmy Guan Sep 28 ’15 at 12:41
I was searching for a similar solution when I found this thread. I figured out a fairly simple way to achieve what you’re looking to do (at least in this particular case.) Maybe it will help others that happen upon this.
If you have the appropriate permissions, you can view «Hidden» files in Windows. They show up as grayed/semi-transparent icons/thumbnails of the original.
First, be sure that you’re able to see Hidden Files.
- Open Folder Options by clicking the Start button , clicking Control Panel, clicking Appearance and Personalization, and then clicking Folder Options.
- Click the View tab.
- Under Advanced settings, click Show hidden files and folders, and then click OK.
Now all you need to do is right click each episode after viewing it, go to Properties, and check the «Hidden» box. It will remain there but grayed out, allowing you to keep your place!
Tag/label folders in Windows using a Windows File Explorer alternative
We have hundreds of folders in our systems. And it gets really hectic to look for specific files lost somewhere in the lot.
Tagging folders is therefore what i would suggest. Just like how you tag files, tagging folders will help you stay organized and makes things more accessible.
In our previous post, we gave steps on how to tag files directly from Windows File explorer, using RecentX, and why it is better than Windows.
Windows offers the ability to tag files. But it only permits tagging of images, videos, and documents. You cannot tag any other type of file in Windows. Plus Windows doesn’t let you tag a folder.
This post will show you how you can tag folders in Windows using the Windows File Explorer and an alternative software, RecentX. RecentX lets you tag any file or folder. This is the most important difference between RecentX and Windows tagging system.
This post will tell you how to tag folders directly from File Explorer using RecentX. You will be able tag even files in the same way.
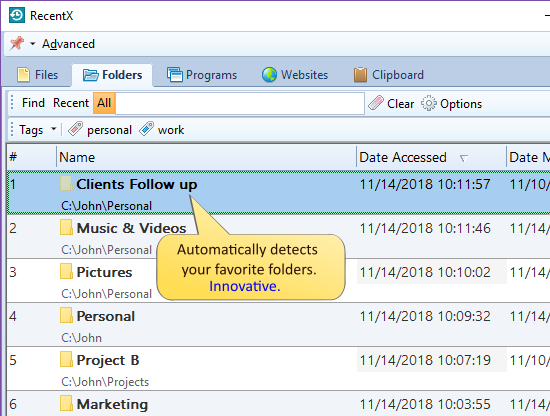
What is RecentX?
RecentX is a smart launcher for Windows designed to make your computing life joyful. Here are some of the many cool things you can do with RecentX:
- Effortlessly access any file, folder or program on Windows in less than 5 seconds!
- Assign tags to frequently used files/folders. Makes things even faster.
- Integrates with Windows File open/save window so that you don’t have to navigate any folder when opening or saving a document.
- It has a clipboard manager too that remembers all the text & pictures copied to a clipboard so that you can quickly pick & paste them again.
Tagging folders using Windows File Explorer
Sadly, Windows does not have a direct way to tag folders. You have to use third party apps to do that.
But don’t worry. RecentX has you covered.
Tagging folders from Windows File Explorer using RecentX
Here’s a short video about this feature:
Here are the steps to follow:
- Go to Windows File Explorer.
- Right-click on the folder(s) you wish to tag and choose the ‘Tag files/folders’ option.
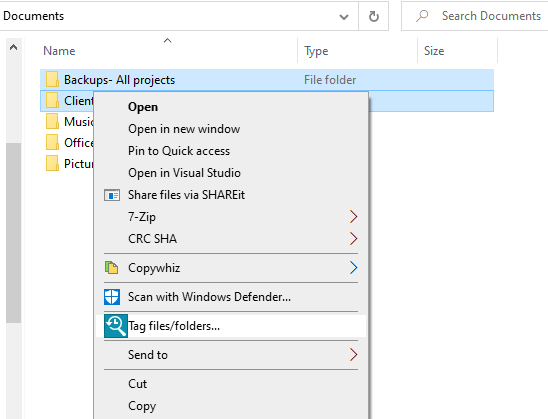
3. The RecentX Tags window will open where you can assign tags.
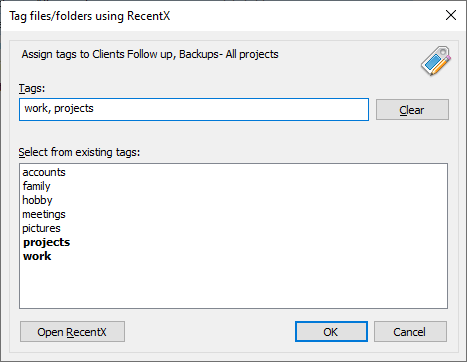
Click on ‘OK’ and the tag will be assigned immediately.
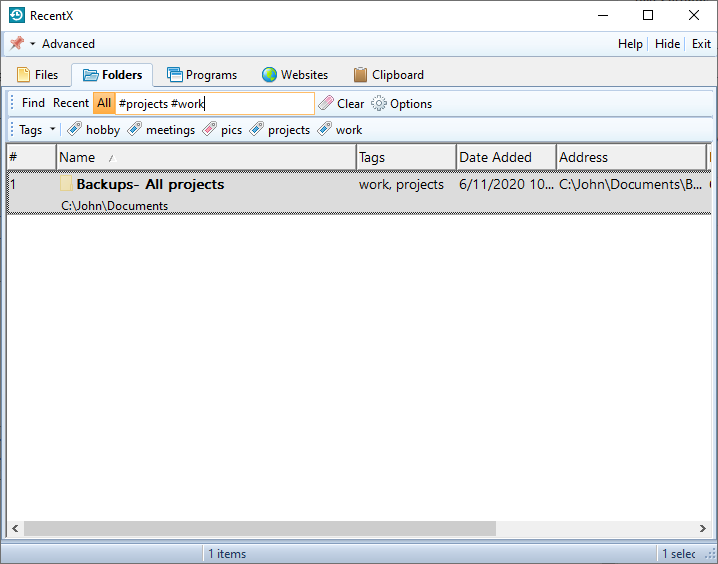
5. You can go to RecentX and click on the tags to find your files there.
We also have an easier way to tag whereby you can drag and drop the folders from within RecentX over the tag button or drag and drop from Windows File Explorer over the tag button to assign that tag.
Conclusion
Tagging things with RecentX is fast and easy. All your items can be accessed quickly.
You can do a lot more with RecentX. It has amazing features you should definitely try.
Another cool thing about RecentX is that it allows searching by multiple tags also. Hold the Ctrl key and select the second tag button from the toolbar in RecentX. You will see the second tag being added automatically.
Способы восстановления флеш-накопителей
Восстановление флеш-накопителя
На просторах интернета можно отыскать множество программных продуктов, предназначенных для возврата к жизни нерабочих флешек. Существуют как универсальные программы, так и фирменные утилиты от производителей накопителей. Рассмотрим несколько способов с применением разного софта.
Способ 1: HP USB Disk Storage Format Tool
Первой в очереди будет HP USB Disk Storage Format Tool. Данная программа способна «увидеть» неопределяемые системой накопители и произвести операции по восстановлению.
Установка
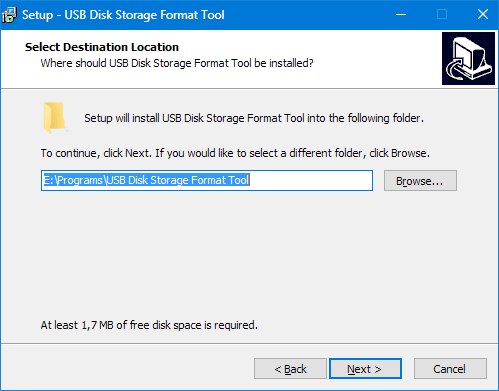
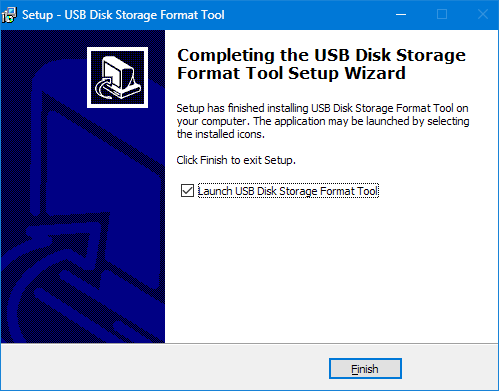
- После окончания загрузки запускаем файл «USBFormatToolSetup.exe». Появится следующее окно:
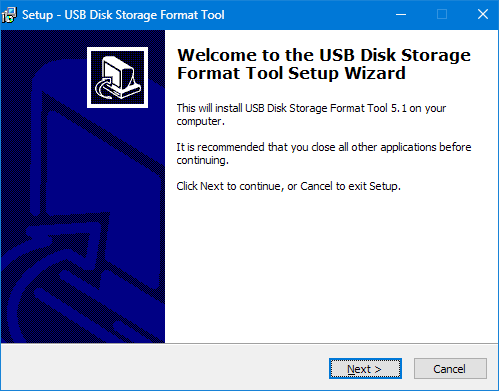
Нажимаем «Next».
Далее выбираем место для установки, желательно, на системном диске. Если устанавливаем программу первый раз, все оставляем как есть.
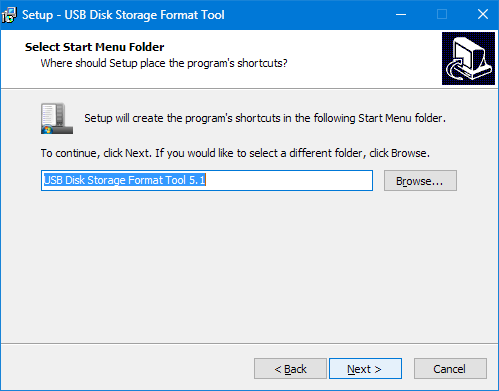
В следующем окне нам предложат определить папку программы в меню «Пуск». Рекомендуется оставить по умолчанию.
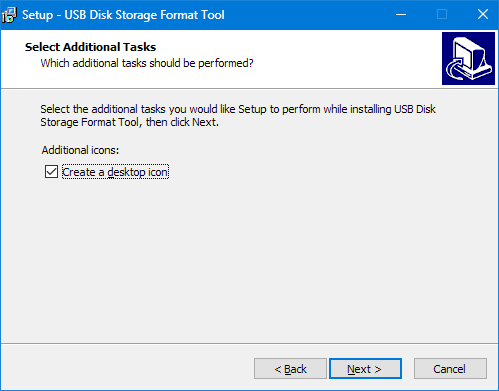
Здесь создаем иконку программы на рабочем столе, то есть галку оставляем.
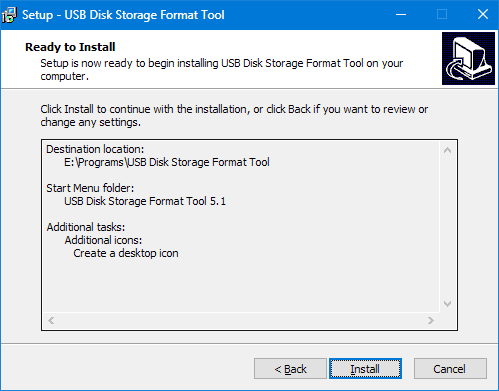
Проверяем параметры установки и нажимаем «Install».
Программа установлена, нажимаем «Finish».
Процесс восстановления
Для начала попробуем произвести сканирование и исправление ошибок.
- В окне программы выбираем флешку.

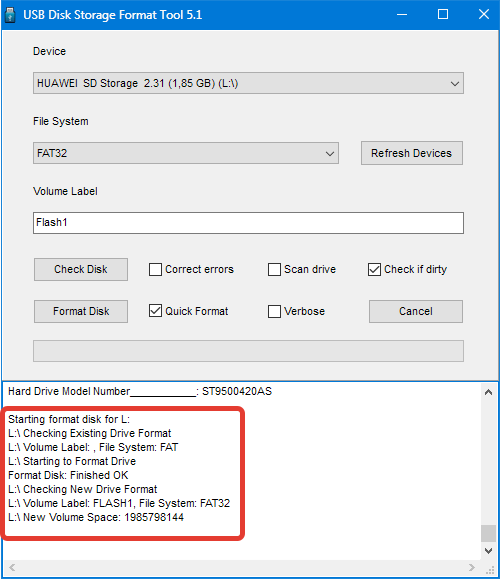
Ставим галку напротив «Scan drive» для получения подробной информации и выявления ошибок. Нажимаем «Check Disk» и ждем завершения процесса.
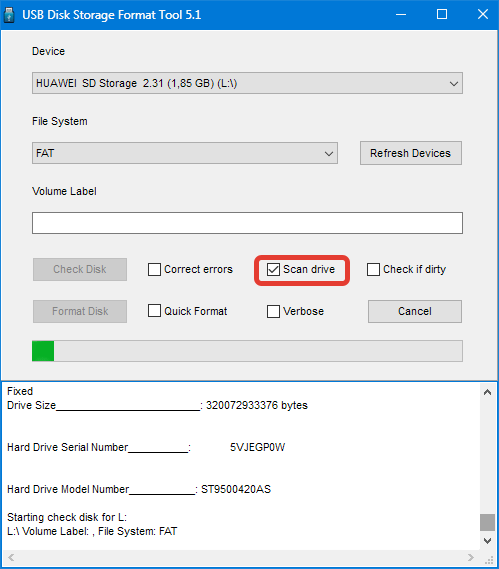
В результатах сканирования видим всю информацию о накопителе.

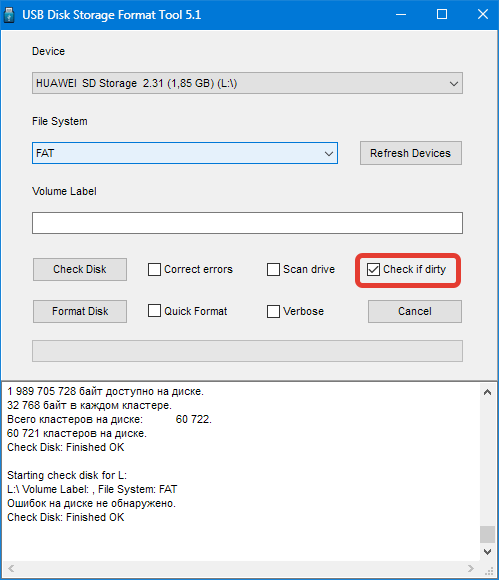
Если обнаружены ошибки, снимаем галку с «Scan drive» и выбираем «Correct errors». Жмем «Check Disk».

В случае неудачной попытки сканирования диска при помощи функции «Scan disk» можно выбрать опцию «Check if dirty» и запустить проверку снова. Если ошибки будут обнаружены, повторить пункт 4.
Для того чтобы восстановить флешку после неудачного форматирования, её необходимо отформатировать заново.
- Выбираем файловую систему.

Если накопитель объемом 4ГБ и меньше, имеет смысл выбрать файловую систему FAT или FAT32.
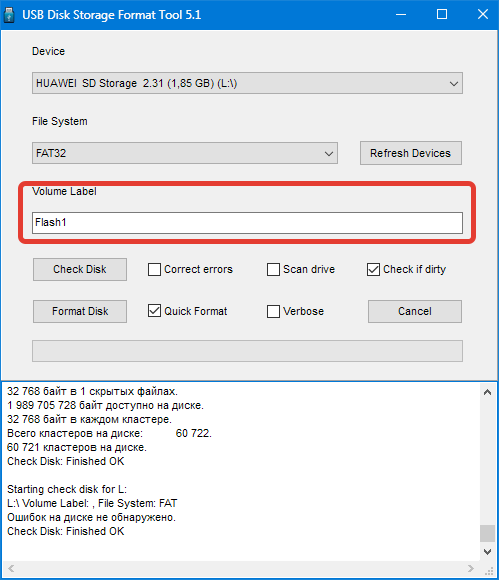
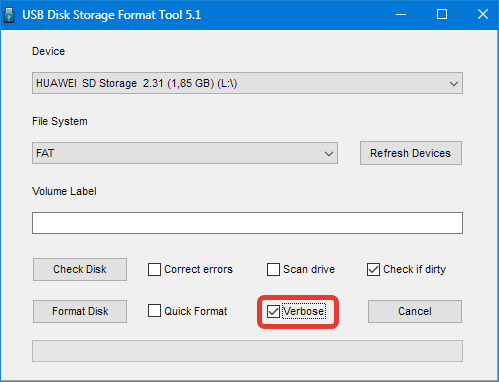
Выбираем тип форматирования. Вариантов два: быстрое и многопроходное.
Если необходимо восстановить (попытаться) записанную на флешке информацию, выбираем быстрое форматирование, если же данные не нужны, многопроходное.
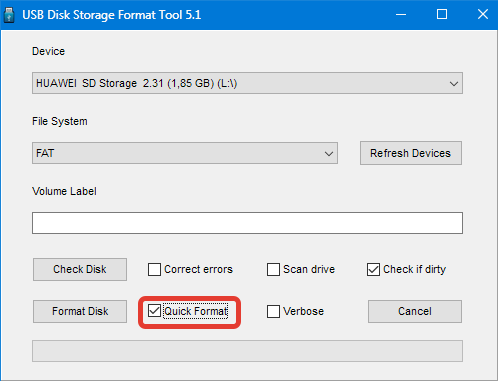
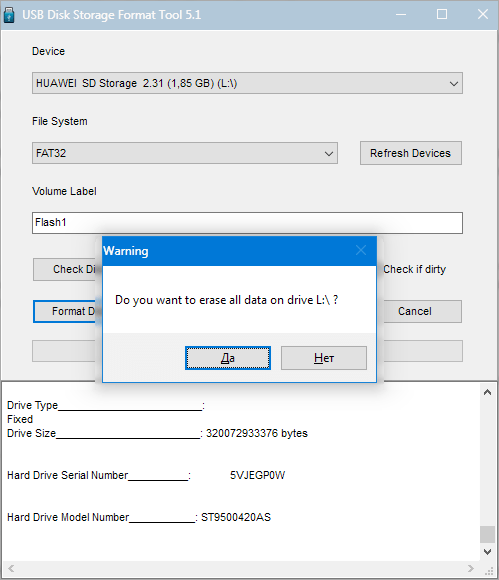
Нажимаем «Format Disk». Соглашаемся с удалением данных.
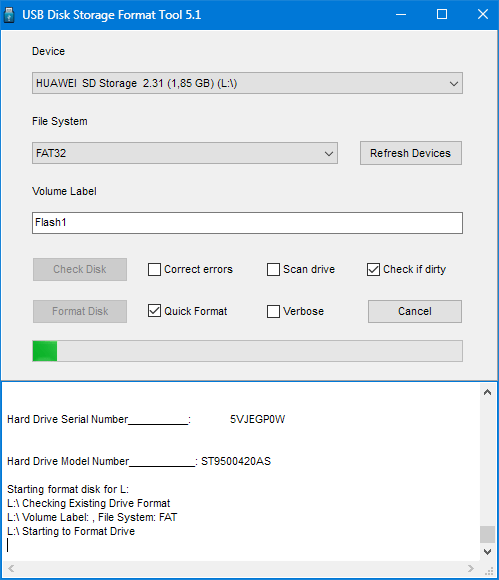
Следить за течением операции можно в журнале программы.
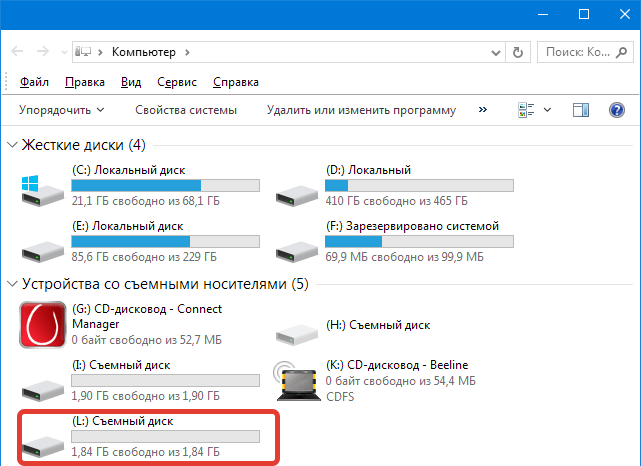
После того как процесс будет завершен, накопитель должен появиться в папке «Компьютер» и в «Проводнике».
Данный способ позволяет быстро и надежно восстановить USB флешку после неудачного форматирования, программных или аппаратных сбоев, а также кривых рук некоторых пользователей.
Способ 2: EzRecover
EzRecover позиционируется разработчиками исключительно как инструмент для восстановления «убитых» накопителей. Программа может вернуть к жизни флешку, если Windows «видит» её как «Security Deviсe», вообще не определяет или показывает объем, равным нулю в свойствах. Условием для применения утилиты является ограничение объема накопителя не более 4 ГБ.
Установка
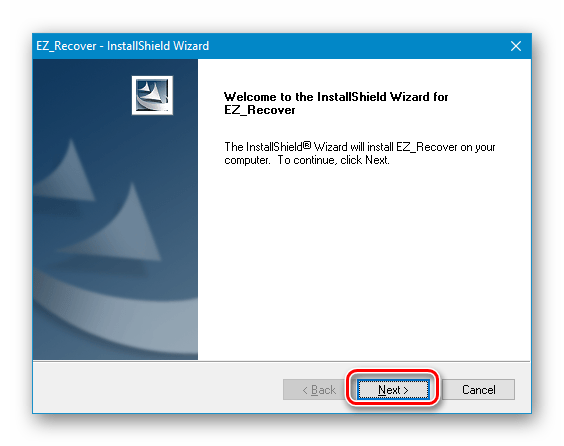
- Запускаем скачанный файл и нажимаем «Next».
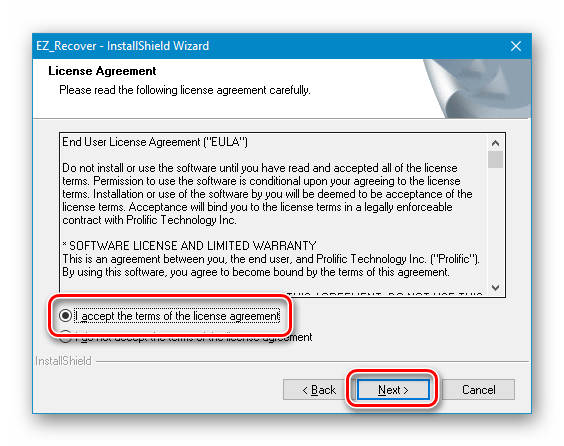
Принимаем условия лицензии.
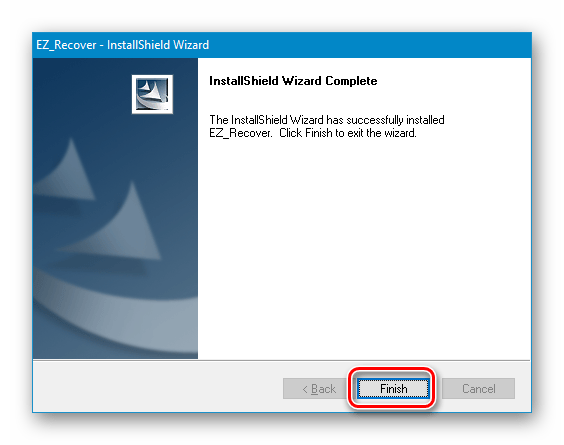
После того как установщик закончит операцию, нажимаем «Finish».
Процесс восстановления
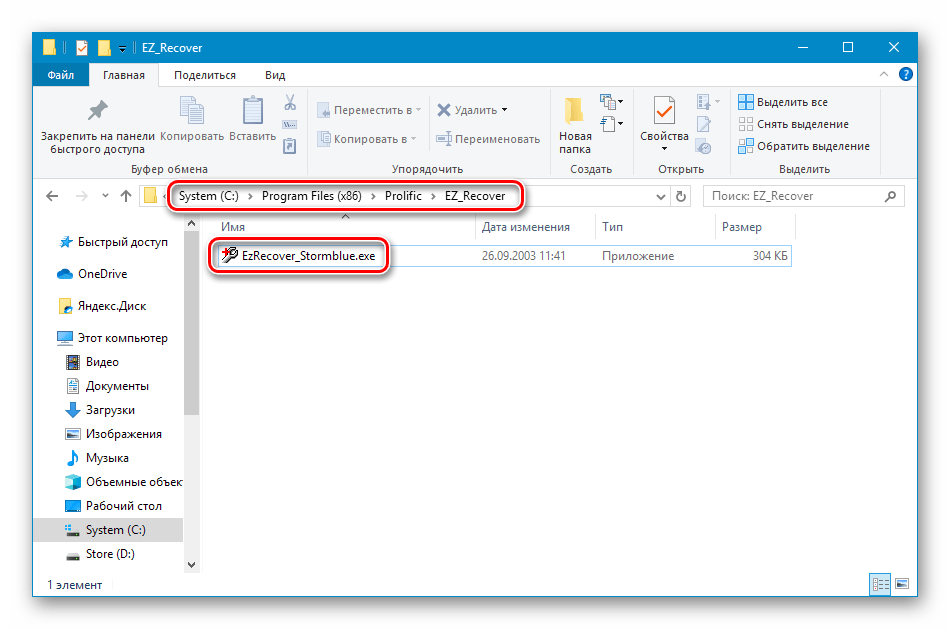
- Запускаем программу с помощью ярлыка на рабочем столе. Если он не появился после установки, можно запустить исполняемый файл EzRecover_Stormblue.exe в папке
C:\Program Files (x86)\Prolific\EZ_Recover
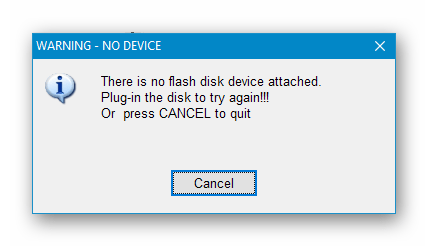
После запуска увидим диалоговое окно с предложением переподключить флешку. Вынимаем накопитель из разъема и вставляем обратно.
Нажимаем «RECOVER».
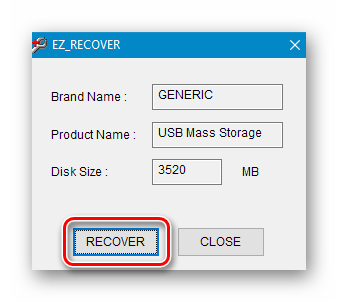
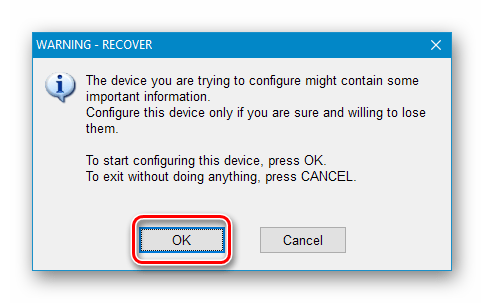
Программа предупредит нас, что все данные будут удалены безвозвратно. Жмем ОК.
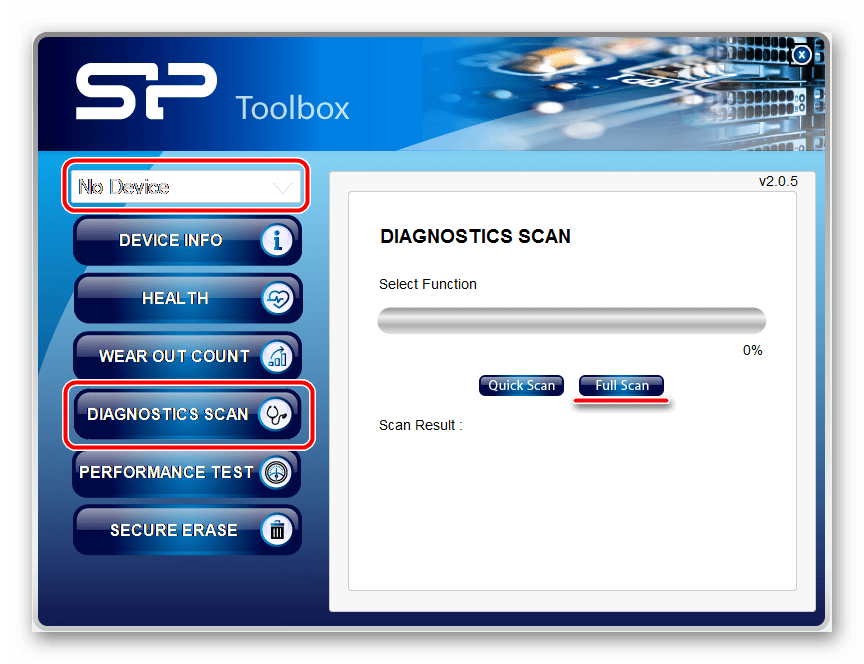
Способ 3: Фирменные утилиты
Многие производители флешек разрабатывают собственные программы для восстановления своих накопителей. Если для вашего устройства существует такой софт, то рекомендуется пользоваться именно им для достижения максимальной эффективности. Ниже мы приведем ссылки на инструкции по использованию фирменных утилит от разных производителей.
Мы привели три способа восстановления флешек с помощью программ. Если производитель вашего накопителя озаботился разработкой собственного софта, рекомендуем воспользоваться именно им. В противном случае можно попытать счастья, обратившись к универсальным продуктам.


