- Getting Connected
- Macs and Thunderbolt 3
- Windows and Thunderbolt 3
- Step 1 — Connect the interface cable
- Step 2 — Connect the power supply
- Step 3 — Launch LaCie Setup Assistant
- Launch LaCie Setup Assistant — Windows
- LaCie Setup Assistant — Mac
- Setup
- Disconnecting the hard drive
- LaCie Drivers Download
- Recent Help Articles
- Popular LaCie Device Categories
- Driver Updates for Popular LaCie Device Models
- How to Update LaCie Device Drivers Quickly & Easily
- Step 1 — Download Your Driver
- Step 2 — Install Your Driver
- How to Open Device Manager
- How to Install drivers using Device Manager
- Getting Connected
- STEP 1 — Connect to the base
- STEP 2 – Open the port protector
- STEP 3 — Connect the power supply
- STEP 4 — Connect the USB cable
- STEP 5 – Close the port protector
- STEP 6 — LaCie Setup Assistant
- Launch LaCie Setup Assistant — Mac
- Launch LaCie Setup Assistant — Windows
- LaCie Setup Assistant steps
Getting Connected
Follow the setup steps in the order they are given to ensure that your LaCie hard drive’s volume mounts correctly on your computer.
Macs and Thunderbolt 3
The Thunderbolt 3 connection can be used on a Mac with a Thunderbolt 3 port to reach transfer rates up to 40Gb/s bi-directional.
Using the Thunderbolt 3 connection with first or second generation Thunderbolt ports requires an adapter (sold separately) and will result in lower transfer rates (20Gb/s bi-directional for Thunderbolt 2 ports, and 10Gb/s bi-directional for first generation Thunderbolt ports).
Windows and Thunderbolt 3
Your LaCie Thunderbolt 3 storage device is certified for use with Windows PCs that have a Thunderbolt 3 port. However, you may experience connectivity issues between the storage device and the Thunderbolt 3 port on a Windows PC. Therefore, before setting up your LaCie Thunderbolt 3 storage device, please visit your PC manufacturer’s website to update your Windows PC to the latest versions of:
- BIOS
- Thunderbolt 3 firmware
- Thunderbolt 3 driver
Make certain that your PC has the most recent version of Windows 10. For questions regarding your PC, please contact the PC manufacturer. You can also review the following website for additional information: https://thunderbolttechnology.net/updates.
This issue pertains to the Thunderbolt 3 port and does not affect USB ports.
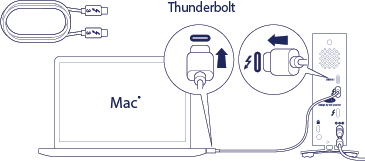
Step 1 — Connect the interface cable
Connect the interface cable from the LaCie d2 to the computer.
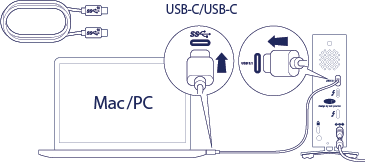
- Thunderbolt 3 to Thunderbolt
- USB 3.1 (USB-C) to USB-A (USB 3.0 & 2.0)

Step 2 — Connect the power supply

Connect the power supply in the following order:
- The power input port on the back of the LaCie d2.
- A live power outlet.
The LaCie d2 will power on automatically when it is connected to a computer that is turned on and a live power outlet.
Step 3 — Launch LaCie Setup Assistant
LaCie Setup Assistant (LSA) must be launched before using your drive. It will allow you to:
Launch LaCie Setup Assistant — Windows
AutoPlay: Windows AutoPlay may detect your LaCie hard drive as soon as it is connected to your computer. If the AutoPlay window appears, choose Open folder to view files and double-click LaCie Setup. 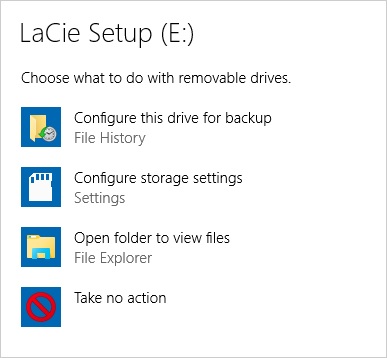
Manual access: Open the LACIE SETUP volume in Computer (My Computer for Windows XP) and double-click LaCie Setup. 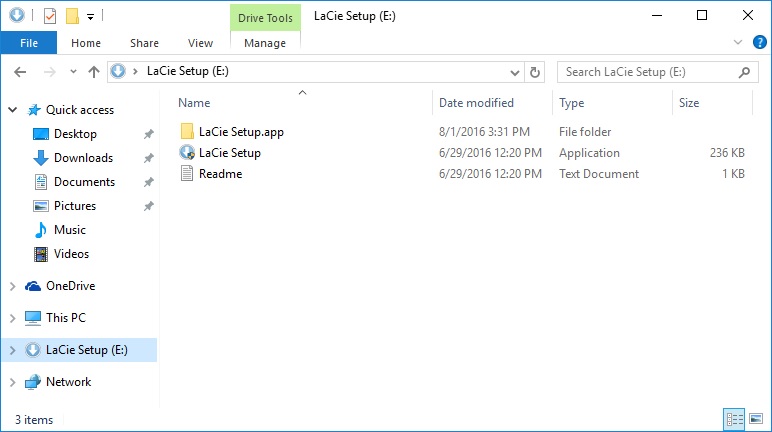
LaCie Setup Assistant — Mac
Open the LACIE SETUP volume on your desktop and then double-click LaCie Setup 
Setup
LaCie Setup Assistant does not prevent you from using your computer’s native disk utility program to format or partition your LaCie drive. Simply follow the Setup Assistant through completion, then use Disk Management for Windows or Disk Utility for Mac to reformat your drive.
- Select your language.
- Read the license agreement before choosing Next. Selecting Next confirms that you accept the license agreement.
- Use the slider to partition your LaCie hard drive. There are two options for partitions:
- LaCie Share: formatted as FAT32 for compatibility with Windows and Mac.
- LaCie: formatted for your operating system, NTFS for Windows or HFS+ for Mac.
Move the slider to the left to reduce the size of the LaCie Share partition. If you do not want the LaCie Share volume, move the slider all the way to the left.
- A prompt alerts you that the disk will be formatted. Select Yes to continue. LaCie Setup Assistant formats the hard drive.
- Register your LaCie device.
- Choose the software utilities that you want to install. Certain software utilities may begin to install before LaCie Setup Assistant has finished. Follow the software utility installer before completing LaCie Setup Assistant. If you do not install software utilities during this step, you can return to LaCie Setup Assistant at any time.
- LaCie Setup Assistant provides a summary of the installation. Choose Finish to close the program.
To install software utilities after the initial installation, you can run LaCie Setup Assistant again. Since the format is complete you are only prompted to choose software utilities. LaCie Setup Assistant is available on:
- LaCie Share: if you created two partitions
- LaCie: if you created one partition
Disconnecting the hard drive
In order to avoid file system corruption, it is important to unmount your hard drive’s volumes before disconnecting the interface cable. See Unmounting Your Hard Drive for details.
LaCie Drivers Download
The best way to fix your PC to run at peak performance is to update your drivers. If your system is slow, unresponsive or crashes often, the problem may be with your drivers. Sometimes, after upgrading to a newer operating system such as Windows 10, problems can occur because your current driver may only work with an older version of Windows. To download and update your drivers, follow the instructions below.
- Updates PC Drivers Automatically
- Identifies & Fixes Unknown Devices
- Supports Windows 10, 8, 7, Vista, XP
Recent Help Articles
Popular LaCie Device Categories
Driver Updates for Popular LaCie Device Models
How to Update LaCie Device Drivers Quickly & Easily
Tech Tip: Updating drivers manually requires some computer skills and patience. A faster and easier option is to use the Driver Update Utility for LaCie to scan your system for free. The utility tells you which specific drivers are out-of-date for all of your devices.
Step 1 — Download Your Driver
To get the latest driver, including Windows 10 drivers, you can choose from the above list of most popular LaCie downloads. Click the download button next to the matching model name. After you complete your download, move on to Step 2.
If your driver is not listed and you know the model name or number of your LaCie device, you can use it to search our driver archive for your LaCie device model. Simply type the model name and/or number into the search box and click the Search button. You may see different versions in the results. Choose the best match for your PC and operating system.
If you don’t know the model name or number, you can start to narrow your search down by choosing which category of LaCie device you have (such as Printer, Scanner, Video, Network, etc.). Start by selecting the correct category from our list of LaCie Device Drivers by Category above.
We employ a team from around the world. They add hundreds of new drivers to our site every day.
Tech Tip: If you are having trouble deciding which is the right driver, try the Driver Update Utility for LaCie. It is a software utility that will find the right driver for you — automatically.
LaCie updates their drivers regularly. To get the latest Windows 10 driver, you may need to go to the LaCie website to find the driver for to your specific Windows version and device model.
Step 2 — Install Your Driver
Once you download your new driver, then you need to install it. To install a driver in Windows, you will need to use a built-in utility called Device Manager. It allows you to see all of the devices recognized by your system, and the drivers associated with them.
How to Open Device Manager
In Windows 10 & Windows 8.1, right-click the Start menu and select Device Manager
In Windows 8, swipe up from the bottom, or right-click anywhere on the desktop and choose «All Apps» -> swipe or scroll right and choose «Control Panel» (under Windows System section) -> Hardware and Sound -> Device Manager
In Windows 7, click Start -> Control Panel -> Hardware and Sound -> Device Manager
In Windows Vista, click Start -> Control Panel -> System and Maintenance -> Device Manager
In Windows XP, click Start -> Control Panel -> Performance and Maintenance -> System -> Hardware tab -> Device Manager button
How to Install drivers using Device Manager
Locate the device and model that is having the issue and double-click on it to open the Properties dialog box.
Select the Driver tab.
Click the Update Driver button and follow the instructions.
In most cases, you will need to reboot your computer in order for the driver update to take effect.
Tech Tip: Driver downloads and updates come in a variety of file formats with different file extensions. For example, you may have downloaded an EXE, INF, ZIP, or SYS file. Each file type has a slighty different installation procedure to follow.
If you are having trouble installing your driver, you should use the Driver Update Utility for LaCie. It is a software utility that automatically finds, downloads and installs the right driver for your system. You can even backup your drivers before making any changes, and revert back in case there were any problems. You can safely update all of your drivers in just a few clicks. Once you download and run the utility, it will scan for out-of-date or missing drivers:
When the scan is complete, the driver update utility will display a results page showing which drivers are missing or out-of-date. You can update individual drivers, or all of the necessary drivers with one click.
For more help, visit our Driver Support Page for step-by-step videos on how to install drivers for every file type.
Getting Connected
Installing your LaCie hard drive is easy thanks to LaCie Setup Assistant. Follow the setup steps in the order they are given to ensure that your LaCie hard drive’s volume mounts correctly on your computer.
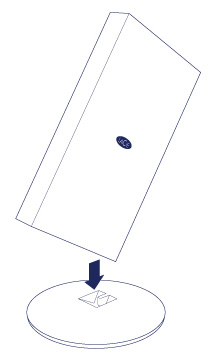
STEP 1 — Connect to the base
Place the LaCie Chromé on its base. Make certain to carefully align the ends of Chromé’s stand with the landing points on the base. The magnetic ends allow for an easy connection.
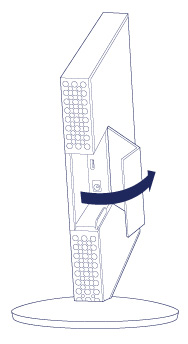
STEP 2 – Open the port protector
Gently open the port protector and keep it ajar for the next steps.
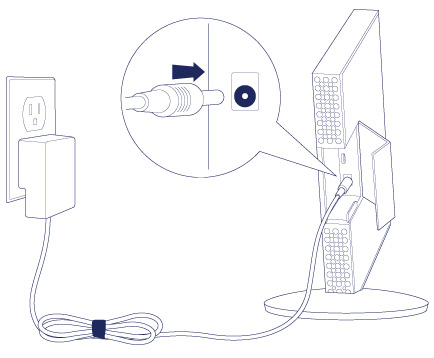
STEP 3 — Connect the power supply
Connect the power supply to a wall outlet and to the hard drive. Only use the power supply provided with your LaCie Chromé.
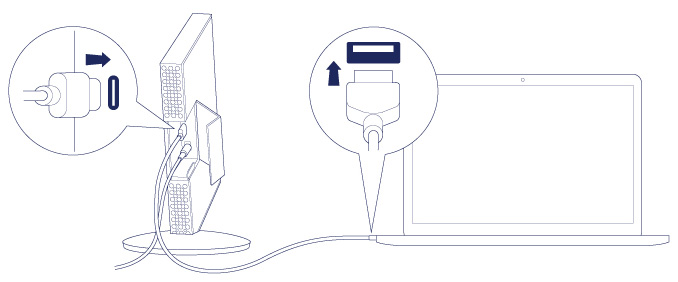
STEP 4 — Connect the USB cable
Before connecting the LaCie device, confirm the USB port on your computer. Your LaCie device is shipped with two cables (see LED Indicator and Cables):
- USB-C–to–USB-C: use this cable if your computer has a USB-C port.
- USB-C–to–USB 3.0/2.0 Type A: use this cable if your computer does not have USB-C port.
Connect the cable to the USB-C port on the back of the LaCie Chromé and to your computer.
- The image below shows a connection to a computer with a USB-C port.

- The image below shows a connection to a computer with a USB 3.0 or 2.0 Type A port.

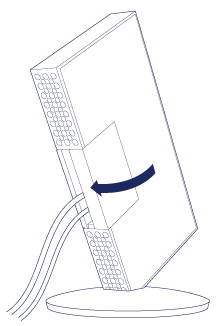
STEP 5 – Close the port protector
Gently close the port protector.
STEP 6 — LaCie Setup Assistant
The drive partition LaCie Setup mounts on your desktop (Mac) or in Computer (Windows).
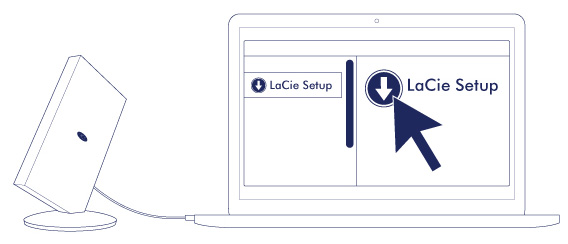
LaCie Setup Assistant must be launched before using your drive. It allows you to:
- Easily format the hard drive according to your needs.
- Copy the user manual to the hard drive.
- Install software for added features.
- Register your LaCie device.
Launch LaCie Setup Assistant — Mac
Open the LACIE SETUP volume on your desktop and then double click LaCie Setup.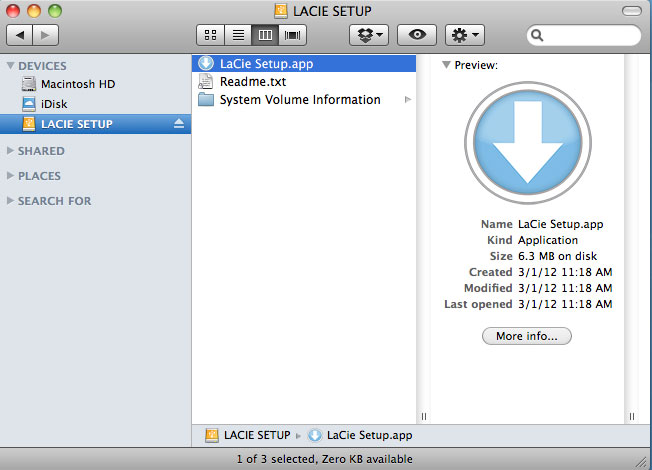
Launch LaCie Setup Assistant — Windows
AutoPlay: Windows AutoPlay may detect your LaCie hard drive as soon as it is connected to your computer. If the AutoPlay window appears, choose Open folder to view files using Windows Explorer and double-click LaCie Setup.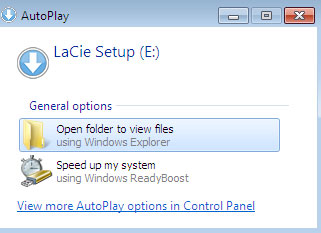
Manual access: open the LACIE SETUP volume in Computer and double-click LaCie Setup.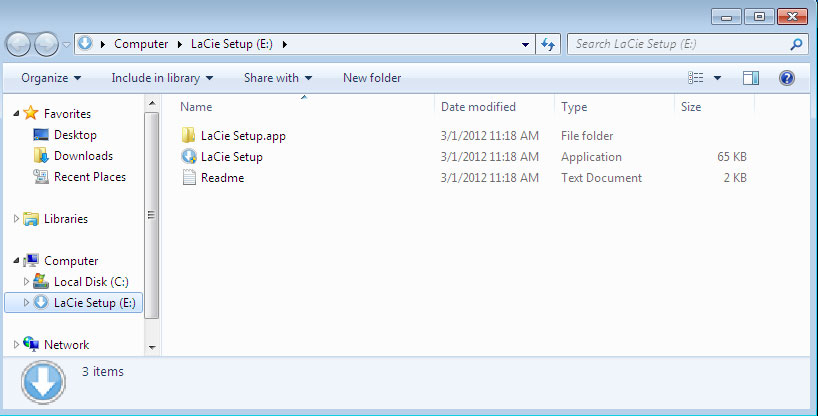
LaCie Setup Assistant steps
Follow the steps below to format your LaCie device for your operating system. LaCie Setup Assistant guides you through formatting and registering your hard drive as well as installing LaCie software utilities.
You can also use your system’s native disk utility program to format or partition your LaCie drive. If you use the disk utility, you can download software utilities and the user manual from LaCie customer support.
- Select your language.
- Read the license agreement before choosing Next. Selecting Next confirms that you accept the license agreement.
- Use the slider to partition your LaCie hard drive. There are two options for partitions:
- LaCie Share: formatted as FAT32 for compatibility with Windows and Mac.
- LaCie: formatted for your operating system, NTFS for Windows or HFS+ for Mac.
Move the slider to the left to reduce the size of the LaCie Share partition. If you do not want the LaCie Share volume, move the slider all the way to the left.
- A prompt alerts you that the disk will be formatted. Select Yes to continue. LaCie Setup Assistant formats the hard drive.
- Register your LaCie device.
- Choose the software utilities that you want to install. Certain software utilities may begin to install before LaCie Setup Assistant has finished. Follow the software utility installer before completing LaCie Setup Assistant. If you do not install software utilities during this step, you can return to LaCie Setup Assistant at any time.
- LaCie Setup Assistant provides a summary of the installation. Choose Finish to close the program.
To install software utilities after the initial installation, you can run LaCie Setup Assistant again. Since the format is complete you are only prompted to choose software utilities. LaCie Setup Assistant is available on:
- LaCie Share: if you created two partitions
- LaCie: if you created one partition


