- Fix: Source file names are larger than is supported by the file system
- Source Path Too Long
- Why does the Source Path Too Long error occur
- Method 1: Deleting by bypassing the Recycle Bin
- Method 2: Deleting a tree by creating a decoy directory
- Method 3: Using the Microsoft Robocopy.exe tool
- Method 4: Using the SuperDelete command-line tool
- Устраняем ошибку «Файл слишком велик для конечной файловой системы»
- Что означает ошибка
- Возможные причины
- Способы решения
- Форматирование с FAT32 на NTFS встроенной утилитой Windows(ВИДЕО)
- Преобразование FAT32 в NTFS без потери данных с помощью стороннего программного обеспечения
- Как записать файл большого размера не потеряв данные
- Ответы на вопросы пользователей
- Как добавить фильм на флешку, если телевизор не читает NTFS
- Как записать образ Windows, чтобы сделать загрузочную флешку
- Заключение
Fix: Source file names are larger than is supported by the file system
Source Path Too Long
A lot of users are dealing with a weird scenario when trying to copy or delete something on their computer. Affected users report receiving a Source Path Too Long prompt telling them that “The source file names are larger than is supported by the file system”. This typically happens with a file (or more) that is buried in a series of subfolders that have long names. Whenever this happens, you can’t move, delete or rename any of the involved files/folders.
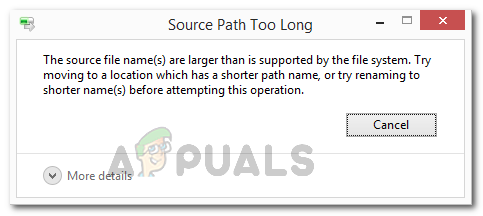 The source file names are larger than is supported by the file system
A big problem with this particular error is that once it occurs, you can’t (apparently) do anything else with the file/folder other than letting it occupy valuable storage space.
Why does the Source Path Too Long error occur
The “The source file names are larger than is supported by the file system” will occur because Microsoft only allows 258 characters in the folder path subfolder. Whenever this limit is exceeded, the entire folder path will be locked from conventional handling.
If you’re struggling to resolve the same error message, the methods below will help you to resolve the issue. Below you have a collection of methods that other users in a similar situation have used to get the issue resolved.
All the methods presented below should resolve the issue. Feel free to follow whichever one seems more accessible to your current situation.
Method 1: Deleting by bypassing the Recycle Bin
A lot of users were successfully able to take care of the issue by bypassing the Recycle bin completely when trying to delete the file or folder that is showing the “The source file names are larger than is supported by the file system” error.
To do this, simply select the file (or folder) that is showing the error and press SHIFT + Delete to permanently delete the file (without passing it through Recycle Bin).
 Select the targeted folder and press Shift + Del key
Method 2: Deleting a tree by creating a decoy directory
There is another manual approach that a lot of affected users have used successfully to delete a folder three that was showing the “The source file names are larger than is supported by the file system” error.
This approach involves creating a decoy folder located in the same directory as the folder that can’t be deleted. By temporarily moving the contents of the folder that can’t be deleted into the decoy folder, some users have managed to remove the whole directory three that was displaying the error.
Here’s a quick guide with what you need to do:
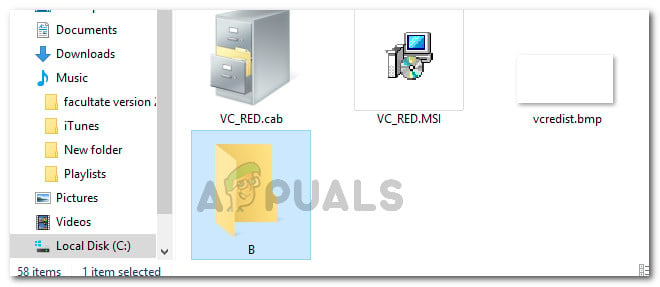
- Go to the root directory of the drive which contains the folder tree that you can’t delete. In our case, the root directory is C:\, since we want to delete a series of folders located in Documents. So go ahead and create a folder with a single letter name in the root directory.

- Leave the single letter folder for now and navigate to the directory that you want to delete. Once you get there, select all it’s contents and press Ctrl + X to cut them. Navigated to the targeted folder path and cutting the content inside
- Next, navigate to and open the temporary folder (in our case, folder B) that you’ve previously created and paste the contents by pressing Ctrl + V. Paste the contents of the targeted directory into the temporary folder
- Then, move up to the root directory, right-click the temporary folder and delete it. Deleting the temporary folder
- Finally, go back to the original directory and delete it. You should be able to do so without receiving the “The source file names are larger than is supported by the file system” error.
 Navigated to the targeted folder path and cutting the content inside
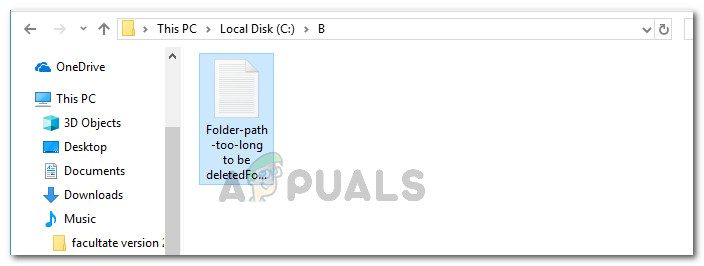 Paste the contents of the targeted directory into the temporary folder
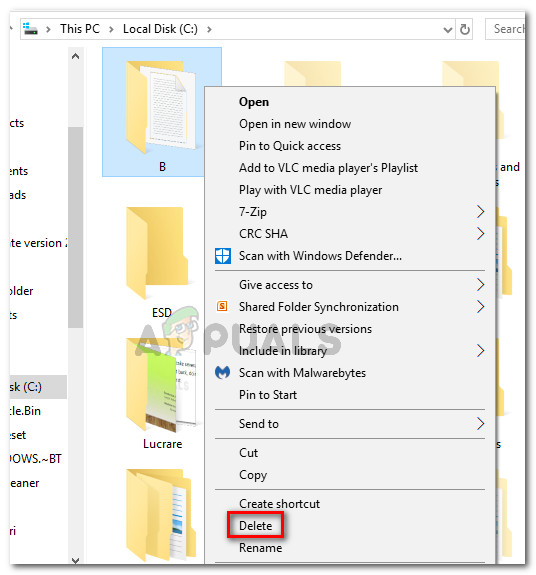 Deleting the temporary folder
Note: Keep in mind that if you have multiple folder levers, you need to repeat the above procedure with each of them in order to be able to remove each and every one.
If this method was not effective, move down to the next method below.
Method 3: Using the Microsoft Robocopy.exe tool
If you’re tech-savvy and you prefer technically-focused solutions instead of slightly more tedious work, you can use a neat Microsoft tool that is integrated into the Command Prompt since Windows Vista.
Some users have managed to resolve this particular issue by creating an empty folder and then using the RoboCopy utility to copy that empty folder onto the folder which contains the long filenames. Most users that attempted this method reported that it worked flawlessly.
Here’s what you need to do:
- Create an empty folder in the same drive as the folder with the long filenames. We named it empty.
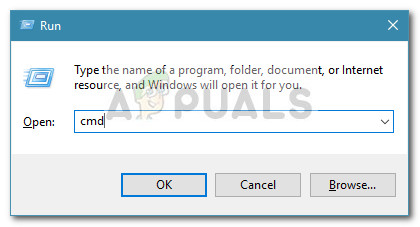
- Press Windows key + R to open up a Run dialog box. Then, type “cmd” and press Ctrl + Shift + Enter to open up an elevated Command Prompt. When prompted by the UAC (User Account Control), click Yes at the prompt. Run dialog: cmd then press Ctrl + Shift + Enter
- Inside the elevated command prompt, type the following in order to copy the empty folder into the targeted folder, facilitating the deletion of the latest:
 Run dialog: cmd then press Ctrl + Shift + Enter
Note: Keep in mind that you’ll need to replace the *empty* and *targetedfolder* placeholders with the actual names in your particular scenario.
 Forcing the deletion of the folder with Robocopy
Method 4: Using the SuperDelete command-line tool
Some users affected by the “The source file names are larger than is supported by the file system” error have managed to remove the pesky folders by using an open-source command-line tool called SuperDelete.
Some users have reported that this method was finally successful after most of the other avenues they’ve previously explored turned out to be ineffective. Don’t be frightened by the fact that this tool is a command-line utility -it’s actually very easy to use.
Here’s a quick guide on using SuperDelete to remove folders and files that are displaying the “source file names are larger than is supported by the file system” error:
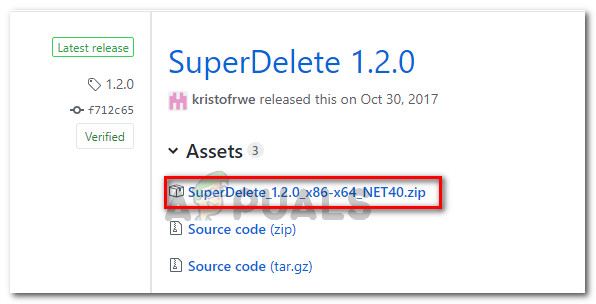
- Visit this link (here) and download the latest version of the SuperDelete archive. Downloading the SuperDelete executable
- Extract the SuperDelete zip folder and paste the SuperDelete executable somewhere convenable.
- Press Windows key + R to open up a Run dialog box. Next, type “cmd” and press Enter to open a Command Prompt window. Run dialog: cmd
- Inside Command Prompt, use the CD command to navigate to the location of SuperDelete.exe. We’ve pasted it into the root directory of C so the command was cd C:\.
- Next, use the following command to delete the folder or file that is showing you the The source file names are larger than is supported by the file system” error:
 Downloading the SuperDelete executable
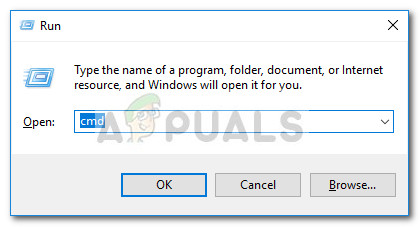 Run dialog: cmd
Note: Replace the *FullPathToFileorFolder* placeholder with the exact path in your particular scenario.
 Deleting long path folders or files with SuperDelete
Note: You can also try to just rename the folders inside and it might get rid of this particular error.
Устраняем ошибку «Файл слишком велик для конечной файловой системы»

При переносе информации на внешний жесткий диск или флешку, Windows может выдать уведомление «Файл слишком велик для конечной файловой системы». При этом, ошибка не исчезает, если вновь повторить копирование.
Что означает ошибка
В целом, информация с диалогового окна предоставляется практически исчерпывающая. Трактуется это так – файловая система внешнего носителя информации не поддерживает файлы большого размера. А при копировании, вы превысили допустимый размер одного или нескольких файлов, и система отказывается их копировать на носитель.

При этом, неважно какая операционная система установлена на компьютере – Windows 7 или Windows 10.
Возможные причины
Скорее всего, внешний носитель имеет файловую систему FAT32. В ней имеется ограничение – максимальный размер файла до 4095 Мб. Копируя файл или папку с ним размером больше, чем позволяет FAT32 в англоязычном варианте Windows, вы увидите диалоговое окно «The file is too large for the destination file system».
Способы решения
Есть несколько вариантов решения вопроса. И зависят они от задач, которыми вы руководствуетесь.
Форматирование с FAT32 на NTFS встроенной утилитой Windows(ВИДЕО)
Если данные на флешке не нужны, вам безразлична файловая система, главное, чтобы можно было записать требуемый файл, то можно форматировать FAT32 в NTFS. После этого, подобного ограничения не будет. Что делать:
- Откройте «Проводник» и перейдите в «Этот компьютер».
- Нажмите ПКМ по отображаемому внешнему жесткому диску и выберите «Форматировать».
- Укажите NTFS и жмите «Начать».
- Затем, скопируйте желаемые данные с вашего компьютера.

Преобразование FAT32 в NTFS без потери данных с помощью стороннего программного обеспечения
В случае, если информация с флешки должна остаться на ней, можно воспользоваться для преобразования FAT32 в NTFS бесплатной программой AOMEI Partition Assistant Standard Edition. Как исправить не потеряв данные:
- Откройте ПО, в меню «Мастера», слева, выберите «NTFS to FAT32 Converter».
- Выберите пункт «FAT32 to NTFS».
- Затем укажите внешний накопитель и жмите «ОК».
- Подтвердите операцию в мастере и дождитесь завершения форматирования.


Как записать файл большого размера не потеряв данные
Когда используете внешний накопитель только для переноса информации с компьютера на компьютер, можно разделить большой файл на несколько частей. Считать его при этом не удастся, но файловую систему не нужно будет менять. Данные на внешнем диске затронуты не будут. Сделать это можно с помощью архиватора:
- Скачайте и установите WinRAR на ПК.
- Нажмите ПКМ по файлу большого размера и выберите «Добавить в архив».
- В первой вкладке, снизу будет возможность разбить будущий архив на тома.
- Выберите размер «4095 Mb (FAT32)» и жмите «ОК».

Архив будет состоять из нескольких частей, размер которых не будут превышать максимально допустимое значение.
Ответы на вопросы пользователей
Как добавить фильм на флешку, если телевизор не читает NTFS
В таком случае можно пойти по пути наименьшего сопротивления и скачать в интернете тот же фильм, только меньшего размера. Также, можно преобразовать накопитель в расширенный формат ExFAT. Ограничение при этом составит 32 Гб, что вполне приемлемо. Но такое преобразование сотрет все данные, поэтому предварительно переместите их на другой накопитель информации.
Для форматирования флешки воспользуйтесь командной строкой:
- Подключите флешку к ПК и посмотрите, какую букву Windows присвоил ей.
- Запустите CMD от имени администратора.
- Введите команду format G: /fs:exfat.
- Произойдет форматирование накопителя.
- Жмите Enter для подтверждения.


Флешку с ExFAT будут читать телевизоры или иные устройства, которые работают с FAT. И конечно, теперь можно записать фильм большого размера в диапазоне от 4 ГБ до 32 ГБ.
Как записать образ Windows, чтобы сделать загрузочную флешку
Если ISO-образ Windows более 4 ГБ, могут возникнуть проблемы при записи, так как обязательное условие загрузочной флешки — FAT32. Разрешить эту проблему могут специальные утилиты, создающие рабочую загрузочную флешку:
- WinSetupFromUSB v1.6 beta – разбивает большие файлы в FAT32 и «склеивает» их при установке;
- Rufus – записывает загрузочные флешки для ПК с материнскими платами UEFI, в системе NTFS.
- А если нужно сделать установочный накопитель с последней версией Windows 10, просто воспользуйтесь MediaCreationTool.
Заключение
В статье собраны способы, которые подойдут для решения практически любой задачи, связанной с этой ошибкой. К сожалению, в силу технических особенностей используемого железа, полностью отказаться от «семейства FAT» пока еще нельзя. Поэтому, сохраняйте мануал в закладки, возможно он еще не раз вам пригодиться.


