- How to find the largest files?
- Features
- System requirements
- What else takes up a lot of space?
- How to Reduce Windows.edb Huge File Size?
- How to Reset and Rebuild Windows Search Index?
- Reducing Windows.edb Size Using Defragmentation
- Remove and Recreate the Windows.edb file
- Move the Windows.edb File to a Different Drive
- Install the Update Rollup to Fix Windows.edb File Growth
- Windows.edb File Keeps Growing
- How do I find the largest files on my PC in Windows 10?
- How do I search for files by size in Windows 10?
- 1. Use a third-party tool
- Copernic Desktop Search
- 2. Use File Explorer
- 4 Ways To Find Large Files In Windows 10
- Find Large Files In Windows 10 Using File Explorer
- Search For Large Files In Windows 10 With Command Prompt
- Use Largest Files Finder To Find Large Files On Windows 10
- Find Largest Files On Windows 10 With TreeSize Free
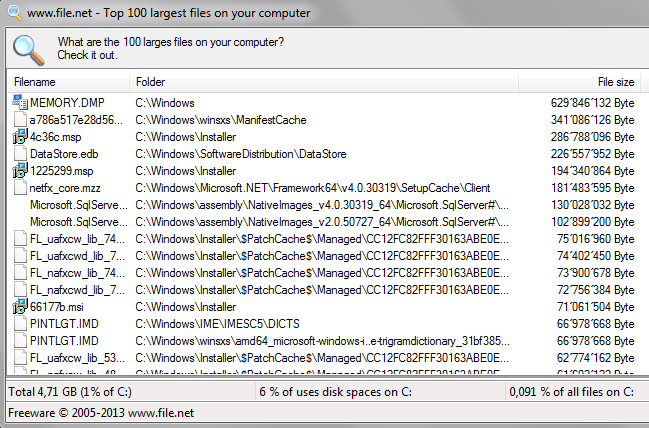
How to find the largest files?
The freeware Largest Files Finder finds the 100 largest files on your hard disk or within multiple subdirectories. Once you start Largest Files Finder, the software automatically scans your hard drive and shows you the top 100 biggest files on your hard disk. For each file you see the following information in the top 100 largest files list: file name, full folder path, file size and date of last change. If you need more free disk space, simply run that freeware and see what files can be deleted to get more free disk space.
You can select any hard drive or any folder you want. The file finder software starts automatically to scan your selected disk or folder. Largest Files Finder only needs 60 seconds for a complete 200 GB disk scan.

Features
- doesn’t require installation
- doesn’t require runtime modules
- doesn’t write to the registry
- doesn’t modify files outside of its own directories
- isn’t adware
- 100% free — just remember it comes from file.net 🙂
System requirements
- Windows 10, 8, 7, Vista, XP or Windows Server
- only 0.6 MB free disk space
What else takes up a lot of space?
Videos, photos and music folders often take up the most space. It’s best to back these up to an external hard drive or in the cloud. Music, audio books or language courses no longer need to be stored as MP3 files on your PC or smartphone. Music streaming services like Spotify, Apple Music or Audible are meant to be more convenient!
How to Reduce Windows.edb Huge File Size?
Windows.edb is the Windows Search index database. A search index allows users to quickly search for data and files in the file system due to indexing of files, e-mails in PST files and other content. Indexing is performed in the background by the SearchIndexer.exe process. Obviously, the more files there are in the system, the larger the size of the Windows.edb file. In some cases, it can grow up to tens or even hundreds of GB, taking up all the free space on the system drive.
The Windows.edb file is hidden and by default is stored in the folder C:\ProgramData\Microsoft\Search\Data\Applications\Windows\.
For example, in my case the size of Windows.edb is more than 15.5 GB (i. e. over 15% on my 100 GB SSD drive).

You can check the current size of the Windows.edb file with the following PowerShell command:

Next, let’s look at a several ways to reduce the size of the huge Windows Search Index (Windows.edb) file.
How to Reset and Rebuild Windows Search Index?
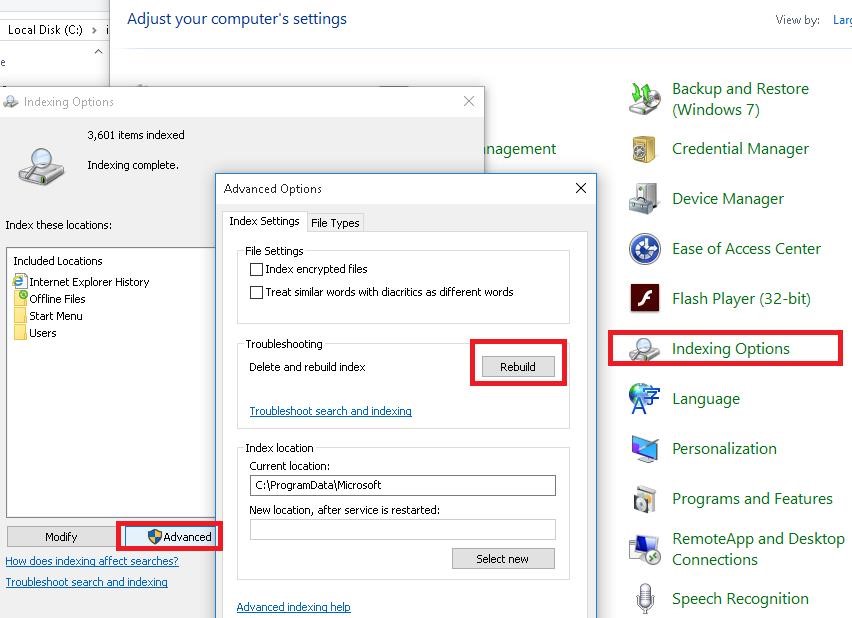
The most appropriate, though not too effective way to reduce the size of Windows.edb is to re-index the files in the system. To do it, open Control Panel -> Indexing Options -> Advanced -> click Rebuild (to open this dialog box, you can run the following command: Control srchadmin.dll ).
In some time, the Windows Search will complete a full reindex of the data on the system drive (and other indexed location), and the size of the edb file will be reduced (it took several hours to rebuild the search index on my computer).
Reducing Windows.edb Size Using Defragmentation
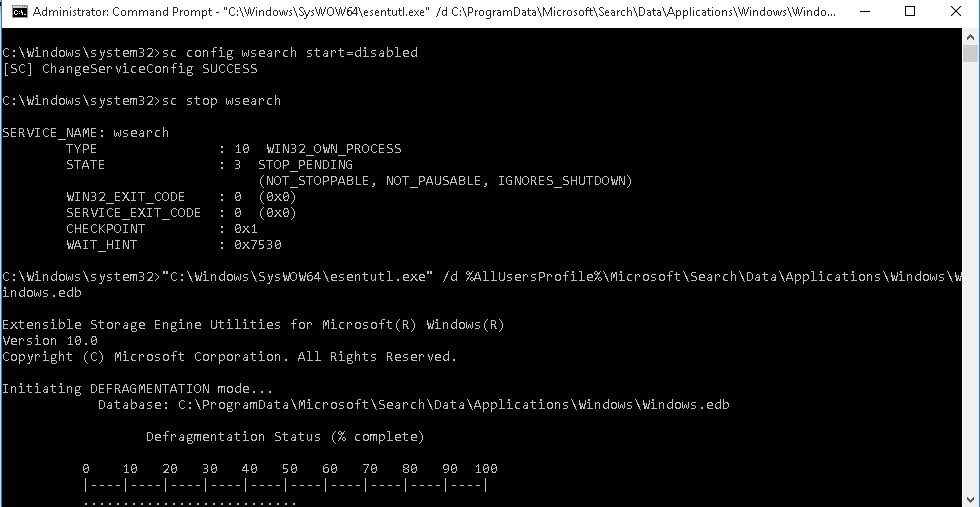
The Windows Search Index file is a Microsoft EDB database. You can defragment the EDB database using the standard tool for maintaining such databases, esentutl.exe (Extensible Storage Engine Utility – should be familiar to Exchange admins). The database is defragmented offline (it must not be used), so you will have to stop Widows Search service first. You can join all these operations in a single bat/cmd script:
sc config wsearch start=disabled
sc stop wsearch
esentutl.exe /d %ProgramData%\Microsoft\Search\Data\Applications\Windows\Windows.edb
sc config wsearch start=delayed-auto
sc start wsearch
Esentutl displays on the screen the current EDB file defragmentation progress.
This means that you are using a 64-bit OS and you need to use the x86 esentutl version to perform defragmentation. In this case, the third command will look like this:
«C:\Windows\SysWOW64\esentutl.exe» /d %AllUsersProfile%\Microsoft\Search\Data\Applications\Windows\Windows.edb
In my case, after the defragmentation, the size of the Windows.edb file reduced by 30%.
Remove and Recreate the Windows.edb file
If free disk space is critical, you can safely delete the Windows.edb file. This action is safe because you don’t lose any data, only the search index is reset. To delete the Windows.edb file, stop the Windows Search service, then delete the file and start the service.
net stop «Windows Search»
REG ADD «HKLM\SOFTWARE\Microsoft\Windows Search» /v SetupCompletedSuccessfully /t REG_DWORD /d 0 /f
del %PROGRAMDATA%\Microsoft\Search\Data\Applications\Windows\Windows.edb
net start «Windows Search»
After you restart Windows Search, it will start the background reindexing process and recreate the Windows.edb file (system performance may decrease during the full reindexing).
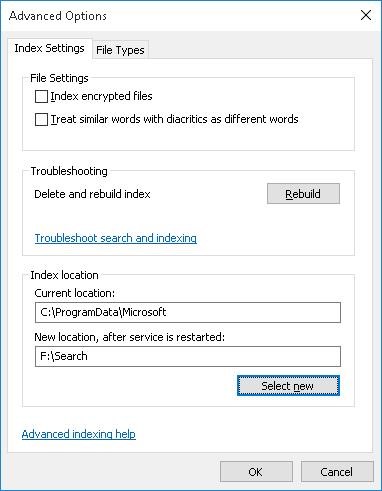
Move the Windows.edb File to a Different Drive
In some cases, when the size of Windows.edb file is constantly growing, it is better to move the index database of Windows Search to another drive (volume). Thus, a sharp increase in the search database won’t cause an OS crash due to the exhaustion of free space on the system partition. As a rule, you should do it on RDS servers, where users actively work with files, personal folders and other indexed content.
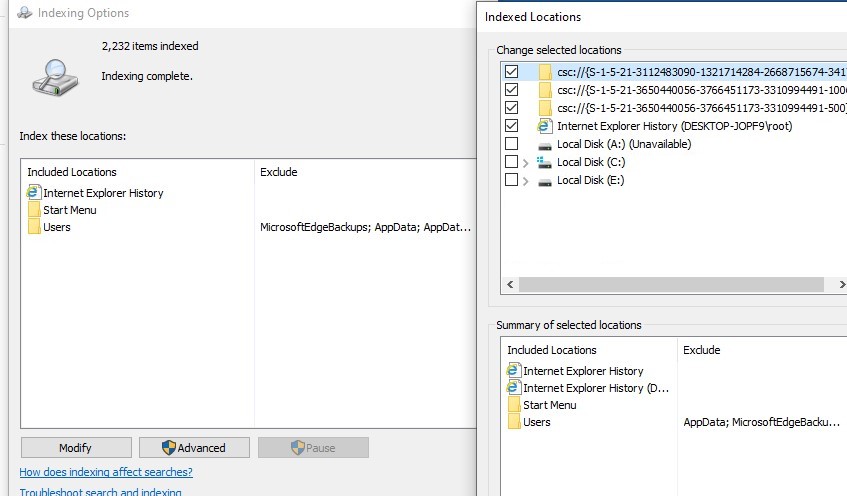
To change the index file location, go to Control Panel -> Indexing Options -> Advanced -> Index location-> New Location, specify the path to the new location of Windows.edb file and click Ok.
Restart Windows Search service:
Restart-Service wsearch
Install the Update Rollup to Fix Windows.edb File Growth
A special update was released in May, 2013 to fix the problem of the constant growth of Windows.edb file in Windows 8 and Windows Server 2012 (this bug fix is a part of update rollup KB 2836988). It is recommended to manually download and install this patch on these Windows versions. Please note that the update doesn’t reduce the current size of the Windows.edb file, but only fixes the bug causing it to grow excessively. To reduce the size of the edb file, you need to rebuild the search index or defragment as described above.
Windows.edb File Keeps Growing
If the Windows.edb file starts growing again after defragmenting and/or rebuilding the search index, try the following methods that may help you to fix the issue:
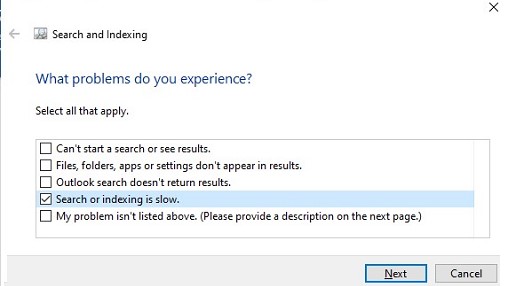
- Run the built-in Windows 10 SearchandIndexingTroubleshooter. You can run this using the command: msdt.exe -ep SystemSettings_Troubleshoot_L2 -id SearchDiagnostic . In the list of issues, select “Search or indexing is slow”. The troubleshooting wizard will then try to get the Windows Search service back to normal state;

- Try to index only the content you need. Exclude items you are not looking for from the search index. Click the “Modify” button in the indexing settings and in the “Indexing Location” window, disable paths and apps that you don’t want to be indexed. After changing the index path settings, you need to rebuild the search index each time (Advanced -> Rebuild);
How do I find the largest files on my PC in Windows 10?

- Sometimes, you need to free up some space by removing large, unused files.
- The two quick tips listed below will surely be of great help to you.
- If you want to use less storage space, find some inspiration in our File Management Hub.
- For 24-hour professional guidance, don’t hesitate to bookmark this Tech Tutorials Hub.

- Find files on your PC, laptop and other devices
- Locate themin multiple places: local, network or cloud storage
- Get back pretty much everything you lost at a snap
find all the files,
even in cloud and network
Is your laptop’s or desktop’s hard drive more than 75% full? If so, you need to free up some hard drive space.
Erasing temporary files with disk cleaner software tools is one convenient way to free up some storage space.
Alternatively, you can free up hard drive storage by manually deleting some of your largest files.
To do that, you’ll just need to find the largest files on your PC ‘s hard drive first. We’re here to help you out with that.
How do I search for files by size in Windows 10?
1. Use a third-party tool

A dedicated file finder tool such as Copernic Desktop Search will help you with the utmost accuracy to find documents depending on your needs.
The tool comes with a Refine search feature to allow you to dig deep into the computer files and get exactly what you’re looking for.
As a result, you can search a file by:
Copernic comes in several subscription versions, including a free one, that has some limitations, in terms of the file types it retrieves.
However, you can rest assured that the most popular ones ( such as Office files, Outlook emails, and attachments, text documents, archived, and multimedia files ) are covered.
After finding the largest files, in case you need to keep some of them, you can still free up HDD space by moving the files from your hard drive into Google Drive or OneDrive cloud storage.
Copernic Desktop Search
2. Use File Explorer
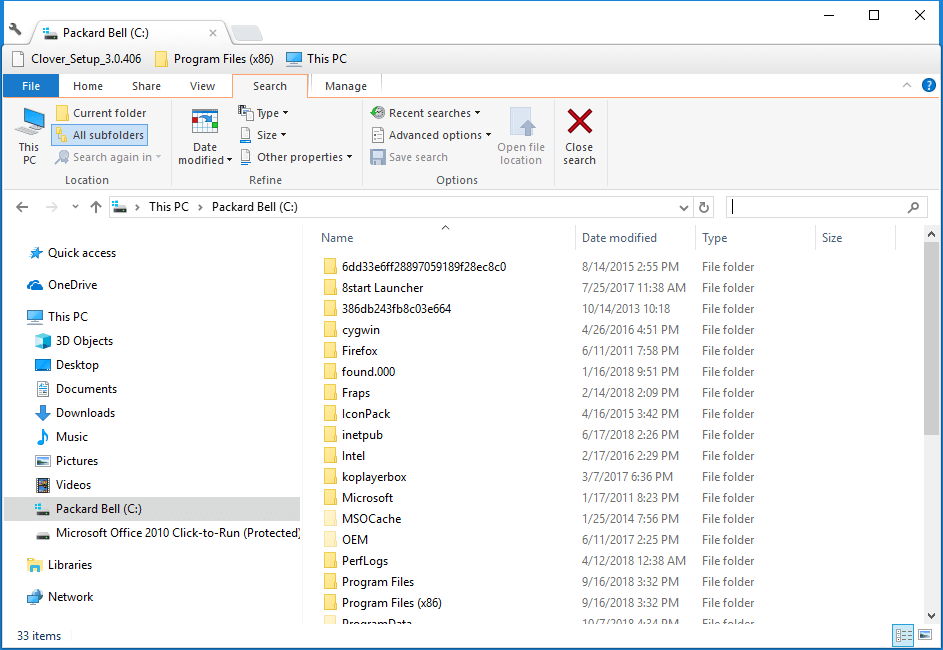
- Press the File Explorer button on the Windows 10 taskbar.
- Select your C: drive or an alternative drive partition to search for files on. (Alternatively, you can select a specific folder to search for files in.)
- Click inside the Search box to the right of Explorer’s window to open the Search tab.
- Select the All subfolders option.
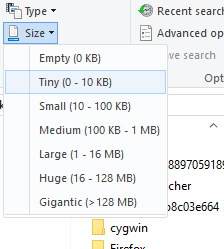
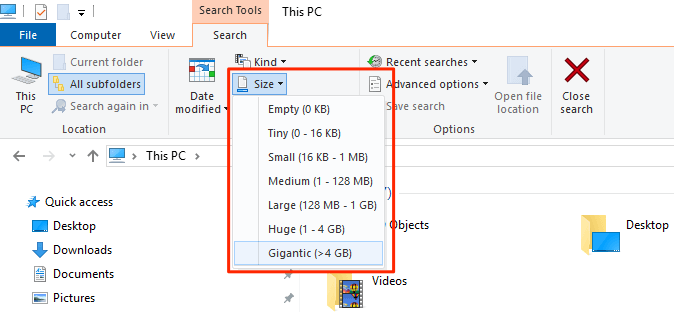
- Click the Size button to open the drop-down menu shown below.
- Select the Gigantic (>128 MB) option to search for the largest files. (File Explorer will then list all files that eclipse 128 MB within your selected directory or drive.)
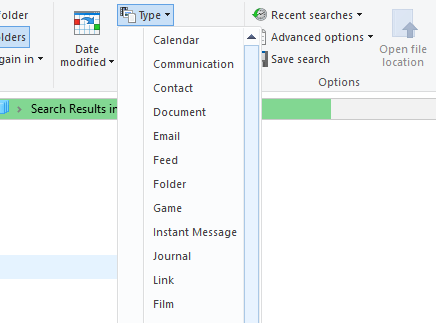
- Press the Type button to further modify your search.
- Select to search for a more specific file type, such as image, music, or video.
- Erase files by selecting them and pressing the Delete button.
- Select the Empty Recycle Bin option in the Recycle Bin to erase the deleted files.

Although many users utilize Cortana to search in Windows 10, File Explorer remains the best built-in utility for file searching.
So, if you don’t want to go for a dedicated tool, Explorer is a decent Windows file manager with numerous search options.
You can find your PC’s largest files with the options on Explorer’s Search tab, simply as described in the procedure above.
You might find that some of your desktop’s or laptop’s largest files are system files in subfolders within the Windows folder. Never delete any large file that might be a system file.
If you’re not sure whether a file is a system one or not, do not erase it. Stick to deleting the largest image, video, document, and other files within your user folder.
File Explorer might also find large program (EXE) files. Don’t delete program files from within Explorer as they’ll probably be listed within the Programs and Features Control Panel applet.
The Windows 10 tips detailed in this useful post will also free up more hard drive space.
Let us know if you managed to achieve your goal in the comments area below.
4 Ways To Find Large Files In Windows 10
Free up space quickly by deleting them
If you quickly want to free-up memory space on your Windows machine, the best way to do that is to find large files on your Windows 10 PC and get rid of them if they’re no longer useful. The question though is how do you go about searching for large files on your computer?
Windows provides you with multiple ways to find all the large files that are stored in your drives. Either you can use the built-in tools on your machine to look for these files or you can grab a third-party app that will do the task for you. Either way, you’ll find the files that occupy a significant portion of your memory space.

Once such files are found, it’s then up to you what you want to do with them. If deleting them permanently isn’t something you’d like to do straightaway, you can move them over to a cloud storage or to an external hard drive.
Also, be sure to check out our YouTube video from our sister site Online Tech Tips where we go through some of the options mentioned below in this article.
Find Large Files In Windows 10 Using File Explorer
File Explorer comes with a lot of hidden features to let you organize, sort, and find files on your computer. One of its abilities is to help you find files that are of specific size on your computer. Using this feature, you can locate those memory-hogging files and get them removed from your PC.
Before you do that, though, you’ll need to first enable the hidden files option. This is to ensure that Explorer looks for large hidden files as well in addition to searching for the normal files.
However, be cautious while dealing with the hidden files. Most of the time, these are system and app related files which, if you delete, will cause your apps to malfunction and even lead your entire system to crash. Before you delete anything, just make sure you know what it is and you’ll be fine.
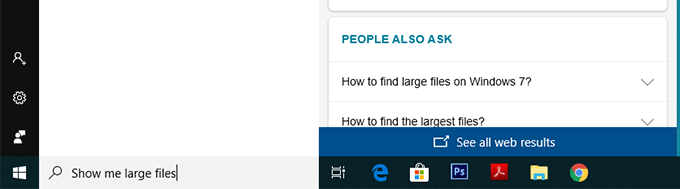
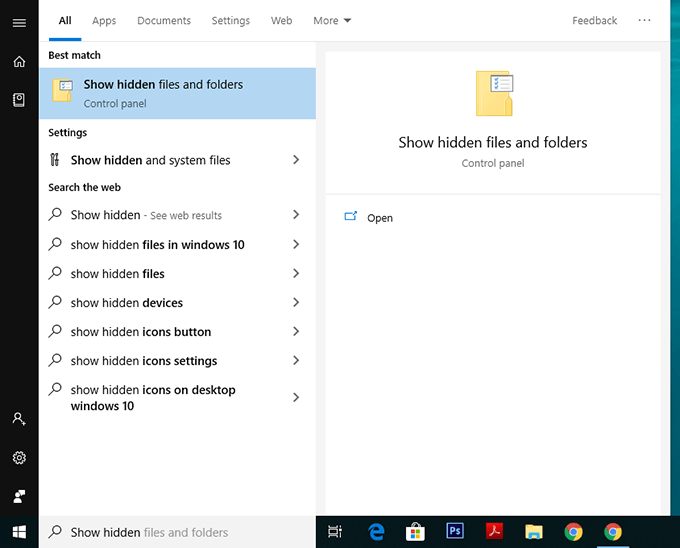
Open the Start Menu and search for Show hidden and click on Show hidden files and folders.
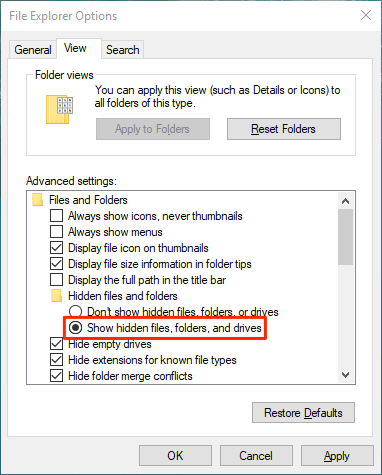
When the dialog box opens, click on the View tab at the top. You’ll see various File Explorer options that you can modify.
Find the option that says Show hidden files, folders, and drives and put a checkmark in it. Then click on the OK button to save your changes.
Double-click on This PC on your desktop to launch File Explorer. When the utility launches, click on the search box given at the top-right corner.
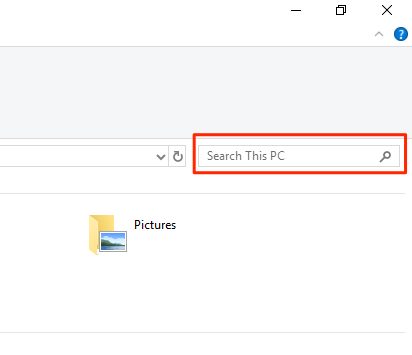
A new menu item will be added to the top of your screen. Click on the newly added item that says Search to view further options.
Select the Size option and then select an appropriate option from the list. It’ll let you find large files available on your PC.
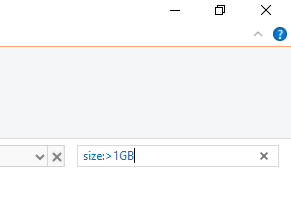
If what you consider as a large file isn’t available in the default menu, type in size:>1GB (replace 1GB with your size) in the search box and hit Enter. It’ll only look for the files that are larger than your specified size.
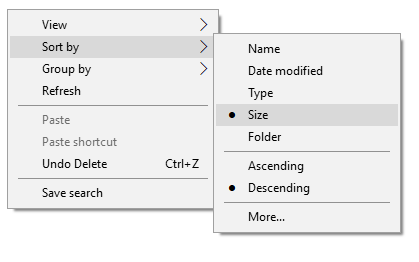
When the search results appear, right-click anywhere blank and select Sort by followed by Size and Descending. This’ll ensure the largest file is shown at the top of the results.
Search For Large Files In Windows 10 With Command Prompt
If you’re more of a geeky person, you can use the Command Prompt utility to retrieve a list of all the files larger than a specified size value. The files list can be exported to a text file for you to then actually find those files on your machine.
Press Windows + R, type in cmd, and hit Enter to launch the utility.
When it launches, type in the following command and hit Enter. It’ll find all the files that are larger than 1GB in size. You can modify the value in the command so it finds files that you think are large.
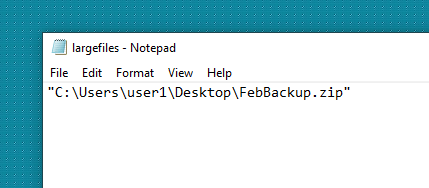
forfiles /S /M * /C “cmd /c if @fsize GEQ 1073741824 echo @path > largefiles.txt

Open the newly created largefiles.txt file and it’ll have a list of all the large files sitting on your computer.
Use Largest Files Finder To Find Large Files On Windows 10
File Explorer and Command Prompt aren’t the only tools to find large files on your Windows 10 computer. There are a few third-party apps as well that can help you find such files.
Largest Files Finder is one of those apps that helps you find the top 100 largest files on your computer. It claims to be only taking a minute to scan drives sized upto 200GB. Also, it doesn’t require any installation and works straight out of the box.
- Download and launch the app on your computer.
- Soon as it launches, it automatically starts searching for large files on your computer. When it’s done, you can review the results for yourself.
If you want to delete any files from the search results, you can do so with ease from within the app. Simply right-click on any of the files and select Delete.
Find Largest Files On Windows 10 With TreeSize Free
TreeSize Free has been around for quite a long time and it helps you find space hogging files on your Windows computers. It requires a small installation but then it works like a charm.
- Download, install, and launch the app on your computer. Make sure to run it with admin rights so it can search the folders that it can’t otherwise.
- You’ll see a tree of your folders along with the space they occupy on your screen. You can double-click on any folder to view its subfolders and their sizes.
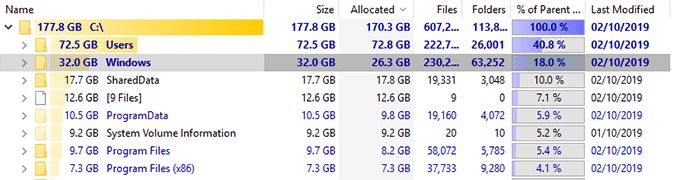
You can then sort the directories by the Size column so that the largest files are always shown at the top.
It has a few customizable options as well should you want to use them. Feel free to play around with any options you think will make it easier to find large files on your computer.
Mahesh has been obsessed with technology since he got his first gadget a decade or so ago. Over the last few years, he’s written a number of tech articles on various online publications including but not limited to MakeTechEasier and Android AppStorm. Read Mahesh’s Full Bio


