- Лаунчер для Android в стиле Windows Phone всё ещё обновляется
- Launch android from windows
- Win X Launcher
- Microsoft Launcher
- Personalized productivity in the palm of your hand
- Your Android, your style
- M365 Feed
- Dark theme
- Landscape mode
- Begin every day with a fresh look
- One username, one password, all your accounts
- Frequently asked questions
- How to run Android apps in Windows
- Bluestacks emulator
- Dual booting
- Android-x86
- Samsung’s Link to Windows
- Surface Duo and Microsoft’s Emulator
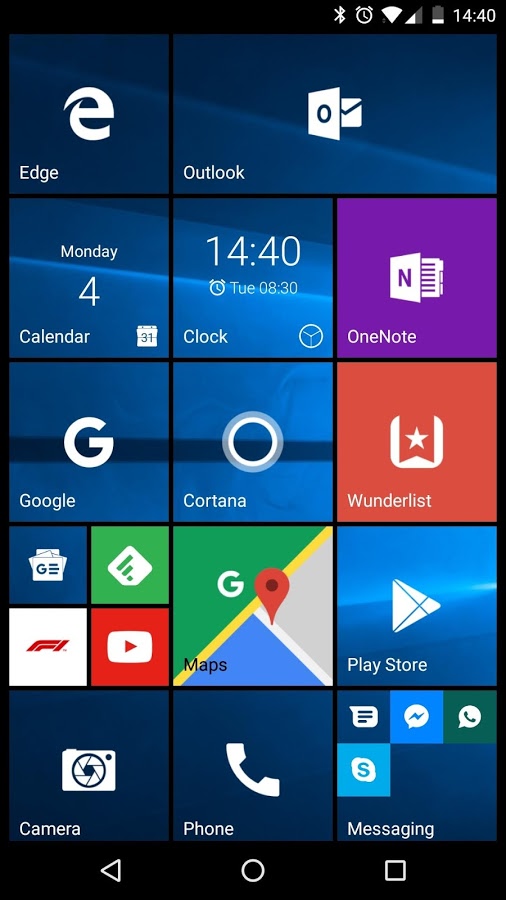
Лаунчер для Android в стиле Windows Phone всё ещё обновляется
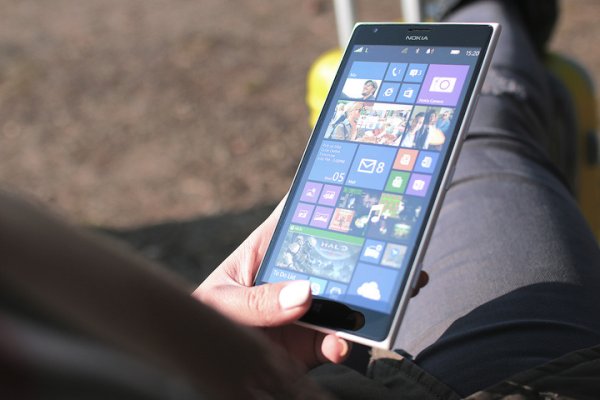
Специфический Launcher 10, привносящий в устройства на Android интерфейс Windows Phone, получил крупное обновление версии 2.1.5. Помимо стандартных исправлений ошибок и повышения производительности, разработчики добавили новые функции. Теперь дизайн Launcher 10 практически ничем не отличается от интерфейса оригинального Windows Phone.
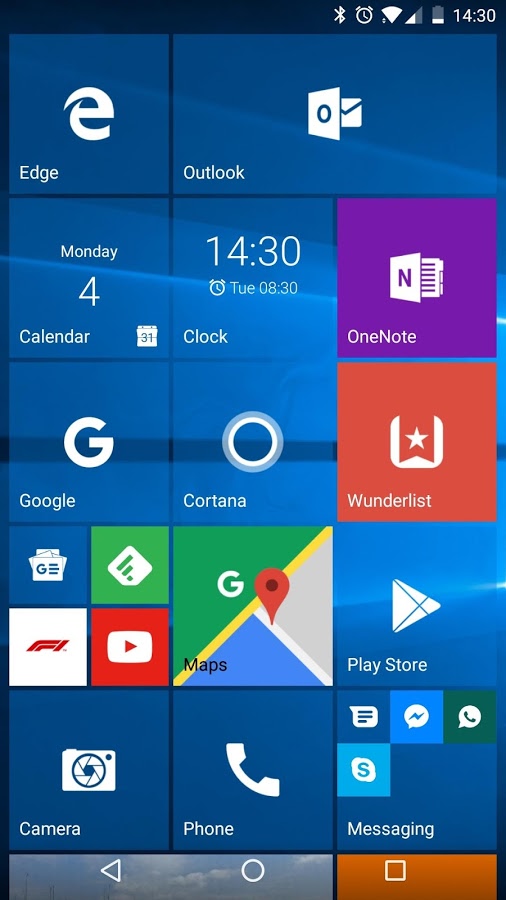
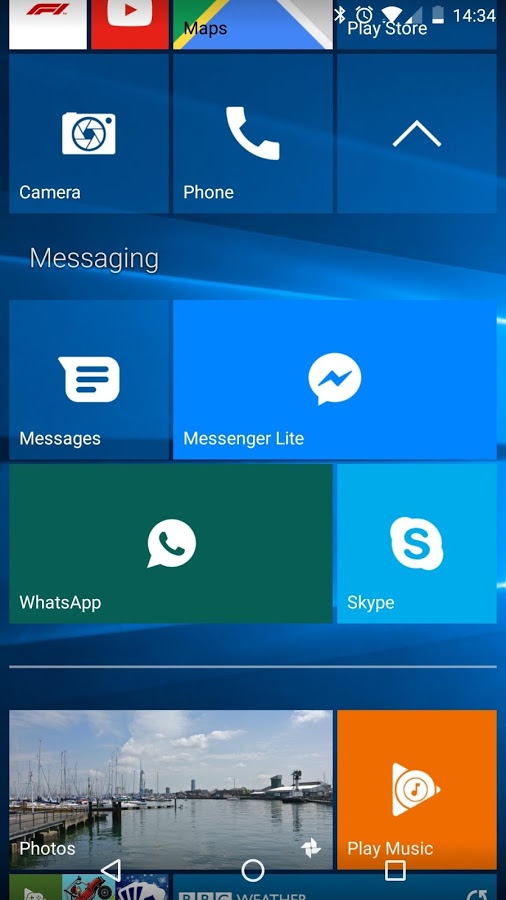
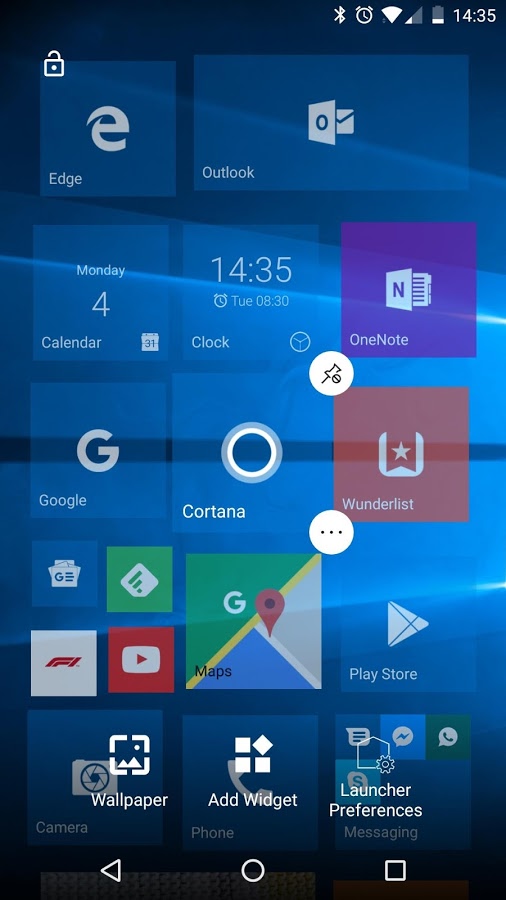
Недавнее обновление Launcher 10 привнесло в приложение следующие нововведения и изменения:
- исправление большого количества багов, повышение стабильности и производительности;
- уведомления на плитках теперь отображаются поверх фонового изображения, если оно есть;
- возможность выбора размера иконки и её типа для каждой плитки;
- добавлены незначительные отступы от краёв;
- поддержка поворота экрана;
- события календаря теперь показываются в живой плитке только в том случае, если пользователь включил их отображение.
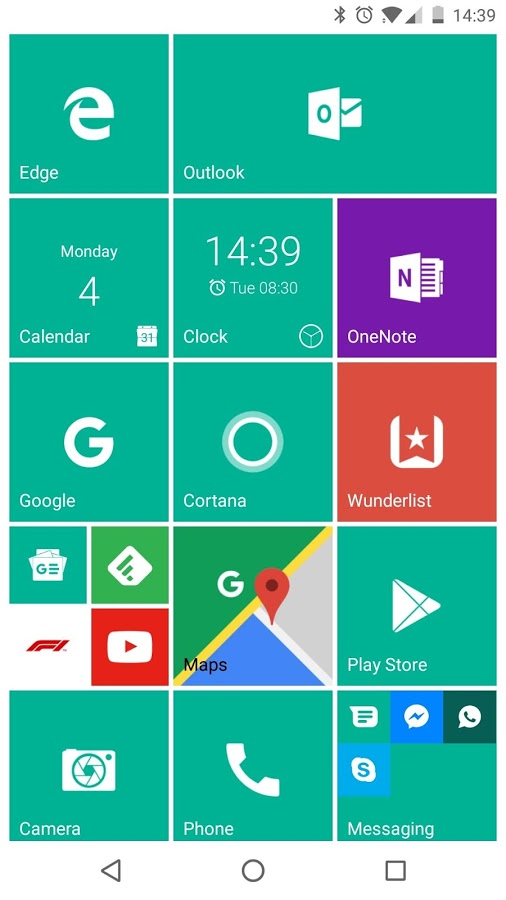
Фанатам мобильной Windows остаётся надеяться, что разработчики Launcher 10 и дальше будут поддерживать свой пользовательский интерфейс. В таком случае, поклонники Windows Phone смогут практически «безболезненно» перейти на Android, сохранив при этом полюбившиеся приложения от Microsoft и любуясь дизайном оболочки.
Launch android from windows
Краткое описание:
Стиль Windows 10 в вашем телефоне
Требуется Android: 4.1+
Русский интерфейс: Да
Версия: 8.51 Premium (denrusvrn)
Версия: 8.47 Premium (denrusvrn)
Версия: 8.37 Premium Computer Launcher (Win X Launcher) (Пост Number one’ #99777510)
Версия: 8.27 Premium Computer Launcher (Win X Launcher) (Пост pokpok #95503568)
Версия: 8.27 GP Computer Launcher (Win X Launcher) (Пост pokpok #94982220)
Версия: 8.26 Computer Launcher (Win X Launcher) (Пост pokpok #94921057)
Версия: 8.15 PRO Computer Launcher (Win X Launcher) (Пост pokpok #94227259)
Версия: 8.11 PRO RUS Computer Launcher (Win X Launcher) (Пост papasha55 #91149705)
Версия: 8.11 PRO Computer Launcher (Win X Launcher) (Пост vadj #91131588)
Версия: 8.10 PRO RUS Computer Launcher (Win X Launcher) (Пост papasha55 #90915277)
Версия: 8.10 Pro Без рекламы (VADEER)
Версия: 8.08 Pro RUS Computer Launcher (Win X Launcher) (Пост papasha55 #90415380)
Версия: 8.08 Pro Computer Launcher (Win X Launcher) (Пост _Maximoff_ #90411479)
Версия: 8.08 GP Computer Launcher (Win X Launcher) (Пост pokpok #90409906)
Версия: 8.04 Pro Rus Computer Launcher (Win X Launcher) (Пост papasha55 #89569026)
Версия: 8.04 Pro Computer Launcher (Win X Launcher) (Пост kameshkovo8 #89554811)
Версия: 7.99 Premium Computer Launcher (Win X Launcher) (Пост Edik1d #89438307)
Версия: 7.99 GP (Rekembus)
Версия: 7.98 PRO Computer Launcher (Win X Launcher) (Пост kameshkovo8 #86977019)
Версия: 7.97 PRO Computer Launcher (Win X Launcher) (Пост pokpok #86776520)
Версия: 7.95 PRO Computer Launcher (Win X Launcher) (Пост kameshkovo8 #86618862)
Версия: 7.92 PRO Computer Launcher (Win X Launcher) (Пост kameshkovo8 #86233146)
Версия: 7.92 GP Computer Launcher (Win X Launcher) (Пост kameshkovo8 #86096550)
Версия: 7.89 Pro (Alex0047)
версия: 7.87 GP + PRO Computer Launcher (Win X Launcher) (Пост pokpok #85528619)
Версия: 7.84 Pro (Alex0047)
версия: 7.83 GP + PRO Computer Launcher (Win X Launcher) (Пост pokpok #85382397)
версия: 7.82 GP + PRO Computer Launcher (Win X Launcher) (Пост pokpok #85320555)
версия: 7.80 GP + PRO Computer Launcher (Win X Launcher) (Пост pokpok #85280782)
версия: 7.79 GP + PRO Computer Launcher (Win X Launcher) (Пост pokpok #85199816)
версия: 7.78 PRO  ComputerLauncherPro778_crc.apk ( 7,65 МБ )
Сообщение отредактировал iMiKED — 08.04.21, 17:44
Win X Launcher
вкл. 21 Май 2019 . Опубликовано в Лончеры


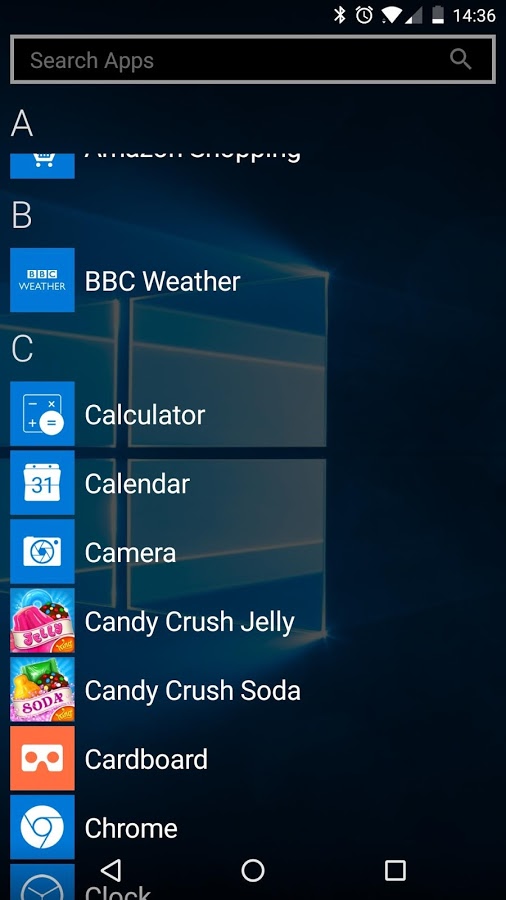
Computer Launcher (Win X Launcher) – это лаунчер Android, который полностью трансформирует интерфейс смартфона и придает ему внешний вид компьютера с ОС Windows 10. Эффект достаточно удивительный! Вы увидите кнопку старта, центр уведомлений, часы в левой нижней части экрана и так далее. При помощи кнопки старт вы получите доступ ко всем установленным приложениям, а также ко всем настройкам лаунчера и кнопке выключения устройства.
Главная особенность Win X Launcher в том, что он не только меняет главный экран; он также меняет и файловый менеджер, который становится точной копией раздела ‘Мой компьютер’. Вы сможете пользоваться этим разделом для быстрого и удобного доступа ко всем файлам на Android. И как вы могли представить, вы сможете осуществлять все те же действия, что и в Windows.
Win X Launcher – это отличная альтернатива любым традиционным лаунчерам, поскольку это приложение обеспечивает совершенно новый опыт пользования телефоном. Лаунчер обязательно понравится всем, кто хочет почувствовать себя так, словно пользуется Windows на своем смартфоне.
Скачать приложение Win X Launcher на Андроид вы можете по ссылке ниже.
Разработчик: Pro Themes and Launchers
Платформа: Android 4.1 и выше
Язык интерфейса: Русский (RUS)
Состояние: [Pro]
Root: Не нужен
Microsoft Launcher
Sync with your Windows PC, customize your Android’s home screen, prioritize, organize, and give your phone a whole new look with Microsoft Launcher. 1
Personalized productivity in the palm of your hand
![]()
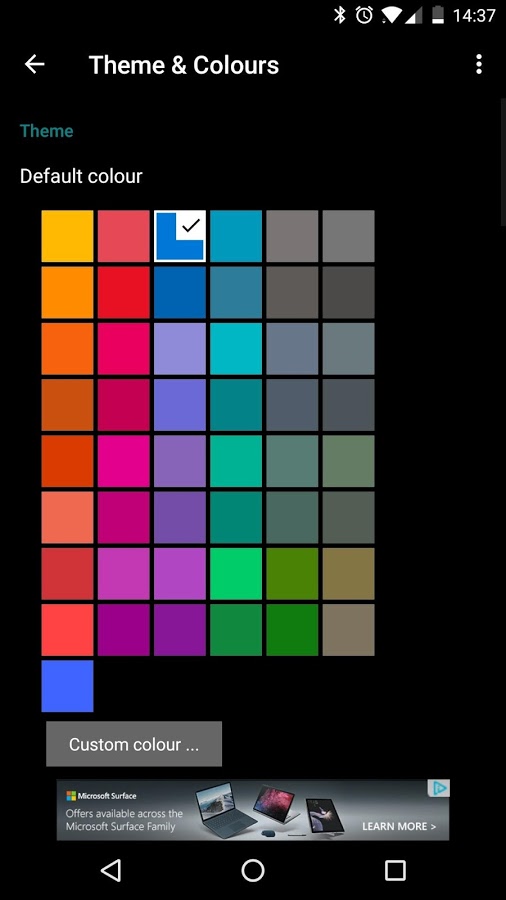
Your Android, your style
Customize, personalize, and revitalize your phone for a fresh look. Microsoft Launcher comes with a variety of themes, customizable app icons, widgets, wallpapers, and more.
![]()
M365 Feed
Stay productive by putting the essentials at your fingertips. Simply swipe left from your home screen to access your calendar, tasks, notes, documents, screen time, and recent activities.
![]()
Dark theme
Dark theme changes the default background to a darker color, which is easier on the eyes, improves focus and battery life.
![]()
Landscape mode
Microsoft Launcher supports vertical and horizontal orientations to enhance your viewing preference.
Begin every day with a fresh look
Microsoft Launcher comes packaged with free access to beautiful Bing wallpaper—set it as your background and the image automatically refreshes daily.
![]()
One username, one password, all your accounts
Get started with a free Microsoft account. It’s a convenient and easy way to sync apps like Outlook, Office, and Skype, across your devices.
Frequently asked questions
1 Phone supporting Android version 7.0 or higher. You must download Microsoft Launcher from Google Play Store. Downloading Microsoft Launcher will replace the default launcher. Microsoft Launcher does not replicate the user’s PC home screen on the Android phone. Users must still purchase and/or download any new apps from Google Play.
How to run Android apps in Windows
When it comes to app selection, few platforms rival Android. Unfortunately, getting apps from your phone or tablet to your Windows PC isn’t as straightforward as simply installing desktop software. To help make the process easier, however, we’ve put together a comprehensive guide on what software and utilities you need to install Android apps on almost any Windows machine. This way, you can enjoy the best Android apps and best Android games on the big screen.
If you’re running a Chromebook, we’ve also put together a dedicated guide on how to install Android apps on Chrome OS.
Bluestacks emulator

The Bluestacks App Player is one of the most popular and robust Android emulators around, allowing you to run 32-bit and 64-bit games and apps for Android 7.1.2 (Nougat) on your Windows desktop.
It’s free to use, and you can easily toggle emulation settings and launch apps using the custom-designed interface. “Layercake” technology uses hardware accelerators to improve the performance of Android games running on Windows-based machines.
If you have a Twitch or similar account and a PC with more than 8GB of RAM, you can even broadcast Android apps and games using the Bluestacks “stream mode” and OBS Studio. However, users may want to enable AMD-V or Intel VT-x within the BIOS for optimal performance, if available.
Bluestacks offers an optional subscription ($4 per month or $40 per year) that enables premium support, disables advertisements, includes wallpapers, and more. It’s also now compatible with the Galaxy Store, allowing you to use and play apps purchased through Samsung’s app store.
Here’s how to install Bluestacks to your computer:
Step 1: Download the installer from the official Bluestacks website.
Step 2: Launch the install application and choose the storage location for the app and data files. Unfortunately, you can’t change the Bluestacks directory — it will install on your boot drive by default.
Step 3: Once Bluestacks installs, launch it and enter your Google and/or Samsung account credentials. You’ll need this info to log in to the Google Play Store and Galaxy Store and access your Android app library.
Dual booting
There’s an alternative to emulation that gives you newer versions of Android, but the setup is a bit more involved. It’s called “dual booting,” and it effectively transforms your Windows computer into an Android device. You’ll gain the option to boot into Android when you switch on your computer, and Android will work just like it does on your smartphone or tablet.
However, getting started is not as simple as installing native Android. Because computer hardware — processors, graphics cards, and hard drives — must be added to Android by a third-party developer, you’ll need to find a custom distribution that supports your machine.
Android-x86

Android-x86 brings Android to x86-based PCs with AMD and Intel processors. What’s interesting about this project is that users can install any flavor of Android, whether it’s the now-stale Donut (v1.6) or the more recent Pie (v9). The project even offers builds of LineageOS (cm-x86) that can run on x86-based processors.
For those seeking a more recent Android build, Android-x86 9.0-r2 was the latest release at the time of this publication. Based on Android-9.0.0_r54, it fixed an audio issue on the Surface 3 and another one regarding booting into UEFI mode. Contributors are currently working on a version based on Android 10, although the project hasn’t released anything new since May 2020.
Though customizations to the Android operating system are minimal, the Android-x86 team did add some meaningful tweaks to give your Android install a desktop-like interface. It comes with features like a new Taskbar launcher and the ability to launch apps in resizable windows rather than just full-screen.
Android-x86 also lets you customize Android to your liking. You can install third-party themes, home screens, and more without having to worry about whether or not they will play nicely together.
To use Android-x86, your PC must have:
- An AMD or Intel processor.
- 2GB or more RAM.
- 4GB or more disk space.
- An available USB port.
If your PC meets the requirements, you will need these three tools:
- A blank USB drive.
- Android-x86 downloaded to your PC
- UNetbootin downloaded to your PC.
Now let’s get started:
 Kevin Parrish/Digital Trends
Step 1: Find and open UNetbootin and click the Three Dots button to the far right of Diskimage.
Step 2: Locate and select the downloaded ISO file.
Step 3: At the bottom next to Type, select USB Drive from the list, and then click OK.
Wait for UNetbootin to copy and install Android-x86 to your flash drive.
Step 4: Reboot your computer. This may require you to hit a specific key to prevent Windows 10 from loading, like ESC or F12. A screen should appear allowing you to select Boot to the Boot Device Selection.
Step 5: Select your flash drive.
Step 6: From the UNetbootin menu, select Install Android-x86 to Hard Disk.
Step 7: Select the partition — or location — to which you want to install Android-x86. The program will ask if you plan to format the disk. If you’re unsure, don’t.
Step 8: Select Yes to install GRUB and then select Yes again.
Step 9: A prompt asks if you want to “make system r/w,” which enables Android-x86 to read and write data to your hard drive. Select Yes.
Step 10: Reboot your computer for the second time. Once installed, use the Google Play Store to install Android apps as you wish.
Samsung’s Link to Windows

Microsoft’s Your Phone app allows Android phone owners to send and receive texts from their Windows PC without using their mobile devices. Users can also access their phone’s photos from Windows 10 and see phone-related notifications in the Action Center.
Samsung takes this cool relationship one step further with Link to Windows. This technology now provides two services: Phone Screen and Apps. With the former, you’re essentially streaming a Samsung phone’s screen to an interactive window on your PC. With Apps, you’re streaming individual apps rather than mirroring the phone’s entire screen.
However, all Android apps remain on the Samsung phone. Moreover, this method requires the Windows 10 PC and Samsung Android phone to be on the same local network. Microsoft provides a list of compatible Samsung phones here — not all Samsung phones support Link to Windows.
Finally, this method requires the Windows 10 November 2019 Update (at the very least) to work properly. All Samsung phones must have Android 9 or newer.
Step 1: Open the Your Phone app or download it from the Microsoft Store if it’s not installed.
Step 2: Sign in to your Microsoft Account.
Step 3: Move to the Samsung phone. Swipe down on the Quick Panel and tap Link to Windows. If it doesn’t appear in the Quick Panel, download it from the Google Play Store — it’s typically integrated into newer Samsung phones.
Step 4: If other Microsoft apps are already signed in, you won’t need to do it again on your phone. If not, sign in manually.
Step 5: Allow permissions when prompted.
Step 6: The Samsung phone and Windows 10 should begin synchronizing. When complete, tap the blue Allow button on the Samsung phone’s screen to allow the pairing.
If successful, the Samsung phone will display a switch that’s toggled on — tap it to disconnect at any time. The screen also lists the connected PC’s name and the Microsoft Account login name.
Step 6: With the Your Phone app open in Windows 10, click the Gear (settings) icon in the bottom-left corner.
Step 7: Verify that the Display My Phone Screen option is on.
Step 8: Select the Phone Screen or Apps option on the left to begin.
Surface Duo and Microsoft’s Emulator

The Surface Duo is a high-tech piece of equipment that first came out on September 10, 2020. This dual-screen device is a folding Android smartphone that operates on a Qualcomm Snapdragon 855 SoC.
Microsoft created the Duo SDK Preview, which developers and fans can download, to get ready for the incoming Surface Duo . The preview lets you install an Android emulator, which mimics the look of the dual-screen Duo layout integrated with Android Studio on your computer.
If you feel ready to try out this preview feature, it’s an excellent chance to use the Duo software to run and test Android apps on your Windows computer. If this sounds up your alley, you can download this emulator for free right here . Check it out and see how everything operates and what the layout would look like.


