- Install Windows 10 on your Mac with Boot Camp Assistant
- What you need to install Windows 10 on Mac
- How to install Windows 10 on Mac
- 1. Check your Secure Boot setting
- 2. Use Boot Camp Assistant to create a Windows partition
- 3. Format the Windows (BOOTCAMP) partition
- 4. Install Windows
- 5. Use the Boot Camp installer in Windows
- How to switch between Windows and macOS
- Learn more
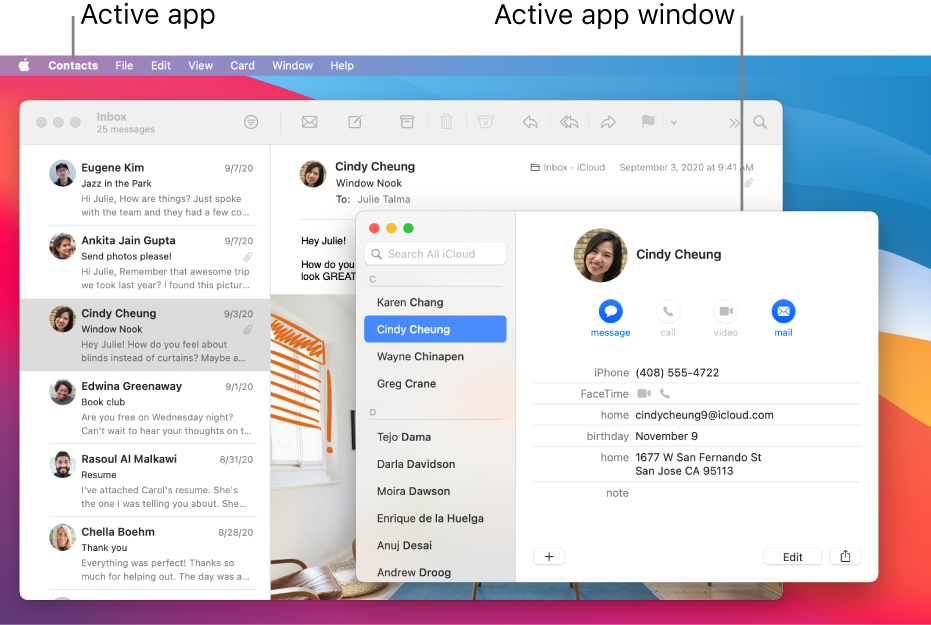
- Manage windows on Mac
- Move, align and merge windows
- Maximise or minimise windows
- Quickly switch between app windows
- Close windows
- Easily Run Windows Applications on Mac OS X
- Installation
- Installing Windows applications
- Running Windows applications
- Conclusion
Install Windows 10 on your Mac with Boot Camp Assistant
With Boot Camp, you can install Microsoft Windows 10 on your Mac, then switch between macOS and Windows when restarting your Mac.
What you need to install Windows 10 on Mac
- MacBook introduced in 2015 or later
- MacBook Air introduced in 2012 or later
- MacBook Pro introduced in 2012 or later
- Mac mini introduced in 2012 or later
- iMac introduced in 2012 or later 1
- iMac Pro (all models)
- Mac Pro introduced in 2013 or later
The latest macOS updates, which can include updates to Boot Camp Assistant. You will use Boot Camp Assistant to install Windows 10.
64GB or more free storage space on your Mac startup disk:
- Your Mac can have as little as 64GB of free storage space, but at least 128GB of free storage space provides the best experience. Automatic Windows updates require that much space or more.
- If you have an iMac Pro or Mac Pro with 128GB of memory (RAM) or more, your startup disk needs at least as much free storage space as your Mac has memory. 2
An external USB flash drive with a storage capacity of 16GB or more, unless you’re using a Mac that doesn’t need a flash drive to install Windows.
A 64-bit version of Windows 10 Home or Windows 10 Pro on a disk image (ISO) or other installation media. If installing Windows on your Mac for the first time, this must be a full version of Windows, not an upgrade.
- If your copy of Windows came on a USB flash drive, or you have a Windows product key and no installation disc, download a Windows 10 disk image from Microsoft.
- If your copy of Windows came on a DVD, you might need to create a disk image of that DVD.

![]()
How to install Windows 10 on Mac
To install Windows, use Boot Camp Assistant, which is included with your Mac.
1. Check your Secure Boot setting
Learn how to check your Secure Boot setting. The default Secure Boot setting is Full Security. If you changed it to No Security, change it back to Full Security before installing Windows. After installing Windows, you can use any Secure Boot setting without affecting your ability to start up from Windows.
2. Use Boot Camp Assistant to create a Windows partition
Open Boot Camp Assistant, which is in the Utilities folder of your Applications folder. Follow the onscreen instructions.
- If you’re asked to insert a USB drive, plug your USB flash drive into your Mac. Boot Camp Assistant will use it to create a bootable USB drive for Windows installation.
- When Boot Camp Assistant asks you to set the size of the Windows partition, remember the minimum storage-space requirements in the previous section. Set a partition size that meets your needs, because you can’t change its size later.
3. Format the Windows (BOOTCAMP) partition
When Boot Camp Assistant finishes, your Mac restarts to the Windows installer. If the installer asks where to install Windows, select the BOOTCAMP partition and click Format. In most cases, the installer selects and formats the BOOTCAMP partition automatically.
4. Install Windows
Unplug any external devices that aren’t necessary during installation. Then click Next and follow the onscreen instructions to begin installing Windows.
5. Use the Boot Camp installer in Windows
After Windows installation completes, your Mac starts up in Windows and opens a ”Welcome to the Boot Camp installer” window. Follow the onscreen instructions to install Boot Camp and Windows support software (drivers). You will be asked to restart when done.
- If the Boot Camp installer never opens, open the Boot Camp installer manually and use it to complete Boot Camp installation.
- If you have an external display connected to a Thunderbolt 3 port on your Mac, the display will be blank (black, gray, or blue) for up to 2 minutes during installation.
How to switch between Windows and macOS
Restart, then press and hold the Option (or Alt) ⌥ key during startup to switch between Windows and macOS.
Learn more
If you have one of these Intel-based Mac models using OS X El Capitan or later, you don’t need a USB flash drive to install Windows:
- MacBook introduced in 2015 or later
- MacBook Air introduced in 2017 or later 3
- MacBook Pro introduced in 2015 or later 3
- iMac introduced in 2015 or later
- iMac Pro (all models)
- Mac Pro introduced in late 2013 or later
For more information about using Windows on your Mac, open Boot Camp Assistant and click the Open Boot Camp Help button.
1. If you’re using an iMac (Retina 5K, 27-inch, Late 2014) or iMac (27-inch, Late 2013) or iMac (27-inch, Late 2012) with a 3TB hard drive and macOS Mojave or later, learn about an alert you might see during installation.
2. For example, if your Mac has 128GB of memory, its startup disk must have at least 128GB of storage space available for Windows. To see how much memory your Mac has, choose Apple menu > About This Mac. To see how much storage space is available, click the Storage tab in the same window.
3. These Mac models were offered with 128GB hard drives as an option. Apple recommends 256GB or larger hard drives so that you can create a Boot Camp partition of at least 128GB.
Information about products not manufactured by Apple, or independent websites not controlled or tested by Apple, is provided without recommendation or endorsement. Apple assumes no responsibility with regard to the selection, performance, or use of third-party websites or products. Apple makes no representations regarding third-party website accuracy or reliability. Contact the vendor for additional information.
Manage windows on Mac
When you open an app or the Finder on your Mac, a window opens on the desktop. Only one app at a time is active; the name of the app (in bold) and the app menus are shown in the menu bar.
Some apps, such as Safari or Mail, let you open multiple windows or different types of windows at the same time. macOS provides several ways to manage open apps and windows.
Move, align and merge windows
On your Mac, do any of the following:
Move a window: Drag the window by its title bar to where you want it. Some windows can’t be moved.
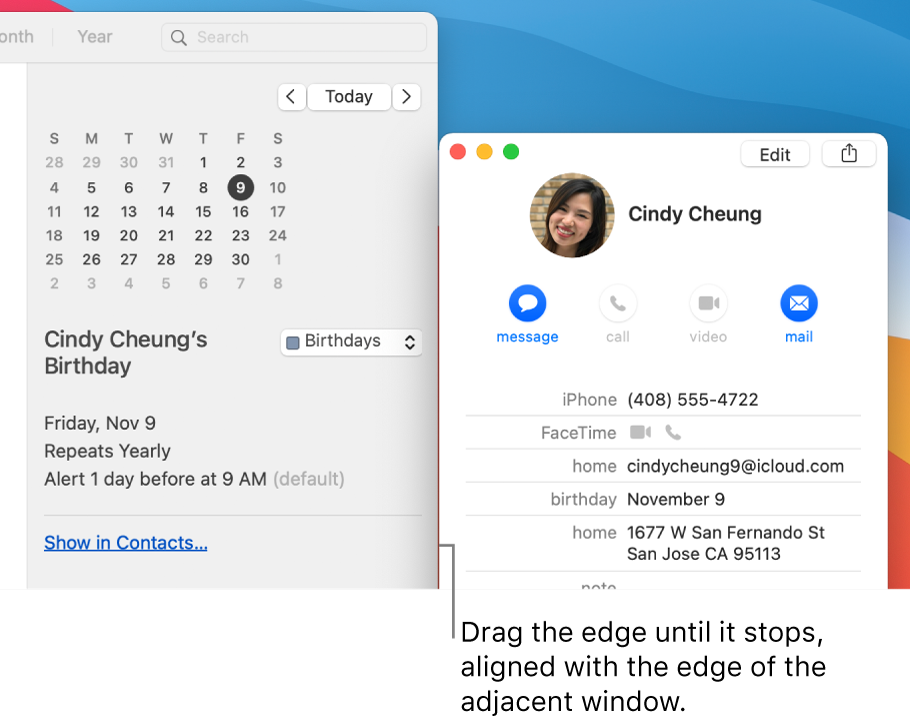
Align windows: Drag a window close to another one — as the window nears the other one, it aligns without overlapping. You can position multiple windows adjacent to each other.
To make adjacent windows the same size, drag the edge you want to resize — as it nears the edge of the adjacent window, it aligns with the edge and stops.
Merge an app’s windows into one tabbed window: In the app, choose Window > Merge All Windows.
To make a tab a separate window again, select the tab, then choose Window > Move Tab to New Window, or just drag the tab out of the window. See Use tabs in windows.
Maximise or minimise windows
On your Mac, do any of the following in a window:
Maximise a window: Press and hold the Option key while you click the green maximise button  in the top-left corner of an app window. To return to the previous window size, Option-click the button again.
You can also double-click an app’s title bar to maximise the window (as long as the option to do so is set to “zoom” in Dock & Menu Bar preferences).
Minimise a window: Click the yellow minimise button  in the top-left corner of the window or press Command-M.
You can set an option in Dock & Menu Bar preferences to have a window minimise when you double-click its title bar.
Most windows can be manually resized. Drag the window’s edge (top, bottom, or sides) or double-click an edge to expand that side of the window.
Quickly switch between app windows
On your Mac, do any of the following:
Switch to the previous app: Press Command-Tab.
Scroll through all open apps: Press and hold the Command key, press the Tab key, then press the Left or Right arrow key until you get to the app you want. Release the Command key.
If you change your mind while scrolling through the apps and don’t want to switch apps, press Esc (Escape) or the Full Stop key, then release the Command key.
Close windows
On your Mac, do any of the following:
Close a single window: In a window, click the red Close button  in the top-left corner of the window, or press Command-W.
Close all open windows for an app: Press Option-Command-W.
Closing one or all windows for an app does not close or quit the app. To do so, press Command-Q, or click the app’s name in the menu bar, then choose Quit [App]. See Quit apps.
You can hide the active app by pressing Command-H.
Use Mission Control to quickly arrange open windows and spaces in a single layer to easily spot the one you need.
Easily Run Windows Applications on Mac OS X

If you are using Mac OS X and want to run Windows applications, the most popular option is to install Windows OS using Bootcamp, or run Windows in a virtual machine. Linux users will know that you can use Wine to install and run Windows applications natively. The good news is that Mac users can run Wine to install Windows applications as well. Wineskin is a Wine-tool ported over to the Mac platform. Check out how you can run Windows applications on Mac OS X.
Wineskin is simply an implementation of Wine at its core. For those who are not sure what Wine (an acronym for “Wine Is Not an Emulator”) is, it is a compatibility layer capable of running Windows applications on several POSIX-compliant operating systems, including Linux and Mac OS X.
Installation
The installation is pretty straight-forward.
1. Download Wineskin. The latest version as of this post is 2.5.12.
2. Extract the file and move the Wineskin app to your Applications folder. Open it.

On the first run, there won’t be any engine showing up in the list. Click the “+” button to download and install the latest engine. The engine is required to make the Windows applications work.

Once the engine is installed, you are ready to install Windows applications.
Installing Windows applications
Before you start, make sure you have the executable file of the desired Windows application with you. Note that Wineskin doesn’t support all the Windows applications out there. Check out Wine’s AppDB to see if the application you want is supported.
1. Click the “Create New Blank Wrapper” button and enter a name for this wrapper. In this example, we will be installing Peazip on Mac.

While creating the wrapper, it will prompt you to install mono package for running .Net applications and Gecko package for running HTML-based apps.


2. Once the wrapper is created, open it in Finder; right click and select “Show Package Content.”

You should see two folders: “Contents” and “drive_c” and a Wineskin app. Run the Wineskin app.

3. Select “Choose Setup executable” and select the executable file of the Windows application.

The installation will proceed just like it does in Windows.

Running Windows applications
Run the Wineskin app (from the Wrapper folder) again. This time, click “Advanced.” Browse and select the installed application and click “Test Run.” This will run the Windows application.

This is what the application will look like:

Once you are happy with the test run, the next time you can just double click the Wrapper app to open this application.
Conclusion
If you need a Windows environment in Mac, your best bet would be either using Bootcamp or to run a virtual machine. However, if all you need is a particular Windows application, using Wineskin is a better option (provided that the application is supported). If you have a lot Windows game in your collection, you will be happy to know that plenty of those older games are supported by Wine, and you can now play them on your Mac machine. Enjoy!
Damien Oh started writing tech articles since 2007 and has over 10 years of experience in the tech industry. He is proficient in Windows, Linux, Mac, Android and iOS, and worked as a part time WordPress Developer. He is currently the owner and Editor-in-Chief of Make Tech Easier.


