- Использование флешек в linux
- Материал из Пингвиньи радостей
- Содержание
- Выбор файловой системы для флешки
- флешка как переносной портфель
- флешка как защищённый сейф
- флешка как средство восстановления
- Монтирование флешки в linux
- Монтирование удалённой флешки
- Как примонтировать флешку в Linux
- Монтирование флешки в Linux
- Автоматическое монтирование флешки в Linux
- Выводы
- Allow normal user to mount linux partitions, usb stick / pen device
- Ubuntu Documentation
- Introduction
- Automounting
- Mounting
- Configuring Automounting
- Configuring Program Autostart
- Unmounting/Ejecting
- Auto-mounting (Ubuntu Server)
- Manually Mounting
- Using Disks
- Using mount
- Get the Information
- Create the Mount Point
- Mount the Drive
- Unmounting the Drive
- Using pmount
- The Importance of Unmounting
- Other Useful Commands
- Troubleshooting
- Interfering services
- Unclean LogFile
- User Privileges
- Preferences
- USB 2 Issues
- old kernels workaround
- recent kernels workaround, from Karmic
- Buffer I/O Errors
- Device suddenly becomes read-only
- USB-Device is or becomes read-only without errors
- General tip
- Seeking Further Help
- Other Resources
Использование флешек в linux
Материал из Пингвиньи радостей
Содержание
Статья об использовании флешек в linux
Статья о некоторых особенностях использования флешек в linux.
Выбор файловой системы для флешки
При выборе файловой системы для флешки следует учитывать её последующее предназначение.
- флешка как «переносной портфель»
- флешка как «защищённый сейф»
- флешка как «средство восстановления»
флешка как переносной портфель
Использование флешки в качестве переносного портфеля предполагает регулярную запись файлов на неё для переноса на другой компьютер. При выборе файловой системы в этом случае следует учитывать предполагаемый максимальный размер размещаемого файла, необходимость использования флешки в разных операционных средах, а также требование увеличения её срока службы.
Для повышения ресурса использования флешки оправданным выглядит установка на неё НЕжурналируемой файловой системы, например FAT32 или EXT2.
Достоинства и недоставки использования файловой системы FAT32 на флешке
- достоинства FAT32 для флешки
- отсутствие журнала файловой системы, что продлевает срок службы флешки
- высокая скорость записи/чтения
- кросплатформенность, что даёт возможность использования флешки как в Windows, так и в Linux
- возможность записи большого файла одним фрагментом, что например важно при подключении iso-образа в загрузчике Grub4dos
- разгрузка параметров монтирования флешки от настройки групп безопасности для одновременного доступа к ней разных пользователей
- недостатки FAT32 для флешки
- ограничение файловой системы FAT32 для максимального размера размещаемого на флешке файла составляет 4Гб
- ограничение логического размера самой флешки (например 129 Гб), но на текущий момент для флешек такие размеры пока недостижимы
Достоинства и недоставки использования файловой системы EXT2 на флешке
- достоинства EXT2 для флешки
- отсутствие журнала файловой системы, что продлевает срок службы флешки
- высокая скорость записи/чтения
- возможность записи файла неограниченного (2 TB) размера
- недостатки EXT2 для флешки
- невозможность записи большого файла одним фрагментом
- отсутствие (штатной) поддержки файловой системы в windows
флешка как защищённый сейф
флешка как средство восстановления
Монтирование флешки в linux
Подключение флешки в Linux выглядит одновременно простым и сложным. Простота заключается в множестве удобных способов её монтирования. Сложность возникает при использовании на флешках *nix — файловых систем, что делает их персональными с ограничениями согласно правилам безопасности, а также в связи с необходимостью выбора удобной системы автоматического монтирования.
Для простейшего монтирования флешки вручную могут быть использованы команды mount, например
Для автоматического монтирования флешки могут быть использованы пакеты usbmount и autofs.
При установке утилиты usbmount, флешка монтируется автоматически в точку установленную файлом конфигурации после установки её в USB-порт.
Подключение флешек с помощью программы autofs идентично подключению жёстких дисков.
Например для автоматического подключения только «правильных» флешек с помощью autofs
- в файл /etc/auto.misc добавляется строка
- в файл /etc/auto.master добавляется строка
- и осуществляется перезапуск autofs
- для получения доступа к флешке может быть использована команда
Монтирование удалённой флешки
Удалённой флешкой в настоящей статье называется флешка, подключённая к удалённой рабочей станции локальной сети. Монтирование такой флешки для использования будет интересно например для пользователей сервера терминалов Linux.
Для получения доступа к удалённой флешке могут быть использована возможность «переноса» её из сети на локальную станцию с помощью пакета Usbip, а также механизмы управления удалённой рабочей станцией заложенные в протоколах samba и ssh.
Для подключения удалённой флешки в Linux с помощью протокола samba
Источник
Как примонтировать флешку в Linux
В наши дни очень большую популярность у пользователей набрали USB флешки. Они используются для обмена файлами, различными фильмами и документами, установки операционных систем, а также восстановления системы после сбоя. Чтобы работать с флешкой в Linux ее нужно примонтировать в корневую файловую систему.
Дело в том, что организация файловой системы Linux немного отличается от того, что мы привыкли видеть в Winodws. Здесь нет никаких дисков C,D,E и так далее, есть только корень, самая верхняя точка файловой системы, в подкаталоги которой подключаются все жесткие диски и внешние носители.
Если в системе используется окружение рабочего стола, то оно, как правило, берет на себя всю низкоуровневую работу чтобы выполнить монтирование флешки в linux. Система обнаруживает подключенную флешку и в системном лотке всплывает уведомление о подключенном устройстве. Дальше остается кликнуть по значку флешки, чтобы система выполнила все нужные для ее монитрования действия. Но если окружение рабочего стола не запущенно или вам нужно работать в консоли можно выполнить все действия по монтированию флешки вручную.
В этой инструкции мы рассмотрим монтирование usb флешки в linux через терминал, а также настройку автоматического монтирования для оконных менеджеров, которые не поддерживают такую возможность.
Монтирование флешки в Linux
Самое первое, что нужно сделать после того, как вы подключили флешку — узнать имя ее файла в системе. В Unix все устройства имеют свои файлы и именно через эти файлы система и программное обеспечение взаимодействуют с ними.
Файлы флешек и других устройств хранения данных находятся в каталоге /dev. Устройства нумеруются по алфавиту sda, sdb, sdc, sdd и т д. Так как флешка подключается последней у нее будет старшая буква. Например, sdb или sdc. Имя sda принадлежит жесткому диску. Можно, конечно, просто посмотреть содержимое каталога /dev/, но такой способ ненадежный. Мы воспользуемся утилитой fdisk.
Подключите флешку и выполните:

Как видите, здесь мы можем посмотреть детальную информацию об устройстве. Имя файла, список разделов, формат таблицы разделов, список разделов. А главное для нас, размер раздела и его файловую систему. Теперь не сложно понять какая из них флешка. В этом примере это /dev/sdc1
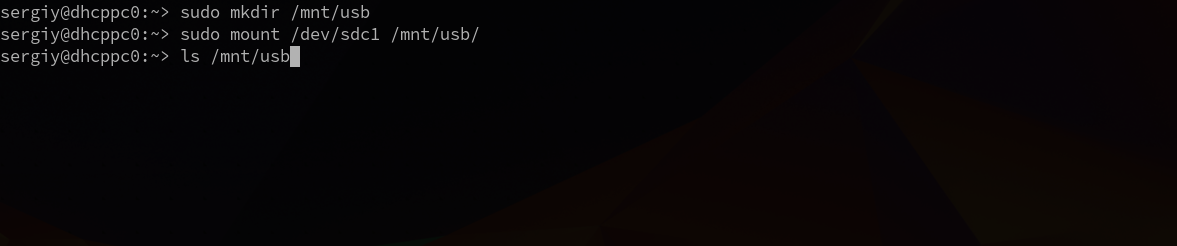
Создаем папку для монтирования:
sudo mkdir /mnt/usb
Теперь монтируем флешку с помощью команды mount:
sudo mount /dev/sdc1 /mnt/usb
Если знаете файловую систему флешки, то лучше ее указать с помощью опции -t. Чаще всего используется FAT, так как ее легко открывают как Windows так и Linux системы:
sudo mount -t vfat /dev/sdc1 /mnt/usb
Монтирование осуществляется от суперпользователя, но если нужно чтобы отмонитровать флешку мог любой нужно указать опцию users:
sudo mount -t vfat -o users /dev/sdc1 /mnt/usb
По умолчанию владельцем файлов на флешке при монтировании устанавливается root, поэтому если вы захотите работать с флешкой через файловый менеджер, то нужно будет его запускать с правами суперпользователя или же сразу примонтировать флешку в linux таким образом, чтобы владельцем был ваш пользователь. Для этого укажите группу и id своего пользователя в опциях uid и gid:
sudo mount -o users,uid=1000,gid=1000 /dev/sdc1 /mnt/usb
Удостовериться что флешка подключена можно посмотрев содержимое каталога, в который мы ее монтировали:
Или выполнив команду mount:

После завершения работы с флешкой не забудьте ее отмонтировать. Потому что иначе данные могут быть не сохранны или вообще повреждена файловая система флешки:
sudo umount /dev/sdc1
Автоматическое монтирование флешки в Linux
Популярные окружения рабочего стола выполняют монтирование флешки linux автоматически, как только она подключена к системе или по клику на ярлыке. Мы можем это реализовать с помощью службы udisks2.
Udisks — это служба dbus, позволяющая другим программам и пользователю взаимодействовать с udev. Мы можем получать сообщения о только что подключенных устройствах, выполнять их монтирование и отключение. Окружения рабочего стола используют именно этот сервис для монтирования устройств.
Мы тоже можем использовать его для ручного монтирования. Здесь даже есть несколько плюсов. Во-первых, мы можем монтировать без прав суперпользователя, во-вторых, не нужно создавать папку.
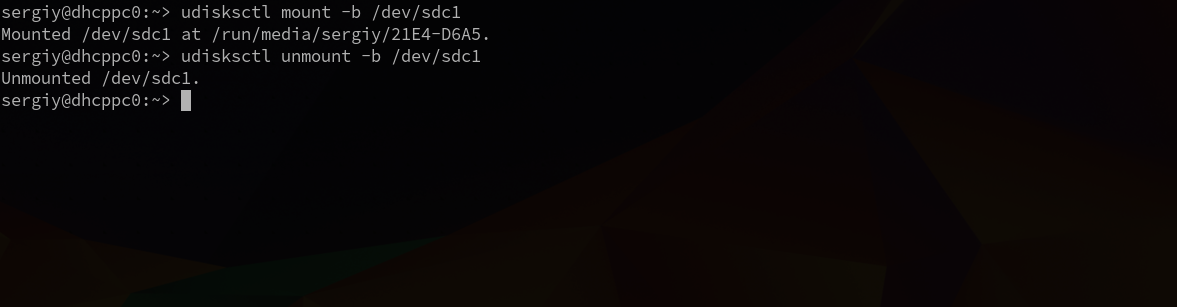
Для монтирования используется такая команда:
udisksctl mount -b /dev/sdc1

Здесь /dev/sdc1 — файл нашей флешки, а опция -b указывает, что нужно монтировать блочное устройство. Так же как и в mount здесь можно задать опции монтирования -o и файловую систему -t. Флешка будет примонтирована в папку /run/имя_пользователя/uuid-флешки/
Для размонтирования используется аналогичная команда:
udisksctl unmount -b /dev/sdc1
Автоматическое монтирование usb флешки в linux можно настроить с помощью утилиты udiskie. Все новые подключенные флешки будут автоматически подключаться, после подключения устройства будет всплывать окно с предложением открыть файловый менеджер, а также значок, с помощью которого можно получить доступ к каждому из устройств.
Устанавливается утилита в Ubuntu командой:
sudo apt install udiskie
Дальше остается запустить программу:
Теперь все подключаемые устройства будут автоматически монтироваться с помощью udisks. Рассмотрим что значат опции:
- -a — выполнять автоматическое монтирование
- -n — показывать всплывающее уведомление
- -t — показывать значок в трее.
Выводы
Теперь монтирование флешки linux не вызовет у вас проблем. Даже если у вас не будет работать окружение рабочего стола и придется делать все вручную. Если остались еще вопросы, спрашивайте в комментариях.
Источник
Allow normal user to mount linux partitions, usb stick / pen device
You need to use autofs. It is use to mount file system on demand. Usually autofs is invoked at system boot time with the start parameter and at shutdown time with the stop parameter. The autofs script can also manually be invoked by the system administrator to shut down, restart or reload the automounters.
autofs will consult a configuration file /etc/auto.master to find mount points on the system.
i) Install autofs if not installed. if you are using Debian / Ubuntu Linux, enter:
# apt-get install autofs
ii) Create dekstop group and add user jimmy to this group:
# groupadd desktop
# usermod -G video,desktop jimmy
# chmod -R a+rx /var/autofs/misc
iii) Configure autofs so that usb stick can be accessed:
# vi /etc/auto.misc
- No ads and tracking
- In-depth guides for developers and sysadmins at Opensourceflare✨
- Join my Patreon to support independent content creators and start reading latest guides:
- How to set up Redis sentinel cluster on Ubuntu or Debian Linux
- How To Set Up SSH Keys With YubiKey as two-factor authentication (U2F/FIDO2)
- How to set up Mariadb Galera cluster on Ubuntu or Debian Linux
- A podman tutorial for beginners – part I (run Linux containers without Docker and in daemonless mode)
- How to protect Linux against rogue USB devices using USBGuard
Join Patreon ➔
iv) Append following text to auto.misc:
usb -fstype=auto, user, sync, nodev, nosuid, gid=desktop, umask=002 :/dev/sda1
d -fstype=vfat, user, sync, nodev, nosuid,gid=desktop, umask=002 :/dev/hda2
Where,
- usb : Is directory name, which can be accessed via /var/autofs/misc/usb directory. User in desktop group just need to type cd command (cd /var/autofs/misc/usb) to change the directory.
- -fstype- auto, user, sync, nodev, nosuid, gid-desktop, umask-002 :- All these are options used to mount the file system by automounter.
- auto: File system is automatically determined by kernel.
- user: Normal user are allowed to mount devices
- nodev: Do not interpret character or block special devices on the file system.
- nosuid: Do not allow set-user-identifier or set-group-identifier bits to take effect. This is security feature.
- gid=desktop: This allows file system mounted as as group dekstop. As we have added user jimmy to this group already.
- umask=002: Setup umask so that users in group desktop can write data to device.
Please note that without gid and umask option normal user cannot write data to device.
Источник
Ubuntu Documentation
Introduction
This page explains how to use USB drives, like external hard disks and USB flash drives (aka USB sticks, thumb drives, pen drives, etc). The material here also applies to flash cards (like in your digital camera).
USB storage devices have the enormous advantage that for the most part they use a standard set of protocols. Thus, instead of needing individual drivers, as does much computer hardware, a standard driver permits access to the devices, making them very portable and able to easily work on many platforms.
For help with internal hard drives, see Fstab and MountingWindowsPartitions.
Automounting
Mounting
By default, storage devices that are plugged into the system mount automatically in the /media/ directory, open a file browser window for each volume and place an icon on your desktop. The rationale for this slight change of behavior can be found here. If you plug in a usb hard disk with many partitions, all of the partitions will automatically mount. This behaviour may not be what you want; you can configure it as shown below.
If the volumes have labels the icons will be named accordingly. Otherwise, they will be named «disk», «disk-1» and so on.
To change the volume label see RenameUSBDrive.
Configuring Automounting
To enable or disable automount open a terminal and type:
Browse to org.gnome.desktop.media-handling.
The automount key controls whether to automatically mount media. If set to true, Nautilus will automatically mount media such as user-visible hard disks and removable media on start-up and media insertion.
Another key, org.gnome.desktop.media-handling.automount-open, controls whether to automatically open a folder for automounted media.
If set to true, Nautilus will automatically open a folder when media is automounted. This only applies to media where no known x-content type was detected; for media where a known x-content type is detected, the user configurable action will be taken instead. This can be configured as shown below.
Configuring Program Autostart
To control which programs automatically start when you plug in a device, go to System-Settings — Details — Removable Media.
For more complex scenarios, see UsbDriveDoSomethingHowto.
Unmounting/Ejecting
Before you disconnect the device, don’t forget to unmount it. This can be done in one of the following ways:
- Right-click the desktop icon and select «Unmount» (or in some cases, «Eject»).
- In the file manager window, click on the «eject» button next to the name of the mounted volume.
- Right-click the icon in the launcher and select «Unmount».
Auto-mounting (Ubuntu Server)
By default, disk drives do not auto-mount in Ubuntu Server Edition. If you are looking for a lightweight solution that does not depend on HAL/DBUS, you can install «usbmount».
Manually Mounting
Using Disks
Disks (the GNOME disk utility) is an application for visually managing disk drives and media. When you run it, you will see a list of your drives, including USB drives. If you click a drive on the list, you can view its details, and you can click the triangle-shaped button (Play button) to mount the drive. (This method works even when the drive does not auto-mount.)
Using mount
Get the Information
Sometimes, devices don’t automount, in which case you should try to manually mount them. First, you must know what device you are dealing with and what filesystem it is formatted with. Most flash drives are FAT16 or FAT32 and most external hard disks are NTFS. Type the following:
Find your device in the list. It is probably something like /dev/sdb1. For more information about filesystems, see LinuxFilesystemsExplained.
Create the Mount Point
Now we need to create a mount point for the device. Let’s say we want to call it «external». You can call it whatever you want, but if you use spaces in the name it gets a little more complicated. Instead, use an underscore to separate words (like «my_external»). Create the mount point:
Mount the Drive
We can now mount the drive. Let’s say the device is /dev/sdb1, the filesystem is FAT16 or FAT32 (like it is for most USB flash drives), and we want to mount it at /media/external (having already created the mount point):
The options following the «-o» give you ownership of the drive, and the masks allow for extra security for file system permissions. If you don’t use those extra options you may not be able to read and write the drive with your regular username.
Otherwise, if the device is formatted with NTFS, run:
Note: You must have the ntfs-3g driver installed. See MountingWindowsPartitions for more information.
Unmounting the Drive
When you are finished with the device, don’t forget to unmount the drive before disconnecting it. Assuming /dev/sdb1 is mounted at /media/external, you can either unmount using the device or the mount point:
You cannot unmount from the desktop by right-clicking the icon if the drive was manually mounted.
Using pmount
There is a program called pmount available in the repositories which allows unprivileged users to mount drives as if they were using sudo, even without an entry in /etc/fstab. This is perfect for computers that have users without RootSudo access, like public terminals or thin clients.
pmount can be used with the same syntax as mount (but without sudo), or quite simply as follows:
Example:
- This will mount the device /dev/sdb1 at /media/flash_drive.
If you leave off the label option, it will mount by default at /media/device.
To unmount the device, use pumount, like so:
For more help, see the man pages for pmount and pumount.
The Importance of Unmounting
Before disconnecting devices, you must unmount them first. This is similar to «Safely Remove» in Windows in that the device won’t unmount until data is finished being written to the device, or until other programs are finished using it. This applies to all types of storage devices, including flash drives, flash cards, external hard drives, ipods and other media players, and even remote storage like Samba or NFS shares.
Failure to unmount before disconnecting the device can result in loss of data and/or a corrupted file system. There are no exceptions to this rule. Be safe — unmount your drives before disconnecting them!
Other Useful Commands
To see a list of your USB devices (the vendor and device ID’s), run:
To see all attached storage devices and their partitions, run:
To see information about currently mounted systems, simply run:
Troubleshooting
Presented here are some common problems users encounter.
Interfering services
Two services/programs responsible for automounting might interfere and thereby prevent a successful automount and permission setting.
Example: Activating the Automount function of Nautilus while using pmount will result in read-only permissions for normal users. Either disable Nautilus’ Automount function or deinstall pmount.
Unclean LogFile
If you are mounting drives formatted with NTFS (like most external USB hard disks are), you must first have the ntfs-3g driver installed. This is done automatically in newer versions of Ubuntu. You should also install ntfs-config and enable mounting, which is not done automatically. For ntfs-3g and ntfs-config, see MountingWindowsPartitions.
When a drive is not Safely Removed from a Windows machine (or a forced shutdown occurs from Windows), you may get an error like this when you plug in your drive:
The best option is Choice 1, but you can force the mount by running Choice 2 with sudo. You must then manually unmount it from the terminal (you can’t right click the desktop icon):
After that the drive should automount normally again.
User Privileges
If your usb device doesn’t appear on your desktop, you should check that your user has the correct privileges. Go to System->Administration->User and Groups, choose the user, click on «Properties», then go to the «User Privileges» tab. You should have the «Access external storage devices automatically» option checked.
Preferences
If your usb device doesn’t appear on your desktop, you should check that the automount action is enabled in the preferences:
Navigate to System->Preferences->Removable Drives and Media
NOTE: This does not seem to apply to Hardy Heron.
USB 2 Issues
old kernels workaround
If you encounter problems using your USB device with USB 2 (i.e. ‘high speed’ mode), you can revert to the ‘full speed’ mode (slower) by unloading ehci_hcd. To do that, type in a terminal:
before plugging in your device.
recent kernels workaround, from Karmic
ehci_hcd is now built into the kernel and cannot be load/unloaded using modprobe. To revert a connected device from (failing) high-speed to full-speed:
- Determine your device id using
- Find which bus it is connected to. The bus id can be found as a folder in /sys/bus/pci/drivers/ehci_hcd. The following script explores buses and connected devices: The information is also usually available in /var/log/kern.log
- Unbind the bus (and all devices) from the ehci_hcd driver. Insert the bus id in the following command, using the format 0000:00:xx.x
Buffer I/O Errors
If you see errors related to Buffer I/O when attaching a USB storage device, there are two ways to work around it. First, try using varying max_sectors settings, as such:
Try values of 120, 64 and 32.
If this does not resolve the issue, then you may need an unusual_dev entry for your device. It would look something like this:
The vendor and device IDs can be obtained from the output of «lsusb». The entry would be placed in drivers/usb/storage/unusual_devs.h. If you cannot compile your own kernel, please file a bug report, and we’ll attempt to compile a test module for you.
Device suddenly becomes read-only
If your device changes suddenly to read-only mode, and you see this kind of error:
This might be the sign of an unclean device. You should check your device. Try TestingStorageMedia to do so. Or use «Disk Utility» (under System, Administration), find your device, unmount it, check the file system, then mount it again.
USB-Device is or becomes read-only without errors
If you see «Write Protect is off» and no errors in your logfiles, than you should set filesystem type specific mount options (FS_MOUNTOPTIONS) in /etc/usbmount/usbmount.conf. Wrong gid causes mounting read only.
General tip
When you encounter problems with USB devices, the first thing to do is to check the latest debug information generated from the kernel just after you plug in your device and/or just after you encounter the problem.
To do that, open a terminal and type :
Check the latest messages; they should be related to your problem.
Seeking Further Help
The best place to get help with almost any Ubuntu problem is on the Ubuntu Forums. The Absolute Beginner Talk section is best for beginners.
Other Resources
Some other related material:
Источник


