- How To Change or Rename Username and User ID In Linux?
- List User Info
- Change User Name
- Change User ID
- Check It Again
- How To Change Username On Ubuntu, Debian, Linux Mint Or Fedora
- Linux Change or Rename User Name and UID
- Linux Change or Rename User Command Syntax
- List all users in Linux system
- How to Change or Rename Username and UID in Linux
- View current user and group membership for user named tom
- Rename and change username from tom to jerry on Linux
- A note about running process
- Rename and change primary groupname from tom to jerry
- How to change user home directory from /home/tom/ to /home/jerry
- How to change user tom UID from 5001 to 10000
- Getting help about usermod command
- Conclusion
- How Do I Change My Username in Linux?
- Prerequisite
- Modify Current Username
- Add a New User and then Modify the Username
- Determine the User Account Currently in Linux
- Conclusion
- About the author
- Aqsa Yasin
How To Change or Rename Username and User ID In Linux?
The problem is we want to change the already created user name or user id. As we know there is a lot of configuration those rely on the user id like permissions. We will use usermod command to make this change. Keep in mind this changes will effects system wide.
List User Info
Before starting to big changes we will list users detailed info with cat command like below.
 List User Info
- test is our user name for this operation
- 1000 is the current id of our test user.
Change User Name
We will change username with the following command by providing new username. We will provide the -l option with the new username and old username. In this example we will change username ismail into ali .
- usermod is command we issue to chage
- -l ali is the new username
- ismail is the original username
Change User ID
Another opportunity is changing the user ID. Previously we have listed user information of the ismail . We know that the user id of the ismail is 1000 . We will use -u option and the new user id with the user name. In this example we will change the user id of ismail into 1010
- usermod is command used too
- -u 1010 is new user id provided for the user
- ismail is the user whose id will be changed.
Check It Again
After these steps we need to the if there is a problem or everything is OK. We will list user information again with the cat command like below.
- test2 is new username but home directory stays the same
- 1010 is the users new id
Источник
How To Change Username On Ubuntu, Debian, Linux Mint Or Fedora
This is a step by step guide on how to change your username on Debian, Ubuntu, Linux Mint (and other Linux distributions based on Debian/Ubuntu), and Fedora.
The instructions explain how to change (rename) the username along with the user’s home folder name, as well as a simple work-around for potential issues with configuration files that still point to the old home folder name. There’s also a step for changing the full name (display name), which is shown on the login screen and other places throughout the desktop.
Throughout all the instructions / commands below, remember to replace newusername with the new username, and oldusername with the . old username.
1. Create a temporary user and give it sudo privileges.
We’ll login with the temporary user to perform the username change commands. This way there won’t be any issues running them from the same user we’re trying to rename (e.g. processes running for that user, etc.).
Add a new temporary user ( tempuser ) and give it sudo privileges on Debian, Ubuntu or Linux Mint (after entering a password you can keep pressing Enter to skip entering the rest of information):
Add a new tempuser and give it sudo privileges on Fedora:
2. Login with tempuser and change (rename) the username, home folder and group.
Logout, and on the login screen select tempuser and login with that user. Next, open a terminal and run these command to change your username, home folder, and group from oldusername to newusername :
If you get an error about a process being in use for the old username, kill that process ( kill PID ), but that shouldn’t happen in most cases since we’re logged in using a temporary, intermediate username to make these changes. If it does happen, another workaround is to reboot and then login straight with tempuser , that way there aren’t any processes used by the old username.
3. Create a symbolic link from /home/newusername to /home/oldusername .
Some applications will show errors when changing the username, because in some cases there are configuration files that point to the old username’s home folder. A solution for this is to create a symbolic link from the new home folder to the old home folder:
4. Change the display name / full name (firstname lastname).
In my case, trying to rename a username on Ubuntu 19.04 and Fedora 29, the display name (full name) remained unchanged on the GDM3 login screen and on the user menu. This can be changed though, using:
Replace firstname and lastname with your first and last name, or whatever you want to show up on the login screen and various other places throughout the system. firstname and lastname can also be one item, e.g. your new username.
The chfn command is available on Fedora in the util-linux-user package, which is not installed by default. You can install it on Fedora using:
After installing this package, the chfn command should work on Fedora.
5. Login using the new (renamed) username, and delete the temporary user created on step 1.
Logout and select the new, renamed username from the login screen, and proceed to login. You can now delete the temporary user created in step 1 ( tempuser ) and its home folder:
Источник
Linux Change or Rename User Name and UID
Linux Change or Rename User Command Syntax
| Tutorial details | |
|---|---|
| Difficulty level | Easy |
| Root privileges | Yes |
| Requirements | Linux terminal |
| Est. reading time | 5 mintues |
The syntax is as follows to rename by user name:
usermod -l login-name old-name
- We use the usermod command in Linux to rename user account. The name of the user will be changed from the old-name to login_name. Nothing else is changed. In particular, the user’s home directory name should probably be changed to reflect the new login name.
The syntax is as follows to rename by a UID (user ID):
usermod -u UID username
Where,
- The numerical value of the user’s ID (UID) . This value must be unique unless the -o option is used. The value must be non-negative. Values between 0 and 99 are typically reserved for system accounts. Any files which the user owns and which are located in the directory tree rooted at the user’s home directory will have the file user ID changed automatically. Files outside of the user’s home directory must be altered
manually.
List all users in Linux system
Type the following cat command:
cat /etc/passwd
One can use the grep command to filter out only user names:
grep -w ‘^username’ /etc/passwd
grep -w ‘^jerry’ /etc/passwd
Another option is to use the cut command:
cut -d: -f1 /etc/passwd
Sample outputs:
How to Change or Rename Username and UID in Linux
Let us see how to rename user login. First, make sure user name is not logged into the server and any other process is not running under the same user name. I also recommend that you backup any data or server files before changing user names.
View current user and group membership for user named tom
First get user identity using the id command:
id tom
Next use the grep command to grab login info about user named tom from the /etc/passwd file
grep ‘^tom:’ /etc/passwd
See group info about user named tom using the groups command:
grep ‘tom’ /etc/group
groups tom
Find home directory permissions for user named tom, run the following ls command:
ls -ld /home/tom/
Finally, see all Linux process owned by user and group named tom using the ps command:
ps aux | grep tom
ps -u tom
Fig.01: Getting info about user named ‘tom’ on a Linux based system
Rename and change username from tom to jerry on Linux
Type the usermod command as follows:
# id tom
# usermod -l jerry tom
## Verify ###
# id tom
# id jerry
# ls -ld /home/tom
A note about running process
You may see an error as follows if tom is logged in and running jobs:
You need to kill all Linux process owned by user named tom and forcefully logged them out of the system:
Rename and change primary groupname from tom to jerry
Type the usermod command as follows:
# id tom
# groupmod -n jerry tom
## Verify it ###
# id tom
# ls -ld /home/tom
Sample outputs:
Fig.02: Sample session renaming user on a Linux based server
How to change user home directory from /home/tom/ to /home/jerry
The syntax is as follows:
# usermod -d /home/jerry -m jerry
# id jerry
# ls -ld /home/jerry
Sample outputs:
- No ads and tracking
- In-depth guides for developers and sysadmins at Opensourceflare✨
- Join my Patreon to support independent content creators and start reading latest guides:
- How to set up Redis sentinel cluster on Ubuntu or Debian Linux
- How To Set Up SSH Keys With YubiKey as two-factor authentication (U2F/FIDO2)
- How to set up Mariadb Galera cluster on Ubuntu or Debian Linux
- A podman tutorial for beginners – part I (run Linux containers without Docker and in daemonless mode)
- How to protect Linux against rogue USB devices using USBGuard
Join Patreon ➔
How to change user tom UID from 5001 to 10000
Type the usermod command as follows:
# id tom
# usermod -u 10000 tom
# id tom
Getting help about usermod command
You can pass the —help option to the usermod command. For instance, type the following command at the shell prompt in Linux:
usermod —help
| Options | Description |
|---|---|
| -c OR —comment | COMMENT new value of the GECOS field |
| -d OR —home | HOME_DIR new home directory for the user account |
| -e OR —expiredate | EXPIRE_DATE set account expiration date to EXPIRE_DATE |
| -f OR —inactive | INACTIVE set password inactive after expiration to INACTIVE |
| -g OR —gid | GROUP force use GROUP as new primary group |
| -G OR —groups | GROUPS new list of supplementary GROUPS |
| -a OR —append | append the user to the supplemental GROUPS mentioned by the -G option without removing the user from other groups |
| -h OR —help | display this help message and exit |
| -l OR —login | NEW_LOGIN new value of the login name |
| -L OR —lock | lock the user account |
| -m OR —move-home | move contents of the home directory to the new location (use only with -d) |
| -o OR —non-unique | allow using duplicate (non-unique) UID |
| -p OR —password | PASSWORD use encrypted password for the new password |
| -R OR —root | CHROOT_DIR directory to chroot into |
| -P OR —prefix | PREFIX_DIR prefix directory where are located the /etc/* files |
| -s OR —shell | SHELL new login shell for the user account |
| -u OR —uid | UID new UID for the user account |
| -U OR —unlock | unlock the user account |
| -v OR —add-subuids | FIRST-LAST add range of subordinate uids |
| -V OR —del-subuids | FIRST-LAST remove range of subordinate uids |
| -w OR —add-subgids | FIRST-LAST add range of subordinate gids |
| -W OR —del-subgids | FIRST-LAST remove range of subordinate gids |
| -Z OR —selinux-user | SEUSER new SELinux user mapping for the user account |
Conclusion
In this tutorial, you learned how to change or rename username and UID in Linux using the usermod command. Read man pages of usermod(8) and groupmod(8) commands for more information see this page.
🐧 Get the latest tutorials on Linux, Open Source & DevOps via
Источник
How Do I Change My Username in Linux?
- Modify current username
- Add user and then modify its username
- Determine the user account
Prerequisite
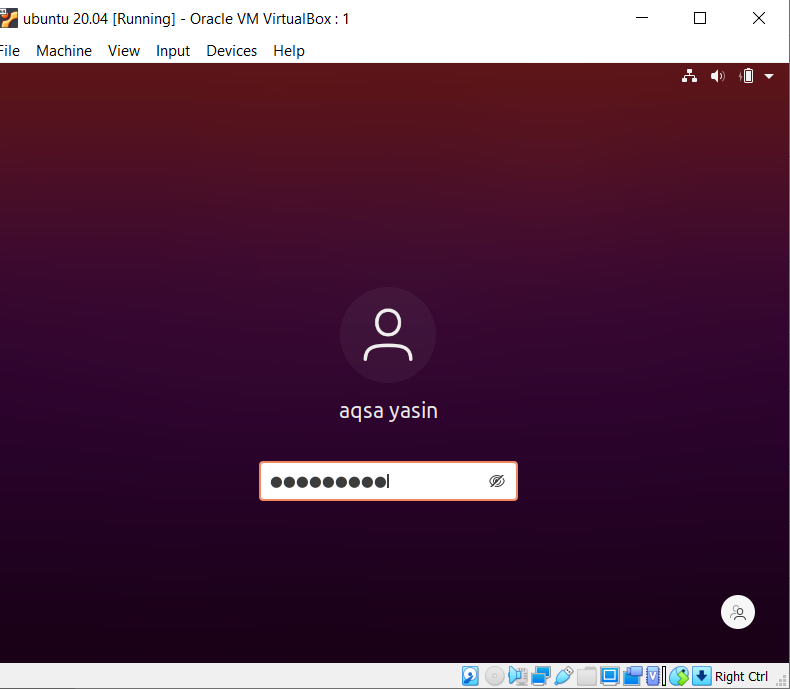
You need to have Linux running on the virtual machine configured on your system. When you install Ubuntu, it requires information like username and password. After providing this information, you will be able to access all the applications and have the privilege to use them.
Modify Current Username
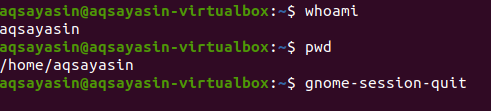
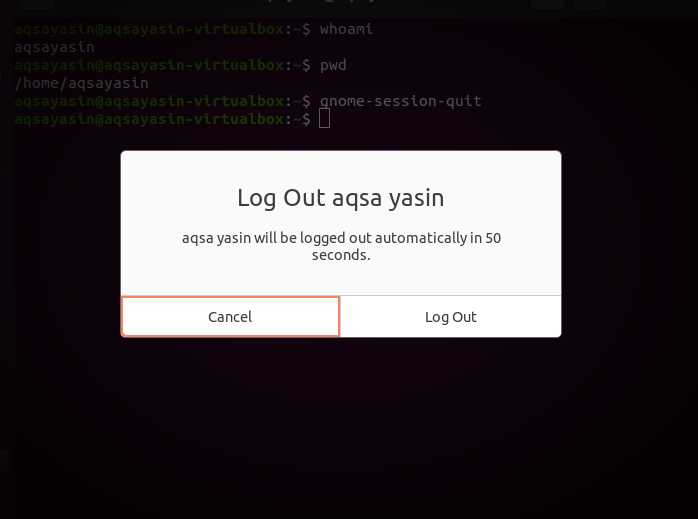
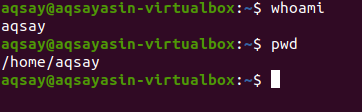
Step 1- User Description: To change the current username in Linux, we use the command to know about the current user and directory. “Whoami” is used to display the username, and “pwd” is used to display commands used to outright the execution. The third command, “gnome-session-quit” is used for logging out from the current account in the system.
After the above command, the system will prompt a message to log out or it will automatically quit from the system.
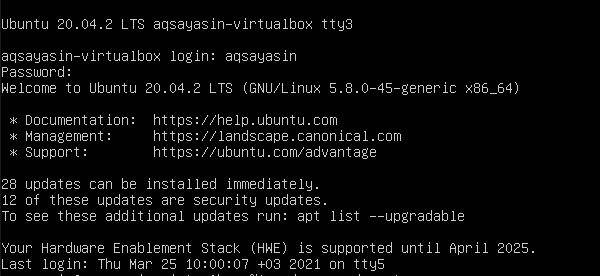
Step 2-Enter in the command shell: When the login page is displayed, type keys Ctrl+alt+f1 then a command prompt will appear. The system will demand a username and password for the login.
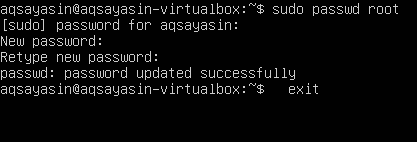
Step 3-Set password for root: Modify the password for the root user. After providing login details, we will implement the appended command to set a password for the root user.
After this command, we will type the current password of the user. Then, you can input the new password you want. After retyping, you will see that password is updated successfully.
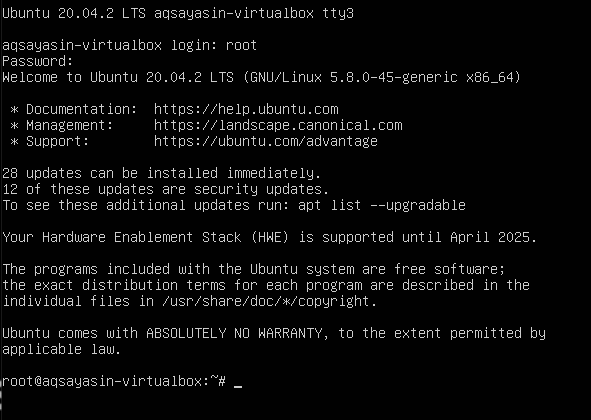
Step 4:Login as root: Now, the user will log in to the system as root. After applying the password, you will see that name is changed from aqsayasin to root. The root is a temporary name.
Step 5-Change username from Aqsa Yasin to aqsay: We will change the root name with our desired one. Once the name is initialized, the home directory name will be altered. Following the change, the user name on the login screen is changed.
#usermod –l aqsay aqsayasin
# usermod –d /home/aqsay –m aqsay
#chfn –f aqsay aqsay

After login to “aqsay”, go to the terminal and write the three commands we used to execute earlier in this guide to check the description of a user after alteration. By using these commands, you can see that the username is changed successfully.
Add a New User and then Modify the Username
In accordance with modifying the username, one must have a user in Linux. If there is no existence of any user, we will see how the user is created and modified in the command line of Ubuntu. This creation and modification require the following steps:
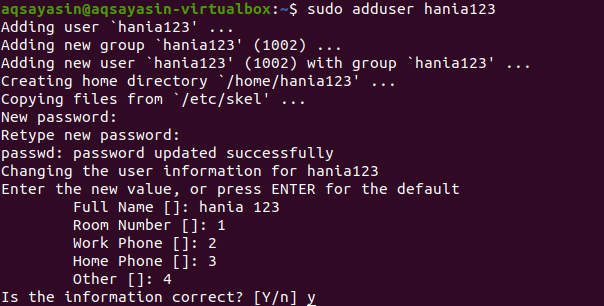
Step 1-Add user: You will add a user by the following command. “hania123” is the name we want to give to a new user.
After providing the username, you will be asked to enter a new password. After retyping the password, a message prompting a successful update will appear. Password confirmation will allow you for further verifications and knowledge of the description of the user, .i.e. Full name etc. The user doesn’t need to enter all details, and you can skip it by pressing the “enter” key. The system will confirm the given information by pressing “y” to continue.
Step 2-Identification: After completing the description process, we will log out from the system to ensure the user’s presence on the homepage of Ubuntu.

Step 3-Modification: Moving forward, we will modify the root name of the directory with the help of the below-cited command.
After modifying the user, you will now want to see all users created in Ubuntu. For this purpose, we will use the “ls” command

Now, you will see the names of the users. Then you will log out from the system. After logging in, you will notice that the root name that has been changed from “Aqsa Yasin” to“zahra123”

Determine the User Account Currently in Linux
To know the currently logged-in user, we will come to know it by using a couple of commands.
The “Who” command will let you know about the identity of the user i.e., name of the current user is “aqsay”.

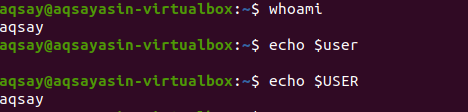
The same answer is obtained by applying “whoami” as a comparative to “who”. Moreover, the same answer is obtained by echoing the “$user”.
One letter word “w” is more effective in giving output in a detailed form. It provides the information of the last 5,10 and 15 minutes, mostly including boot time, etc.

TTY shows the terminal type you are using,:0 means the mouse and keyboard connected with. FROM represent the name of the host. IDLE shows the idle time of the user in the system. [email protected] depicts the time, the user was logged in. JCPU and PCPU represent the joint and process CPU timings. Whereas WHAT shows the current process of the user.
To obtain more details about the user, as we have to know who the user is. The below command is the better way to start.

This command gives us user id (uid), groups of them (gid), and shows the group in which the user has become the member.
If you want to obtain the output of only groups, specific less cluttered view of groups can be obtained.

Conclusion
In the article mentioned above, we have described changing usernames using some set of commands in the terminal and on a simple command-line shell.
About the author

Aqsa Yasin
I am a self-motivated information technology professional with a passion for writing. I am a technical writer and love to write for all Linux flavors and Windows.
Источник


