- Смена пользователя в Linux
- Меняем пользователя в Linux
- Способ 1: Список профилей при входе в систему
- Способ 2: Кнопка «Сменить пользователя» в окружении
- Способ 3: Команда в «Терминале»
- Способ 4: Функция «Автоматический вход»
- How to Switch Users in Ubuntu and Other Linux Distributions [Quick Beginner Tip]
- Change user in Linux command line
- Change users in Linux graphically (for desktop Linux)
- How To Linux Set or Change User Password
- Linux Set User Password
- Linux change password for other user account
- Linux Change Group Password
- Changing user passwords on Linux
- Forcing Linux user to change password at their next login
- Locking and Unlocking user password of the named account
- A note about setting up a secure Linux password
- Conclusion
Смена пользователя в Linux

Иногда компьютерами под управлением операционных систем Linux пользуются несколько юзеров по очереди, например, дома. В таких случаях не всегда удобно иметь одну учетную запись на всех человек, поскольку каждый желает задать определенную конфигурацию ОС и получить хотя бы минимальную конфиденциальность. Именно поэтому разработчики добавляют возможность создавать неограниченное количество защищенных профилей, чтобы в любой момент переключиться к какому-либо из них. На нашем сайте уже имеется статья, в которой детально описано два способа создания юзеров, поэтому сегодня мы опустим этот процесс и сразу перейдем к теме способов переключения между профилями.
Меняем пользователя в Linux
Далее вы узнаете о четырех доступных вариантах смены учетной записи в Linux на примере дистрибутива Ubuntu. Проще всего это сделать через графическую оболочку или сразу же при начале нового сеанса. Однако существуют и другие условия, о которых мы тоже поговорим в рамках данного материала. Дополнительно вам может понадобиться просмотреть список всех профилей, чтобы знать, какие у них установлены пароли и имена. Для этого мы предлагаем ознакомиться со следующей статьей по ссылке ниже, а мы переходим к первому варианту.
Способ 1: Список профилей при входе в систему
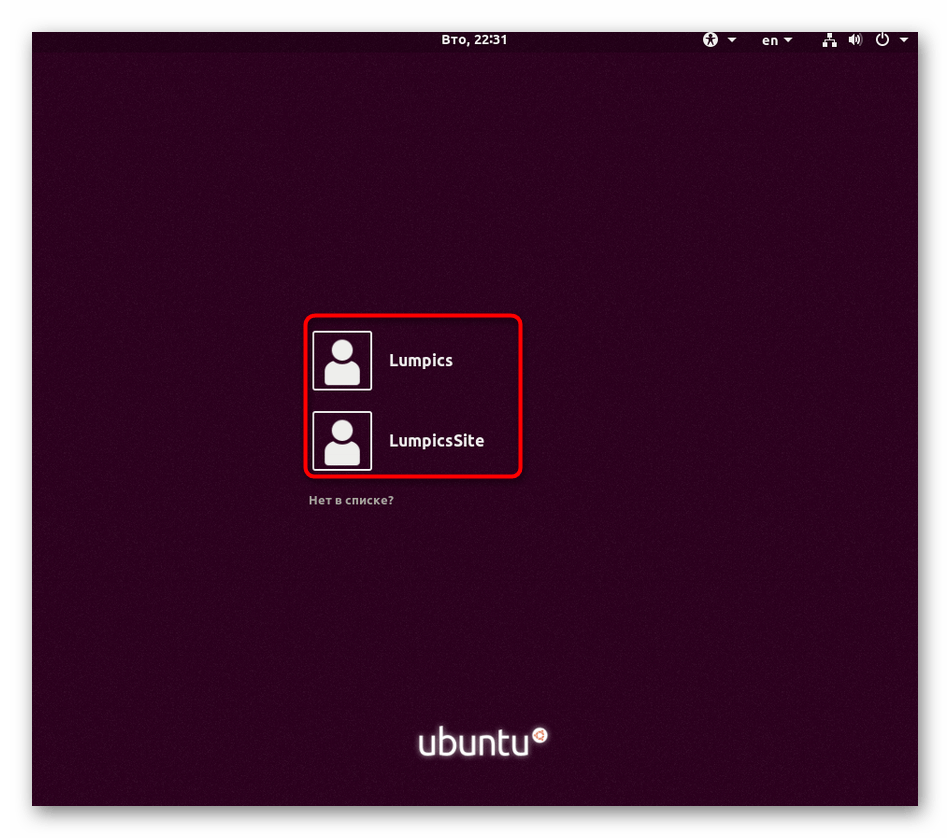
По умолчанию абсолютно во всех существующих дистрибутивах Линукс функция автоматического входа отключена, поэтому при создании нового сеанса требуется выбрать пользователя для входа, а уже потом появится строка для ввода пароля. На этом этапе вы можете указать, к какой именно учетной записи хотите подключиться.
- Включите компьютер, чтобы создать новый сеанс. При отображении списка кликните левой кнопкой мыши по соответствующей строке с подходящим именем.
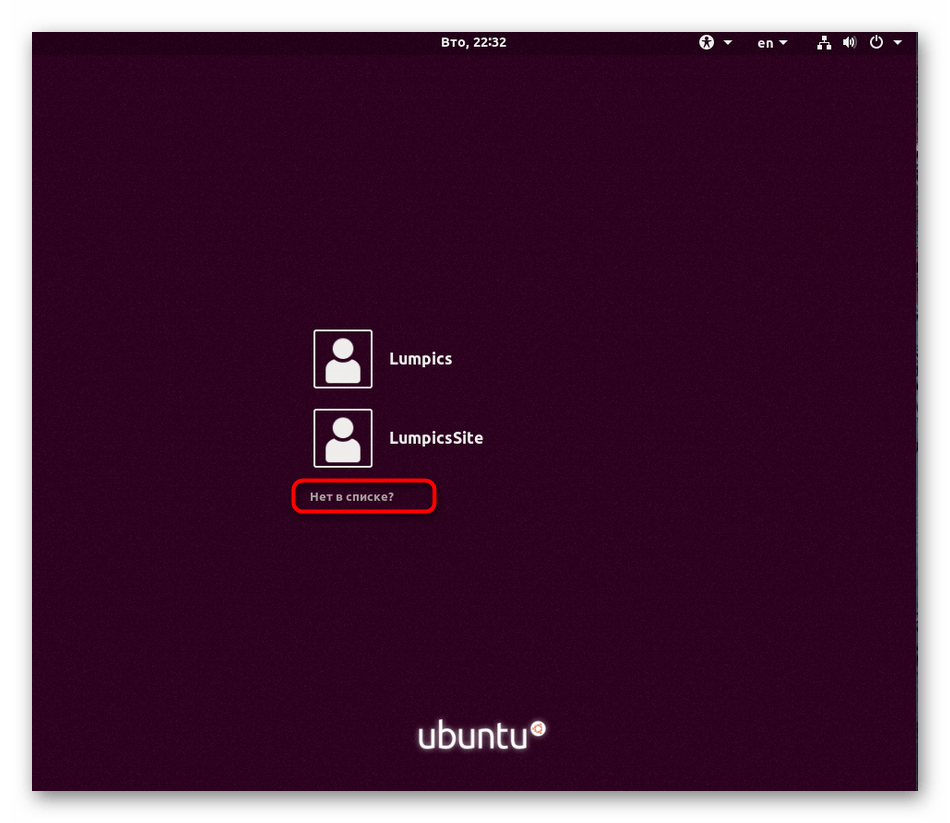
Если вы обнаружили, что профиль отсутствует в списке, потребуется перейти к отдельному меню.
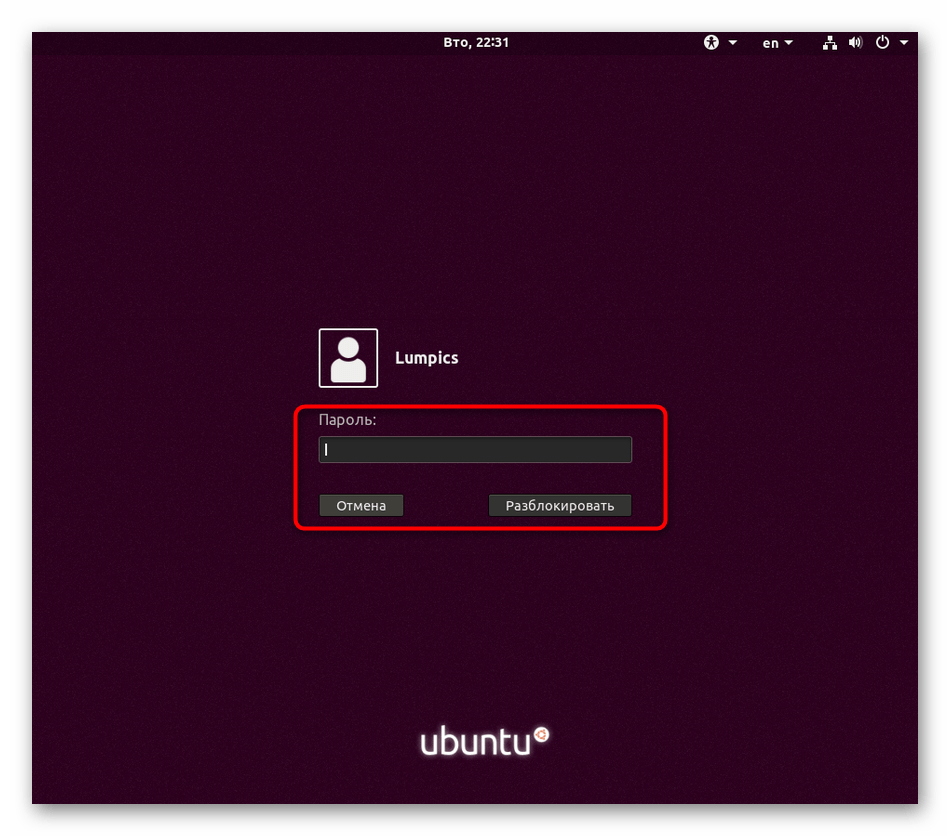
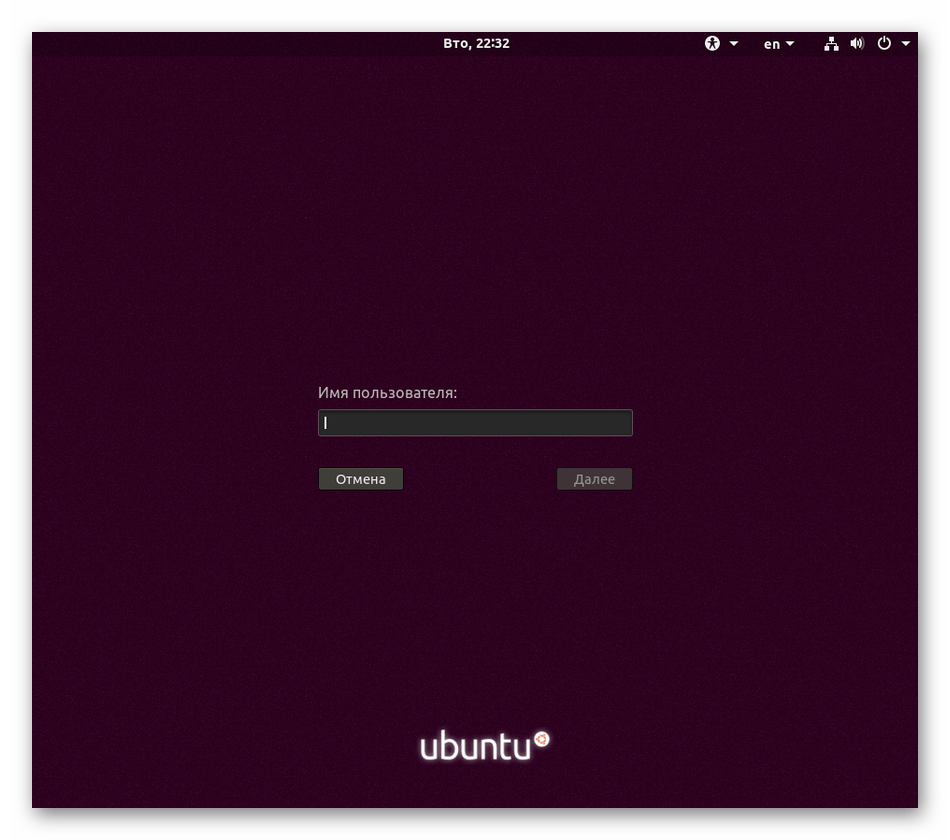
Здесь сначала указывается имя, поэтому вам необходимо точно знать его, а далее вводится пароль. Если вся информация указана правильно, создастся новая виртуальная консоль с графической оболочкой.
Как видите, этот метод максимально прост, что позволит даже самому начинающему юзеру выполнить его без каких-либо трудностей. Однако если вы уже создали сеанс и не желаете перезагружать ПК для смены профиля, обратите внимание на следующий способ.
Способ 2: Кнопка «Сменить пользователя» в окружении
Еще раз уточним, что мы рассматриваем выполняемую процедуру на примере Ubuntu и установленной по умолчанию в ней графической оболочке. Если же вы обнаружили какие-либо различия, изучая скриншоты, вам предстоит самостоятельно отыскать необходимую кнопку. Это не составит труда, если вы хотя бы немного ориентируетесь в графическом интерфейсе. В противном случае можно обратиться к официальной документации дистрибутива и его оболочки. Смена учетной записи через окружение рабочего стола происходит так:
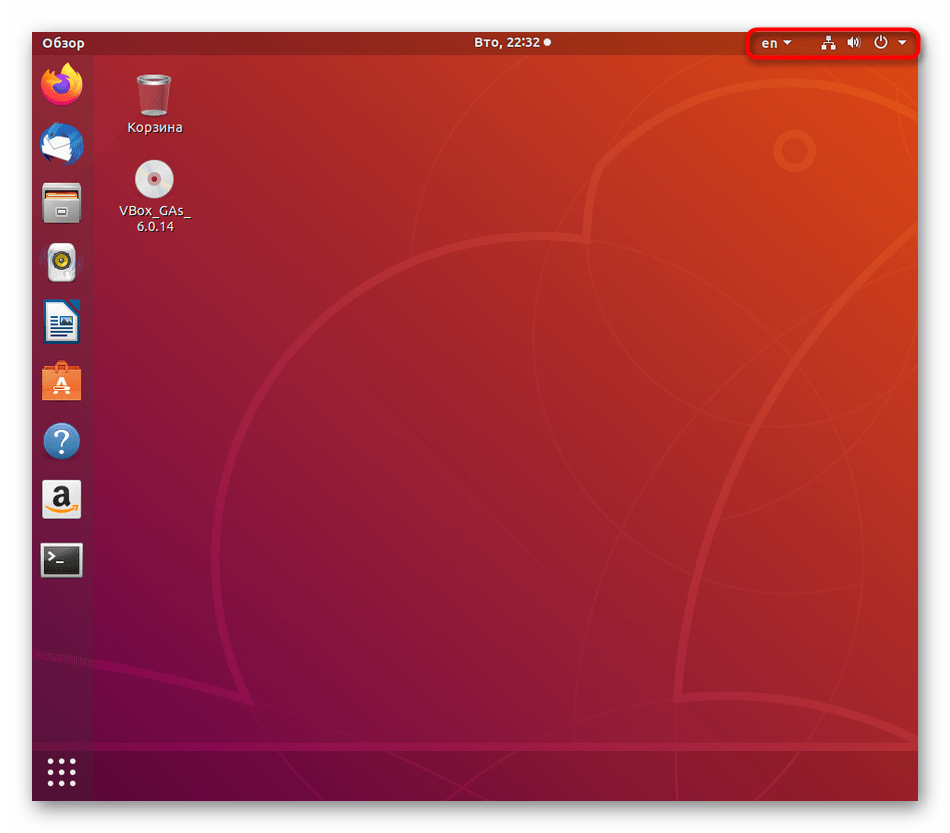
- Нажмите на кнопку выключения, которая находится на панели задач. Она может быть расположена вверху или снизу, что зависит от общих настроек.
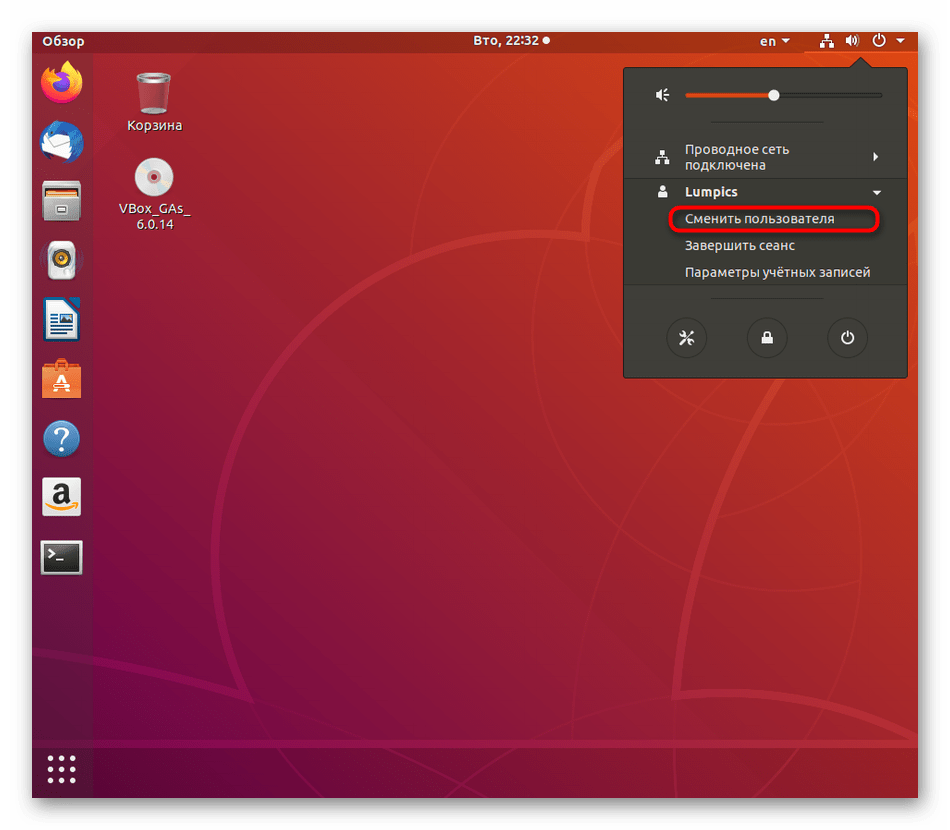
В появившемся контекстном меню кликните по имени своего профиля и в списке выберите «Сменить пользователя».
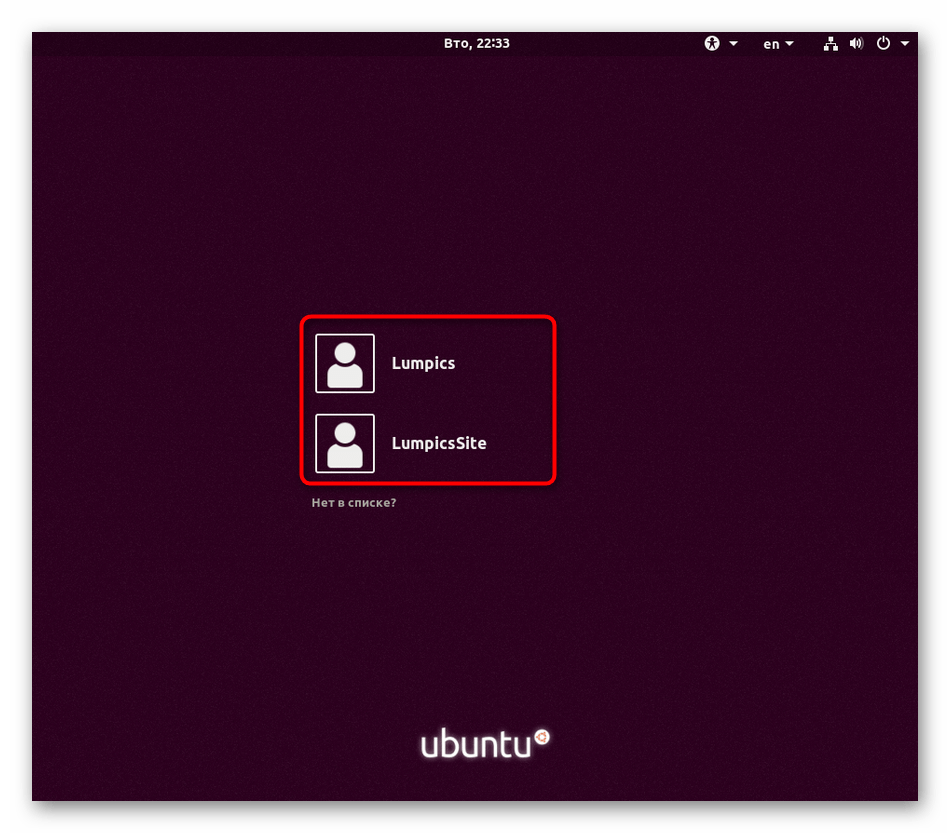
Появится та же самая форма, что вы видели в инструкции к предыдущему методу. Здесь кликните ЛКМ по нужной учетной записи.
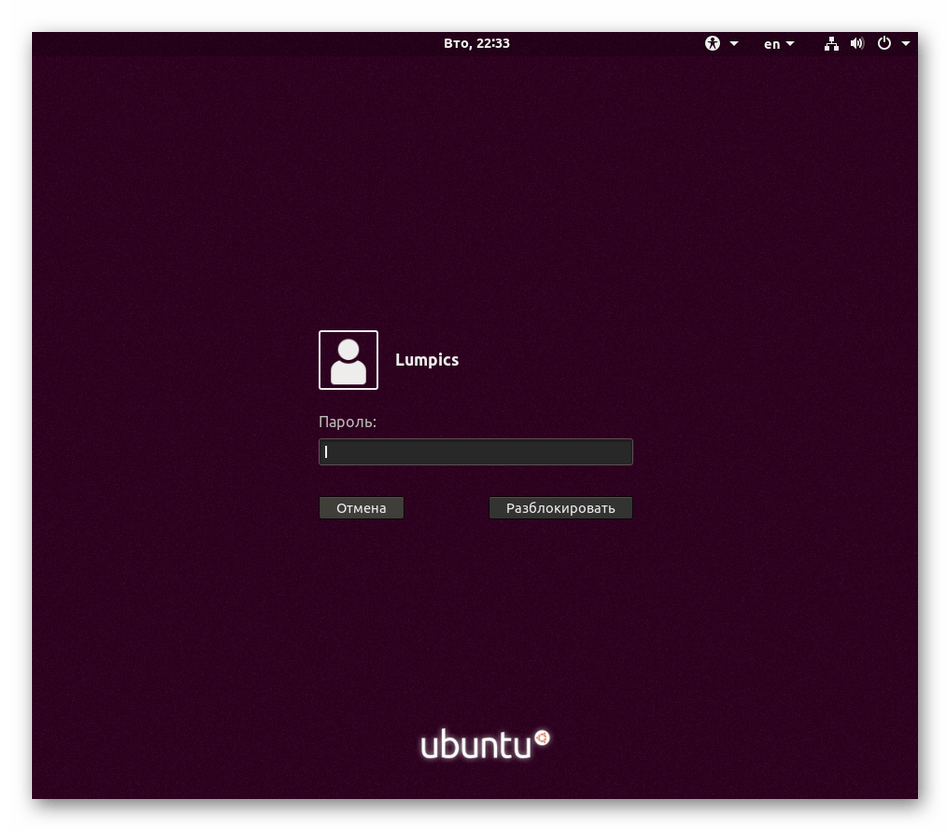
Введите пароль и нажмите на «Разблокировать».
Теперь вы можете с легкостью проверить, произошла ли смена пользователя. Это осуществляется через ту же кнопку на панели задач, о которой мы говорили в первом шаге или путем запуска «Терминала». Там вы увидите, от какого имени была открыта консоль.
Способ 3: Команда в «Терминале»
Отметим, что этот вариант подойдет только в том случае, если вы не хотите менять юзера для всей сессии, а желаете выполнить какие-либо команды от его имени через консоль, а потом снова вернуться к управлению через исходный профиль. В любом дистрибутиве существует единая команда, позволяющая осуществить задуманное.
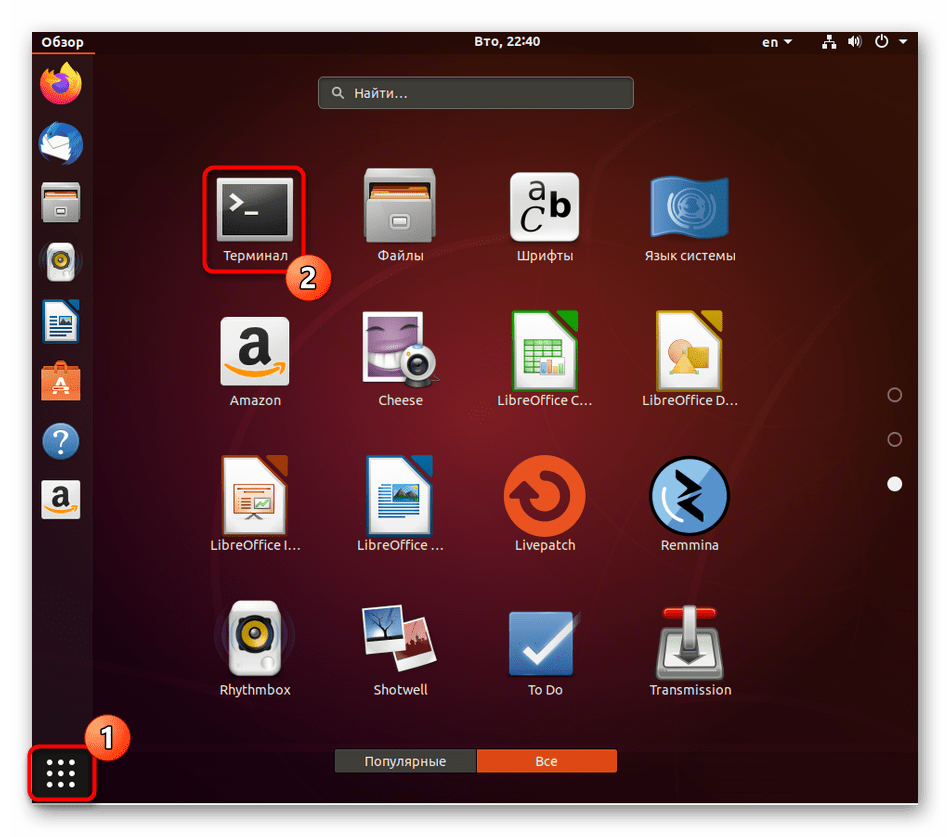
- Откройте «Терминал» любым удобным способом, например, через главное меню.
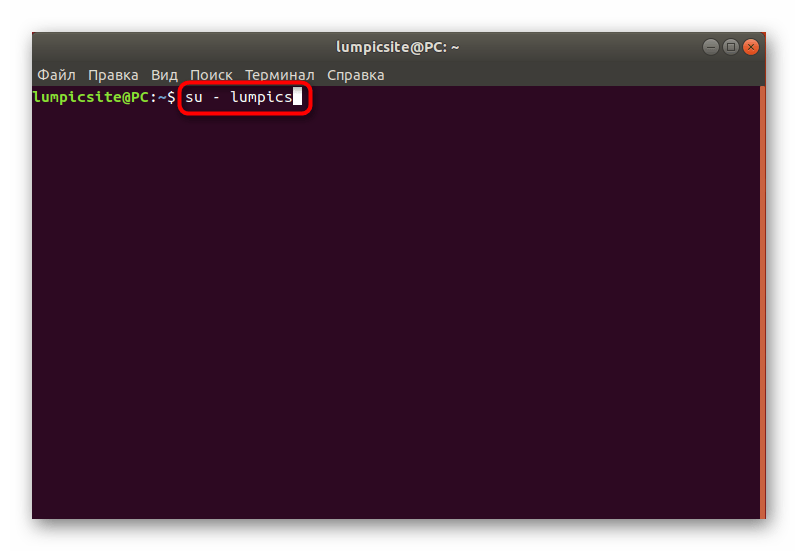
Введите команду su — username , где username — точное имя необходимой учетной записи.
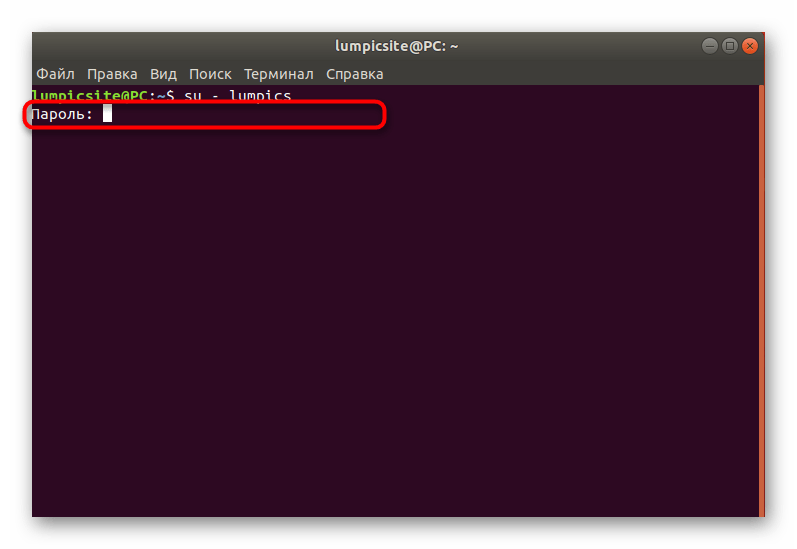
Для разблокирования управления введите пароль. Учтите, что отображаться в консоли он не будет, но символы при этом корректно вводятся.
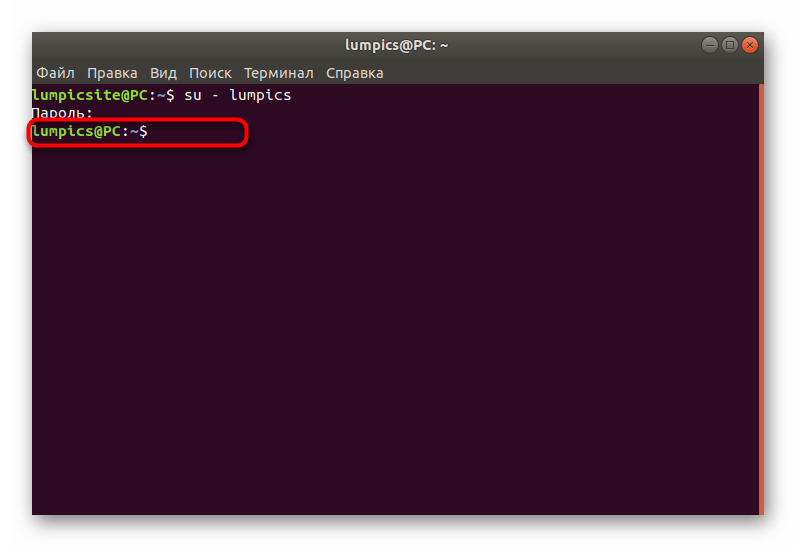
Теперь обратите внимание на зеленую надпись. Как видите, пользователь был успешно сменен.
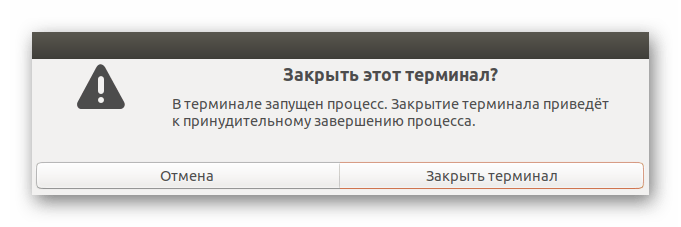
При закрытии консоли появится всплывающее окно, что здесь запущен какой-то процесс. Этот процесс как раз и является сменой пользователя. Подтвердите закрытие, чтобы завершить консольную сессию учетной записи.
Как видите, для осуществления данного способа потребуется знать точное имя пользователя, а не только его пароль. Однако это единственный доступный вариант, позволяющий выполнять команды в пределах одной консоли от имени другого юзера.
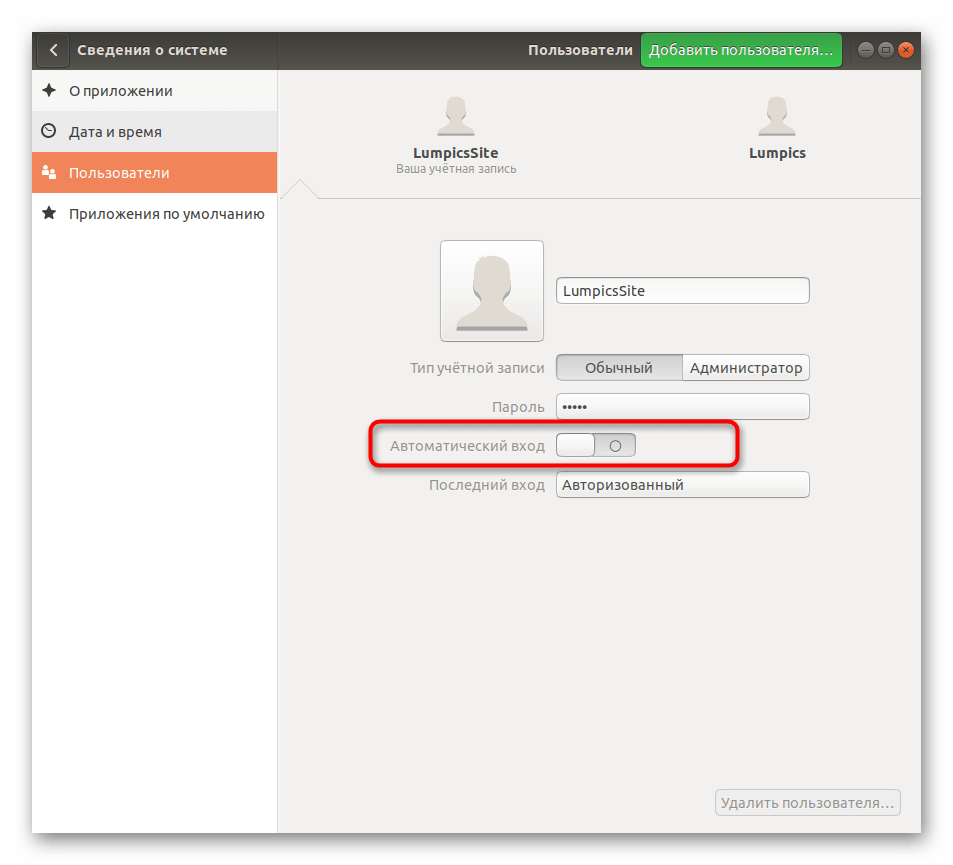
Способ 4: Функция «Автоматический вход»
Иногда во время установки или уже после нее юзер создает учетную запись без пароля и активирует функцию «Автоматический вход». В такой ситуации авторизация происходит самостоятельно, поэтому у других юзеров нет возможности сменить профиль при включении компьютера. Исправить это положение или назначить другой профиль для автоматического входа помогут параметры, реализованные через графическую оболочку.
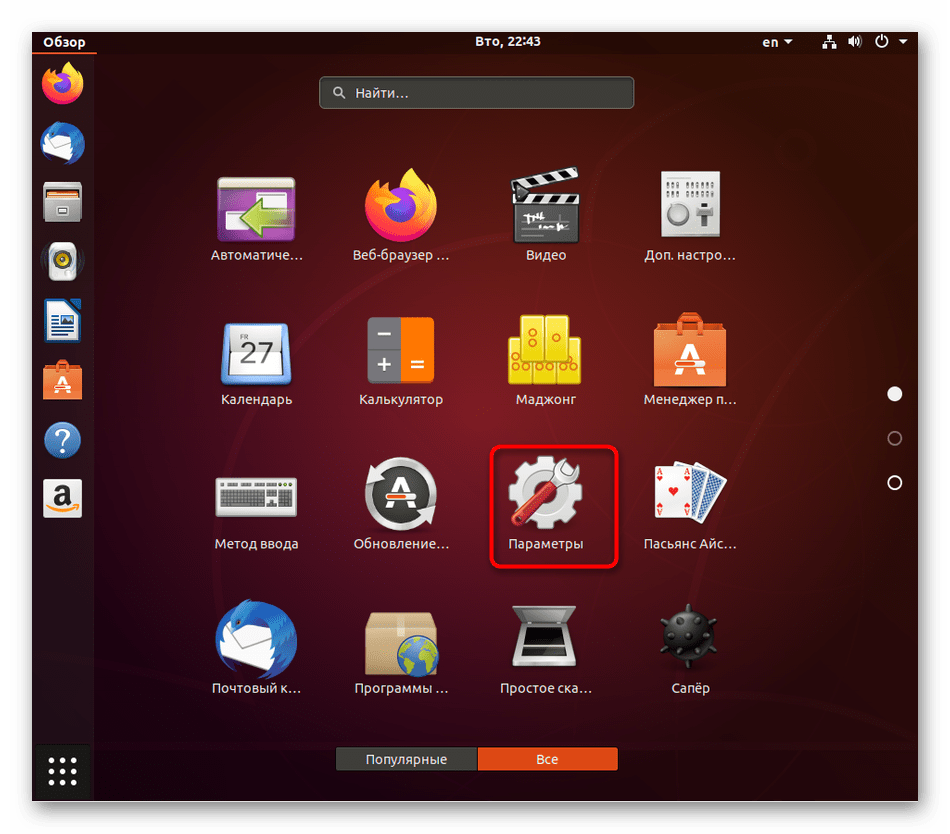
- Откройте меню приложений и перейдите в «Параметры».
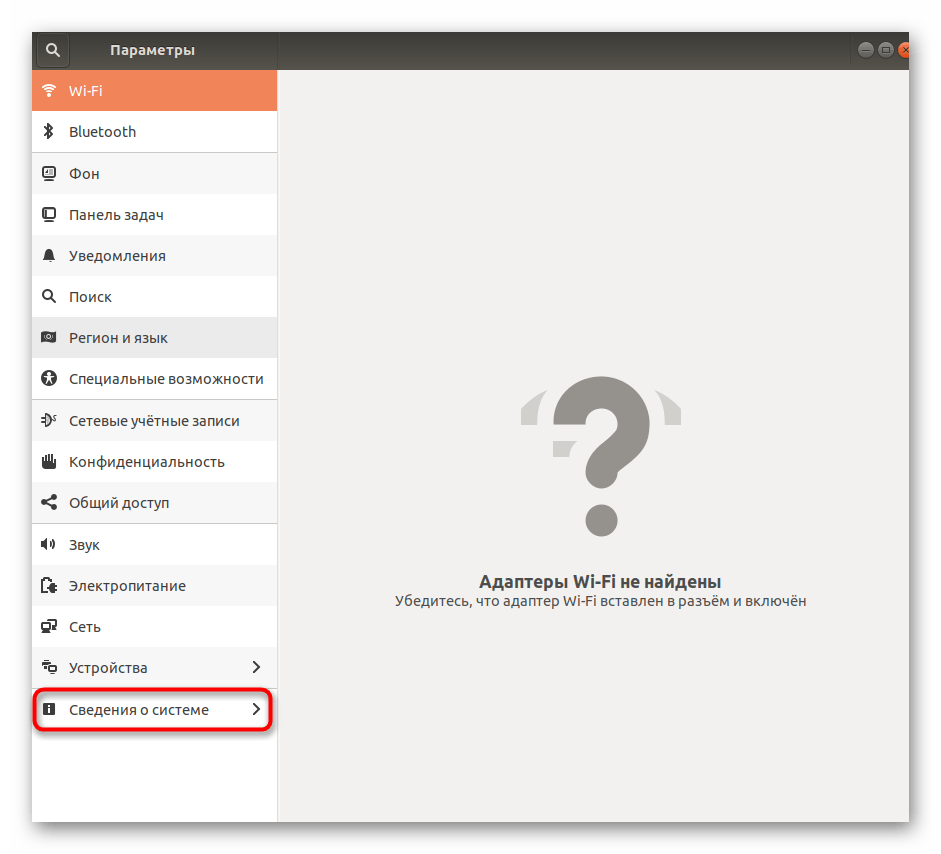
Здесь вас интересует категория «Сведения о системе».
Разверните категорию «Пользователи» и кликните по кнопке «Разблокировать».
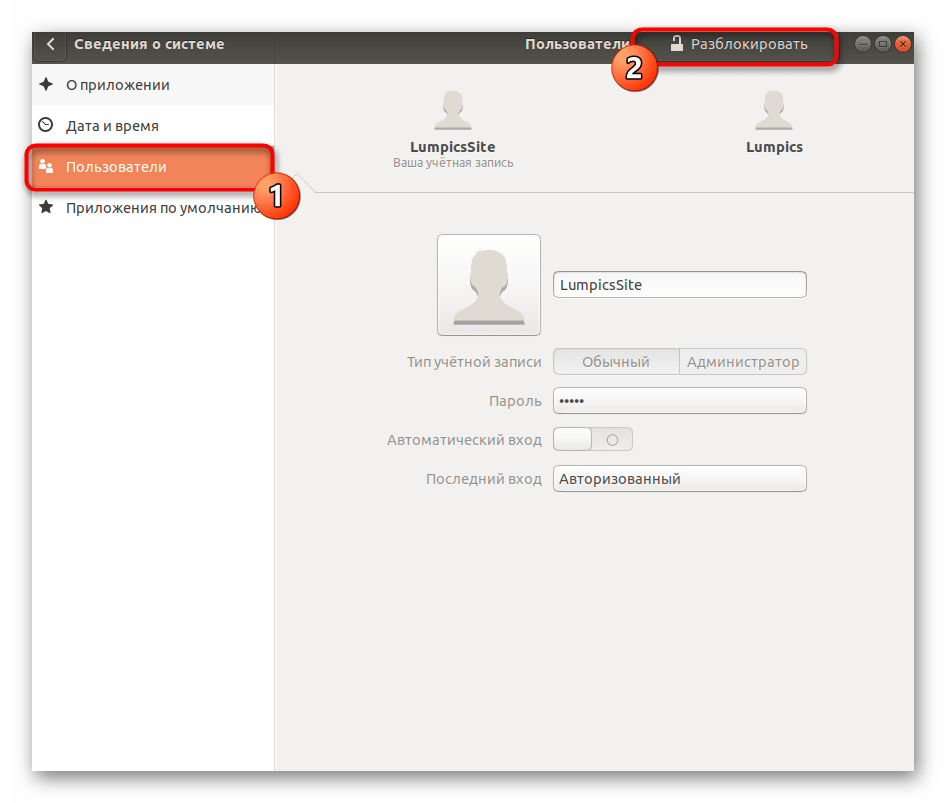
Потребуется ввести пароль суперпользователя, чтобы получить возможность управлять другими учетными записями.

После этого переключитесь на необходимый профиль, активируйте или деактивируйте функцию «Автоматический вход» путем перемещения ползунка.
Выше вы узнали о четырех доступных вариантах смены пользователя, последний из которых предполагает включение опции автоматического входа, что позволит упростить процедуру переключения в тех ситуациях, когда она производится довольно редко. Вам осталось только выбрать подходящий способ и следовать инструкциям, чтобы без проблем справиться с поставленной задачей.
Помимо этой статьи, на сайте еще 12315 инструкций.
Добавьте сайт Lumpics.ru в закладки (CTRL+D) и мы точно еще пригодимся вам.
Отблагодарите автора, поделитесь статьей в социальных сетях.
Источник
How to Switch Users in Ubuntu and Other Linux Distributions [Quick Beginner Tip]
Last updated October 29, 2020 By Abhishek Prakash 12 Comments
It is really simple to switch users in Ubuntu or any other Linux distribution using the terminal.
All you need to do is to know the unsername and its account password and you can switch users with su command:
You’ll be asked to enter the password of the user you want to switch to.

As you can see in the screenshot above, I changed to user prakash from user abhishek in the terminal.
There are some minor details with this method that I’ll share with you in a moment. I’ll also share the graphical way of switching users in Linux if you are using desktop Linux.
Switching to root user
If you want to switch to the root user in Ubuntu, you can use the following command:
sudo su
You’ll have to enter your own user password here.
Change user in Linux command line

Let’s see things a bit in detail. To switch users, you need to first know the exact username because tab competition doesn’t work here. You can list all the users in Linux command line by viewing the content of the /etc/passwd file.
You’ll also need to know the password of the user account you want to switch to. This is for security reason, of course.
If you are the admin user or have sudo access, you can change account password with passwd command.
You’ll notice that some people use a — between su and the username. There is a specific reason for that.
When you use -, -l or –login option, you start the shell as a login shell. This means that it will initialize the environment variables like PATH and changes to the home directory of the changed user. It will be as if you logged into the terminal as the second user.

Note: though — is more popular, it is advised to use –login option.
Change users in Linux graphically (for desktop Linux)
If you are using desktop Linux, the above method may not be sufficient for you. Why? Because you switch the user in the terminal only. It is confined to the terminal. Nothing is changed outside the terminal.
If you want to switch users so that you can log in as another user and use all the system (browser, applications etc) graphically, you’ll have to log out and then log back in.
Now the screenshots may look different but the steps remain the same. Here’s how to switch users in Ubuntu Linux.
Go to the top right corner and click the Power Off/Log out option to open the dropdown and you can choose either of Switch User or Log Out.
- Switch User: You get to keep your session active (applications keep on running) for current user. Good for temporarily switching users as you won’t lose your work.
- Log out: Current session ends (all applications are closed). Good when you want to switch to the other user for a long time.
You can choose whichever option is more suited for your need.

Now, you’ll be at the login screen with all the available users for your system. Choose the user account of your choice.
Clearly, you need to know the password of the user account you want to use.
That’s it. I hope you find this quick beginner tip helpful in changing users in Ubuntu and other Linux distributions. Questions and suggestions are always welcome.
Like what you read? Please share it with others.
Источник
How To Linux Set or Change User Password
Linux Set User Password
Type following passwd command to change your own password:
$ passwd
Sample Outputs:
The user is first prompted for his/her old password if one is present. This password is then encrypted and compared against the stored password. The user has only one chance to enter the correct password. The super user is permitted to bypass this step so that forgotten passwords may be changed. A new password is tested for complexity. As a general guideline, passwords should consist of 10 to 20 characters including one or more from each of following sets:
- Lower case alphabetics
- Upper case alphabetics
- Digits 0 thru 9
- Punctuation marks/spacial characters
Linux change password for other user account
You need to login as the root user, type the following command to change password for user vivek:
# passwd vivek
OR
$ sudo passwd vivek
Sample putput:
- vivek – is username or account name.
Passwords do not display to the screen when you enter them. For example:
Linux changing user password using passwd
Linux Change Group Password
When the -g option is used, the password for the named group is changed. In this example, change password for group sales:
# passwd -g sales
The current group password is not prompted for. The -r option is used with the -g option to remove the current password from the named group. This allows group access to all members. The -R option is used with the -g option to restrict the named group for all users.
Changing user passwords on Linux
As a Linux system administrator (sysadmin) you can change password for any users on your server. To change a password on behalf of a user:
- First sign on or “su” or “sudo” to the “root” account on Linux, run: sudo -i
- Then type, passwd tom to change a password for tom user
- The system will prompt you to enter a password twice
To change or set a new root (superuser) password type:
$ sudo passwd
Forcing Linux user to change password at their next login
By default, Linux passwords never expire for users. However, we can force users to change their password the next time they log in via GUI or CLI methods. The syntax is straightforward:
$ sudo passwd -e
$ sudo passwd —expire
Let us immediately expire an account’s password:
$ sudo passwd -e marlena
The system will confirm it:
When user try to login via ssh command, they will see the following on screen:
Locking and Unlocking user password of the named account
Note that the following local command does not disable the account. The user may still be able to login using another authentication token, such as an SSH key. To disable the account, administrators should use either usermod —expiredate 1
We can lock the password as follows:
$ sudo passwd -l
This option disables a password by changing it to a value which matches no possible encrypted value (it adds a ! at the beginning of the password in the /etc/shadow file. Want to unlock the password, try:
$ sudo passwd -u
The above command option re-enables a password by changing the password back to its previous value. In other words, to the value before using the -l option.
- No ads and tracking
- In-depth guides for developers and sysadmins at Opensourceflare✨
- Join my Patreon to support independent content creators and start reading latest guides:
- How to set up Redis sentinel cluster on Ubuntu or Debian Linux
- How To Set Up SSH Keys With YubiKey as two-factor authentication (U2F/FIDO2)
- How to set up Mariadb Galera cluster on Ubuntu or Debian Linux
- A podman tutorial for beginners – part I (run Linux containers without Docker and in daemonless mode)
- How to protect Linux against rogue USB devices using USBGuard
Join Patreon ➔
A note about setting up a secure Linux password
Compromises in password security typically result from careless password selection. Avoid common password such as:
- Words which appears in a dictionary
- Your first and last name
- Pet names
- Kids or spouses names
- License number
- Date of birth (DoB)
- Home or office address
I strongly recommend that you generate a unique password for all user accounts using your chosen password manager.
Conclusion
The passwd command line utility is used to update or change user’s password. The encrypted password is stored in /etc/shadow file and account information is in /etc/passwd file. To see all user account try grep command or cat command as follows:
$ cat /etc/passwd
$ grep ‘^userNameHere’ /etc/passwd
$ grep ‘^tom’ /etc/passwd
The guidance given in this quick tutorial should work with any Linux distribution, including Alpine, Arch, Ubuntu, Debian, RHEL, Fedora, Oracle CentOS, SUSE/OpenSUSE and other popular Linux distros.
🐧 Get the latest tutorials on Linux, Open Source & DevOps via
Источник


