- WebSocket Example Program
- Prerequisites
- Creating a WebSocket Server
- Code Explanation
- Creating a WebSocket Client
- Code Explanation
- Preparing an HTML File
- Putting Everything Together
- Conclusion
- About the author
- Zeeman Memon
- ExamplesпѓЃ
- Creating Your First WebSocket ConnectionпѓЃ
- Debug and Logging OptionsпѓЃ
- Connection OptionsпѓЃ
- Setting Common Header ValuesпѓЃ
- Suppress Origin HeaderпѓЃ
- Setting Custom Header ValuesпѓЃ
- Disabling SSL or Hostname VerificationпѓЃ
- Using a Custom ClassпѓЃ
- Setting Timeout ValueпѓЃ
- Connecting through a proxyпѓЃ
- Connecting with Custom SocketsпѓЃ
- Post-connection Feature SummaryпѓЃ
- Ping/Pong UsageпѓЃ
- Sending Connection Close Status CodesпѓЃ
- Receiving Connection Close Status CodesпѓЃ
- Customizing frame maskпѓЃ
- Customizing opcodeпѓЃ
WebSocket Example Program
The WebSocket protocol allows for two-way communication to occur between a client and a server. This process is similar to the way in which calls on your phone take place: first, you establish a connection, and then you can start communicating with one another. The WebSocket protocol is used almost everywhere – from multiplayer browser games to chat applications.
This article shows you how to create a WebSocket protocol and use it to communicate with multiple users.
Prerequisites
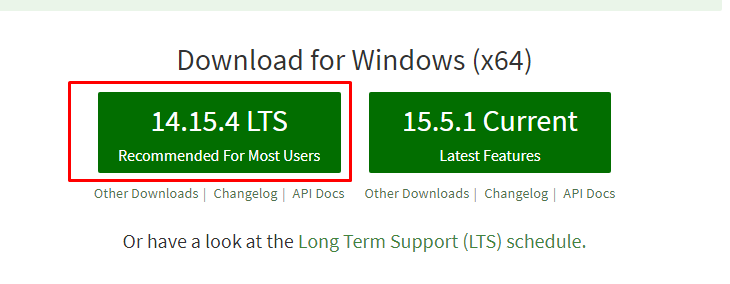
Before moving on to the process of creating and using a WebSocket protocol, you first need to install a few things that are required for this process. The first thing that you need to install is Node.js, a server-side platform that converts the JavaScript programming language into machine code that allows you to run JavaScript directly on your computer. To install Node.js, Windows users can simply go to the official Node.js website and click on the green LTS button found in the center of the screen.
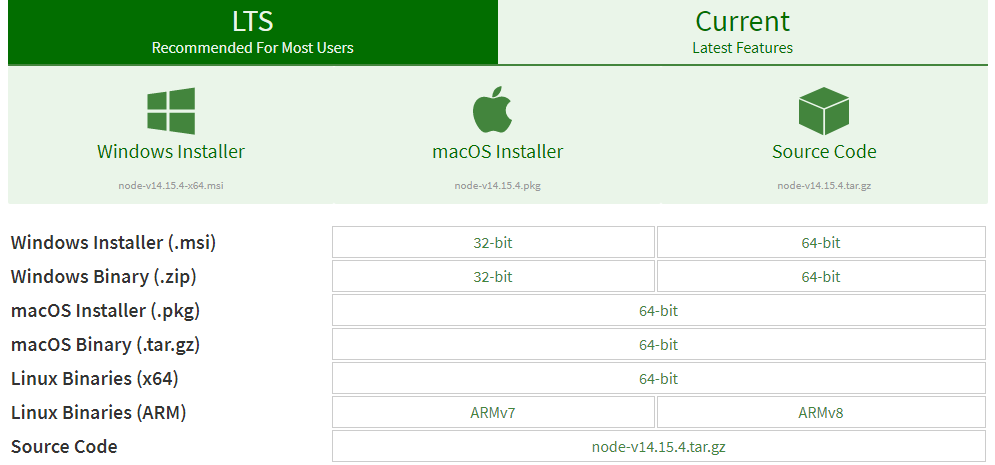
For Linux and macOS users, click on the Downloads section in the sub-header of the website.

After opening the Downloads section, you will see installation files for all three major platforms. Select a package that is supported by your system.
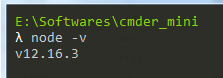
Run the installer that comes with the downloaded files, and Node.js will be installed on your computer. To check whether the program has been installed, open the terminal and issue the following command:
After installing Node.js, you now have access to various JavaScript modules, which will make your work more efficient in the long run. Open the directory in which you want to create your client and server architecture, then open the terminal inside that directory and run the following command:
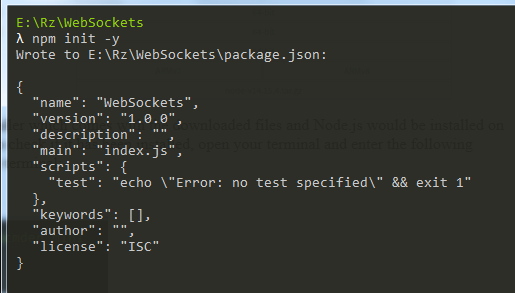
This command is used to create the package.json file that allows you to set up and install different Node.js packages. Install the WebSocket protocol package by issuing the following command in the terminal:
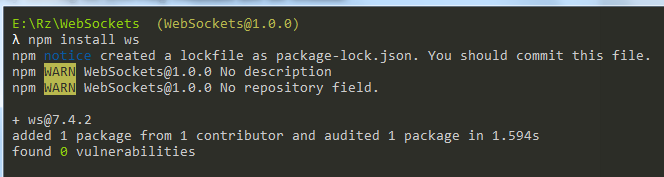
Create three files, called index.html, client.js, and server.js. As indicated by the names, these JavaScript files are the client and server architecture of our WebSocket protocol. Now, we can finally start writing the code of our client and server applications.
Creating a WebSocket Server
To create a WebSocket server, we will start by writing the code for the server. Open the server.js file that you created inside your text editor or IDE in the previous section and enter the following lines inside the file.
const WebSocket = require ( ‘ws’ ) ;
const ws = new WebSocket. Server ( < port : 8080 >) ;
console. log ( «Server Started» ) ;
ws. on ( ‘connection’ , ( wss ) => <
console. log ( «A new Client Connected» )
wss. send ( ‘Welcome to the Server!’ ) ;
wss. on ( ‘message’ , ( message ) => <
console. log ( `Server Received : $ < message >` ) ;
wss. send ( ‘Got your Message: ‘ + message ) ;
Now, we will explain what each line is doing in greater detail.
Code Explanation
As mentioned previously, there are some built-in modules available in Node.js that make your work much easier. To import these modules, we will use the require keyword.
const WebSocket = require ( ‘ws’ ) ;
const ws = new WebSocket. Server ( < port : 8080 >) ;
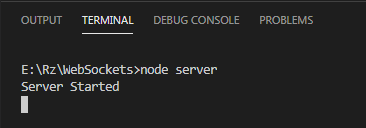
console. log ( «Server Started» ) ;
The first line is used to import the Node.js WebSocket module. Using this module, in the next line, we create our WebSocket server, which is listening on port 8080. The console.log() line is simply there to let us know that the Server has started. You will see this appear inside your terminal when you run the following command in the terminal:

In the next line, we are establishing a connection between the server and the client.
ws. on ( ‘connection’ , ( wss ) => <
console. log ( «A new Client Connected» )
After a connection has been established, the wss.send() line sends a message to the client. In this case, the message is “Welcome to the Server.”
Finally, the wss.on (‘message’) is for the server to receive the message from the client. For confirmation, the server sends this message back to the client in the last line.
wss. on ( ‘message’ , ( message ) => <
console. log ( `Server Received : $ < message >` ) ;
wss. send ( ‘Got your Message: ‘ + message ) ;
Creating a WebSocket Client
For the client-side, we need both the index.html file and the client.js file. Of course, you can simply add the content from the client.js file into your index.html file, but I prefer keeping them separate. Let us first look at the client.js code. Open the file and enter the following lines inside of the file:
const socket = new WebSocket ( ‘ws://localhost:8080’ ) ;
socket. addEventListener ( ‘open’ , ( ) => <
console. log ( ‘Connected to the Server!’ ) ;
socket. addEventListener ( ‘message’ , ( msg ) => <
console. log ( `Client Received : $ < msg. data >` ) ;
socket. send ( ‘Hows it going amigo!’ ) ;
>
Code Explanation
Like with the server.js, we will create a new WebSocket that is listening to port 8080, which can be seen in the localhost:8080 section of the code.
In the next line, addEventListener makes your client listen to any events that are currently happening. In this case, it would be creating and starting the server. Once the connection is established, the client outputs a message to the terminal.
socket. addEventListener ( ‘open’ , ( ) => <
console. log ( ‘Connected to the Server!’ ) ;
Once again, the client listens to any events currently happening. When the server sends a message, the client receives this and then displays the message in the terminal.
socket. addEventListener ( ‘message’ , ( msg ) => <
console. log ( `Client Received : $ < msg. data >` ) ;
The last few lines are simply a function where the client is sending a message to the server. We will connect this to a button in our html file for a better understanding of how this is working.
socket. send ( ‘Hows it going amigo!’ ) ;
Preparing an HTML File
Finally, open the index.html file and add a reference to your client.js file inside of it. In my case, I will simply add the following lines of code:
meta name = «viewport» content = «width=device-width, initial-scale=1.0» >
button onClick = «sendMsg()» > Send Message to Server / button >
As you can see in the lines below, src (inside the script tag) refers to the client javascript file. The sendMsg function, which was created in the client.js file, has also been connected to the button’s onClick function.
button onClick = «sendMsg()» >Send Message to Server / button >
Putting Everything Together
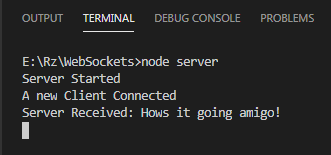
You can now start testing your Client and Server Architecture. First, open the terminal and run the following command to start your server:
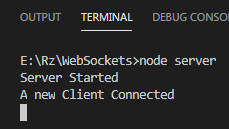
After starting your server, open the directory in which your index.html file is present, and double-click on it to open it in your browser. You will see the following message appear in the terminal stating that a client has connected:
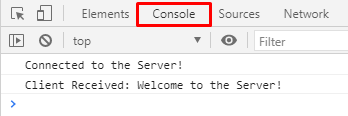
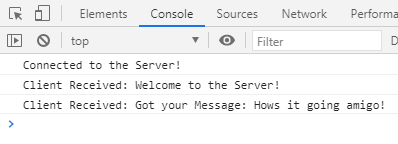
You can also check the messages sent from the server to the client by pressing the right-click button and then opening the Inspect window. In this window, click the Console section, and you will be able to see the messages sent from the server.
Once you click on the button, both the server and client will be able to send and receive messages to and from each other.
Server:
Client:
Voilà, your WebSocket connection has been established!
Conclusion
The WebSocket protocol is an excellent way to establish communication between a client and a server. This protocol is used in several fields, including multiplayer browser games, chat systems of various social media platforms, and even collaboration processes between coders.
About the author
![]()
Zeeman Memon
Hi there! I’m a Software Engineer by degree, Blogger by skills who loves to write about tech, develop websites & do SEO. You can reach out to me on LinkedIn.
Источник
ExamplesпѓЃ
Creating Your First WebSocket ConnectionпѓЃ
If you want to connect to a websocket without writing any code yourself, you can try out the Getting Started wsdump.py script and the examples/ directory files.
You can create your first custom connection with this library using one of the simple examples below. Note that the first WebSocket example is best for a short-lived connection, while the WebSocketApp example is best for a long-lived connection.
WebSocket example
WebSocketApp example
Debug and Logging OptionsпѓЃ
When you’re first writing your code, you will want to make sure everything is working as you planned. The easiest way to view the verbose connection information is the use websocket.enableTrace(True) . For example, the following example shows how you can verify that the proper Origin header is set.
The output you will see will look something like this:
Connection OptionsпѓЃ
After you can establish a basic WebSocket connection, customizing your connection using specific options is the next step. Fortunately, this library provides many options you can configure, such as:
“Host” header value
“Cookie” header value
“Origin” header value
SSL or hostname verification
For a more detailed list of the options available for the different connection methods, check out the source code comments for each:
Setting Common Header ValuesпѓЃ
To modify the Host , Origin , Cookie , or Sec-WebSocket-Protocol header values of the WebSocket handshake request, pass the host , origin , cookie , or subprotocols options to your WebSocket connection. The first two examples show the Host, Origin, and Cookies headers being set, while the Sec-WebSocket-Protocol header is set separately in the following example. For debugging, remember that it is helpful to enable Debug and Logging Options .
WebSocket common headers example
WebSocketApp common headers example
WebSocket subprotocols example
WebSocketApp subprotocols example
Suppress Origin HeaderпѓЃ
There is a special suppress_origin option that can be used to remove the Origin header from connection handshake requests. The below examples illustrate how this can be used. For debugging, remember that it is helpful to enable Debug and Logging Options .
WebSocket suppress origin example
WebSocketApp suppress origin example
Setting Custom Header ValuesпѓЃ
Setting custom header values, other than Host , Origin , Cookie , or Sec-WebSocket-Protocol (which are addressed above), in the WebSocket handshake request is similar to setting common header values. Use the header option to provide custom header values in a list or dict. For debugging, remember that it is helpful to enable Debug and Logging Options .
WebSocket custom headers example
WebSocketApp custom headers example
Disabling SSL or Hostname VerificationпѓЃ
See the relevant FAQ page for instructions.
Using a Custom ClassпѓЃ
You can also write your own class for the connection, if you want to handle the nitty-gritty connection details yourself.
Setting Timeout ValueпѓЃ
The _socket.py file contains the functions setdefaulttimeout() and getdefaulttimeout() . These two functions set the global _default_timeout value, which sets the socket timeout value (in seconds). These two functions should not be confused with the similarly named settimeout() and gettimeout() functions found in the _core.py file. With WebSocketApp, the run_forever() function gets assigned the timeout from getdefaulttimeout(). When the timeout value is reached, the exception WebSocketTimeoutException is triggered by the _socket.py send() and recv() functions. Additional timeout values can be found in other locations in this library, including the close() function of the WebSocket class and the create_connection() function of the WebSocket class.
The WebSocket timeout example below shows how an exception is triggered after no response is received from the server after 5 seconds.
WebSocket timeout example
The WebSocketApp timeout example works a bit differently than the WebSocket example. Because WebSocketApp handles long-lived connections, it does not timeout after a certain amount of time without receiving a message. Instead, a timeout is triggered if no connection response is received from the server after the timeout interval (5 seconds in the example below).
WebSocketApp timeout example
Connecting through a proxyпѓЃ
websocket-client supports proxied connections. The supported proxy protocols are HTTP, SOCKS4, SOCKS4a, SOCKS5, and SOCKS5h. If you want to route DNS requests through the proxy, use SOCKS4a or SOCKS5h. The proxy protocol should be specified in lowercase to the proxy_type parameter. The example below shows how to connect through a HTTP or SOCKS proxy. Proxy authentication is supported with the http_proxy_auth parameter, which should be a tuple of the username and password. Be aware that the current implementation of websocket-client uses the “CONNECT” method for HTTP proxies (though soon the HTTP proxy handling will use the same python_socks library currently enabled only for SOCKS proxies), and the HTTP proxy server must allow the “CONNECT” method. For example, the squid HTTP proxy only allows the “CONNECT” method on HTTPS ports by default. You may encounter problems if using SSL/TLS with your proxy.
WebSocket HTTP proxy with authentication example
WebSocket SOCKS4 (or SOCKS5) proxy example
WebSocketApp proxy example
Work in progress — coming soon
Connecting with Custom SocketsпѓЃ
You can also connect to a WebSocket server hosted on a specific socket using the socket option when creating your connection. Below is an example of using a unix domain socket.
Other socket types can also be used. The following example is for a AF_INET (IP address) socket.
Post-connection Feature SummaryпѓЃ
Autobahn|TestSuite is an independent automated test suite to verify the compliance of WebSocket implementations.
Running the test suite against this library will produce a summary report of the conformant features that have been implemented.
A recently-run autobahn report (available as an .html file) is available in the /compliance directory.
Ping/Pong UsageпѓЃ
The WebSocket specification defines ping and pong message opcodes as part of the protocol. These can serve as a way to keep a connection active even if data is not being transmitted.
Pings may be sent in either direction. If the client receives a ping, a pong reply will be automatically sent.
However, if a blocking event is happening, there may be some issues with ping/pong. Below are examples of how ping and pong can be sent by this library.
You can get additional debugging information by using Wireshark to view the ping and pong messages being sent. In order for Wireshark to identify the WebSocket protocol properly, it should observe the initial HTTP handshake and the HTTP 101 response in cleartext (without encryption) — otherwise the WebSocket messages may be categorized as TCP or TLS messages. For debugging, remember that it is helpful to enable Debug and Logging Options .
WebSocket ping/pong example
This example is best for a quick test where you want to check the effect of a ping, or where situations where you want to customize when the ping is sent.
WebSocketApp ping/pong example
This example, and run_forever() in general, is better for long-lived connections.
In this example, if a ping is received, and pong is sent as response, and then the client is notified, via on_ping() .
Further, a ping is transmitted every 60 seconds. If a pong is received, the client is notified, via on_pong() . If no pong is received, within 10 seconds, run_forever() will exit with a WebSocketTimeoutException .
Sending Connection Close Status CodesпѓЃ
RFC6455 defines various status codes that can be used to identify the reason for a close frame ending a connection. These codes are defined in the websocket/_abnf.py file. To view the code used to close a connection, you can enable logging to view the status code information. You can also specify your own status code in the .close() function, as seen in the examples below. Specifying a custom status code is necessary when using the custom status code values between 3000-4999.
WebSocket sending close() status code example
WebSocketApp sending close() status code example
Receiving Connection Close Status CodesпѓЃ
The RFC6455 spec states that it is optional for a server to send a close status code when closing a connection. The RFC refers to these codes as WebSocket Close Code Numbers, and their meanings are described in the RFC. It is possible to view this close code, if it is being sent, to understand why the connection is being close. One option to view the code is to enable logging to view the status code information. If you want to use the close status code in your program, examples are shown below for how to do this.
WebSocket receiving close status code example
WebSocketApp receiving close status code example
Customizing frame maskпѓЃ
WebSocket frames use masking with a random value to add entropy. The masking value in websocket-client is normally set using os.urandom in the websocket/_abnf.py file. However, this value can be customized as you wish. One use case, outlined in issue #473, is to set the masking key to a null value to make it easier to decode the messages being sent and received. This is effectively the same as “removing” the mask, though the mask cannot be fully “removed” because it is a part of the WebSocket frame. Tools such as Wireshark can automatically remove masking from payloads to decode the payload message, but it may be easier to skip the demasking step in your custom project.
WebSocket custom masking key code example
WebSocketApp custom masking key code example
Customizing opcodeпѓЃ
WebSocket frames contain an opcode, which defines whether the frame contains text data, binary data, or is a special frame. The different opcode values are defined in RFC6455 section 11.8. Although the text opcode, 0x01, is the most commonly used value, the websocket-client library makes it possible to customize which opcode is used.
WebSocket custom opcode code example
WebSocketApp custom opcode code example
The WebSocketApp class contains different functions to handle different message opcodes. For instance, on_close, on_ping, on_pong, on_cont_message. One drawback of the current implementation (as of May 2021) is the lack of binary support for WebSocketApp, as noted by issue #351.
Источник


