- Linux Directory Structure and Important Files Paths Explained
- Linux Directory Structure Diagram
- Exploring Important file, their location and their Usability
- Linux Delete All Files In Directory Using Command Line
- Linux Delete All Files In Directory
- How to remove all the files in a directory?
- Understanding rm command option that deleted all files in a directory
- Deleting hidden vs non-hidden files
- Bash remove all files from a directory including hidden files using the dotglob option
- Linux Remove All Files In Directory
- Conclusion
- Linux directory deny all
- Шаг 1. Обновите свой APT
- Шаг 2. Задайте имя хоста сервера и DNS
- Шаг 3. Установите необходимые пакеты
- Шаг 4. Откройте для себя домен Active Directory в Debian 10 / Ubuntu 20.04 | 18.04
- Шаг 5. Присоединитесь к Ubuntu 20.04 | 18.04 / Debian 10 к домену Active Directory (AD)
- Шаг 6. Контроль доступа — Ограничьте до пользователя / группы
- Шаг 7. Настройте доступ через Sudo
- Шаг 8. Проверьте доступ по SSH
Linux Directory Structure and Important Files Paths Explained
For any person, who does not have a sound knowledge of Linux Operating System and Linux File System, dealing with the files and their location, their use may be horrible, and a newbie may really mess up.
This article is aimed to provide the information about Linux File System, some of the important files, their usability and location.
Linux Directory Structure Diagram
A standard Linux distribution follows the directory structure as provided below with Diagram and explanation.
![]() Linux Directory Structure
Linux Directory Structure
Each of the above directory (which is a file, at the first place) contains important information, required for booting to device drivers, configuration files, etc. Describing briefly the purpose of each directory, we are starting hierarchically.
- /bin : All the executable binary programs (file) required during booting, repairing, files required to run into single-user-mode, and other important, basic commands viz., cat, du, df, tar, rpm, wc,history, etc.
- /boot : Holds important files during boot-up process, including Linux Kernel.
- /dev : Contains device files for all the hardware devices on the machine e.g., cdrom, cpu, etc
- /etc : Contains Application’s configuration files, startup, shutdown, start, stop script for every individual program.
- /home : Home directory of the users. Every time a new user is created, a directory in the name of user is created within home directory which contains other directories like Desktop, Downloads, Documents, etc.
- /lib : The Lib directory contains kernel modules and shared library images required to boot the system and run commands in root file system.
- /lost+found : This Directory is installed during installation of Linux, useful for recovering files which may be broken due to unexpected shut-down.
- /media : Temporary mount directory is created for removable devices viz., media/cdrom.
- /mnt : Temporary mount directory for mounting file system.
- /opt : Optional is abbreviated as opt. Contains third party application software. Viz., Java, etc.
- /proc : A virtual and pseudo file-system which contains information about running process with a particular Process-id aka pid.
- /root : This is the home directory of root user and should never be confused with ‘/‘
- /run : This directory is the only clean solution for early-runtime-dir problem.
- /sbin : Contains binary executable programs, required by System Administrator, for Maintenance. Viz., iptables, fdisk, ifconfig, swapon, reboot, etc.
- /srv : Service is abbreviated as ‘srv‘. This directory contains server specific and service related files.
- /sys : Modern Linux distributions include a /sys directory as a virtual filesystem, which stores and allows modification of the devices connected to the system.
- /tmp :System’s Temporary Directory, Accessible by users and root. Stores temporary files for user and system, till next boot.
- /usr : Contains executable binaries, documentation, source code, libraries for second level program.
- /var : Stands for variable. The contents of this file is expected to grow. This directory contains log, lock, spool, mail and temp files.
Exploring Important file, their location and their Usability
Linux is a complex system which requires a more complex and efficient way to start, stop, maintain and reboot a system unlike Windows. There is a well defined configuration files, binaries, man pages, info files, etc. for every process in Linux.
- /boot/vmlinuz : The Linux Kernel file.
- /dev/hda : Device file for the first IDE HDD (Hard Disk Drive)
- /dev/hdc : Device file for the IDE Cdrom, commonly
- /dev/null : A pseudo device, that don’t exist. Sometime garbage output is redirected to /dev/null, so that it gets lost, forever.
- /etc/bashrc : Contains system defaults and aliases used by bash shell.
- /etc/crontab : A shell script to run specified commands on a predefined time Interval.
- /etc/exports : Information of the file system available on network.
- /etc/fstab : Information of Disk Drive and their mount point.
- /etc/group : Information of Security Group.
- /etc/grub.conf : grub bootloader configuration file.
- /etc/init.d : Service startup Script.
- /etc/lilo.conf : lilo bootloader configuration file.
- /etc/hosts : Information of Ip addresses and corresponding host names.
- /etc/hosts.allow : List of hosts allowed to access services on the local machine.
- /etc/host.deny : List of hosts denied to access services on the local machine.
- /etc/inittab : INIT process and their interaction at various run level.
- /etc/issue : Allows to edit the pre-login message.
- /etc/modules.conf : Configuration files for system modules.
- /etc/motd : motd stands for Message Of The Day, The Message users gets upon login.
- /etc/mtab : Currently mounted blocks information.
- /etc/passwd : Contains password of system users in a shadow file, a security implementation.
- /etc/printcap : Printer Information
- /etc/profile : Bash shell defaults
- /etc/profile.d : Application script, executed after login.
- /etc/rc.d : Information about run level specific script.
- /etc/rc.d/init.d : Run Level Initialisation Script.
- /etc/resolv.conf : Domain Name Servers (DNS) being used by System.
- /etc/securetty : Terminal List, where root login is possible.
- /etc/skel : Script that populates new user home directory.
- /etc/termcap : An ASCII file that defines the behaviour of Terminal, console and printers.
- /etc/X11 : Configuration files of X-window System.
- /usr/bin : Normal user executable commands.
- /usr/bin/X11 : Binaries of X windows System.
- /usr/include : Contains include files used by ‘c‘ program.
- /usr/share : Shared directories of man files, info files, etc.
- /usr/lib : Library files which are required during program compilation.
- /usr/sbin : Commands for Super User, for System Administration.
- /proc/cpuinfo : CPU Information
- /proc/filesystems : File-system Information being used currently.
- /proc/interrupts : Information about the current interrupts being utilised currently.
- /proc/ioports : Contains all the Input/Output addresses used by devices on the server.
- /proc/meminfo : Memory Usages Information.
- /proc/modules : Currently using kernel module.
- /proc/mount : Mounted File-system Information.
- /proc/stat : Detailed Statistics of the current System.
- /proc/swaps : Swap File Information.
- /version : Linux Version Information.
- /var/log/lastlog : log of last boot process.
- /var/log/messages : log of messages produced by syslog daemon at boot.
- /var/log/wtmp : list login time and duration of each user on the system currently.
That’s all for now. Keep connected to Tecmint for any News and post related to Linux and Foss world. Stay healthy and Don’t forget to give your value-able comments in comment section.
Источник
Linux Delete All Files In Directory Using Command Line
Linux Delete All Files In Directory
The procedure to remove all files from a directory:
- Open the terminal application
- To delete everything in a directory run: rm /path/to/dir/*
- To remove all sub-directories and files: rm -r /path/to/dir/*
Let us see some examples of rm command to delete all files in a directory when using Linux operating systems.
How to remove all the files in a directory?
Suppose you have a directory called /home/vivek/data/. To list files type the ls command:
$ ls
Understanding rm command option that deleted all files in a directory
- -r : Remove directories and their contents recursively.
- -f : Force option. In other words, ignore nonexistent files and arguments, never prompt. Dangerous option. Be careful.
- -v : Verbose option. Show what rm is doing on screen.
Deleting hidden vs non-hidden files
In Linux, any file or directory that starts with a dot character called a dot file. It is to be treated as hidden file. To see hidden files pass the -a to the ls command:
ls
ls -a
ls -la
To remove all files except hidden files in a directory use:
rm /path/to/dir/*
rm -rf /path/to/dir/*
rm *
In this example, delete all files including hidden files, run:
rm -rf /path/to/dir1/<*,.*>
rm -rfv /path/to/dir1/
- No ads and tracking
- In-depth guides for developers and sysadmins at Opensourceflare✨
- Join my Patreon to support independent content creators and start reading latest guides:
- How to set up Redis sentinel cluster on Ubuntu or Debian Linux
- How To Set Up SSH Keys With YubiKey as two-factor authentication (U2F/FIDO2)
- How to set up Mariadb Galera cluster on Ubuntu or Debian Linux
- A podman tutorial for beginners – part I (run Linux containers without Docker and in daemonless mode)
- How to protect Linux against rogue USB devices using USBGuard
Join Patreon ➔
Bash remove all files from a directory including hidden files using the dotglob option
If the dotglob option set, bash includes filenames beginning with a ‘.’ in the results of pathname expansion. In other words, turn on this option to delete hidden files:
See GNU/bash man page for the shopt command online here:
man bash
help shopt
Linux Remove All Files In Directory
As I said earlier one can use the unlink command too. The syntax is:
unlink filename
For example, delete file named foo.txt in the current working directory, enter:
unlink foo.txt
It can only delete a single file at a time. You can not pass multiple files or use wildcards such as *. Therefore, I strongly recommend you use the rm command as discussed above.
Conclusion
In this quick tutorial, you learned how to remove or delete all the files in a directory using the rm command. Linux offers a few more options to find and delete files. Please see the following tutorials:
🐧 Get the latest tutorials on Linux, Open Source & DevOps via
Источник
Linux directory deny all
Как мне ввести в домен Ubuntu 20.04 | 18.04 к домену Windows? Могу ли я присоединить Debian 10 к домену Active Directory?
Эта статья была написана, чтобы показать вам, как использовать realmd для присоединения сервера или рабочего стола Ubuntu 20.04 | 18.04 / Debian 10 к домену Active Directory. Домен Active Directory является центральным узлом информации о пользователях в большинстве корпоративных сред.
Например, в инфраструктуре моей компании ключевым требованием является то, чтобы все пользователи прошли аутентификацию во всех системах Linux с учетными данными Active Directory. Это должно работать как для Debian, так и для дистрибутивов Linux на основе Red Hat.
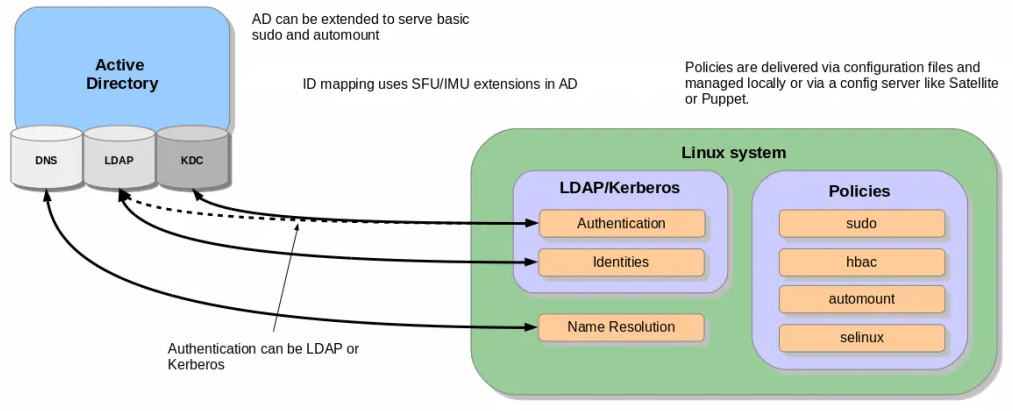
В этом руководстве будет показано, как настроить SSSD для получения информации из доменов в одном лесу ресурсов Active Directory. Если вы работаете с несколькими лесами AD, это руководство может вам не подойти. Мы также пойдем дальше и настроим правила sudo для пользователей, которые входят в систему через AD. Вот схема, изображающая установку и как она работает.
Итак, выполните следующие действия, чтобы присоединиться к домену Ubuntu 20.04 | 18.04 / Debian 10 в Active Directory (AD).
Шаг 1. Обновите свой APT
Начните с обновления вашей системы Ubuntu / Debian Linux.
sudo apt -y update
Это важно, поскольку установка может завершиться ошибкой, если сервер установлен только что.
Для Ubuntu 20.04 | 18.04 добавьте следующие репозитории в файл sources.list
sudo tee -a /etc/apt/sources.list
Шаг 2. Задайте имя хоста сервера и DNS
Установите правильное имя хоста для вашего сервера с правильным доменным компонентом.
sudo hostnamectl set-hostname myubuntu.example.com
Подтвердите свое имя хоста:
$ hostnamectl
Static hostname: myubuntu.example.com
Icon name: computer-vm
Chassis: vm
Machine ID: 5beb7ac3260c4f00bcfbe1088f48b8c7
Boot ID: b2a0d9abe43b455fb49484dbaa59dc41
Virtualization: vmware
Operating System: Ubuntu 18.04.1 LTS
Kernel: Linux 4.15.0-29-generic
Architecture: x86-64
Убедитесь, что DNS настроен правильно:
$ cat /etc/resolv.conf
Ubuntu 20.04 | 18.04 поставляется с systemd-resolve, который вам нужно отключить, чтобы сервер мог напрямую обращаться к вашему сетевому DNS.
sudo systemctl disable systemd-resolved
sudo systemctl stop systemd-resolved
Если вы используете DHCP, вы можете обновить DNS-сервер вручную.
$ sudo unlink /etc/resolv.conf
$ sudo vim /etc/resolv.conf
Шаг 3. Установите необходимые пакеты
Для присоединения системы Ubuntu 20.04 | 18.04 / Debian 10 к домену Active Directory (AD) требуется ряд пакетов.
sudo apt update
sudo apt -y install realmd libnss-sss libpam-sss sssd sssd-tools adcli samba-common-bin oddjob oddjob-mkhomedir packagekit
Только после успешной установки зависимостей вы можете приступить к обнаружению домена Active Directory в Debian 10 / Ubuntu 20.04 / 18.04.
Шаг 4. Откройте для себя домен Active Directory в Debian 10 / Ubuntu 20.04 | 18.04
Команда realm discover возвращает полную конфигурацию домена и список пакетов, которые должны быть установлены для регистрации системы в домене.
$ sudo realm discover example.com
example.com
type: kerberos
realm-name: EXAMPLE.COM
domain-name: example.com
configured: no
server-software: active-directory
client-software: sssd
required-package: sssd-tools
required-package: sssd
required-package: libnss-sss
required-package: libpam-sss
required-package: adcli
required-package: samba-common-bin
Замените example.com своим действующим доменом AD.
Шаг 5. Присоединитесь к Ubuntu 20.04 | 18.04 / Debian 10 к домену Active Directory (AD)
Учетная запись администратора AD требуется для интеграции вашего компьютера Linux с доменом Windows Active Directory. Проверьте и подтвердите учетную запись администратора AD и пароль.
Команда realm join настроит локальный компьютер для использования с указанным доменом, настроив как локальные системные службы, так и записи в домене идентификации. У команды есть несколько параметров, которые можно проверить с помощью:
$ realm join —help
Базовое выполнение команды:
$ sudo realm join -U Administrator example.com
Password for Administrator:
Администратор — это имя учетной записи администратора, используемой для интеграции машины в AD.
example.com — это имя домена AD
Команда сначала пытается подключиться без учетных данных, но при необходимости запрашивает пароль.
Просмотр сведений о текущей области.
$ realm list
example.com
type: kerberos
realm-name: EXAMPLE.COM
domain-name: example.com
configured: kerberos-member
server-software: active-directory
client-software: sssd
required-package: sssd-tools
required-package: sssd
required-package: libnss-sss
required-package: libpam-sss
required-package: adcli
required-package: samba-common-bin
login-formats: %U@example.com
login-policy: allow-realm-logins
В системах на основе RHEL домашний каталог пользователя будет создан автоматически. В Ubuntu / Debian вам необходимо включить эту функцию.
sudo bash -c «cat > /usr/share/pam-configs/mkhomedir»
Затем активируйте с помощью:
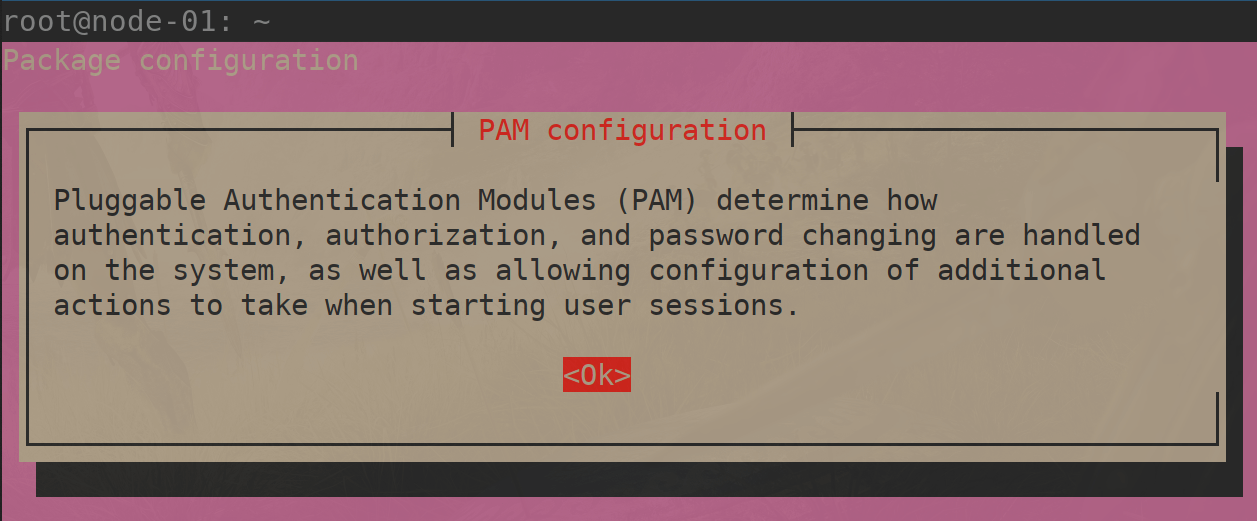
sudo pam-auth-update
Убедитесь, что выбрано “activate mkhomedir” с помощью звездочки — [*]
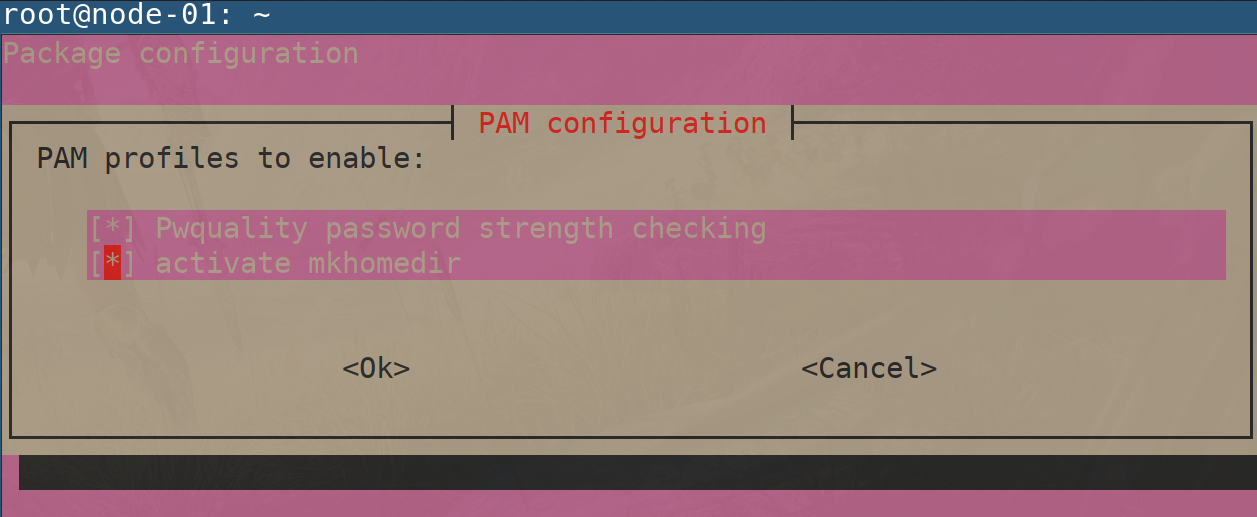
Затем выберите , чтобы сохранить изменения.
Ваш файл конфигурации sssd.conf находится в /etc/sssd/sssd.conf . При каждом изменении файла требуется перезагрузка.
Статус должен быть запущен.
$ systemctl status sssd
Если интеграция работает, должна быть возможность получить информацию о пользователе AD.
$ id jmutai@example.com
uid=1783929917(jmutai@example.com) gid=1784800513(domain users@example.com) groups=1783870513(domain users@example.com)
Шаг 6. Контроль доступа — Ограничьте до пользователя / группы
Доступ к зарегистрированному серверу можно ограничить, разрешив только определенных пользователей и группы.
Ограничение для пользователей
Чтобы разрешить пользователю доступ через SSH и консоль, используйте команду:
$ sudo realm permit user1@example.com
$ sudo realm permit user2@example.com user3@example.com
Разрешить доступ к группе — Примеры
$ sudo ream permit -g sysadmins
$ sudo realm permit -g ‘Security Users’
$ sudo realm permit ‘Domain Users’ ‘admin users’
Это изменит файл sssd.conf .
Если вместо этого вы хотите разрешить доступ всем пользователям, запустите:
$ sudo realm permit —all
Чтобы запретить доступ всем пользователям домена, используйте:
$ sudo realm deny —all
Шаг 7. Настройте доступ через Sudo
По умолчанию у пользователей домена не будет разрешения на повышение привилегий до root. Пользователям должен быть предоставлен доступ на основе имен пользователей или групп.
Давайте сначала создадим файл разрешений sudo.
$ sudo vi /etc/sudoers.d/domain_admins
Добавить одного пользователя:
user1@example.com ALL=(ALL) ALL
Добавить еще одного пользователя:
user1@example.com ALL=(ALL) ALL
user2@example.com ALL=(ALL) ALL
Добавить группу
%group1@example.com ALL=(ALL) ALL
Добавьте группу с пробелами.
%security\ users@example.com ALL=(ALL) ALL
%system\ super\ admins@example.com ALL=(ALL) ALL
Шаг 8. Проверьте доступ по SSH
Получите доступ к серверу удаленно, поскольку пользователю AD разрешено входить в систему.
$ ssh user1@localhost
The authenticity of host ‘localhost (::1)’ can’t be established.
ECDSA key fingerprint is SHA256:wmWcLi/lijm4zWbQ/Uf6uLMYzM7g1AnBwxzooqpB5CU.
ECDSA key fingerprint is MD5:10:0c:cb:22:fd:28:34:c6:3e:d7:68:15:02:f9:b4:e9.
Are you sure you want to continue connecting (yes/no)? yes
Warning: Permanently added ‘localhost’ (ECDSA) to the list of known hosts.
Это подтверждение того, что наша конфигурация прошла успешно.
Посетите вики-страницы realmd и sssd, чтобы узнать больше.
Источник


