- Создание загрузочного USB OSX из dmg на Linux
- 3 ответов
- How to Burn DMG to USB on Mac, Windows and Linux
- Method 1: How to Burn DMG to USB on macOS or Mac OS X
- Method 2: How to Burn DMG to USB in Windows 10 (Bootable)
- Step 1 Install DMG Editor
- Step 2 Load DMG File into DMG Editor
- Step 3 Start Burning DMG to USB
- Step 4 Install macOS from USB Drive
- Method 3: How to Burn a DMG File to USB in Linux
- The Bottom Line:
- How to create a macOS installation disk on Linux
- Install Dmg2Img
- Ubuntu
- Debian
- Arch Linux
- Fedora
- OpenSUSE
- Generic Linux
- Burn to USB – Dmg2Img
- Как создать установочный диск macOS в Linux
- от sasza
- Установить Dmg2Img
- Ubuntu
- Debian
- Arch Linux
- Fedora
- OpenSUSE
- Общий Linux
- Запись на USB — Dmg2Img
Создание загрузочного USB OSX из dmg на Linux
У меня есть 2 машины-MacBook Pro и рабочий стол под управлением Fedora, у меня есть USB-накопитель и OSX 10.8 dmg. MacBook не будет загружаться в OSX к сожалению, я пытаюсь сделать загрузочный Mac usb, чтобы восстановить его.
любое понимание? Я пробовал dmg2img но не удалось поместить это изображение на USB-накопитель.
существует ли простой способ сделать это?
3 ответов
он преобразует DMG в ISO для вас. После этого самый простой способ сделать загрузочный USB-это использовать DD.
dd if= / path/to / osx.iso= / dev / sdX & & sync
Примечание: sdX является примером, вам придется проверить адрес флэш-накопителя (обычно sdb, если у вас есть только один жесткий диск). Не добавить раздел # после этого (например, sdb1). Этот метод немного жесткий на флэш-накопители (я убил один или два делать это относительно часто, но один раз должно быть хорошо).
Если вы не знакомы, ДД немного по чуть-чуть копирования и синхронизации просто проверяет, что все файлы были записаны на usb.
конвертировать DMG файл изображения в ISO файл
копировать ISO-образ на USB
СКБ-пример. В вашем случае это может быть иначе
вы можете сделать преобразование и записать в один проход, если вы не нужны .iso впоследствии: это займет половину времени, как преобразование .iso, а затем запись на USB-устройство. Справедливый do:
опять СКБ-пример. В вашем случае это может быть по-другому.
Источник
How to Burn DMG to USB on Mac, Windows and Linux
A DMG file is Apple’s equivalent of an ISO installation file or disk image. It usually contains all the information required to install a program on a Mac computer running Mac OS X or macOS. It is also a container to hold macOS installation image. If you want to create a bootable macOS bootable disk, the first step is to burn DMG to USB or DVD.
However, native support for DMG files is only available on Apple’s desktop operating system. For Windows or Linux, you will need to use different methods. For example, if you want to burn a DMG file to USB on a Mac, it’s as easy as using the built-in Disk Utility tool. On Linux and Windows, you obviously have to use other ways. This article explains how to burn a DMG file to a USB flash drive on a Mac, a Windows computer and a machine running Linux.
Method 1: How to Burn DMG to USB on macOS or Mac OS X
If you have a Mac, then Disk Utility will help you create your bootable USB drive. Since this is a native application, no downloads are required. The built-in tool will be able to directly burn the DMG file to a disk or drive. You simply have to follow the process as described below:
Step 1: Open Disk Utility by going to Applications >> Utilities and clicking on the tool.
Step 2: You should be able to see all the drive names in the left-side panel. Now open a Finder window and drag your DMG file into Disk Utility. Drop it in the blank area below the drive names on the left panel.
Step 3: You can now insert your USB drive and wait for it to appear in the drives list. Next, click on your mounted DMG file on the left panel and click on вЂBurn’ in the top toolbar. When you see the вЂBurn Disk In:’ message, click on the USB drive.
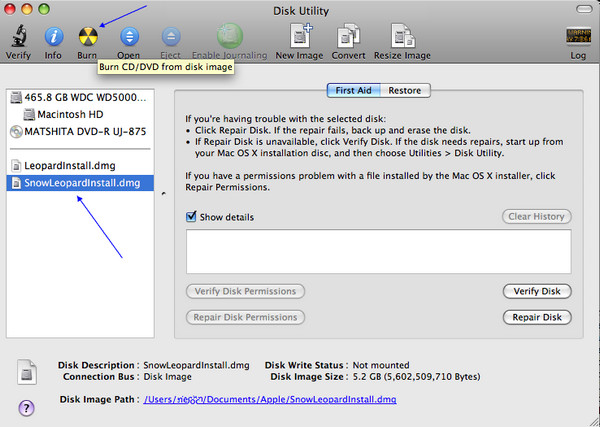
The DMG file will now be burned to the USB drive, and you can use it to do program installations. Disk Utility has a good burn success rate, so hopefully you won’t have to repeat the process to get it right.
Method 2: How to Burn DMG to USB in Windows 10 (Bootable)
Since Windows doesn’t natively support DMG files, you will need to first download and install a utility that can handle such disk images. The best software for the job is DMG Editor, a Windows-based desktop solution for authoring Apple’s disk image files in a non-Mac environment.
DMG Editor requires no technical expertise to use. The clean interface only shows the user the necessary functions, and all the heavy lifting is done at the back end. One of the unique features of this increasingly popular software is the amount of beta testing it has gone through. Extensive and gruelling tests with different storage media brands and Windows versions have made this one of the most reliable DMG utilities for Windows. With one of the industry’s highest burn success rates, it’s no wonder that DMG Editor is emerging as the leader in its class.
Step 1 Install DMG Editor
Download DMG Editor to your Windows PC and install the program by following the setup instructions in the wizard.
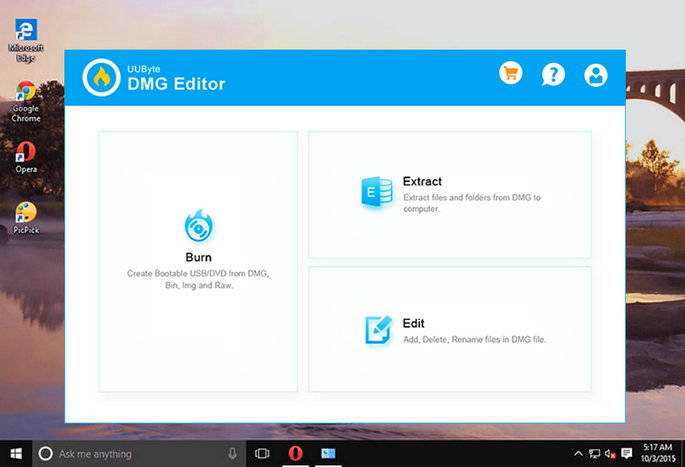
Step 2 Load DMG File into DMG Editor
After launching the program, you’ll see various options on the home page. Click on «Burn» to kick off the process. Now click on «Browse» to add the file to the program, and insert a USB flash drive.
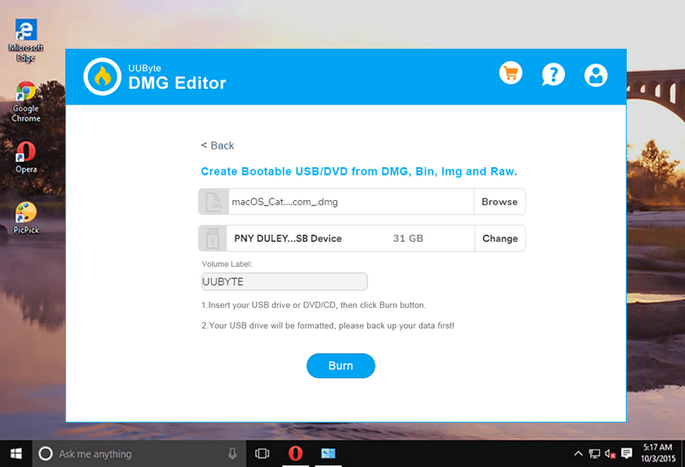
Step 3 Start Burning DMG to USB
The drive will be automatically detected by the software, so all that’s left is to click on «Burn» and wait for your drive to get ready.
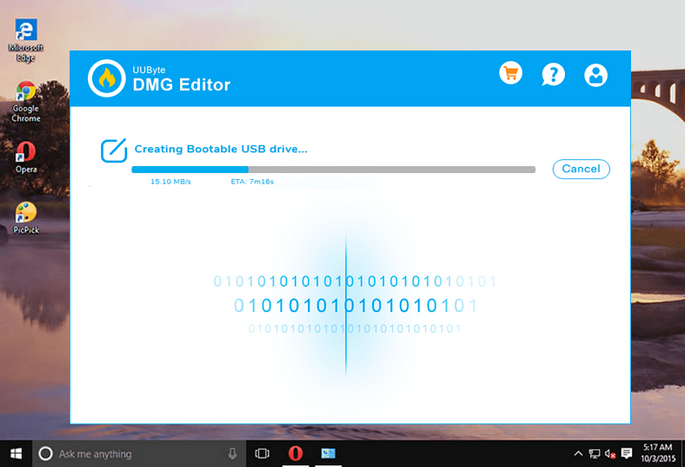
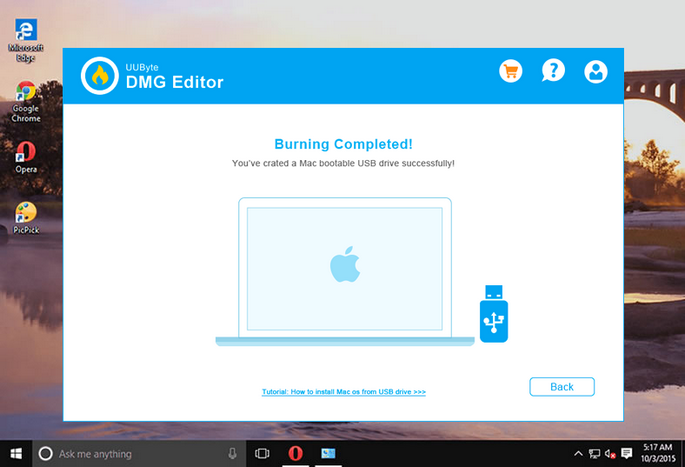
Step 4 Install macOS from USB Drive
When the burning process is completed successfully, you will receive a message like the following screenshot. It means the job is done without any error. Now insert the USB on your Mac and press Power + Option key to open Startup Manager. From there, you can start macOS installation.
You won’t be able to find other alternatives that can do the job in such an easy way. For Windows users, DMG Editor is the best tool to create bootable macOS USB or DVD.
Method 3: How to Burn a DMG File to USB in Linux
The process of burning a DMG to USB in Linux is a little more complicated since it requires converting the file to an ISO before burning it to a drive. It also requires command line executions, but if you own a Linux machine you may already be familiar with command line work. Please note that in order for the USB drive to be bootable, the original DMG must have boot information. In here, we take Ubuntu Linux as an example.
Step 1: Download and install dmg2img by using the following command: sudo apt-get install dmg2img
Step 2: Convert the DMG to IMG with the following command: dmg2img sample.dmg
Step 3: Change the filename of the resulting .img file to .iso. Remember, this is still an IMG file, but it will have a .iso extension. Use the command below to do this: mv sample.img sample.iso
Step 4: Insert the USB drive, but make sure it is not mounted. If it is, you can unmount it with the following command: sudo umount /media/
Make sure you know the file path to the mounted USB drive. Although external drives are generally mounted in /media in Linux, it could be in a different location. To check, you can use this command: lsblk
This command reads the sysfs file system and shows you information about block devices. Your drive can usually be identified by the size, but make sure you use the correct disk name, not the partitions within the disk.
Step 5: You can now burn the DMG to the USB drive with the following command:
sudo dd bs=4M if=sample.iso of=/dev/sdX %% sync
If the original DMG file was bootable, then this .img version on your USB will also be bootable. The process looks a bit complicated, but it should work as long as you follow the steps described above.
The Bottom Line:
As we can see, burning DMG to USB on Mac is the easiest solution as you don’t need to install any other tools or type command to complete the task, which could be annoying for some users. How about the Mac was broken and you want to create a bootable macOS disk to repair the computer? That depends what kind of computer you get at hand. Just follow the steps listed above according to the computer model.
Источник
How to create a macOS installation disk on Linux
Feb 12, 2019
Comment
Have a broken Macbook or iMac? In need of a fresh macOS installation to fix it but only have access to a Linux PC? Don’t worry! Thanks to the Dmg2Img application, it’s possible to make a macOS installation disk on Linux.
Please keep in mind that the Dmg2Img application doesn’t work 100% of the time. Use at your own risk!
Install Dmg2Img
Before being able to create a new installation image, you must install the Dmg2Img application on your computer. In this section of the tutorial, we’ll go over how to install Dmg2Img on most Linux operating systems, including Ubuntu, Debian, Arch Linux, Fedora Linux, OpenSUSE and even from source.
Ubuntu
To install Dmg2Img on Ubuntu, you’ll need first to enable the “Universe” software repository. To enable it, open up a terminal window and enter the following command into it.
With Universe working, you’ll be able to install Dmg2Img with the Apt package manager.
Debian
Dmg2Img is available on Debian Linux in the “Main” software repository. To install it, launch a terminal window with Ctrl + Alt + T or Ctrl + Shift + T. Then, enter the following Apt-get command into the terminal window.
Arch Linux
Arch users can install Dmg2Img through the AUR. To get the app installed, launch a terminal. Then, once it’s opened up, use the Pacman packaging tool to install both the Base-devel and Git packages.
With the packages installed, it’s time to use the git clone tool to download the Dmg2Img snapshot from the Arch Linux AUR.
After the git clone command finishes up, move the terminal window into the new “dmg2img” folder on your computer.
Lastly, use the makepkg command to build and install Dmg2Img on your Arch Linux PC.
Fedora
Dmg2Img is available to Fedora Linux users through the traditional software sources. To install it, launch a terminal window via Ctrl + Alt + T or Ctrl + Shift + T. Then, enter the following Dnf packaging command.
OpenSUSE
Unlike a lot of other Linux distributions on this list, Dmg2Img isn’t available for OpenSUSE releases directly. Instead, if you’re looking to get the app working, you must download an RPM file from the internet and load it up.
According to our testing, Dmg2Img works fine on both OpenSUSE Tumbleweed and OpenSUSE Leap 15.0. To get the RPM downloaded, launch a terminal by pressing Ctrl + Alt + T or Ctrl + Shift + T. Then, use the wget command below.
OpenSUSE Tumbleweed
OpenSUSE Leap
With the RPM file downloaded, use the Zypper package manager to load up Dmg2Img onto your Linux PC.
Generic Linux
The source code for the Dmg2Img application is up on Github. Better yet, there are detailed instructions on how to compile it from the source code. If you’re using a Linux operating system that is lesser-known, follow this link, and you’ll be able to get it going!
Burn to USB – Dmg2Img
Now that the DMG2Img application is set up, we can use it to burn a DMG file. To start, place your macOS image file on the Linux computer. Then, follow the steps below to make a bootable disk.
Step 1: Plug in a compatible USB stick into the computer. Make sure that it’s large enough — at least 8 GB in size.
Step 2: Launch a terminal window on your Linux computer by pressing the Ctrl + Alt + T or Ctrl + Shift + T on the keyboard.
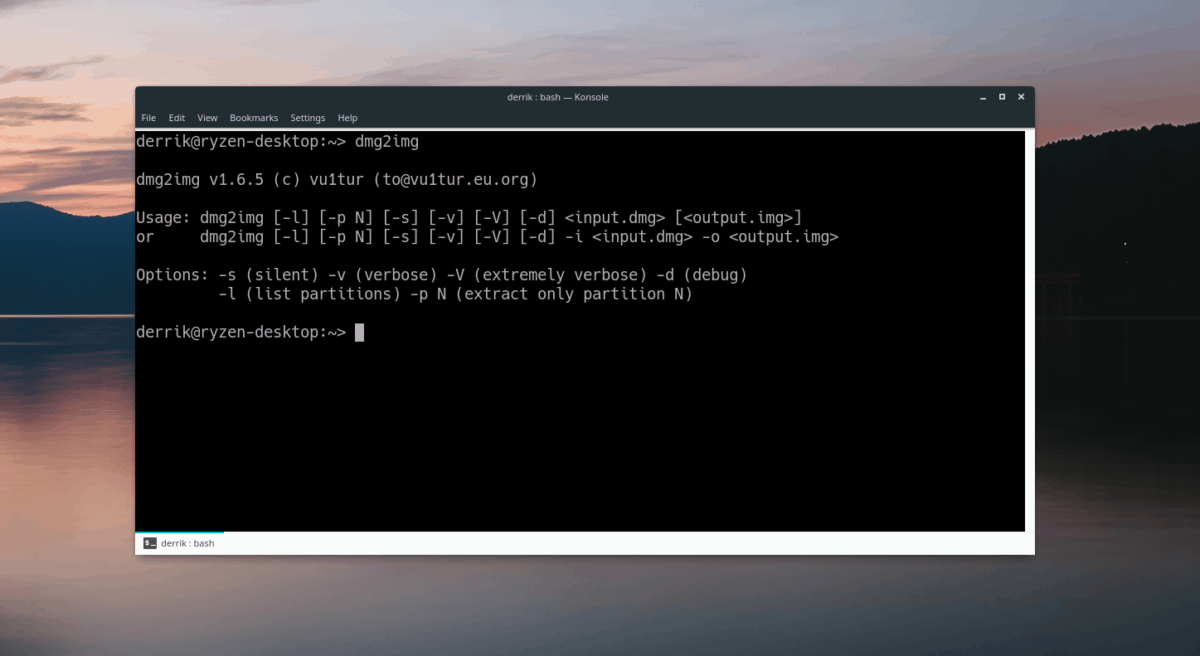
Step 3: Use the Dmg2Img program to convert your macOS DMG file to a burnable ISO file. Keep in mind that /path/to/image_file.dmg is the exact location of the DMG file on your Linux computer, and /path/to/image_file.iso is the location you’d like to save the new macOS ISO file. Be sure to change both of those lines in the command below.
Step 4: Once the Dmg2Img application is done converting your macOS DMG file to a Linux-compatible ISO file, run the lsblk command and determine what your USB’s drive label is. In this example, the drive label is /dev/sdd. Yours will differ.
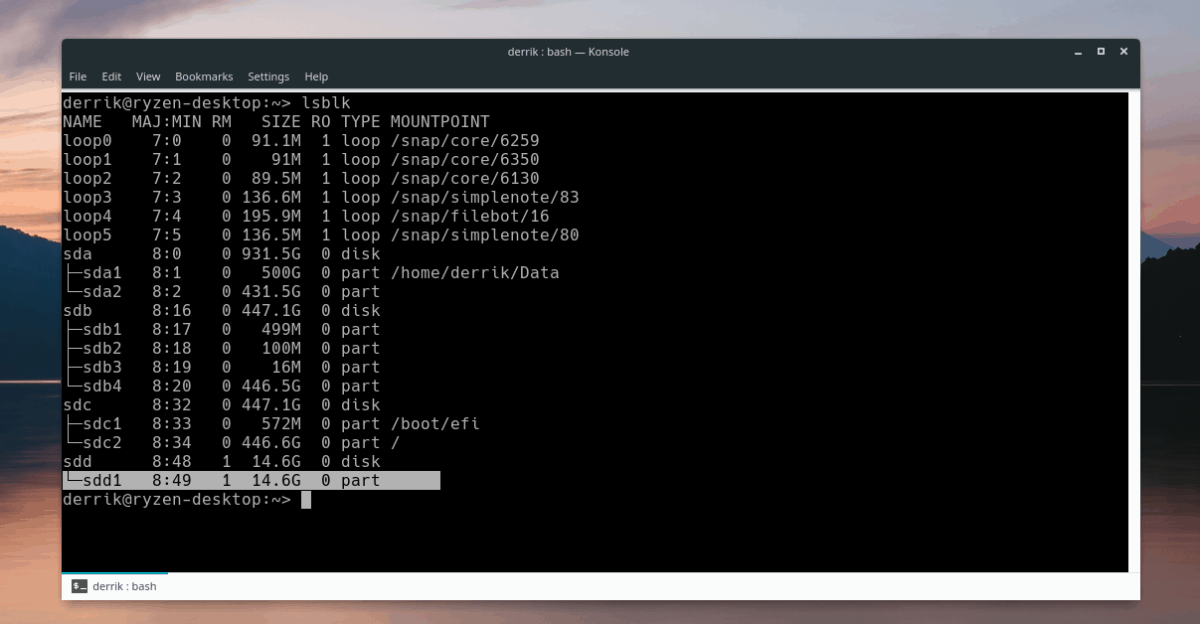
Need help finding out what your USB stick’s drive label is on Linux? Check out our post about finding hard drive information on Linux! It covers how to use lsblk in detail so that you can quickly find information about hard drives and other removable devices.
Step 5: Use the DD command to burn the new macOS ISO file to the USB drive. Keep in mind that this command needs to run with sudo or it will fail!
Remember, in this example that the USB is /dev/sdd. Please make sure to replace of=/dev/sdd in the command below to the drive label of the USB stick on your system.
When the DD command finishes writing, the terminal will be usable again. From here, unplug the USB stick from your computer and use it to re-install macOS on your Apple device!
Источник
Как создать установочный диск macOS в Linux
от sasza

У вас сломанный Macbook или iMac? Вам нужна новая установка macOS, чтобы исправить это, но у вас есть доступ только к ПК с Linux? Не волнуйтесь! Благодаря приложению Dmg2Img можно сделать установочный диск macOS в Linux.
Имейте в виду, что приложение Dmg2Img не работает в 100% случаев. Используйте на свой риск!
Установить Dmg2Img
Перед тем как создать новый установочный образ, вы должны установить приложение Dmg2Img на свой компьютер. В этом разделе руководства мы рассмотрим, как установить Dmg2Img в большинстве операционных систем Linux, включая Ubuntu, Debian, Arch Linux, Fedora Linux, OpenSUSE и даже из исходного кода.
Ubuntu
Чтобы установить Dmg2Img в Ubuntu, вам нужно сначала включить программный репозиторий «Universe». Чтобы включить его, откройте окно терминала и введите в него следующую команду.
Когда Universe работает, вы сможете установить Dmg2Img с помощью диспетчера пакетов Apt.
Debian
Dmg2Img доступен в Debian Linux в «Основном» репозитории программного обеспечения. Чтобы установить его, запустите окно терминала с помощью Ctrl + Alt + T или Ctrl + Shift + T. Затем введите следующую команду Apt-get в окно терминала.
Arch Linux
Пользователи Arch могут установить Dmg2Img через AUR. Чтобы установить приложение, запустите терминал. Затем, как только он откроется, используйте инструмент упаковки Pacman для установки пакетов Base-devel и Git.
После установки пакетов пора использовать инструмент git clone для загрузки снимка Dmg2Img из Arch Linux AUR.
После завершения команды git clone переместите окно терминала в новую папку «dmg2img» на вашем компьютере.
Наконец, используйте команду makepkg для сборки и установки Dmg2Img на вашем компьютере с Arch Linux.
Fedora
Dmg2Img доступен пользователям Fedora Linux из традиционных источников программного обеспечения. Чтобы установить его, запустите окно терминала с помощью Ctrl + Alt + T или Ctrl + Shift + T. Затем введите следующую команду упаковки Dnf.
OpenSUSE
В отличие от многих других дистрибутивов Linux в этом списке, Dmg2Img не доступен напрямую для выпусков OpenSUSE. Вместо этого, если вы хотите, чтобы приложение работало, вы должны загрузить файл RPM из Интернета и загрузить его.
Согласно нашему тестированию, Dmg2Img отлично работает как с OpenSUSE Tumbleweed, так и с OpenSUSE Leap 15.0. Чтобы загрузить RPM, запустите терминал, нажав Ctrl + Alt + T или Ctrl + Shift + T. Затем используйте команду wget ниже.
Загрузив файл RPM, используйте диспетчер пакетов Zypper для загрузки Dmg2Img на ваш компьютер с Linux.
Общий Linux
Исходный код приложения Dmg2Img размещен на Github. А еще лучше, есть подробные инструкции о том, как его скомпилировать из исходного кода. Если вы используете менее известную операционную систему Linux, перейдите по этой ссылке , и вы сможете запустить его!
Запись на USB — Dmg2Img
Теперь, когда приложение DMG2Img настроено, мы можем использовать его для записи файла DMG. Для начала поместите файл образа macOS на компьютер Linux. Затем выполните следующие действия, чтобы создать загрузочный диск.
Шаг 1. Подключите совместимый USB-накопитель к компьютеру. Убедитесь, что он достаточно большой — не менее 8 ГБ.
Шаг 2: Запустите окно терминала на вашем компьютере Linux, нажав Ctrl + Alt + T или Ctrl + Shift + T на клавиатуре.
Шаг 3. Используйте программу Dmg2Img для преобразования файла macOS DMG в записываемый файл ISO. Имейте в виду, что /path/to/image_file.dmg — это точное местоположение файла DMG на вашем компьютере Linux, а /path/to/image_file.iso — это место, где вы хотите сохранить новый ISO-файл macOS. Обязательно измените обе эти строки в приведенной ниже команде.
Шаг 4. После того, как приложение Dmg2Img завершит преобразование вашего файла macOS DMG в файл ISO, совместимый с Linux, запустите команду lsblk и определите, какая метка у вашего USB-накопителя. В этом примере метка диска — / dev / sdd. Ваш будет отличаться.

Нужна помощь в том, чтобы узнать, какая метка у вашего USB-накопителя в Linux? Прочтите наш пост о поиске информации о жестких дисках в Linux! В нем подробно рассказывается, как использовать lsblk, чтобы вы могли быстро найти информацию о жестких дисках и других съемных устройствах.
Шаг 5. Используйте команду DD, чтобы записать новый ISO-файл macOS на USB-накопитель. Имейте в виду, что эту команду нужно запускать с sudo, иначе она не удастся!
Помните, что в этом примере USB — это / dev / sdd. Не забудьте заменить = / dev / sdd в приведенной ниже команде на метку USB-накопителя в вашей системе.
Когда команда DD закончит запись, терминал снова можно будет использовать. Отсюда отключите USB-накопитель от компьютера и используйте его для переустановки macOS на устройстве Apple!
Источник


