- Как очистить / сбросить кеш DNS в Linux
- 1) Очистить кеш DNS на Ubuntu / Debian / LinuxMint
- 2) Сброс кеша dns сервера BIND
- 3) Очистить кэш nscd DNS
- 4) Очистить dnsmasq dns кэш
- 5) Очистка кеша dns в Windows
- DNS caching in linux
- 4 Answers 4
- How To Flush Linux / UNIX DNS Cache
- HowTo: Flush nscd dns cache
- Flush dnsmasq dns cache
- Flush caching BIND server dns cache
- A note about Mac OS X Unix users
- A note about /etc/hosts file
- See also:
- How do I clear the DNS cache?
- 15 Answers 15
- Ubuntu 17.04 and higher (18.04)
- For 18.04 and higher
- For 11.10 and below
- By default, DNS is not cached in Ubuntu dnsmasq is caching, run ps ax | grep dnsmasq and look at the running command. Here’s a breakdown of my default 13.10 machine:
- How to Flush DNS Cache in Linux
- Flush DNS Cache in Linux in 2020
- Checking if DNS Caching is Enabled
- Flush DNS Cache in Ubuntu
- Flush DNS Cache in DNS Services on Linux
- Flush nscd DNS Cache
- Flush dnsmasq DNS Cache
- Flush BIND DNS Cache
- Bonus: Change DNS Settings in Ubuntu
- Change DNS Settings using the GUI
- Change DNS Settings using the Terminal
- Clear DNS Cache in Linux Using These Methods
Как очистить / сбросить кеш DNS в Linux

В некоторых случаях вам трудно добраться до некоторых сайтов из-за проблемы с DNS, возможно, ваш локальный DNS-кеш поврежден.
Для такой ситуации вам необходимо перезапустить службу кэширования DNS операционной системы.
Кэш-память DNS для системы доменных имен – это временная база данных, которая поддерживается операционной системой компьютера, которая содержит IP-адрес сайтов, которые вы недавно просматривали.
См. Ниже список основных серверов кэширования DNS, используемых в дистрибутиве Linux.
- nscd DNS cache
- dnsmasq dns cache
- BIND server dns cache
nscd DNS Cache: nscd – демон кэша службы имен, Nscd – это демон, который обеспечивает кэш для наиболее распространенных запросов службы имен.
Файл конфигурации по умолчанию, /etc/nscd.conf
dnsmasq DNS Cache: Dnsmasq – легкий, небольшой в размере, простой в настройке, DNS-сервер и DHCP-сервер.
Он предназначен для предоставления DNS и опционально DHCP для небольшой сети и подходит для маршрутизаторов с ограниченным доступом и брандмауэров.
Он может обслуживать имена локальных машин, которые не входят в глобальный DNS.
Он предназначен для использования в персональных компьютерах и небольших сетях, а не для больших сетей.
BIND Server DNS Cache: BIND означает «Berkeley Internet Name Domain».
Наиболее широко используемое программное обеспечение сервера имен, BIND – это программное обеспечение с открытым исходным кодом, которое реализует протоколы доменных имен (DNS) для Интернета.
BIND на сегодняшний день является наиболее широко используемым программным обеспечением DNS в Интернете, обеспечивая надежную и стабильную платформу.
1) Очистить кеш DNS на Ubuntu / Debian / LinuxMint
Используйте приведенную ниже команду для очистки кеша DNS в системах Ubuntu / Debian / Mint.
2) Сброс кеша dns сервера BIND
Используйте приведенную ниже команду для сброса кеша BIND сервера dns
3) Очистить кэш nscd DNS
Используйте команду ниже:
4) Очистить dnsmasq dns кэш
Используйте приведенную ниже команду для стирания кеша dnsmasq server dns
5) Очистка кеша dns в Windows
Используйте приведенную ниже команду для очистки кеша dns в Windows:
Источник
DNS caching in linux
I am confused about DNS caching. I am writing a small forward proxy server and want to use OS DNS cache on a Linux system.
If I understand correctly, then there is DNS caching at the browser level. Then there is DNS caching at OS level (Windows has it. I am not sure if Linux distros have it by default).
So, how does a browser/proxy_server use OS DNS caching? I am trying to find if I can rely on Linux for DNS caching instead of doing it on my own inside my proxy.

4 Answers 4
On Linux (and probably most Unix), there is no OS-level DNS caching unless nscd is installed and running. Even then, the DNS caching feature of nscd is disabled by default at least in Debian because it’s broken. The practical upshot is that your linux system very very probably does not do any OS-level DNS caching.
You could implement your own cache in your application (like they did for Squid, according to diegows’s comment), but I would recommend against it. It’s a lot of work, it’s easy to get it wrong (nscd got it wrong. ), it likely won’t be as easily tunable as a dedicated DNS cache, and it duplicates functionality that already exists outside your application.
If an end user using your software needs to have DNS caching because the DNS query load is large enough to be a problem or the RTT to the external DNS server is long enough to be a problem, they can install a caching DNS server such as Unbound on the same machine as your application, configured to cache responses and forward misses to the regular DNS resolvers.
Источник
How To Flush Linux / UNIX DNS Cache
I ‘m on a Dial UP Internet connection under Linux and frequent dial up disconnection causing dns problems. How do I flush DNS cache under UNIX / Linux distribution using a shell prompt?
Under MS-Windows you can use the ipconfig command to flush dns cache. However, Linux and UNIX provides various ways to flush cache. Linux can run nscd or BIND or dnsmasq as the name service caching daemon. Large and work-group servers may use BIND or dnsmasq as a dedicated caching server to speed up queries.
HowTo: Flush nscd dns cache
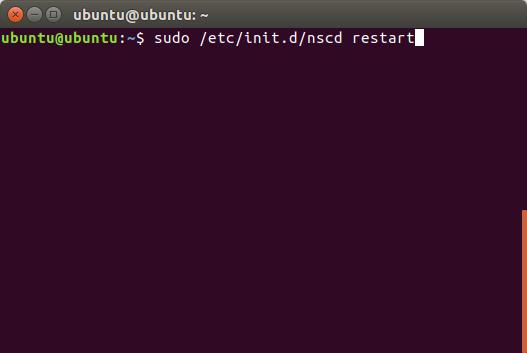
Nscd caches libc-issued requests to the Name Service. If retrieving NSS data is fairly expensive, nscd is able to speed up consecutive access to the same data dramatically and increase overall system performance. Just restart nscd:
$ sudo /etc/init.d/nscd restart
OR
# service nscd restart
OR
# service nscd reload
This daemon provides a cache for the most common name service requests. The default configuration file, /etc/nscd.conf, determines the behavior of the cache daemon.
Flush dnsmasq dns cache
dnsmasq is a lightweight DNS, TFTP and DHCP server. It is intended to provide coupled DNS and DHCP service to a LAN. Dnsmasq accepts DNS queries and either answers them from a small, local, cache or forwards them to a real, recursive, DNS server. This software is also installed many cheap routers to cache dns queries. Just restart the dnsmasq service to flush out dns cache:
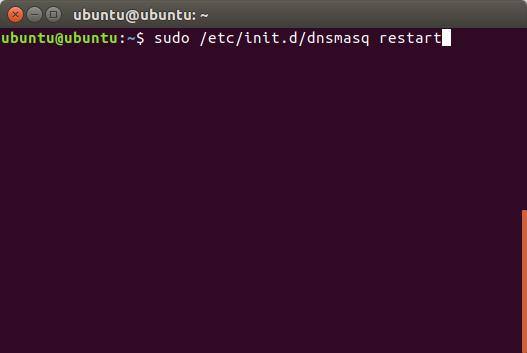
$ sudo /etc/init.d/dnsmasq restart
OR
# service dnsmasq restart
- No ads and tracking
- In-depth guides for developers and sysadmins at Opensourceflare✨
- Join my Patreon to support independent content creators and start reading latest guides:
- How to set up Redis sentinel cluster on Ubuntu or Debian Linux
- How To Set Up SSH Keys With YubiKey as two-factor authentication (U2F/FIDO2)
- How to set up Mariadb Galera cluster on Ubuntu or Debian Linux
- A podman tutorial for beginners – part I (run Linux containers without Docker and in daemonless mode)
- How to protect Linux against rogue USB devices using USBGuard
Join Patreon ➔
Flush caching BIND server dns cache
A caching BIND server obtains information from another server (a Zone Master) in response to a host query and then saves (caches) the data locally. All you have to do is restart bind to clear its cache:
# /etc/init.d/named restart
You can also use rndc command as follows flush out all cache:
# rndc restart
OR
# rndc exec
BIND v9.3.0 and above will support flushing all of the records attached to a particular domain name with rndc flushname command. In this example flush all records releated to cyberciti.biz domain:
# rndc flushname cyberciti.biz
It is also possible to flush out BIND views. For example, lan and wan views can be flushed using the following command:
# rndc flush lan
# rndc flush wan
A note about Mac OS X Unix users
Type the following command as root user:
# dscacheutil -flushcache
OR
$ sudo dscacheutil -flushcache
If you are using OS X 10.5 or earlier try the following command:
lookupd -flushcache
A note about /etc/hosts file
/etc/hosts act as the static table lookup for hostnames. You need to remove and/or update records as per your requirements under Unix like operating systems:
# vi /etc/hosts
Sample outputs:
See also:
Related: Windows Vista / XP Flush DNS Cache with ipconfig Command
🐧 Get the latest tutorials on Linux, Open Source & DevOps via
Источник
How do I clear the DNS cache?
I just updated the DNS record ( ns1 , ns2 , ns3.myhostingcompany.com ) for a site I’ve got hosted, but I still get the domain registrar parking page.
I’d like to see if the problem is Ubuntu’s cached DNS records. Is there a way to clear Ubuntu’s DNS cache? (if such a thing exists?)

15 Answers 15
Ubuntu 17.04 and higher (18.04)
From Ubuntu 17.04 and onwards, systemd-resolve is used for DNS. You can flush systemd’s caches like so:


For 18.04 and higher
For 11.10 and below
Ubuntu doesn’t cache dns records by default so unless you’ve installed a dns cache there isn’t anything to clear.
DNS records are likely cached by your provider’s DNS servers so if you want to check if the DNS changes you made were successful you can interrogate a DNS server from your domain hosting service with dig:
dig -t a ns1.myhostingcompany.com @domain_registrar_dns_server
It you want Ubuntu to start caching dns I recommend installing pdnsd together with resolvconf . nscd is buggy and not advisable.
Ubuntu 12.04 uses dnsmasq which is built into network-manager , but it doesn’t cache dns so there is no need to flush it. Here is a sample line from my syslog to prove that point:
There is also no need for any configuration of dnsmasq . If you are running with stock settings it won’t be caching dns, as for it to do so you have to explicitly set it up as this Ubuntu article describes.
If you wanted to refresh your settings you could disable and then enable networking or run
This restarts dnsmasq because it is built in to network-manager ; check your syslog for the evidence for this.
If you are using a wired connection with dhcp network manager will be taking the settings direct from your router and your connection will be automatically established when you login to Ubuntu. You could check that the settings are correct in your router if you can access it via the web interface, and perhaps reboot it if necessary. If it is a general problem with dns, you could try using Google dns instead of your isp dns, and more information on that is detailed here.
Note that Ubuntu uses systemd-resolve from 17.04 and onwards so this answer doesn’t apply anymore to recent Ubuntu versions. See «flush DNS cache in Ubuntu 17.04 and higher (18.04)»
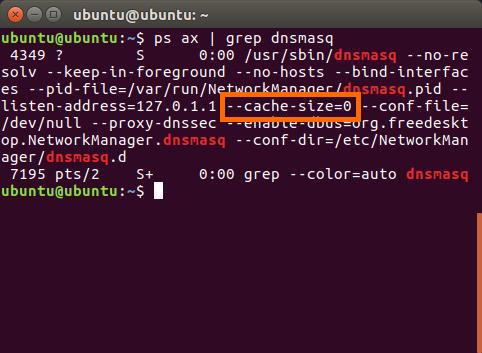
By default, DNS is not cached in Ubuntu dnsmasq is caching, run ps ax | grep dnsmasq and look at the running command. Here’s a breakdown of my default 13.10 machine:
/etc/NetworkManager/dnsmasq.d is empty by default. So there aren’t any overrides coming in there and just to check —cache-size=0 means what we think it means (instead of an unlimited cache), man dnsmasq shows:
So while dnsmasq can cache DNS, it isn’t caching out the box. You can check your machine and various configuration directories to check you’re on the same page.
If you are seeing cache issues, this is likely happening in one of a few places:
- Upstream from your computer. Some routers cache. Many corporate networks will cache DNS. Many ISP-run DNS servers and will use their own caches. The only way to guarantee against a network cache is to use a cache you can manually refresh. This is why I like OpenDNS.
- In the client application (notably browsers). Applications can do all sorts of their own caching that Ubuntu has no effect on. How Firefox caches DNS. How to clear Chrome’s DNS cache. Other browsers (and applications) might have their own mechanisms.
I’m scraping the barrel here but perhaps you’ve installed a non-standard DNS server in Ubuntu instead of turning caching on in dnsmasq . There are many: nscd , DJBDNS dnscache (aka TinyDNS), pdns , pdnsd , Bind9 (and its variants), and more I can’t even remember. These will probably be evidenced in /etc/resolv.conf (with config in /etc/resolvconf/` to autogen that file). The following shows an locally intercepted DNS query:
If you’re not hitting 8.8.8.8 (or whatever you expect your DNS server to be), check what you are hitting instead. In my case I can see this is just dnsmasq set up to mirror DNS queries back for LXC, but in your case it might be doing bad cachey things.
If you have done of the listed caches, the process for clearing each varies:
Источник
How to Flush DNS Cache in Linux
DNS, or a Domain Name System, is responsible for resolving website names into their respective IP addresses. There are multiple DNS servers and you can pick and choose the one you want to use. So, if you’re having trouble connecting to a website, or if you just want a DNS change to be seen by your Ubuntu machine, you should try to flush the DNS cache. You can also clear DNS cache in Ubuntu if you made changes to the hosts file, and you want it to be “seen” by your system without having to reboot it. Well, if you’re in any of these situations, and you want to clear DNS cache, here is how to flush DNS cache in Linux.
Note : I’m using an Ubuntu 16.10 “Yakkety Yak” system to demonstrate these methods. However, the process should be similar on most Linux distros.
Flush DNS Cache in Linux in 2020
Before we get to our tutorial, let’s see first if DNS caching is enabled on your machine or not.
Checking if DNS Caching is Enabled
All Linux distros do not behave the same way, when it comes to things like caching DNS. For example, Ubuntu, by default, doesn’t cache DNS. Before we try to clear DNS cache on a Linux machine, let’s check if caching is even enabled. To do this on an Ubuntu system, you can follow the steps below:
1. Launch Terminal, and type “ps ax | grep dnsmasq“.
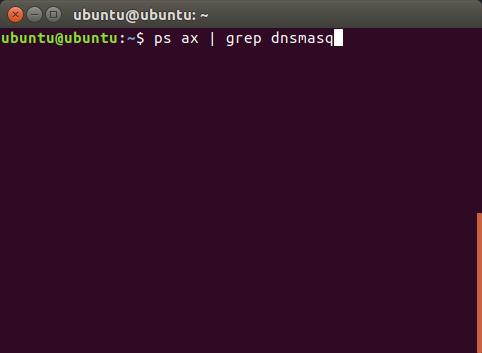
2. In the output from the command, you will be able to see a field called “cache-size“. Check its value. If the value is zero, it means that caching is disabled on the system.
Note : If you want to enable DNS caching on Linux, you can do so by using the command “sudo dnsmasq -c 150”. You can use any number in place of 150, which is basically the number of entries that dnsmasq can cache.
Flush DNS Cache in Ubuntu
If your Linux system is caching DNS entries, then you can try to flush the DNS cache in order to get rid of any DNS related problems. To clear DNS cache in Ubuntu, you can follow the steps below:
1. Launch Terminal (ctrl + alt + T), and type “sudo /etc/init.d/dns-clean restart“.
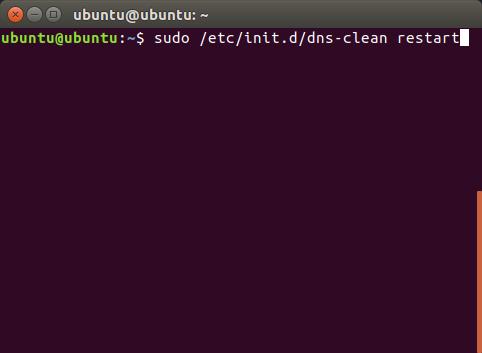
2. Next, type the command “sudo /etc/init.d/networking force-reload”
![]()
This will clear your DNS cache in Ubuntu, and if the problems you were experiencing were due to DNS issues, they should now be gone.
Flush DNS Cache in DNS Services on Linux
Like I said, Ubuntu doesn’t cache DNS entries by default, however, if you have manually installed a DNS service such as nscd, you can clear its cache. Methods to clear cache for some common DNS services are given below:
Flush nscd DNS Cache
Flush dnsmasq DNS Cache
Flush BIND DNS Cache
If you’re using BIND, you can clear DNS cache by using one of the following commands:
- sudo /etc/init.d/named restart


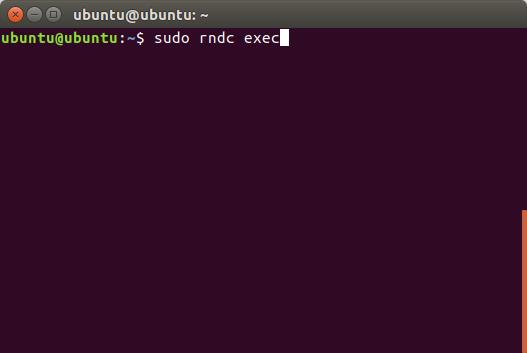
- sudo rndc exec
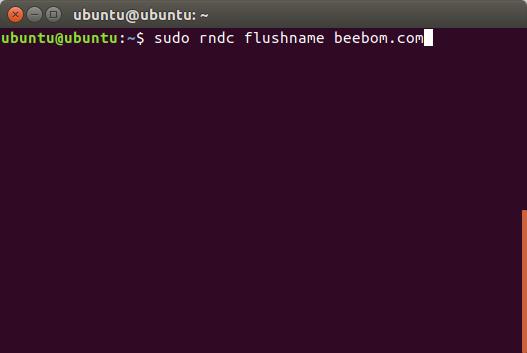
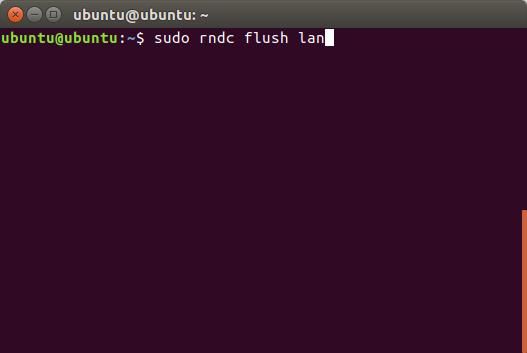
BIND version 9.3.0, and greater, support flushing DNS cache for a particular domain, as well as for the LAN, or the WAN. You can use the following commands to make use of this feature:
- To clear DNS cache for a particular domain, use “sudo rndc flushname beebom.com“
- To clear DNS cache for LAN, use “sudo rndc flush lan“
- To clear DNS cache for WAN, use “sudo rndc flush wan“

Bonus: Change DNS Settings in Ubuntu
We’ve been talking about flushing the DNS cache in Ubuntu, however, there may be cases where you just want to make a change to the DNS settings in Ubuntu. If you want to change the DNS settings in Ubuntu, you can do that using the GUI, or via the Terminal.
Change DNS Settings using the GUI
Using the GUI to change DNS settings is easier than using the Terminal. However, if you use multiple connections, you will have to change the DNS setting for each one of them. To change DNS settings using the GUI, just follow the steps below:
1. Open System Settings, and click on Network.
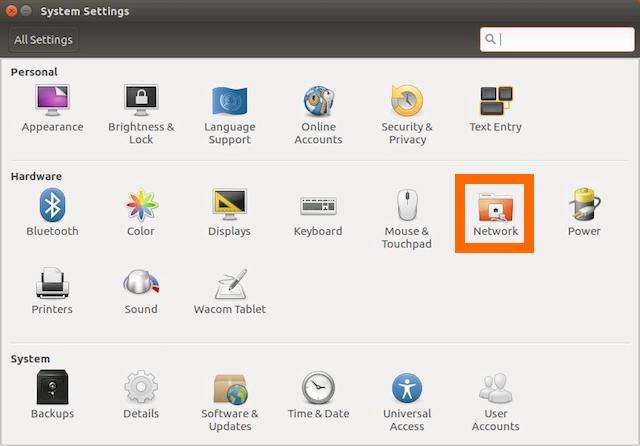
2. Click on the arrow next to the name of the network you’re connected to.
![]()
3. Now, click on “Settings”. This will open up the settings for that connection.

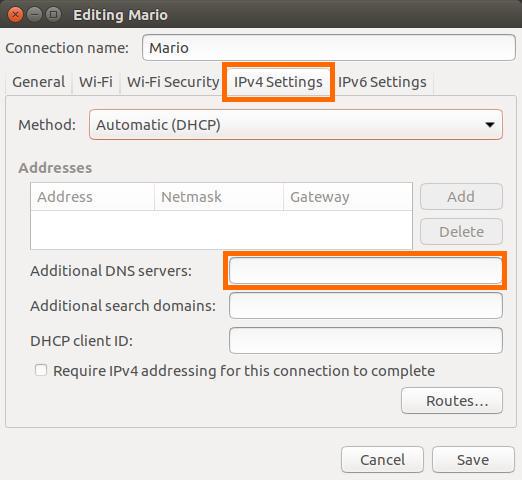
4. Switch over to the IPv4 tab, and you’ll see an option called “Additional DNS Servers“. You can enter the DNS servers you want to use in this field. If you want to enter more than one DNS server, just separate them with commas.
Change DNS Settings using the Terminal
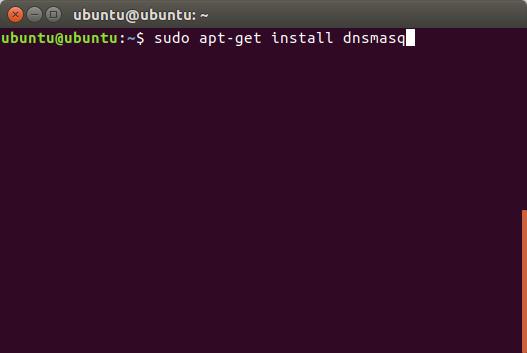
If you don’t want to use the GUI, and prefer changing DNS settings using the Terminal, you can do this by adding the nameservers to the dnsmasq config file. However, dnsmasq does not come installed by default in Ubuntu systems (dnsmasq-base, does). So, first you’ll have to install dnsmasq by launching a Terminal, and using “sudo apt-get install dnsmasq“.
- Once you have installed dnsmasq. You can edit the config file with “sudo nano /etc/dnsmasq.conf“.
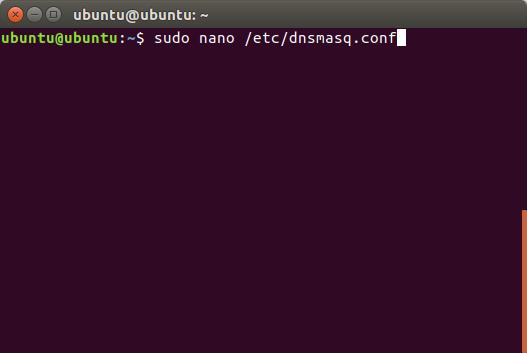
- Here, you can add your DNS servers’ IP addresses where it says “Add other nameservers here“.

Clear DNS Cache in Linux Using These Methods
You can use any of these methods to clear DNS cache in a Linux system. Issues with DNS cache can cause problems such as a webpage not loading, nameserver changes not being recognized by your system, and a lot more. Once you flush DNS cache, these problems will most likely go away. So, have you ever had to flush the DNS cache on your Linux system? If so, what method did you use? If you know of any other method to clear the DNS cache on your Linux system, do let us know in the comments section below.
Источник


